
WINDOW MOTOR HELP!? has anyone done it?
 07-31-2010, 09:22 PM
#1
TECH Resident
Thread Starter
iTrader: (8)
Join Date: Jun 2008
Location: south jersey
Posts: 958
Likes: 0
Received 0 Likes
on
0 Posts
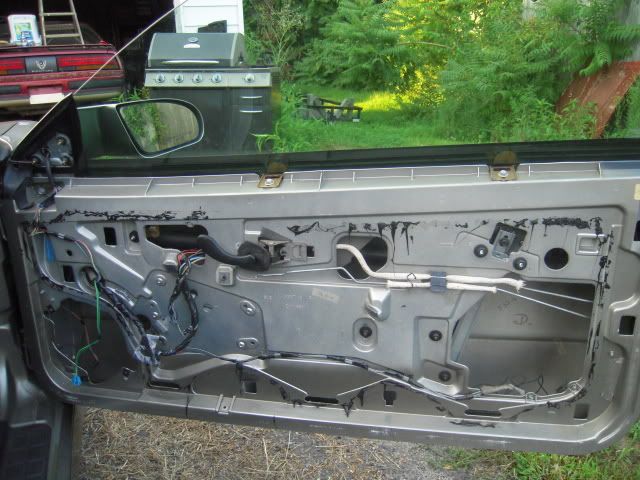
So I have the door panel off ready to replace the motor, now i'm stuck. I'm not sure where to drill exactly to expose the rivets. I'm thinking i can use the drill and check method? lol. And after exposing them I just drill using a smaller size to drill the rivets out? I've been using that Shbox.com website as a guide but.. stuck.
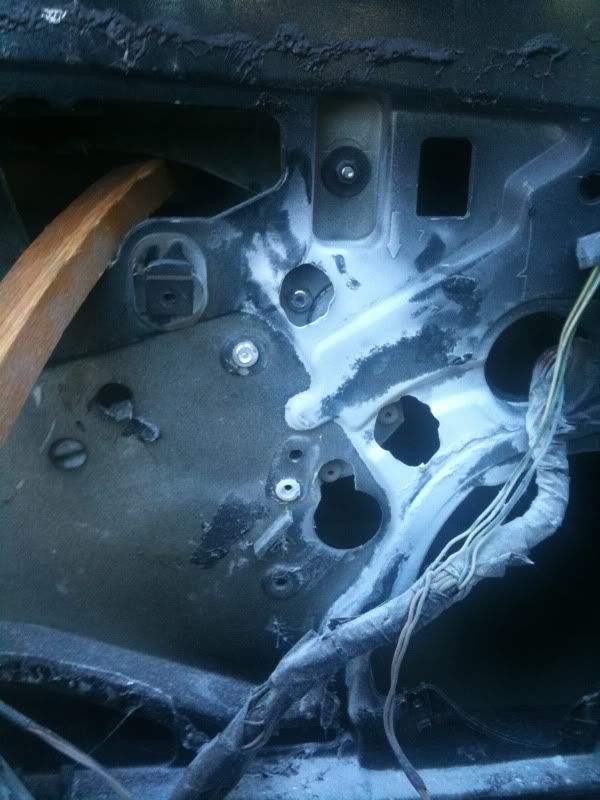
My guess as to where the rivets are. (yellow dots)
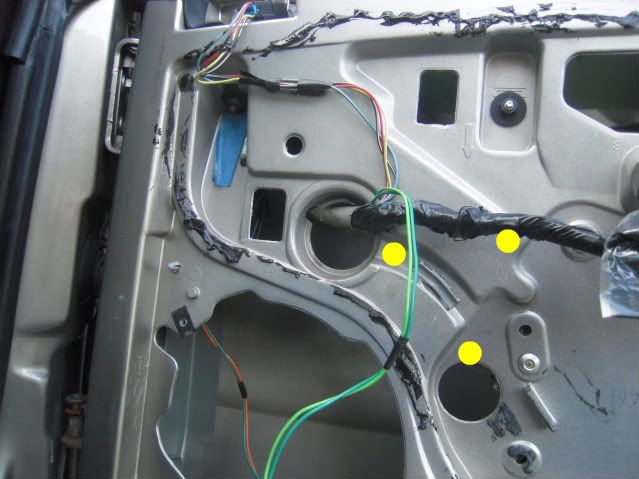
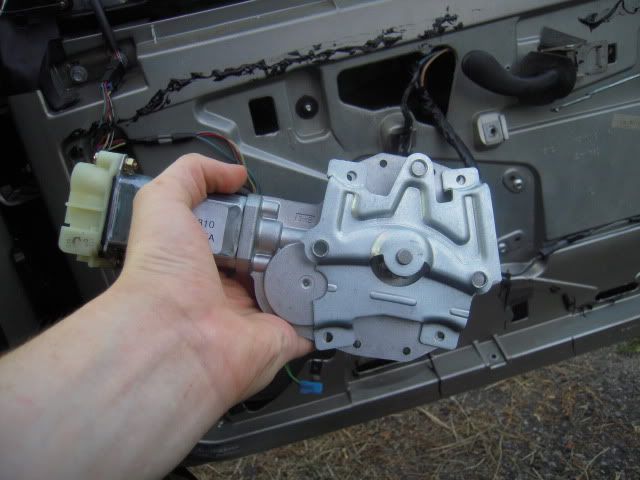
SO this \/ is generally how the motor should be inside the door correct?

Also see the difference is this picture compared to the first as far as the face plate on the motor goes? Which way is correct?
My guess as to where the rivets are. (yellow dots)
SO this \/ is generally how the motor should be inside the door correct?
Also see the difference is this picture compared to the first as far as the face plate on the motor goes? Which way is correct?

 07-31-2010, 11:53 PM
#4
TECH Fanatic
 08-01-2010, 04:19 AM
#5
TECH Fanatic

 08-06-2010, 09:25 PM
#7
Teching In
Join Date: Dec 2004
Location: NJ
Posts: 42
Likes: 0
Received 0 Likes
on
0 Posts

I did my passenger one last weekend. Took less than an hour. Just print out this page (the bottom pic)
I held it by the door and went by eye. Got them almost dead on but had to widen one hole a little.
Also, install the autotrix passenger window fix to lengthen the life of your motor.
Definitely, works much better after doing those 2 things.
Code:
http://shbox.com/page/windowmotor13.html
Also, install the autotrix passenger window fix to lengthen the life of your motor.
Definitely, works much better after doing those 2 things.
Trending Topics
08-07-2010, 06:41 AM
#8
TECH Addict
iTrader: (3)
Join Date: Feb 2006
Location: The dirty taint of the country. ...Los Angeles
Posts: 2,498
Likes: 0
Received 3 Likes
on
2 Posts
Hour and a half to break down the door, drill, remove, replace, test, re-assemble and test again.
Do yourself a favor. Expect allot of Fiberglas particles(white dust) when you pull out the dremel so keep a wet rag handy for clean-up and close your AC vents before you start.
Do yourself a favor. Expect allot of Fiberglas particles(white dust) when you pull out the dremel so keep a wet rag handy for clean-up and close your AC vents before you start.
08-07-2010, 07:18 AM
#9
TECH Addict
iTrader: (3)
Join Date: Feb 2006
Location: The dirty taint of the country. ...Los Angeles
Posts: 2,498
Likes: 0
Received 3 Likes
on
2 Posts
My Driver Side Door:
Ok, so after you disasemble the door and get to using the dremel, these are the 3 rivets you need to expose. ... You can see how messy it can get. All of that white crap is the Fiberglas dust. It can get a bit messy so keep a wet rag handy.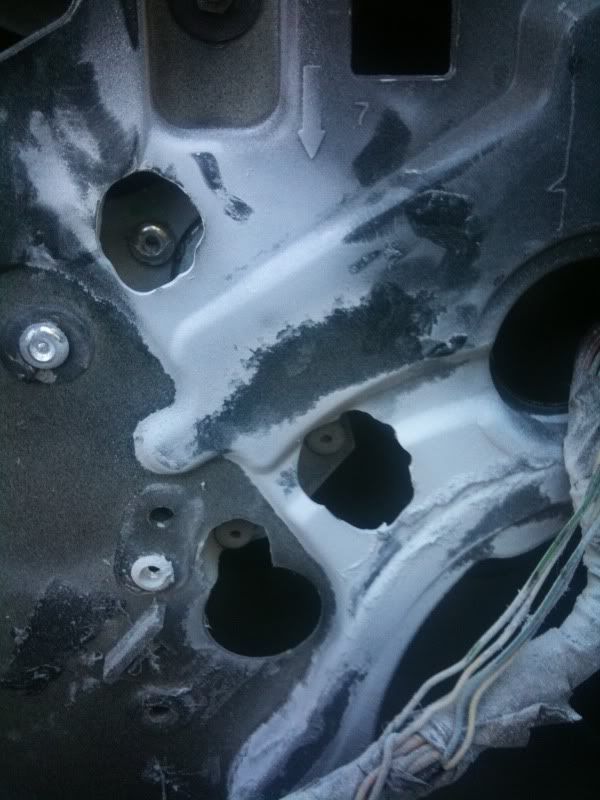
I used a broken char leg to prop under the glass. Last thing you need is that sucker falling.
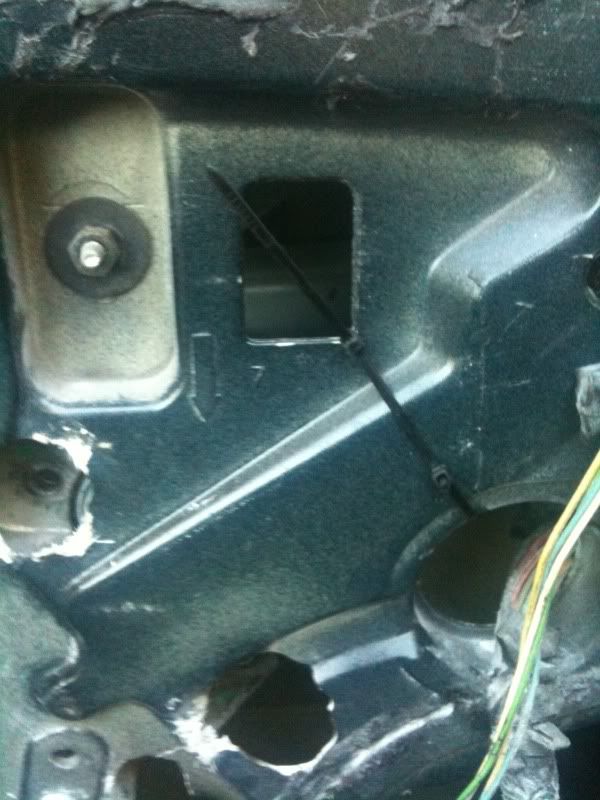
This isn't mentioned in the "How To" but I used a zip tie to hold the new motor in place while I was putting the bolts in place. Made my life super easy considering I have some big ol bear claws that made it tough get my hands in there to hold in place while feeding the bolts through the hole. ... Afterwards I just cut the excess and left them in place in case the nuts decide to back out one day.
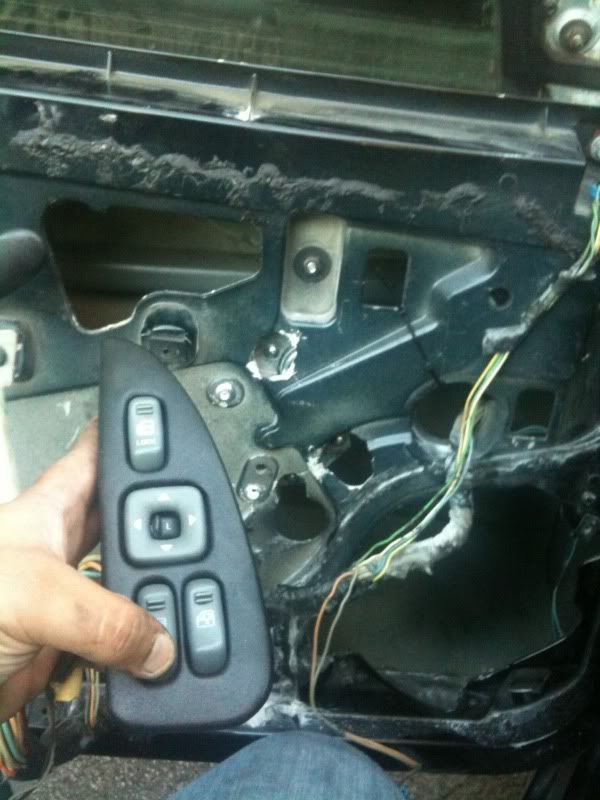
Plug the switch panel back in real quick to test it before you button it all back up.
Throw it back together!!!
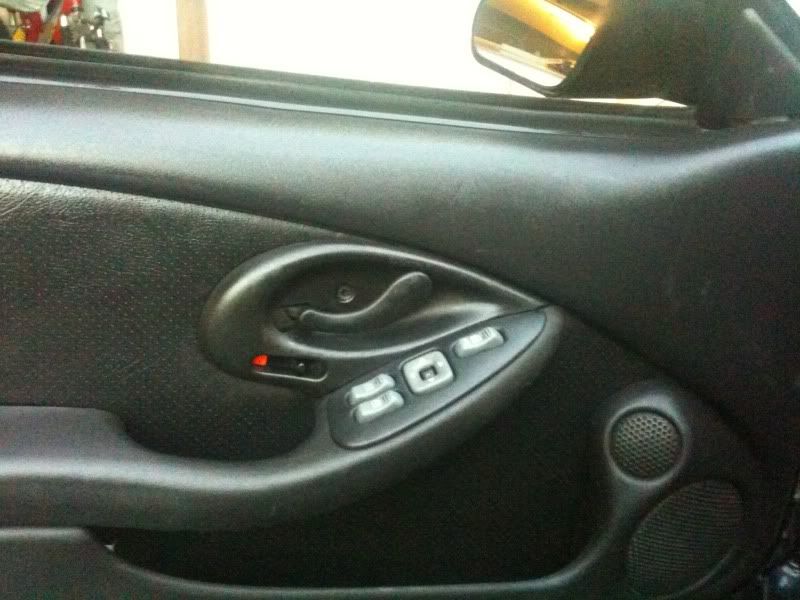
FIN!
Ok, so after you disasemble the door and get to using the dremel, these are the 3 rivets you need to expose. ... You can see how messy it can get. All of that white crap is the Fiberglas dust. It can get a bit messy so keep a wet rag handy.
I used a broken char leg to prop under the glass. Last thing you need is that sucker falling.
This isn't mentioned in the "How To" but I used a zip tie to hold the new motor in place while I was putting the bolts in place. Made my life super easy considering I have some big ol bear claws that made it tough get my hands in there to hold in place while feeding the bolts through the hole. ... Afterwards I just cut the excess and left them in place in case the nuts decide to back out one day.
Plug the switch panel back in real quick to test it before you button it all back up.
Throw it back together!!!
FIN!
 08-09-2010, 01:45 PM
#11
Staging Lane
Join Date: Jul 2008
Location: Reno, Nv
Posts: 99
Likes: 0
Received 0 Likes
on
0 Posts
I have done 2 motors so far. The easier thing i found was to not drill the door panel itself, but to drill out the rivets holding in the regulator. This will require some help, unless the door is off. Remover the regulator, pop your rivets, then bolt or rivet the new motor on, then replace the regulator.
I hate doing this job which is why my main project has been converted to hand cranks.
I hate doing this job which is why my main project has been converted to hand cranks.
08-09-2010, 04:20 PM
#12
TECH Addict
iTrader: (3)
Join Date: Feb 2006
Location: The dirty taint of the country. ...Los Angeles
Posts: 2,498
Likes: 0
Received 3 Likes
on
2 Posts
I have done 2 motors so far. The easier thing i found was to not drill the door panel itself, but to drill out the rivets holding in the regulator. This will require some help, unless the door is off. Remover the regulator, pop your rivets, then bolt or rivet the new motor on, then replace the regulator.
I hate doing this job which is why my main project has been converted to hand cranks.
I hate doing this job which is why my main project has been converted to hand cranks.
08-18-2010, 01:30 AM
#13
Registered User
Join Date: Aug 2010
Location: Wilmington, DE
Posts: 23
Likes: 0
Received 0 Likes
on
0 Posts
02v8TA... Did you get it fixed.?
I just did my passenger side 2 weekends ago. I did my driverside last year. I used the same site that was recomended in earlier replies. It worked great...! The only thing I had an issue with was using an AFTERMARKET motor. I coulden't get it to line up with the old (factory) bracket. Drilling out the "proper" 3 rivets leaves the bracket in place. The part of the stud that sticks out where the drive gear is mounted to the replacement motor would not go into the hole on the factory bracket. ( i tried for an hour ) I got the FACTORY part and it slipped right in... Don't forget the grease on the gear as well.. Also don't forget to wedge the window in the fully UP position. i used a quick clamp with rubber grips. Job took less than an hour.
I just did my passenger side 2 weekends ago. I did my driverside last year. I used the same site that was recomended in earlier replies. It worked great...! The only thing I had an issue with was using an AFTERMARKET motor. I coulden't get it to line up with the old (factory) bracket. Drilling out the "proper" 3 rivets leaves the bracket in place. The part of the stud that sticks out where the drive gear is mounted to the replacement motor would not go into the hole on the factory bracket. ( i tried for an hour ) I got the FACTORY part and it slipped right in... Don't forget the grease on the gear as well.. Also don't forget to wedge the window in the fully UP position. i used a quick clamp with rubber grips. Job took less than an hour.