
Firebird Headlights--ALL COMMENTS/QUESTIONS REGARDING HEADLIGHTS GO IN HERE
 07-28-2010, 09:07 AM
#881
The headlights should stay down when just the park(middle setting) and fog lights are switched on.
Usually a stripped gear will cause them to pop up when the parking lights are turned on. (when you use the fob do they pop up/down?)
Also Canadian models have the auto headlights which make them pop open.
Usually a stripped gear will cause them to pop up when the parking lights are turned on. (when you use the fob do they pop up/down?)
Also Canadian models have the auto headlights which make them pop open.
 07-30-2010, 09:28 AM
#884
TECH Enthusiast
iTrader: (7)
Join Date: Mar 2004
Location: Schaumburg, IL
Posts: 510
Likes: 0
Received 0 Likes
on
0 Posts

Alright I need some help, I'm about to take a sledgehammer to my headlights.
1 year ago I installed metal gears in both headlight motors. Now all of the sudden they are doing the same old routine when I lock or unlock the car; going up, down and making that loud grinding noise. Any ideas?
1 year ago I installed metal gears in both headlight motors. Now all of the sudden they are doing the same old routine when I lock or unlock the car; going up, down and making that loud grinding noise. Any ideas?
07-30-2010, 10:32 AM
#885
The fix is to tighten them up again. Wiggle the motor, if it has play in it bang down the metal tabs that hold it in place. If the cover came loose, reseal it.
08-01-2010, 06:30 PM
#887
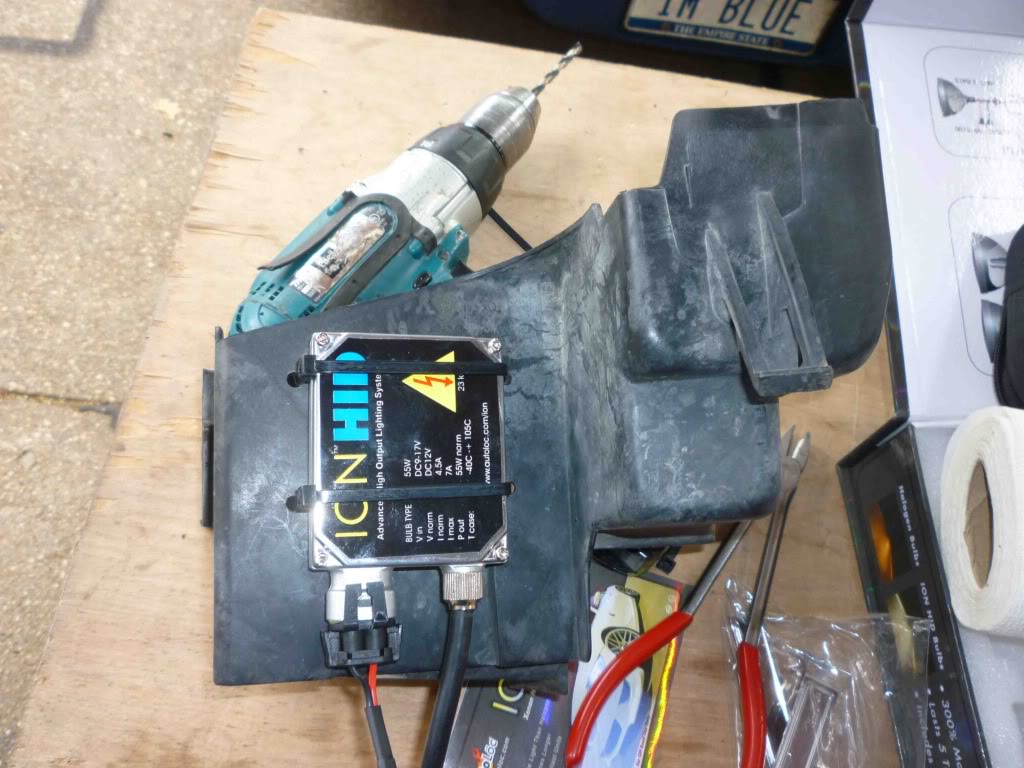
I finally got around to installing the HID kits into my LMC housings.
I wanted to mount the ballasts on the engine side of everything, not just behind the headlights where water is more prevalent.
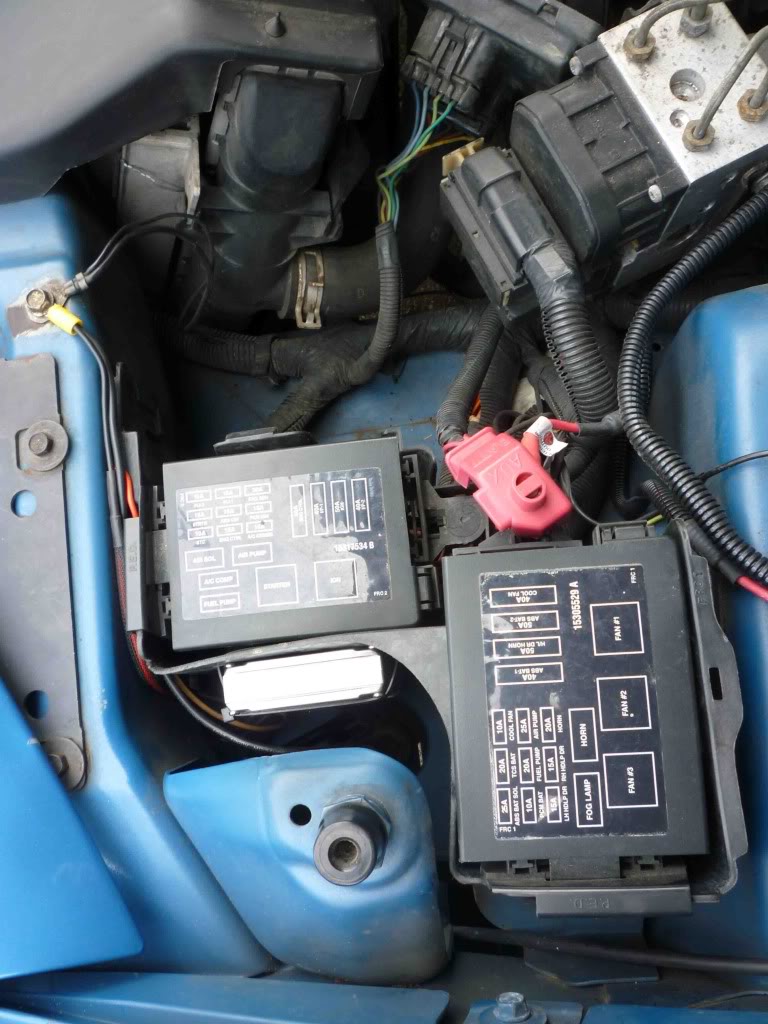
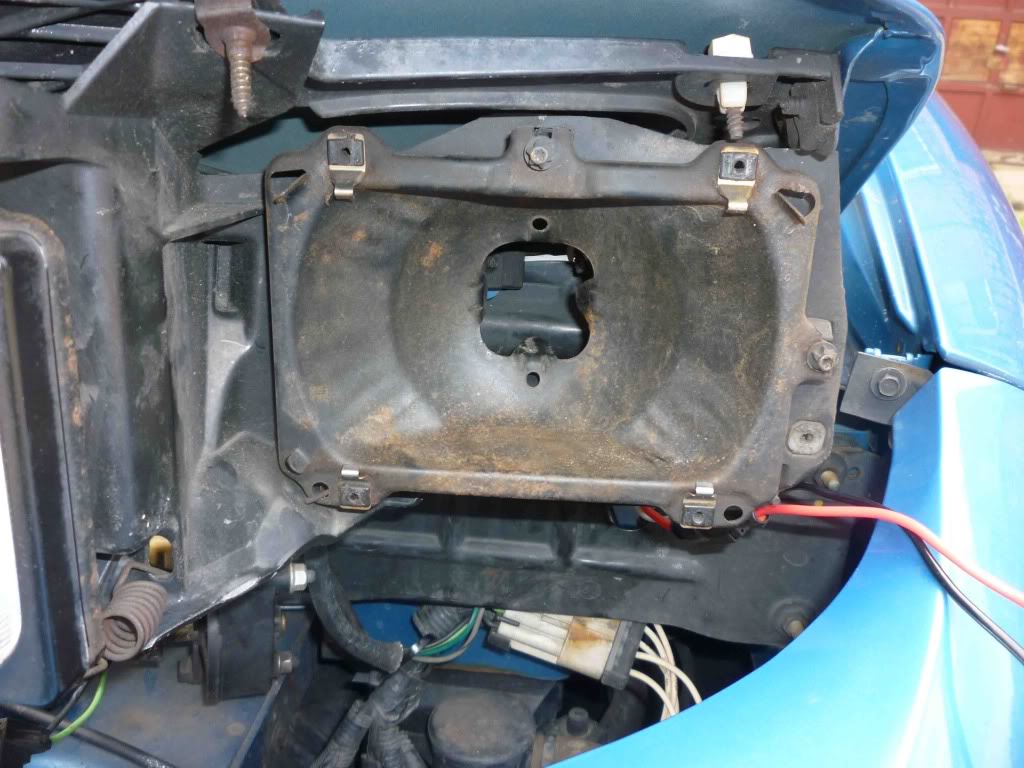
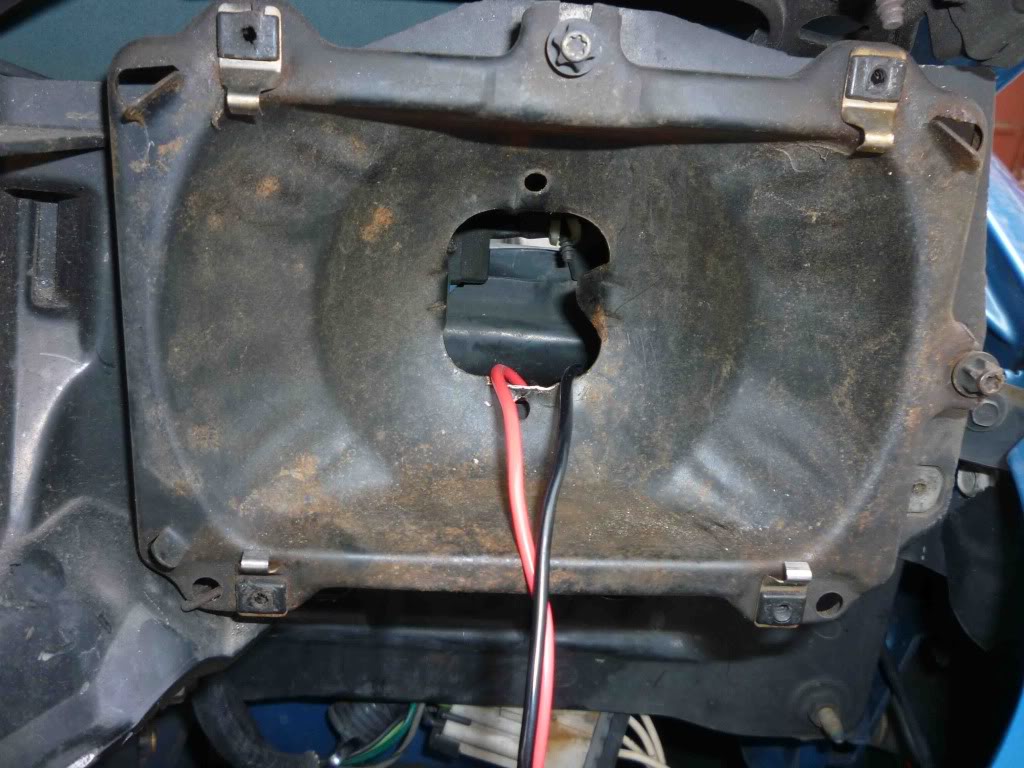
The left side was pretty easy. I pulled out the molded plastic housing that the two fuse blocks sit in. The fuse blocks and the housing all pull out after depressing tabs. I simply drilled some holes and tie-wrapped the ballast neatly to the outside. This worked well and it was easy.
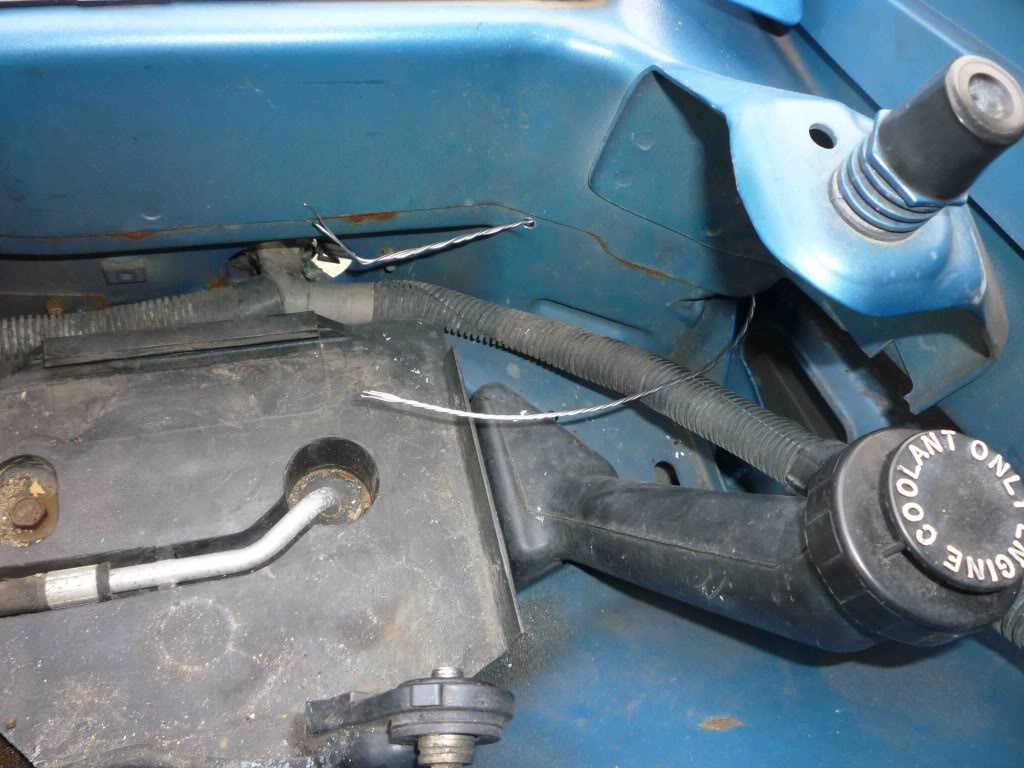
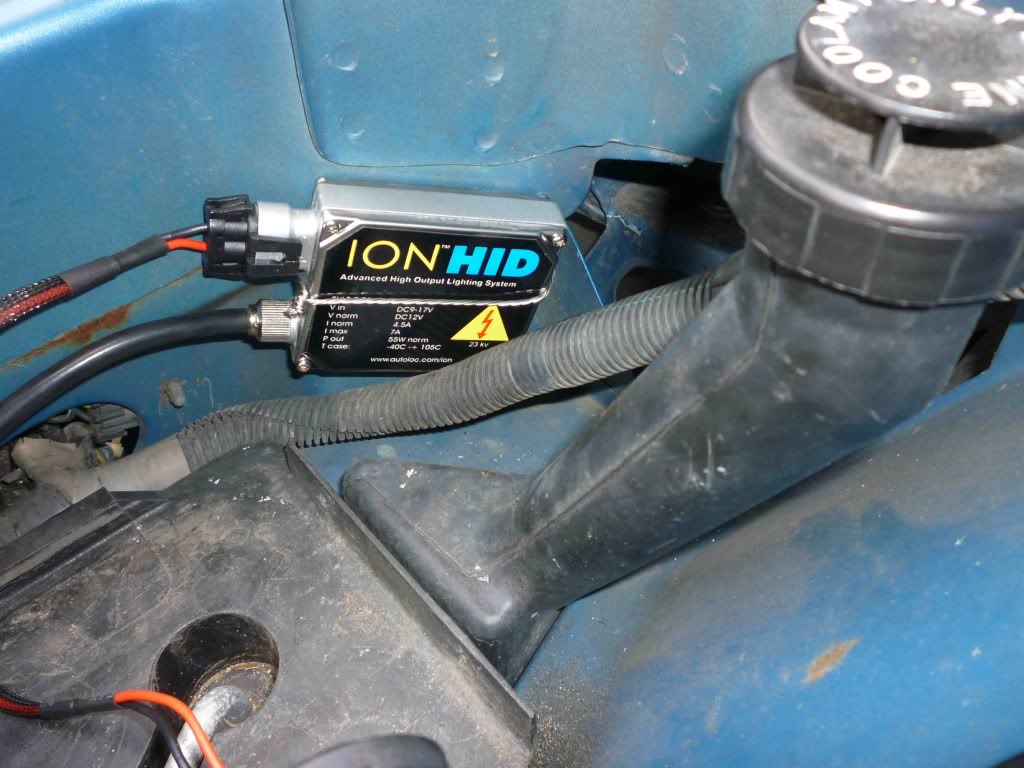
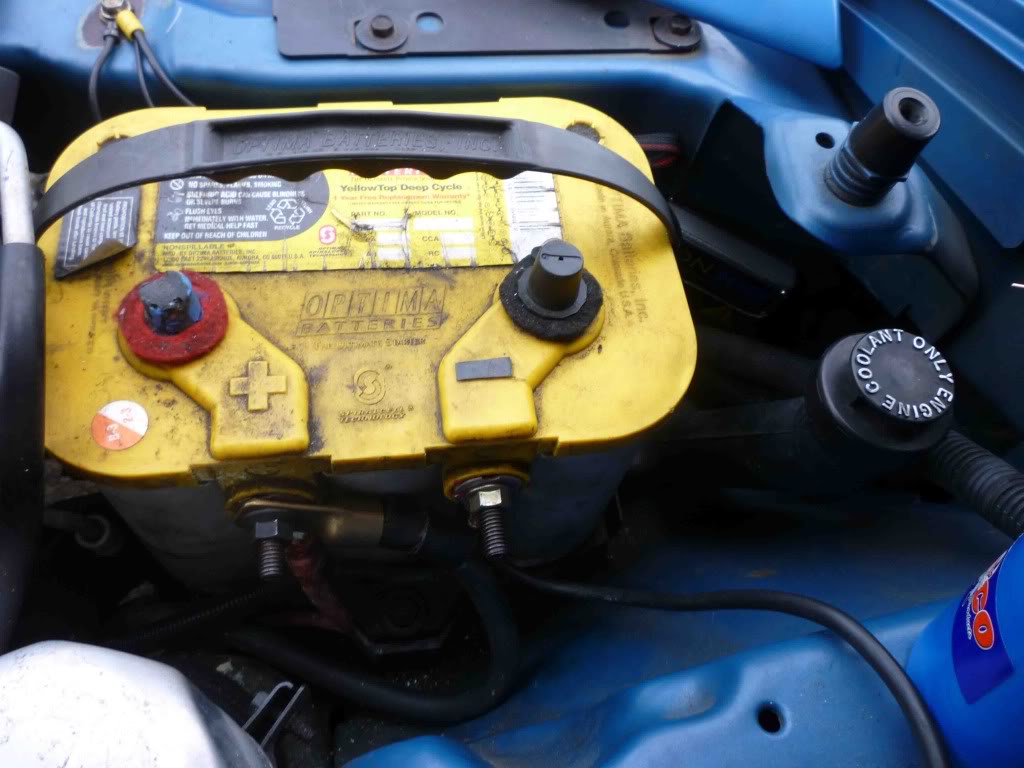
The right side is a bit more involved. I pulled the battery to mount the ballast. I drilled one hole and passed some twisted together safety wire through. This worked pretty well also.
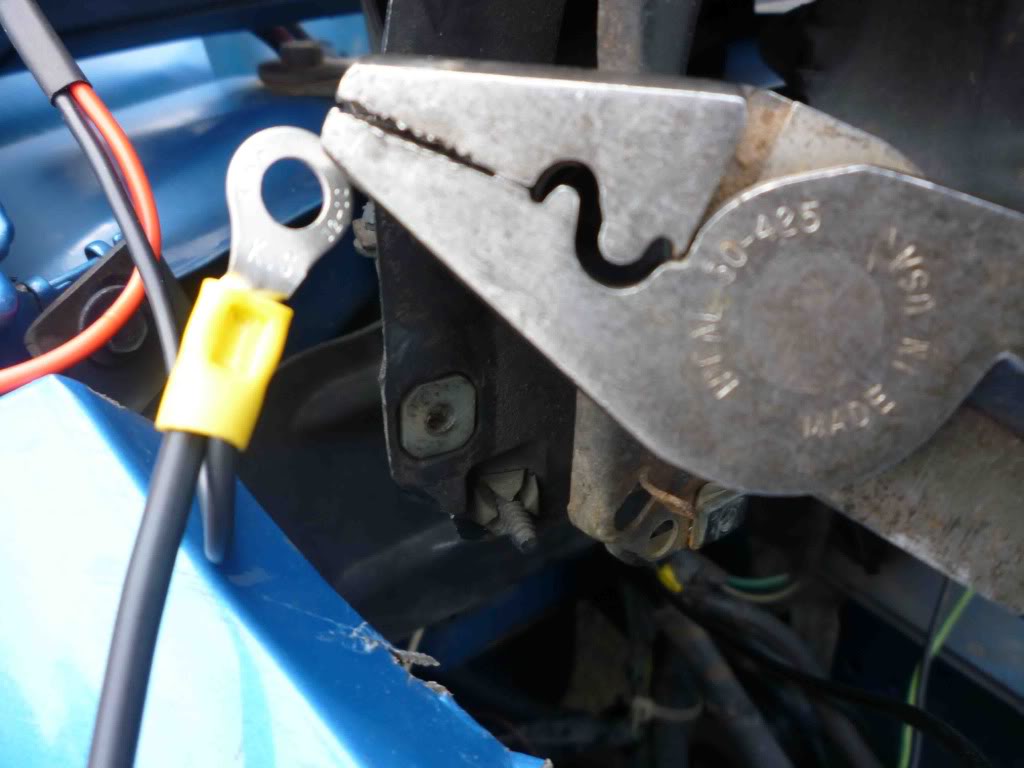
Wiring for both sides: I passed the original bulb’s positive wire to the other side and made a nice crimp to the ballast feed. It's negative got a nice crimp to the radiator support along with a 12 gauge tail for a high beam harness upgrade that’ll be later.
You are all crimping with the proper tool that correctly dimples the joint, not flattens it like the cheap tool does, right?
The bulbs were a bit of a tight fit through the headlight buckets. There are a few tabs in the opening. I bent the bottom one back and forth until it snapped off. They clear the bulbs nicely now.
I’ll have to get a night pic of the lights posted. It did seem that the beam went too high so I adjusted them downwards. I’ll be out hoisting a few cold ones tonight and I’ll have a T15 driver with me and I'll at least be able to later report how they look from the driver's seat. I HATE headlights that blind people and I refuse to be one of them.
Forgive my fugly battery and the cabling. This is not representative of my usual finished work. In short time I’m installing a British made battery in the trunk.

I wanted to mount the ballasts on the engine side of everything, not just behind the headlights where water is more prevalent.
The left side was pretty easy. I pulled out the molded plastic housing that the two fuse blocks sit in. The fuse blocks and the housing all pull out after depressing tabs. I simply drilled some holes and tie-wrapped the ballast neatly to the outside. This worked well and it was easy.
The right side is a bit more involved. I pulled the battery to mount the ballast. I drilled one hole and passed some twisted together safety wire through. This worked pretty well also.
Wiring for both sides: I passed the original bulb’s positive wire to the other side and made a nice crimp to the ballast feed. It's negative got a nice crimp to the radiator support along with a 12 gauge tail for a high beam harness upgrade that’ll be later.
You are all crimping with the proper tool that correctly dimples the joint, not flattens it like the cheap tool does, right?
The bulbs were a bit of a tight fit through the headlight buckets. There are a few tabs in the opening. I bent the bottom one back and forth until it snapped off. They clear the bulbs nicely now.
I’ll have to get a night pic of the lights posted. It did seem that the beam went too high so I adjusted them downwards. I’ll be out hoisting a few cold ones tonight and I’ll have a T15 driver with me and I'll at least be able to later report how they look from the driver's seat. I HATE headlights that blind people and I refuse to be one of them.
Forgive my fugly battery and the cabling. This is not representative of my usual finished work. In short time I’m installing a British made battery in the trunk.
Last edited by Paul Bell; 08-01-2010 at 11:32 PM.
08-01-2010, 10:49 PM
#888
OK guys here's the verdict:
ONCE YOU GO HID YOU'LL NEVER GO BACK!
I shoulda done this a long time ago.
Just do it, you won't be sorry.
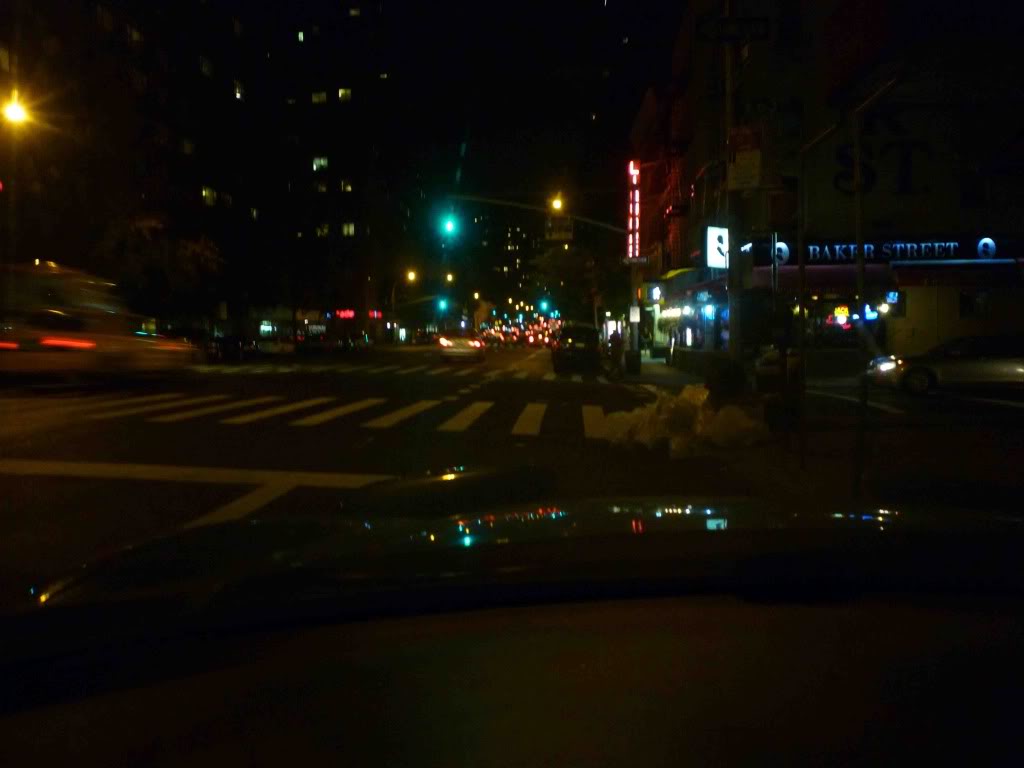
Some nightime pics:
On a street in NYC at a crosswalk & trash bags. Headlights off then on.
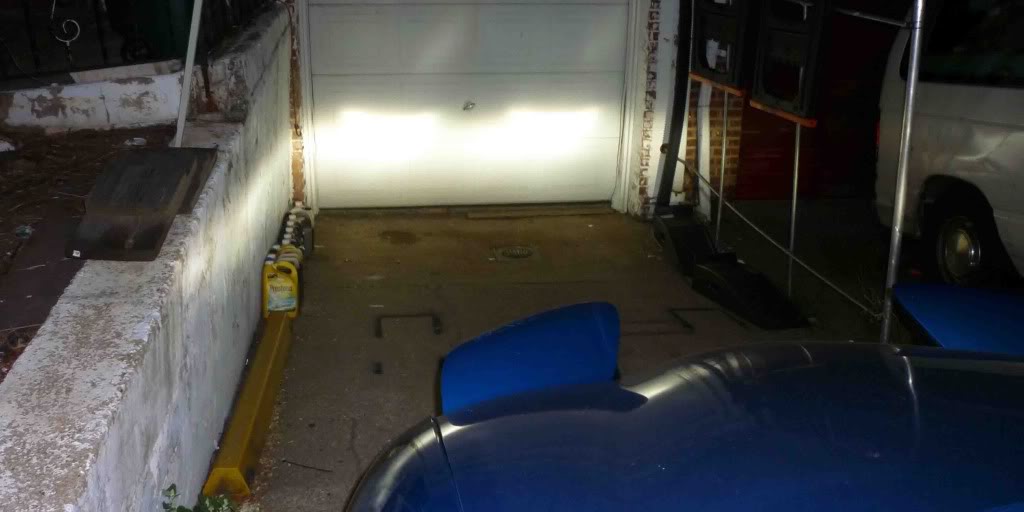
On my garage door, lows then highs & lows. You can easily see the well defined beam and cut off point in the lows. This is from the LMC housings. You won't get this in any other housing, incandescent or HID.


ONCE YOU GO HID YOU'LL NEVER GO BACK!
I shoulda done this a long time ago.
Just do it, you won't be sorry.
Some nightime pics:
On a street in NYC at a crosswalk & trash bags. Headlights off then on.
On my garage door, lows then highs & lows. You can easily see the well defined beam and cut off point in the lows. This is from the LMC housings. You won't get this in any other housing, incandescent or HID.
The following users liked this post:
kyphur (06-06-2021)
08-01-2010, 11:03 PM
#889
TECH Fanatic
iTrader: (2)

Join Date: Nov 2007
Location: Newport, RI
Posts: 1,406
Likes: 0
Received 0 Likes
on
0 Posts
SO my headlight motor has been grinding, which is a symtom of a worn gear. So today I tried to do the quick fixt of unhooking the arm off the motor and rotating the motor 180 degrees with the ****.
Technically, that did the trick. The headlight now goes up and down w/out grinding.
But, I have a problem now. When shutting the lights off, the door goes all the way down, then the motor reverses a bit, and the door raises back up about a 1/4 inch. So yes it's shut, but it sticks up a bit and is not down as far as the other side.
I tried unhooking it and rotating the **** a little bit more, but that didn't help.
Is there some way to adjust this??
Thanks!!!
08-02-2010, 09:28 AM
#891

Ive checked Ebay and google...no luck. My **** is cracked and doesnt work lol 
I can only turn the **** a little before it slips.
Thanks
I can only turn the **** a little before it slips.
Thanks
08-02-2010, 11:13 AM
#893
TECH Fanatic
iTrader: (2)
Join Date: Nov 2007
Location: Newport, RI
Posts: 1,406
Likes: 0
Received 0 Likes
on
0 Posts
Thanks...I completely missed that sticky. Tons of good info in there.
I think the stoppers are good, I remember seeing them in there.
One thing that I didn't mention was that the lights worked perfect before I unhooked the arm.
I hated driving around looking ghetto all day with the lights up, so what I would do is open the fuse box and put the fuse in long enough to clese them, then pull it right out when it started to grind. The lights would always both go down all the way and be perfectly flush with the hood and even on both sides.
I did get out of the video how to adjust the covers, so I'll give that a shot if it's not the stopper.
Thanks again.
08-02-2010, 11:30 PM
#894
TECH Apprentice
iTrader: (6)

Join Date: Sep 2007
Location: Houston, Texas
Posts: 388
Likes: 0
Received 0 Likes
on
0 Posts
Tried searching through all 40+ pages but I gave up.
Roughly 2 years ago my passenger side low beam headlight was flickering when I would hit a bump and then stop working all together. I found out that the connector or socket (female) was melted on the end and causing this problem. I was able then to splice in a new socket that I sourced from a Cadillac dealership. As of yesterday, it is doing it all over again. What are my options? Does anyone know the part number for the socket so I can look again at a stealership or a way to create my own and splice the new one in?
Roughly 2 years ago my passenger side low beam headlight was flickering when I would hit a bump and then stop working all together. I found out that the connector or socket (female) was melted on the end and causing this problem. I was able then to splice in a new socket that I sourced from a Cadillac dealership. As of yesterday, it is doing it all over again. What are my options? Does anyone know the part number for the socket so I can look again at a stealership or a way to create my own and splice the new one in?
08-03-2010, 11:18 AM
#896
TECH Apprentice
iTrader: (6)
Join Date: Sep 2007
Location: Houston, Texas
Posts: 388
Likes: 0
Received 0 Likes
on
0 Posts
Actually I just found the socket at Autozone and had to 2 day order it for $5.99 (pick up at my local store), cheaper than any online site.
Thanks
Thanks
Last edited by E V I L; 08-03-2010 at 03:04 PM.
08-03-2010, 10:39 PM
#897
TECH Resident
iTrader: (4)
Join Date: Feb 2007
Location: Manassas, VA
Posts: 794
Likes: 0
Received 0 Likes
on
0 Posts
Picked my car up after some work was done at the dealer, apparently the headlights started grinding while it was there.
Some reading on here, 1 hour later. Fixed! Just used the manual raise/lower mechanism to rotate the gear. Great info in this thread.
Some reading on here, 1 hour later. Fixed! Just used the manual raise/lower mechanism to rotate the gear. Great info in this thread.
08-04-2010, 03:15 AM
#898

Just installed my 6000k HIDs in low beam LMC housings, ( part #: 36-0302 ) and 9006 DDM hid kit, i adjusted them down a bit, but not too much, these housings are amazing, and cut off is pretty amazing as well, i spent $140 total on the head lights, I also have 6000k HID fogs.
I'd also like to state that the above combo is plug and play, no splicing, cutting, anything, pretty much same as the fogs.
Here's a video of the headlights only, the video makes it look wayy blue, another neat thing I noticed with these housings is the bulb cover inside the housing, it makes it so it's not as blinding to on-coming traffic, and I only had to adjust them down a few turns, WAYYY better then eurolamps conversion housings.
I'd also like to thank Paul Bell for recommending these amazing housings.
http://www.youtube.com/watch?v=44oN6tOSI8s
Last edited by mischief; 08-05-2010 at 12:55 AM.
The following users liked this post:
kyphur (06-07-2021)
08-05-2010, 01:25 PM
#900
TECH Enthusiast
iTrader: (7)
Join Date: Mar 2004
Location: Schaumburg, IL
Posts: 510
Likes: 0
Received 0 Likes
on
0 Posts
Very simple, either the motor is cocked sideways or else the cover glue/epoxy has weakened. Either way, the gears are slipping under high torque.
The fix is to tighten them up again. Wiggle the motor, if it has play in it bang down the metal tabs that hold it in place. If the cover came loose, reseal it.
The fix is to tighten them up again. Wiggle the motor, if it has play in it bang down the metal tabs that hold it in place. If the cover came loose, reseal it.