
1997 427 Camaro
 08-17-2009, 07:36 PM
#1

Well guys I figured I join in on the fun and start a thread about my SBC 427 swap.
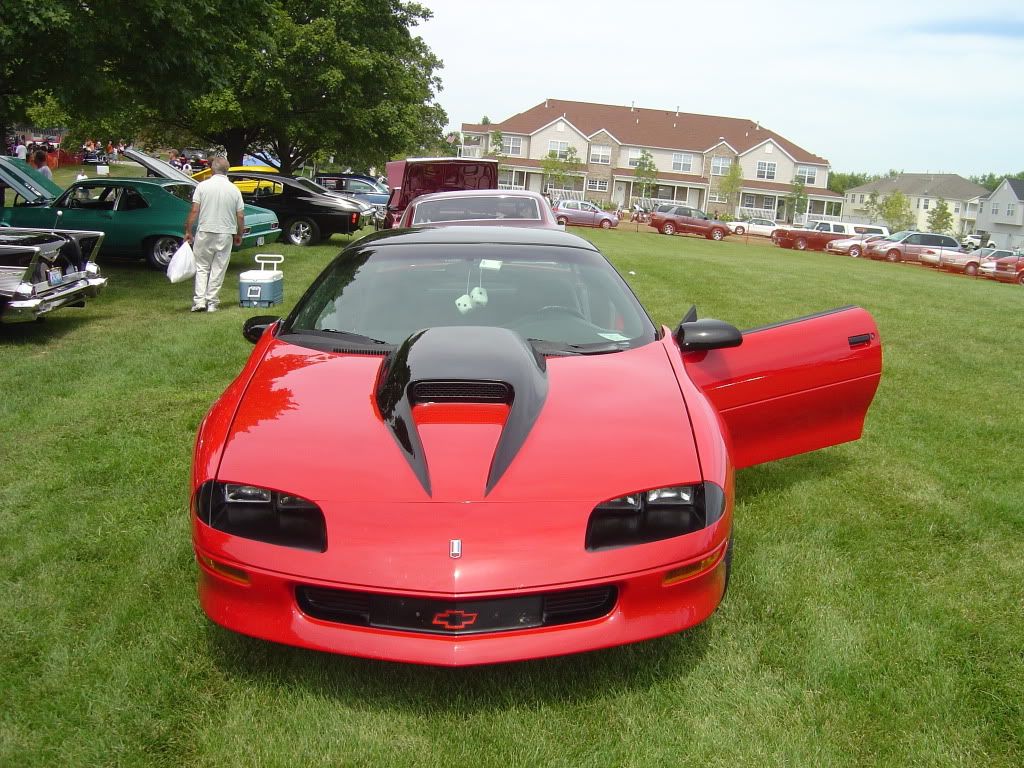
Little history about the car. It started out as a 97 Z/28 stripper. . I always wanted a 427 car but didn't want to pay for a real ZL-1. So i Figured what the heck why not make one.
This is how she looked in 2006 after I put the new hood on it.
Here's how she sat just a few days ago.
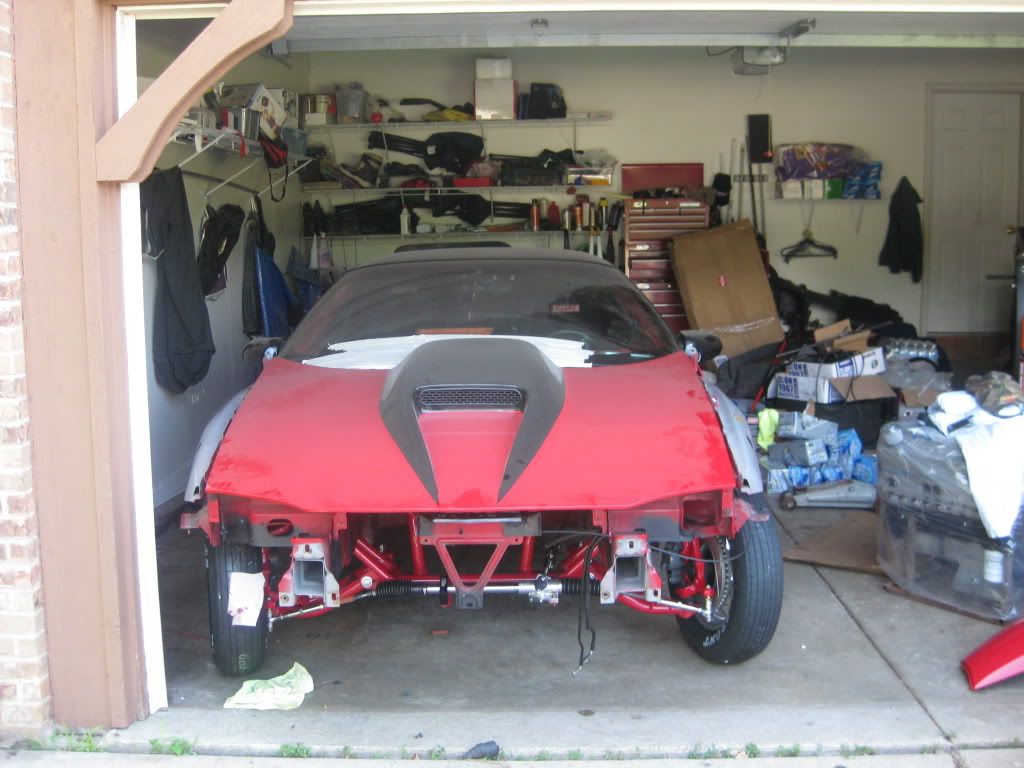
You can see I made quite the mess of my garage.
~Jim~
Little history about the car. It started out as a 97 Z/28 stripper. . I always wanted a 427 car but didn't want to pay for a real ZL-1. So i Figured what the heck why not make one.
This is how she looked in 2006 after I put the new hood on it.
Here's how she sat just a few days ago.
You can see I made quite the mess of my garage.
~Jim~

 08-17-2009, 09:08 PM
#5
Here's a little before and after shot.
Before:
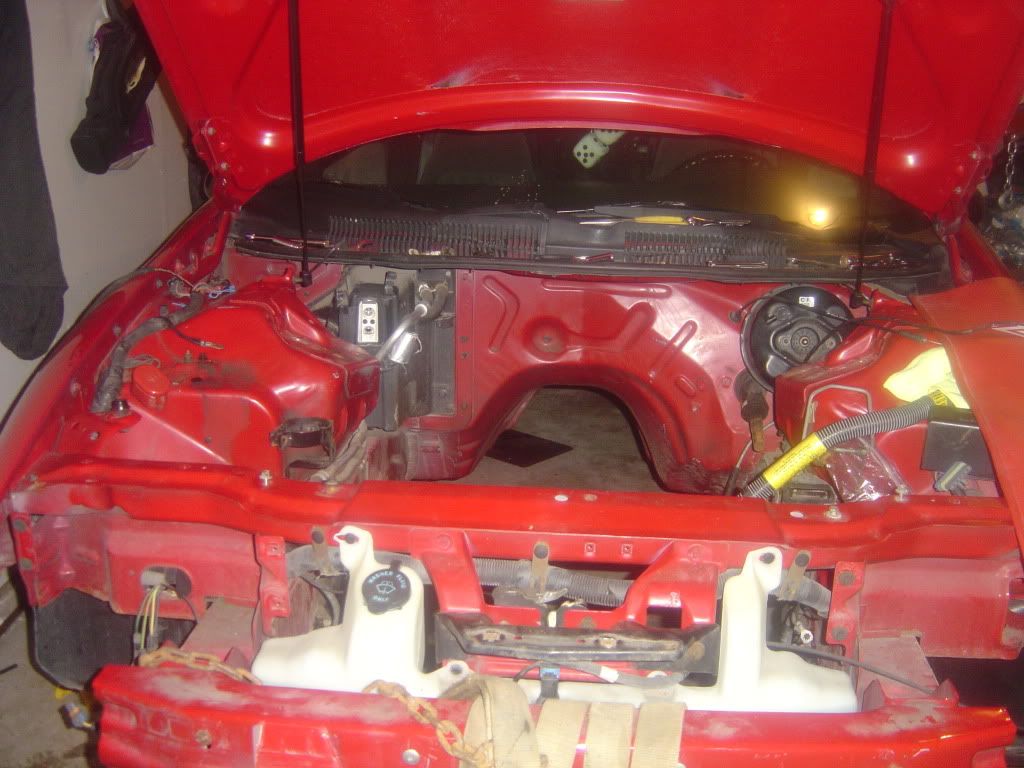
After:

You can see the new lower radiator support and the cut out for the vertical radiator in the core support. The motor is a Dart Little M with a 4.125" bore and a 4" stroke. I'll have some pictures of the motor tomorrow. I can't give up all goods tonight.
~Jim~
Before:
After:
You can see the new lower radiator support and the cut out for the vertical radiator in the core support. The motor is a Dart Little M with a 4.125" bore and a 4" stroke. I'll have some pictures of the motor tomorrow. I can't give up all goods tonight.
~Jim~

Trending Topics

 08-19-2009, 06:30 AM
#10
Good eye. I got in on the deal when summit was hurrying them out the door. They sent me two different center caps though. So I won't be running the caps.
I ordered up my rear last night. Estimated 2 weeks before I can have the car back into a roller. Still have alot of grinding to do on the underside before I can paint it and the engine bay.
~Jim~
I ordered up my rear last night. Estimated 2 weeks before I can have the car back into a roller. Still have alot of grinding to do on the underside before I can paint it and the engine bay.
~Jim~
08-19-2009, 08:24 PM
#11
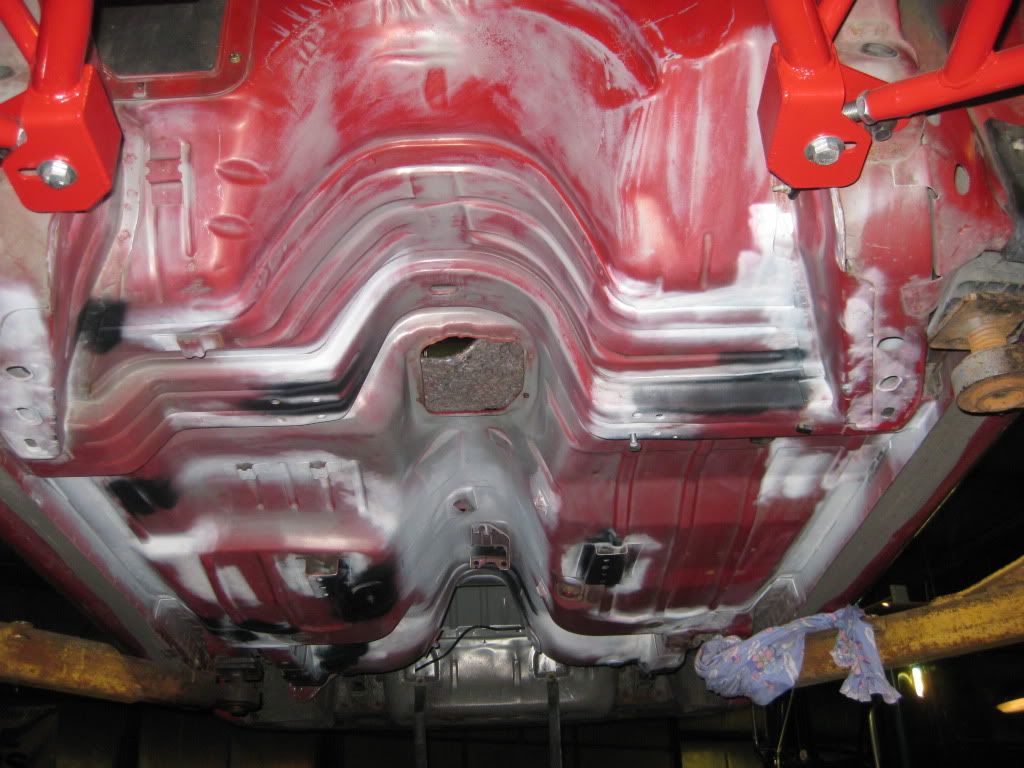
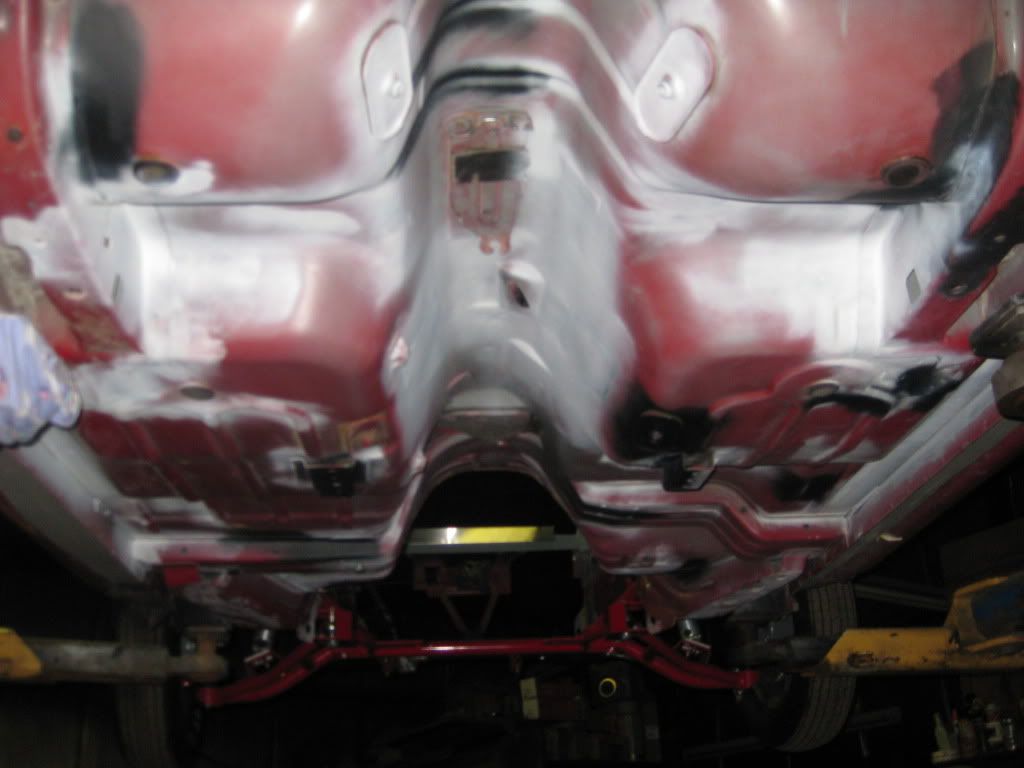
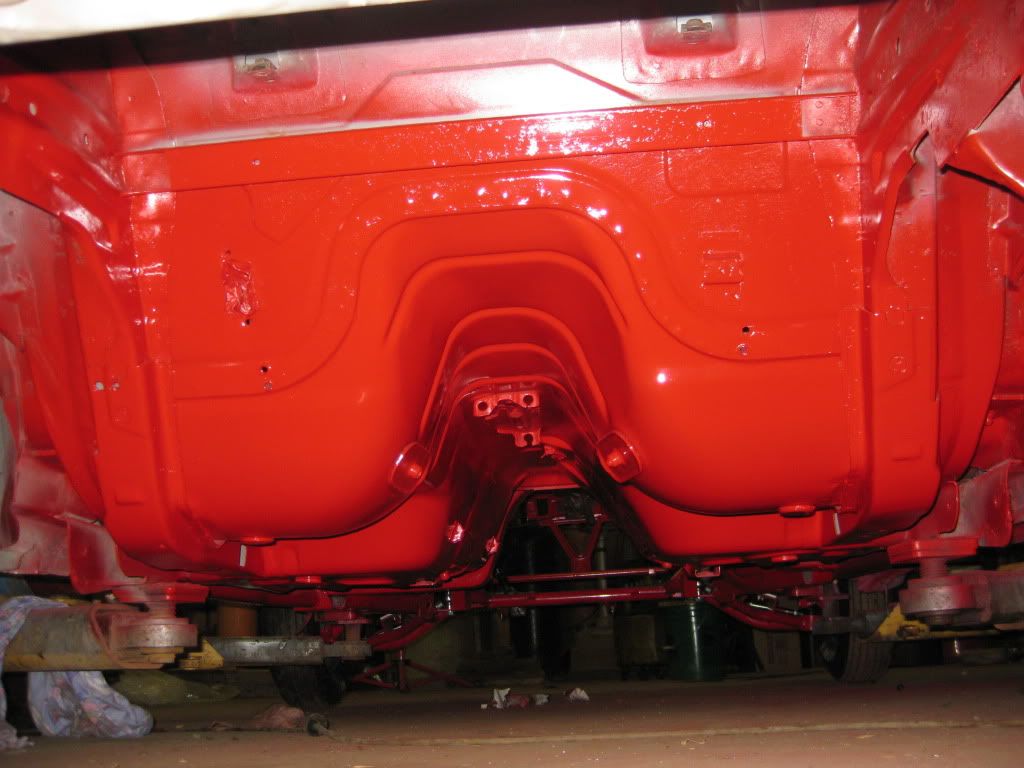
Well it was a long night but I got the whole underside of the car prepped for prime. Next step is prepping the engine bay tomorrow then priming on Saturday.
Here's a few picks of the days work. Man does it look ugly but I'm hoping it'll be worth the time and work.
There's no body filler on the car all the white and black spots are spot primer.
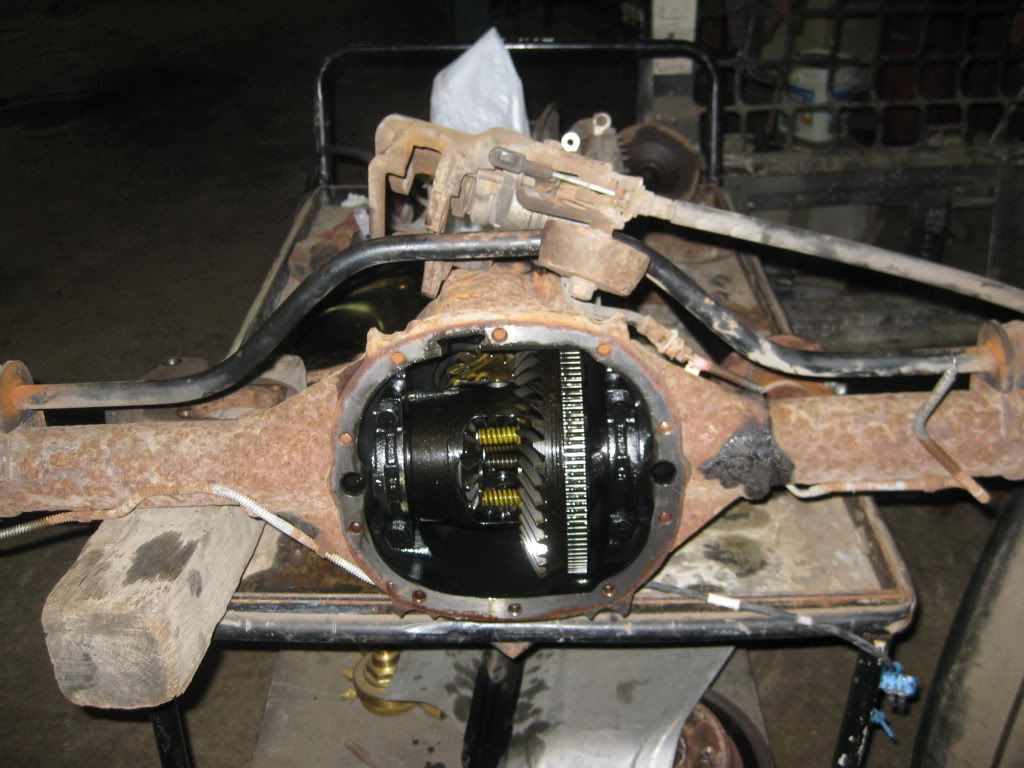
Here is a picture that may not be seen often. A ten bolt thats not blown up.
~Jim~
Here's a few picks of the days work. Man does it look ugly but I'm hoping it'll be worth the time and work.
There's no body filler on the car all the white and black spots are spot primer.
Here is a picture that may not be seen often. A ten bolt thats not blown up.
~Jim~
08-20-2009, 07:59 PM
#14
Well I made some more progress tonight. I've found out I really hate body work. I got the whole engine bay cleaned and sanded. Hopefully priming and painting the car this week.
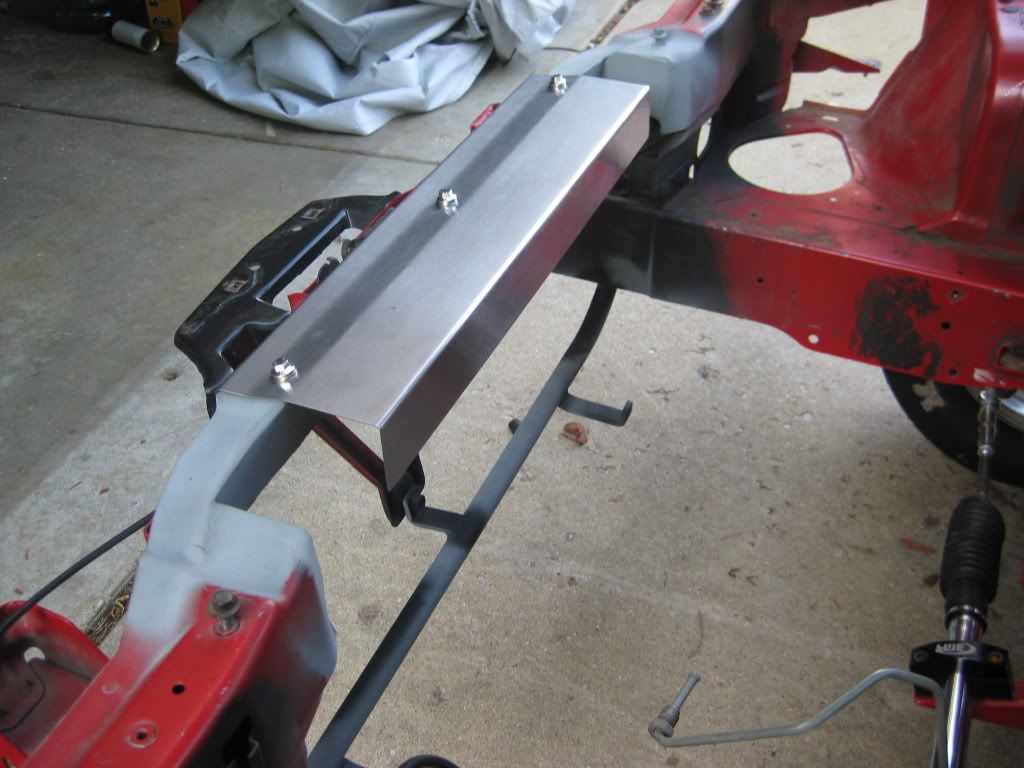
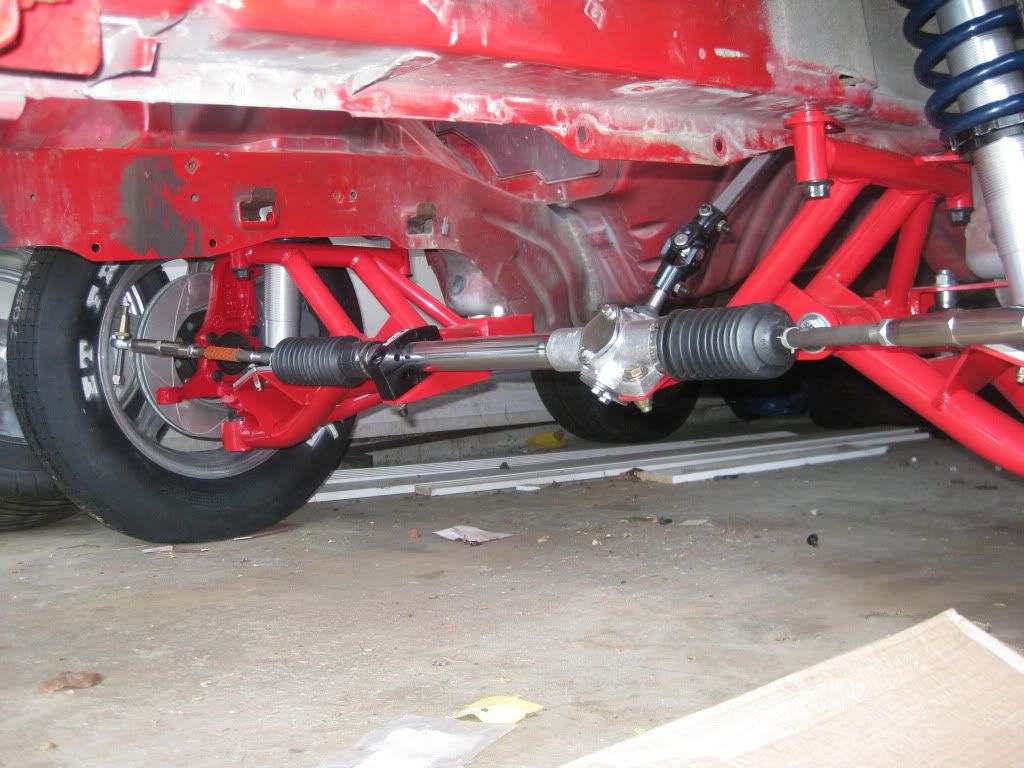
Since I don't have any new pictures, I figured I share the parts list for my front suspension and another picture.
- BMR SBC/BBC cross member
- BMR upper and lower A- arms (double adj)
- Strange double adjustable drag shocks
- Strange 300lb springs
- Flaming River manual steering rack (which I'm not very fond of!)
- Custom tie rod ends (most of the reason I don't like the rack)
- GM replacement Shock mounts
- New hubs from Timkin
- ARP 3.25" wheel studs
- ATE Zinc coated rotors
- LT1 Stock spindles (coated by Powder pro)
- LT1 stock calipers (rebuilt and coated by Powder pro)
- Hawk Pads
- Greg weld 3.5" wheels and matching open lugs
- Mickey Thompson 26" skinnies
Here's a better pic of the suspension.
~Jim~
08-24-2009, 02:02 PM
#16
It's not that I don't like the rack. I felt that the way they designed the connections b/w the rack and the spindle (tie rods) was cheap and unsafe.
It cost me extra time and money to get that figured out. I later found out that MADMAN has a fix to this solution but they charge $150 plus shipping. So that brings the cost of the rack to $800 for a few pounds of weight savings. Now I got the tie rods done for much cheaper then that but it cost me a lot of time and some favors.
I still plan to use the rack now that I got the bugs worked out.
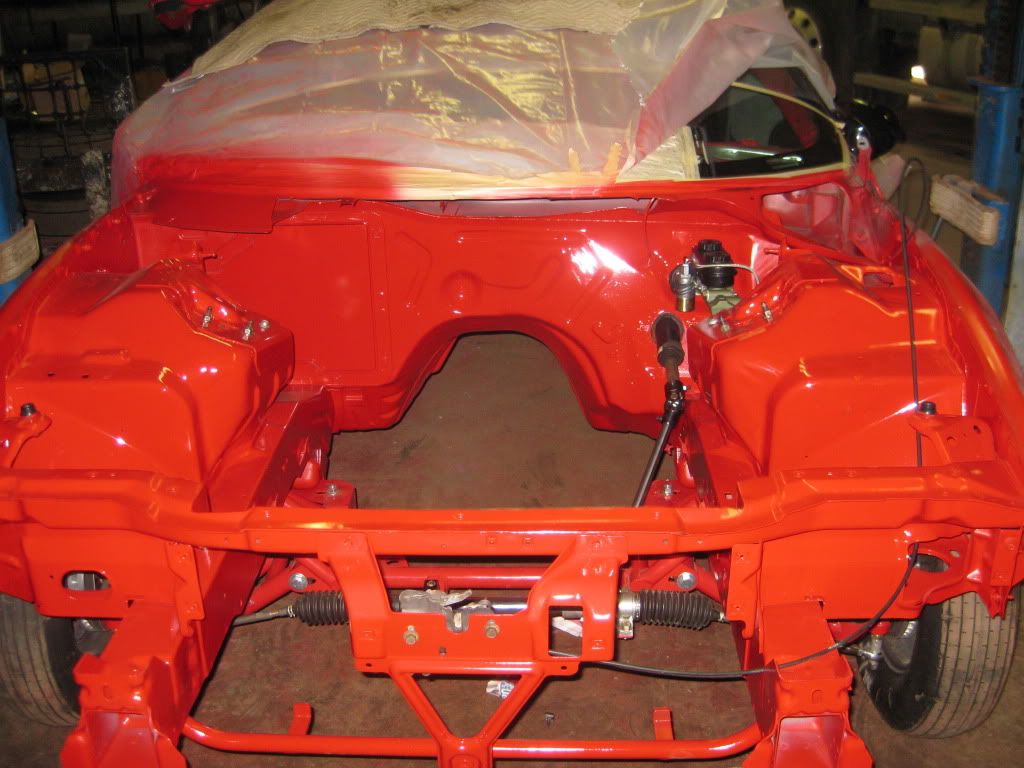
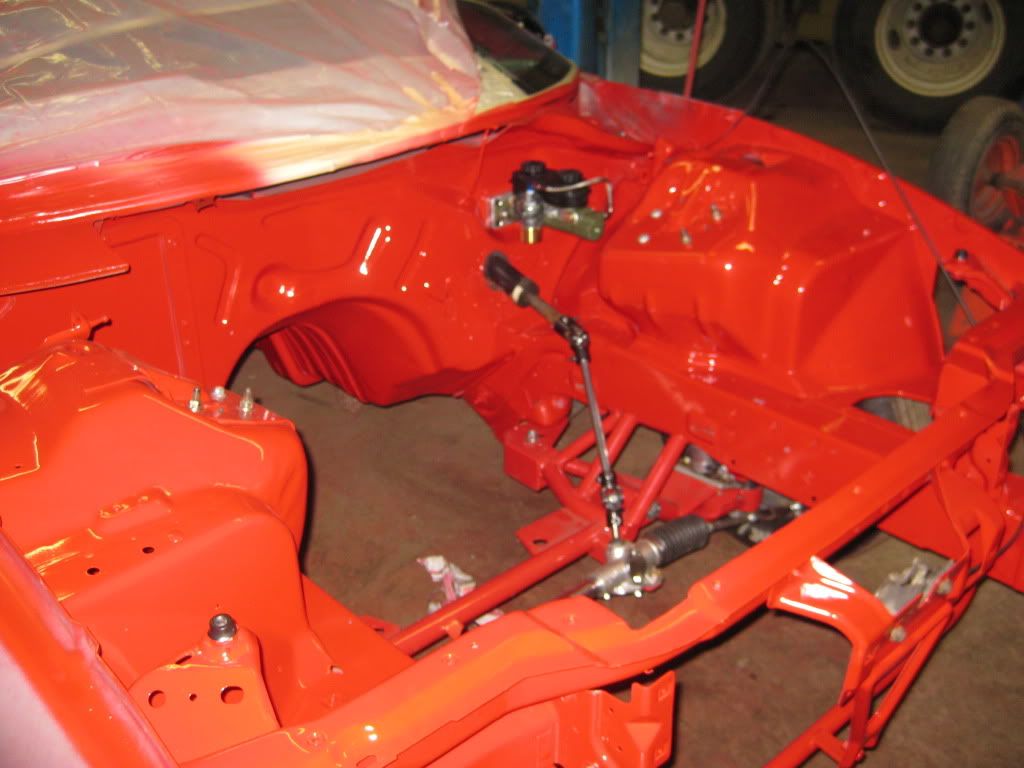
Update: Got the bulk of the painting done on Saturday. Thanks to the help from my Uncle and Brother. We need to put one more coat on the engine bay tomorrow. I'll have some updated pics when it gets the next coat.
It should be ready for brakes, engine and trans some time this week.
It's moving right along hopefully I have the car rolling by the first week of September. I'd really like to be at the strip in October.
~Jim~
It cost me extra time and money to get that figured out. I later found out that MADMAN has a fix to this solution but they charge $150 plus shipping. So that brings the cost of the rack to $800 for a few pounds of weight savings. Now I got the tie rods done for much cheaper then that but it cost me a lot of time and some favors.
I still plan to use the rack now that I got the bugs worked out.
Update: Got the bulk of the painting done on Saturday. Thanks to the help from my Uncle and Brother. We need to put one more coat on the engine bay tomorrow. I'll have some updated pics when it gets the next coat.
It should be ready for brakes, engine and trans some time this week.
It's moving right along hopefully I have the car rolling by the first week of September. I'd really like to be at the strip in October.
~Jim~
09-01-2009, 06:45 PM
#18
Sorry for the delay but here is the latest pics of the finished body work.
You can see the new Burkhart Master cylinder mounted also in the pic.
I'm really happy with the way it turned out. It should look real good with the 427 sitting in b/w there
~Jim~
You can see the new Burkhart Master cylinder mounted also in the pic.
I'm really happy with the way it turned out. It should look real good with the 427 sitting in b/w there
~Jim~
