


Garage floor coating pics
Working on a little project at home, before the weather gets unbearably hot.
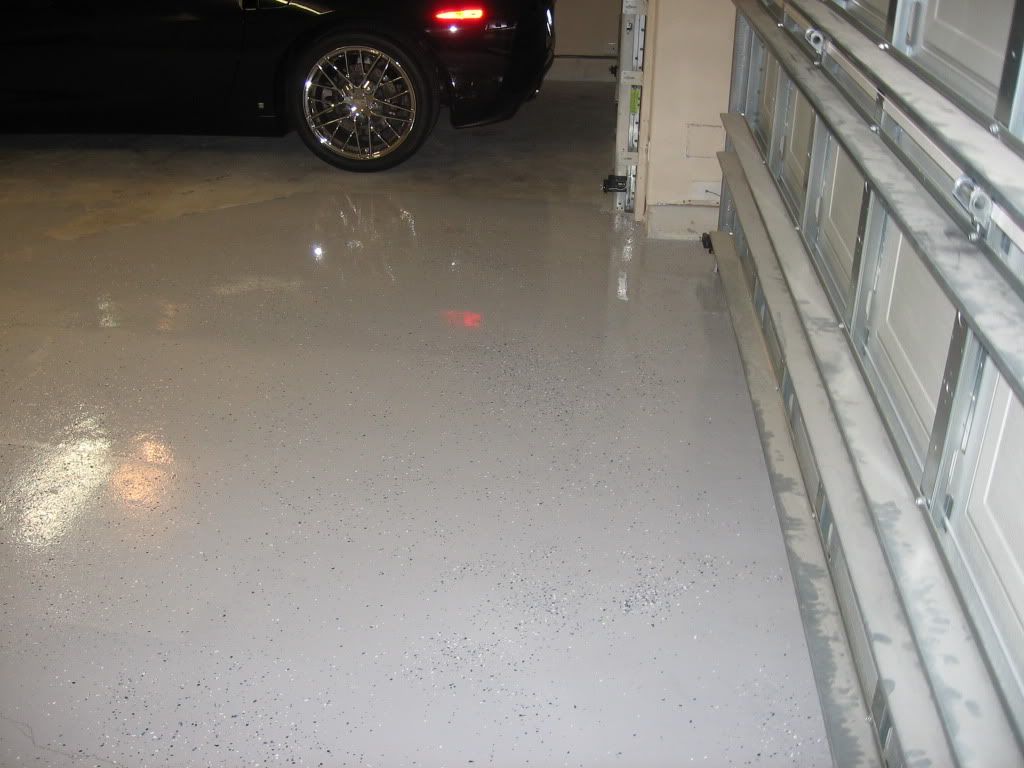
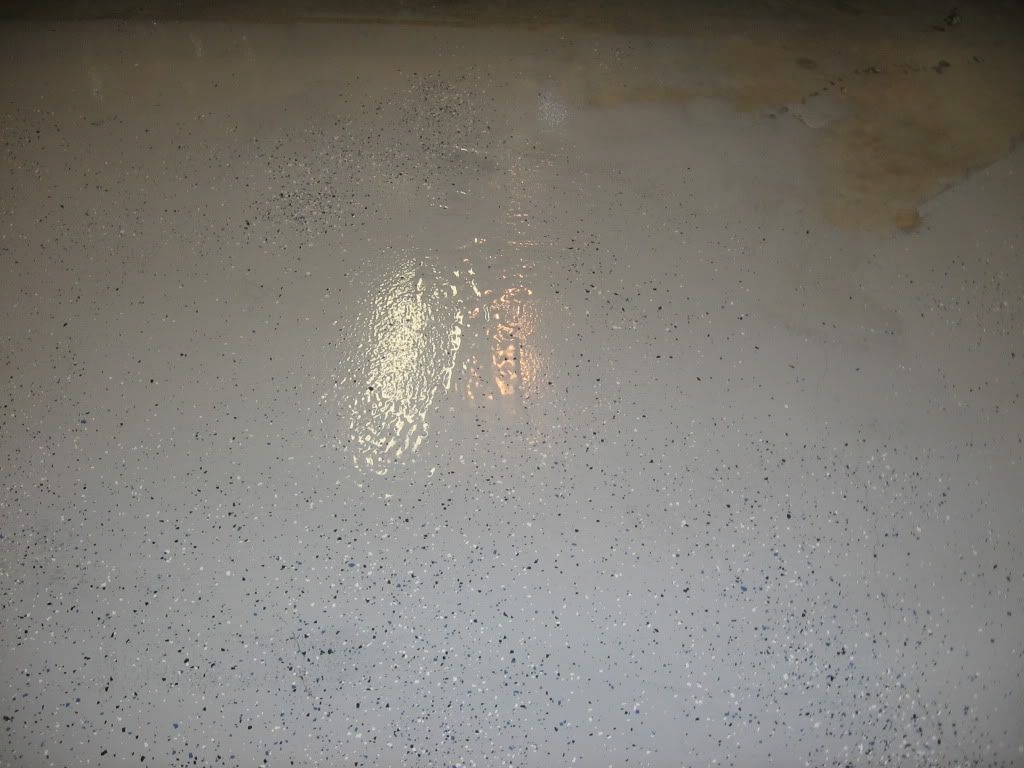
Yes, it's dry, except for the spot nearest the rear wheel of the Vette, which we (my dad and I...my wife is pregnant and not allowed in the garage while we're doing this) did tonight. It's a very glossy finish, without a clearcoat.
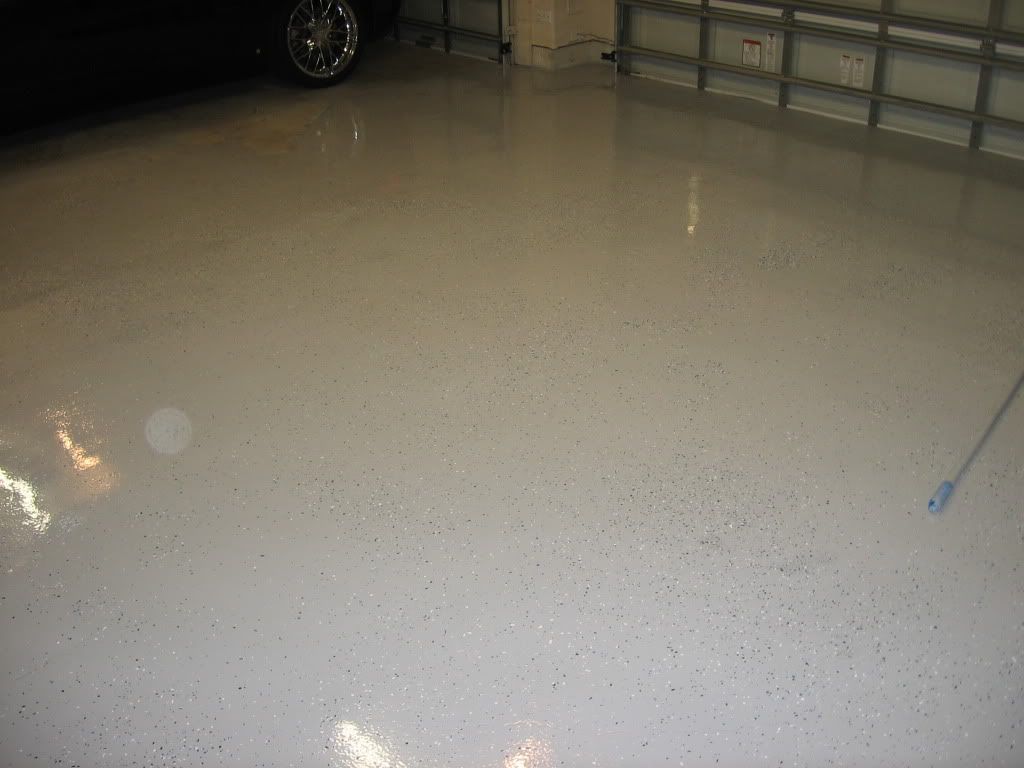
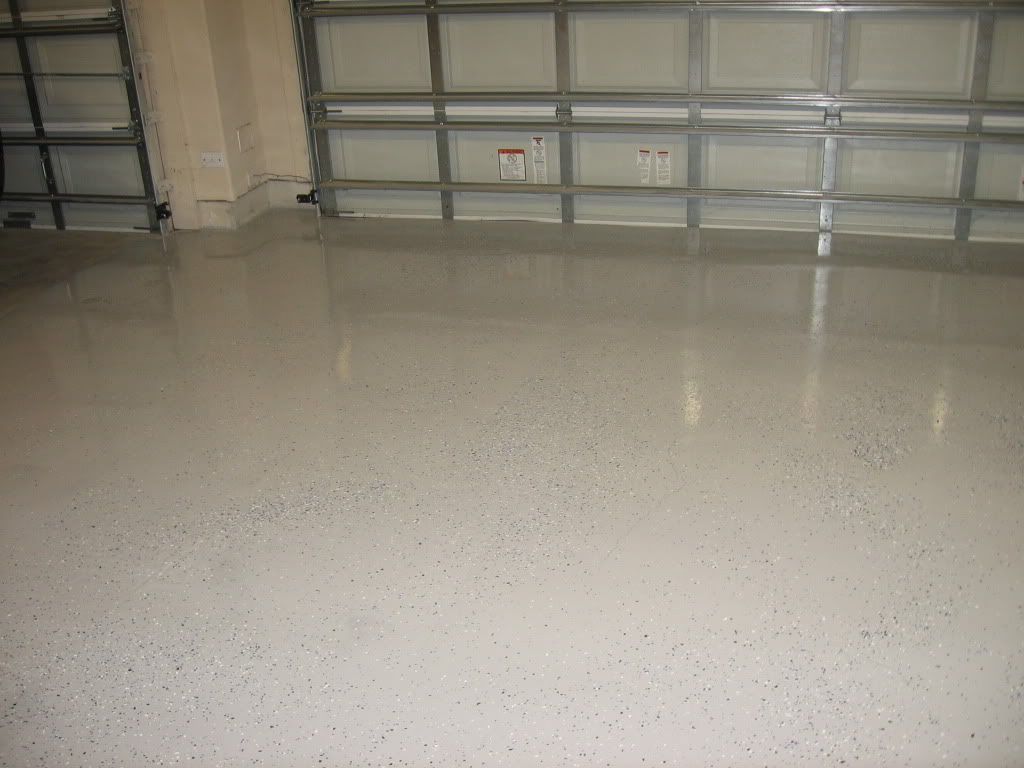
Haven't done the third bay yet.
Tip: Don't re-use the same bucket if there is ANY residual left in it, and work when it's cooler. The second batch we made was a disaster and set in about five minutes, leaving me this large...lump
Tip 2: If there are any oily patches, this stuff WILL NOT ADHERE.
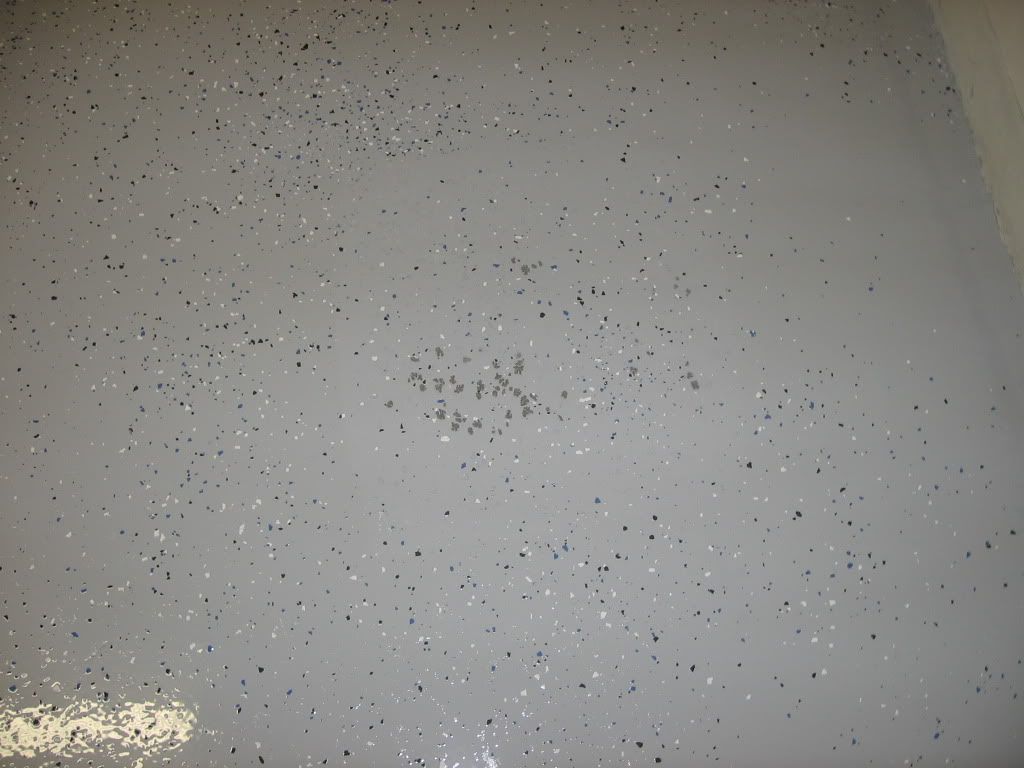
Overall, I'm very pleased. I used the off-the-shelf Rustoleum kit from Lowes at my old house, but after a couple years, it didn't hold up as well as I would have liked. This time, I got a kit online from www.epoxy-coat.com, and it's a much thicker product. Application is a little odd, in that you mix it, pour it onto the concrete IMMEDIATELY, use a squeegee to spread it out, then roll it to even it. The flakes are for show and a little traction.
At any rate, I'm happy with the looks so far. I'll be able to drive on it by the end of the week, so once the original bays have a chance to dry, I'll move the Vette over, re-prep the 3rd bay, then coat it as well.
-Mike
Yes, it's dry, except for the spot nearest the rear wheel of the Vette, which we (my dad and I...my wife is pregnant and not allowed in the garage while we're doing this) did tonight. It's a very glossy finish, without a clearcoat.
Haven't done the third bay yet.
Tip: Don't re-use the same bucket if there is ANY residual left in it, and work when it's cooler. The second batch we made was a disaster and set in about five minutes, leaving me this large...lump
Tip 2: If there are any oily patches, this stuff WILL NOT ADHERE.
Overall, I'm very pleased. I used the off-the-shelf Rustoleum kit from Lowes at my old house, but after a couple years, it didn't hold up as well as I would have liked. This time, I got a kit online from www.epoxy-coat.com, and it's a much thicker product. Application is a little odd, in that you mix it, pour it onto the concrete IMMEDIATELY, use a squeegee to spread it out, then roll it to even it. The flakes are for show and a little traction.
At any rate, I'm happy with the looks so far. I'll be able to drive on it by the end of the week, so once the original bays have a chance to dry, I'll move the Vette over, re-prep the 3rd bay, then coat it as well.
-Mike
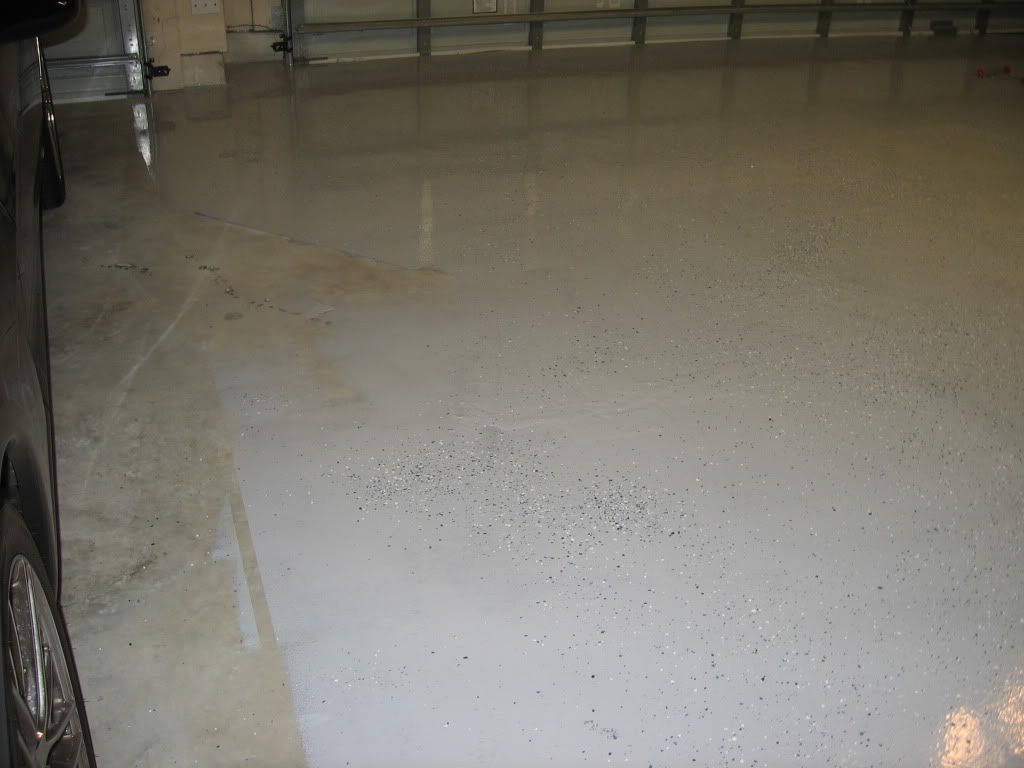
The kit came with a muriatic acid prep solution. 1 quart acid to 4 quarts water, etch the floor, baking soda, rinse/brush/rinseX3, then let dry overnight. There are just a couple spots like the one in the last picture, where it looks like I didn't get them clean enough.
I can probably grind the coating off, re-treat the spots with a degreaser and then the acid again, then re-coat with a touch-up kit. At the end of the day, it's my garage floor, not the living room. I can deal with a few imperfections.
-Mike
I can probably grind the coating off, re-treat the spots with a degreaser and then the acid again, then re-coat with a touch-up kit. At the end of the day, it's my garage floor, not the living room. I can deal with a few imperfections.
-Mike
was your garage cement already smooth or was it textured... me and my dad are about to do this to our garage and he wants it smooth like that but our garage is textured and is not sure if it will end up smooth like that or not... or is it thick enough it will fill in all those tiny grooves and come out smooth?
Trending Topics
LS1 Tech Stories
The Best V8 Stories One Small Block at Time

Gas Monkey Built a 6-Wheel Ferrari Testarossa With a Corvette LT4 Engine
Verdad Gallardo
7 Most Reliable High-Performance Engines GM Has Ever Built
Verdad Gallardo
Amazing '71 Camaro Restomod Is Modern Muscle Car Under the Skin
Verdad Gallardo
6 Common C5 Corvette Failures and What's Involved In Repairing Them
Pouria Savadkouei
Retro Modern Bandit Pontiac Trans AM Comes With Burt Reynolds' Autograph
Verdad Gallardo
Top 10 Greatest Cadillac V Series Performance Models Ever, Ranked
Pouria Savadkouei
Top 10 Most Powerful Chevy Trucks Ever Made!

Hennessey's New Supercharged Silverado ZR2 Has 700 HP
Verdad Gallardo
Coachbuilt N2A Anteros Is an LS2-Powered C6 Corvette In Italian Clothes
Verdad Gallardo Texture: My garage floor was pretty smooth, not raked or textured like a driveway. To get it smooth, you would probably need to grind off all the texture or apply a LOT of coating.
Flakes: Good tip on the leaf blower. Another thing I've found helpful is to throw the flakes UP, not ACROSS. Bouncing them off walls and ceilings helps, too.
Square footage: the surface I'm coating (just the parking area, not the ledge at the front of the garage) came out to right around 500 square feet. One full kit is supposed to cover 500, so I bought a full kit and a touch up kit, to give myself a little wiggle room. Total price with delivery was just under $400. You mix it in batches, and each batch covers about 120 square feet.
It's a two part kit, color and hardener. If you buy multiple kits, mix both of the colors together first, so they blend. They sell it in large quantities for industrial/commercial applications, too.
-Mike


I did the same about 2 years ago and its held up pretty good for the use and abuse I give it. I didn't use the sprinkles on mine tho, makes it look dirty and hard to find little stuff/bolts/tools/etc on the floor.
Edit: never mind, I used the rust-oleum stuff at Home Depot (Walmart had it cheaper tho).
Edit: never mind, I used the rust-oleum stuff at Home Depot (Walmart had it cheaper tho).
Yeah, it's too early to compare, other than the fact that this product is a lot thicker. One thing I learned from the Rustoleum experience was to work in smaller batches. As long as your ratios are the same, you can work in smaller areas, which is important when it's eleventy billion degrees outside.
I didn't do the flakes with the Rustoleum kit either. It looked like a clown barfed. I regretted it, though, because every time the floor got a little wet, it became a tailbone hazard. I'll be curious to see how the longevity compares. The only problem areas with the Rustoleum stuff was where the tires came to rest, so that will be the test for this stuff as well.
If it peels at tire contact, I'll just have to get a kwiklift and park on that.
-Mike

Teching In
Joined: Apr 2006
Posts: 14
Likes: 0
From: TX
I used a single stage epoxy (Quick Crete) sp? any how I laid it with the help of a friend who has the rustolium 2 stage on his garage. Prep was done w/ etching/acid wash or whatever the instructions asked for. I moved into newly built home so I had no oil spots which made this process easier then most i'm told. Anyhow we laid it all down in 10x10 sections spreading flakes in between and when we were done I found that half my flakes didn't dry onto the epoxy  after I put the first car on it after 72 hrs I found that it left rubber marks all over so I cleaned those off and put a sealer (optional) that glossed it up but I still get some small flaking from my wifes car I have noticed. all in all i think multi stage coaters are the way to go this one stage **** did not work like i wanted although my garage does look 10x better than plain old cement!
after I put the first car on it after 72 hrs I found that it left rubber marks all over so I cleaned those off and put a sealer (optional) that glossed it up but I still get some small flaking from my wifes car I have noticed. all in all i think multi stage coaters are the way to go this one stage **** did not work like i wanted although my garage does look 10x better than plain old cement!