Post your best welds!
 01-06-2016, 03:03 AM
#221

That is nuts. I have used Praxair and Airgas and have never had a problem.
Also figured I would post that if anyone wants to see my welds I post a lof of the fab/turbo kits im building on my instagram but don't really often upload any online.
ablake211 if anyone wants to check it out. Just finished up a few f-body turbo kits that came out pretty cool.
Also figured I would post that if anyone wants to see my welds I post a lof of the fab/turbo kits im building on my instagram but don't really often upload any online.
ablake211 if anyone wants to check it out. Just finished up a few f-body turbo kits that came out pretty cool.
 01-07-2016, 12:18 PM
#222


 01-08-2016, 07:56 AM
#224
Next week if I have time I will get some of the other kit up. My favorite part was that i did a freehand weave on the wastegates that came out pretty cool.
 01-08-2016, 02:14 PM
#226
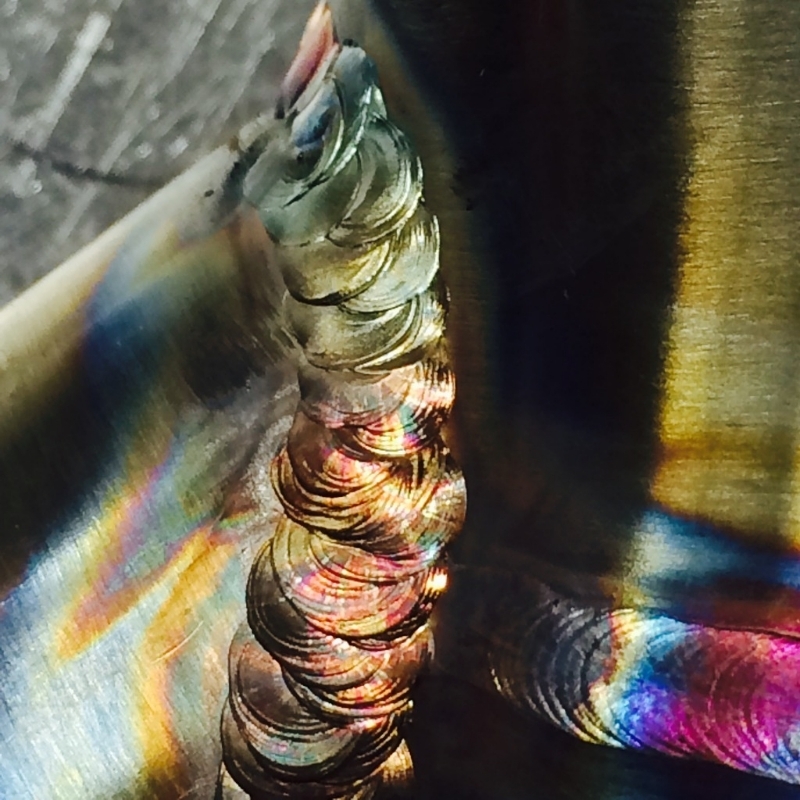
Off the top of my head. These were prob on a #10 and #12 cup with gas lens 25cfh approx. Back purge around 3-5. 3/32 purple tungsten
130-40 amps on truck manifolds and the t6 flanges
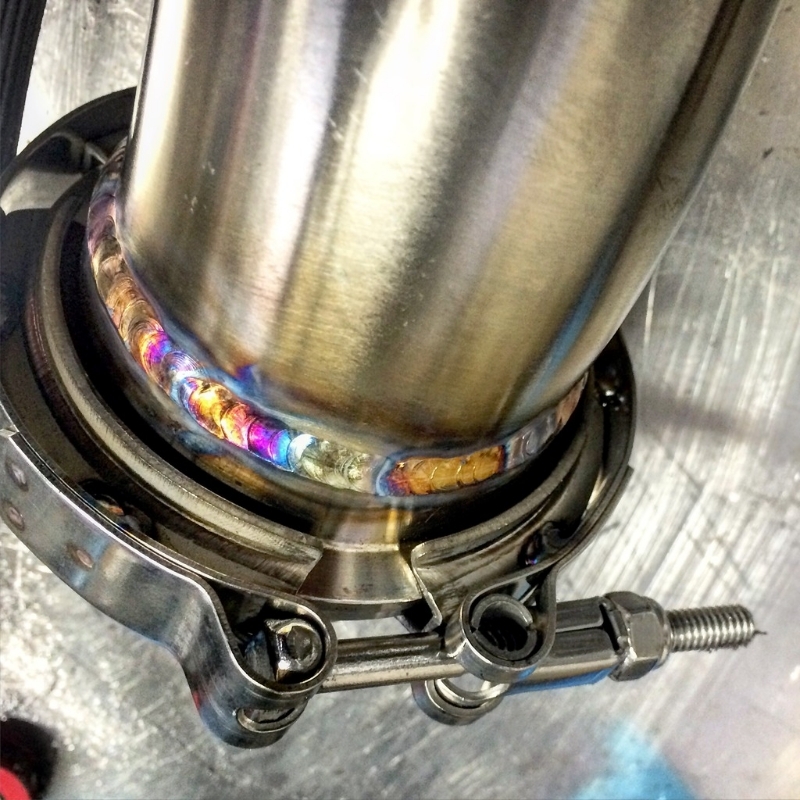
60-75 amps on vbands
45-55 amps on thin wall tube
I tend to move the puddle very slow so i dont lack penetration especially starting the weld. I use a fair amount of filler as well. 1/16 308 or 9 depending.
130-40 amps on truck manifolds and the t6 flanges
60-75 amps on vbands
45-55 amps on thin wall tube
I tend to move the puddle very slow so i dont lack penetration especially starting the weld. I use a fair amount of filler as well. 1/16 308 or 9 depending.
01-08-2016, 03:56 PM
#227


I used .040 filler rod, I find it's easier to get it to melt into the puddle, and I can run the current on stainless a little lower down around 40-45 I also bevel the edge when I prep the ends of the tubing as well, so there's a small V that I am filling with the filler. May also be a reason that I run the heat lower too.
01-10-2016, 03:57 AM
#230
I agree with the smaller filler wire. Stainless doesn't seem to require as much power (amps) as comparable thickness steel or 4130. I've always used 1/16" filler on my stainless stuff, but I'm considering going to get me a spool (for a mig machine) of stainless filler that is smaller than 1/16" and I can cut off the spool as I use it.
01-10-2016, 08:31 AM
#231
Not a bad idea. I bought some .040 from my local welding supply, and it was slot easier to deal with than the 1/16 I had.
I dunno if I'd wanna go much thinner, but I did find.023 wire from my mig was the way to go with sheet metal, and about 10 amps on the machine lol
I dunno if I'd wanna go much thinner, but I did find.023 wire from my mig was the way to go with sheet metal, and about 10 amps on the machine lol
01-11-2016, 08:43 AM
#233
I used .040 filler rod, I find it's easier to get it to melt into the puddle, and I can run the current on stainless a little lower down around 40-45 I also bevel the edge when I prep the ends of the tubing as well, so there's a small V that I am filling with the filler. May also be a reason that I run the heat lower too.
 01-11-2016, 02:44 PM
#237
On the filler rod note above I like the thin stuff too. For me personally how rod flows has everything to do with where I am entering the puddle and how much puddle/heat I am willing to carry throughout the weld. I don't usually make a full bevel on thin wall since I can penetrate straight through a butt joint pretty easily. I prep/remove the burr on a roloc tan disc usually holding about 30* so it does leave a slight taper. But hardly a full on bevel like I would on thicker SCH work.
01-11-2016, 08:26 PM
#238
I take the end of the tube after it's cut on my cheapo band saw and square it up on the disk sander (40 grit disk it cuts pretty well). Once that's done I take it and pitch it at an angle and quickly turn it and put a little bevel on it, and take a edge scraper to the inside to get rid of the sharp edge.
Tacking when I build headers I usually put stainless wire in the mig, tack with the mig, then when welding I will take the joint, put a 1/2 inch of weld, go around to the opposite side, do the same thing, and then will hit the tacks and grind them back and tig over them.
That's what I do. I have very little luck tacking with the tig welder, on anything other than thick wall stuff where I can blast a little heat at it and get a puddle that's not going to burn thru at 70-80 amps. That's me though.
01-12-2016, 12:26 AM
#239
Here is a tig tacking trick I learned a while back that works awesome if you do it right.
Lets say you're welding two pieces of material together and to weld you plan on dialing 90 amps (and using a foot control) to make the weld. Double the amperage you would typically use, so in this case crank the machine to 180 amp. Here is where it gets tricky. If your torch placement is correct, you can basically slightly roll into the throttle for maybe half a second to make sure the torch is where it needs to be, then go WOT for a split second and release. If you did it right, it makes a perfect tack. This tip works good on steel/4130/stainless for example, but not so much on aluminum as I like to add filler to aluminum tacks.
Sometimes if the torch angle isn't right or the fit up is not perfect, the blast of amperage can just burn the two pieces away from each other, leaving a bigger gap to fill. So use this tip wisely.
I run a 200 amp Miller Dynasty, so I just normally turn it up to 200 amps unless I'm doing some thin wall exhaust tubing. But I've had luck using this method on **** as small as 16 gauge steel set up around 150 amps.