
Built my own ramps
 08-30-2013, 11:13 PM
#1
TECH Regular
Thread Starter
Join Date: Oct 2011
Location: Jacksonville, FL
Posts: 443
Likes: 0
Received 0 Likes
on
0 Posts
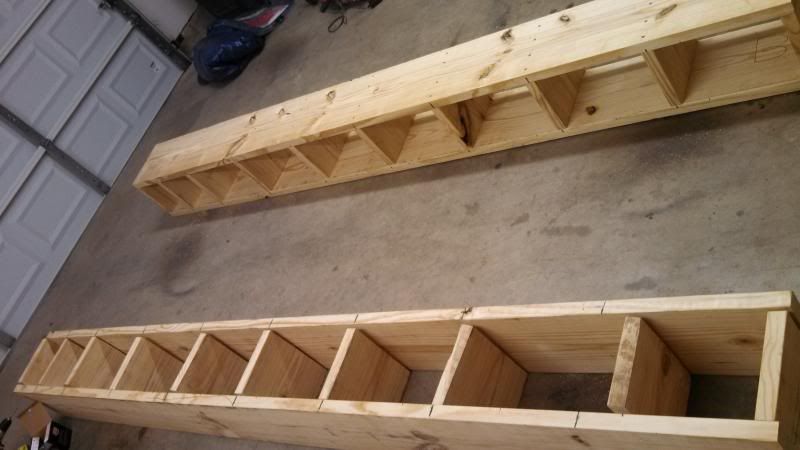
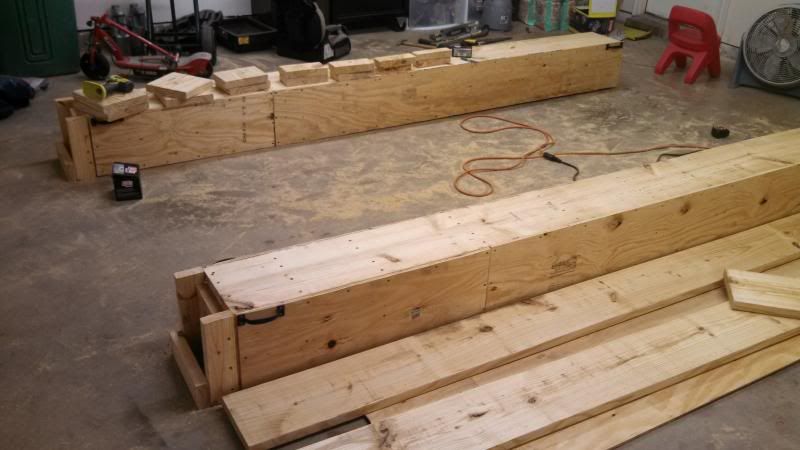
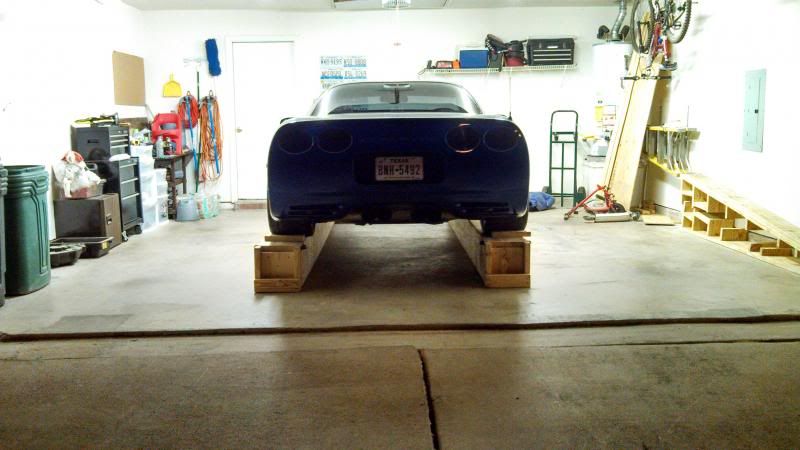
I decided to build some full length ramps because out side my garage is a slight slope and Im going to need to change out my trans. i know i need to get it on jack stands but at least i have room to get under to place stands all at once. and i can do maintenance on all my cars with out jacking 20 times haha.
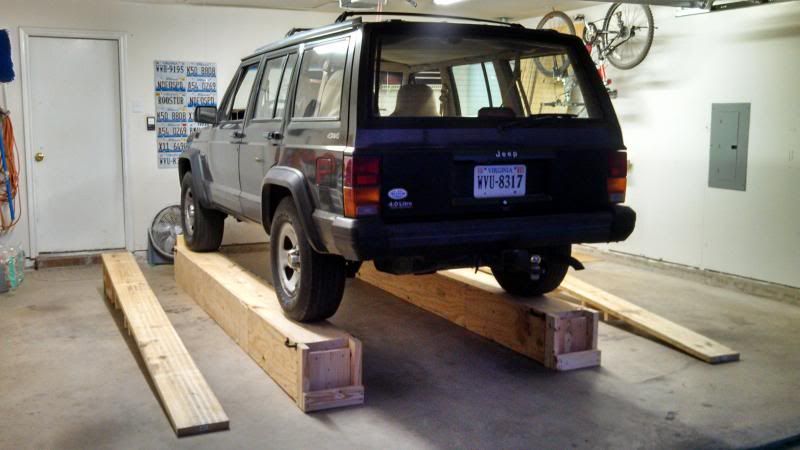
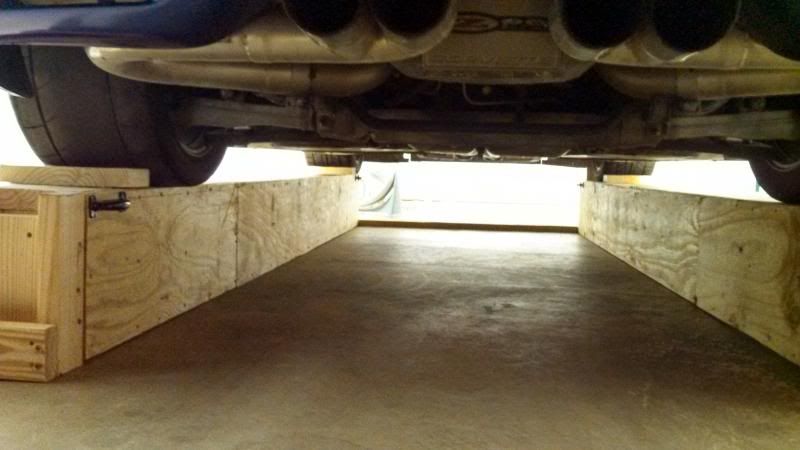
total height is 12"
used 2x12's for the top and bottom.
length of "usable" surface is 11'
ramps are getting done tomorrow so ill finish this post then, I had to do some errands which took up my building time.
this picture was mid process so the platform on its side isnt screwed together yet, i put plywood on the sides to make it a little more rigid and clean it up a bit.
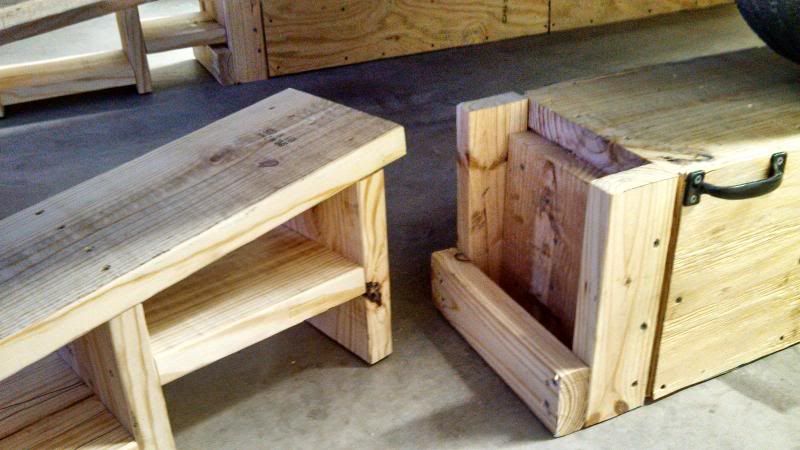
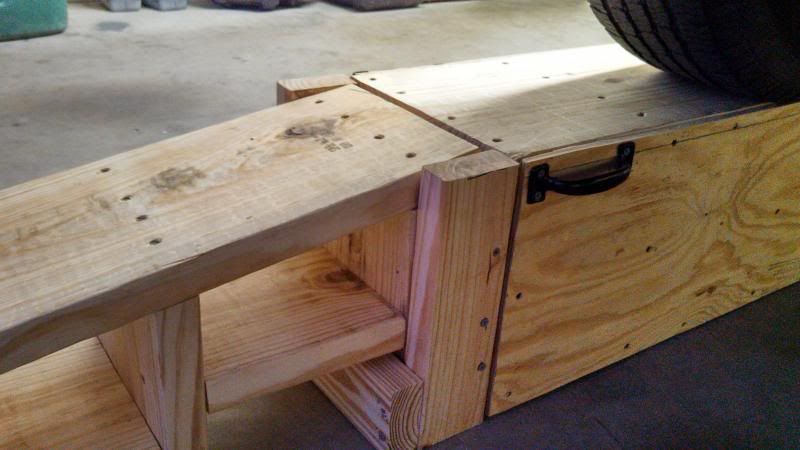
The ramp will have a support coming down into that "hole" to orientate it and "lock" it in place (pictured below)
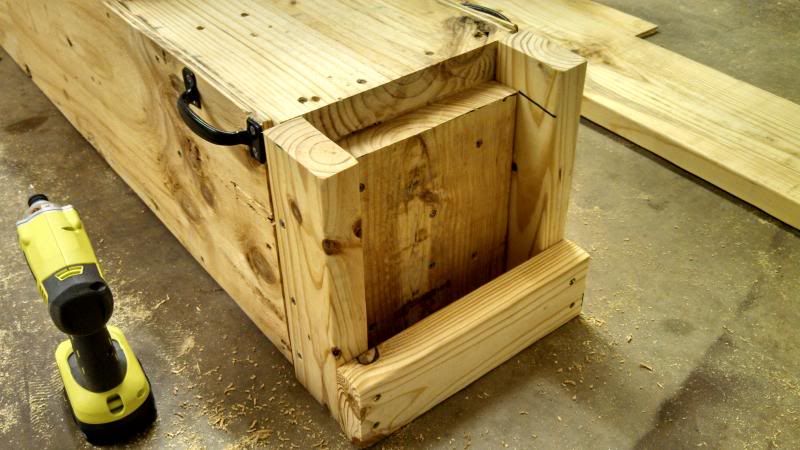
added some handles so i can move them easier and stack them to the side when not in use.
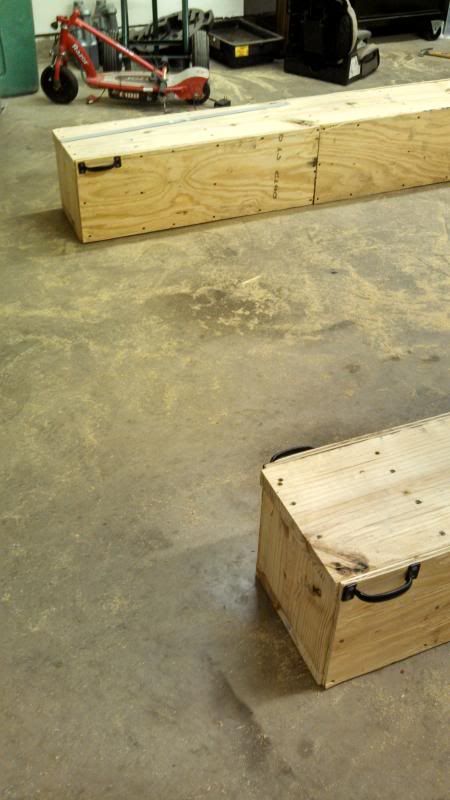
more to come tomorrow.
total height is 12"
used 2x12's for the top and bottom.
length of "usable" surface is 11'
ramps are getting done tomorrow so ill finish this post then, I had to do some errands which took up my building time.
this picture was mid process so the platform on its side isnt screwed together yet, i put plywood on the sides to make it a little more rigid and clean it up a bit.

The ramp will have a support coming down into that "hole" to orientate it and "lock" it in place (pictured below)

added some handles so i can move them easier and stack them to the side when not in use.


more to come tomorrow.
 08-31-2013, 09:10 PM
#2
TECH Regular
Thread Starter
Join Date: Oct 2011
Location: Jacksonville, FL
Posts: 443
Likes: 0
Received 0 Likes
on
0 Posts
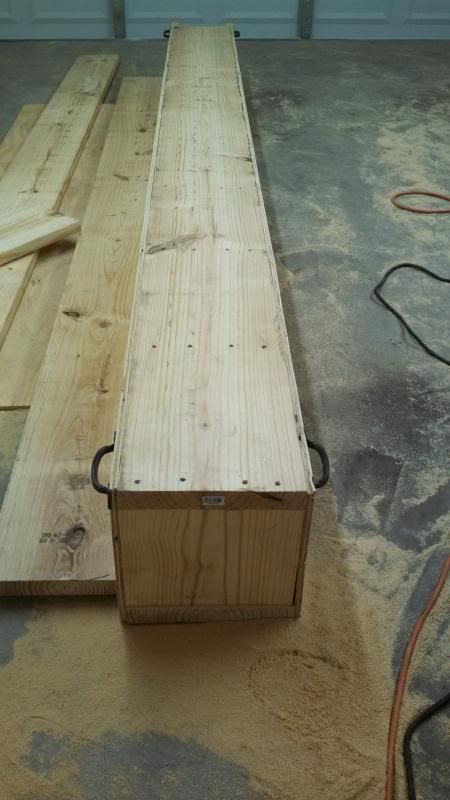
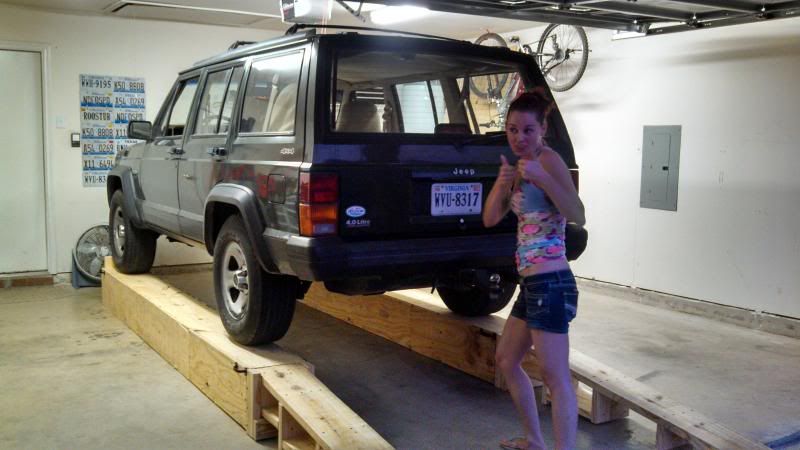
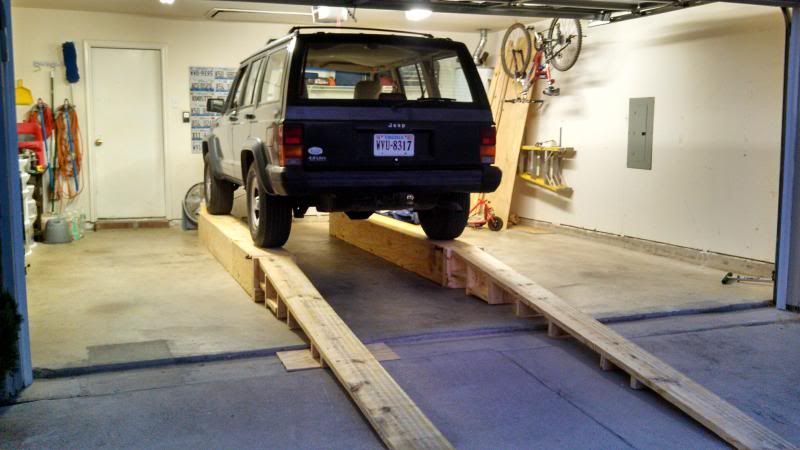
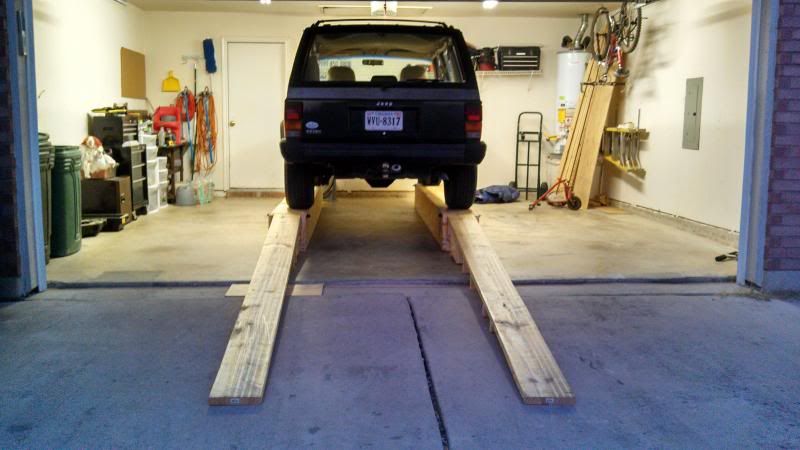
ok so almost done, a couple more tweaks and ill be set. with the uneven driveway I need some more bracing on the ramps to prevent any flex.
heres the ramps and tested
had to test it on the jeep first, and to see if its too tall for the jeep to fit in the garage
heres the ramps and tested


had to test it on the jeep first, and to see if its too tall for the jeep to fit in the garage


 09-01-2013, 11:38 AM
#4
TECH Regular
Thread Starter
Join Date: Oct 2011
Location: Jacksonville, FL
Posts: 443
Likes: 0
Received 0 Likes
on
0 Posts
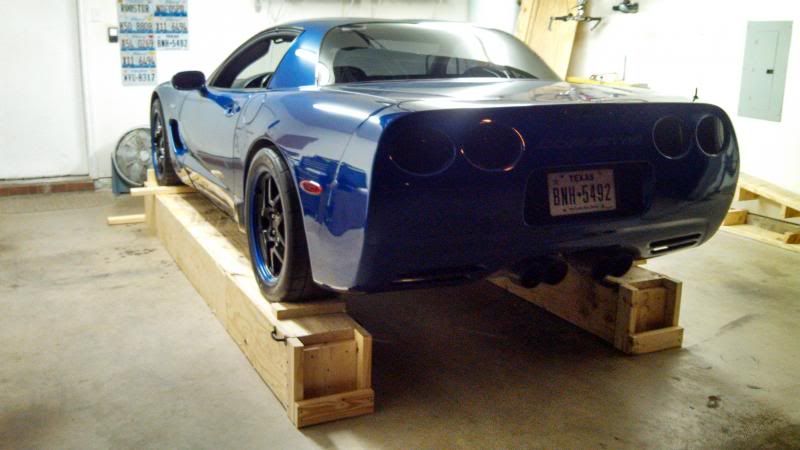
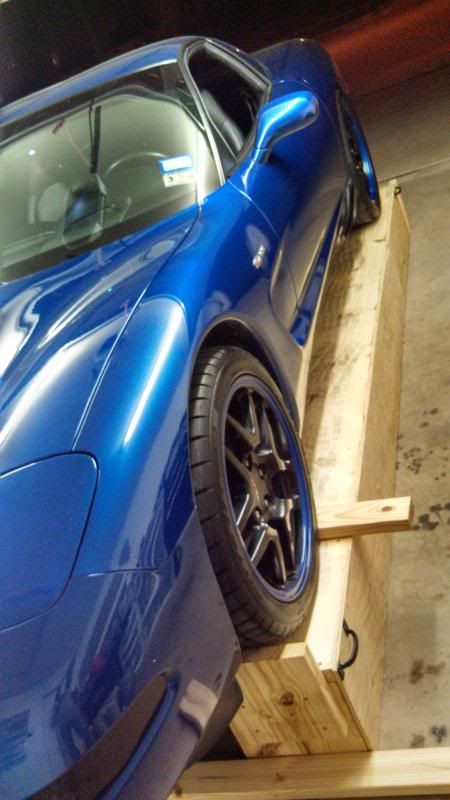
thanks, i just need to stiffen/brace the actual ramp part, they flexed and scratched the bottom of the vette but nothing too bad, just got to tweak them before theyre finished.
thanks again
I was thinking of fastening a 2x4 on each side of the ramp length wise to try and stiffen it. just dont know if that will help at all. its just with the "stilt" support with the uneven driveway since i cant guarantee the same placement every time. sometimes they allow the ramp to dip enough to lift the top of the ramp to touch the vette on its way up.
09-01-2013, 12:56 PM
#7
TECH Regular
Thread Starter
Join Date: Oct 2011
Location: Jacksonville, FL
Posts: 443
Likes: 0
Received 0 Likes
on
0 Posts
thanks! the hardest part was bearing the heat of texas during the day to complete this. and i needed to buy a circular saw, total cost was about $250 in building material.
not bad imo.
im also thinking about throwing up some 2x4's on the platform sides so that 1/2" is sticking up to help "guide" the car up the ramp. especially since the Mrs. kinda left me lopsided haha
not bad imo.
im also thinking about throwing up some 2x4's on the platform sides so that 1/2" is sticking up to help "guide" the car up the ramp. especially since the Mrs. kinda left me lopsided haha
Trending Topics
09-03-2013, 03:07 PM
#8
TECH Regular
iTrader: (5)
Join Date: Jun 2012
Location: Toronto
Posts: 499
Likes: 0
Received 0 Likes
on
0 Posts
thanks! the hardest part was bearing the heat of texas during the day to complete this. and i needed to buy a circular saw, total cost was about $250 in building material.
not bad imo.
im also thinking about throwing up some 2x4's on the platform sides so that 1/2" is sticking up to help "guide" the car up the ramp. especially since the Mrs. kinda left me lopsided haha
not bad imo.
im also thinking about throwing up some 2x4's on the platform sides so that 1/2" is sticking up to help "guide" the car up the ramp. especially since the Mrs. kinda left me lopsided haha
09-03-2013, 03:29 PM
#9
TECH Regular
Thread Starter
Join Date: Oct 2011
Location: Jacksonville, FL
Posts: 443
Likes: 0
Received 0 Likes
on
0 Posts
i need to get a better jack though so i can lift the car off the ramps for my trans swap (i have the cheapo walmart one) but luckily ive got a harbor frieght right down the street from me.

 09-21-2013, 02:23 PM
#12

Don't mean to rain in your parade OP and no disrespect is intended, maybe my suggestion can save someone a little work.
I came up with these after got tired of setting up and storage space required to use drive up ramps, there are three different height option by flipping to the sides. Use under tire contact patch, cross frame sub assembly or frame rail:

Cheaper way would be bolting together a stack of 2x12's to accomplish the same as with my welded set.
---
This set is for multi car use. Very simple to set up as the car sits all without major commitment to space requirements and such. To use on my Vette, I use floor jack under shipping slot, directly behind either left/right front wheel. Raise one side then the other to install front/rear stands under tire contact patch - 2 times and the whole car is up - can be as high as 24" if needed be. When done, the set requires a small foot print to store and by placing a sheet of 2' x 3' x 3/8" thick T6 on top, it serves as a solid base for a welding/layout table.
Hope this is helpful to someone!
I came up with these after got tired of setting up and storage space required to use drive up ramps, there are three different height option by flipping to the sides. Use under tire contact patch, cross frame sub assembly or frame rail:
Cheaper way would be bolting together a stack of 2x12's to accomplish the same as with my welded set.
---
This set is for multi car use. Very simple to set up as the car sits all without major commitment to space requirements and such. To use on my Vette, I use floor jack under shipping slot, directly behind either left/right front wheel. Raise one side then the other to install front/rear stands under tire contact patch - 2 times and the whole car is up - can be as high as 24" if needed be. When done, the set requires a small foot print to store and by placing a sheet of 2' x 3' x 3/8" thick T6 on top, it serves as a solid base for a welding/layout table.
Hope this is helpful to someone!
 09-26-2013, 04:06 PM
#14
Same here.
Two car garage: motorcycle, machine/welding shop and gym all in one:

I had a short glimpsing vision to make one similar to the many steel welded up versions new car dealers have here to display new cars.
Common sense prevailed and ended up with the above compact design. Just raise car up where it sits vertically to any of the 3 heights, slide in the stands and good to go. And need only small foot print to store in/out door:

Using the 3/8" thk. aluminum plate @ the left upper corner on top of the stands serves as a portable welding/layout table.
Two car garage: motorcycle, machine/welding shop and gym all in one:
I had a short glimpsing vision to make one similar to the many steel welded up versions new car dealers have here to display new cars.
Common sense prevailed and ended up with the above compact design. Just raise car up where it sits vertically to any of the 3 heights, slide in the stands and good to go. And need only small foot print to store in/out door:
Using the 3/8" thk. aluminum plate @ the left upper corner on top of the stands serves as a portable welding/layout table.
 09-26-2013, 05:03 PM
#16

Both of those designs were creative. I have seen quite a few of these home made ramps, and I definately think it would be handy to have some. You guys have my brain going...They look handy and I'm sure they are plenty functional!!
-Garrett
-Garrett