
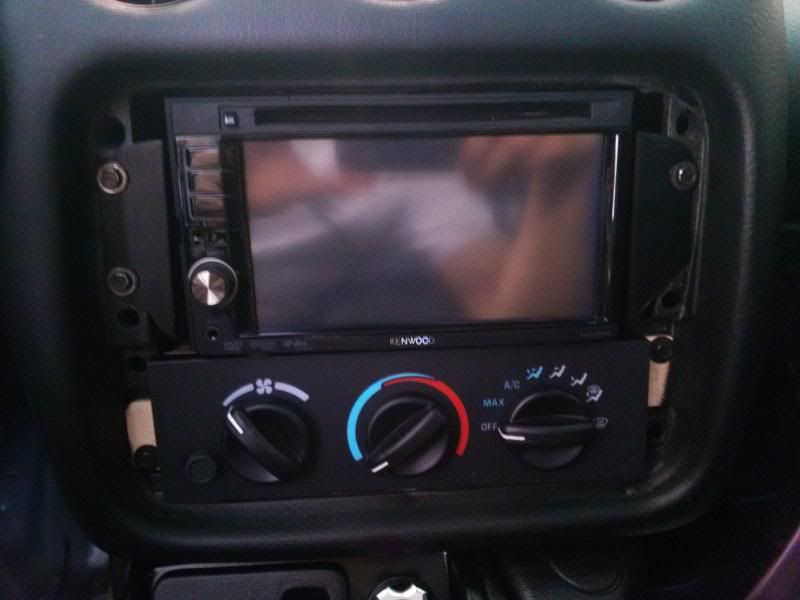
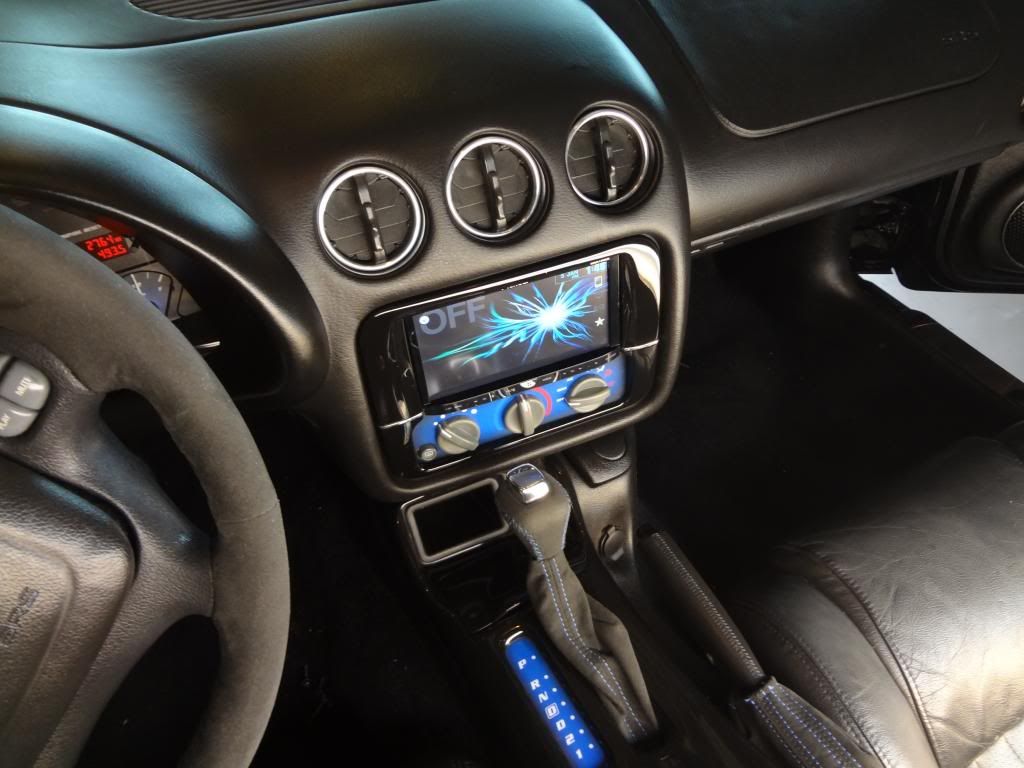
Made my own double din bezel and brackets for $7...beat that! (PICS)
 04-08-2013 | 09:34 PM
#1

Cost me some JB Weld and a metal tie plate from Home Depot
It wasn't nearly as hard as you think. I couldn't find much info on making one yourself...or at least pictures of the steps.
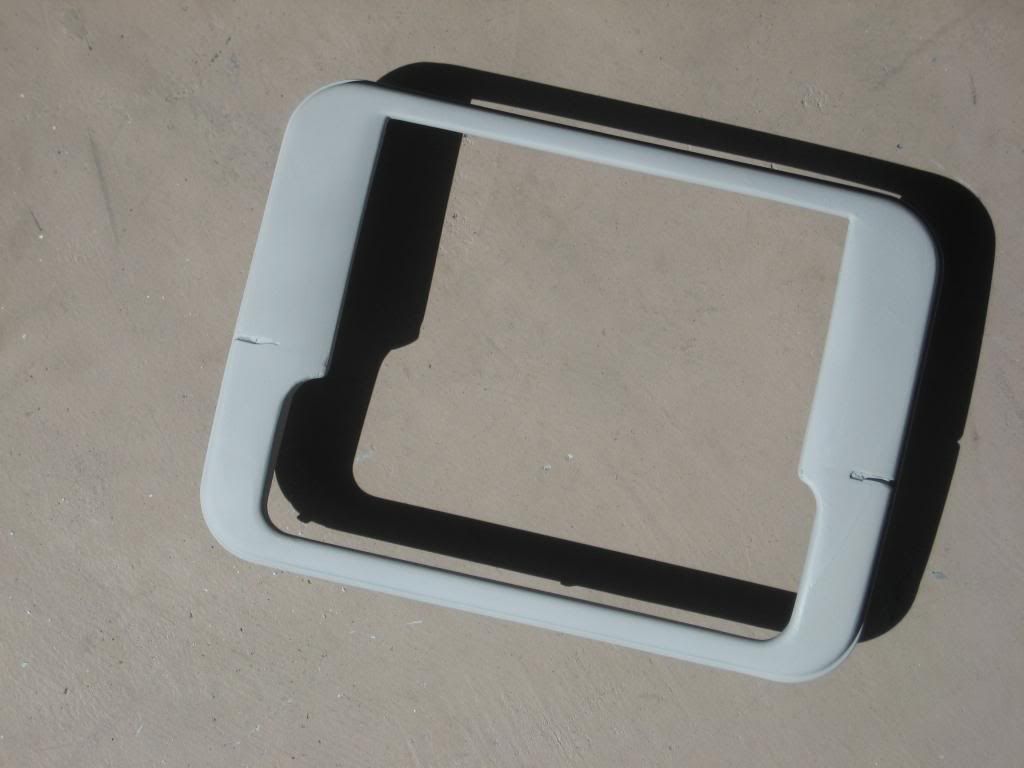
The bezel
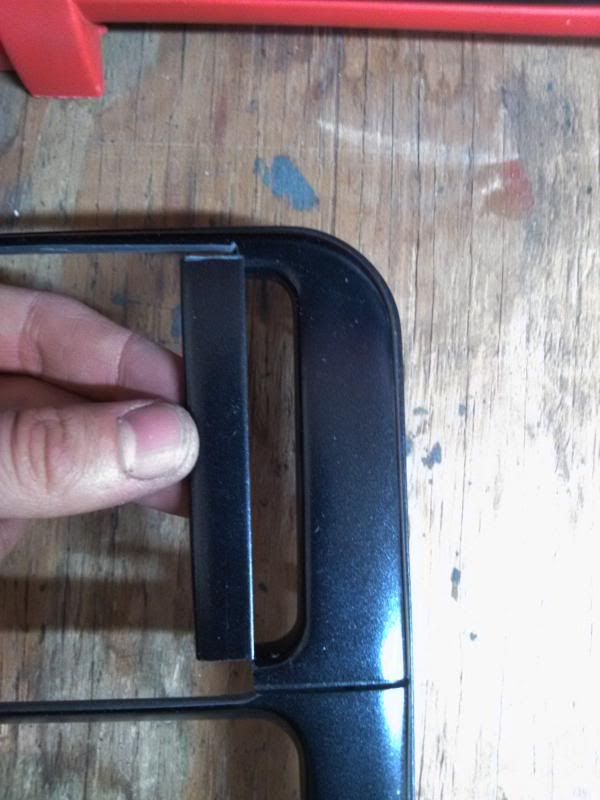
This is what I cut out. The larger piece came from the bottom and you cut right on the factory line. I used masking tape to follow my line and cut with my Dremel.
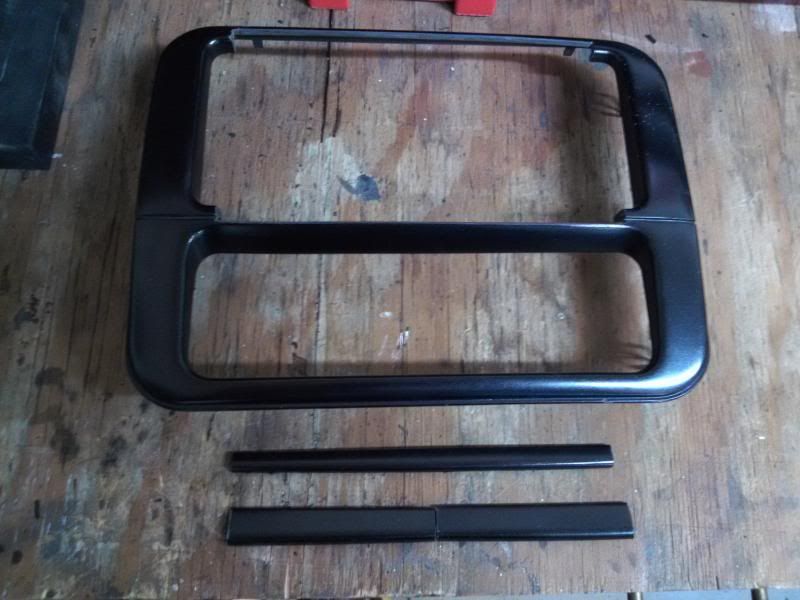
Front
Back
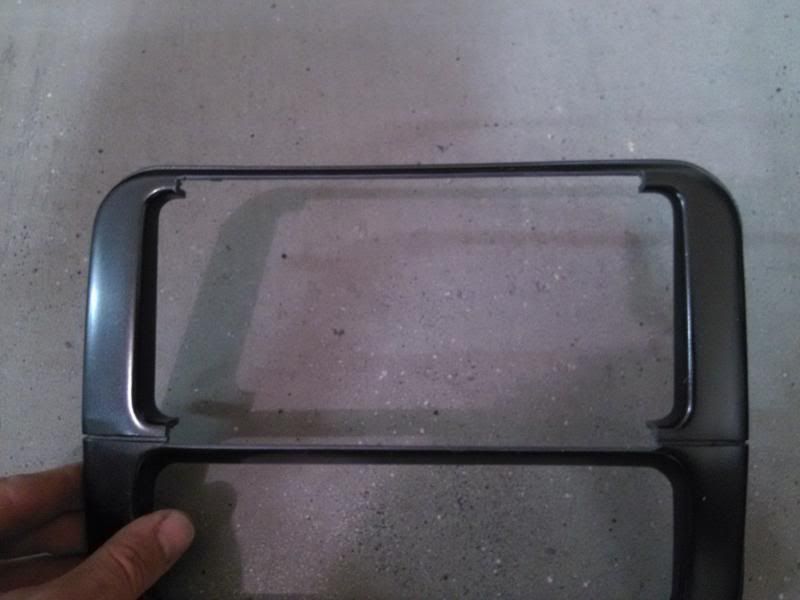
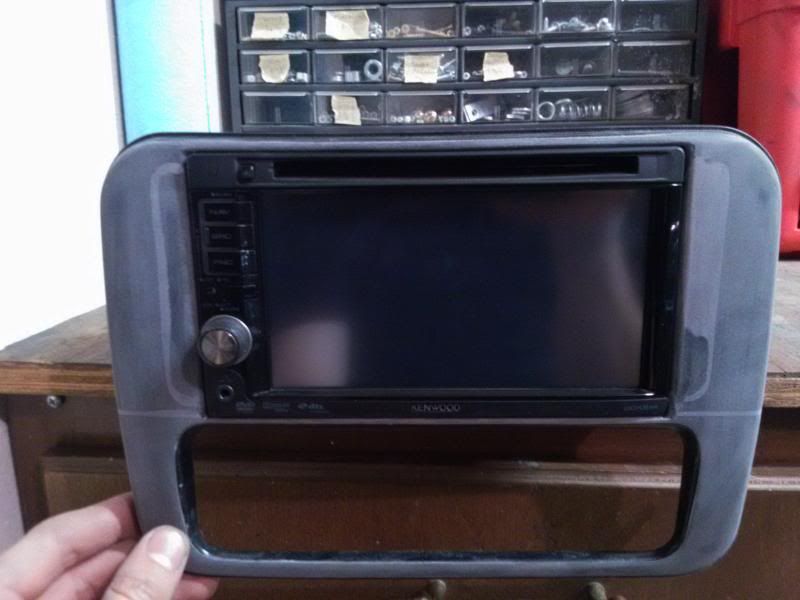
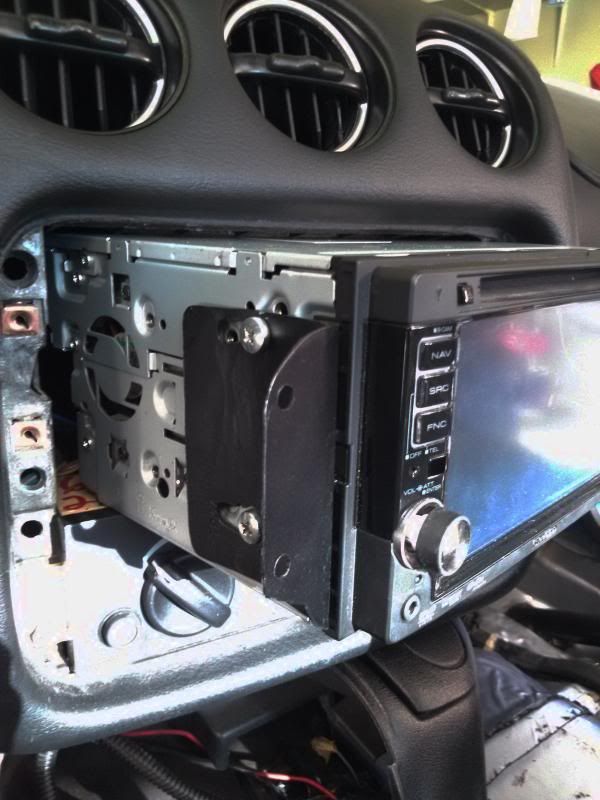
Checking fitment
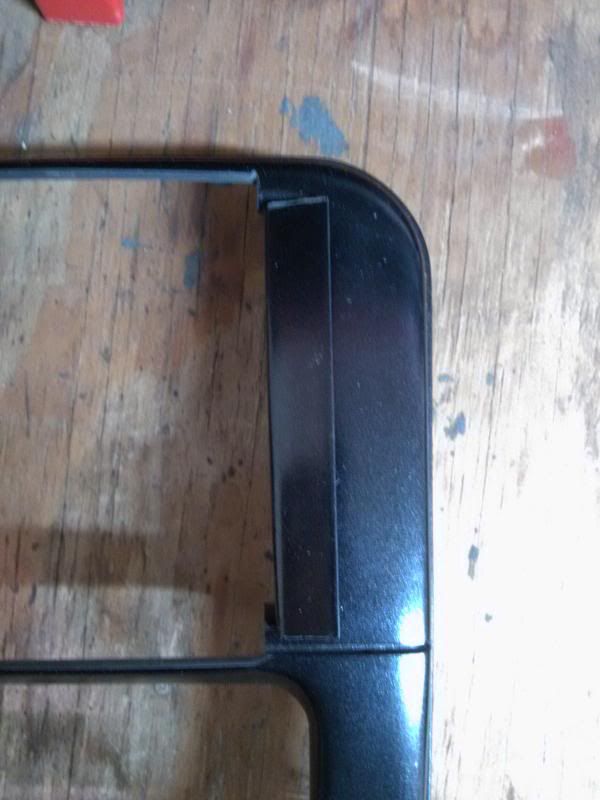
This is the cool part. That larger bottom piece you cut? Cut that mother in half. It's almost a perfect fit minus sanding in a radius to conform inside the slot. You can see in the first picture that it already is cut in half.
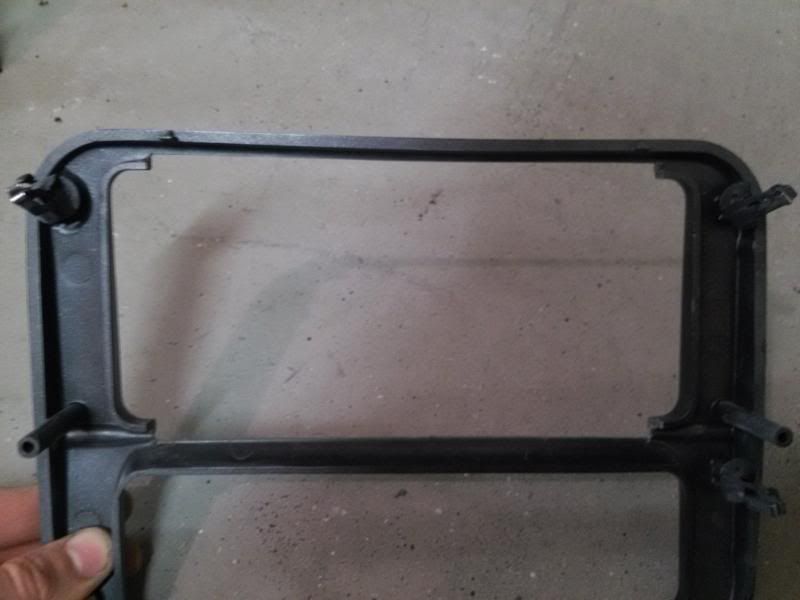
Not sanded or trimmed, but you can see it'll give it a nice factory smooth edge once done.
Sanded, trimmed, JB Welded in....this work is SOLID. It's very strong
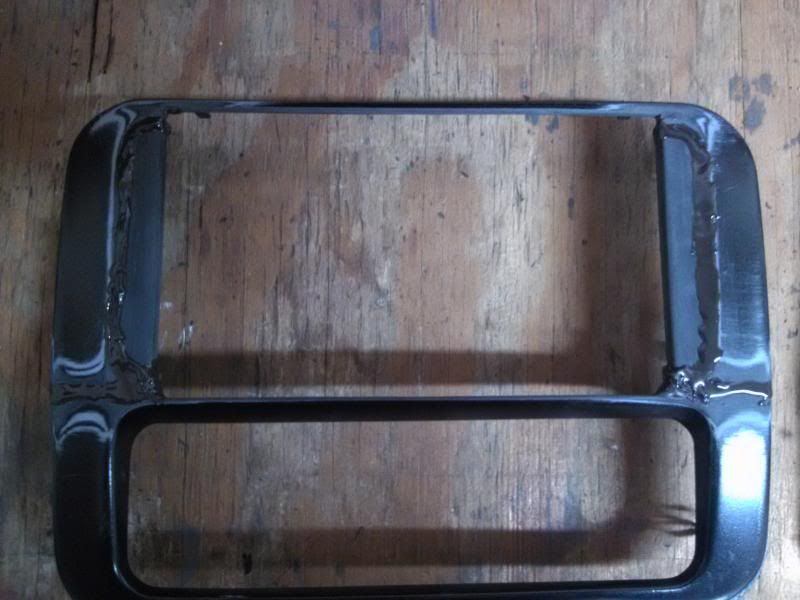

Sanded smooth, fitting good!
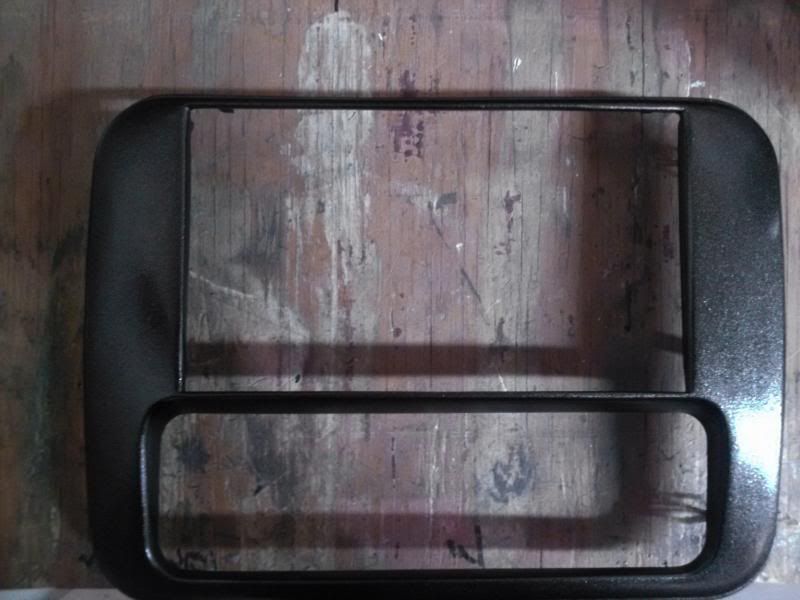
Painted
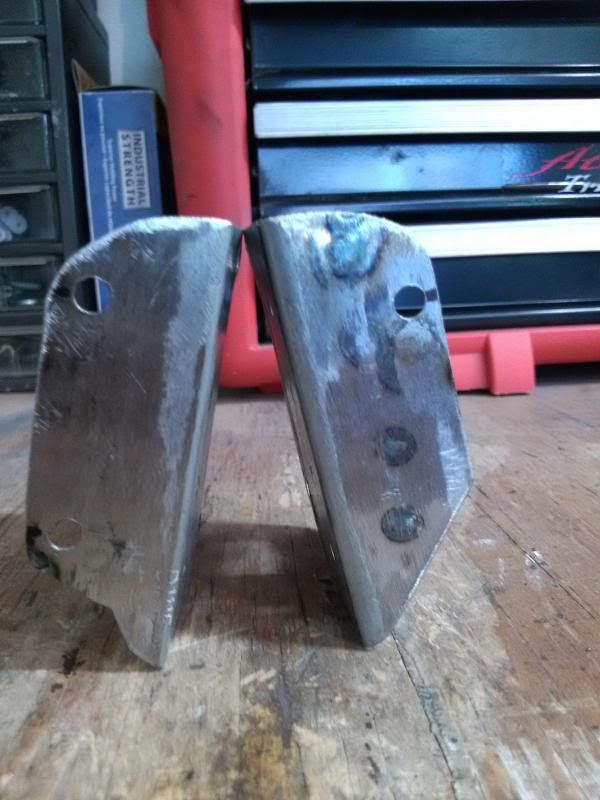
The brackets
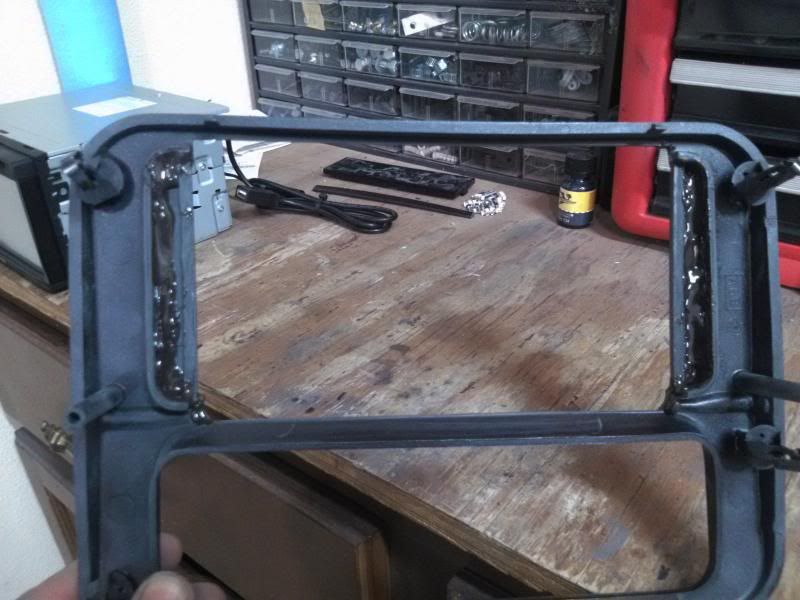
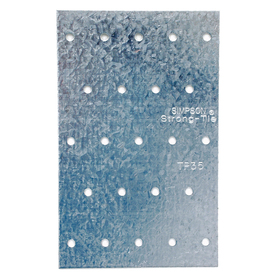
The tie plate. Roughly 4 x 6". Over by the lumber in Lowes/Home Depot. I cut one in half and went to town.
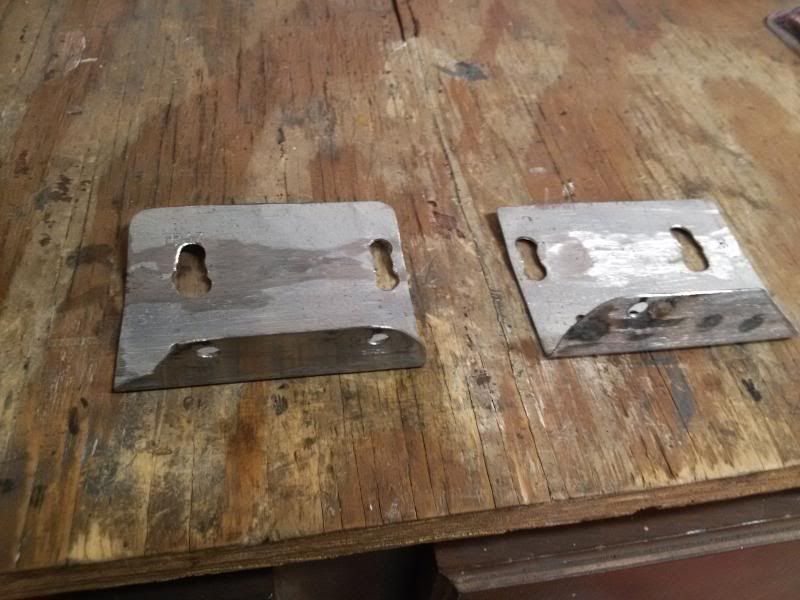
I can't really explain how to do it, but this is how mine turned out. Lots of measuring, thinking, cutting, grinding, drilling and some welding in my case. The shape and what is cut is there for a reason. I welded up the extra holes just because and the fact that I drilled the wrong spot more than once and needed to fix it
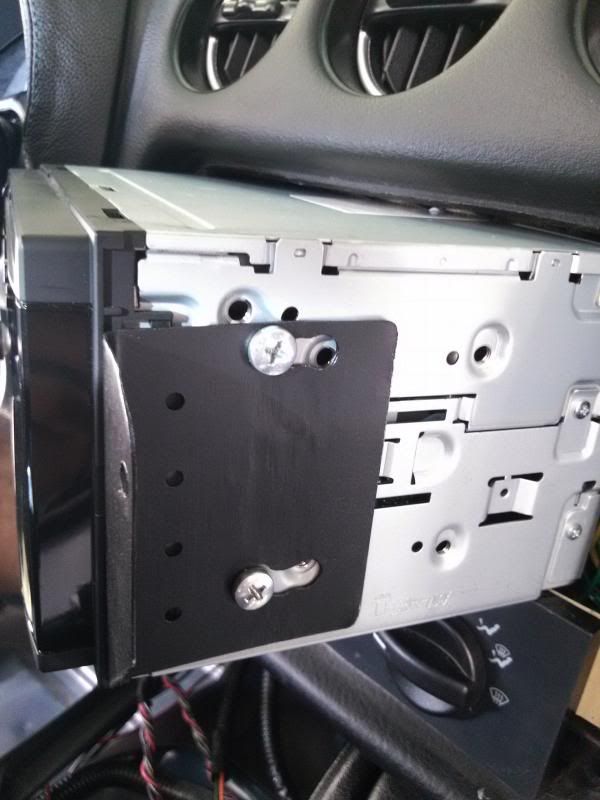
Painted and installed

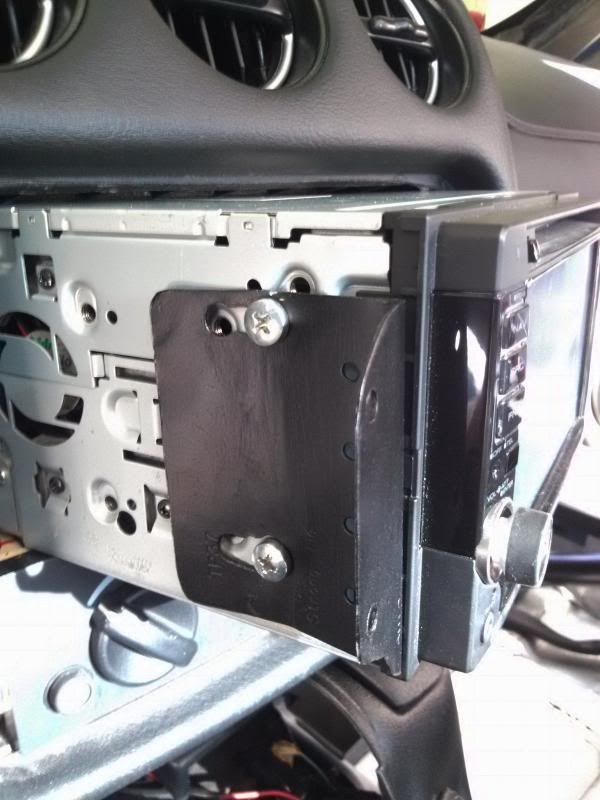
Mounted. Notice the shape of the brackets is to clear those holes where the bezel fits into
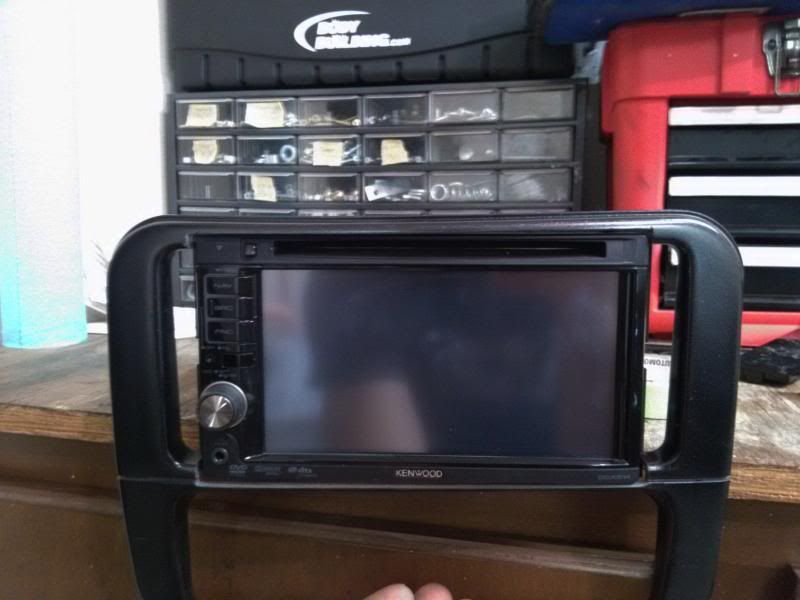
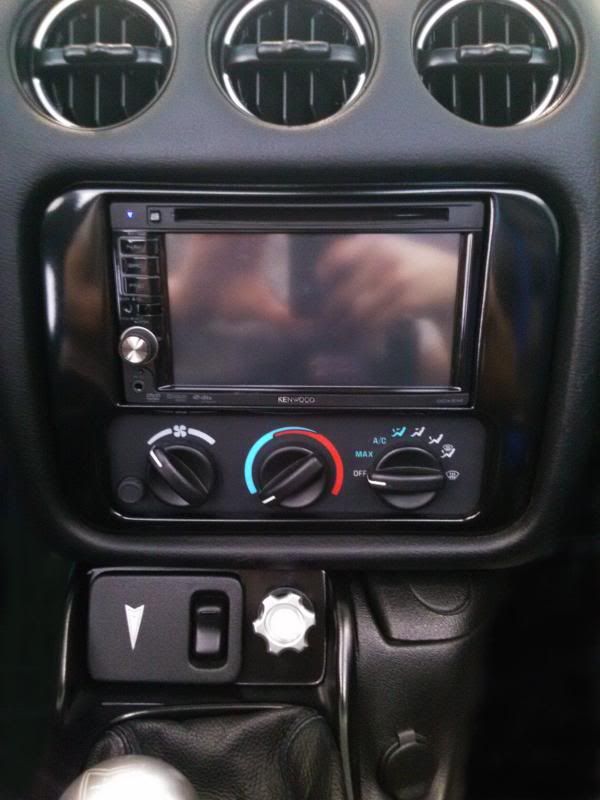
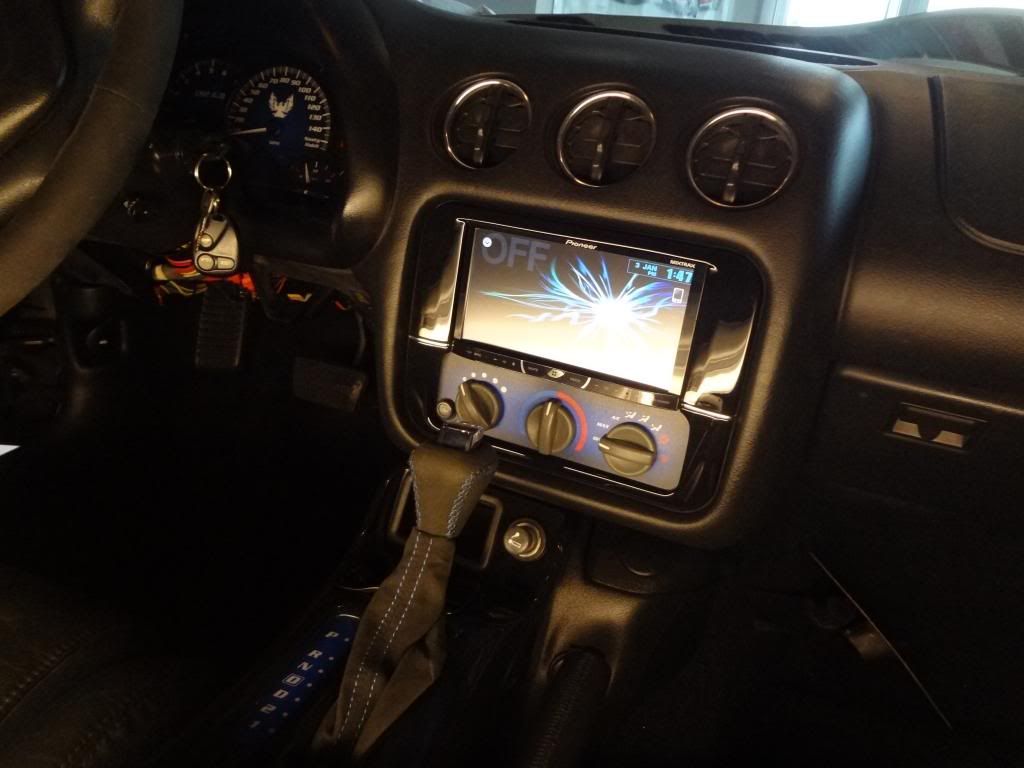
DONE!
It wasn't nearly as hard as you think. I couldn't find much info on making one yourself...or at least pictures of the steps.
The bezel
This is what I cut out. The larger piece came from the bottom and you cut right on the factory line. I used masking tape to follow my line and cut with my Dremel.
Front
Back
Checking fitment
This is the cool part. That larger bottom piece you cut? Cut that mother in half. It's almost a perfect fit minus sanding in a radius to conform inside the slot. You can see in the first picture that it already is cut in half.
Not sanded or trimmed, but you can see it'll give it a nice factory smooth edge once done.
Sanded, trimmed, JB Welded in....this work is SOLID. It's very strong
Sanded smooth, fitting good!
Painted
The brackets
The tie plate. Roughly 4 x 6". Over by the lumber in Lowes/Home Depot. I cut one in half and went to town.
I can't really explain how to do it, but this is how mine turned out. Lots of measuring, thinking, cutting, grinding, drilling and some welding in my case. The shape and what is cut is there for a reason. I welded up the extra holes just because and the fact that I drilled the wrong spot more than once and needed to fix it
Painted and installed
Mounted. Notice the shape of the brackets is to clear those holes where the bezel fits into
DONE!


Trending Topics
04-09-2013 | 07:38 PM
#8
 04-10-2013 | 07:35 PM
#10
 Question though- what did you use to sand down the jb weld?
04-10-2013 | 07:40 PM
Question though- what did you use to sand down the jb weld?
04-10-2013 | 07:40 PM
#11
As far as I know, nobody has really explained or showed decent pictures of HOW it's done.
I used the quik weld stuff since it sets faster. After about 15 minutes it gets reasonably firm. What I did was use a razor blade and shave it down where it was almost flat and perfect. Then I let it fully cure and sanded it with my old Porter Cable DA. I sanded the edges by hand.
I used the quik weld stuff since it sets faster. After about 15 minutes it gets reasonably firm. What I did was use a razor blade and shave it down where it was almost flat and perfect. Then I let it fully cure and sanded it with my old Porter Cable DA. I sanded the edges by hand.
04-10-2013 | 07:45 PM
#12

Teching In
Joined: Mar 2013
Posts: 5
Likes: 0
From: SouthEast PA
Thanks for the great how to... I actually got my back up bezel last night to try this on so your how to couldn't have come anymore timely! I like the gloss finish compared to others flat textured finish... Great Job!
 04-10-2013 | 09:44 PM
#16
You got that right! I hate paying for something when I can do it myself 10 times cheaper and learn a thing or 2 to add to my skill set.
Thanks. It's really not hard at all. I have literally 2 hours in this. Most of which was sanding old paint to lay a new finish which was giving me fits.
Me too, well that applies to doing pretty much anything car wise really.
Me too, well that applies to doing pretty much anything car wise really.
04-11-2013 | 09:39 PM
#17
As far as I know, nobody has really explained or showed decent pictures of HOW it's done.
I used the quik weld stuff since it sets faster. After about 15 minutes it gets reasonably firm. What I did was use a razor blade and shave it down where it was almost flat and perfect. Then I let it fully cure and sanded it with my old Porter Cable DA. I sanded the edges by hand.
I used the quik weld stuff since it sets faster. After about 15 minutes it gets reasonably firm. What I did was use a razor blade and shave it down where it was almost flat and perfect. Then I let it fully cure and sanded it with my old Porter Cable DA. I sanded the edges by hand.


