
Help me complete my set up.


 05-13-2008, 08:53 PM
#103
TECH Regular
Thread Starter
iTrader: (4)
Join Date: May 2005
Posts: 438
Likes: 0
Received 0 Likes
on
0 Posts

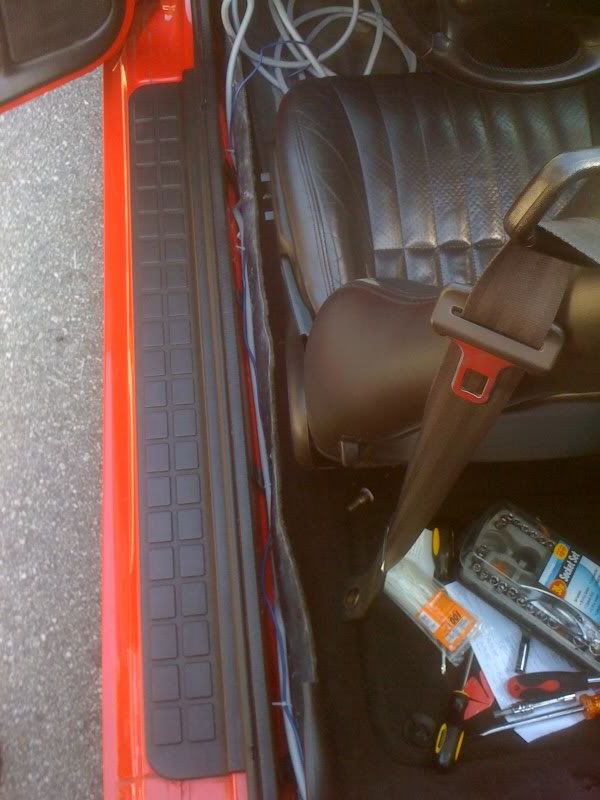
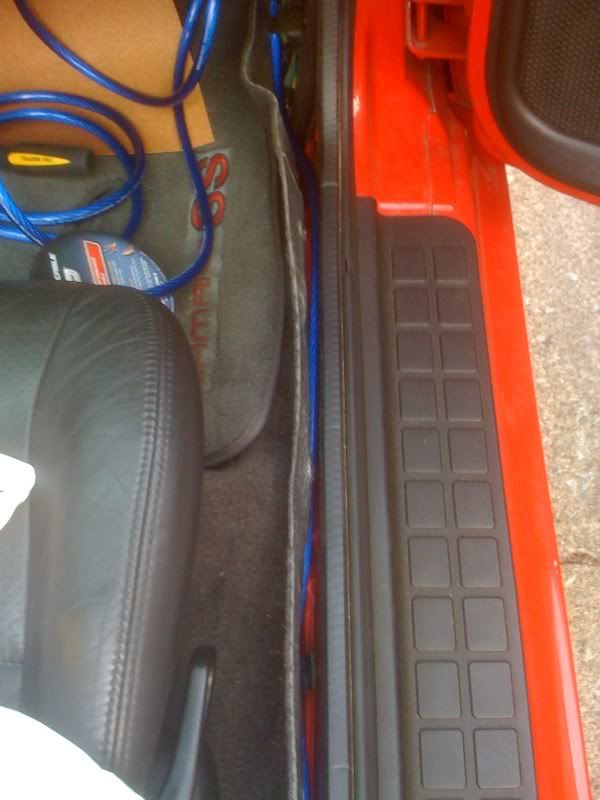
Okay day number too hahahaha. What I had a chance to do today was run the RCA Cord and Remote Cord down the Driver Side under the carpet and stopped at the driver seat.
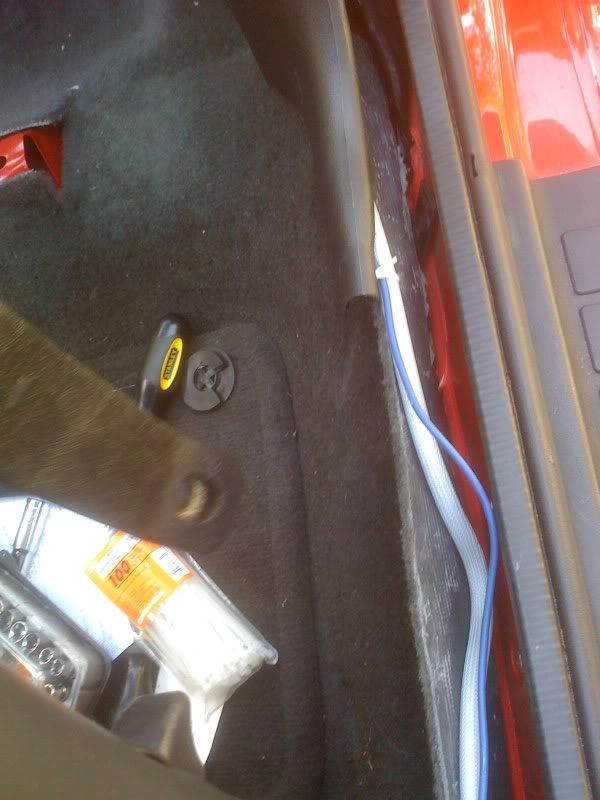
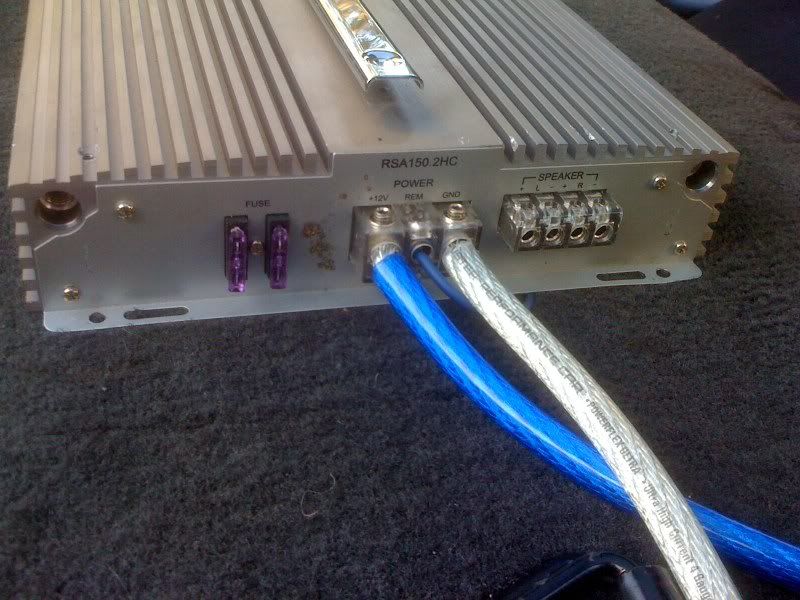
Connected the Power Cord from the Amp and ran it down the driver side under the carpet and also stopped at the passenger seat. I found a place to ground the wire which below you will see a picture of where I connected it too. So please let me know if that is an okay place to ground the wire.
RCA Cord and Remote Cord on the Driver Side
Power Cable on the Passenger Side
Here is where I grounded the wire, once again please let me know if that is an okay spot and if I sanded the paint good enough
Here's a picture of how I connected the Power and Ground, please confirm if correct
 05-13-2008, 10:35 PM
#107
Should be pretty easy, just make sure you DON'T CUT THE FACTORY HARNESS! The one you bought off ebay or wherever plugs into the factory harness and that is the one that you solder or butt-connect to the HU harness.
05-14-2008, 12:27 PM
#109
TECH Regular
Thread Starter
iTrader: (4)
Join Date: May 2005
Posts: 438
Likes: 0
Received 0 Likes
on
0 Posts
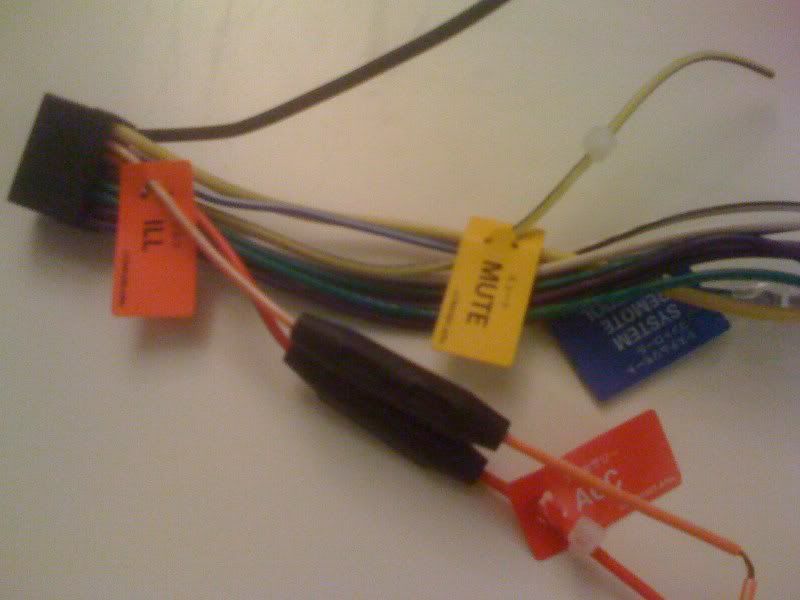
Hey Hatch quick question on the HU wiring. The harness that came with the HU and the Metra Harness that I purchased both have Blue Wires (Remote Wires). Correct me if I'm wrong, but I will not be using the Blue Wire (Remotoe Wire) on the Metra Harness because I will be connecting the Remote Wire from the Amp to the Blue Wire on the HU Harness right? The HU harness also has a Femal connected, do I remove it and splice it or do I connect a Male Connector to the other Remote Wire and connect it?
Also same with the Ground (Black Wire) wire on the HU, it has a ground connector. I splice that and connected it to the Black Wire on the Metra Harness correct? I can't seem to fine the MUTE wire on the Metra (Yellow Wire)?
Also same with the Ground (Black Wire) wire on the HU, it has a ground connector. I splice that and connected it to the Black Wire on the Metra Harness correct? I can't seem to fine the MUTE wire on the Metra (Yellow Wire)?
05-14-2008, 12:33 PM
#110

You wont use blue on metra harness
Connect remote of radio to remote of amp
You can get a male connector or cut the female off of the radio its up to u
You can either ground the radio to metal behind the dash or cut the connector off and splice to the ground from the metra
there will be no mute wire on the metra (tape it off on the radio)
05-14-2008, 12:39 PM
#111
TECH Regular
Thread Starter
iTrader: (4)
Join Date: May 2005
Posts: 438
Likes: 0
Received 0 Likes
on
0 Posts
Just what I wanted to hear, thank you. I'm atually at work and going to wiring the HU Harness and Metra Harness now and just have it ready when I pull out the Monsoon CD player. Thank you Pentavolvo.
05-14-2008, 03:09 PM
#114
Yeah, just cut a little bit off.
It's probably easier just to go with the option of just cutting that ground connector off the HU harness and either solder or butt connect it to the Metra harness. Also, just a tip . . . Whether you're soldering or using butt connectors, I always like to wrap the final connection with electrical tape or use heat shrink to make a nice, secure connection. Then, afterward, wrap some more electrical tape around the length of wires to make it a nice, tight package. Just don't wrap the tape around the bundle where the soldered connections are. You don't want to squeeze them together too much, or it could cause a short.
It's probably easier just to go with the option of just cutting that ground connector off the HU harness and either solder or butt connect it to the Metra harness. Also, just a tip . . . Whether you're soldering or using butt connectors, I always like to wrap the final connection with electrical tape or use heat shrink to make a nice, secure connection. Then, afterward, wrap some more electrical tape around the length of wires to make it a nice, tight package. Just don't wrap the tape around the bundle where the soldered connections are. You don't want to squeeze them together too much, or it could cause a short.
05-14-2008, 11:59 PM
#115
TECH Regular
Thread Starter
iTrader: (4)
Join Date: May 2005
Posts: 438
Likes: 0
Received 0 Likes
on
0 Posts
I didn't have much time to work on the installation today but I did connect both harness together. Please look at the picture below, now where do I connect the RCA Cables too? There are a few places where it can go? Thanks.
It's a bad picture, sorry. Also there is that blue type of connector thing right under the USB. What goes there?
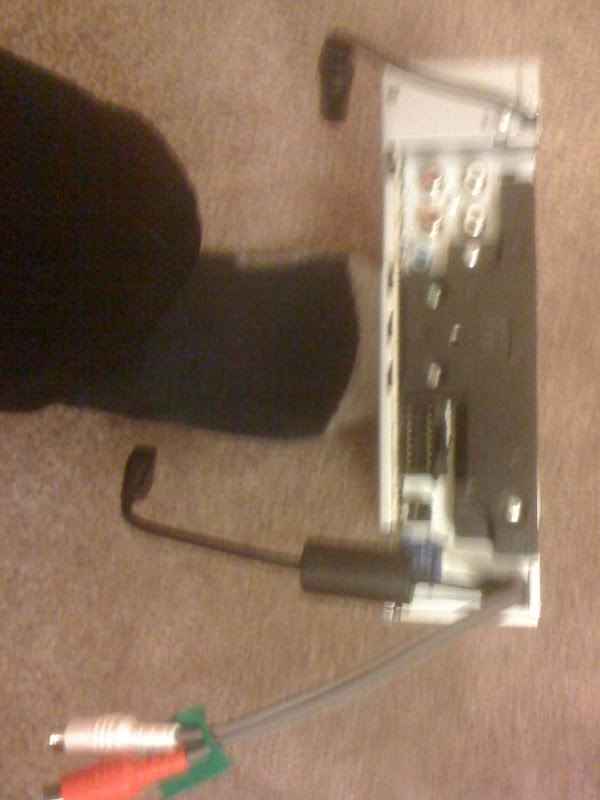
It's a bad picture, sorry. Also there is that blue type of connector thing right under the USB. What goes there?
05-15-2008, 07:23 AM
#116
Wow! How fast was that going when you took the picture?
What does that green label say on the red and white plugs on the right hand side? That might be for sub output.
Not sure about the blue plug. Check the manual. It might tell you what they all are.
What does that green label say on the red and white plugs on the right hand side? That might be for sub output.
Not sure about the blue plug. Check the manual. It might tell you what they all are.
05-15-2008, 07:33 AM
#117
Ok, I just looked at the manual for that player online and it actually lists two sub outs for RCAs, but that one with the green label will work fine. The blue plug under the USB is the pioneer IP-bus plug, which you would only use for adding a cd changer to it. BTW, the plug all the way to the left on top is where the antenna cable goes.
05-15-2008, 08:35 AM
#119
TECH Regular
Thread Starter
iTrader: (4)
Join Date: May 2005
Posts: 438
Likes: 0
Received 0 Likes
on
0 Posts
Ok, I just looked at the manual for that player online and it actually lists two sub outs for RCAs, but that one with the green label will work fine. The blue plug under the USB is the pioneer IP-bus plug, which you would only use for adding a cd changer to it. BTW, the plug all the way to the left on top is where the antenna cable goes.
Oh sweet, I didn't realize you posted twice. I hope I get that thing installed today. I'm having a had time trying to remove the grommet on the passenger side. Any tips for me?
Also I lost the damn thing that screws the clmate controls. There's two screws one on the right and left. He one on the left fell off somewhere and I can't fins it, so ghetto.
05-15-2008, 07:46 PM
#120
TECH Regular
Thread Starter
iTrader: (4)
Join Date: May 2005
Posts: 438
Likes: 0
Received 0 Likes
on
0 Posts
Hey Hatch, huge problem. Well first of all the Head Unit is in and works fine. After I connected the power cord to the battery my car would not start, when the key is on the ignition switch everything works but once I try to start it everything die's. Can't even turn on the light and the radio. I thougth at first maybe the fuse was backwards, flipped it and the car started.
Okay, so I took a shower and drove the car to Kragen to get a bolt. When I came out to start the car it did the same thing. I then noticed the positive (red) was lose so then I tried tightening it and the bolt seemed like it wouldn't go all the way through and basically ended up ripping the o-ring off the positve so I ended up having to buy a new battery.
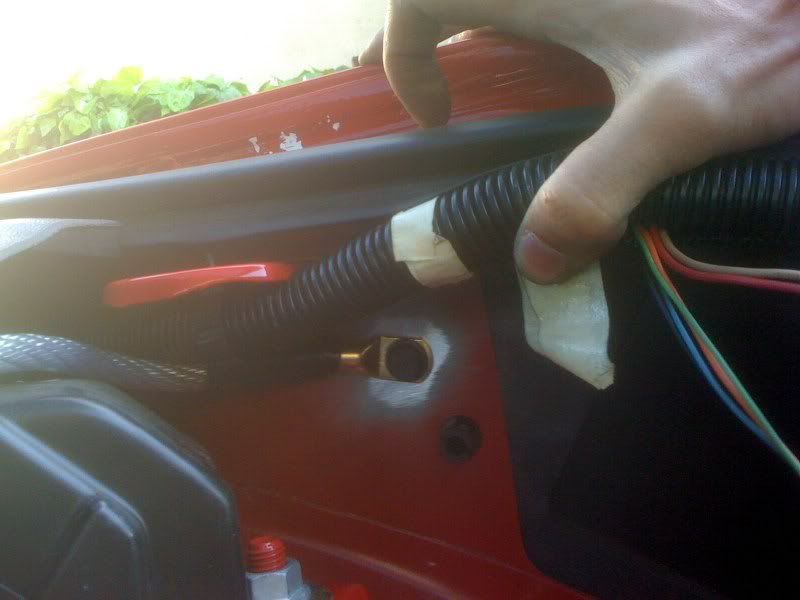
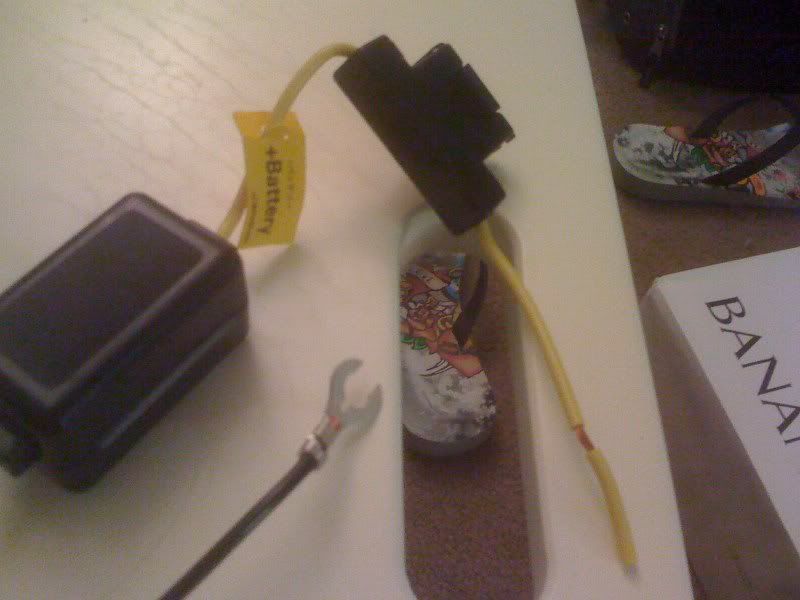
I installed the new battery and it started up fine but then my car seemed like it wanted to die again so I rushed home before it did. What I noticed that the GM Bolt Adapter is way longer then the stock bolt. Picture below:
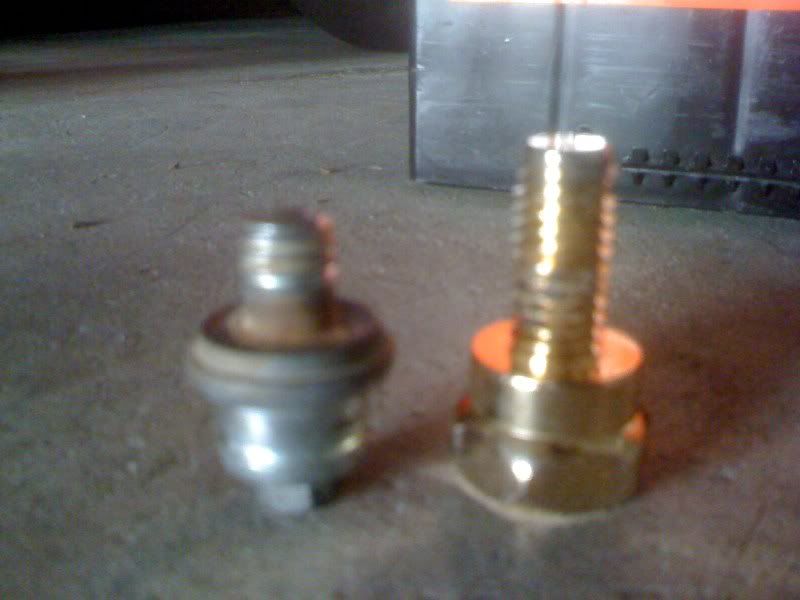
Did monster cable give me the wrong GM Adapter? Now my new battery's positive area is getting burned also and the o-ring part of it seems like it's going to pop out again.
What do you think it can be Hatch? I need serious help
Okay, so I took a shower and drove the car to Kragen to get a bolt. When I came out to start the car it did the same thing. I then noticed the positive (red) was lose so then I tried tightening it and the bolt seemed like it wouldn't go all the way through and basically ended up ripping the o-ring off the positve so I ended up having to buy a new battery.
I installed the new battery and it started up fine but then my car seemed like it wanted to die again so I rushed home before it did. What I noticed that the GM Bolt Adapter is way longer then the stock bolt. Picture below:
Did monster cable give me the wrong GM Adapter? Now my new battery's positive area is getting burned also and the o-ring part of it seems like it's going to pop out again.
What do you think it can be Hatch? I need serious help