
Engine Bay Dress-Up Project Begins!!! Pics!!!
 04-11-2010, 10:31 PM
#1
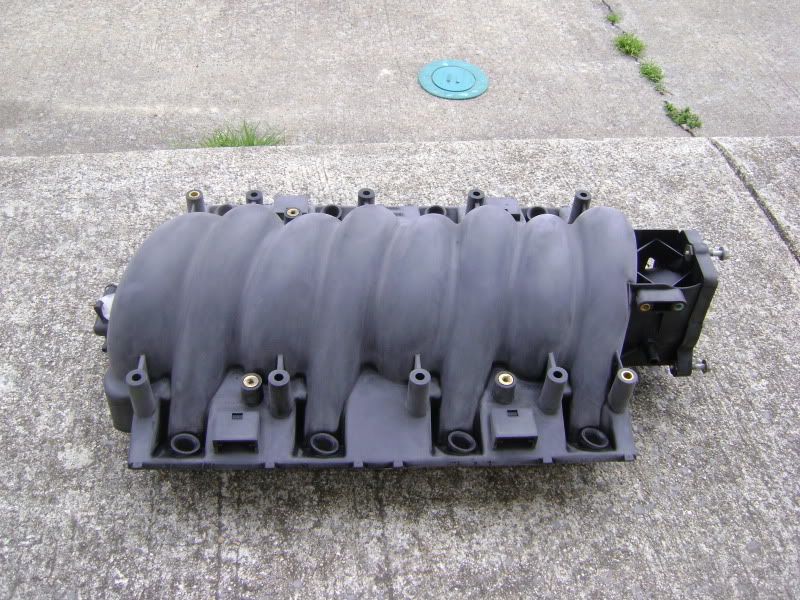
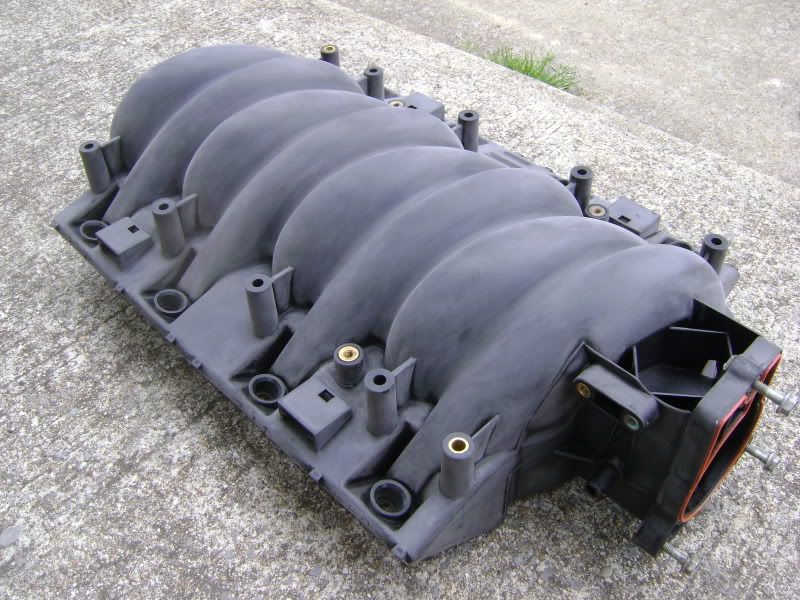
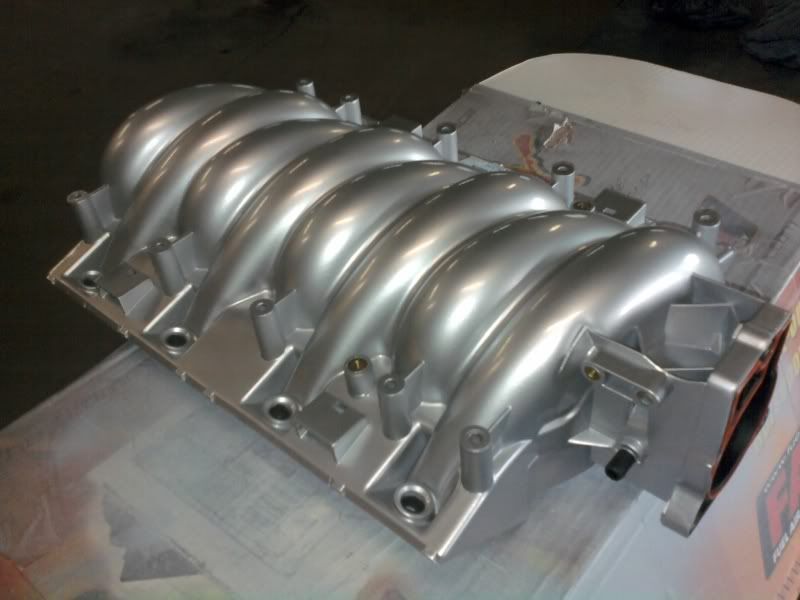
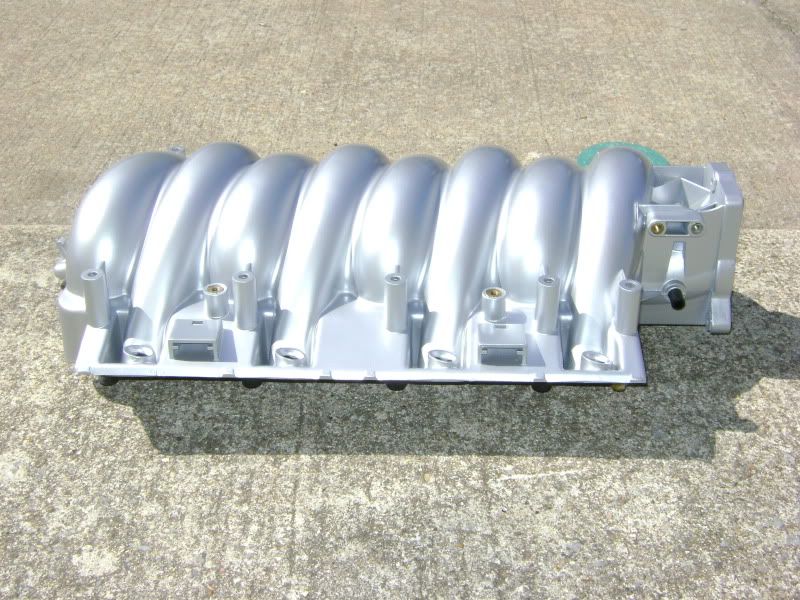
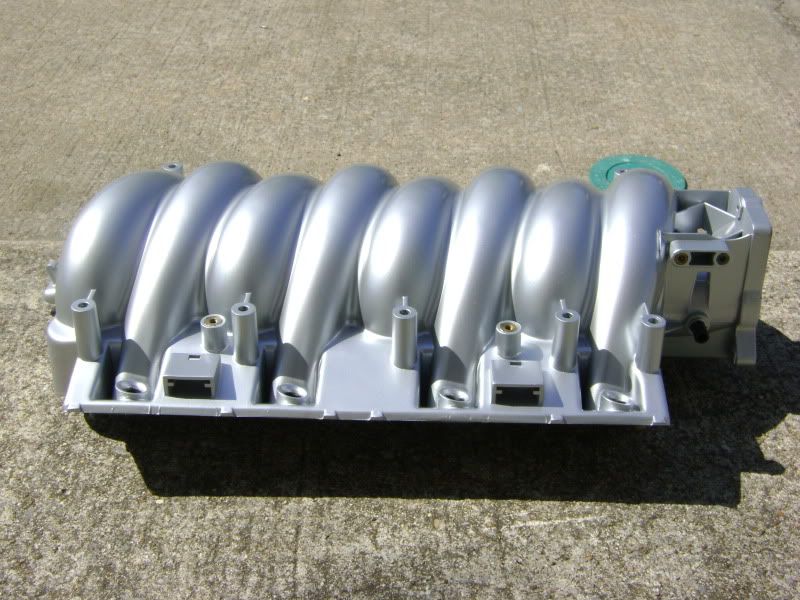
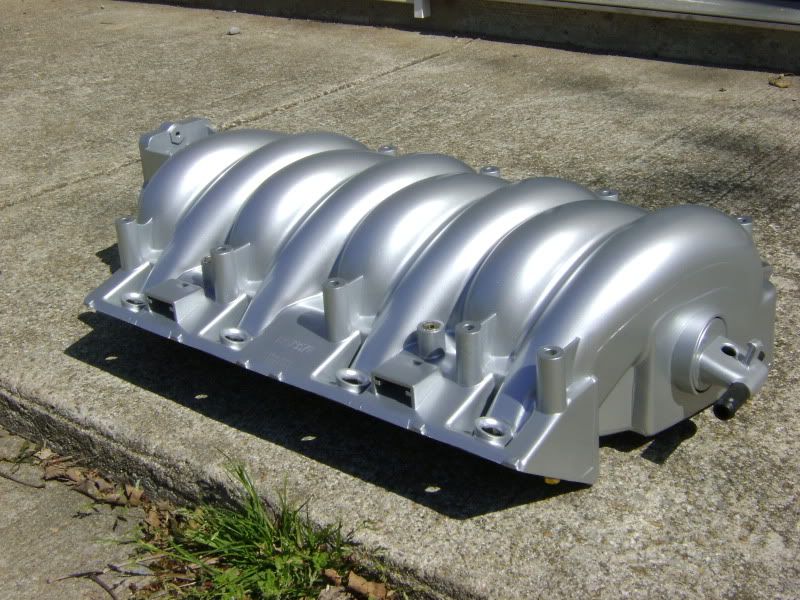
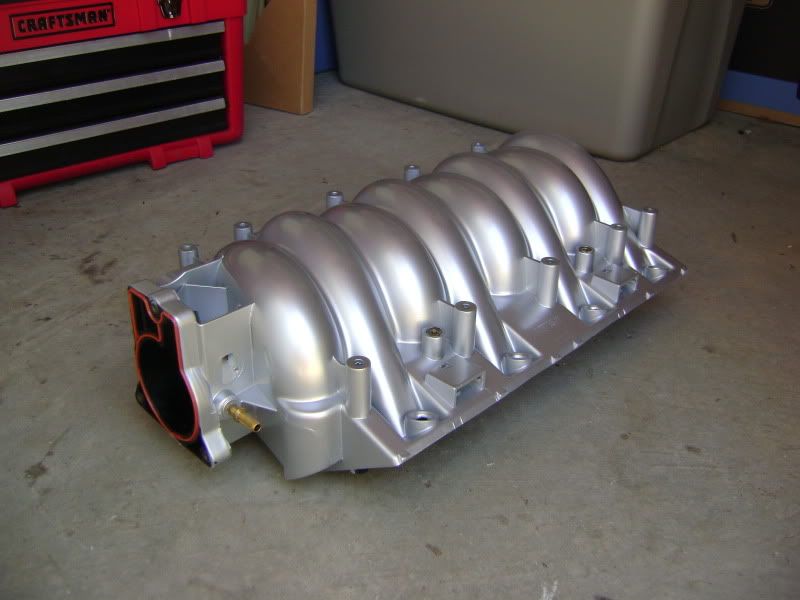
I've decided to dress up my engine bay and am close to completing phase 1, which is painting my LS6 intake and putting it on. So far I have it painted and hopefully will get it put on this week. Plans are to add custom painted fuel rail covers, polish some pieces under the hood (TB, MAF, A/C, etc.), maybe a clear, maybe paint the strut towers and such, and some others I just haven't thought of yet. I used Dupli-Color adhesion promotor, high-build primer, silver metallic paint, and clear coat. Anyway, here are some pics of the intake. I'm adding pics of the pre-paint process since I didn't see any when I was researching the project just to show my fellow rookies what it will probably look like for them. The finished pic is from my cell phone...sorry. I'll post more when I get it on the car.
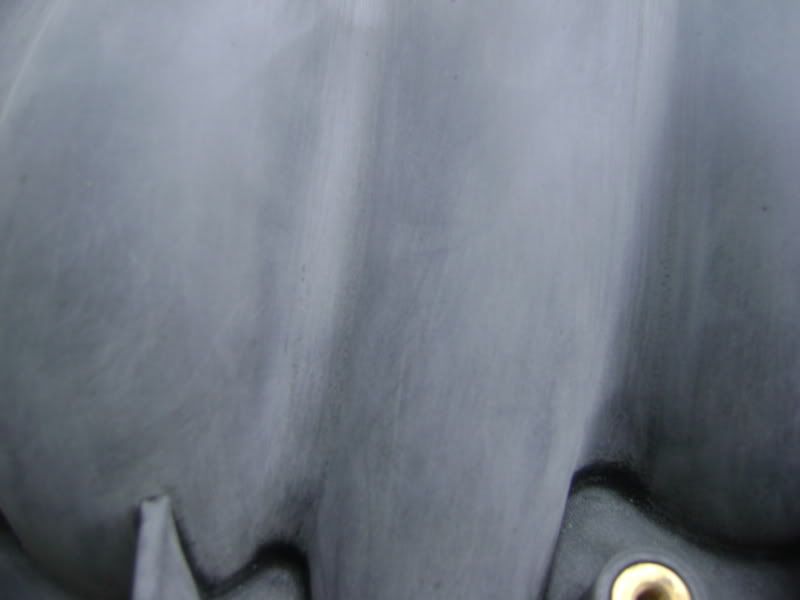
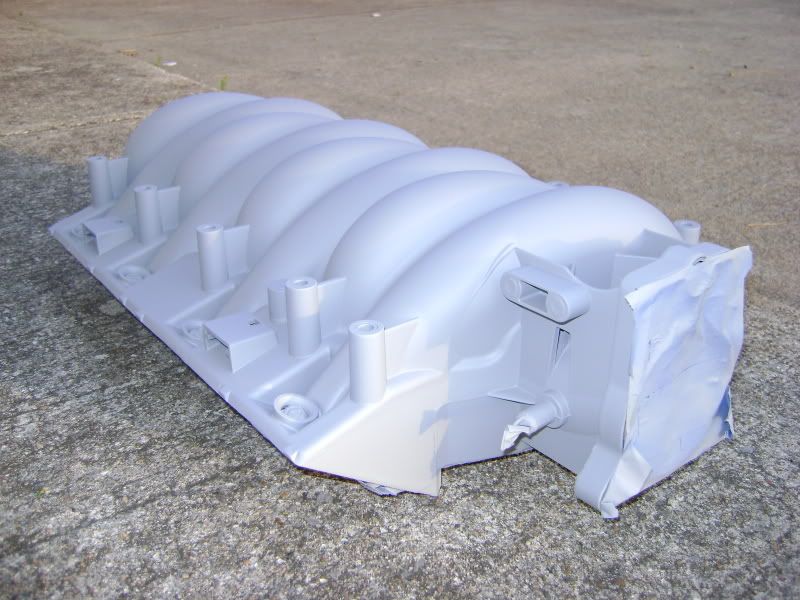
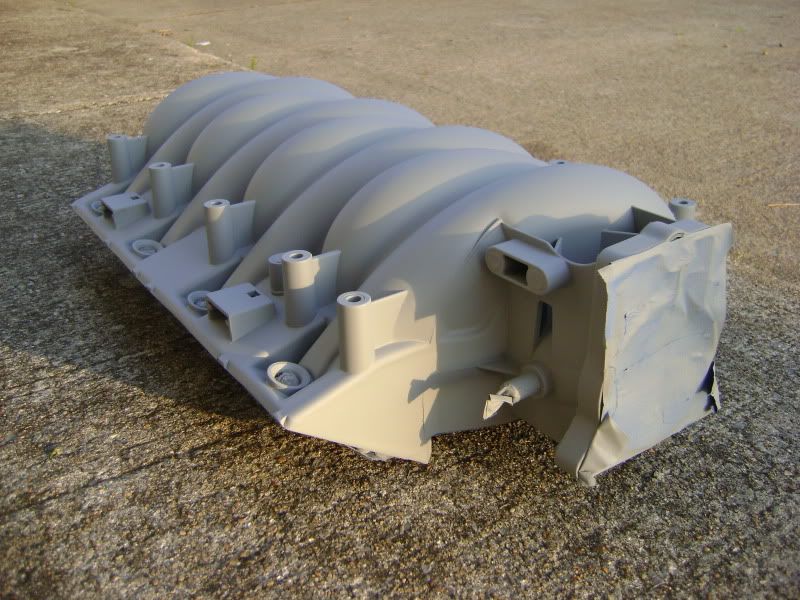
After sanding with 120 grit and then 320 grit to remove texture. TOOK FOREVER!!!
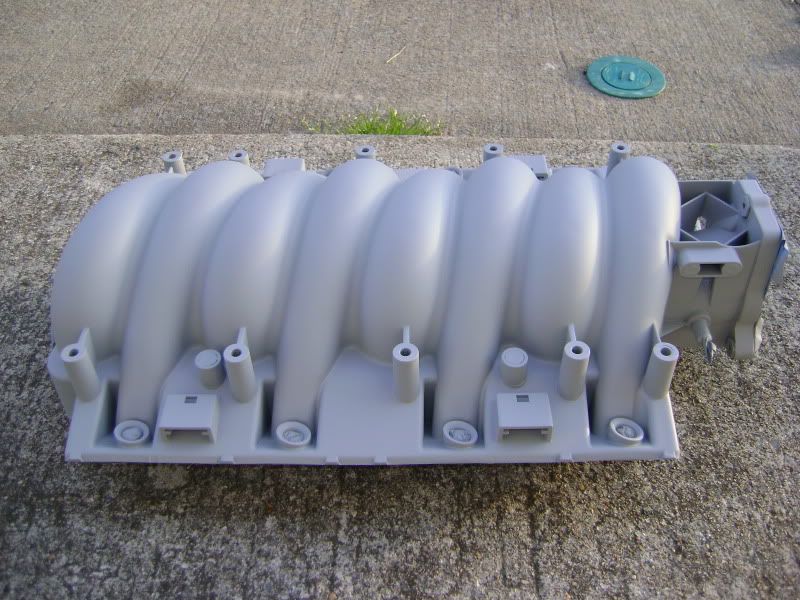
Primered.
Done!
After sanding with 120 grit and then 320 grit to remove texture. TOOK FOREVER!!!
Primered.
Done!
Last edited by schtick; 04-12-2010 at 11:01 AM.


Trending Topics
 04-12-2010, 11:11 AM
#11
I added some more pics...the first one is a little overexposed. Thanks for the compliments. Keep an eye out for pics of it on the car.
I used Dupli-Color adhesion promotor, high-build primer, silver metallic paint, and clear coat.
Someone already has.  It's in the stickies in the paint and body work forum. Painting Plastic (Intake, etc.) I used the high build primer method.
DO IT!!! 
looks good. what did you paint it with?
nice! some one should do a write up on this hint hint you lol
It's in the stickies in the paint and body work forum. Painting Plastic (Intake, etc.) I used the high build primer method.
JDECO wow! that really makes me want to take mine off and do it. Great work!
crimson_bird tel me about it. i feel like going out and doing it right now. that looks gorgeous
04-12-2010, 08:22 PM
#12
Update: Made some progress today. I did the !EGR, !AIR, and got my intake off. I think I'm going to paint my fuel rails silver so the line that crosses over the intake blends in. It may be hard to do on the car though but from the looks of it you need a special tool to get the fuel line loose from the rails. Anybody know for sure?
04-12-2010, 08:32 PM
#14
TECH Fanatic

Join Date: Jul 2007
Posts: 1,516
Likes: 0
Received 0 Likes
on
0 Posts
Update: Made some progress today. I did the !EGR, !AIR, and got my intake off. I think I'm going to paint my fuel rails silver so the line that crosses over the intake blends in. It may be hard to do on the car though but from the looks of it you need a special tool to get the fuel line loose from the rails. Anybody know for sure?
04-12-2010, 08:46 PM
#16
TECH Enthusiast
iTrader: (5)
Join Date: Apr 2009
Location: Houston, TX
Posts: 637
Likes: 0
Received 0 Likes
on
0 Posts

yeah you can get the cheap ones for like 15 bucks i believe from orielly's, just find the right size that fits the line push it in and pull the fuel line out...
intake looks good, your crazy for sanding that **** down so much... when i painted some plastic textures like on my truck i just cleaned it real good, put some primer on it were it had rolls and stuff to fill in the cracks sanded it smooth and that worked for me... just another option for anyone who wants to try that...
intake looks good, your crazy for sanding that **** down so much... when i painted some plastic textures like on my truck i just cleaned it real good, put some primer on it were it had rolls and stuff to fill in the cracks sanded it smooth and that worked for me... just another option for anyone who wants to try that...
04-12-2010, 08:54 PM
#17
yeah you can get the cheap ones for like 15 bucks i believe from orielly's, just find the right size that fits the line push it in and pull the fuel line out...
intake looks good, your crazy for sanding that **** down so much... when i painted some plastic textures like on my truck i just cleaned it real good, put some primer on it were it had rolls and stuff to fill in the cracks sanded it smooth and that worked for me... just another option for anyone who wants to try that...
intake looks good, your crazy for sanding that **** down so much... when i painted some plastic textures like on my truck i just cleaned it real good, put some primer on it were it had rolls and stuff to fill in the cracks sanded it smooth and that worked for me... just another option for anyone who wants to try that...
04-13-2010, 07:51 AM
#19
Thanks. I'd say to anyone who is on the fence whether or not to do it...definitely do it. I'm by no means a painting/body work stud and pulled it off pretty easy with just a few grits of sandpaper and spray paint. Like many said earlier in the thread, just take your time with the prep work to get your best results.