
LS7 Fiero swap
 04-27-2012, 06:12 AM
#441
On The Tree
Thread Starter

Join Date: Mar 2008
Posts: 171
Likes: 0
Received 0 Likes
on
0 Posts
With the modifications we will have to make to the S/C side covers for clearance, some of the coil packs will be exposed. You guys know how I feel about my Engine compartment, it has to look just as good as it performs and as good as the outside of the car...... so I found this on the Z06 forum Billet Ls7 coil pack covers


They looked great, but the thought of having to polish them was driving me crazy and you guys know I like chrome...... so out to the chrome shop they went. Found a great chrome shop in RI called D&D chrome plating, great price and crazy fast turn around. I shipped my parts to them on Monday 4/16 and they were back on my door step when I arrived home from work 4/23. They did a great job and more parts will be going to them soon.

They looked great, but the thought of having to polish them was driving me crazy and you guys know I like chrome...... so out to the chrome shop they went. Found a great chrome shop in RI called D&D chrome plating, great price and crazy fast turn around. I shipped my parts to them on Monday 4/16 and they were back on my door step when I arrived home from work 4/23. They did a great job and more parts will be going to them soon.
 04-27-2012, 05:01 PM
#442
On The Tree
Thread Starter
Join Date: Mar 2008
Posts: 171
Likes: 0
Received 0 Likes
on
0 Posts
Originally posted by Archie:
Troy, you should find a nice sunny day ~mid 50's mid afternoon when traffic is lite & take this car out & just give it heck.
I just had it out, you know "Testing" (somebody has to test it, right?) & I feel 20 years younger.
Somebody has to have the burden of test driving & I guess it's on me.
BTW: the testing was to determine if I coud get the clutch to slip. Now that the tach is working properly (the guys that did the interior had the tach on the wrong setting, that's all that was wrong with it) I was able to test it in several different conditions & it appears that the "slipping" that you say you might have felt was really the rear tires spinning.
But, please don't think that I'm done testing it. It will have to be tested several more times before you get here.
Next time, I'll take the video camera along
Archie
04-27-2012, 08:36 PM
#443
ModSquad
iTrader: (6)

I'm speechless......mmmm........I just peed a little.....where am I? I must have fainted.

 05-03-2012, 02:45 AM
#446
On The Tree
Thread Starter
Join Date: Mar 2008
Posts: 171
Likes: 0
Received 0 Likes
on
0 Posts
Originally posted by Archie:
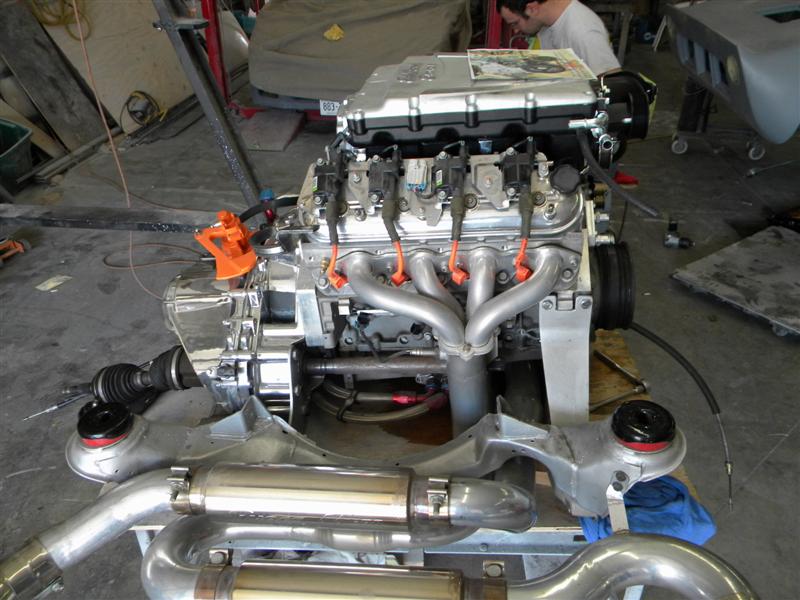
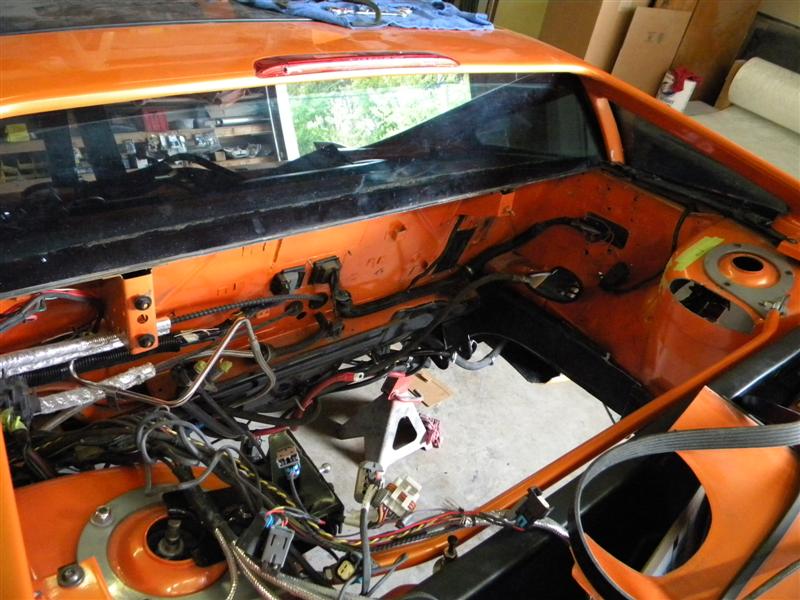
Today, a bunch more fitting & planning. The biggest thing to figure out is how we're going to do the belt routing & we now have a plan for that.
Here's a pic of where we left it today.
Tomorrow, Troy will be here to go over all the other stuff he wants to do & help us pull the engine out.
Lots of info will come tomorrow.
Archie
 05-10-2012, 10:36 PM
#448
TECH Resident
iTrader: (4)

Join Date: Feb 2009
Location: Ohio
Posts: 784
Likes: 0
Received 0 Likes
on
0 Posts
Painting the blower in the original 2.8 red color scheme with "Fiero" engraved in it would fool some people at shows. I'd get a good kick out of it at least.
Awesome car. My buddy had a couple GTs a few years back. Fun cars, but unreliable and lacking some power.
Awesome car. My buddy had a couple GTs a few years back. Fun cars, but unreliable and lacking some power.

 05-26-2012, 05:21 AM
#451
On The Tree
Thread Starter
Join Date: Mar 2008
Posts: 171
Likes: 0
Received 0 Likes
on
0 Posts
........
Well there are several reasons we pulled the engine out as part of this installation.
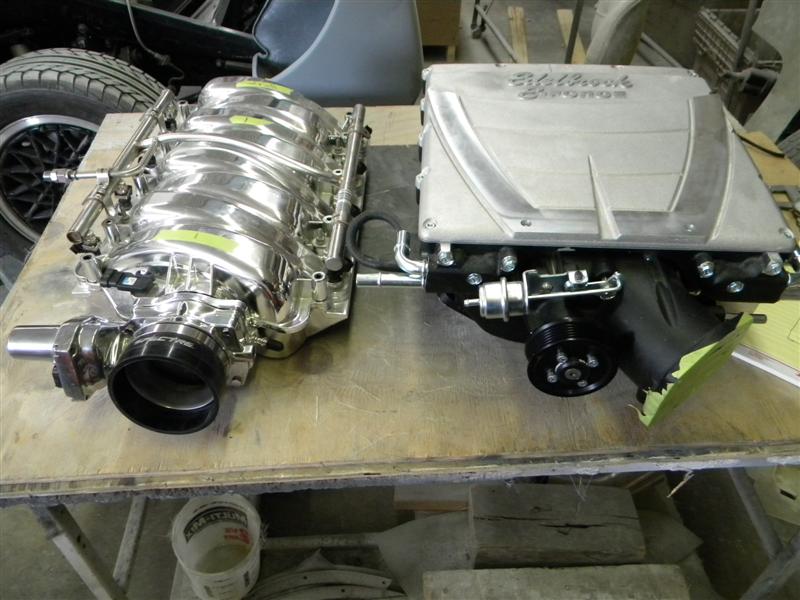
The first reason is that the E-Force kit is a "bolt-on" if you're putting it in a Camaro or Corvette. Sure the Blower bolts to the engine but, It's not a bolt on in a Fiero until someone develops the parts & methods to make it such. One of the reasons is that we have to make the belt drive fit.
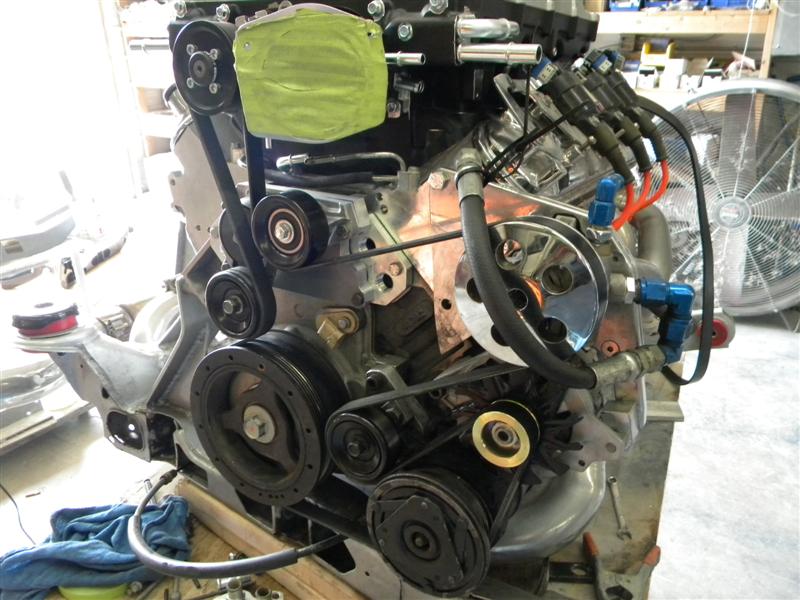
If installing the SC into a Camaro or Corvette Edelbrock supplies all the mounts & brackets to make it a bolt in. However the Belt routing on the C. or C. kits won't work on the Fiero. When looking at the front of the engine, this is the typical belt routing that the kits would have...
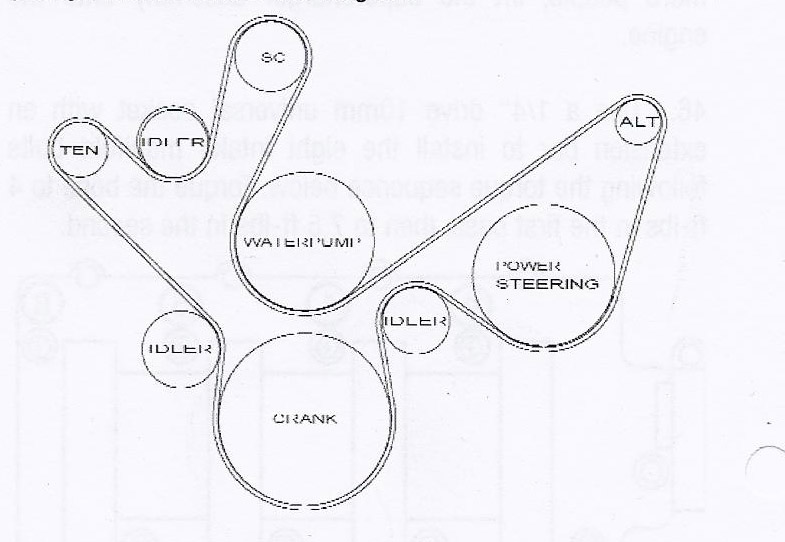
On the LS installation into the Fiero all of the pullies & idlers you see to the left of the Harmonic Balancer Pulley can't be used because the Fiero shock tower is in the way.
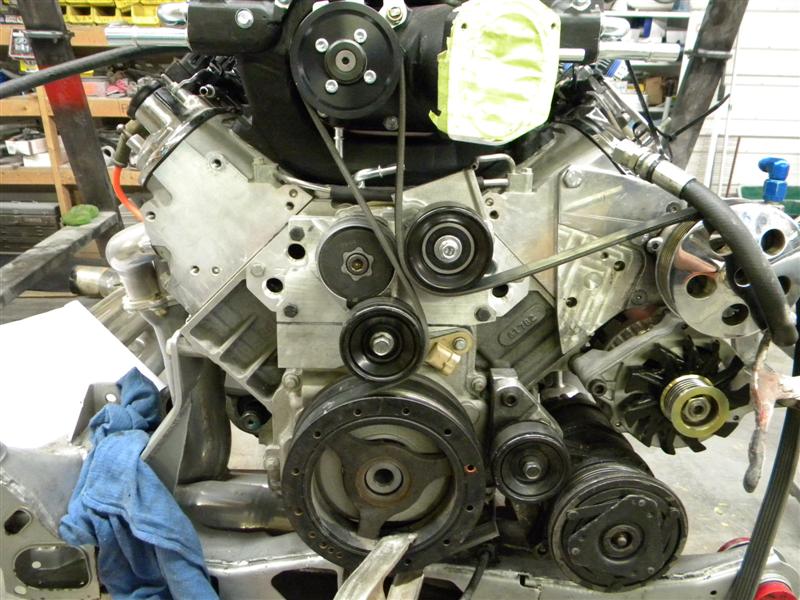
We knew this going into this project. In the original installation of the LS7 into Troy's car we also had to keep everything to the front side of the engine. In this picture the Blue vertical line represents the forward side of the Fiero shock tower...
.jpg)
While it's not completed yet this is a mock-up of what we have on belt routing so far.
(PLEASE NOTE, we don't need to be told that it's not complete yet or that it's not all shined up & pretty yet. That's why it has been pointed out that it's an in process picture......."It's a mock-up".......)
There are several other reasons we took the engine out of the car for this installation.
On the original installation the intake manifold was turned around putting the Throttle Bbody & the C.I.A. on the drivers' side of the engine. With this SC, we have to relocate the C.A.I. To the right side of the engine compartment. Plus the original installation had hoses, electric W/P, P.S. fluid tank & wiring on the right side of the engine compartment. A lot of this stuff has to be re-routed or moved to make room for the C.A.I. & the new belt routing.
Additionally, we have to make 2 small notches in the shock tower to clear parts of the blower. It's easier to make these mods & box them in & repaint the area with the engine out of the car.
Hope that helps
Archie
Originally posted by IwannaIRM:
Just a question.
Why remove the whole drive-train if the supercharger is a "bolt-on" unit? Is this because of the belt problem?
Just a question.
Why remove the whole drive-train if the supercharger is a "bolt-on" unit? Is this because of the belt problem?
The first reason is that the E-Force kit is a "bolt-on" if you're putting it in a Camaro or Corvette. Sure the Blower bolts to the engine but, It's not a bolt on in a Fiero until someone develops the parts & methods to make it such. One of the reasons is that we have to make the belt drive fit.
If installing the SC into a Camaro or Corvette Edelbrock supplies all the mounts & brackets to make it a bolt in. However the Belt routing on the C. or C. kits won't work on the Fiero. When looking at the front of the engine, this is the typical belt routing that the kits would have...
On the LS installation into the Fiero all of the pullies & idlers you see to the left of the Harmonic Balancer Pulley can't be used because the Fiero shock tower is in the way.
We knew this going into this project. In the original installation of the LS7 into Troy's car we also had to keep everything to the front side of the engine. In this picture the Blue vertical line represents the forward side of the Fiero shock tower...
While it's not completed yet this is a mock-up of what we have on belt routing so far.
(PLEASE NOTE, we don't need to be told that it's not complete yet or that it's not all shined up & pretty yet. That's why it has been pointed out that it's an in process picture......."It's a mock-up".......)
There are several other reasons we took the engine out of the car for this installation.
On the original installation the intake manifold was turned around putting the Throttle Bbody & the C.I.A. on the drivers' side of the engine. With this SC, we have to relocate the C.A.I. To the right side of the engine compartment. Plus the original installation had hoses, electric W/P, P.S. fluid tank & wiring on the right side of the engine compartment. A lot of this stuff has to be re-routed or moved to make room for the C.A.I. & the new belt routing.
Additionally, we have to make 2 small notches in the shock tower to clear parts of the blower. It's easier to make these mods & box them in & repaint the area with the engine out of the car.
Hope that helps
Archie
 05-26-2012, 05:23 AM
#453
On The Tree
Thread Starter
Join Date: Mar 2008
Posts: 171
Likes: 0
Received 0 Likes
on
0 Posts
..................
Originally posted by Archie:
Today we have the engine back in the car today.
Testing for fit everywhere & working on setting up the Throttle Body & CAI.
Then figureing where things are going to be routed & how it all going to go together.
Found a place to remount the Electric W/P & Thermostat housing block & working on calculating the routing of hoses.
We will continue on this trial fitting tomorrow.
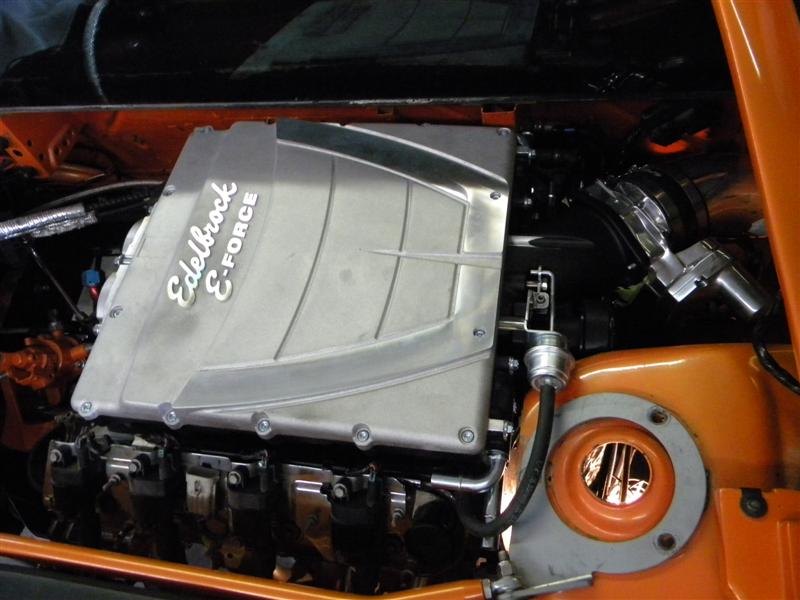
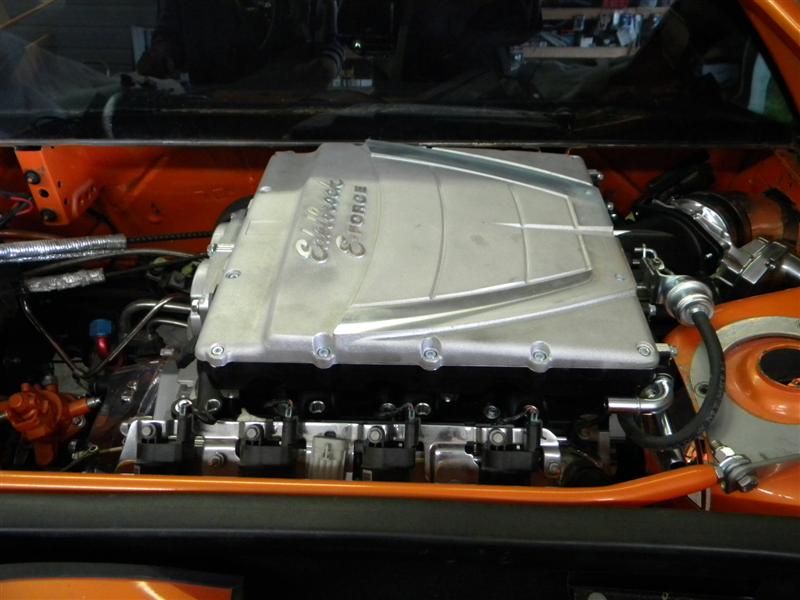
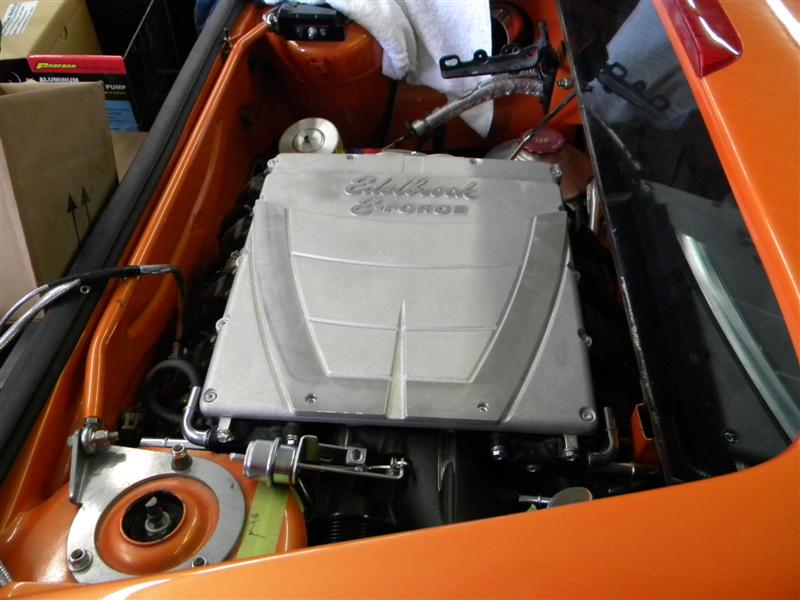
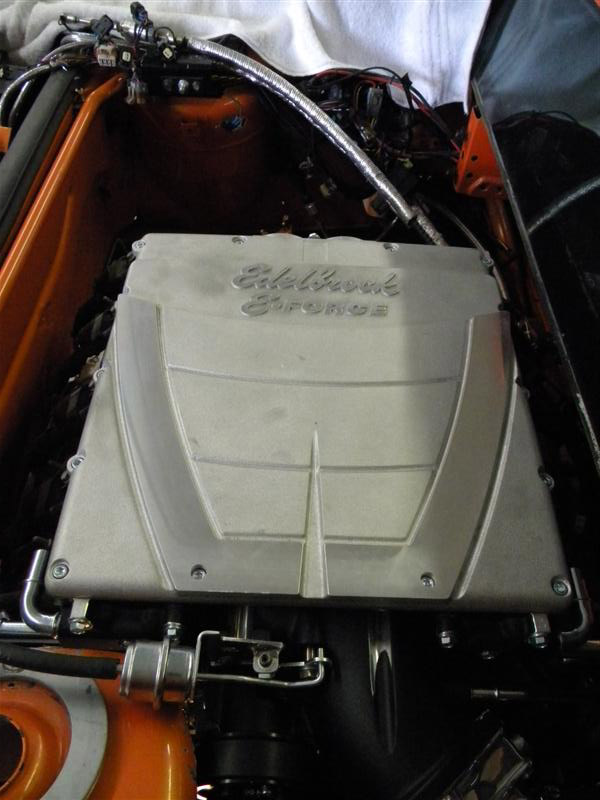
Notice that the top of the SC is only about 2" from the rear window. We have determined that, on final assembly, we can't install the engine into the car with the SC on the enigne, it has to be put on the engine with the engine in the car. You have to bolt the blower down & then install the injectors & fuel rails in that order. With 2" to work with, that was going to be difficult.
We've determined that on installation after we set the blower onto the engine & start a bolt or 2, we will lower the back end of the engine cradle keeping the front bolts in the cradle. That will piviot the engine away from thew rear window a couple of inches & allow us more room to put everything together.
More tomorrow.
Archie
Today we have the engine back in the car today.
Testing for fit everywhere & working on setting up the Throttle Body & CAI.
Then figureing where things are going to be routed & how it all going to go together.
Found a place to remount the Electric W/P & Thermostat housing block & working on calculating the routing of hoses.
We will continue on this trial fitting tomorrow.
Notice that the top of the SC is only about 2" from the rear window. We have determined that, on final assembly, we can't install the engine into the car with the SC on the enigne, it has to be put on the engine with the engine in the car. You have to bolt the blower down & then install the injectors & fuel rails in that order. With 2" to work with, that was going to be difficult.
We've determined that on installation after we set the blower onto the engine & start a bolt or 2, we will lower the back end of the engine cradle keeping the front bolts in the cradle. That will piviot the engine away from thew rear window a couple of inches & allow us more room to put everything together.
More tomorrow.
Archie


 05-26-2012, 05:27 AM
#455
On The Tree
Thread Starter
Join Date: Mar 2008
Posts: 171
Likes: 0
Received 0 Likes
on
0 Posts
................
Originally posted by Archie:
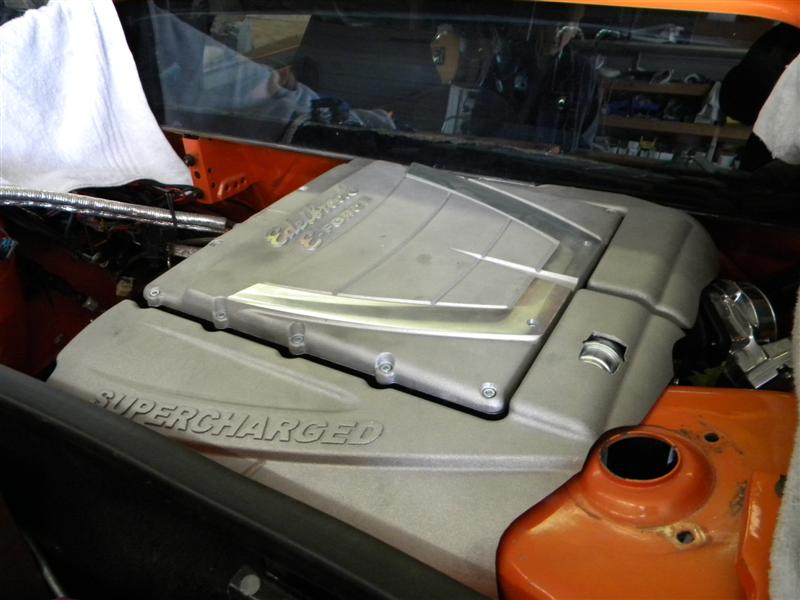
It's getting better looking as we go.......
We're already set to have the bikini babe taken care of.
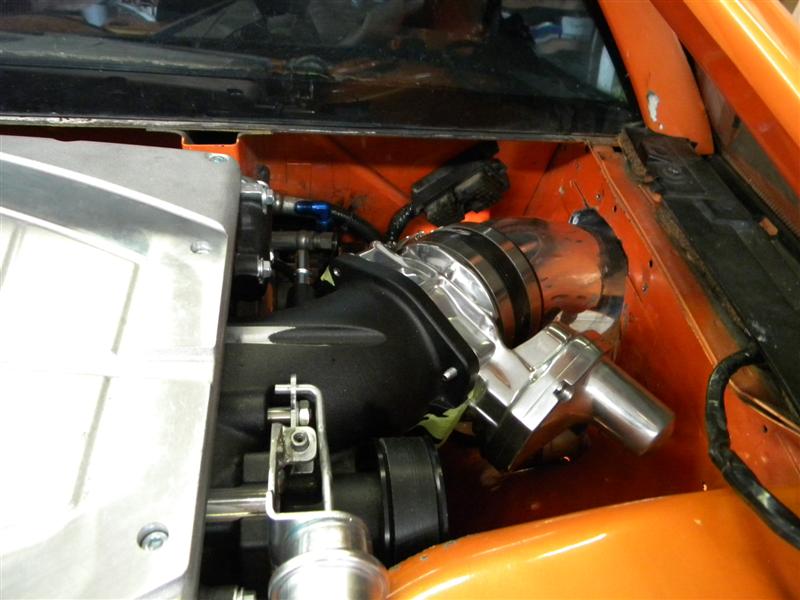
While we think the back end of the SC looks cool, we're open to any suggestions you might have.
Archie
It's getting better looking as we go.......
We're already set to have the bikini babe taken care of.
While we think the back end of the SC looks cool, we're open to any suggestions you might have.
Archie
05-26-2012, 05:29 AM
#456
On The Tree
Thread Starter
Join Date: Mar 2008
Posts: 171
Likes: 0
Received 0 Likes
on
0 Posts
......................
Originally posted by Archie:
The last 2 days were spent taking care ofthe little things.
Asside from fitting the coil covers we needed to figure out how things we needing to be mounted & routed.
Before the SC installation both decklid hinges were basically stock. On the right side the SC was going to interfere with the hinge. We had anticipated this before the SC arrived from Edelbrock. The good thing is that our measurements from before the SC arrived indicated that the SC didn't interfere with the pivot pin location on the right side. The whole hinge needed to be modified but we knew it would work because we didn't need to relocate the hinge pins.
To have 2 hinges that are on the same axis you have to have the hinges pins in the same relative position.
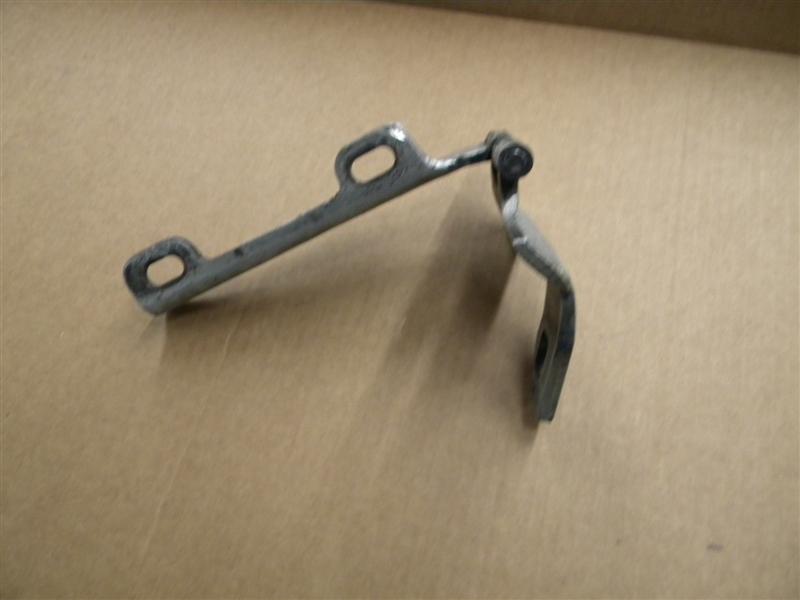
Everyone knows what a stock hinge looks like..... in case you don't this is one.....
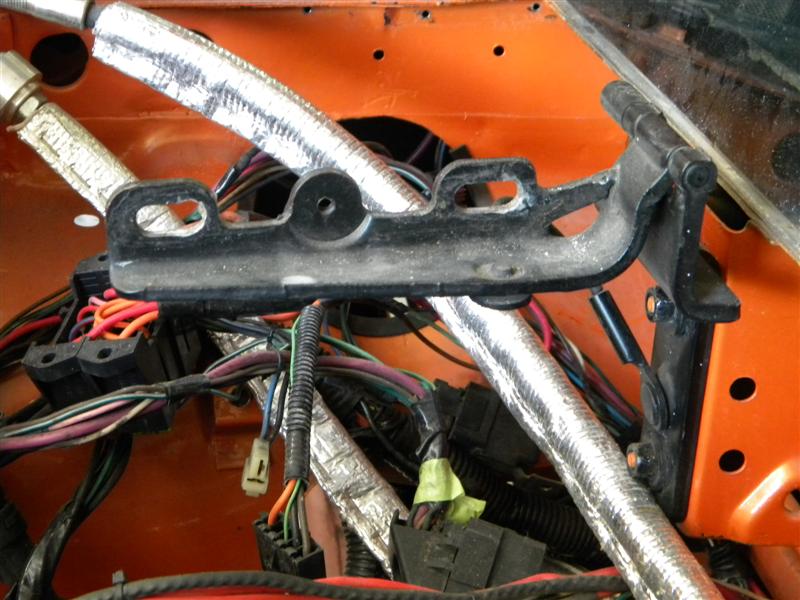
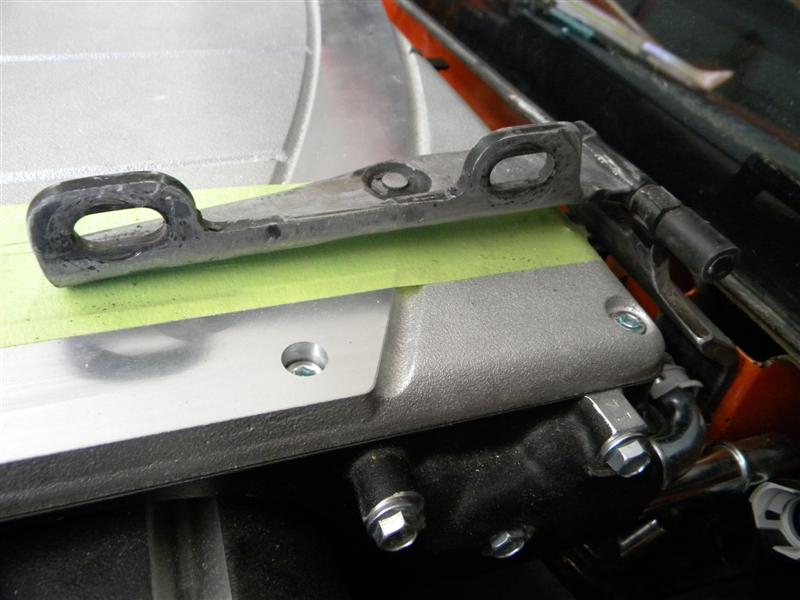
Our right side hinge, had to have the top half modified & to clear one of the intercooler line fittings the bottom half had to be modified too. When finished it looks like this ...
Wednesday, you could see that we had been modifying the Coil covers.
Before Wednesday's mods they looked like this ...
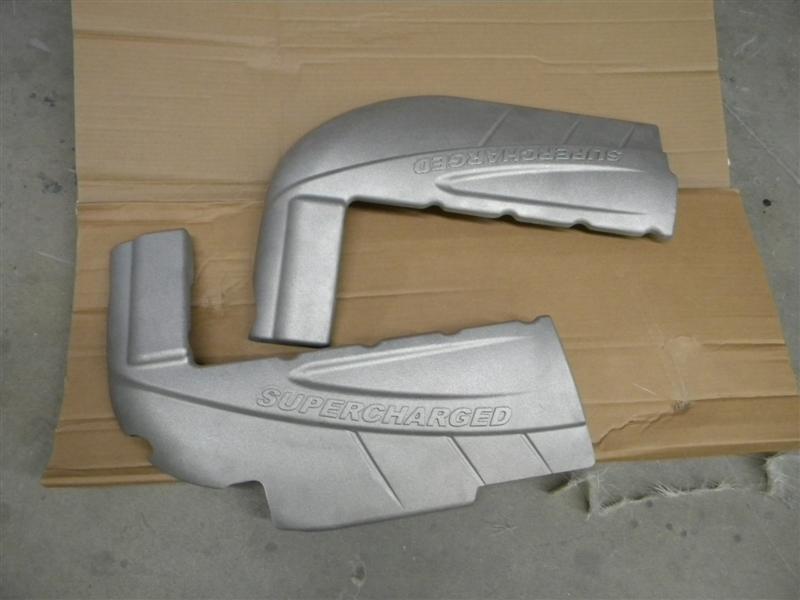
At the EOD Wednesday they looked like this....
.JPG)
I showed you pics of the covers on the engine on Wednesday, However, that wasn't going to be good enough. Even though there wasn't much left of the front cover, we still needed to be able to open the decklid & to make some clearance in the cover for the modified hinge.....
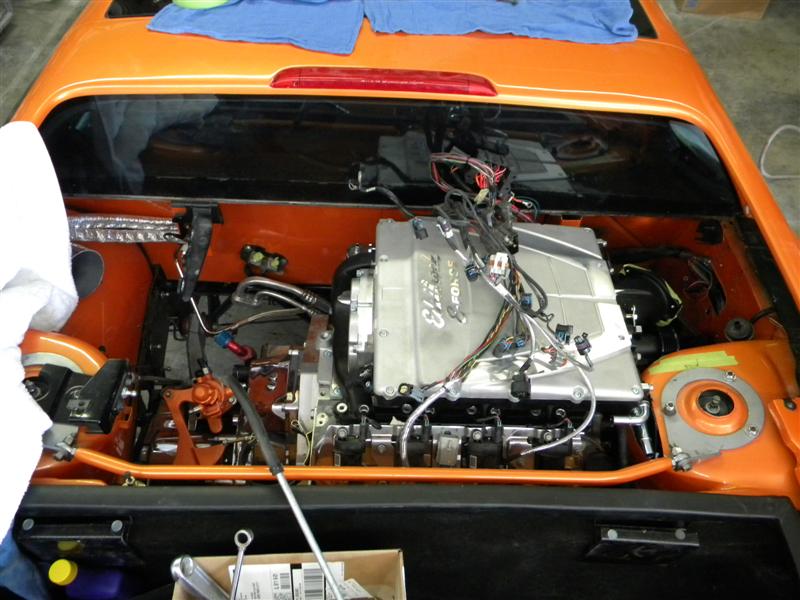
When that was done the covers looked like this .......


On the engine with the decklid in place.....

To clear the SC we also had to modify the right rib on the underside of the decklid...
By the end of the day, we pulled the engine back out of the car so we can get some welding & cleaning up in the engine compartment
But, first you can see the engine thru the louvers in the decklid... & I had to get a few pics of it....

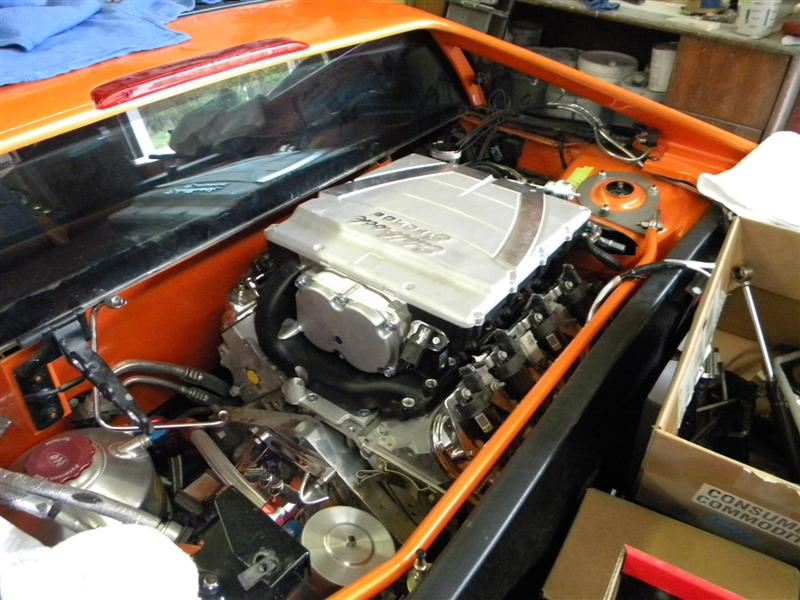
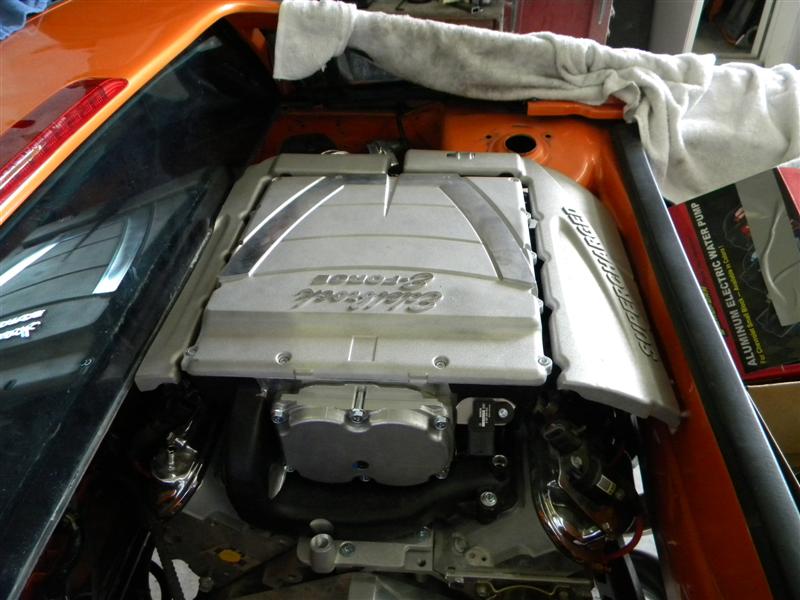
One thing when you're doing something that hasn't been done before, you have to put together a plan on putting it all together. When taking this engine in & out of the car you have to have the SC removed. Among other things keeping us from leaving it on during R&R is that trhe SC has an intercooler connection that just to the right of the right decklid hinge block & it can't be moved. Also the SC drive is into a notch in the right shock tower by about 3/8". So when removing the SC you need to lift on the rear of the SC to get the pulley up out of the notch it's in & then lift the SC to clear out the intercooler connection.
The one thing that makes this SC low enough that we can get it under the decklid of a Fiero is that instead of having the intercooler under the rotors, you have 2 smaller intercooler mounted above & outboard of the rotors. That makes the top of the SC wider instead of taller.
The problem with that is that the fasteners that bolt the SC to the engine are up under the intercoolers.......
.JPG)
You also have to install these bolts before you install the injectors & fuel rails.
That's all fine & dandy if your installing the SC in a Camaro or 'Vette. On those cars at least you can reach in from either side of the car to do this. On our Fiero with the front side of the Sc top only 2" from the back window, you're going to have a problem.
We planned around this problem by planning to use a floor jack up under the rear of the cradle (with the car on jackstands) & removing the 2 vertical cradle bolts & lowering the back of the cradle a couple of inches to give us more room to do all the assembly on both side of the SC at the same time. We will also be removing both sets of coils to try to get to the fasteners without an universal joint.
That's all for today....... you can have the rest of the day off.
Archie
The last 2 days were spent taking care ofthe little things.
Asside from fitting the coil covers we needed to figure out how things we needing to be mounted & routed.
Before the SC installation both decklid hinges were basically stock. On the right side the SC was going to interfere with the hinge. We had anticipated this before the SC arrived from Edelbrock. The good thing is that our measurements from before the SC arrived indicated that the SC didn't interfere with the pivot pin location on the right side. The whole hinge needed to be modified but we knew it would work because we didn't need to relocate the hinge pins.
To have 2 hinges that are on the same axis you have to have the hinges pins in the same relative position.
Everyone knows what a stock hinge looks like..... in case you don't this is one.....
Our right side hinge, had to have the top half modified & to clear one of the intercooler line fittings the bottom half had to be modified too. When finished it looks like this ...
Wednesday, you could see that we had been modifying the Coil covers.
Before Wednesday's mods they looked like this ...
At the EOD Wednesday they looked like this....
I showed you pics of the covers on the engine on Wednesday, However, that wasn't going to be good enough. Even though there wasn't much left of the front cover, we still needed to be able to open the decklid & to make some clearance in the cover for the modified hinge.....
When that was done the covers looked like this .......
On the engine with the decklid in place.....
To clear the SC we also had to modify the right rib on the underside of the decklid...
By the end of the day, we pulled the engine back out of the car so we can get some welding & cleaning up in the engine compartment
But, first you can see the engine thru the louvers in the decklid... & I had to get a few pics of it....
One thing when you're doing something that hasn't been done before, you have to put together a plan on putting it all together. When taking this engine in & out of the car you have to have the SC removed. Among other things keeping us from leaving it on during R&R is that trhe SC has an intercooler connection that just to the right of the right decklid hinge block & it can't be moved. Also the SC drive is into a notch in the right shock tower by about 3/8". So when removing the SC you need to lift on the rear of the SC to get the pulley up out of the notch it's in & then lift the SC to clear out the intercooler connection.
The one thing that makes this SC low enough that we can get it under the decklid of a Fiero is that instead of having the intercooler under the rotors, you have 2 smaller intercooler mounted above & outboard of the rotors. That makes the top of the SC wider instead of taller.
The problem with that is that the fasteners that bolt the SC to the engine are up under the intercoolers.......
You also have to install these bolts before you install the injectors & fuel rails.
That's all fine & dandy if your installing the SC in a Camaro or 'Vette. On those cars at least you can reach in from either side of the car to do this. On our Fiero with the front side of the Sc top only 2" from the back window, you're going to have a problem.
We planned around this problem by planning to use a floor jack up under the rear of the cradle (with the car on jackstands) & removing the 2 vertical cradle bolts & lowering the back of the cradle a couple of inches to give us more room to do all the assembly on both side of the SC at the same time. We will also be removing both sets of coils to try to get to the fasteners without an universal joint.
That's all for today....... you can have the rest of the day off.
Archie
05-26-2012, 05:34 AM
#457
On The Tree
Thread Starter
Join Date: Mar 2008
Posts: 171
Likes: 0
Received 0 Likes
on
0 Posts
..............
Originally posted by Archie:
A little update from the last several days.
We built steels pockets to box in the notches in the shock tower & welded them in.....

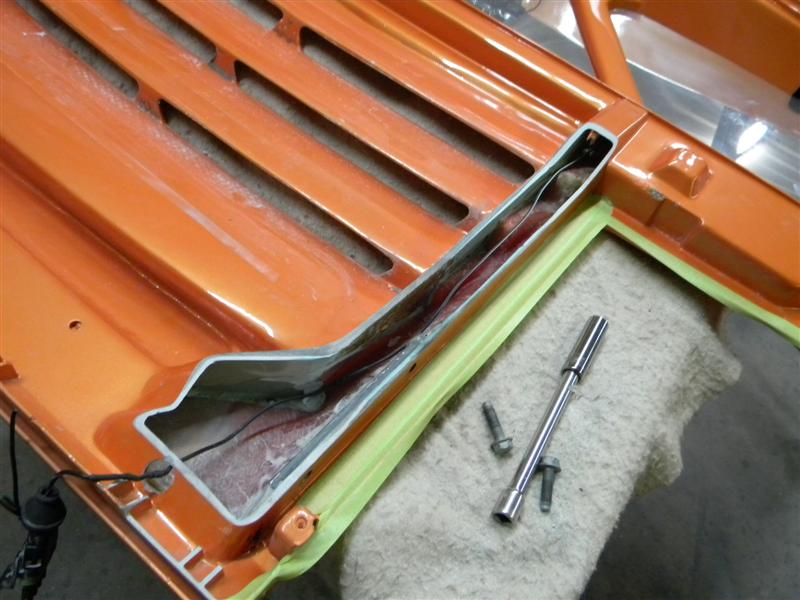
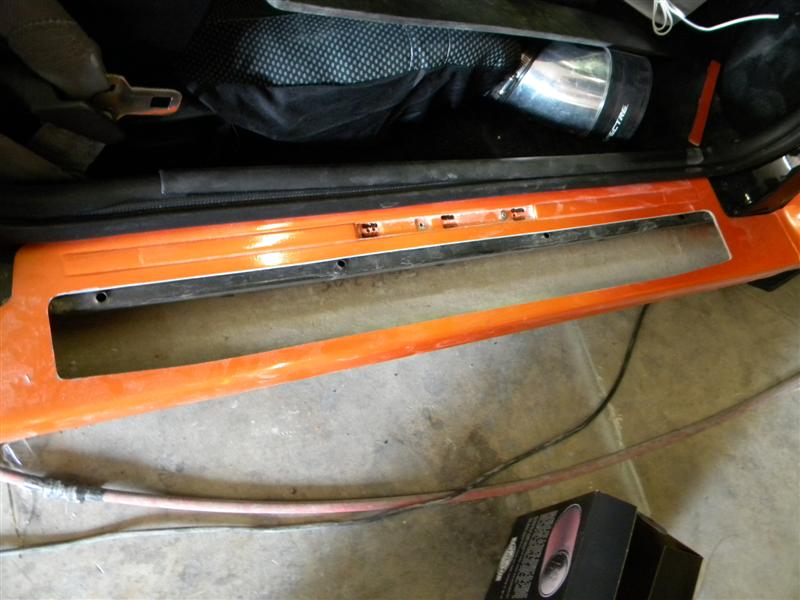
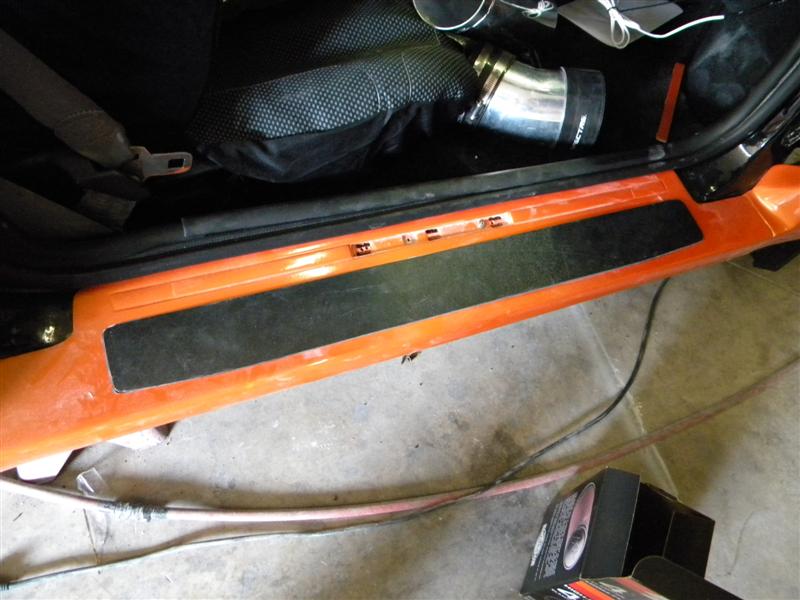
Aso working on the Sill Plate installation.....
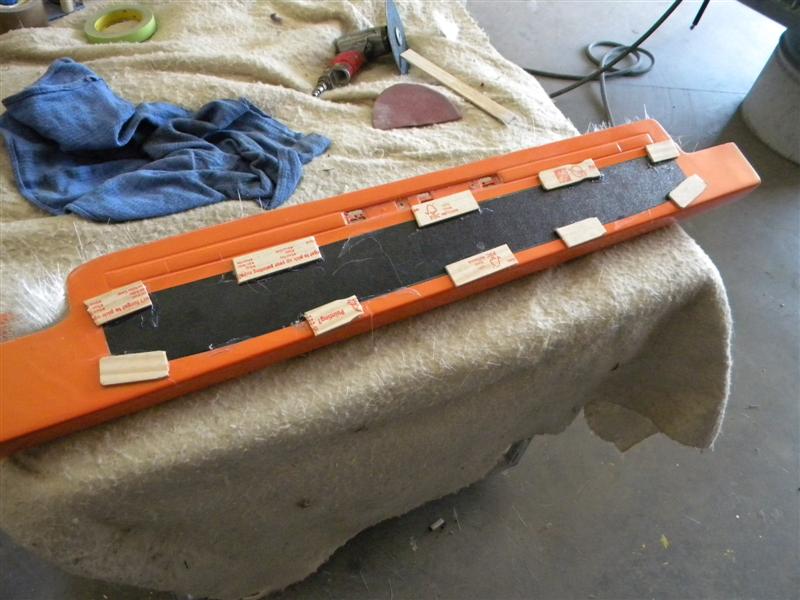
With the rockers off the car we made a plastic ABS pattern & then carefully made the opening in the rocker panel. It's shown here back on the car to check positioning.
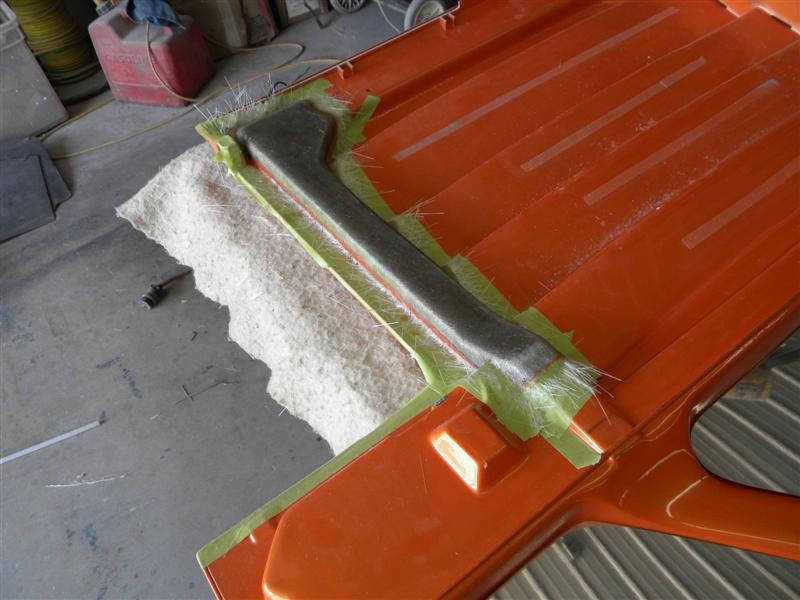
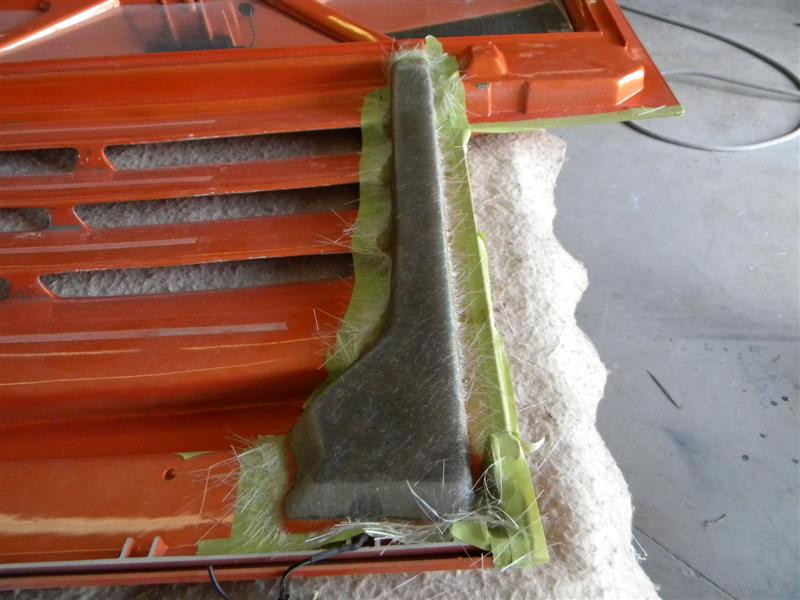
Then, off the car again, we hot glue paint sticks to the top of the ABS then we can go in from the backside & layup a couple of layers of fiberglass.....
While we have that fiberglass curing, we marked up to enlarged hood vents that Troy wanted & I emailed pics to his for his approval.

We also worked on a few other things. Then back to the rockers.....After we remove the ABS pattern, we have a nice pocket & floor to mount the Sill Plates to.......
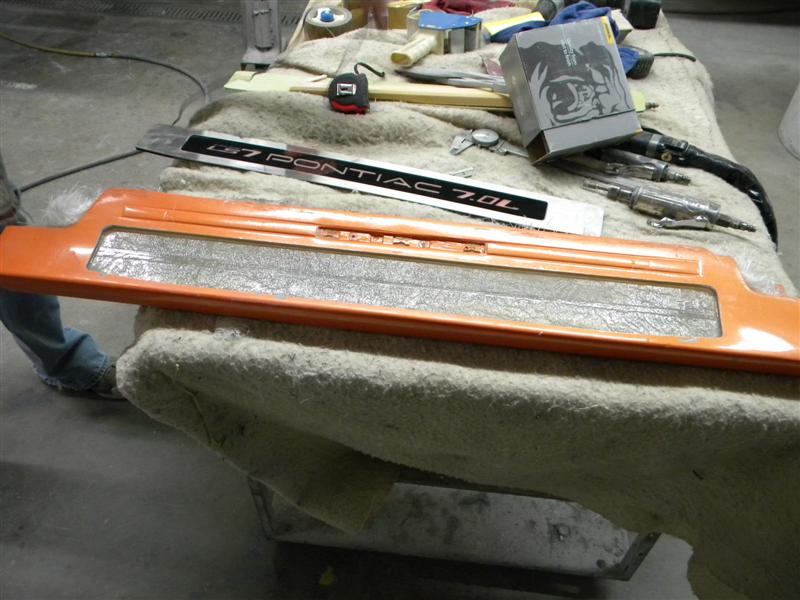
After we put a hole in the floor for the wires, we can set the plate into the pocket.
ON

OFF
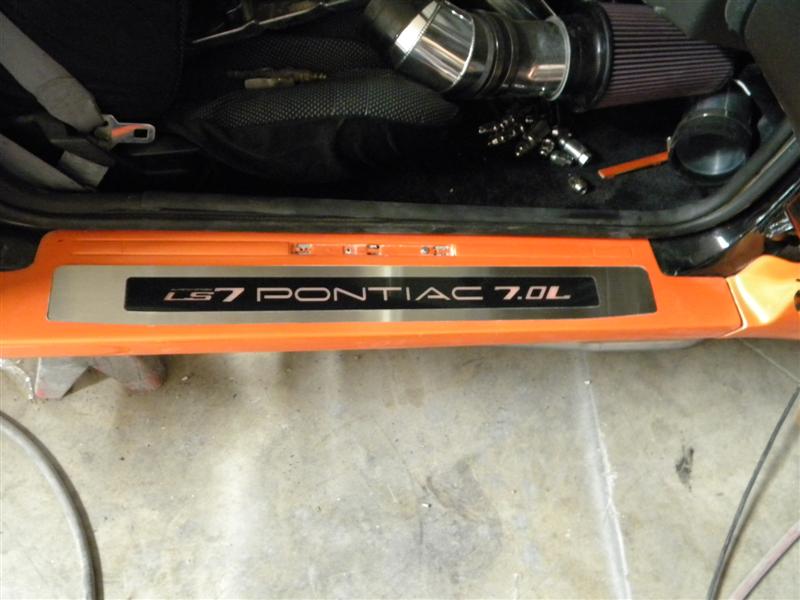
On again...
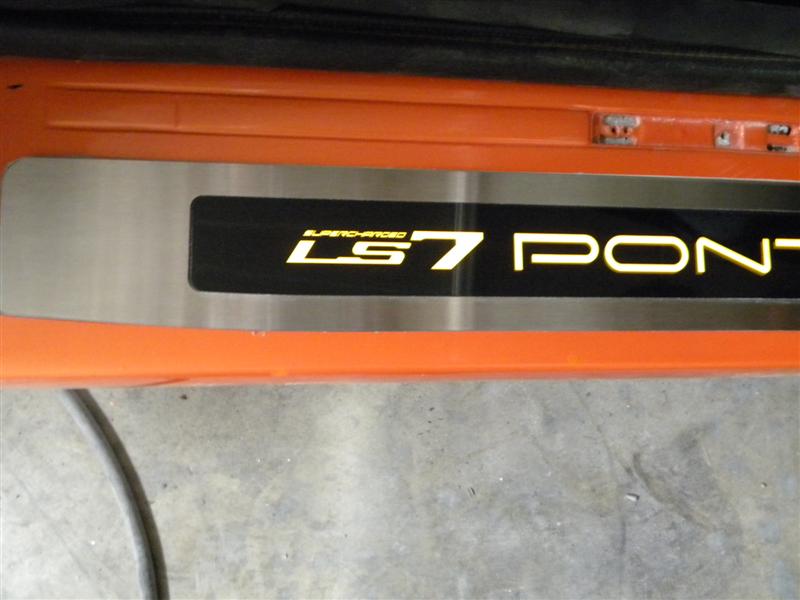
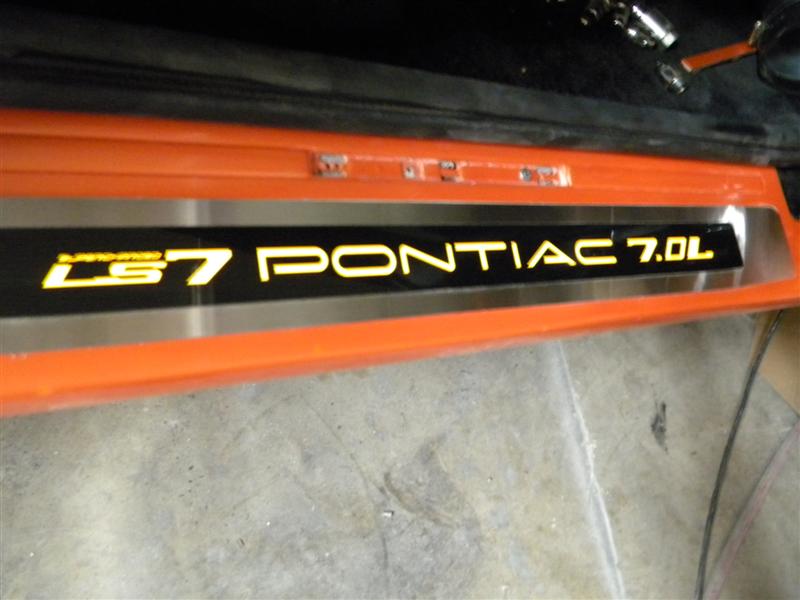
The rocker are going to be repainted, so we won't final mount the Sill Plates until after paint is done.
Working on the hood scoops too.


We also made a custom tray for Dual Batteries....


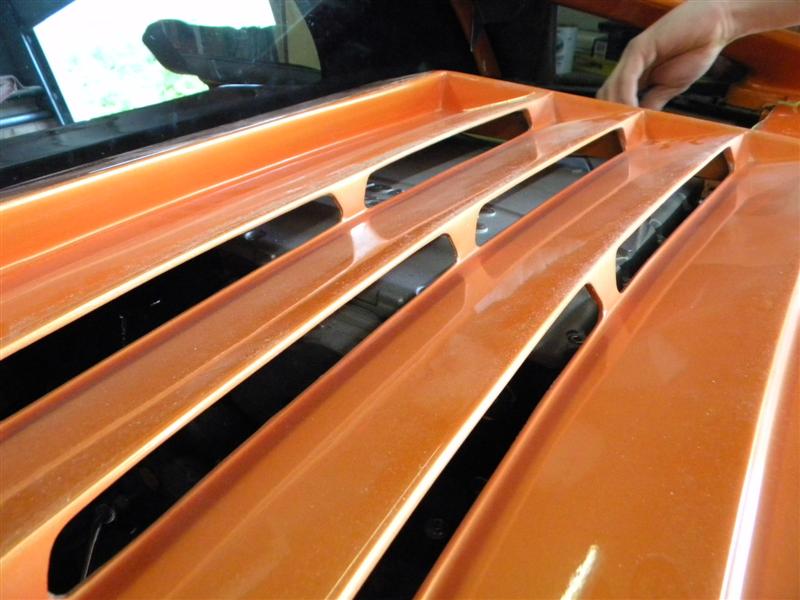
And cut a new row of louvers in the Deck lid.


Archie
A little update from the last several days.
We built steels pockets to box in the notches in the shock tower & welded them in.....
Aso working on the Sill Plate installation.....
With the rockers off the car we made a plastic ABS pattern & then carefully made the opening in the rocker panel. It's shown here back on the car to check positioning.
Then, off the car again, we hot glue paint sticks to the top of the ABS then we can go in from the backside & layup a couple of layers of fiberglass.....
While we have that fiberglass curing, we marked up to enlarged hood vents that Troy wanted & I emailed pics to his for his approval.
We also worked on a few other things. Then back to the rockers.....After we remove the ABS pattern, we have a nice pocket & floor to mount the Sill Plates to.......
After we put a hole in the floor for the wires, we can set the plate into the pocket.
ON
OFF
On again...
The rocker are going to be repainted, so we won't final mount the Sill Plates until after paint is done.
Working on the hood scoops too.
We also made a custom tray for Dual Batteries....
And cut a new row of louvers in the Deck lid.
Archie
05-26-2012, 05:36 AM
#458
On The Tree
Thread Starter
Join Date: Mar 2008
Posts: 171
Likes: 0
Received 0 Likes
on
0 Posts
..................
Originally posted by Archie:
Yesterday, Mark (FireFox) came over & with my guys acting as his assistants, He repainted a few areas in the front & rear compartments Including the rocker where we mounted the Sill plates.


The new material that Troy ordered for the grills he wanted to replace came in today. Kris spent part of today making some of the new grills. I'll show pics when they are done.
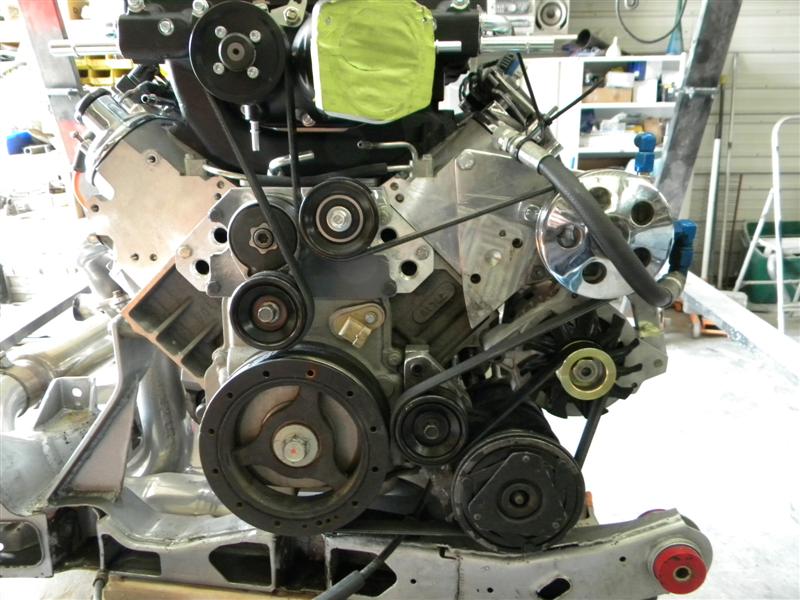
We also re-engineered & made a few parts to re-route the belt drive. We moved the A/C compressor about 1.25" forward & added an idler between the HBP & the A/C compressor & put in a larger diameter idler between the PS pump & the Alternator & moved it up a little.

Have a nice weekend.
Archie
Yesterday, Mark (FireFox) came over & with my guys acting as his assistants, He repainted a few areas in the front & rear compartments Including the rocker where we mounted the Sill plates.
The new material that Troy ordered for the grills he wanted to replace came in today. Kris spent part of today making some of the new grills. I'll show pics when they are done.
We also re-engineered & made a few parts to re-route the belt drive. We moved the A/C compressor about 1.25" forward & added an idler between the HBP & the A/C compressor & put in a larger diameter idler between the PS pump & the Alternator & moved it up a little.
Have a nice weekend.
Archie
Last edited by mrtroyboy; 05-26-2012 at 08:29 AM.


