
418+Turbo+FD RX7 Build
 03-19-2011, 12:47 AM
#1


Well I have been building this for a few months and share it on a few other sites but I get so much tech info here! So I figured I should share here as well.
Quick summary:
I built a cam-only ls1/FD and ran some 10s last season, loved it. Decided I wanted more power and always enjoyed turbo driveability. Then I got a little carried away and the rest is in the pictures. Basically decided to redo the entire car. It has been a blast so far and hope to get it out and to the track in the next few months.
Sorry for a million pics at once,hope you have some time to kill.
Winter Build
Ok so I already got started on the winter build. Im not going to lie after all of the issues last year and working on it so much it is just getting so easy for me to work on this car. All of what you see here is about 7-8hrs MAX of work so far. Before you guys look at all of these pics I am interested in ideas of colors for the suspension and engine bay. I am going to have every suspension component and subframes professionally blasted and powdercoated. I am thinking the subframes one color, suspension stuff another and the engine bay a third color maybe black/gold flake engine bay. i am kinda leaning toward a black/gold/gunmetal theme for the car. Let me know guys! Ok pics now hehe
Dash out and getting started on teardown


These grounds were on a bolt to the head that was not tight at all.(picard myself) this certainly was not helping my electrical issues.

Oh haiii engine harness on my seat

Luke L is obv on top of the wiring situation and teaching me oh so much. I am getting pretty decent at this stuff. We made a full page of labels and an index for when we start remaking a new harness. It is all going to be in the pretty loom newman uses that I <3. I am stoked.


All starting to come out!


Engine/trans could come out right now it is just sitting in there right now. I had to take the mounts/subframe out to get the headers out. I am going to slap the subframe back in tomorrow though so that the car can be a roller and we can get started on building the turbo kit while I wait for my new motor.


Entire harness out!


Jus chillin in there


Enjoy
Quick summary:
I built a cam-only ls1/FD and ran some 10s last season, loved it. Decided I wanted more power and always enjoyed turbo driveability. Then I got a little carried away and the rest is in the pictures. Basically decided to redo the entire car. It has been a blast so far and hope to get it out and to the track in the next few months.
Sorry for a million pics at once,hope you have some time to kill.
Winter Build
Ok so I already got started on the winter build. Im not going to lie after all of the issues last year and working on it so much it is just getting so easy for me to work on this car. All of what you see here is about 7-8hrs MAX of work so far. Before you guys look at all of these pics I am interested in ideas of colors for the suspension and engine bay. I am going to have every suspension component and subframes professionally blasted and powdercoated. I am thinking the subframes one color, suspension stuff another and the engine bay a third color maybe black/gold flake engine bay. i am kinda leaning toward a black/gold/gunmetal theme for the car. Let me know guys! Ok pics now hehe
Dash out and getting started on teardown
These grounds were on a bolt to the head that was not tight at all.(picard myself) this certainly was not helping my electrical issues.
Oh haiii engine harness on my seat
Luke L is obv on top of the wiring situation and teaching me oh so much. I am getting pretty decent at this stuff. We made a full page of labels and an index for when we start remaking a new harness. It is all going to be in the pretty loom newman uses that I <3. I am stoked.
All starting to come out!
Engine/trans could come out right now it is just sitting in there right now. I had to take the mounts/subframe out to get the headers out. I am going to slap the subframe back in tomorrow though so that the car can be a roller and we can get started on building the turbo kit while I wait for my new motor.
Entire harness out!
Jus chillin in there
Enjoy
 03-19-2011, 12:50 AM
#2
Got some work done today. Spent a good amount of time just cleaning things really. Hopefully this week I might finally get the suspension and subframes into powdercoat. Cleaned then installed oil pan, cleaned then installed intake manifold, painted valve covers(thanks pat) guys if you don’t like this paint you have to see it in person. SO HOT! Everything is going to be black and gold now in the engine and suspension.
I changed the cam in my other motor for it to go to its new owner as well. Too easy.


This is a 1 liter dr pepper not a 20oz. Still dwarfs it.


A few parts came back from powder. Nothing is final installed yet just in place. A ton more is at powder and I just took the throttle body apart tonight to go to powder as well. Most everything else going on the motor is going to be the grey color covering and “relaxing” the gold if you will. I am VERY happy with how this stuff looks in person to say the least.
Then I spent many hours getting the wheel wells and under body ready for paint. The car is literally down to a unibody shell right now. A little intimidating……but not really haha. A ton a good old labor getting these wheel wells and such to almost ready for paint. Oof


I changed the cam in my other motor for it to go to its new owner as well. Too easy.
This is a 1 liter dr pepper not a 20oz. Still dwarfs it.
A few parts came back from powder. Nothing is final installed yet just in place. A ton more is at powder and I just took the throttle body apart tonight to go to powder as well. Most everything else going on the motor is going to be the grey color covering and “relaxing” the gold if you will. I am VERY happy with how this stuff looks in person to say the least.
Then I spent many hours getting the wheel wells and under body ready for paint. The car is literally down to a unibody shell right now. A little intimidating……but not really haha. A ton a good old labor getting these wheel wells and such to almost ready for paint. Oof
03-19-2011, 12:52 AM
#3
Took apart some axles today. These are the custom centers to ford inners and mazda outers that I run to my 8.8” rear setup. I am having these all powdered as well and changing the inners. Nothing on this build will be overlooked!!! Ok some will but im trying my best haha. Also I am aware one of the Ford inners is not pictured.


Ok now back onto some oh so pretty stuff.
I had already take out every single bushing, ball joint, and bearing that I could which led me to this…in my trunk!


Then everything blasted and now it is all at powder and let me tell you these guys(Suzukiriderman and spam16v) are staying ahead of my schedule which is quite hard to do.

So I went out to clean up the garage before I get started on installing 220/gas and all new power out there tomorrow for the new compressor/welder. Figured I would snag a few pics of some stuff.
100% ready for paint. Just took one pic for ya. The wheel wells and underbody are all so clean you could eat off of it.

Front/Rear subframes, Trans brace, 8.8” mount back from powder. Sorry I didn’t snag pics before I stacked it all together like this.


Wheel bearings, studs, caliper rebuild kits


New fuel rails

Adj alt bracket(warning might be on wrong just tossed it on lol)

Undercoat I am using and the gun with it.

New compressor

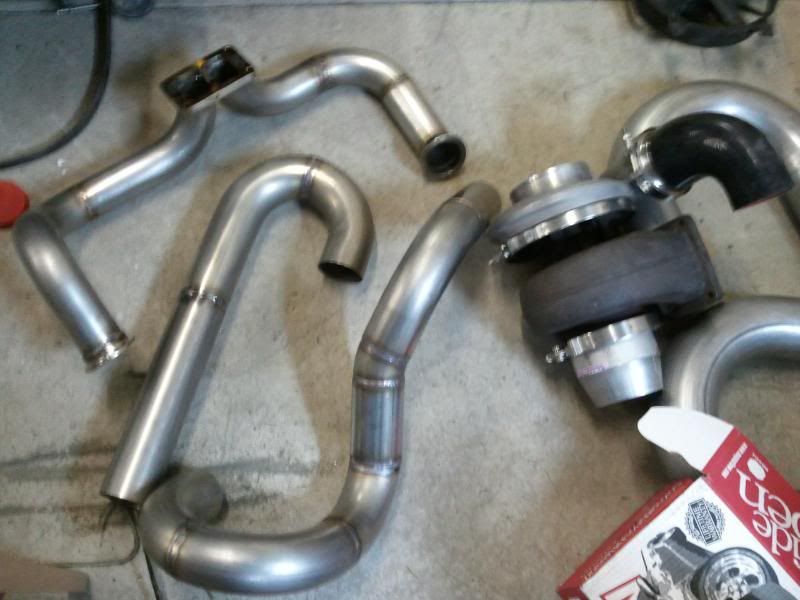
Everything came in to make the turbo kit, doing everything in stainless, didn’t feel like unpacking it all for a pic srry.


Long day! Paint tomorrow unless I wake up and have no motivation.
Ok now back onto some oh so pretty stuff.
I had already take out every single bushing, ball joint, and bearing that I could which led me to this…in my trunk!
Then everything blasted and now it is all at powder and let me tell you these guys(Suzukiriderman and spam16v) are staying ahead of my schedule which is quite hard to do.
So I went out to clean up the garage before I get started on installing 220/gas and all new power out there tomorrow for the new compressor/welder. Figured I would snag a few pics of some stuff.
100% ready for paint. Just took one pic for ya. The wheel wells and underbody are all so clean you could eat off of it.
Front/Rear subframes, Trans brace, 8.8” mount back from powder. Sorry I didn’t snag pics before I stacked it all together like this.
Wheel bearings, studs, caliper rebuild kits
New fuel rails
Adj alt bracket(warning might be on wrong just tossed it on lol)
Undercoat I am using and the gun with it.
New compressor
Everything came in to make the turbo kit, doing everything in stainless, didn’t feel like unpacking it all for a pic srry.
Long day! Paint tomorrow unless I wake up and have no motivation.
03-19-2011, 12:55 AM
#4
MOAR POWER!


Almost paint time!


Undercoat finally sprayed!!!


Some of the gold stuff that went to powder started coming back today. Looks amazing in person I just snapped a few quick pix and I had the spotlights on so it was reallllly bright. Second pic is closer to normal lighting. I am amazed with how much I loved the look. With the pearl gray subframes, wheels, calipers, black wheel wells and car I think it will all flow great.


Almost paint time!
Undercoat finally sprayed!!!
Some of the gold stuff that went to powder started coming back today. Looks amazing in person I just snapped a few quick pix and I had the spotlights on so it was reallllly bright. Second pic is closer to normal lighting. I am amazed with how much I loved the look. With the pearl gray subframes, wheels, calipers, black wheel wells and car I think it will all flow great.
03-19-2011, 12:56 AM
#5
Here is the progress as it stands on the LS1 engine harness.
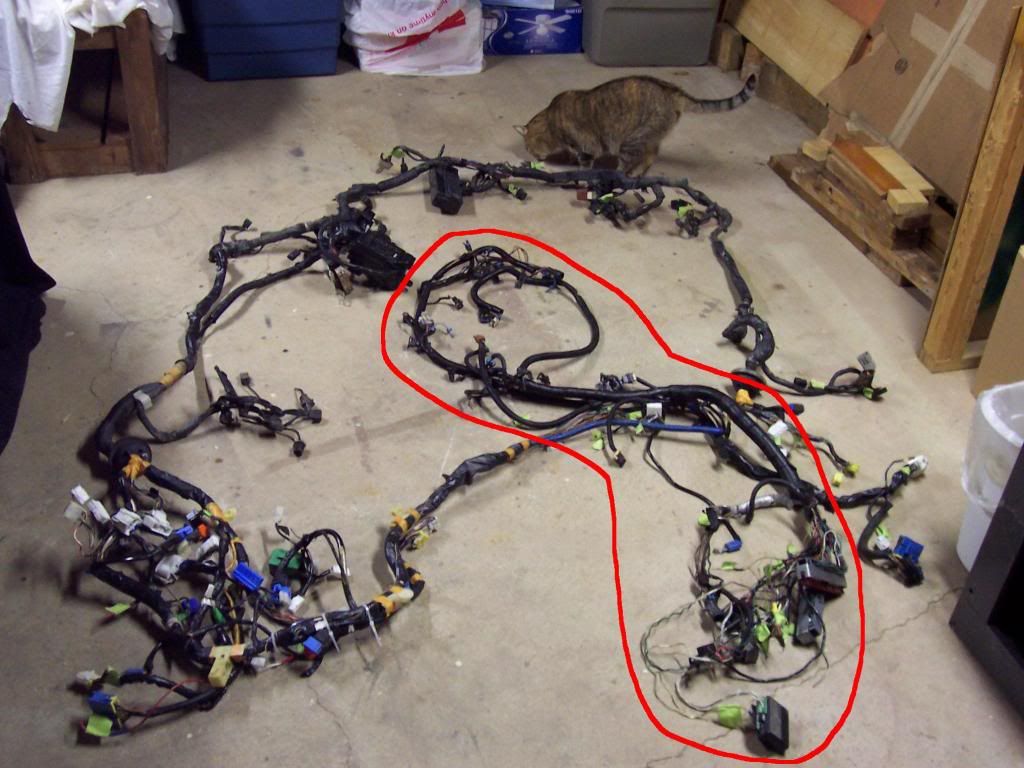
Drew and I knew of some issues when we pulled it out of the car...but, I uncovered more.
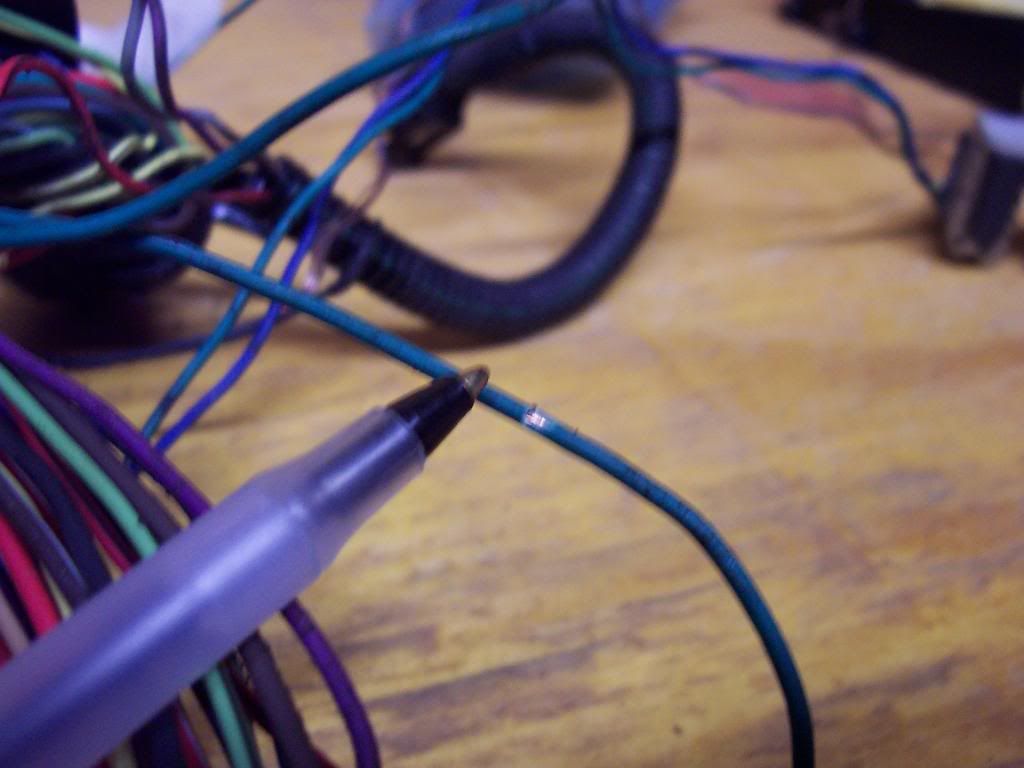
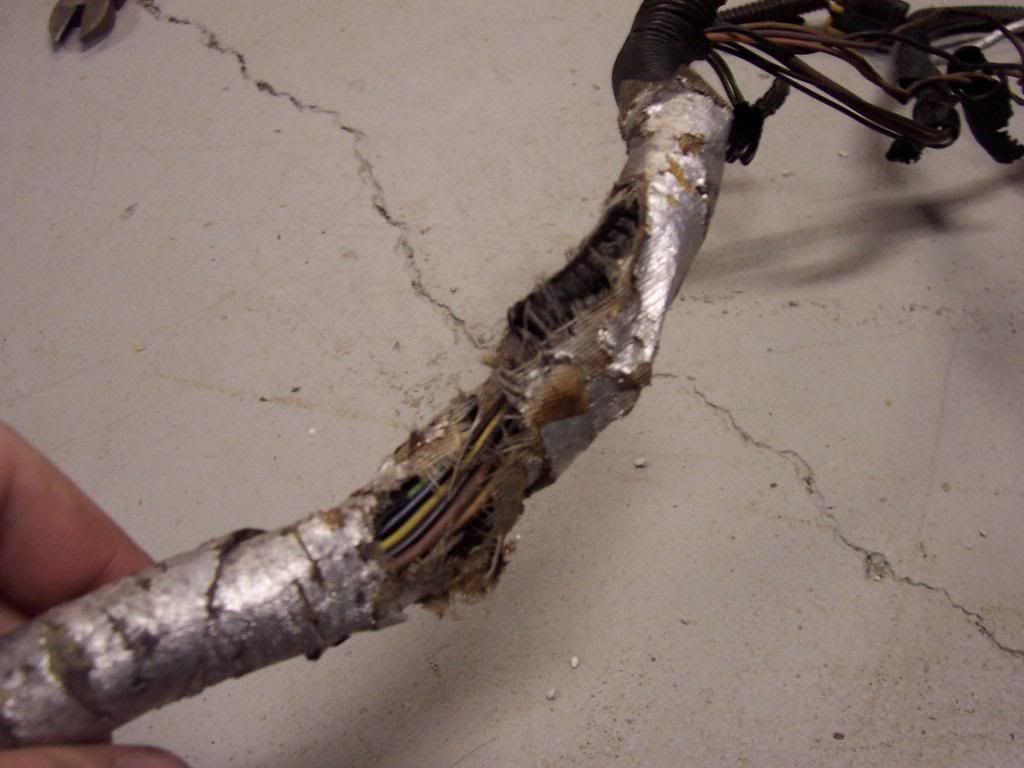
Exposed wires:
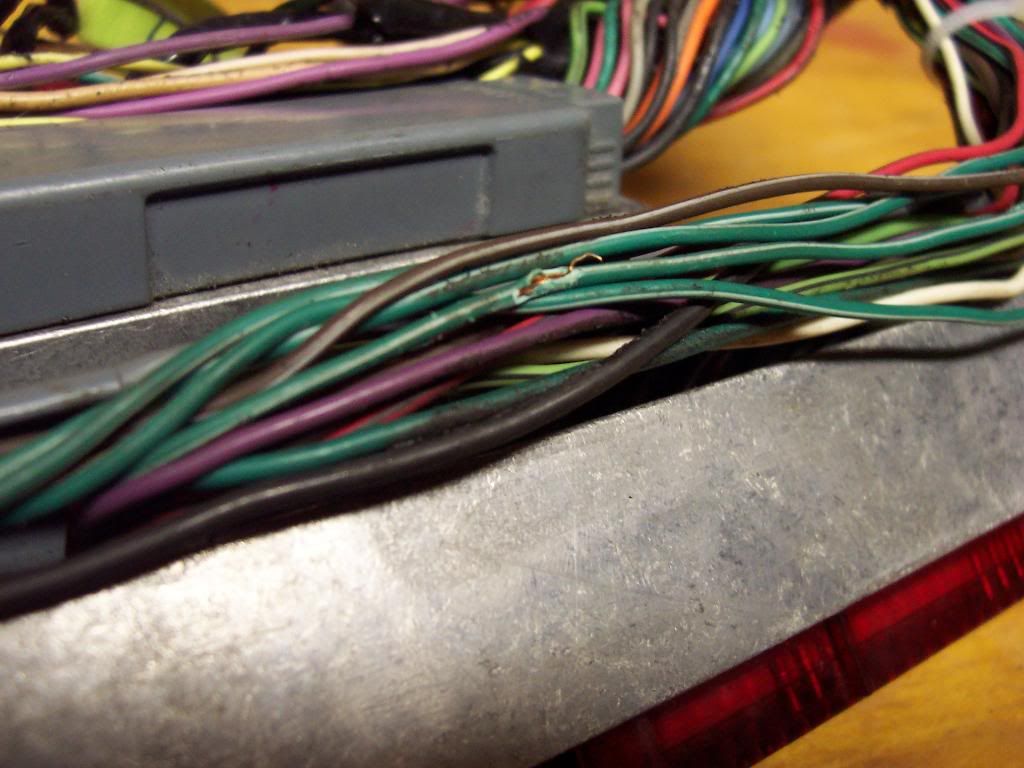
Good thing this does not power anything high voltage, oh wait:

Just to point out.....holes this small can lead to a completely torched car.
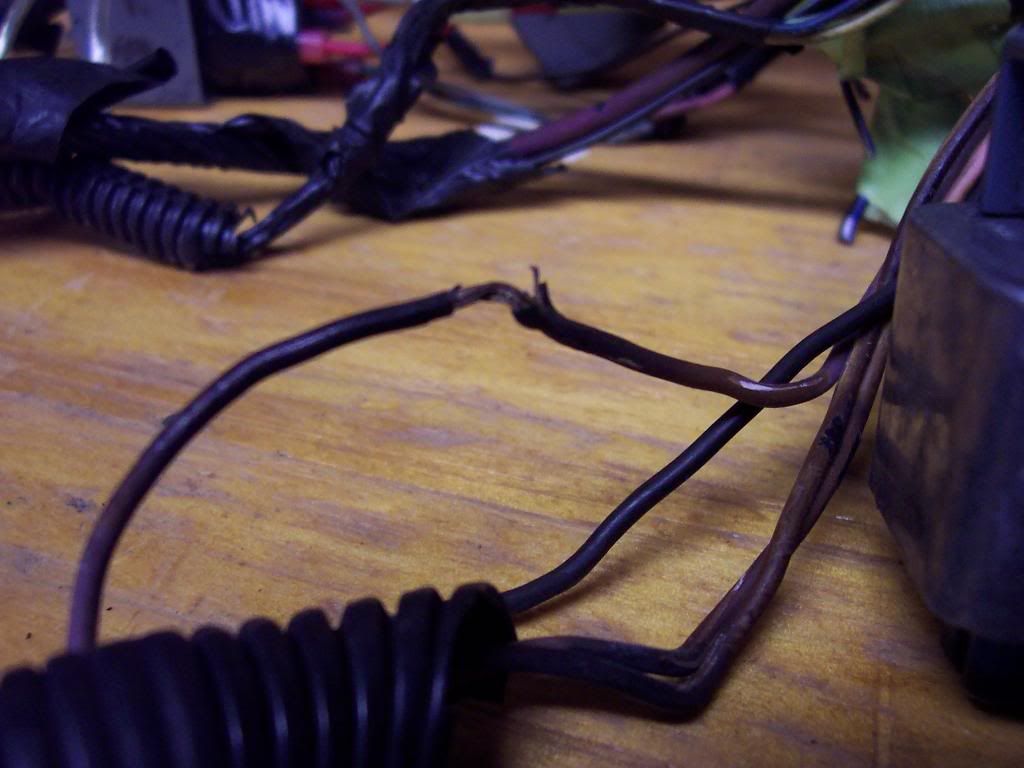
Broken wires suck the most because half the time you can't find what they went to very easily:

Melted wires:
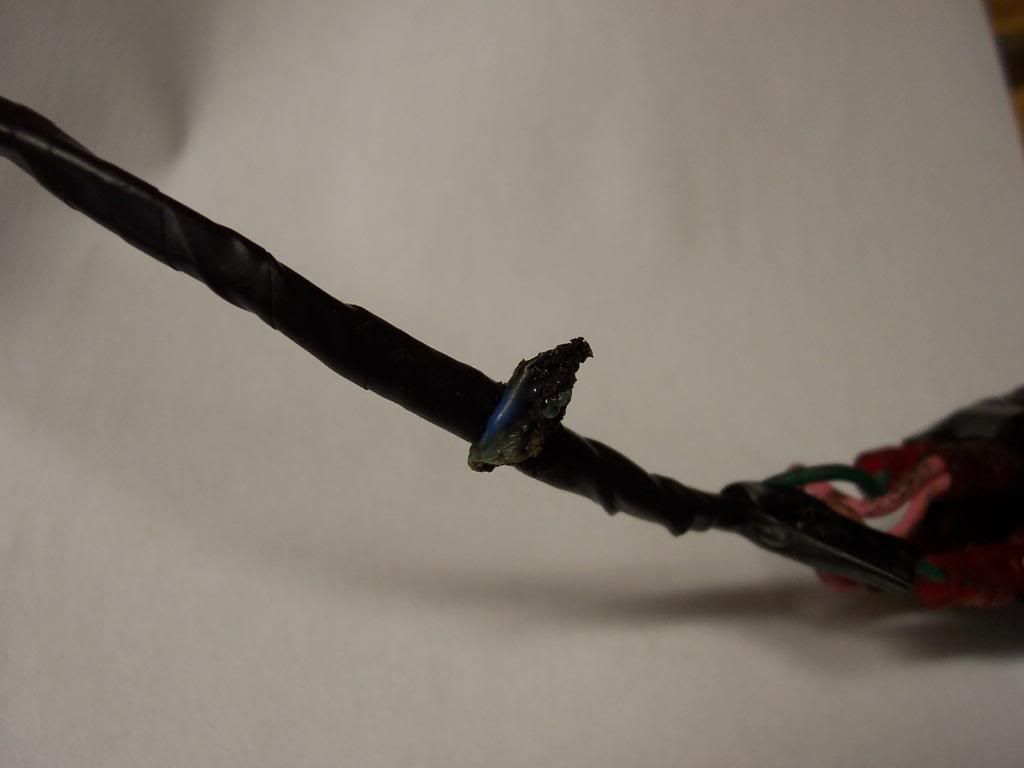

Umm, WTF..?!..This was all the same wire traced back to the main loom:
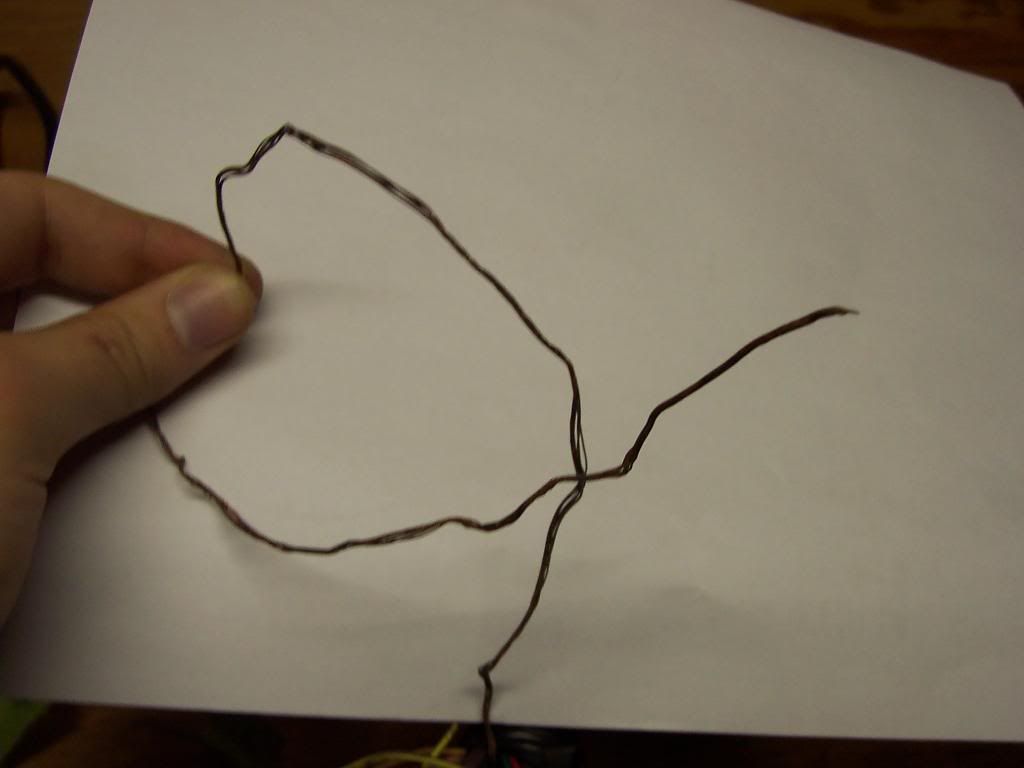
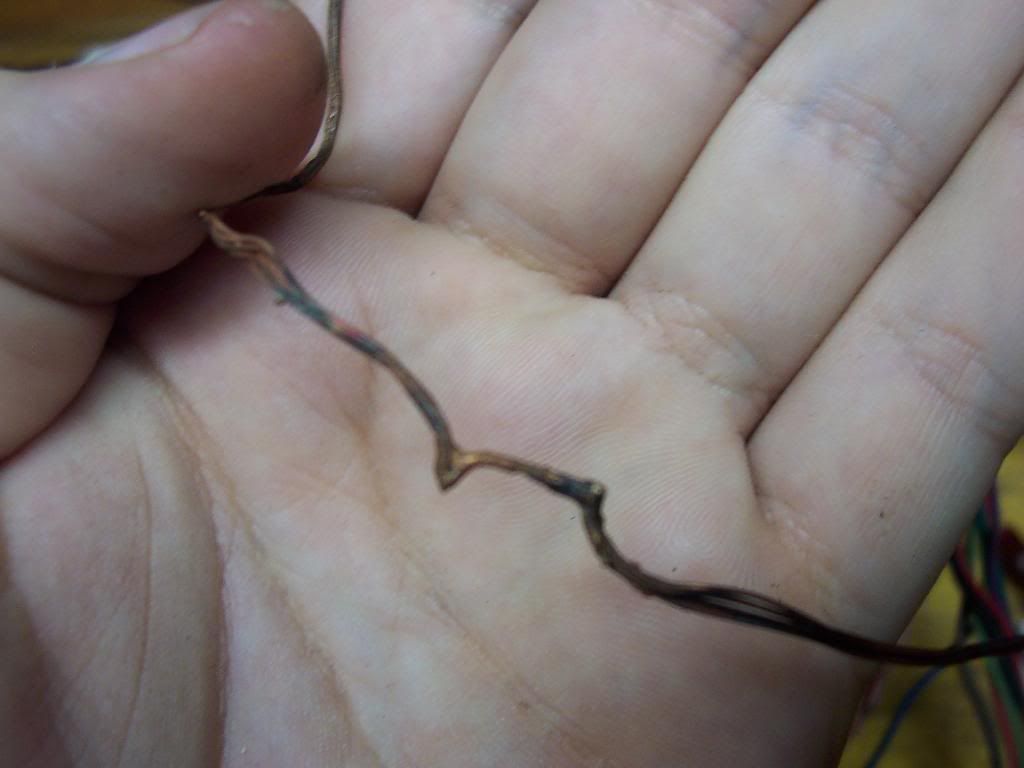


When I pulled out all the dead wire I had over 2 feet of singed, melted goodness:

Cool, hidden treasures:


MOAR hidden garbage:

I'll let the pictures do the talking:
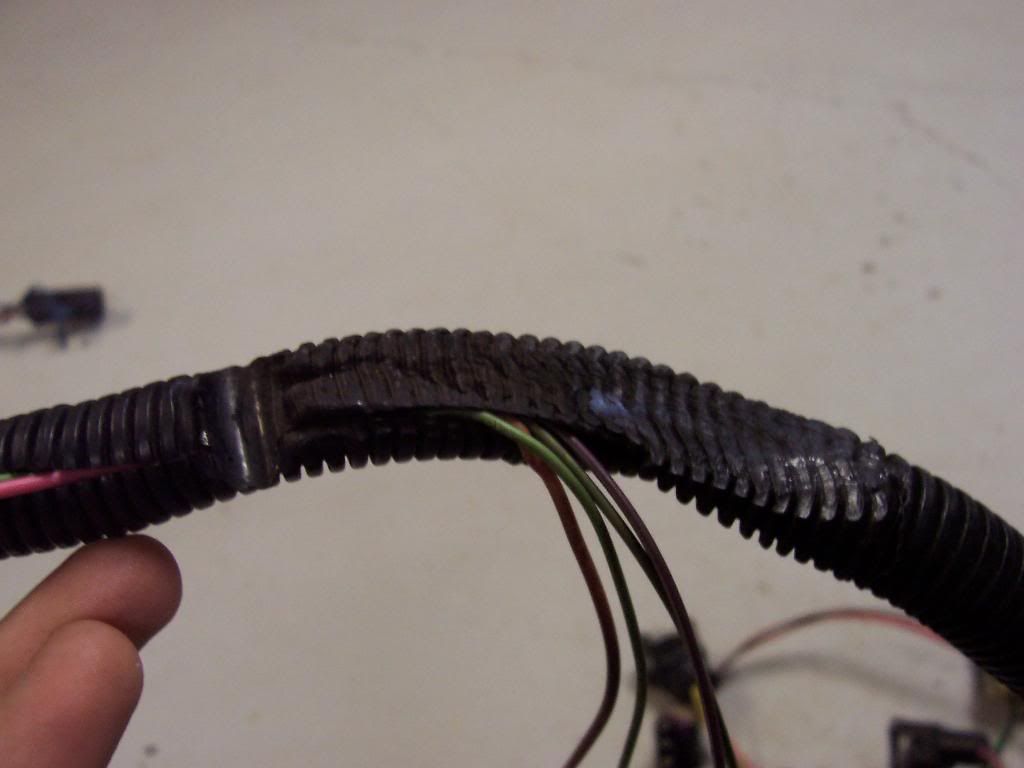

Other "problems" just involved horrid loom and massive amounts of electrical tape:
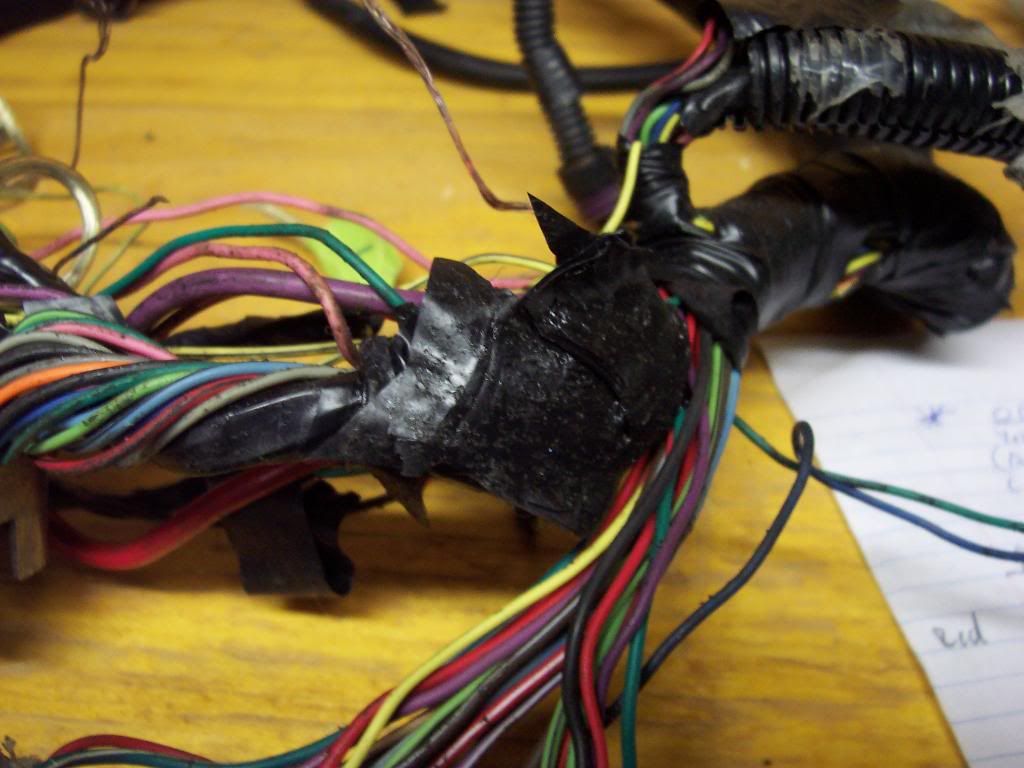
Now that all the issues have been identified I can begin fixing this debacle. The plan is to re-wire and re-loom the entire harness. Some connectors are being lengthened while others are being relocated. I spent the better part of the weekend replacing all the bad wiring. Right now I am about 18 hours into this harness on just stripping loom/tape, cleaning, inspecting and repairing.
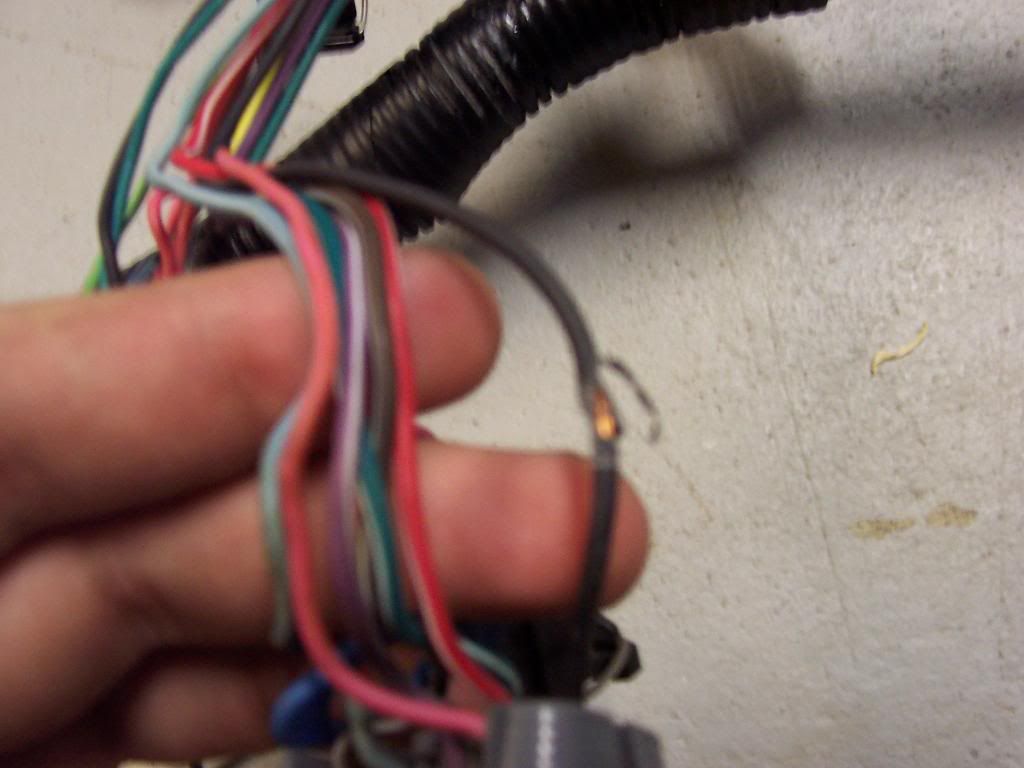
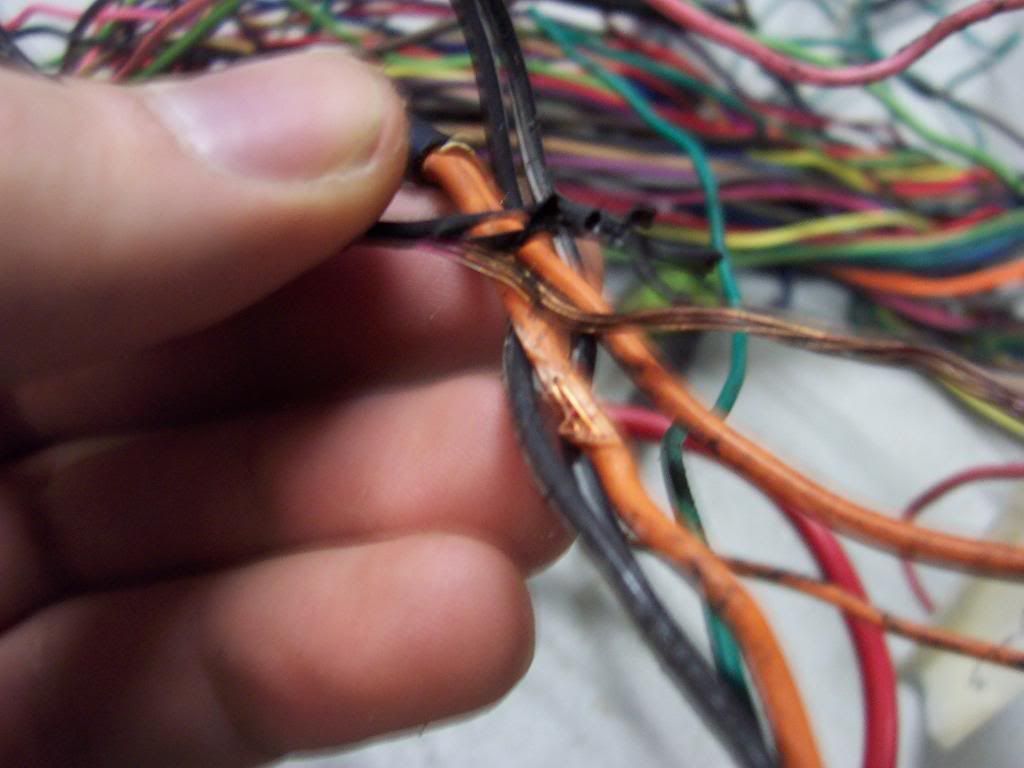
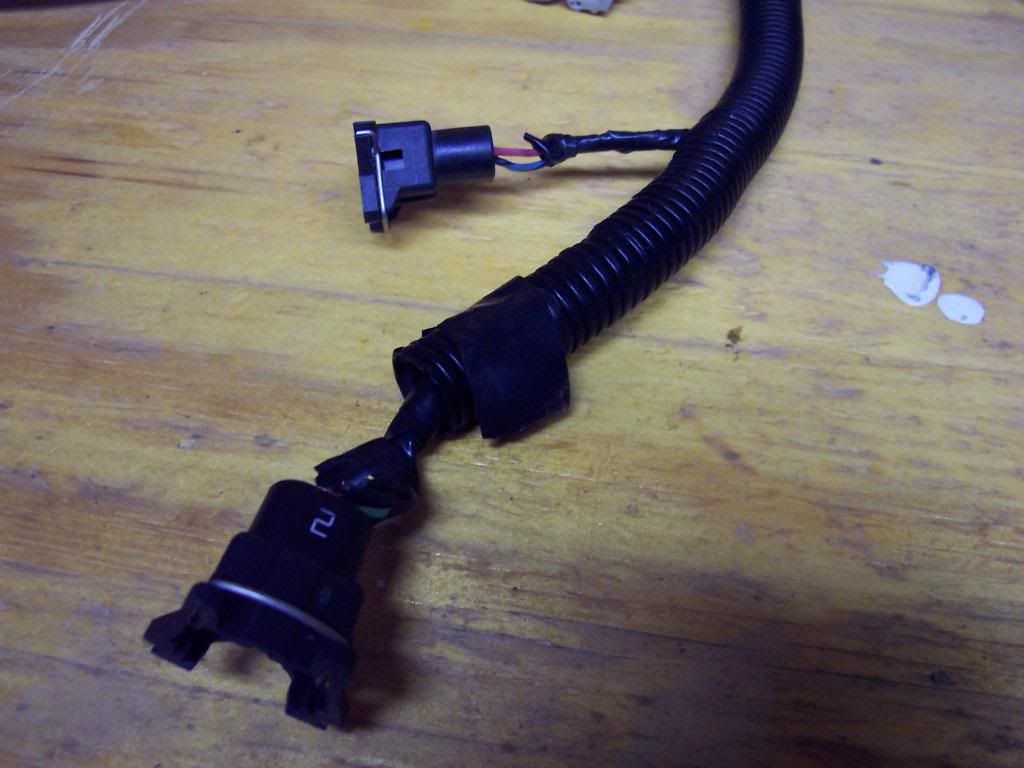
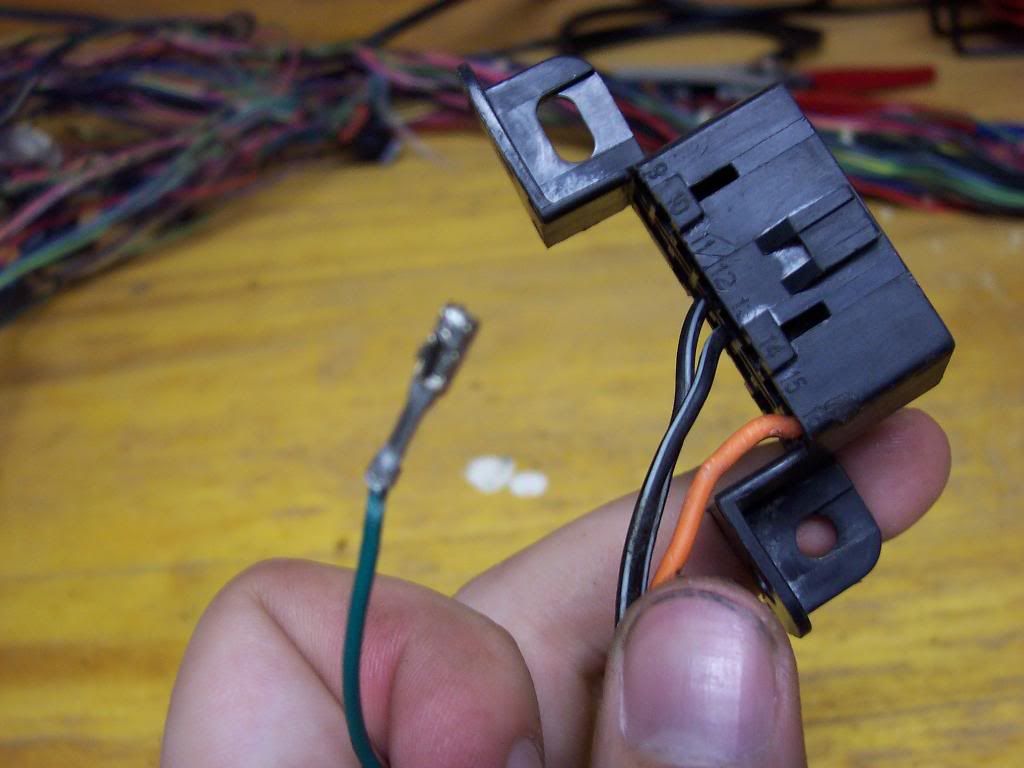
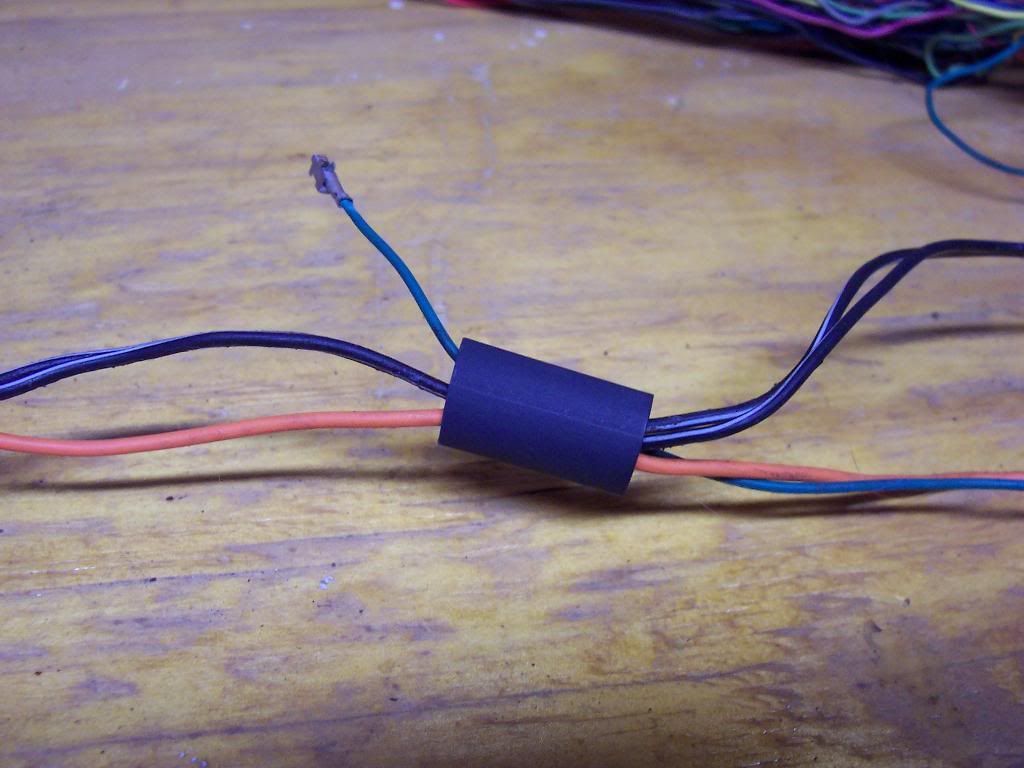
Here you can see the melted black/white wire and the exposed orange wire:
Due to re-looming the wire each end will be finished. Therefore, I need to get tubing on the wire I want to cover. For the wires that are not cut/damaged already simply remove the pins. Pins can be removed, usually. No need to cut wires.
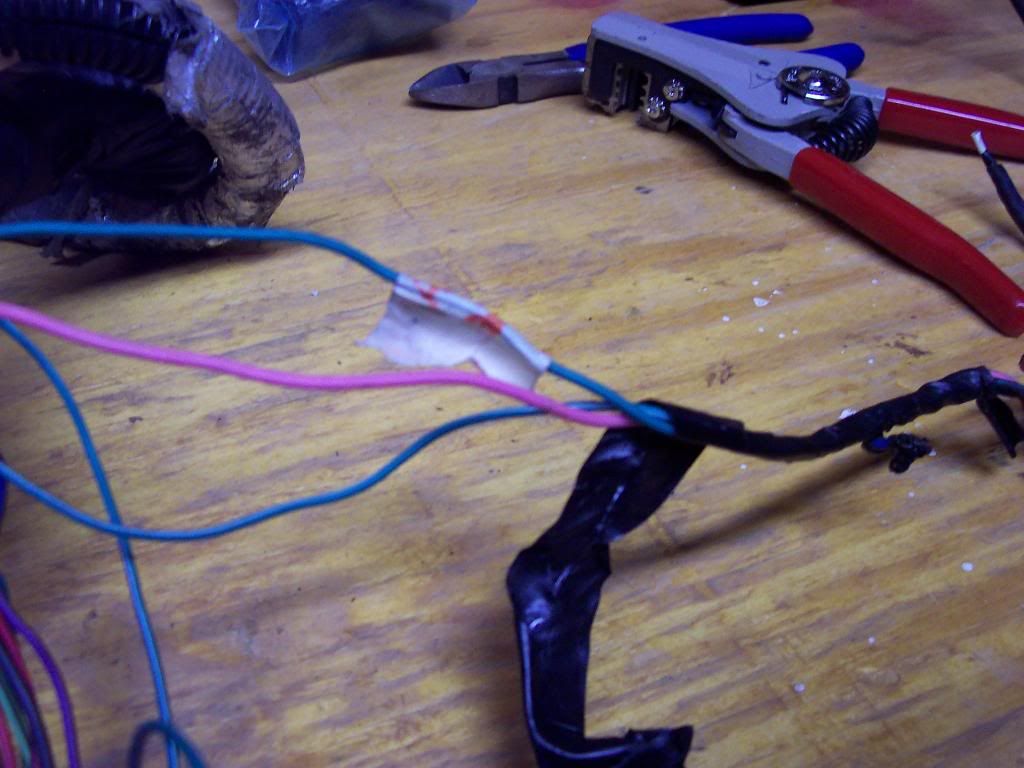
Slide main tubing on to cover the wire bundle that will get loomed:
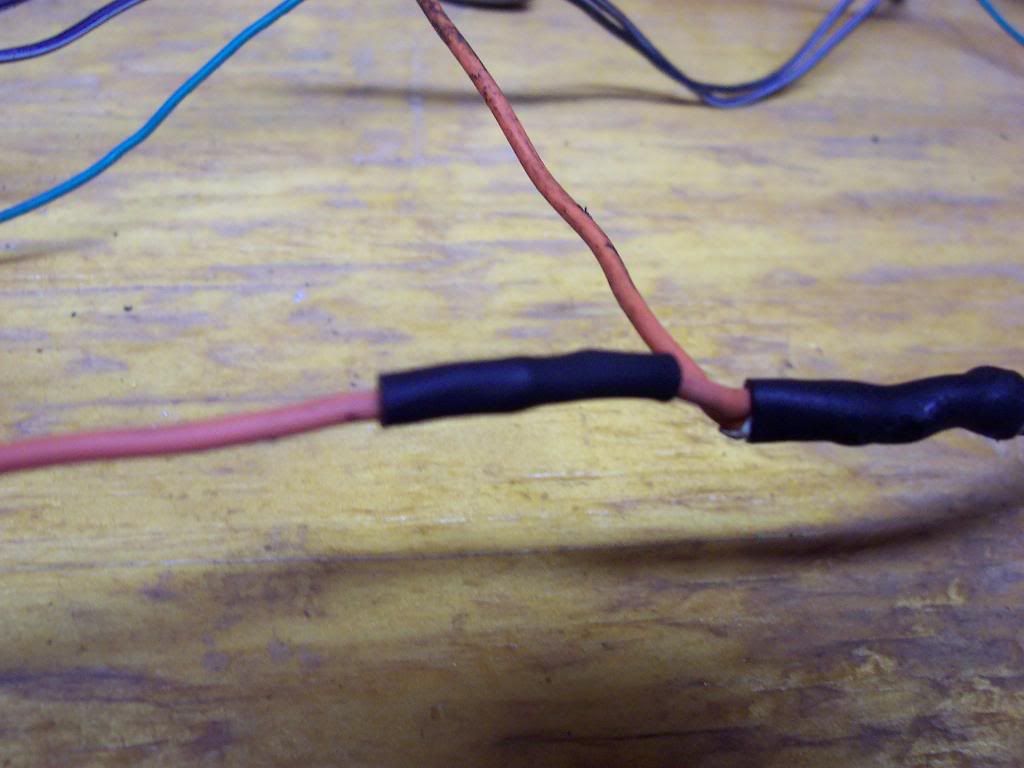
Cut exposed area of wire. Don't forget that every connection needs insulation so be sure to slide a piece of tubing on before you solder it. Then, re-strip for clean copper and wrap the wire. This is where I get the most questions/debate. Do me a favor, hook your index fingers together and pull. Yeah, STONGEST. *******. CONNECTION.

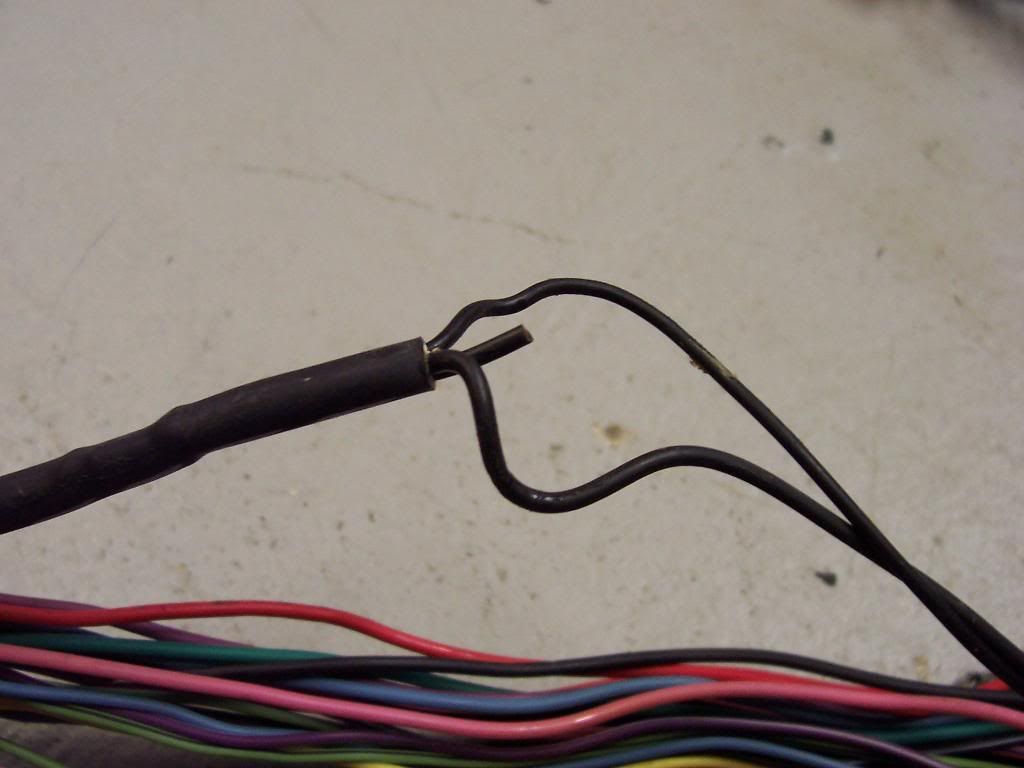
Then slide the tubing over the connection and shrink.
Drew and I knew of some issues when we pulled it out of the car...but, I uncovered more.
Exposed wires:
Good thing this does not power anything high voltage, oh wait:
Just to point out.....holes this small can lead to a completely torched car.
Broken wires suck the most because half the time you can't find what they went to very easily:
Melted wires:
Umm, WTF..?!..This was all the same wire traced back to the main loom:
When I pulled out all the dead wire I had over 2 feet of singed, melted goodness:
Cool, hidden treasures:
MOAR hidden garbage:
I'll let the pictures do the talking:
Other "problems" just involved horrid loom and massive amounts of electrical tape:
Now that all the issues have been identified I can begin fixing this debacle. The plan is to re-wire and re-loom the entire harness. Some connectors are being lengthened while others are being relocated. I spent the better part of the weekend replacing all the bad wiring. Right now I am about 18 hours into this harness on just stripping loom/tape, cleaning, inspecting and repairing.
Here you can see the melted black/white wire and the exposed orange wire:
Due to re-looming the wire each end will be finished. Therefore, I need to get tubing on the wire I want to cover. For the wires that are not cut/damaged already simply remove the pins. Pins can be removed, usually. No need to cut wires.
Slide main tubing on to cover the wire bundle that will get loomed:
Cut exposed area of wire. Don't forget that every connection needs insulation so be sure to slide a piece of tubing on before you solder it. Then, re-strip for clean copper and wrap the wire. This is where I get the most questions/debate. Do me a favor, hook your index fingers together and pull. Yeah, STONGEST. *******. CONNECTION.
Then slide the tubing over the connection and shrink.
03-19-2011, 12:57 AM
#6
Some more stuff from powder. Yes I even powdered my boor and hood hinges. This stuff looks SOOOOO good in person. I am going to start putting the car back to being a roller this weekend probably then start making this darn turbo kit. Oh where does the time go.


Now to show some contrast of the colors together.


Sooooooooo sorry I didn’t get any in progress pics I was ummmm busy. Motor and trans installed. The subframe and everything look SO GOOD. Under the car looks mint as hell. My new bellhousing will be powdercoated and I want to make the trans look cleaner as well. As always I am taking pics at night with limited lighting so I did some with and without flash to show the colors.


Well I wasn’t able to get as much as I wanted done this week mostly due to laziness but here is some progress pics. I need to rebuild the calipers and figure out what I am doing with the axle boot situation. Then just replace the tie rod boots and we are good to go. Maybe by next weekend we shall see.
After I already started hitting the rear with a wire wheel for awhile


Painted 1st coat then 2nd using nason chassis coat


SS brake lines for the entire car. Yeahhhh Boieeeee obv zip tied to the old ones


Powdercoated driveshaft and oh yeah I pressed all of my bushings back in. All delrin and the pillow *****.


Wiring!


Boot removal then I clean, regrease and replace the boots


Starting to setup the rear subframe

Then I got distracted


Well I have really been slacking on the pics but I have been working on the car some.
Now to show some contrast of the colors together.
Sooooooooo sorry I didn’t get any in progress pics I was ummmm busy. Motor and trans installed. The subframe and everything look SO GOOD. Under the car looks mint as hell. My new bellhousing will be powdercoated and I want to make the trans look cleaner as well. As always I am taking pics at night with limited lighting so I did some with and without flash to show the colors.
Well I wasn’t able to get as much as I wanted done this week mostly due to laziness but here is some progress pics. I need to rebuild the calipers and figure out what I am doing with the axle boot situation. Then just replace the tie rod boots and we are good to go. Maybe by next weekend we shall see.
After I already started hitting the rear with a wire wheel for awhile
Painted 1st coat then 2nd using nason chassis coat
SS brake lines for the entire car. Yeahhhh Boieeeee obv zip tied to the old ones
Powdercoated driveshaft and oh yeah I pressed all of my bushings back in. All delrin and the pillow *****.
Wiring!
Boot removal then I clean, regrease and replace the boots
Starting to setup the rear subframe
Then I got distracted
Well I have really been slacking on the pics but I have been working on the car some.
03-19-2011, 12:58 AM
#7
Painted the rear hatch and all the jambs but only have pics of the hatch.


Started putting the suspension together to make it a roller. Right after I put it down I realized I put the rear suspension upper a-arm on upside down. Two years in a row I did this haha. Hence the rear being up a lil high. I will fix it in a few days when I have some time. Only takes a few minutes.


Roller time!


Mr. Turbociv getting some work going on the turbo kit. Sadly we have to wait on a few more bends. Also while there I swapped the rear suspension piece I had on upside down and it is sitting nice and low again.(no pic srry)


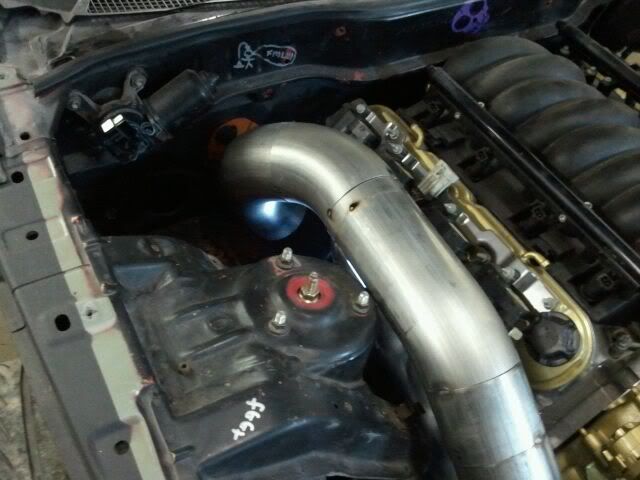
Lil work done today


MOAR!

This given an idea of how much room I have for the fans. Should be plenty.

Then……look how pretty.


Started putting the suspension together to make it a roller. Right after I put it down I realized I put the rear suspension upper a-arm on upside down. Two years in a row I did this haha. Hence the rear being up a lil high. I will fix it in a few days when I have some time. Only takes a few minutes.
Roller time!
Mr. Turbociv getting some work going on the turbo kit. Sadly we have to wait on a few more bends. Also while there I swapped the rear suspension piece I had on upside down and it is sitting nice and low again.(no pic srry)
Lil work done today
MOAR!
This given an idea of how much room I have for the fans. Should be plenty.
Then……look how pretty.
Trending Topics
03-19-2011, 12:58 AM
#8
Here ya go. Lots of new issues,lots more to fab. Coils are getting moved. Probably doing electric ps. Going to work on fans this weekend
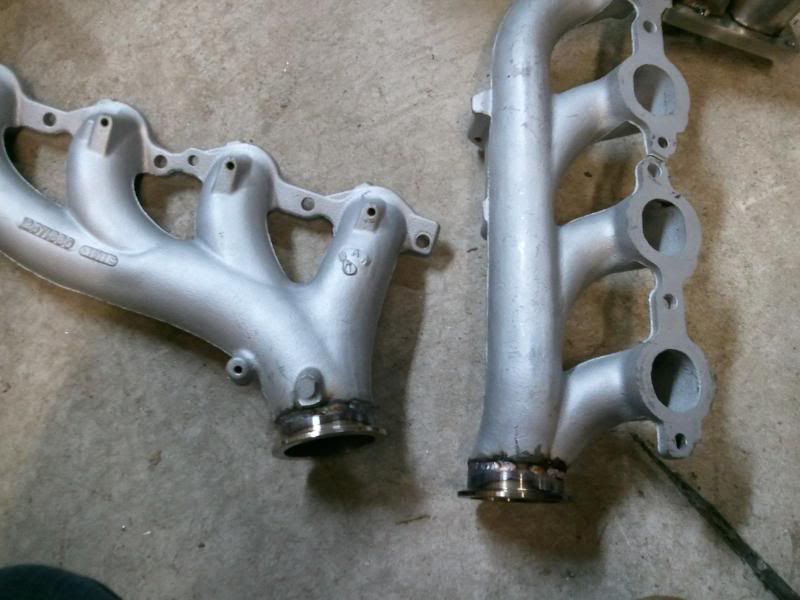
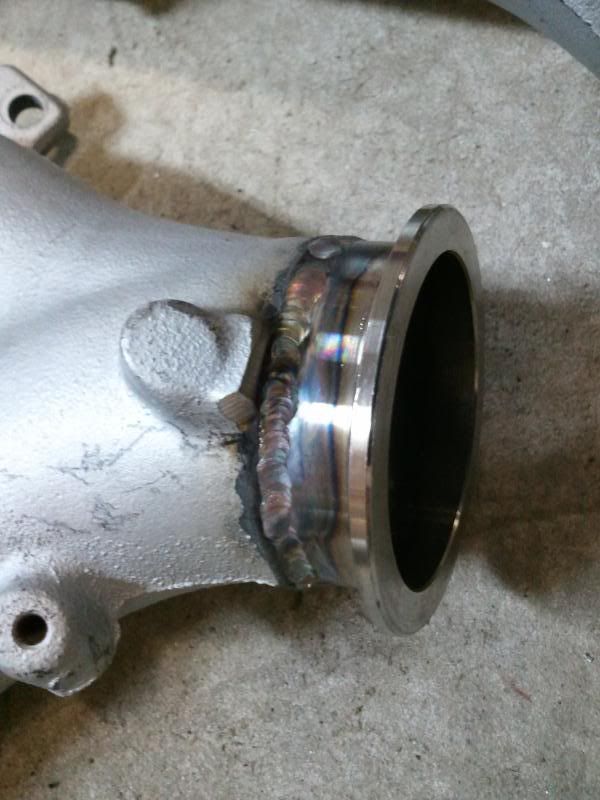
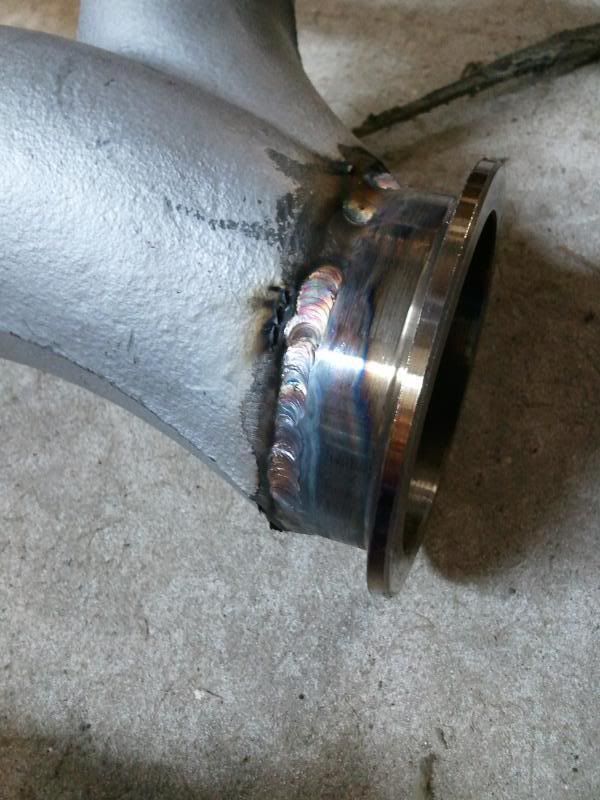
y pipe almost complete. just need to weld up the collector.
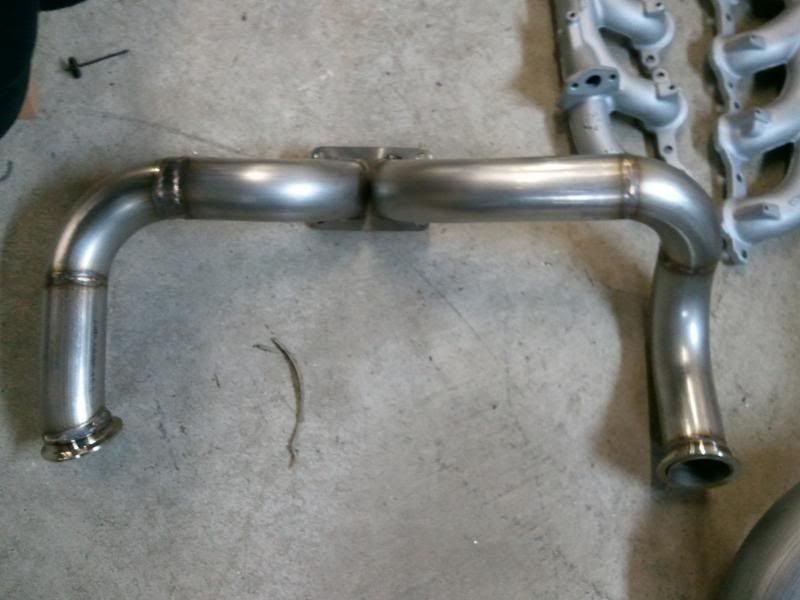
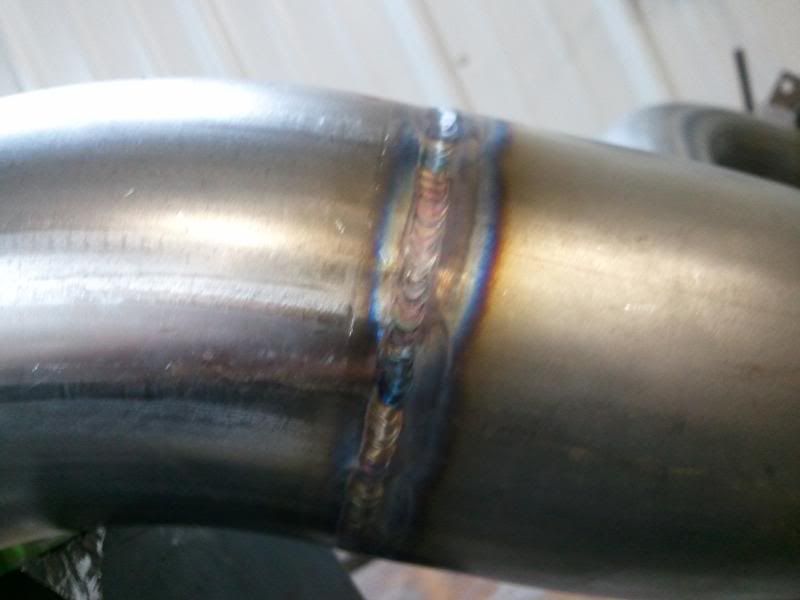
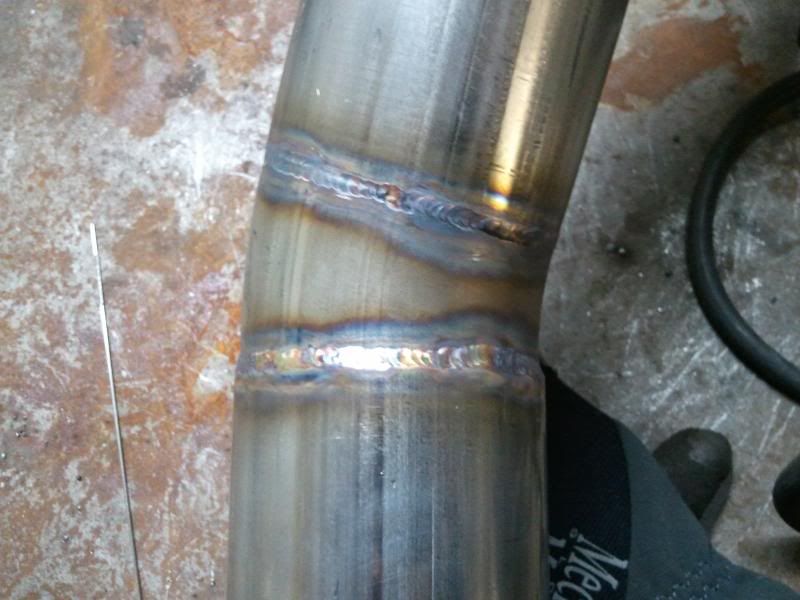
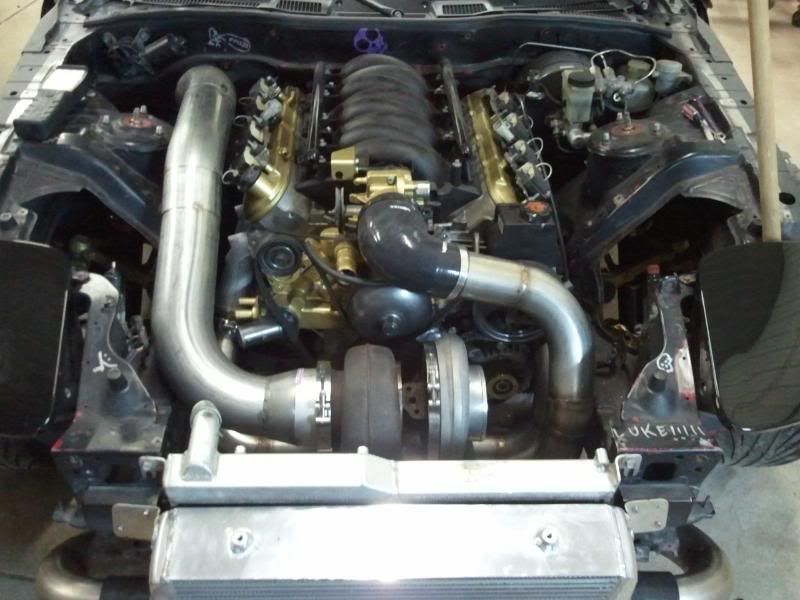
Some pics I took while at the shop last night. I am starting to get excited and glad to finally give you guys some underside shots although I had to take these on my phone.


Mmmmm exhaust looking good under there.

y pipe almost complete. just need to weld up the collector.
Some pics I took while at the shop last night. I am starting to get excited and glad to finally give you guys some underside shots although I had to take these on my phone.
Mmmmm exhaust looking good under there.
 03-19-2011, 01:35 AM
#13
On The Tree
iTrader: (2)

Join Date: Jun 2006
Location: Peoria,IL
Posts: 177
Likes: 0
Received 0 Likes
on
0 Posts
You must have posted the 2nd set of pics while I was posting. You have plenty of room by your subframe the way you routed your downpipe. LOL...
Your car is going to be a screamer. And I like the black and gold.
Nice work.
Your car is going to be a screamer. And I like the black and gold.
Nice work.
03-19-2011, 09:41 AM
#15

That wiring reminds me of my harness. EVeryone wondered why I just ended up going with an aftermarket harness.. well even though the beat one worked I was always having intermitent issues because of nicked crushed loose wires
03-19-2011, 05:13 PM
#18

Way to fully go thru the car! Looks awesome.
Are those truck manifolds?
What size turbo (compressor wheel and turbine wheel?) A/R on the hot side?
What size injectors are you running?
Looks great so far! What a rebirth that car has gone thru! Nice job.

Are those truck manifolds?
What size turbo (compressor wheel and turbine wheel?) A/R on the hot side?
What size injectors are you running?
Looks great so far! What a rebirth that car has gone thru! Nice job.
 03-19-2011, 07:15 PM
#20

Yes they are truck manis
It is a modified S480, don't have the specs handy.
#80lbs injectors
haha as always there is no making everyone happy. I knew it would be hard to read though since i was copying over so much.