
How To: Make prostar caps not look so goofy and long!
 03-30-2009, 09:50 PM
#1
TECH Apprentice
Thread Starter
iTrader: (8)

Join Date: Sep 2004
Location: Springfield/Charleston, IL
Posts: 333
Likes: 0
Received 0 Likes
on
0 Posts

Wasn't sure if anyone else had thought about this before and didn't know if there was a how-to yet, but here's my contribution to the site if not.
So compared to the greg welds, the prostar caps stick out really far and if I run the Prostar/GW combo I was really irritated at the center cap on the Prostar not matching that of the GW wheel at all.... So here's a simple solution using some tape and a mini hacksaw ($5.40 total expense).
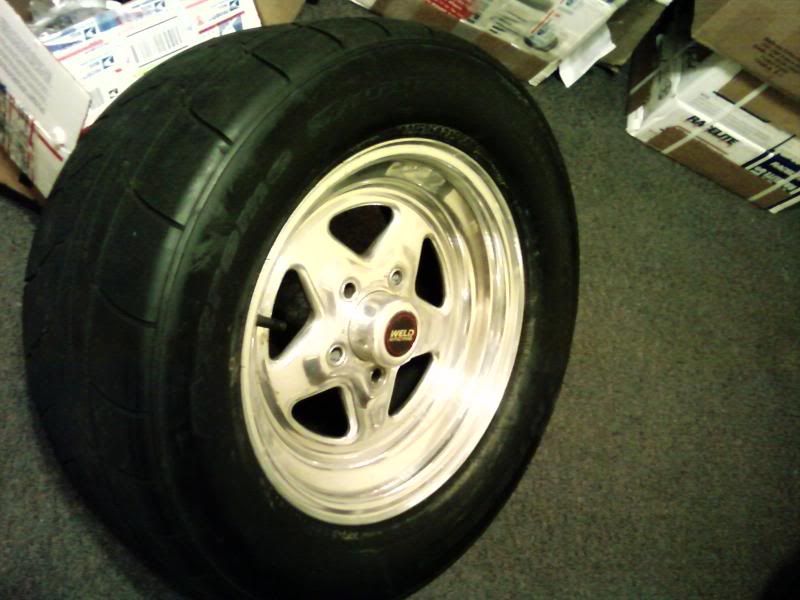
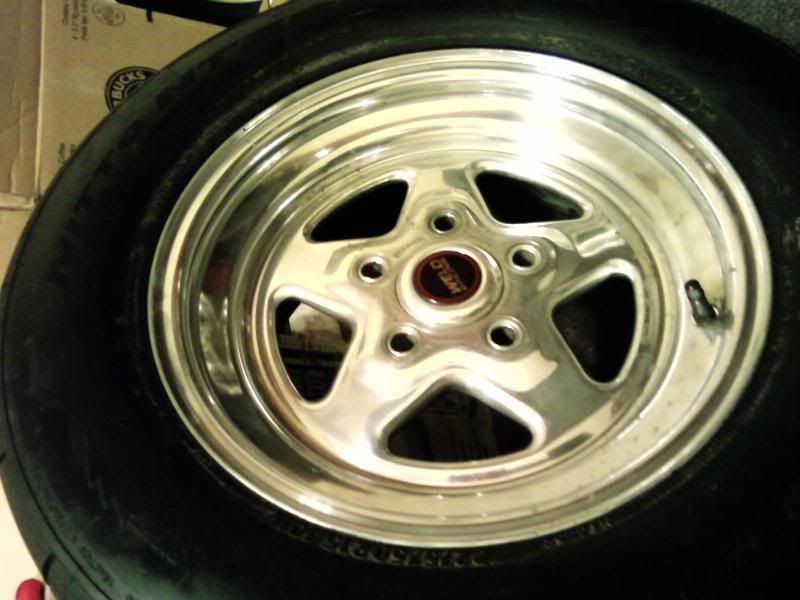
First off here's how the prostar cap looked before on the wheel, notice how far out the cap extends past the face of the wheel, yuck...
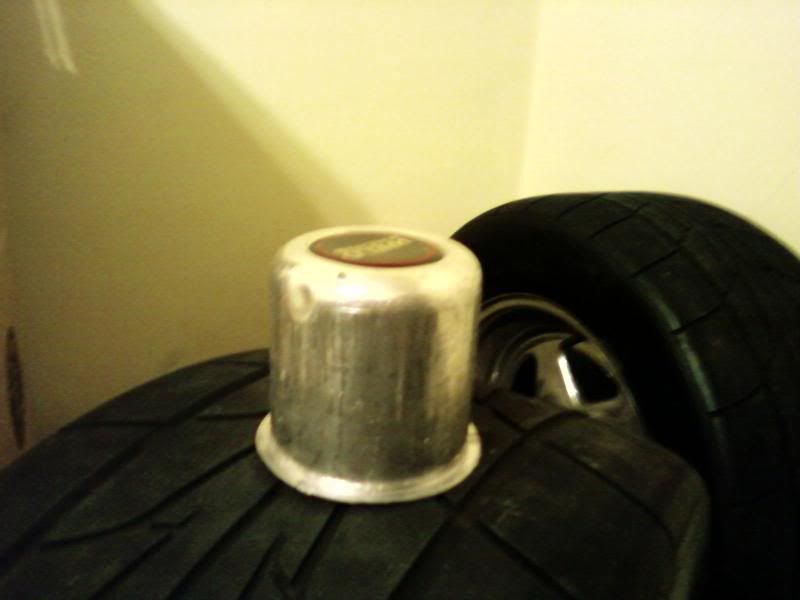
Here's how the cap looks off the wheel, notice how long it is...
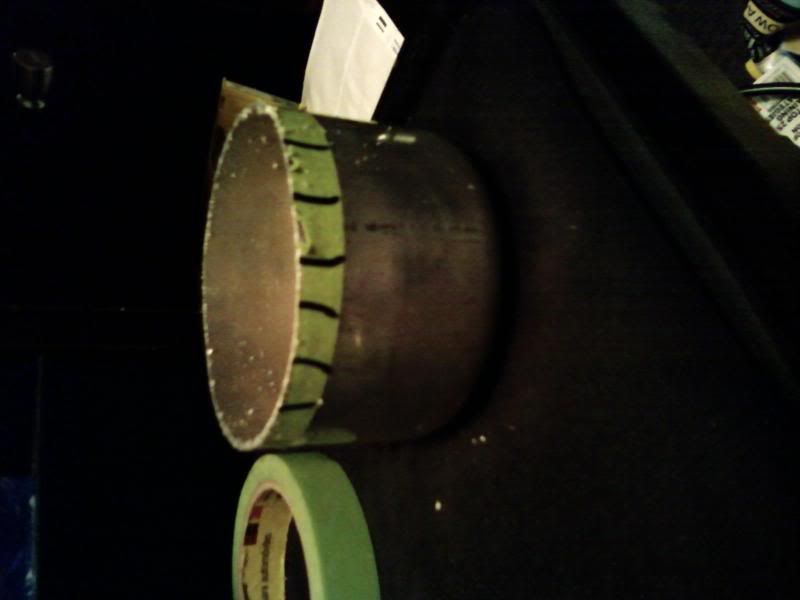
STEP 1: Using standard size masking tape start at the base of the cap (where the flange is) and go all the way around with the tape, then make another round of tape right next to that one...

STEP 2: Make your cut through the cap midway on the second portion of tape.. It will look like this when done (took off about 1 1/8th inch from the cap in total). When done mark lines perpendicular to the tape about every 1/2" or 3/4" apart or so
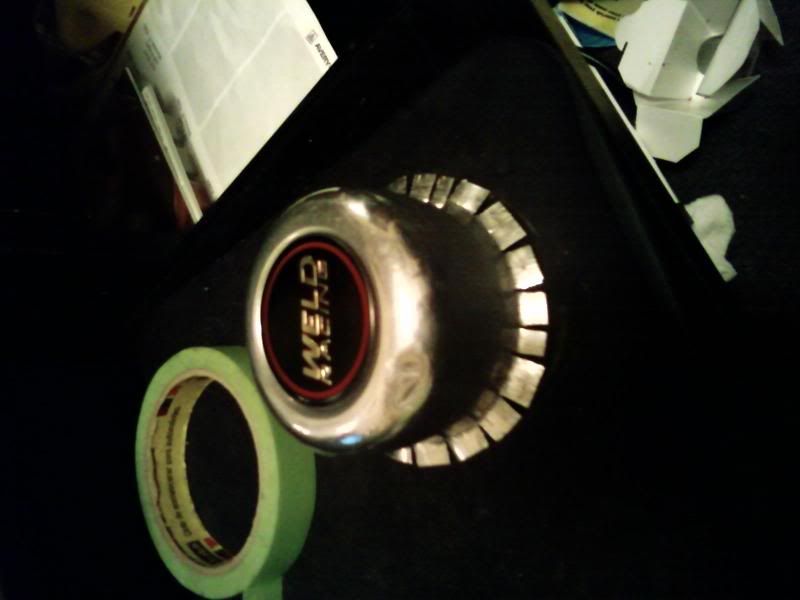
Step 3: Cut on the lines you've made, then with a pair of pliers bend back the flaps to form the new flange.
Next place the cap back in the wheel and this is the result, a nicer flush cap that only sticks out 1/4" or so and looks much cleaner than the huge hunk of a cap that it was before!
Can't wait to mount them and see how they look!
So compared to the greg welds, the prostar caps stick out really far and if I run the Prostar/GW combo I was really irritated at the center cap on the Prostar not matching that of the GW wheel at all.... So here's a simple solution using some tape and a mini hacksaw ($5.40 total expense).
First off here's how the prostar cap looked before on the wheel, notice how far out the cap extends past the face of the wheel, yuck...
Here's how the cap looks off the wheel, notice how long it is...
STEP 1: Using standard size masking tape start at the base of the cap (where the flange is) and go all the way around with the tape, then make another round of tape right next to that one...
STEP 2: Make your cut through the cap midway on the second portion of tape.. It will look like this when done (took off about 1 1/8th inch from the cap in total). When done mark lines perpendicular to the tape about every 1/2" or 3/4" apart or so
Step 3: Cut on the lines you've made, then with a pair of pliers bend back the flaps to form the new flange.
Next place the cap back in the wheel and this is the result, a nicer flush cap that only sticks out 1/4" or so and looks much cleaner than the huge hunk of a cap that it was before!
Can't wait to mount them and see how they look!
 03-31-2009, 12:49 AM
#4
TECH Apprentice
iTrader: (1)

Join Date: Sep 2007
Location: Orange Park (JAX)
Posts: 351
Likes: 0
Received 0 Likes
on
0 Posts
however that will throw the balance of the tire off... it was designed like that to keep the centrifugal force level.
i'm just kidding...i made that up.
i'm just kidding...i made that up.
 I started reading that and said to myself what the **** is this guy on!! Anyway good job on the caps looks much better
Trending Topics
 04-01-2009, 10:08 AM
#14
TECH Apprentice
Thread Starter
iTrader: (8)
Join Date: Sep 2004
Location: Springfield/Charleston, IL
Posts: 333
Likes: 0
Received 0 Likes
on
0 Posts
Me too! But we just got snow here over the weekend and I still need to grind my rear calipers for the prostars going out back..
 04-02-2009, 11:08 AM
#16
here are the pics, also chopped the front Center caps to be shorter..... now im undecided whether to chop the rear ones or not. i think i like those to be long and the front short, im going to end up re-painting the rear wheels the next nice day we have. just not happy with them. also have to polish them anyway


