


faux CF thread?
yeah I just wrapped my laptop mouse with it and it came out great. the mouse had a lot of curves and places to tuck in but the material meet its demands. This 3M vinyl is very forgiving and with "heat" can bend and stretch very easily. It doesn't hold up well with materials that aren't smooth. People who are using adjectives such as "rough" and "rugged" to characterize this 3m vinyl are very misleading. It feels exactly like a sheet of paper ...maybe a little smoother. If I wasn't planning on having my entire center console hydrodipped I would definitely go crazy on my interior and wrap everything. I didn't have an exacto blade on me so I just used a razor blade to cut around the edges and the backside of the razorblade to tuck it into the creases. It definitely looks like carbon fiber!
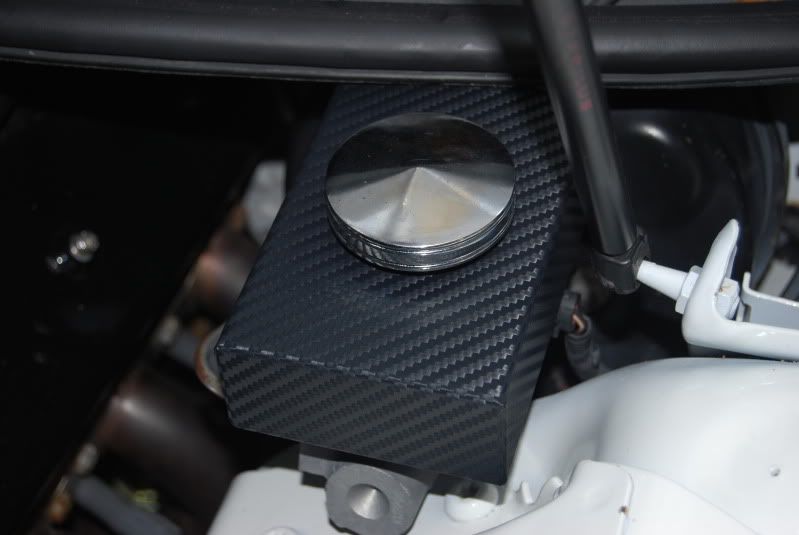
Well I got my Di Noc material that I plan on using on a few parts on my girl's car. I gave it a try on some engine bay pieces but not really sure if I'm going to leave it or not. The pieces were already powder coated black. I will say one thing the adhesive is pretty damn strong. I started to pull up on one corner that needed adjusting and it pulled off the powder coat 

^^^ it took me a long time to cut the middle out but it was soo worth it.. it's ******* hilarious to use a carbon fiber laptop mouse hahaha
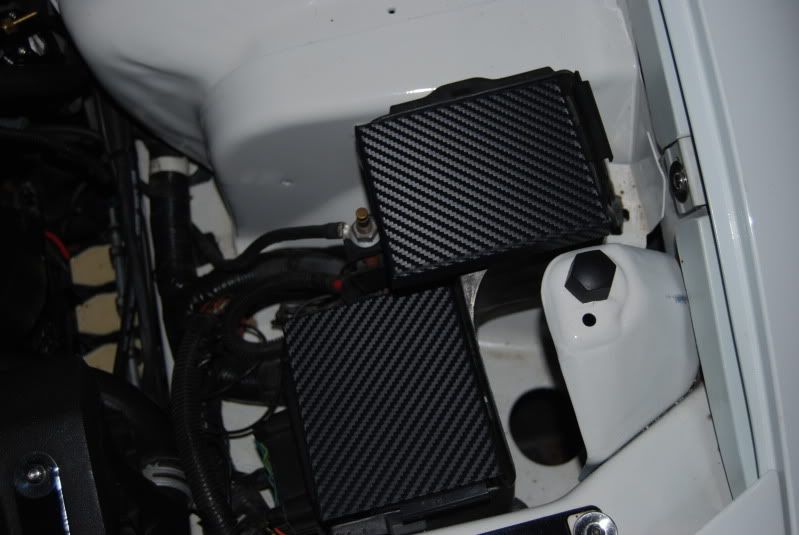
EDIT:: dopefedz that looks great on the fuse covers .. i think i'm gonna do that too and also the pcm
^^^mouse and fuse covers look great, I finally got my material in today though I ordered "Neffy Wrap" instead of the di-noc. It doesnt have the adhesive backing so I will have to pick up a can of adhesive spray. The material is VERY soft and silk like and stretchable so im excited to work with it, i'll post up some pics soon
I bought mine off ebay. you can get lucky sometimes and save yourself $5-8 bucks off the 1' x 4'. but DopeFedZ do you have fuze block covers? or did you do it right over the OEM covers? cause wouldn't that pose a problem when you have to run diagnostics and evaluate what went wrong?
LS1 Tech Stories
The Best V8 Stories One Small Block at Time

6 Common C5 Corvette Failures and What's Involved In Repairing Them
Pouria Savadkouei
Retro Modern Bandit Pontiac Trans AM Comes With Burt Reynolds' Autograph
Verdad Gallardo
Top 10 Greatest Cadillac V Series Performance Models Ever, Ranked
Pouria Savadkouei
Top 10 Most Powerful Chevy Trucks Ever Made!

Hennessey's New Supercharged Silverado ZR2 Has 700 HP
Verdad Gallardo
Coachbuilt N2A Anteros Is an LS2-Powered C6 Corvette In Italian Clothes
Verdad Gallardo
Awesome K5 Blazer Restomod Comes With C7 Corvette Power
Verdad Gallardo
10 Camaros You Should Never Buy

10 LS Engine Myths That Refuse to Die
Verdad Gallardo Since everyone seems to be getting on this **** I had to hurry up to be the first to wrap our key fobs =]. Hope this inspires others to do the same .... btw it took me a longgggg time to do this. I was inspired through a comment on a youtube video of a Trans Am racing a Ferrari Scaglietti.. where a guy said " I guess a turbo trans am is cool...but at the end of the day I would look at my ferrari keys and then my trans am keys and yeah you get the point." well you know what bitch I would choose the trans am keys !!
* as you can see there is a few small bumps on the top right side. a light sanding and polish will smooth that out.

*also the hole for the ring wasn't cutout yet

** btw anyone know how I can restore the lettering on my buttons without replacing the buttons? thanks
* as you can see there is a few small bumps on the top right side. a light sanding and polish will smooth that out.
*also the hole for the ring wasn't cutout yet
** btw anyone know how I can restore the lettering on my buttons without replacing the buttons? thanks
Last edited by Trans Am Jam; Feb 6, 2010 at 02:28 AM.
I just cleaned it up and now it looks sick.
For those interested in wrapping your key fob here are the steps
(take apart keyfob with scredriver)
1) place the key fobs back onto a cutout vinyl
2) using a heat gun / blow dryer stretch the vinyl nice and tight over the back of the keyfob and have it hang over the front
3) cut the extra vinyl and using a razorblade tuck the vinyl into the creases (very time consuming. heat definitely mandatory.
4) now get a cutout of the vinyl for the front and press it down, using heat to wrap it tight and to get a small outline of the buttons.
5) using the razor trace the rubber buttons, pull off the cutouts, and tuck the vinyl in the creases around the buttons.
6)stretch the remaining slack in the vinyl into the keyfob side creases, mating with the back vinyl cutout. and try to use the flat side of the razor blade to push out all the airbubbles and folds.
7) poke the hole for the ring w/ the razor, feed the ring in and press against the sides to push the vinyl in the inside.
8) lightly sand the sides if you have any little bumps w/ 1500 or 2000 grit.
9) use some liquid wax and onto a microfiber wipe everything down, especially the sides you just leveled with the sand paper. and voila your done, enjoy.
10) show off to all your friends at the superbowl as the Saints win against the Colts!
Last edited by Trans Am Jam; Feb 6, 2010 at 03:02 PM.


Trans Am Jam - You bastard you beat me to it!  I was really thinking about doing my key fobs, but I worried about the corners since the piece is so small. After seeing that I might just have to try it out.
Also, I don't know if there's a decent way to put new lettering on the buttons, but I do know there's a website where you can get JUST the buttons for our remotes for something like $6 plus shipping. I don't have a link to the site, but my friend does. I'll post it when I get it.
Also, I don't know if there's a decent way to put new lettering on the buttons, but I do know there's a website where you can get JUST the buttons for our remotes for something like $6 plus shipping. I don't have a link to the site, but my friend does. I'll post it when I get it.


Well I got my Di Noc material that I plan on using on a few parts on my girl's car. I gave it a try on some engine bay pieces but not really sure if I'm going to leave it or not. The pieces were already powder coated black. I will say one thing the adhesive is pretty damn strong. I started to pull up on one corner that needed adjusting and it pulled off the powder coat
you're probably right. haha . i'm probably lucky I didn't scratch into the motherboard. good call
Last edited by Trans Am Jam; Feb 6, 2010 at 03:01 PM.

