the brian mod.(lots of pics)
Thread Starter
TECH Addict
Joined: Mar 2009
Posts: 2,099
Likes: 3
From: Texas/Afghanistan
so myself and brian(70hemicuda) tackled a project with his fog lights today. basically it's the whistler mod for T/A fogs.
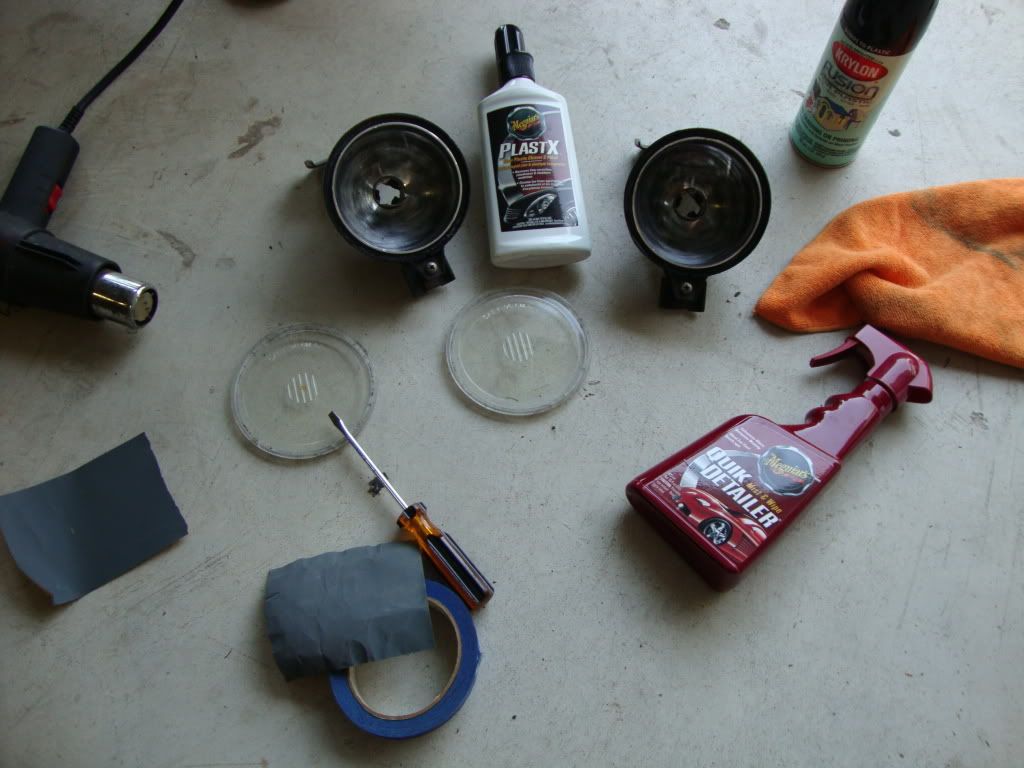
our materials list:
1. krylon fusion gloss black
2. 1000 grit sand paper
3. 10mm socket and ratchet
4. flat head screw driver
5. phillips head screw driver
6. heat gun
7. masking tape
8. meguiars quick detailer
9. meguiars plastx
10. clear silicone RTV
11. ramps stands/jack(this car is lowered)
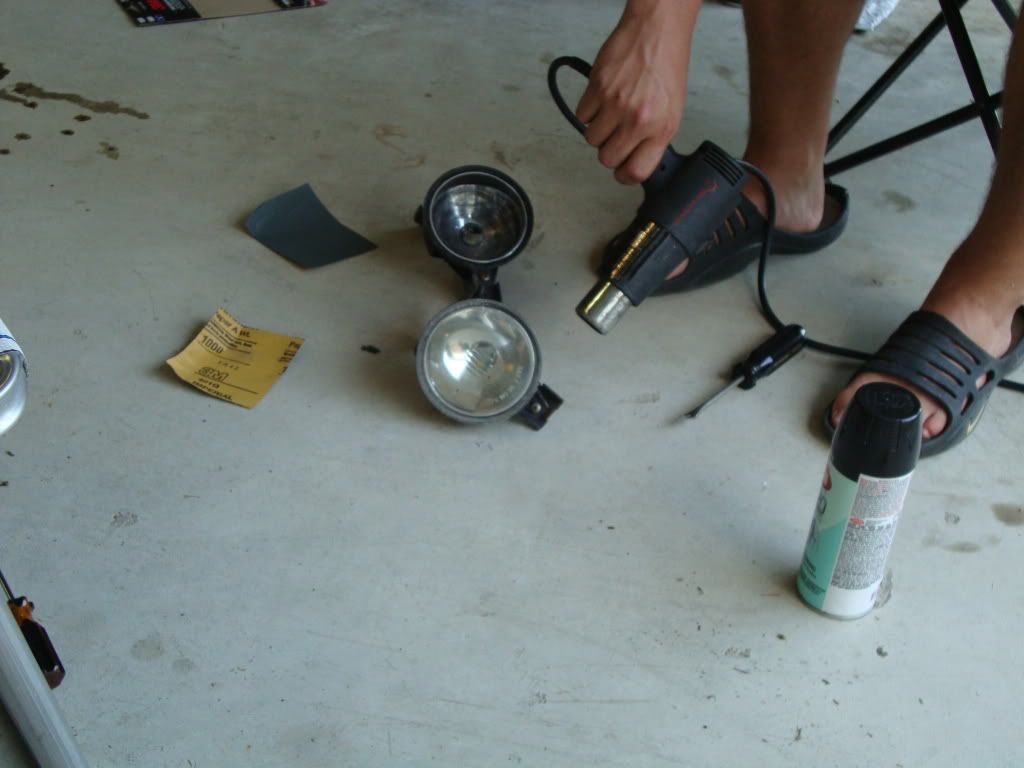
STEP 1
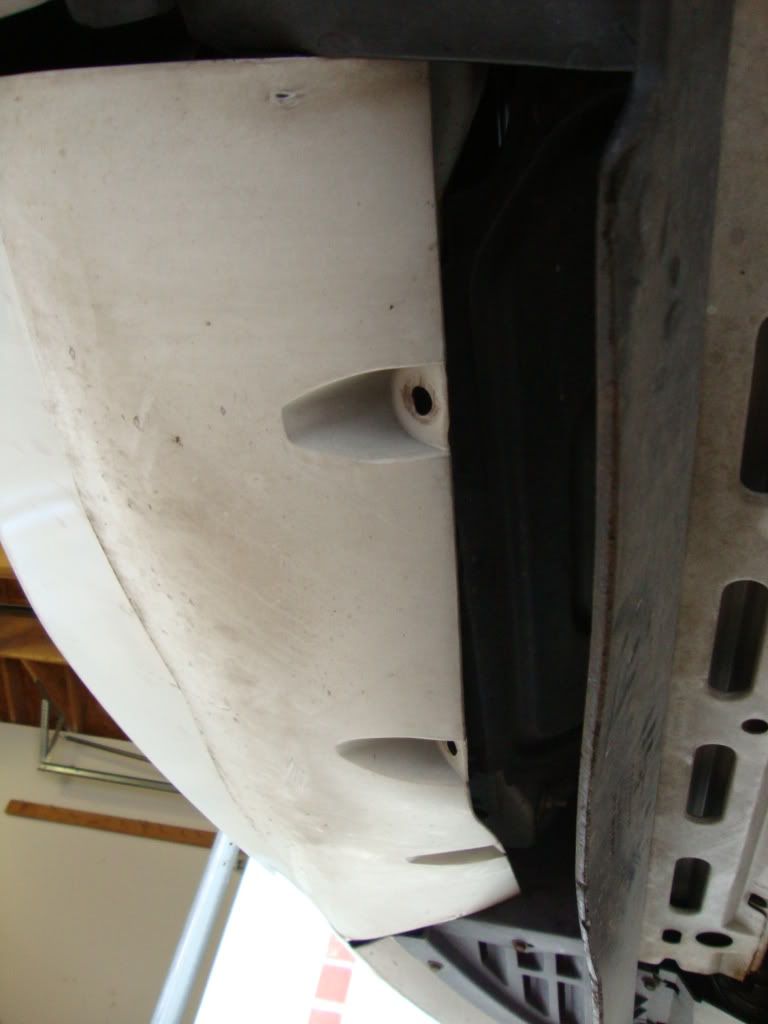
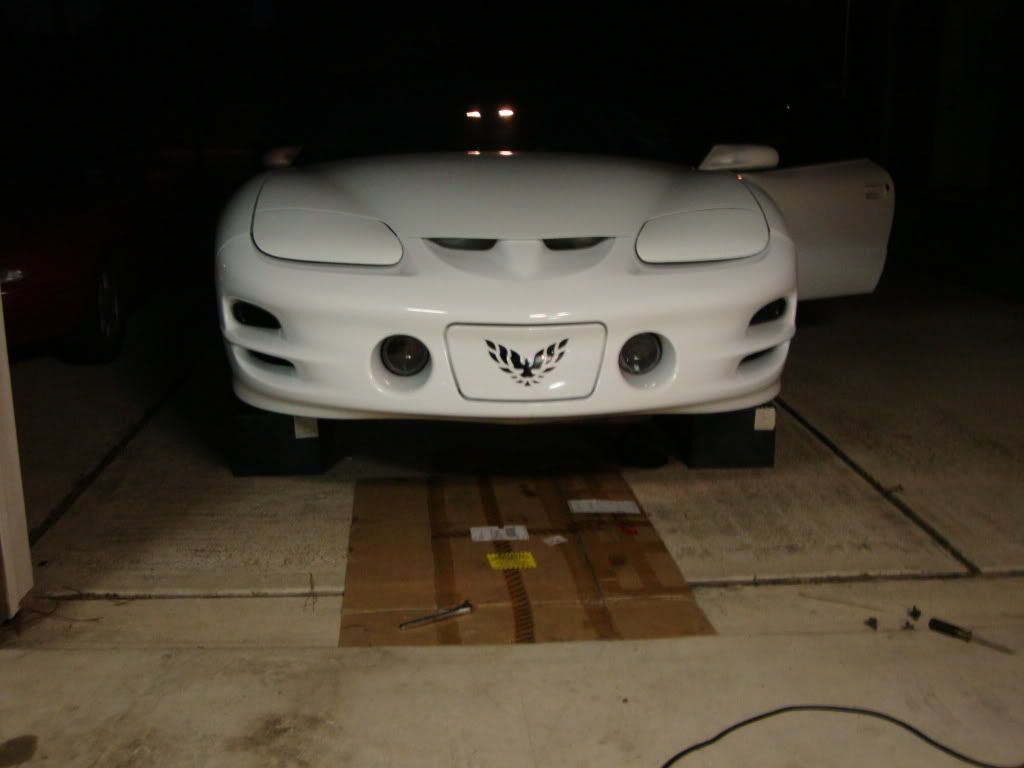
gain access to the fog lights by undoing the plastic rivets on the under side of the front bumper.
STEP 2
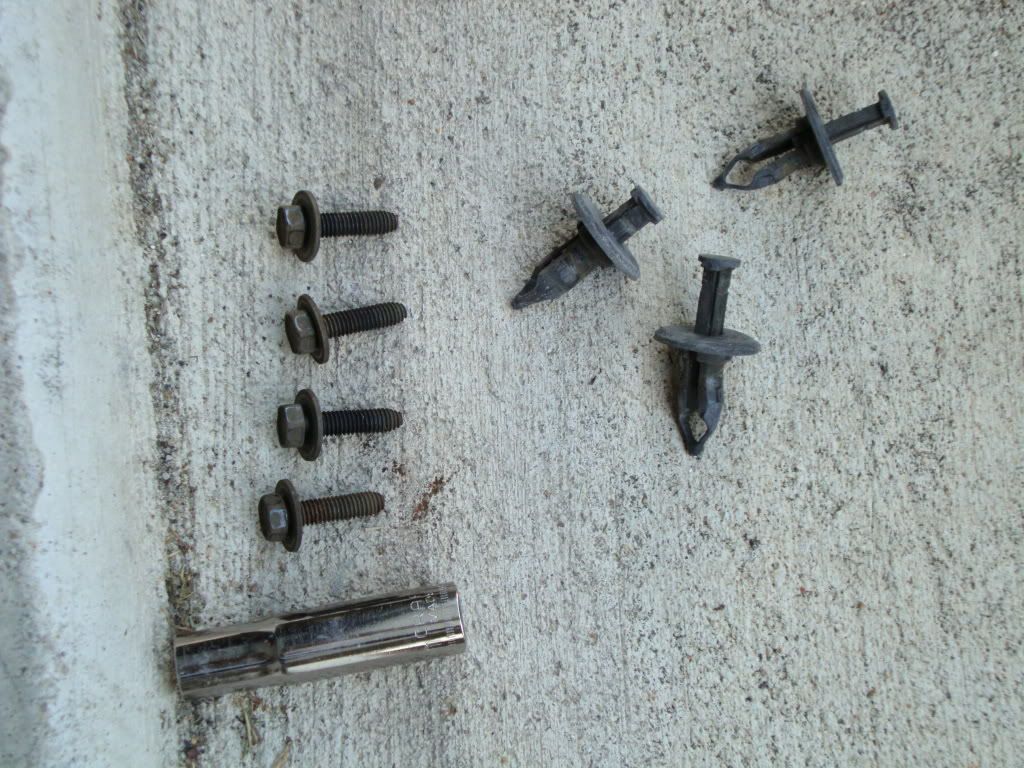
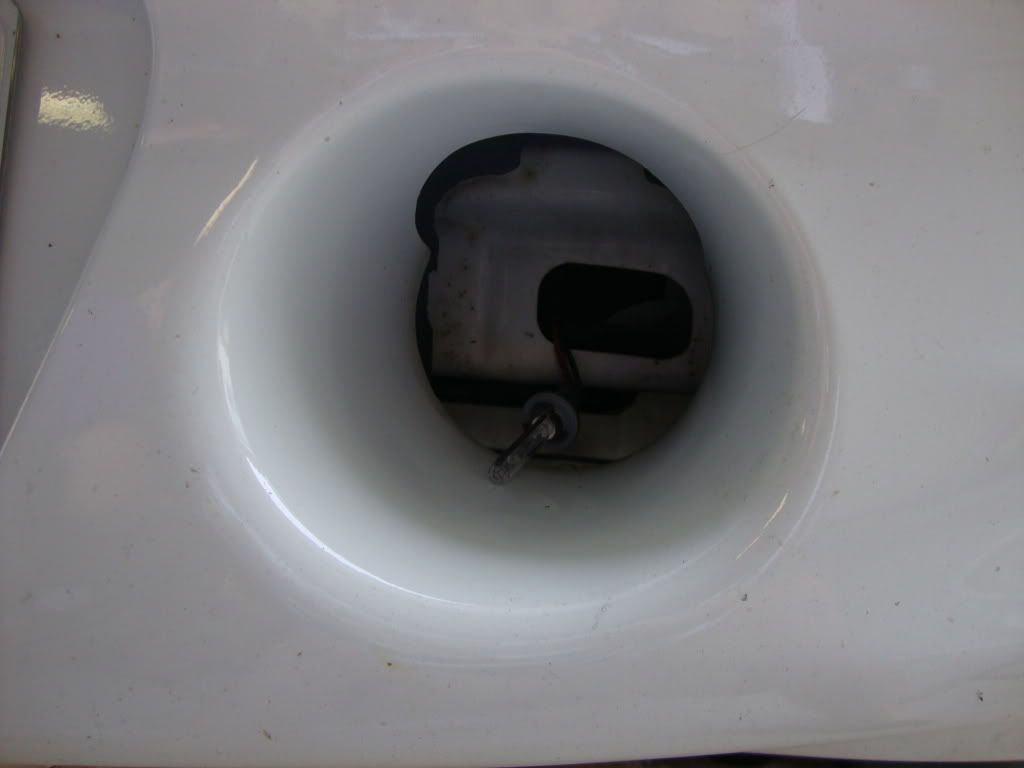
take the ratchet and 10mm socket and remove the 4 10mm bolts that attach the fog light brackets to the bumper support. remove the bulb from the light housing, then jockey the housing/bracket assembly out through the front of the bumper.
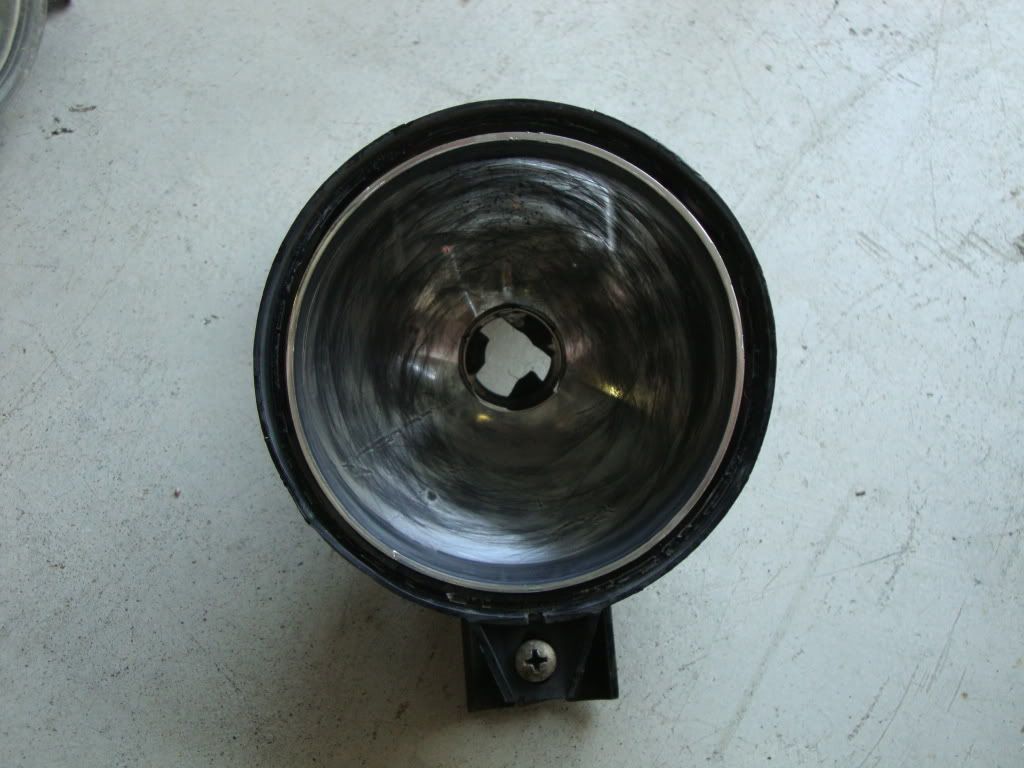
STEP 3
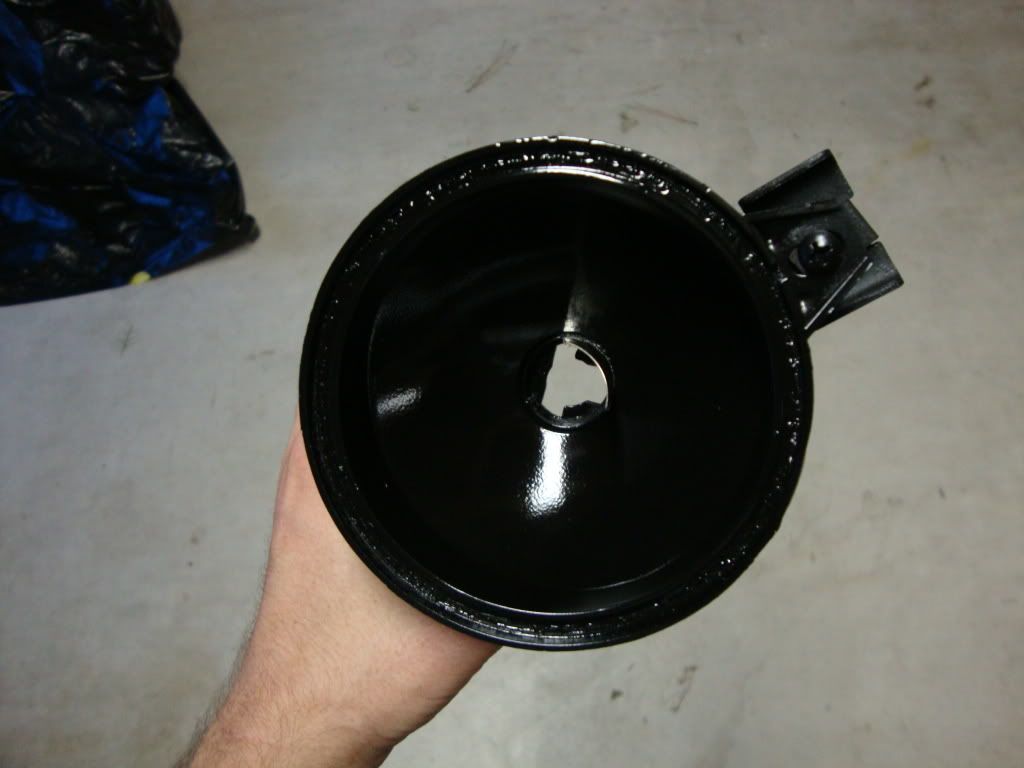
grab the heat gun and start heating the seam where the lens and housing meet. this takes awhile, so be patient. give it a good few minutes worth of heating before trying to pry them apart. once hot grab a flat head screw driver and start wedging the two apart. **IF YOU HEAR A CRACKING SOUND DON'T WORRY THAT'S JUST THE GLUE BREAKING LOOSE**
STEP 4
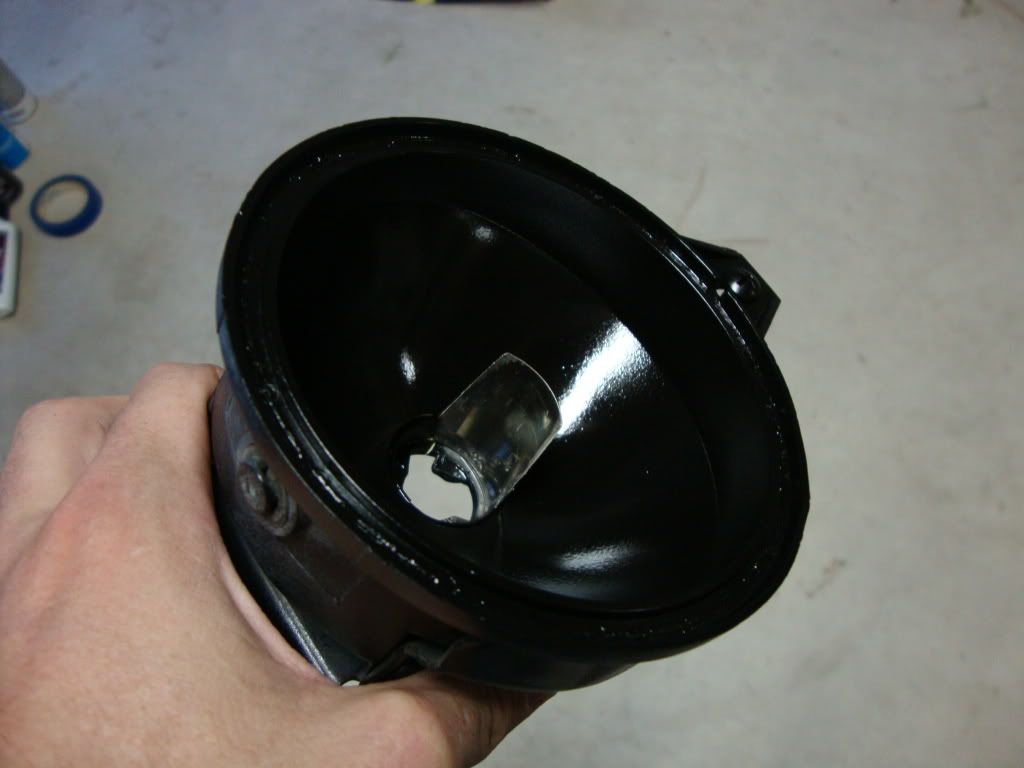
once both lenses are off start prepping the surfaces for paint. lightly sand the inside of the light with the 1k grit sand paper until it's all scuffed. then grab what ever you like to remove substrate from the surface to be painted. then mask off the little metal shield in the center of the housing.
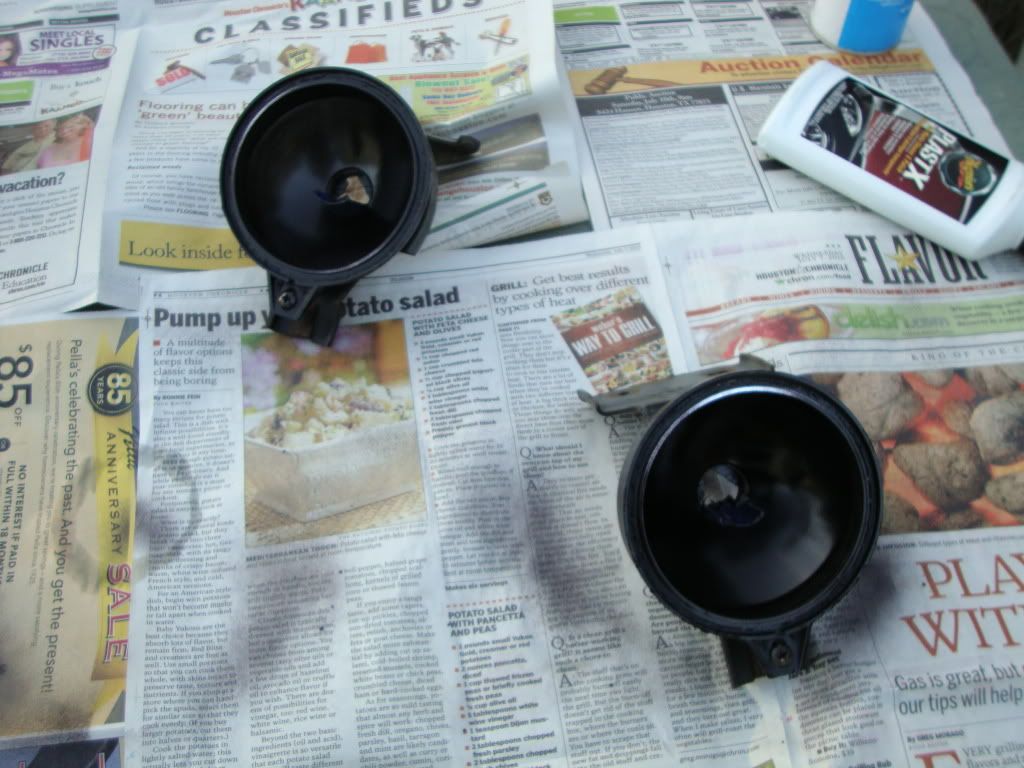
STEP 5
PAINT! grab your can of paint and go to town. we ended up spraying about 4 even coats. allowing 10-15 min of dry time between each coat. it's a tricky surface to cover so you might have to get creative.
after 1st coat:
after last coat:
STEP 6
clean up the lenses and hit them with some plastx.
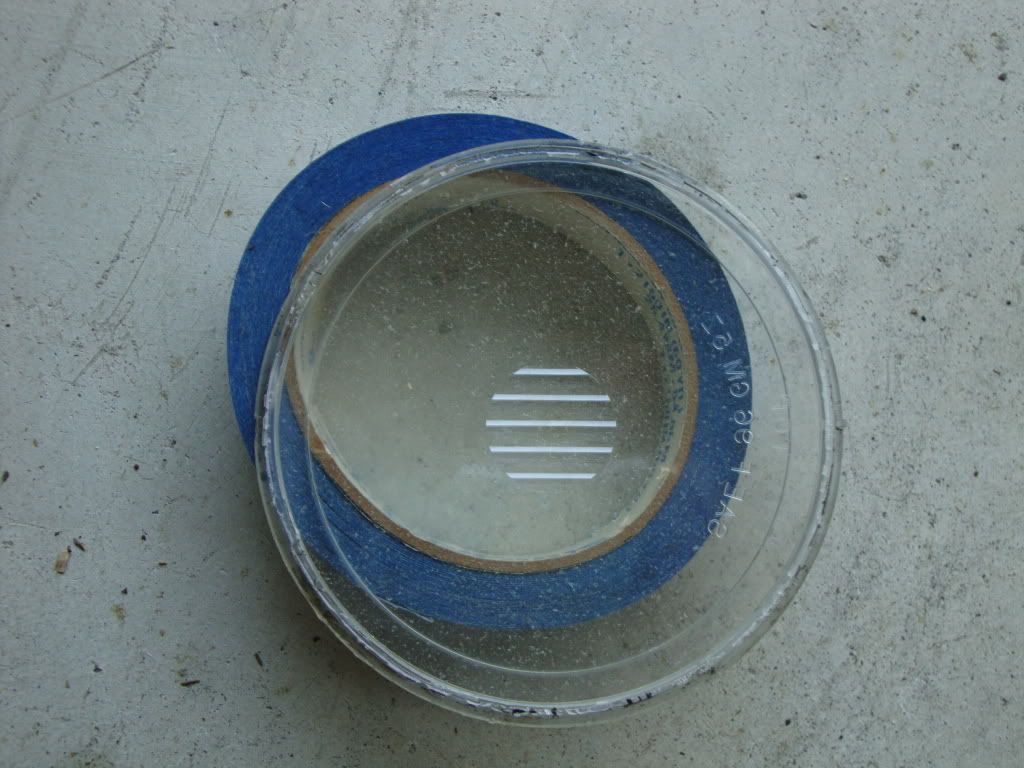
STEP 7
take the RTV and run a bead around the recess where the old glue was and then carefully place the lense back on making sure that it lines up with the notch at the top of the housing.
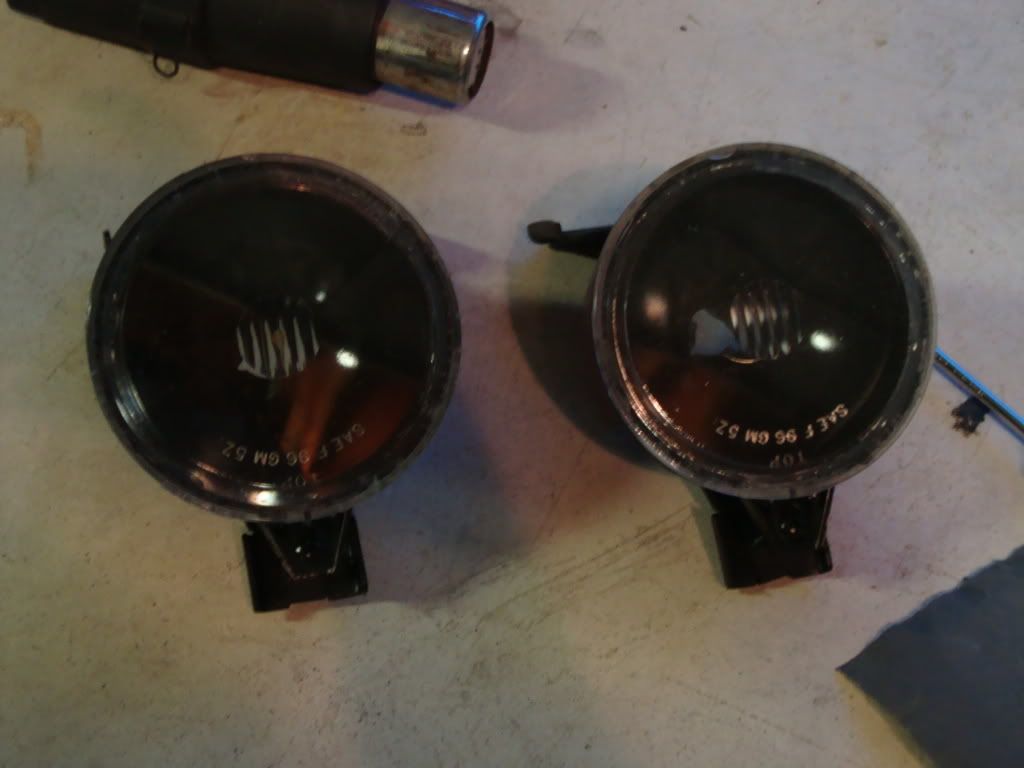
FINISHED PRODUCT
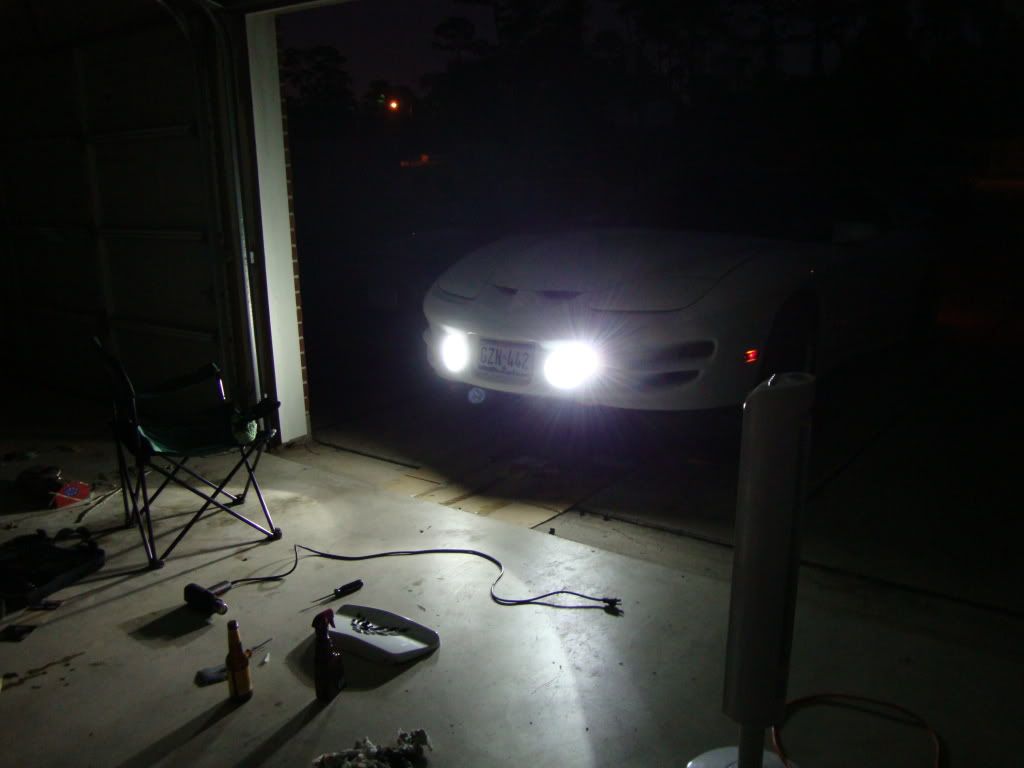
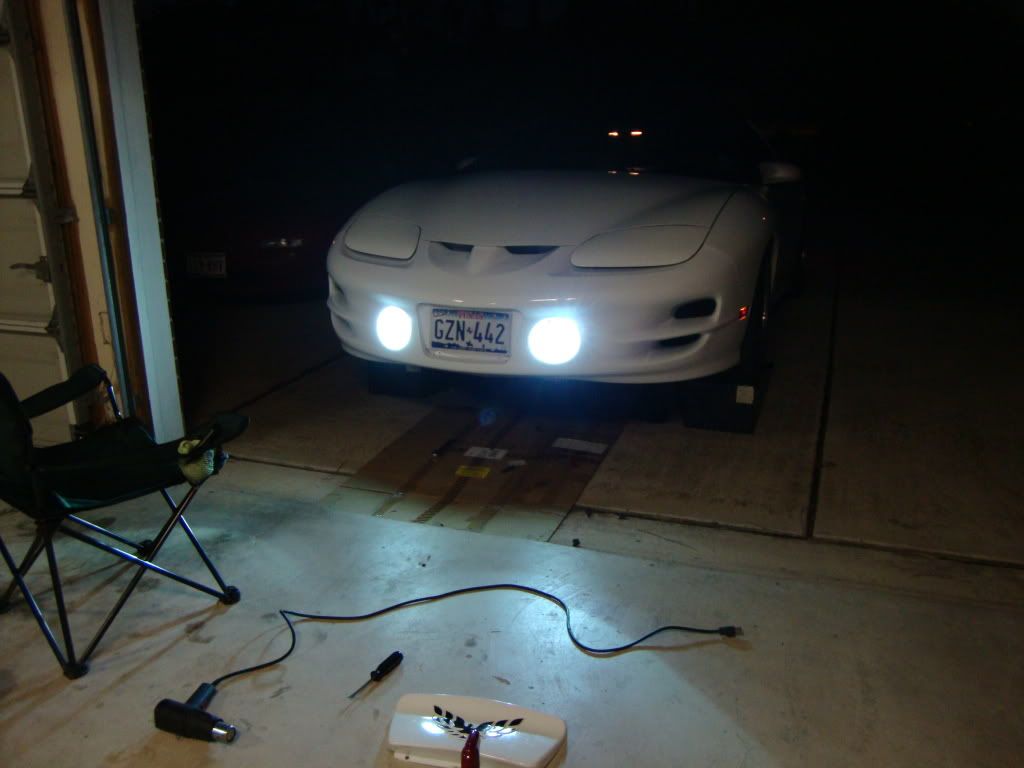
SO...whatya think?
(btw he has HID fogs and the volume of light is still more than enough)
our materials list:
1. krylon fusion gloss black
2. 1000 grit sand paper
3. 10mm socket and ratchet
4. flat head screw driver
5. phillips head screw driver
6. heat gun
7. masking tape
8. meguiars quick detailer
9. meguiars plastx
10. clear silicone RTV
11. ramps stands/jack(this car is lowered)
STEP 1
gain access to the fog lights by undoing the plastic rivets on the under side of the front bumper.
STEP 2
take the ratchet and 10mm socket and remove the 4 10mm bolts that attach the fog light brackets to the bumper support. remove the bulb from the light housing, then jockey the housing/bracket assembly out through the front of the bumper.
STEP 3
grab the heat gun and start heating the seam where the lens and housing meet. this takes awhile, so be patient. give it a good few minutes worth of heating before trying to pry them apart. once hot grab a flat head screw driver and start wedging the two apart. **IF YOU HEAR A CRACKING SOUND DON'T WORRY THAT'S JUST THE GLUE BREAKING LOOSE**
STEP 4
once both lenses are off start prepping the surfaces for paint. lightly sand the inside of the light with the 1k grit sand paper until it's all scuffed. then grab what ever you like to remove substrate from the surface to be painted. then mask off the little metal shield in the center of the housing.
STEP 5
PAINT! grab your can of paint and go to town. we ended up spraying about 4 even coats. allowing 10-15 min of dry time between each coat. it's a tricky surface to cover so you might have to get creative.
after 1st coat:
after last coat:
STEP 6
clean up the lenses and hit them with some plastx.
STEP 7
take the RTV and run a bead around the recess where the old glue was and then carefully place the lense back on making sure that it lines up with the notch at the top of the housing.
FINISHED PRODUCT
SO...whatya think?
(btw he has HID fogs and the volume of light is still more than enough)
Trending Topics
Thread Starter
TECH Addict
Joined: Mar 2009
Posts: 2,099
Likes: 3
From: Texas/Afghanistan
LS1 Tech Stories
The Best V8 Stories One Small Block at Time

6 Common C5 Corvette Failures and What's Involved In Repairing Them
Pouria Savadkouei
Retro Modern Bandit Pontiac Trans AM Comes With Burt Reynolds' Autograph
Verdad Gallardo
Top 10 Greatest Cadillac V Series Performance Models Ever, Ranked
Pouria Savadkouei
Top 10 Most Powerful Chevy Trucks Ever Made!

Hennessey's New Supercharged Silverado ZR2 Has 700 HP
Verdad Gallardo
Coachbuilt N2A Anteros Is an LS2-Powered C6 Corvette In Italian Clothes
Verdad Gallardo
Awesome K5 Blazer Restomod Comes With C7 Corvette Power
Verdad Gallardo
10 Camaros You Should Never Buy

10 LS Engine Myths That Refuse to Die
Verdad Gallardo thanks for all the positive feedback. It was fun to step into some uncharted waters. I will note that we probably didn't wait long enough for all the product to dry before turning on the fogs. There is some sort of moisture/chemical residue on the inside of the lense. i took the bulbs out for the night. Hopefully it clears up. if not ill take the lights out again and clean in there with a microfiber.
i read somewhere on here that if you dont wait at least like 30 mint to an hour before sealing the lights back off that the chemicals from the paint will seep into the clear plastic and turn it yellow and there is no going back... i dont remembre exactly his words but he said you should wait like 12 or 24 hours before sealing it shut, but who the hell does that?!?!? lol looks good and i dont think i have ever seen that, so props!