My engine bay and engine redo - 98 TA


 08-30-2010, 09:51 AM
#43
nice job! i did the same thing when my #7 rod went out the side of my block lol question though, are you using 5.3 heads cause they came with the engine or are you using them because they bump up compression???? when i build my engine (if that ever happens lol) i'm going with airflow over compression, but thats just my opinion.
08-30-2010, 11:12 PM
#44
TECH Apprentice
Thread Starter
iTrader: (13)
Join Date: Aug 2003
Location: Wake Forest, NC
Posts: 355
Likes: 0
Received 0 Likes
on
0 Posts

I'm going with them for the bump in compression. My buddy is going to build them up, they'll flow pretty well when he gets through with them.
Well, I worked another 15 hour day, so didn't get to touch the wiring. I'm hoping tomorrow night I can get this wiring all sorted out.
I'm a little afraid of it, the bundle I need to extend has a bunch of wires that are all the same color. I guess I'll just cut them at different lengths so I know which one is which. Tonight wasn't the night, 15 hours almost straight of hard engineering and design at work my mind was in no shape for it.
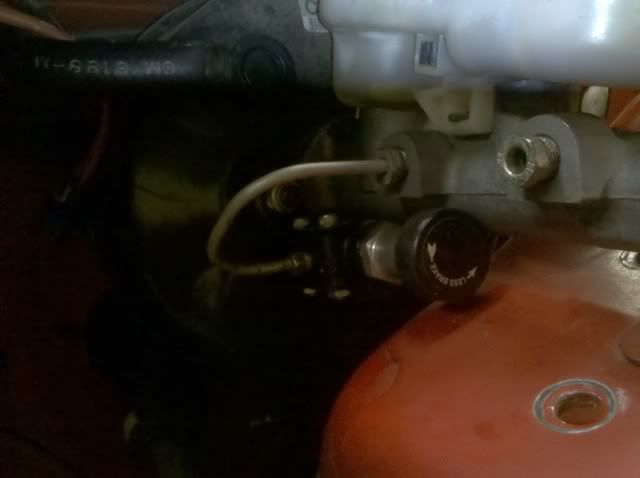
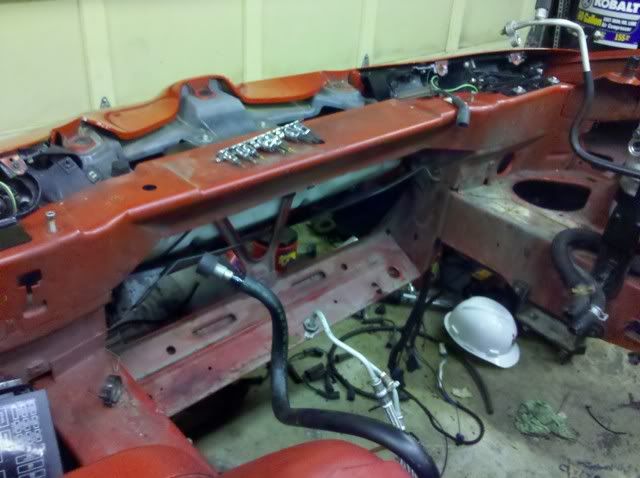
But I did remember this trick setup I had made for the PD Camaro brakes, and it fit well on the TA. Would really clean up the ABS removal. What do you guys think? I'm wondering if a brake shop can make a tighter bend in a line for me, this one is kinda large, but the best I could do with my bender and flaring kit. The valve is only like $20, so I'll just buy another one and match it up so I can run the same setup on the TA and Camaro.
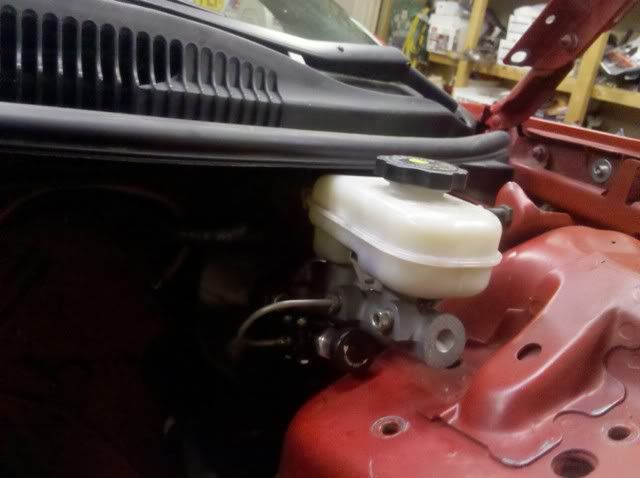
Well, I worked another 15 hour day, so didn't get to touch the wiring. I'm hoping tomorrow night I can get this wiring all sorted out.
I'm a little afraid of it, the bundle I need to extend has a bunch of wires that are all the same color. I guess I'll just cut them at different lengths so I know which one is which. Tonight wasn't the night, 15 hours almost straight of hard engineering and design at work my mind was in no shape for it.
But I did remember this trick setup I had made for the PD Camaro brakes, and it fit well on the TA. Would really clean up the ABS removal. What do you guys think? I'm wondering if a brake shop can make a tighter bend in a line for me, this one is kinda large, but the best I could do with my bender and flaring kit. The valve is only like $20, so I'll just buy another one and match it up so I can run the same setup on the TA and Camaro.
Last edited by 4Birdman; 08-30-2010 at 11:18 PM.
08-31-2010, 10:10 PM
#46
TECH Apprentice
Thread Starter
iTrader: (13)
Join Date: Aug 2003
Location: Wake Forest, NC
Posts: 355
Likes: 0
Received 0 Likes
on
0 Posts
I HAVE ***** THE SIZE OF TEXAS!

Guess it is too late now, what's done is done!
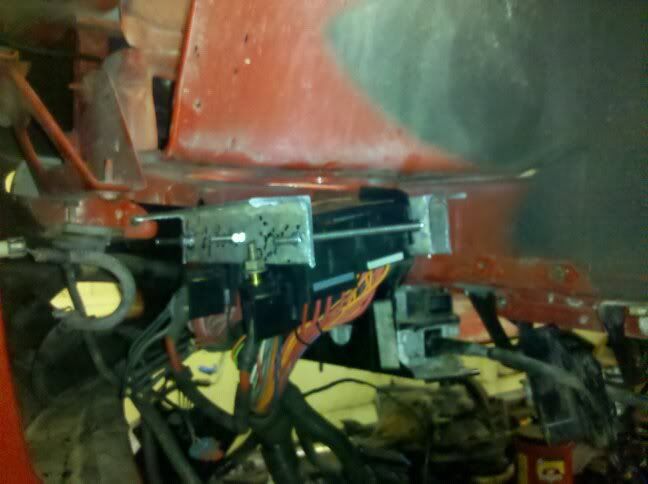
I cut a hole right under the brake booster and ran the wiring in there after tagging and clipping every wire.
Can't even see the wiring with the booster in there!
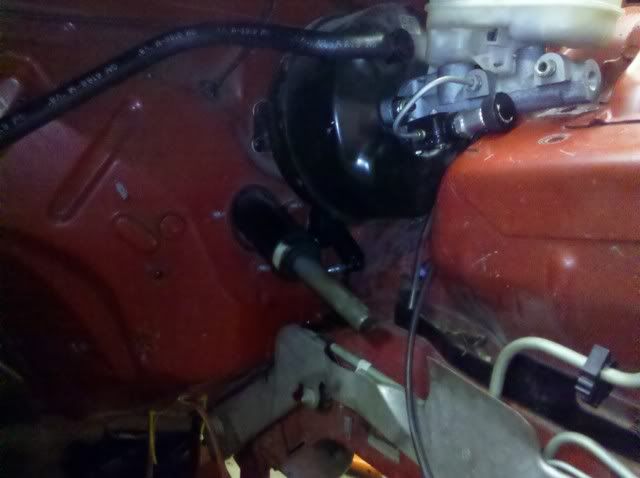
I then cut a notch in the impact absorber in the front bumper and ran all the wires along the channel underneath the washer reservoir. You can't see a single wire now.
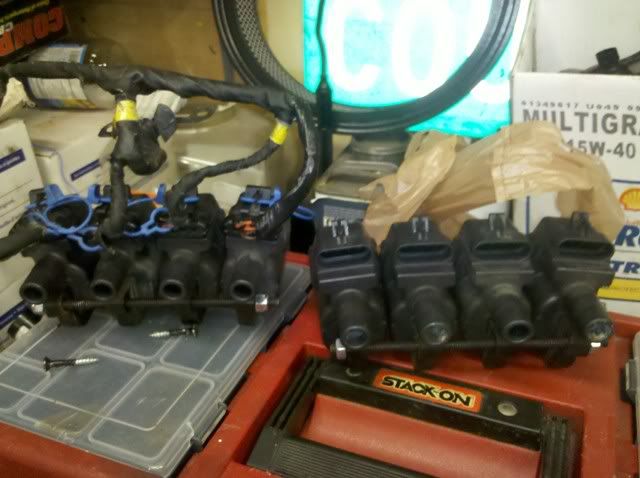
And then I cut some sections of 1/4-20 rod to make a bracket for my coil pack relocation.
Guess it is too late now, what's done is done!
I cut a hole right under the brake booster and ran the wiring in there after tagging and clipping every wire.
Can't even see the wiring with the booster in there!
I then cut a notch in the impact absorber in the front bumper and ran all the wires along the channel underneath the washer reservoir. You can't see a single wire now.
And then I cut some sections of 1/4-20 rod to make a bracket for my coil pack relocation.
Last edited by 4Birdman; 08-31-2010 at 10:26 PM.
10-01-2010, 12:54 PM
#48
TECH Apprentice
Thread Starter
iTrader: (13)
Join Date: Aug 2003
Location: Wake Forest, NC
Posts: 355
Likes: 0
Received 0 Likes
on
0 Posts
Sorry for the lack of updates, it has been crazy around here recently. I did manage to get the fuse boxes relocated, still need to solder the wires back together. I made a bracket out of some aluminum angle and threaded rod, tucks right up against the metal under where they used to be. I'm going to cut an access panel and then cover it up with a piece of metal that is painted and fastened with some stainless hardware and speednuts. Should look pretty good and be functional. I'm going to start the soldering and repairing of the harness this weekend.
10-01-2010, 01:55 PM
#51
TECH Apprentice
Thread Starter
iTrader: (13)
Join Date: Aug 2003
Location: Wake Forest, NC
Posts: 355
Likes: 0
Received 0 Likes
on
0 Posts
But I needed an engine, right?
 cant wait to see this when its done.
10-01-2010, 06:16 PM
cant wait to see this when its done.
10-01-2010, 06:16 PM
#53

don't hurry to finish, otherwise frustration sets in. Even if it takes another year, do it because you enjoy it. doesn't sound like it's you're only car so sounds like you have the time. impressed with all the wire relocation. anytime it gets to soldering that many wires, always makes me wonder if there are simple soldering tools out there that can accomplish it. I'd hate to think how long all those wires will take to solder with a regular soldering iron.
10-01-2010, 07:16 PM
#54
TECH Apprentice
Thread Starter
iTrader: (13)
Join Date: Aug 2003
Location: Wake Forest, NC
Posts: 355
Likes: 0
Received 0 Likes
on
0 Posts
Oh yeah, definitely taking my time with it. The rest of the car is almost perfect, so I'm not going to skimp on this work.
I am NOT looking forward to soldering this many wires.
Here is the bracket I made. I'm going to trim out a little around where the positive cable attaches to avoid any arcing.
My son got happy with the permanent marker.
I am NOT looking forward to soldering this many wires.
Here is the bracket I made. I'm going to trim out a little around where the positive cable attaches to avoid any arcing.
My son got happy with the permanent marker.
10-01-2010, 08:30 PM
#55
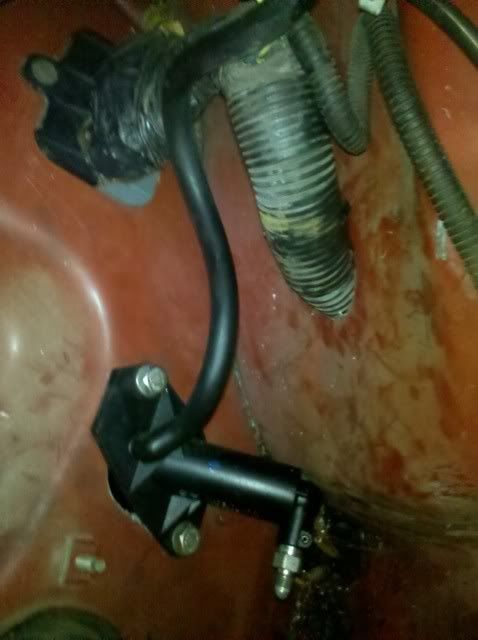
OK, I know this is a crappy job but it'll get my point across I hope! So the red are 90 degree fitings and the blue is a straight or slightly curved line. This should clean up this area a bit better than that big arc of line.
This project's looking really good! I can't wait to eventually start a similar one on my Trans Am! I'll be using this thread as a guid for sure when I do get around to mine!
This project's looking really good! I can't wait to eventually start a similar one on my Trans Am! I'll be using this thread as a guid for sure when I do get around to mine!
10-03-2010, 04:51 PM
#56
OK, I know this is a crappy job but it'll get my point across I hope! So the red are 90 degree fitings and the blue is a straight or slightly curved line. This should clean up this area a bit better than that big arc of line.
This project's looking really good! I can't wait to eventually start a similar one on my Trans Am! I'll be using this thread as a guid for sure when I do get around to mine!
This project's looking really good! I can't wait to eventually start a similar one on my Trans Am! I'll be using this thread as a guid for sure when I do get around to mine!
10-03-2010, 11:35 PM
#59
Drill and tap maybe? If you're looking at that kind of detail then drilling those two spots to fit whatever 90 degree elbows you can get would be well worth it. Either way I Hope you find your solution. I love the work so far! I hate that it's gonna be SO long from now until I'm able to do the work i want on my engine bay.
10-04-2010, 03:02 PM
#60
TECH Apprentice
Thread Starter
iTrader: (13)
Join Date: Aug 2003
Location: Wake Forest, NC
Posts: 355
Likes: 0
Received 0 Likes
on
0 Posts
Well, I had about 2 hours last night to start on the soldering. About two wires into it my youngest son woke up with a stomach ache and I ended up on the couch with him until my wife came home and got him back to sleep somehow.
Then my wife had me preoccupied.......
Then my wife had me preoccupied.......