Appearance & Detailing Interior & Exterior Appearance Modifications

update on my engine bay thread

Thread Tools
 
Search this Thread
 
Old 09-09-2010, 09:38 AM
  #41  
TECH Fanatic
Thread Starter
iTrader: (12)
 
01SOMSS!'s Avatar
 
Join Date: Aug 2006
Posts: 1,296
Likes: 0
Received 0 Likes on 0 Posts
Default

Originally Posted by 4U2NV-SS
Quick question, since you did a coil relocation, why did you not get the valve covers without the coil mounting brackets????
maybe its just me,but the plain covers look uglier to me. sounds funny,but the coil mount pins gives it character...lol! plus i wanted to have the option.well that and i had ordered the valve covers thinking i was able to fit the coils on perfectly. they were to tight so i had to buy the relo kit.

Originally Posted by kyles2000z
Just a suggestion that will improve the looks. Hide that traction control/cruise control (whatever it is) module back behind the PCM. Only requires the lengthening of one wire, and looks a TON better.
I've thought about that and its a good idea,but i have specilized stainless covers that cover all those pieces(brake res,tc,battery cov,pcm...)

Originally Posted by 99'CajunFirehawk157
Great work, I know how you felt when you cut that block for your new ls6 valley pan did mine this past winter, but I have to say, its been all good. I have the throttle cover in red too, those are killer. What headers are you running? Great work bro!
pacessetters. i like them. they've been good to me for 3 years. i also have a set of LPP stainless st. sitting in my garage that might go in latter.


Originally Posted by motoo344
Looks great. That hard work really paid off.
Originally Posted by Camaro_94
Looks great! Very nice work!
Originally Posted by Reaper-Z
That's an awesome setup dude! Very clean!
thanks guys! I hope she's all ready for the sunday show.
Old 09-09-2010, 09:53 AM
  #42  
Staging Lane
 
A350SOM's Avatar
 
Join Date: Jun 2009
Location: (Lincoln/Fairbury, NE)
Posts: 90
Likes: 0
Received 0 Likes on 0 Posts

Default

Bump for a very sexy car and color.
Old 09-09-2010, 10:05 AM
  #43  
12 Second Club
iTrader: (22)
 
tbird31's Avatar
 
Join Date: Nov 2005
Location: Huntersville, NC
Posts: 2,726
Received 22 Likes on 14 Posts

Default

Where did you get the coil pack relocation kit? I'm going to be doing a LS1 PCM conversion this winter on my bird and that kit looks very well put together. Is there enough wire where you are you able to tuck them nicely?
Old 09-09-2010, 08:56 PM
  #44  
TECH Enthusiast
iTrader: (9)
 
RedVertTA's Avatar
 
Join Date: Jan 2009
Location: Winter Garden, FL
Posts: 712
Likes: 0
Received 2 Likes on 2 Posts

Default

Subscribed, beautiful build.
Old 09-10-2010, 10:27 AM
  #45  
TECH Regular
iTrader: (21)
 
4U2NV-SS's Avatar
 
Join Date: Mar 2008
Location: Colorado
Posts: 432
Likes: 0
Received 0 Likes on 0 Posts

Default

[QUOTE=01SOMSS!;13842411]maybe its just me,but the plain covers look uglier to me. sounds funny,but the coil mount pins gives it character...lol! plus i wanted to have the option.well that and i had ordered the valve covers thinking i was able to fit the coils on perfectly. they were to tight so i had to buy the relo kit.

I hear you they are a tight fit. I recently bought the same valve covers and going to mount the coils on them. I cromed my coil bracket so we will see how they look real soon here.

Good looking set up!
Old 11-03-2010, 01:13 AM
  #46  
TECH Fanatic
Thread Starter
iTrader: (12)
 
01SOMSS!'s Avatar
 
Join Date: Aug 2006
Posts: 1,296
Likes: 0
Received 0 Likes on 0 Posts
Default

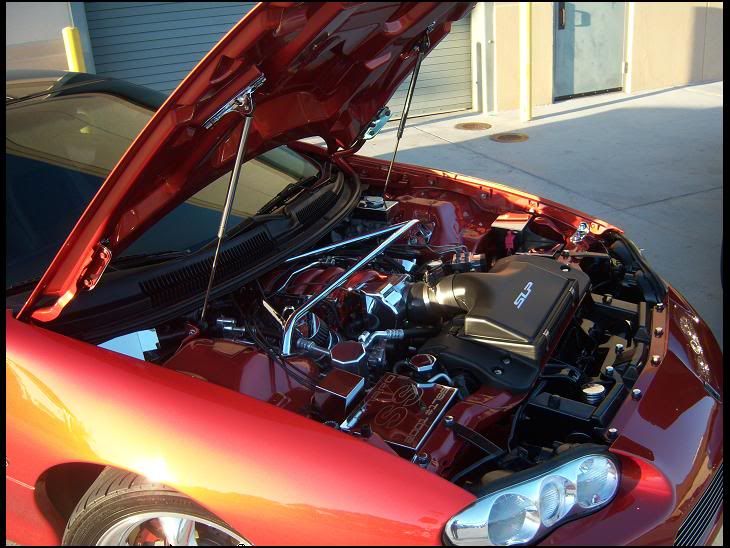
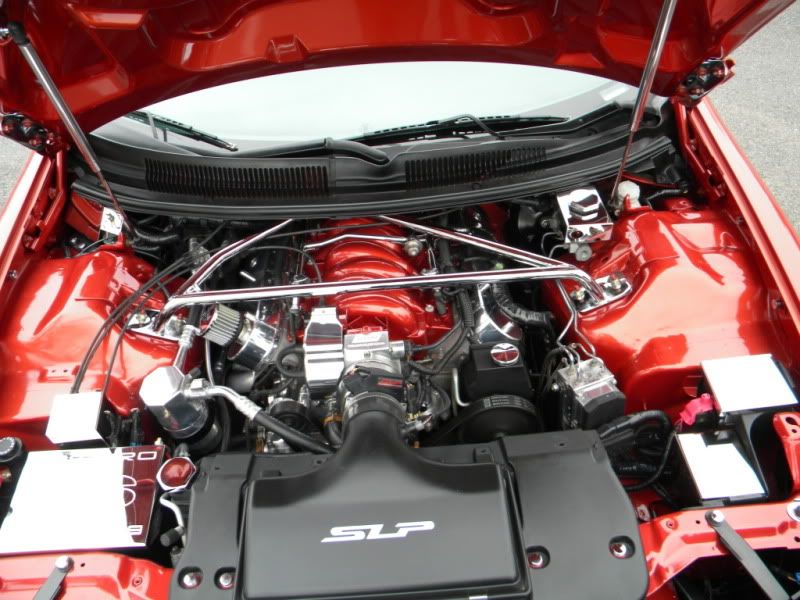
the engine bay turned out great. forgot to post pics.

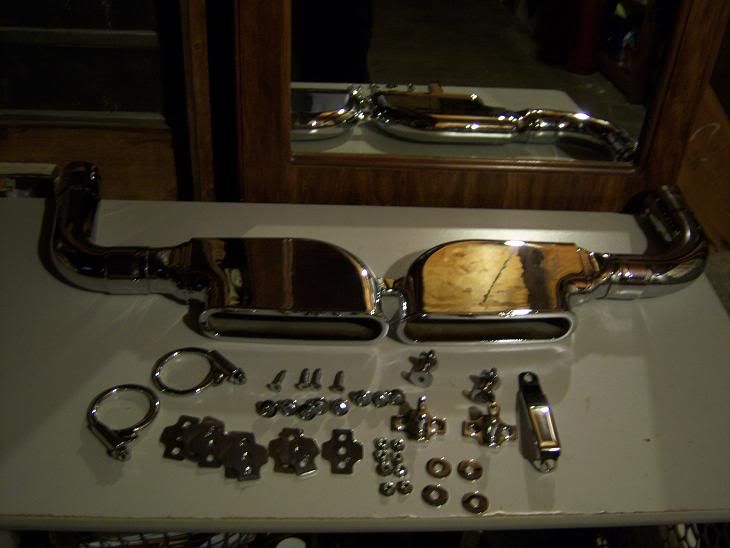
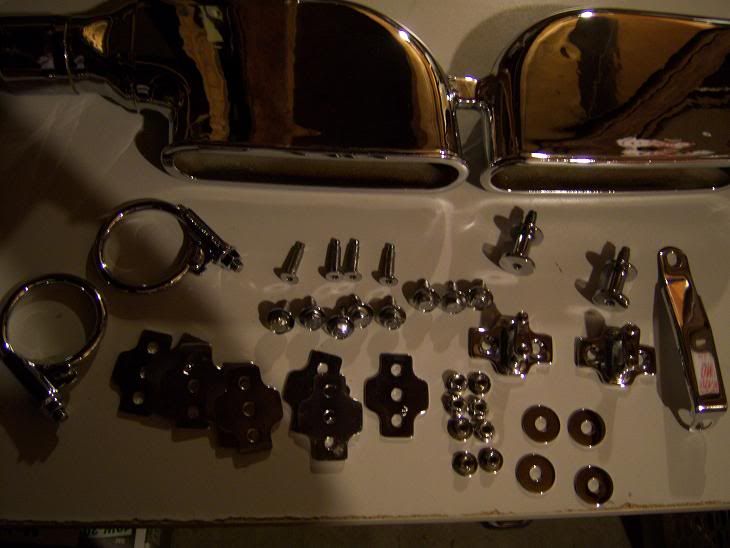
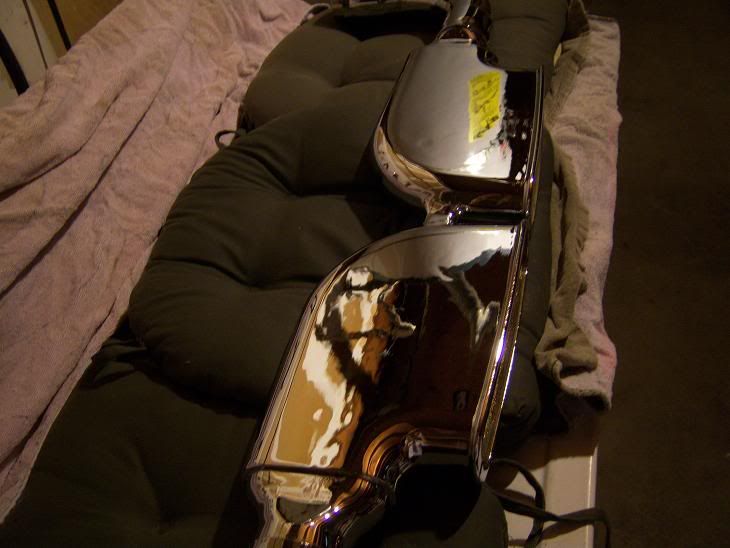
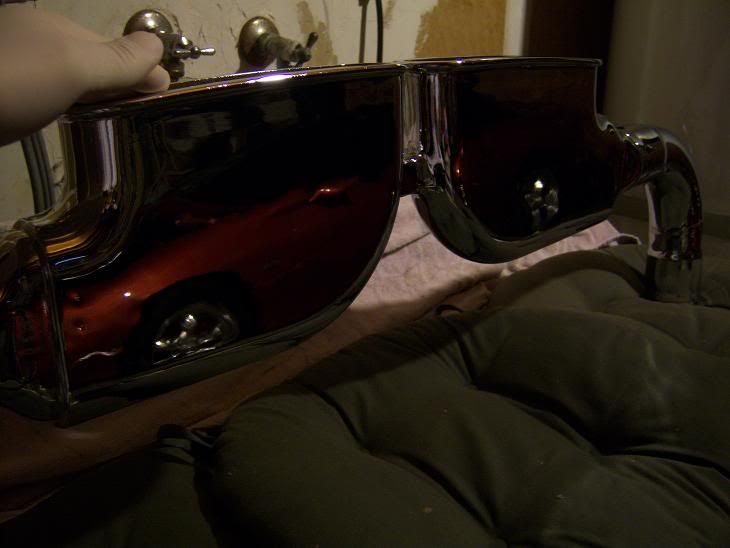
although today I picked up the CME from Westcoast platting along with a few other lil pieces i needed to finish up the SOM. they did a outstanding job as always.cant wait to install them.install pics coming soon.


Old 11-03-2010, 05:24 AM
  #47  
TECH Addict
iTrader: (53)
 
White.Lightning's Avatar
 
Join Date: Mar 2005
Location: Aston, PA
Posts: 2,863
Likes: 0
Received 1 Like on 1 Post

Default

Awesome job. Looks great
Old 11-03-2010, 07:21 AM
  #48  
TECH Enthusiast
 
SOMSS1LE's Avatar
 
Join Date: Feb 2009
Location: Schaumburg, IL
Posts: 650
Likes: 0
Received 1 Like on 1 Post

Default

Looks great, nice work..
Old 11-03-2010, 09:02 AM
  #49  
TECH Junkie
iTrader: (35)
 
Spd-Kilz's Avatar
 
Join Date: Nov 2005
Location: Rack City
Posts: 3,424
Likes: 0
Received 5 Likes on 5 Posts

Default

Wow! I can't wait to see that CME installed!
Old 11-03-2010, 11:53 AM
  #50  
TECH Enthusiast
iTrader: (4)
 
KLaBZ28's Avatar
 
Join Date: Dec 2008
Location: Haverhill Ma
Posts: 627
Likes: 0
Received 0 Likes on 0 Posts

Default

wow the tips look outstanding. I kind of want to chrome mine now.. Polishing the Aluminum all the time is a bitch.
Old 11-03-2010, 04:39 PM
  #51  
TECH Enthusiast
iTrader: (14)
 
ssjason232's Avatar
 
Join Date: Oct 2009
Location: Warrenton VA
Posts: 512
Likes: 0
Received 3 Likes on 3 Posts

Default

looks sick. I would suggest putting some money away for a new washer and dryer consider all the pounding those things are taking as photo stands for your bling
Old 11-04-2010, 11:29 AM
  #52  
12 Second Club
iTrader: (19)
 
LS1RedZ's Avatar
 
Join Date: Mar 2005
Location: Waco, TX
Posts: 3,080
Likes: 0
Received 1 Like on 1 Post

Default

Wow!! Engine bay looks REALLY damn good.
Old 11-04-2010, 11:08 PM
  #53  
TECH Fanatic
Thread Starter
iTrader: (12)
 
01SOMSS!'s Avatar
 
Join Date: Aug 2006
Posts: 1,296
Likes: 0
Received 0 Likes on 0 Posts
Default

Originally Posted by ssjason232
looks sick. I would suggest putting some money away for a new washer and dryer consider all the pounding those things are taking as photo stands for your bling
lmfao!
Old 11-04-2010, 11:16 PM
  #54  
9 Second Club
iTrader: (26)
 
02sleeperz28's Avatar
 
Join Date: Aug 2006
Location: homeless
Posts: 1,833
Likes: 0
Received 0 Likes on 0 Posts

Default

Very nice.
Old 11-04-2010, 11:29 PM
  #55  
TECH Fanatic
Thread Starter
iTrader: (12)
 
01SOMSS!'s Avatar
 
Join Date: Aug 2006
Posts: 1,296
Likes: 0
Received 0 Likes on 0 Posts
Default

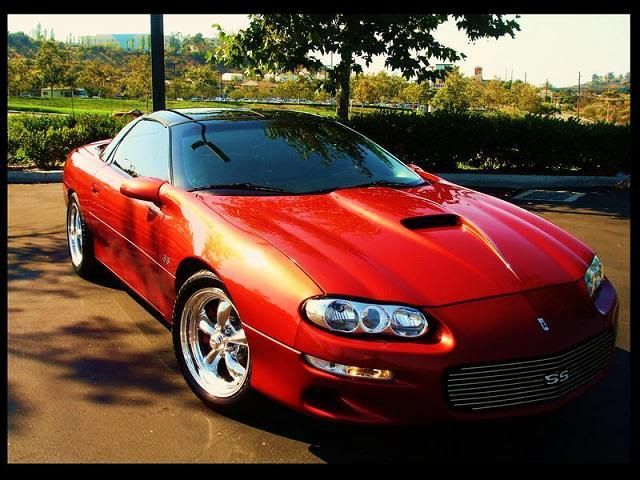
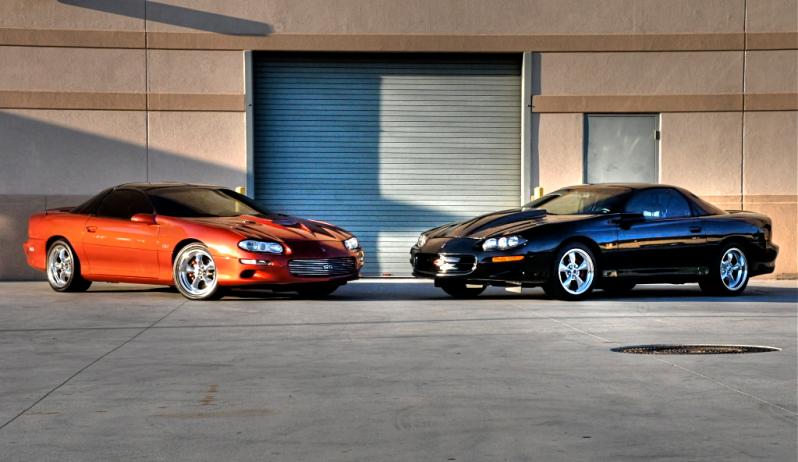
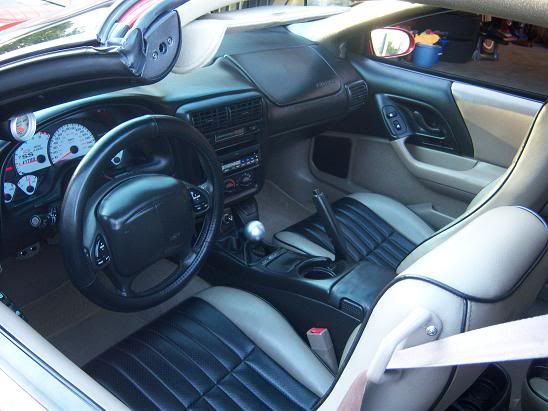
here's a few pics/ vid of the car and the engine bay we took at my car clubs photo shoot. I also threw in a few other ones so u get an idea of how she sits all around.

by the way i did chrome the headlight brackets,but i guess my father in law must have toss one in the trash since it was wrapped in newspaper. I had to get it redone that's why its not in the pics. anyways enjoy...


and a vid.
Old 11-04-2010, 11:34 PM
  #56  
TECH Veteran
iTrader: (4)
 
crimson_bird's Avatar
 
Join Date: Aug 2009
Location: The Bay Area, CA
Posts: 4,138
Likes: 0
Received 7 Likes on 3 Posts
Default

everything really looks great man. my only suggestion is to paint the lower part of the air box black, and clear coat the lid. That'd really complete it, gotta give that black a fresh finish.
Old 11-04-2010, 11:55 PM
  #57  
TECH Fanatic
Thread Starter
iTrader: (12)
 
01SOMSS!'s Avatar
 
Join Date: Aug 2006
Posts: 1,296
Likes: 0
Received 0 Likes on 0 Posts
Default

yeah, I was either going to go with a Mti lid or airbrush some realistic SOM flames on the lid. honestly I'm going to be going FI in the future so i dont know if i want to dump money into that.
Old 11-05-2010, 07:04 AM
  #58  
TECH Enthusiast
iTrader: (14)
 
ssjason232's Avatar
 
Join Date: Oct 2009
Location: Warrenton VA
Posts: 512
Likes: 0
Received 3 Likes on 3 Posts

Default

that model is super hot by the way, damn.
Old 11-05-2010, 08:28 AM
  #59  
TECH Senior Member
iTrader: (71)
 
lemons12's Avatar
 
Join Date: Jul 2007
Location: Winchester, TN
Posts: 11,088
Likes: 0
Received 2 Likes on 2 Posts

Default

What did you use to fill in the holes in engine bay?
killer job man!
Old 11-05-2010, 09:22 AM
  #60  
TECH Fanatic
Thread Starter
iTrader: (12)
 
01SOMSS!'s Avatar
 
Join Date: Aug 2006
Posts: 1,296
Likes: 0
Received 0 Likes on 0 Posts
Default

bondo.

yes the model is hot! briana lee. google her vidz. you will love them!


Quick Reply: update on my engine bay thread


All times are GMT -5. The time now is 07:34 PM.