
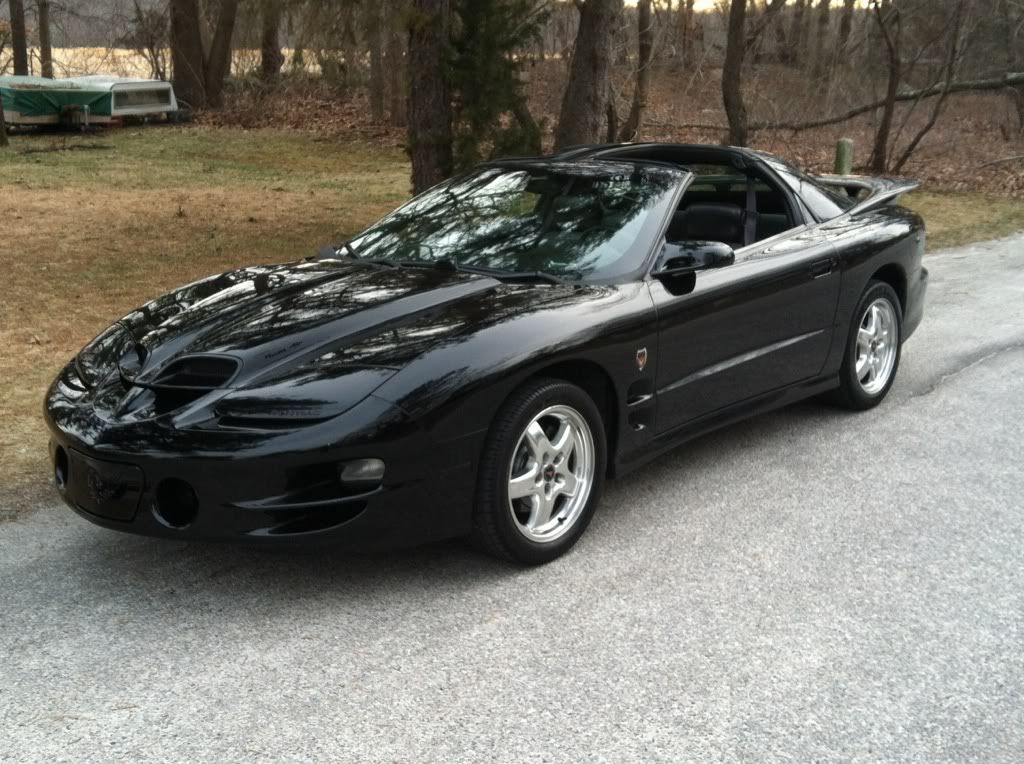
took a shot with the blackbird stripes
 08-12-2012 | 10:14 PM
#1
Thread Starter
On The Tree
Joined: Jul 2007
Posts: 180
Likes: 0
got flat black blackbird stripes on the firebird a couple of days ago...still has a few tiny bubbles to work out. I loved the turn out because u can only see them at certain angles


Trending Topics

 08-17-2012 | 07:12 PM
#13
TECH Resident
Joined: Aug 2011
Posts: 828
Likes: 11
From: 4o5
Could you please tell me the steps you did or write up you followed. My first attempt on putting on the stripes I messed up on the first stripe... So I ordered another set and haven't touched them. I've called several local decal shops and they won't even attempt to apply my blackbird stripes.
 08-17-2012 | 10:49 PM
#15
Thread Starter
On The Tree
Joined: Jul 2007
Posts: 180
Likes: 0
yeah i hear you...i screwed up one set of stripes up already on my first attempt.....re-ordered some new ones and found out that the trick to the best way to install them is by weting the hood and decal itself before you peel it off.....after its nice and wet peel decal and position it on hood.....this is where pre-soaking the decal comes in cause once you lay it on the wet hood it will slide where ever you want it too...after you position it dry carefully with a soft rag and slowly work bubbles out....after that the sun will work out the rest of the small bubbles.......hope this helps....mine came out great!!! good luck

 08-18-2012 | 05:49 AM
#18
Looks pretty good. LOVE black stripes on a black car, and you can't go wrong with the blackbird stripes! I'm thinking about doing the wingtips like slowv696 has, but I'm on the fence. not sure how it'll look with my stripes... most likely will end up trying them out though
needed: squeegee, spray bottle (water+soap), tape, marking pen, blow dryer/heat gun (not absolutely necessary, but helps)
1) cut away the bulk of the paper/plastic that contain the stripes, leaving only about 1/4" around the stripe itself.
2) take stripes out to car, lay them where they should go.
3) tape in place. put dash marks on the tape, going onto the paper wrapping of the stripes, to mark the proper location of the stripes.
4) remove stripes, but leave the tape with the marks
5) clean the place where the stripes go, and do a final rub down with some alcohol
6) mix a water/soap solution in a spray bottle: just a little bit of dish detergent or car wash soap, etc, mixed with a bottle of water. don't need too much soap.
7) 1- Spray solution on car, liberally. 2- Spray your hands/fingers. 3- remove the paper or plastic backing from the stripes, spray both sides of the stripes. lay stripes in place
8) with the stripes in place, get your squeegee and begin working the water and air out from under the stripe. Start from the CENTER and work your way out to the edges. keep the outside surface wet while working, so keep the spray bottle handy
9) heat helps with stubborn air pockets and helping the adhesive stick to the car. If using a heat gun, do not leave on any spot for long at all, they can damage the vinyl, blow dryers don't get as hot so they pose less of a threat. Squeegee out the air/water till the stripes lay down completely flat. Remove the plastic cover from the stripes
10) if you have any bubbles that you could not work out, leave them. give it a few days, and the air/water may work itself out. if after 2-3 days of being parked out in the sun the bubble is still there, get a small safety pin, and press through the hole, in the center. Using the squeegee work the air toward the hole. should lay flat now.
done... stand back and enjoy. Seems like a lot, but in reality, its a 15 minute job.
Could you please tell me the steps you did or write up you followed. My first attempt on putting on the stripes I messed up on the first stripe... So I ordered another set and haven't touched them. I've called several local decal shops and they won't even attempt to apply my blackbird stripes.
needed: squeegee, spray bottle (water+soap), tape, marking pen, blow dryer/heat gun (not absolutely necessary, but helps)
1) cut away the bulk of the paper/plastic that contain the stripes, leaving only about 1/4" around the stripe itself.
2) take stripes out to car, lay them where they should go.
3) tape in place. put dash marks on the tape, going onto the paper wrapping of the stripes, to mark the proper location of the stripes.
4) remove stripes, but leave the tape with the marks
5) clean the place where the stripes go, and do a final rub down with some alcohol
6) mix a water/soap solution in a spray bottle: just a little bit of dish detergent or car wash soap, etc, mixed with a bottle of water. don't need too much soap.
7) 1- Spray solution on car, liberally. 2- Spray your hands/fingers. 3- remove the paper or plastic backing from the stripes, spray both sides of the stripes. lay stripes in place
8) with the stripes in place, get your squeegee and begin working the water and air out from under the stripe. Start from the CENTER and work your way out to the edges. keep the outside surface wet while working, so keep the spray bottle handy
9) heat helps with stubborn air pockets and helping the adhesive stick to the car. If using a heat gun, do not leave on any spot for long at all, they can damage the vinyl, blow dryers don't get as hot so they pose less of a threat. Squeegee out the air/water till the stripes lay down completely flat. Remove the plastic cover from the stripes
10) if you have any bubbles that you could not work out, leave them. give it a few days, and the air/water may work itself out. if after 2-3 days of being parked out in the sun the bubble is still there, get a small safety pin, and press through the hole, in the center. Using the squeegee work the air toward the hole. should lay flat now.
done... stand back and enjoy. Seems like a lot, but in reality, its a 15 minute job.