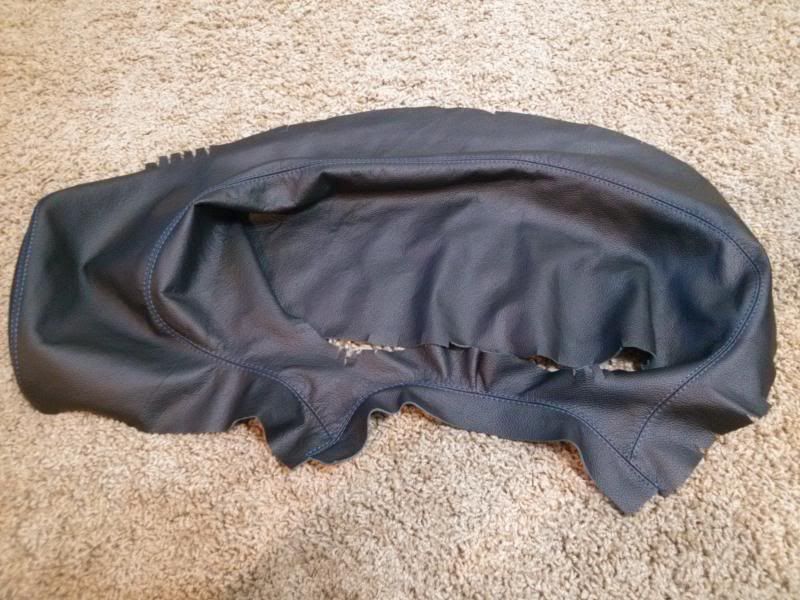
Redline Goods Leather Trans Am gauge bezel done!
 03-23-2013, 06:46 PM
#1

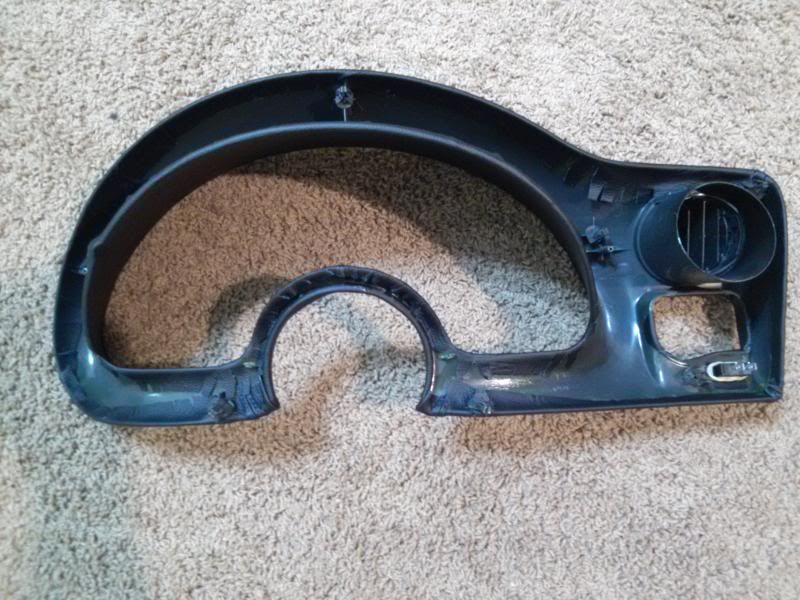
This gauge bezel is for sale now!
https://ls1tech.com/forums/parts-cla...-pontiacs.html
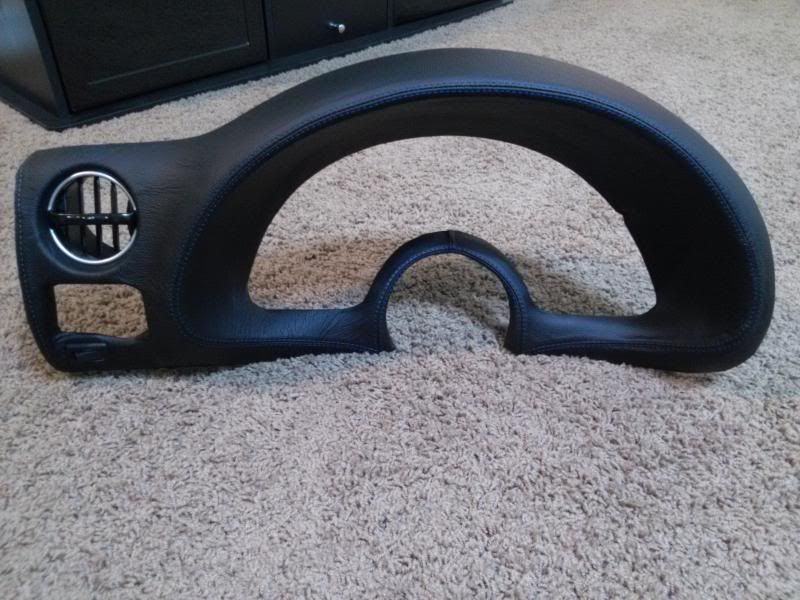
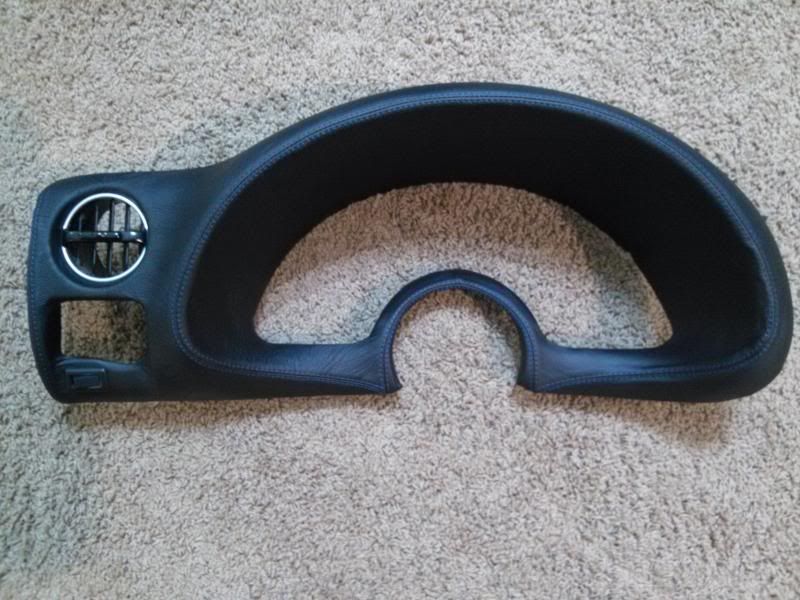
Notice the new black fog light switch...much cleaner
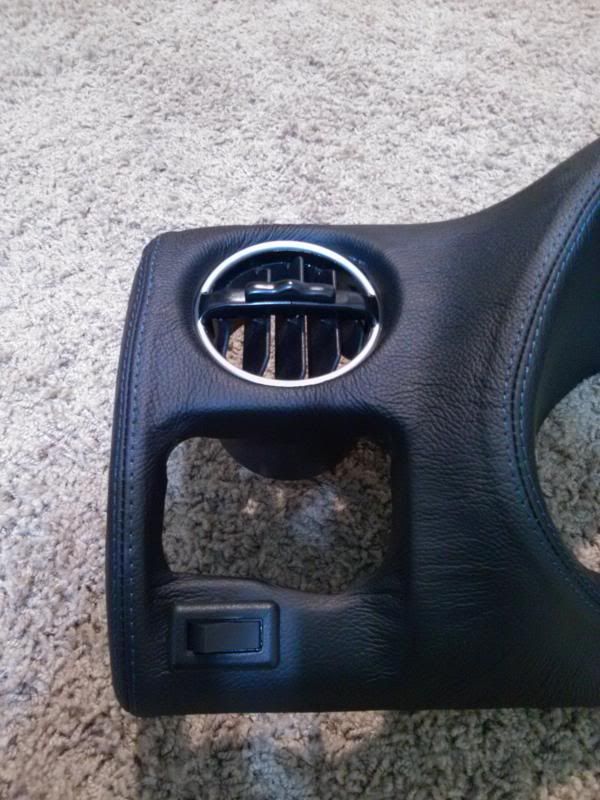
Also note the black headlight switch and dimmer controls, along with the padded leather steering wheel I've posted up before
https://ls1tech.com/forums/appearanc...ook-again.html
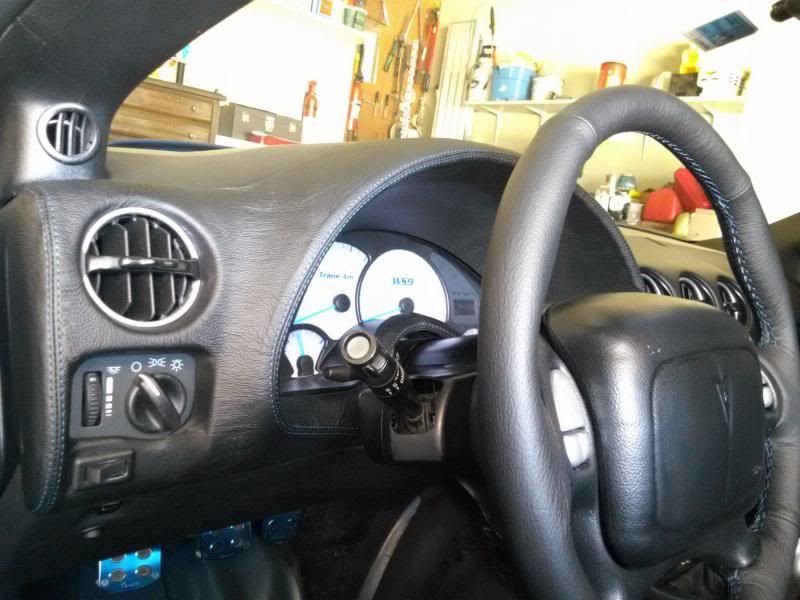
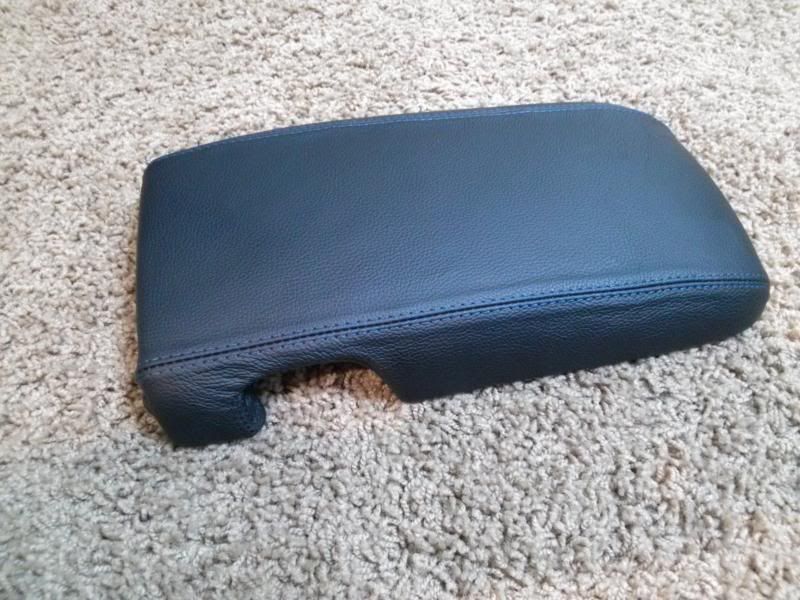
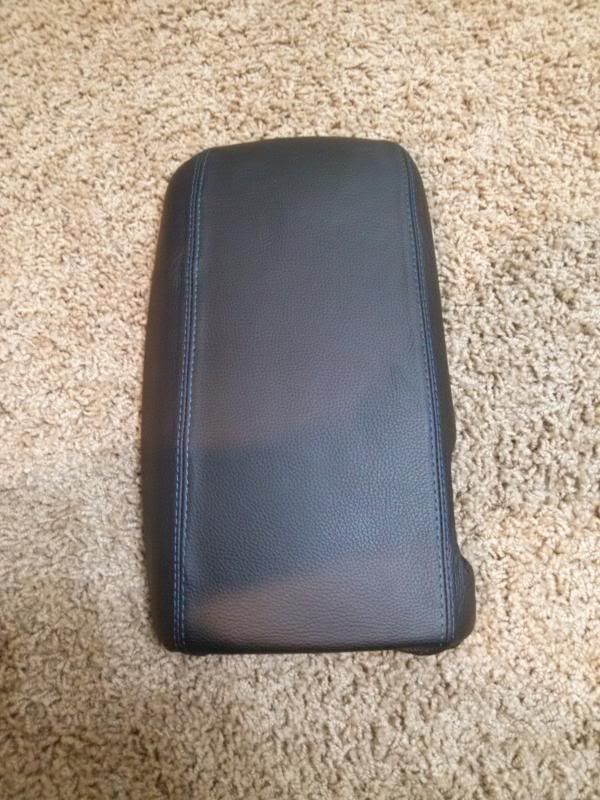
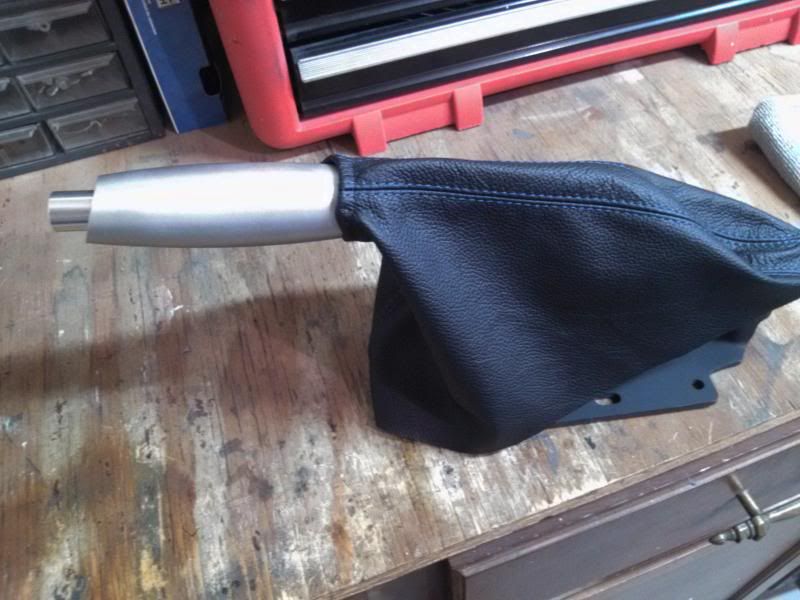
I also got my Redline Goods arm rest and E-brake boot
Posted a write up on the billet handle install
https://ls1tech.com/forums/appearanc...e-4th-gen.html
https://ls1tech.com/forums/parts-cla...-pontiacs.html
Notice the new black fog light switch...much cleaner
Also note the black headlight switch and dimmer controls, along with the padded leather steering wheel I've posted up before
https://ls1tech.com/forums/appearanc...ook-again.html
I also got my Redline Goods arm rest and E-brake boot
Posted a write up on the billet handle install
https://ls1tech.com/forums/appearanc...e-4th-gen.html
Last edited by HotWhipT/A; 12-15-2013 at 01:16 AM.

 03-23-2013, 07:08 PM
#3
Launching!
Join Date: Nov 2007
Location: Nashville, TN
Posts: 271
Likes: 0
Received 0 Likes
on
0 Posts
 03-24-2013, 12:48 AM
#5
OP it looks good! Should look even better once it gets out in the sun a couple of times and pulls tight. (my families mr2 had redone leather seats and a couple of heat cycles and it looked perfect!)

Trending Topics
03-24-2013, 02:43 AM
#8
I think it was just over $100
03-25-2013, 06:18 PM
#11
Teching In

Join Date: Feb 2011
Location: South Bend, Indiana
Posts: 17
Likes: 0
Received 0 Likes
on
0 Posts
Looks great. Where did u find the black *****, and switch? One thing to improve, grey steering wheel switches to black camaro ones. Did mine but ***** drive me crazy.
03-25-2013, 07:32 PM
#12
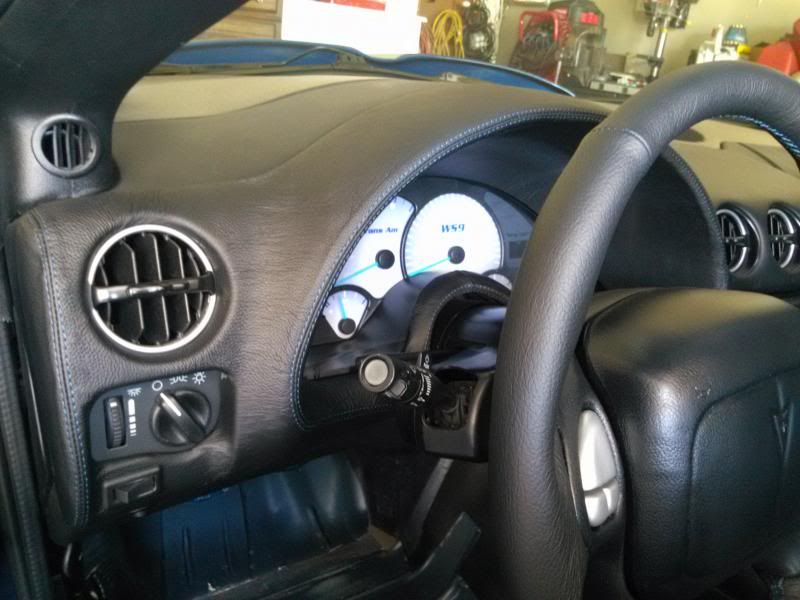
I didn't find anything. As you know the ***** are rubbery. I sprayed them with Duplicolor flat black vinyl dye and they are very durable. It comes off the white part pretty easy. The headlight switch is super simple to pull apart. I sprayed the dimmer control with a satin black. The small silver mark is part of a pinstripe cut and placed real well. The fog light switch is a very basic switch from Autozone.
My steering wheel controls aren't grey. They are glossy silver and they have no lettering. I tried the black look and it looked like complete ****. The silver matches my gauges and my switches on the doors.
Here you can see that and my grey dimmer control/stock fog light switch.
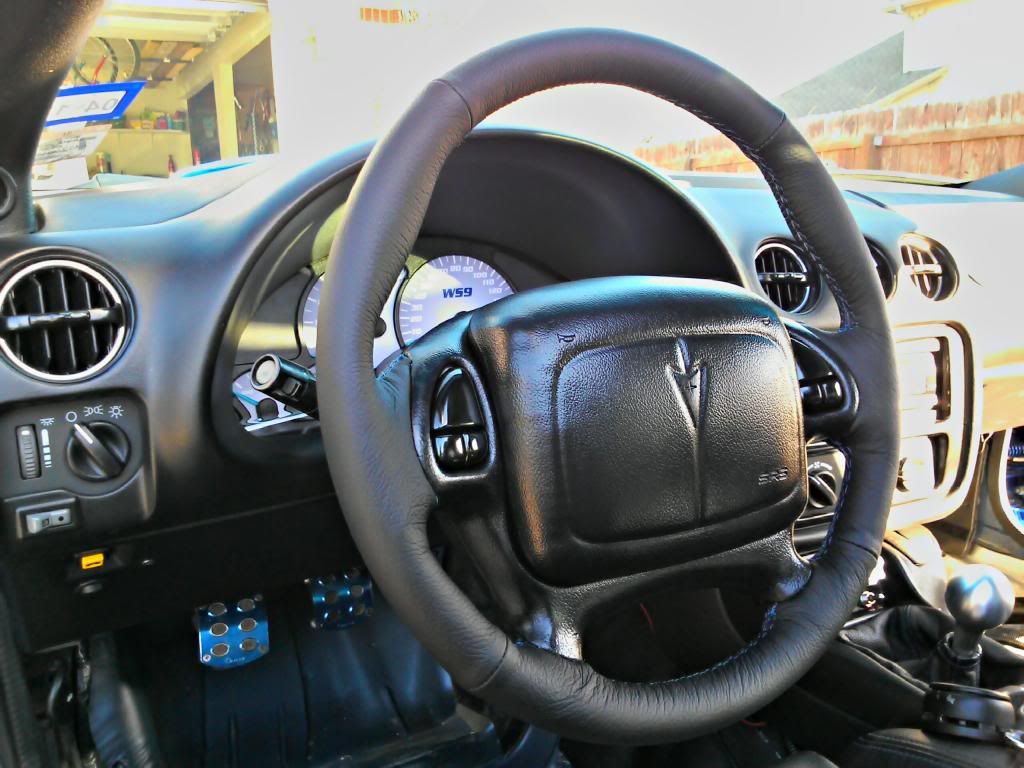
My steering wheel controls aren't grey. They are glossy silver and they have no lettering. I tried the black look and it looked like complete ****. The silver matches my gauges and my switches on the doors.
Here you can see that and my grey dimmer control/stock fog light switch.
03-25-2013, 08:00 PM
#13
 03-25-2013, 08:08 PM
#14
Nice! I like that. How hard was the install?
What are you planning on for the center stack, passenger side, A pillars, etc? Or is Redline doing something for those too?
I would think that leather wrapped A pillars would be a bit much however. Gotta break it up a bit but not sure with what.
What are you planning on for the center stack, passenger side, A pillars, etc? Or is Redline doing something for those too?
I would think that leather wrapped A pillars would be a bit much however. Gotta break it up a bit but not sure with what.
03-25-2013, 10:45 PM
#16
Thought you might've got the dimmer switch from a Camaro. Been thinking about going that route but if it's easy to take a part, I might just paint it too. I plasti-dipped my ***** and they look great and have held up well so far.
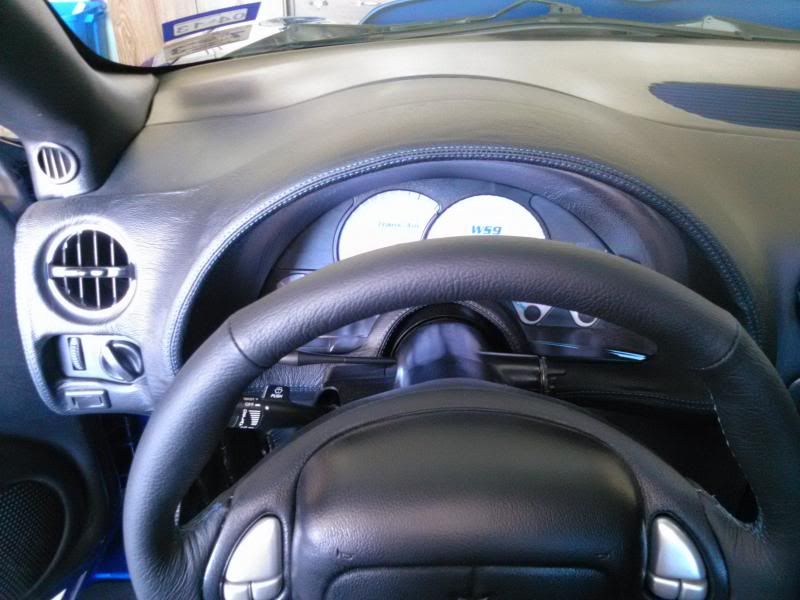
I like the bezel wrap, but It's a bit too much for me. Just makes the dash look cheaper than it already does compared to the 'new' wrap.
I like the bezel wrap, but It's a bit too much for me. Just makes the dash look cheaper than it already does compared to the 'new' wrap.
03-26-2013, 01:05 AM
#18
Nice! I like that. How hard was the install?
What are you planning on for the center stack, passenger side, A pillars, etc? Or is Redline doing something for those too?
I would think that leather wrapped A pillars would be a bit much however. Gotta break it up a bit but not sure with what.
What are you planning on for the center stack, passenger side, A pillars, etc? Or is Redline doing something for those too?
I would think that leather wrapped A pillars would be a bit much however. Gotta break it up a bit but not sure with what.
Thanks
12-15-2013, 01:20 AM
#19
Updated some links to other mods I've done in the first post AND the gauge bezel is FOR SALE!
I'm going to have one made by Redline out of a different material and I'm planning on sending them my door armrests to have those wrapped and stitched. It'll look great!
I'm going to have one made by Redline out of a different material and I'm planning on sending them my door armrests to have those wrapped and stitched. It'll look great!
