


Custom coil Bracketless valve covers
I've see the Holley LS valve covers where the coils mount directly to them eliminating the coil bracket. I really liked how clean and nice it looked, but I didn't like the fact that I had to use the LS2 style coils, so I made my own that allow the heatsink coils to mount to them.
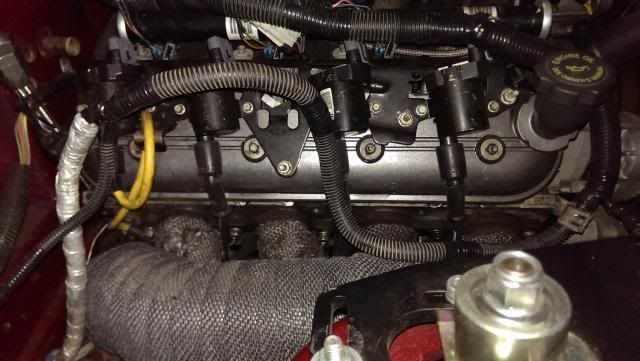
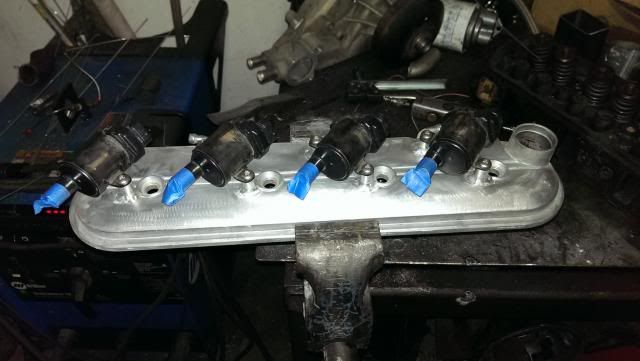
A Friend of mine has heatsink coils on his motor and I simply did not like the look of the bracket or the clutteredness of the valve covers. this just doesn't fit my fancy in the slightest
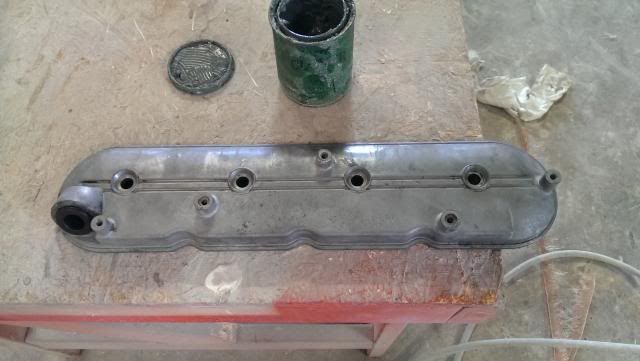
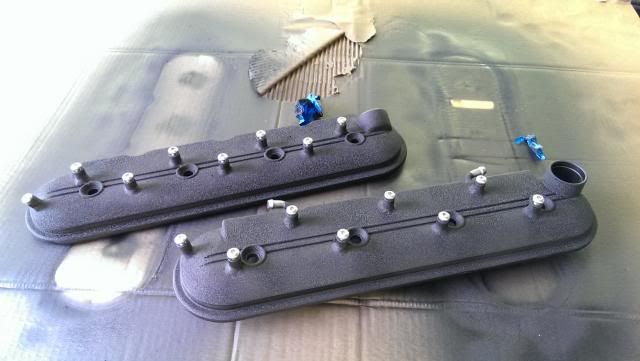
So, the work began. The valve covers started life looking like this.
I took a pneumatic hacksaw and cut the bosses off and smoothened out the casting marks.
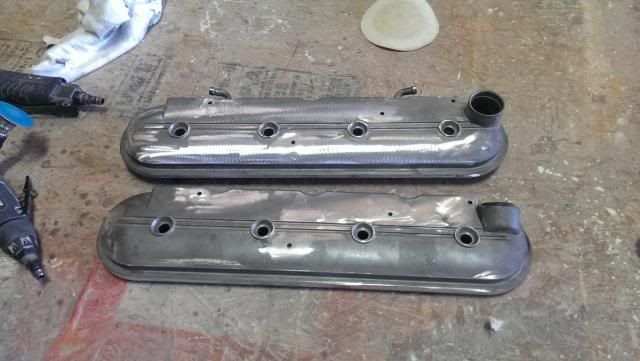
For the new bosses I ordered some aluminum stand offs from McMaster-Carr and some stainless steel button top screws to fasten things together. This is pretty much what things will look like. the old bolt holes have been welded up and smoothened out.
One down one to go
To prep for paint, I sand blasted both valve covers followed by a cleaning with acetone.
I decided to use the VHT black wrinkle paint from Advanced Auto Parts and it really did turn out great.
A little closer view of the wrinkle
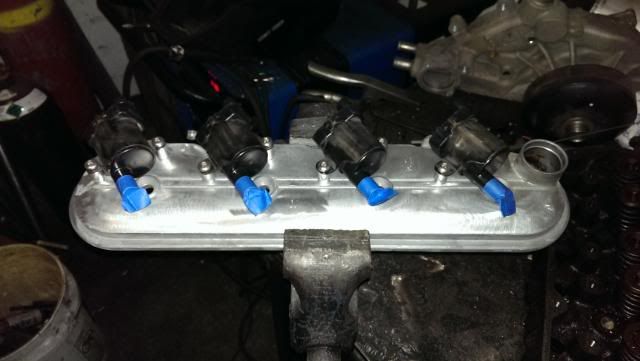
the paint is now dry and waiting to paint the coils to mount everything.
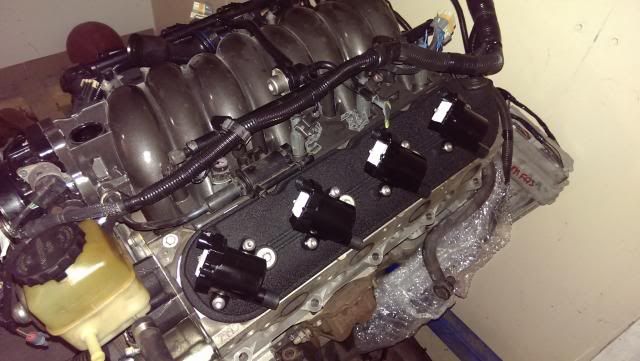
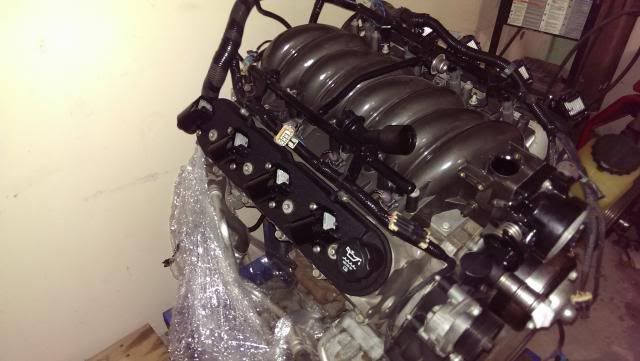
I didn't get any shots of the painting process of the coils, but I sanded everything down with 220 grit sandpaper. Then, I masked everything off and gave all eight coils an acetone bath. Once that was done, I hung them up with some heavy test fishing line ( just had it laying around) and sprayed them with four coats of satin black Krylon fusion. Here is the finished product. It turned out better than I ever could have expected.

A Friend of mine has heatsink coils on his motor and I simply did not like the look of the bracket or the clutteredness of the valve covers. this just doesn't fit my fancy in the slightest

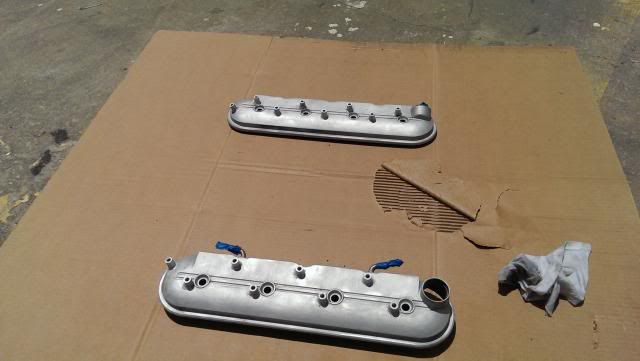
So, the work began. The valve covers started life looking like this.

I took a pneumatic hacksaw and cut the bosses off and smoothened out the casting marks.

For the new bosses I ordered some aluminum stand offs from McMaster-Carr and some stainless steel button top screws to fasten things together. This is pretty much what things will look like. the old bolt holes have been welded up and smoothened out.

One down one to go

To prep for paint, I sand blasted both valve covers followed by a cleaning with acetone.

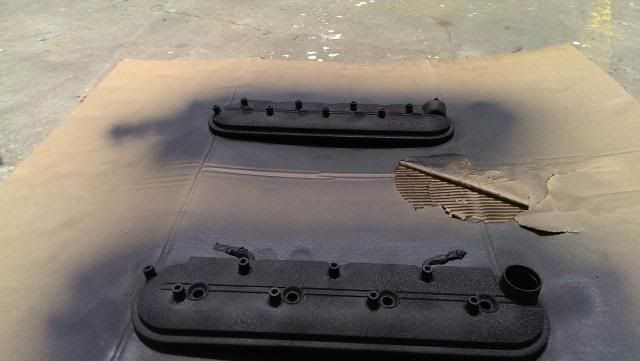
I decided to use the VHT black wrinkle paint from Advanced Auto Parts and it really did turn out great.

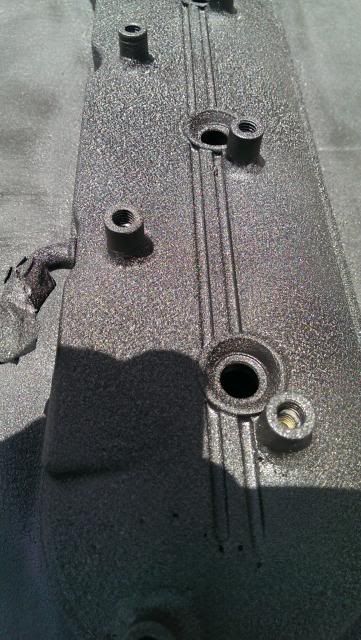
A little closer view of the wrinkle

the paint is now dry and waiting to paint the coils to mount everything.

I didn't get any shots of the painting process of the coils, but I sanded everything down with 220 grit sandpaper. Then, I masked everything off and gave all eight coils an acetone bath. Once that was done, I hung them up with some heavy test fishing line ( just had it laying around) and sprayed them with four coats of satin black Krylon fusion. Here is the finished product. It turned out better than I ever could have expected.


Trending Topics
LS1 Tech Stories
The Best V8 Stories One Small Block at Time

Topdon ONE vs. Artidiag 800 BT2: Which is the Diagnostic Tablet For You?
Pouria Savadkouei
Gas Monkey Built a 6-Wheel Ferrari Testarossa With a Corvette LT4 Engine
Verdad Gallardo
7 Most Reliable High-Performance Engines GM Has Ever Built
Verdad Gallardo
Amazing '71 Camaro Restomod Is Modern Muscle Car Under the Skin
Verdad Gallardo
6 Common C5 Corvette Failures and What's Involved In Repairing Them
Pouria Savadkouei
Retro Modern Bandit Pontiac Trans AM Comes With Burt Reynolds' Autograph
Verdad Gallardo
Top 10 Greatest Cadillac V Series Performance Models Ever, Ranked
Pouria Savadkouei
Top 10 Most Powerful Chevy Trucks Ever Made!

Hennessey's New Supercharged Silverado ZR2 Has 700 HP
Verdad Gallardo
Launching!
Joined: May 2011
Posts: 215
Likes: 0
From: Honey Brook, Pa.
Looks good, nice mod! It sure cleans things up! At first I thought you were using 2 rightside covers cause the pics with blue tape on the coils shows the same cover with the coils facing different directions. After a closer look I saw no welds on the top pic. The end result really looks good!!
There was actually a slight mistake when having the coils welded on the driver side valve cover, I wanted the coils to be exactly like the the passenger side for plug wire routing but the welder accidentally welded the on on the opposite direction, but it really made it look symmetrical with the heatsinks all facing towards the front of the car. Also, there is no issue with plug wire length, on either side.


I've thought about it making them for other people, but I had a friend weld them up for me so I would have to talk to him. In just materials I have approximately $50 in them.