
99-02 odo, swapped OEM smd leds with white smd leds, +converting odo to OLED screen
 06-17-2014, 08:57 PM
#81

Thanks man. Unfortuately, as far as I can tell at this point, this would only work for the 99-02 clusters. Even though they look the same as the 97-98's, the odometer design is completely different and the 99-02's use alot of class 2 serial data. The main circuit board is vastly different as well, the main circuit board is where Im getting the odo/trip and mph info from for the screen, and class 2 serial data for the low fuel light.
 06-18-2014, 05:41 PM
#82
TECH Enthusiast
iTrader: (4)
Join Date: Dec 2008
Location: Haverhill Ma
Posts: 627
Likes: 0
Received 0 Likes
on
0 Posts

Thanks man. Unfortuately, as far as I can tell at this point, this would only work for the 99-02 clusters. Even though they look the same as the 97-98's, the odometer design is completely different and the 99-02's use alot of class 2 serial data. The main circuit board is vastly different as well, the main circuit board is where Im getting the odo/trip and mph info from for the screen, and class 2 serial data for the low fuel light.
Just need to decide to swap it. If I do it though, its such a big task I might as well look for an ebony dash. Then I'll want the rest of the ebony interior.. then it just branches from there so..
 07-07-2014, 05:32 PM
#84
Holding pattern right now man. Waiting for the parts to arrive to guy helping me do the programming in Germany. Usps said it can take up to 6-8 weeks, I shipped the oled module and connectors out 3 weeks ago. Soon as he gets the parts stuff should happen pretty fast.
 08-03-2014, 11:07 AM
#88
Small update on this for those that care. The white led's with the lcd just isnt going to work. Given the nature of how white leds work, theres no way to illuminate lcd glass in a display like this without a blue tint. Im so ocd, so that's just not exceptable to me.
So...I'm taking the opportunity to further expand my knowledge of electrical code writing/programming and learn something that will help me in more areas outside the car. I bought a 160x128 pixel, full color OLED module. With the help of a pretty brilliant programmer I met in Germany I figured out how to do the OLED on my own with his help and skipping the INSANE cost of having a business design one. I might have a $100 in the display when all is said and done as opposed to $3-4000 having one custom made, my jaw was on the ground getting quotes, I had no idea. He is helping me design a board that communicates with the stock cluster serial data. The display will be very simple for now just being black and white. When my skills improve I may do more with it.
Here the new module I got for the ODO. It is bigger than the stock screen, and thankfully its about identical to the size of the screen from the plx dm-100 scan tool Im using on the opposite side of the cluster. Needless to say a little fab work is in order to the instrument cluster housing.

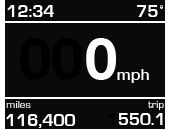
Heres what the new ODO display will look like. The OLED has a 2000:1 contrast ratio, blacks will be pure black and whites will be pure white. The guy in Germany already has a prototype board that is communicating with the 99-02 f-car cluster making it possible to get the speed, odo and trip info. The time and temp are external inputs.
In the gauge face.
Should be about a month to month and 1/2. Cant wait to finally get this project done. Ive learned a ton of cool nerdy stuff, lol .
So...I'm taking the opportunity to further expand my knowledge of electrical code writing/programming and learn something that will help me in more areas outside the car. I bought a 160x128 pixel, full color OLED module. With the help of a pretty brilliant programmer I met in Germany I figured out how to do the OLED on my own with his help and skipping the INSANE cost of having a business design one. I might have a $100 in the display when all is said and done as opposed to $3-4000 having one custom made, my jaw was on the ground getting quotes, I had no idea. He is helping me design a board that communicates with the stock cluster serial data. The display will be very simple for now just being black and white. When my skills improve I may do more with it.
Here the new module I got for the ODO. It is bigger than the stock screen, and thankfully its about identical to the size of the screen from the plx dm-100 scan tool Im using on the opposite side of the cluster. Needless to say a little fab work is in order to the instrument cluster housing.
Heres what the new ODO display will look like. The OLED has a 2000:1 contrast ratio, blacks will be pure black and whites will be pure white. The guy in Germany already has a prototype board that is communicating with the 99-02 f-car cluster making it possible to get the speed, odo and trip info. The time and temp are external inputs.

In the gauge face.

Should be about a month to month and 1/2. Cant wait to finally get this project done. Ive learned a ton of cool nerdy stuff, lol .
 08-05-2014, 04:39 AM
#89
Thanks.
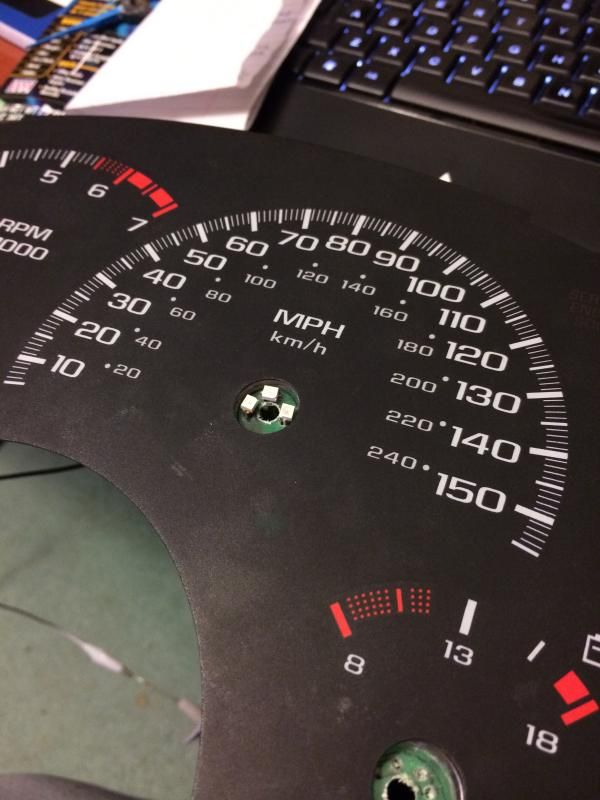
Not ready to show anything on the OLED screen, but Im getting other aspects of the cluster worked out. Namely the blue needles and the lighting. Since there's quite a bit of custom aspects of this cluster, the new gauge face is the last thing I will have made. In the meantime, I scraped off the blue tint on the back of a stock face and am using it for now.
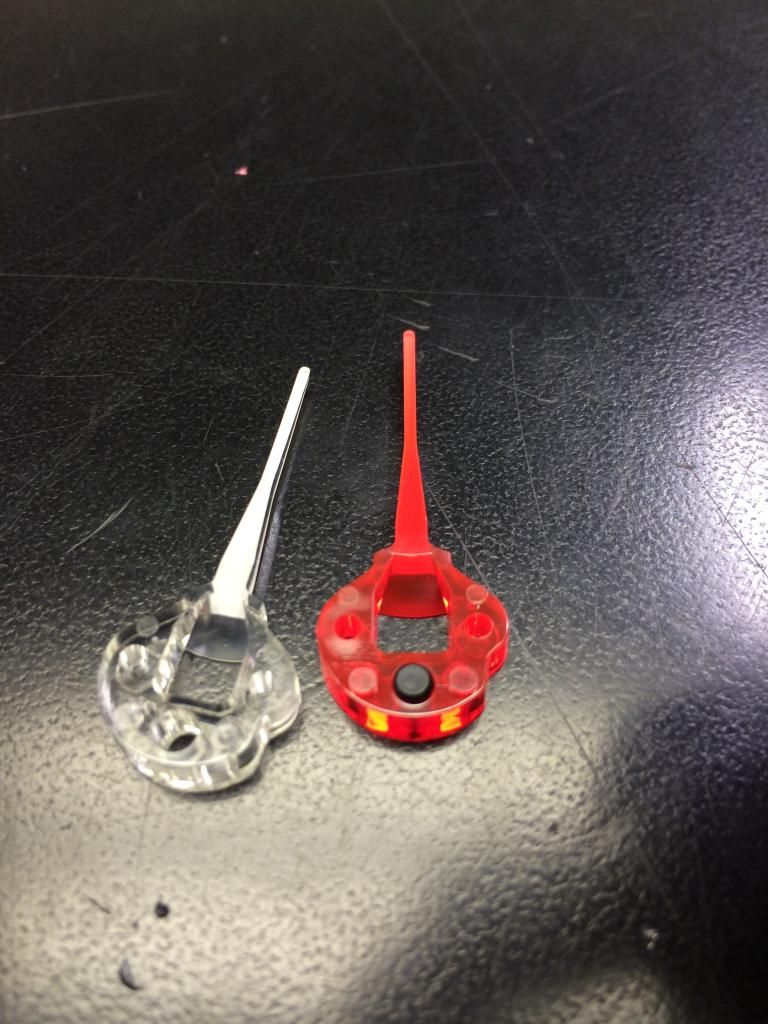
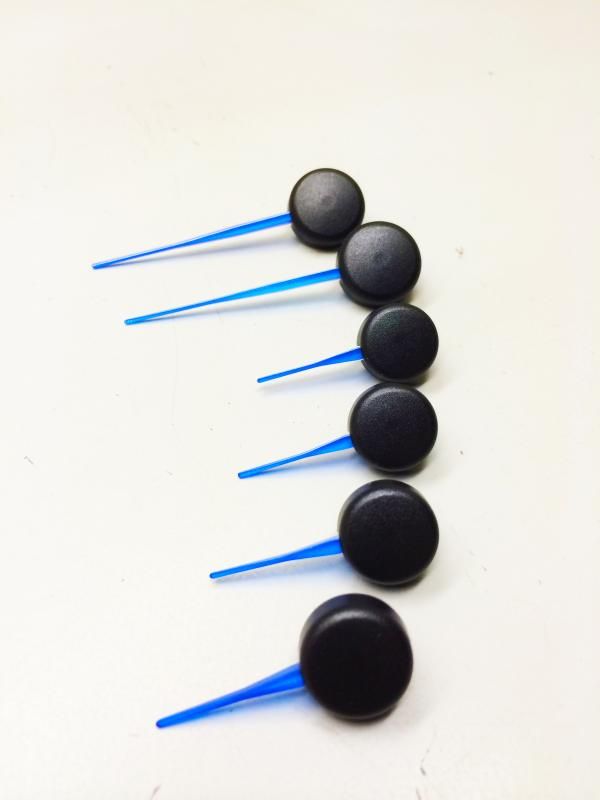
Needles- It took alot of work to get the blue how I wanted. Benchmark was the VW Golf R color. First off was getting new needles. I didnt feel like spending alot of money on this, so I looked in GM's parts bin by going through a local u-pick junkyard. Turns out the 2000'ish Chevy Venture/Olds Silhouette minivans use the exact needles as the Camaro/Firebirds, except they are white. Downside, you cant get a full set of needles from one cluster, you need 2. The minivan clusters have a tach, speedo and 2 smaller gauges. The tach needles is smaller, so you need 2 speedo needles, and the 2 smaller gauge needles from each cluster to make the full set of 6 we need. Good thing for me this junkyard is u-pick in a true sense, they could care less if you take apart a cluster for the needles only. Went up to pay and the guy laughed and said have a nice day. Score...cost $0.
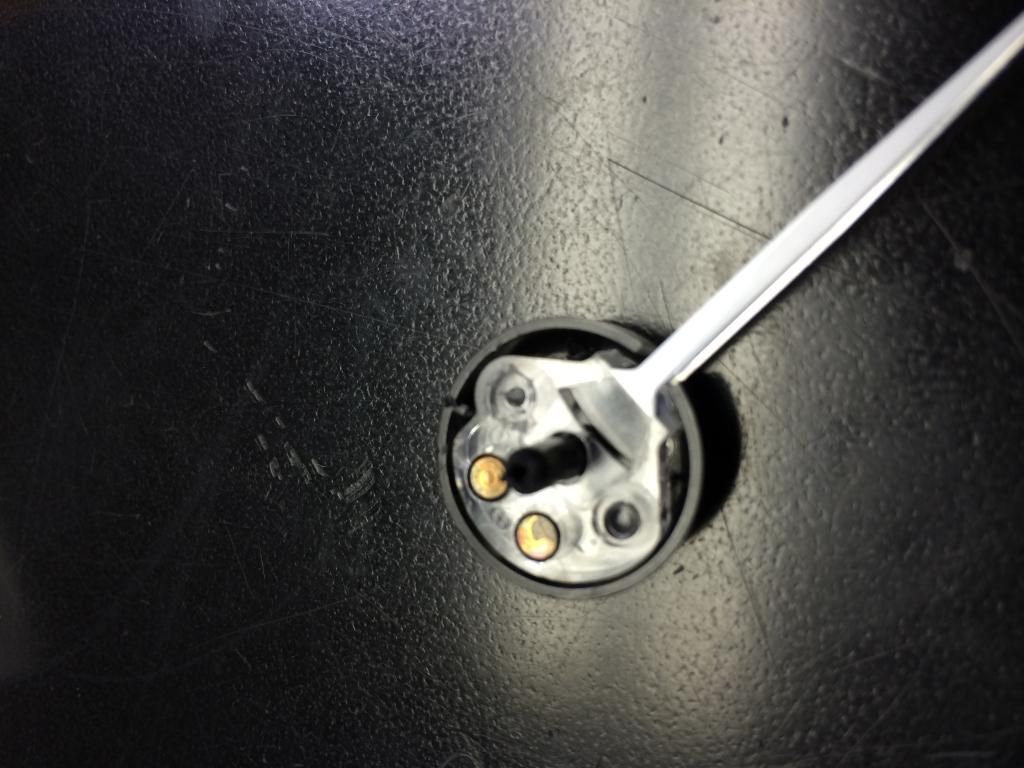
You do need to swap the black caps though with the F-car caps. On the minivan caps, the stems are much longer and the spindle hole is much smaller.
Getting the caps off is not a biggie. They are plastic welded on so you need to cut the smashed plastic cap off each post. Super easy as the plastic is really thin. To reapply a VERY small amount of epoxy and they will never come.
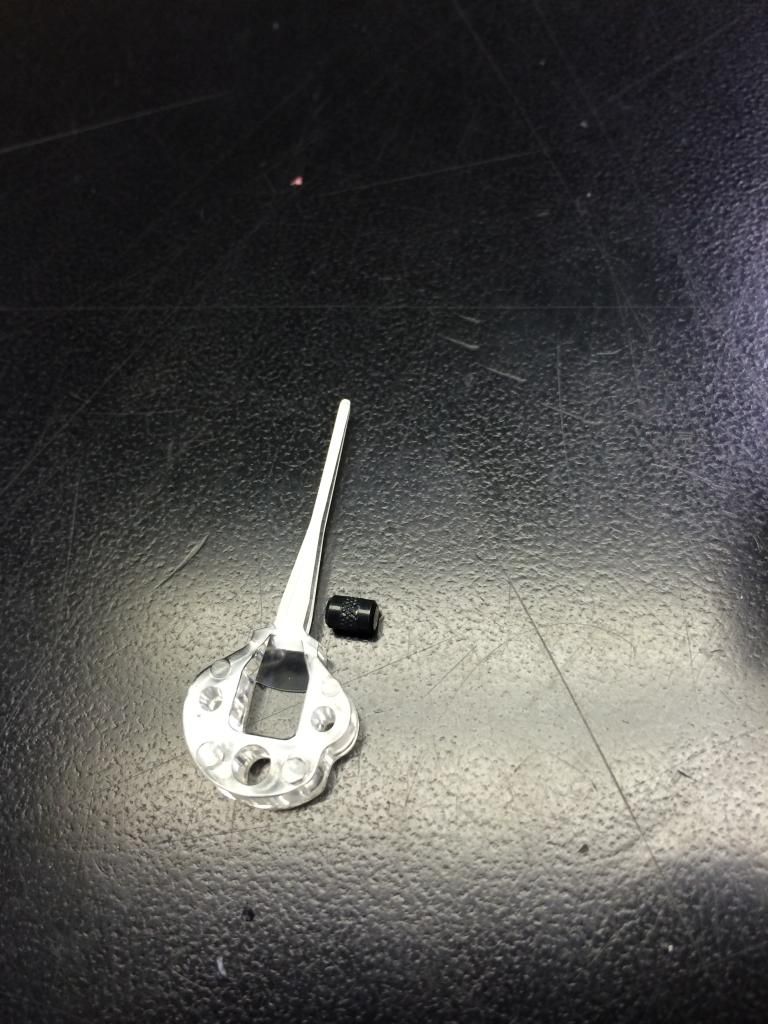
One cap cut off the post.
Comparison between Camaro and Venture Speedo needles diassembled.
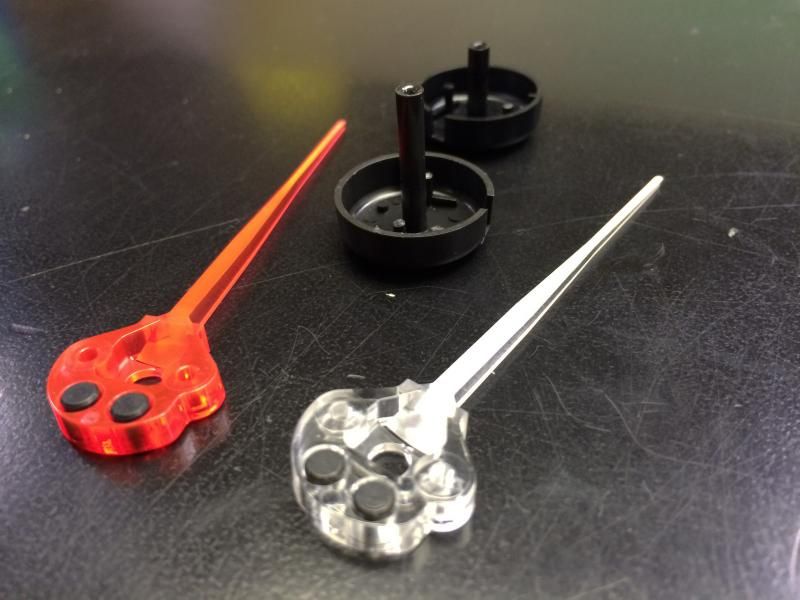
Heres the smaller needles. Note, the Venture needles dont come with the weight the Camaro has.
Sooo, you need to swap it over. Its stupid easy, just push the weight out of the Camaro needles and install into the Venture needle. You will need pliers to squeeze it in. The weights are splined and designed to be pressed in.
Done
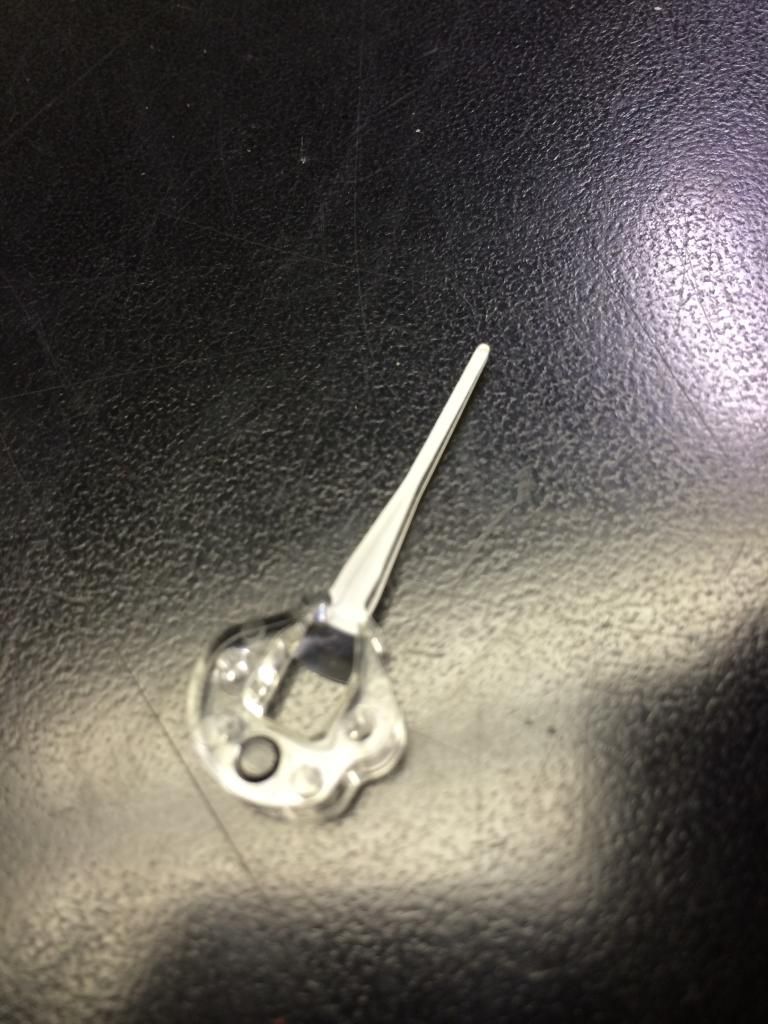
Now the mechanics are settled, time to paint. Took awhile to find the exact color I wanted. Settled on Tamiya transparent blue polycarbonate paint and Tamiya clearcoat.
Just ran a zip tie thru the holes on the center of each needles to they were stable to paint.
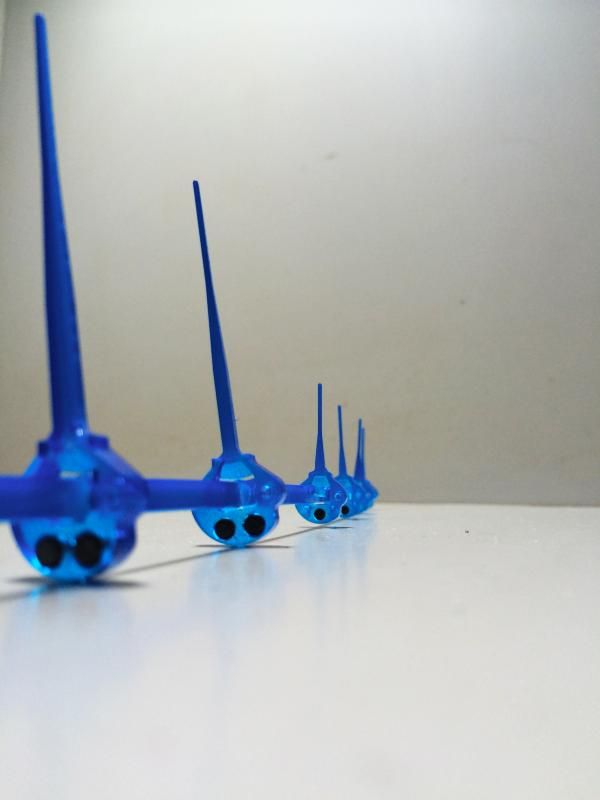
Because I could I weighed them, the painted needle weighs 1.5 grams just like the unpainted one.
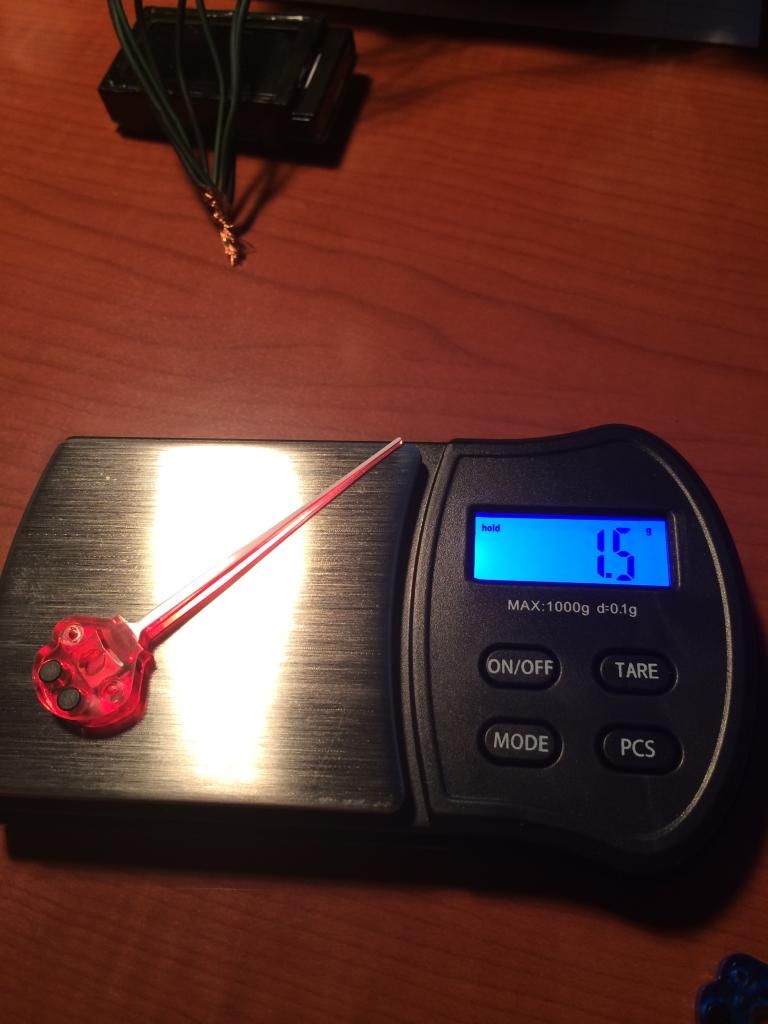
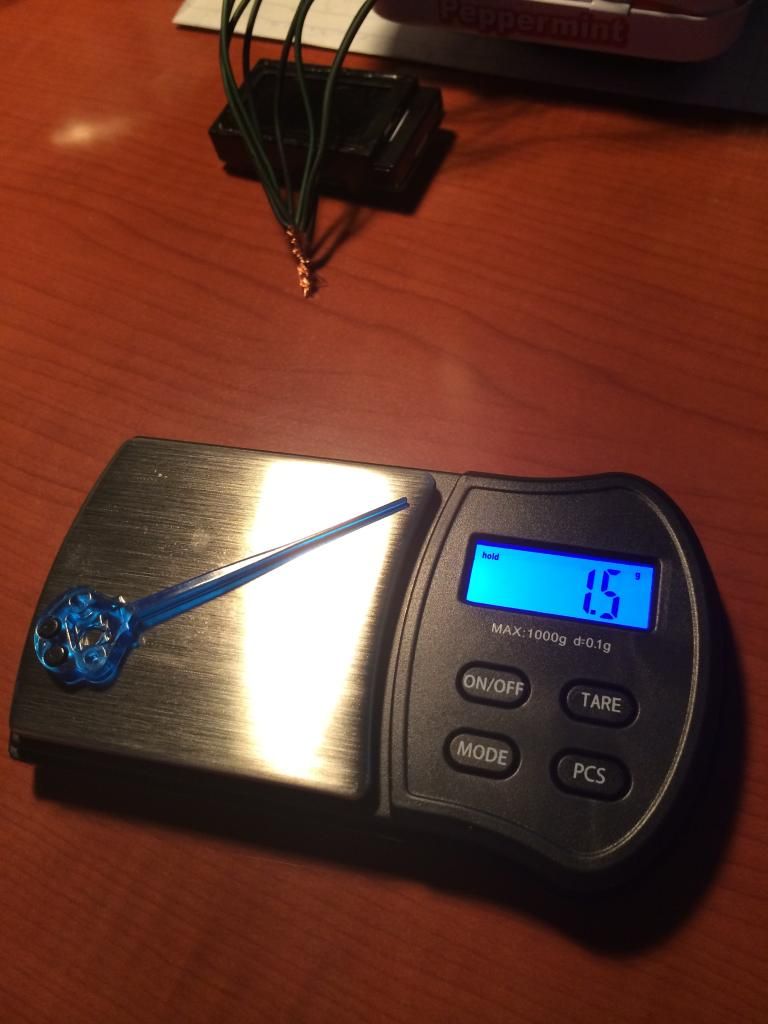
Done
Heres where it get a little interesting. I wanted to make the needle lighting independent to the backlighting. The stock light guides suck making the light distribution through the needles terrible. Time for a solution. I drilled out the area where the needles are.
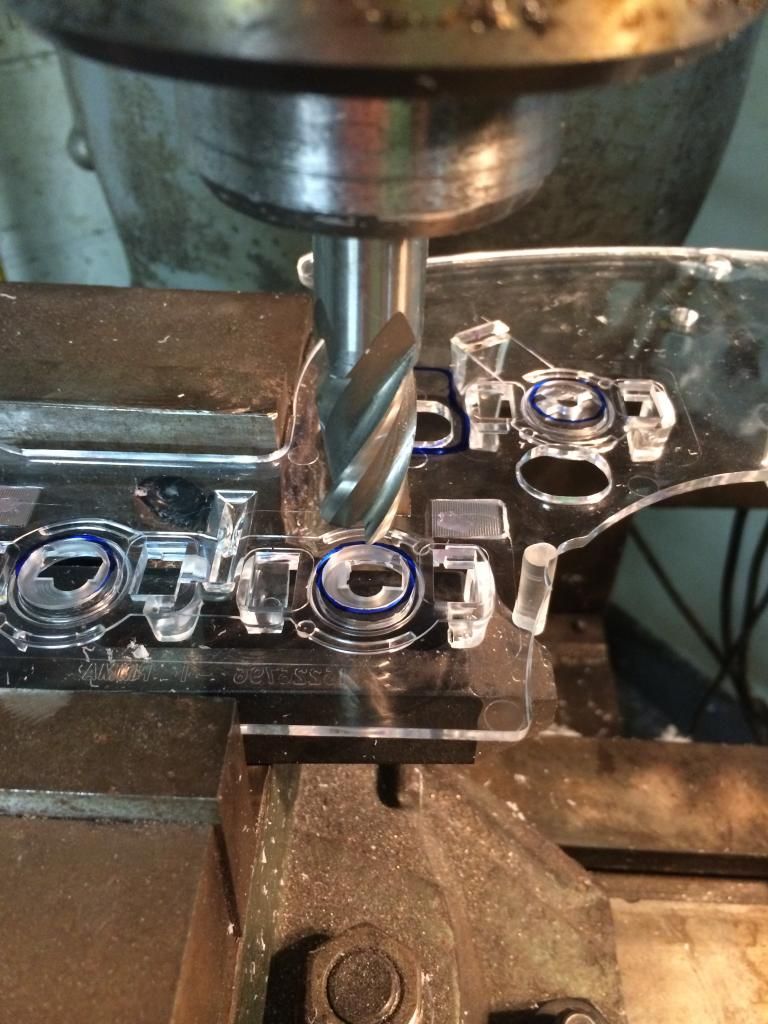
Next I made little circuit boards and used Osram plcc2 smd leds in true blue. The work is messy, theyre just proto's for light placement. For the finished products I will etch surface mount pcb's so it will nice and tidy and professionally done.
Lit up
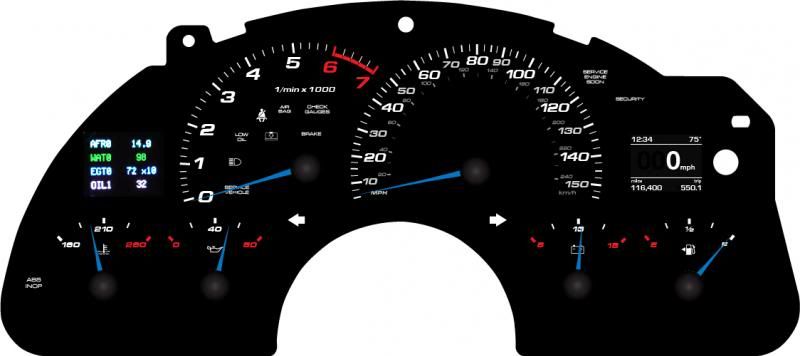
Then onto fabbing the main backlighting. Right now I only have the speedo done. Im doing all the gauges independent right now for led placement. The finished product though will be 1 very thin surface mount pcb (.062") That pcb will house the white backlighting, turn signal leds and all the re-located warning light leds.
Again, messy for the proto lol. I did not want to use this many LEDs, but the area is so slim its impossible to get the full potential spread of light these leds are capable of. Just playing around, if I was about 6" away I could light the whole speedo with 4 of these little leds and the light filter. Leds again are Osram plcc2 smds, this time in pure white, 5600 kelvin to be exact. Most of the white leds are 6500 kelvin and above, I didnt want the bluish white they make. These 5600K leds ended up being perfection, pure white, no bluish hue or yellowish hue.
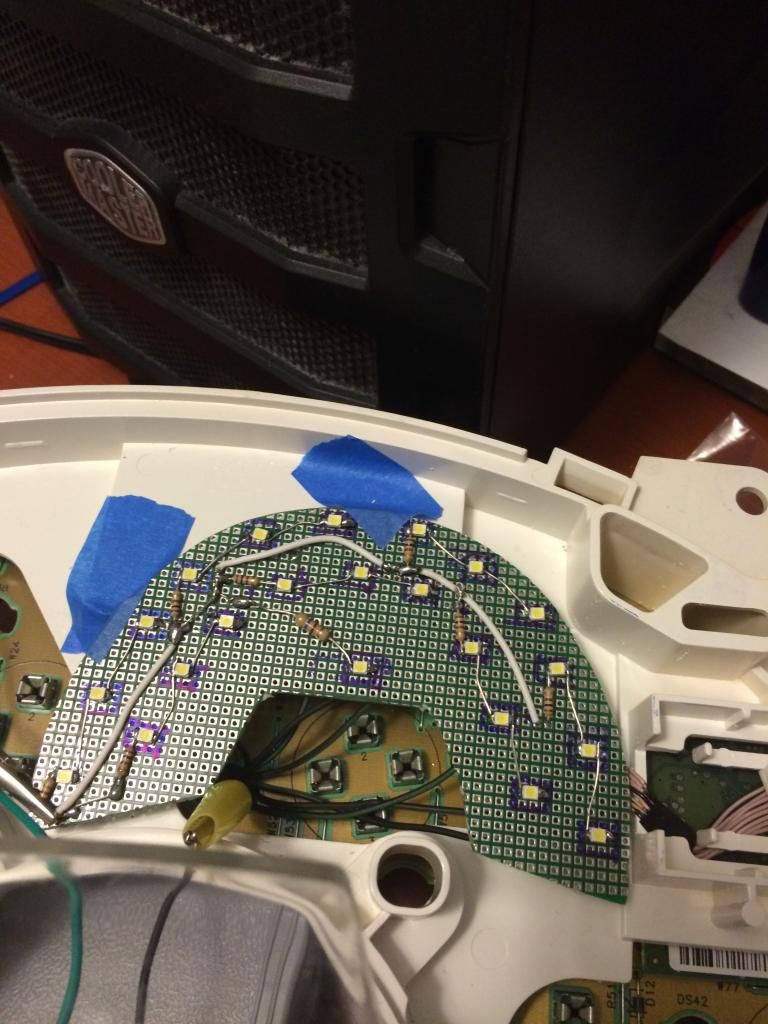
Next step with the backlighting is making sure theres no hot or cold spots like the stock lighting. I also did not want blinding bright light. I used a Optix light filter from Plaskolite made for diffusing led light. Its a translucent white polycarbonate. It did its job perfectly.
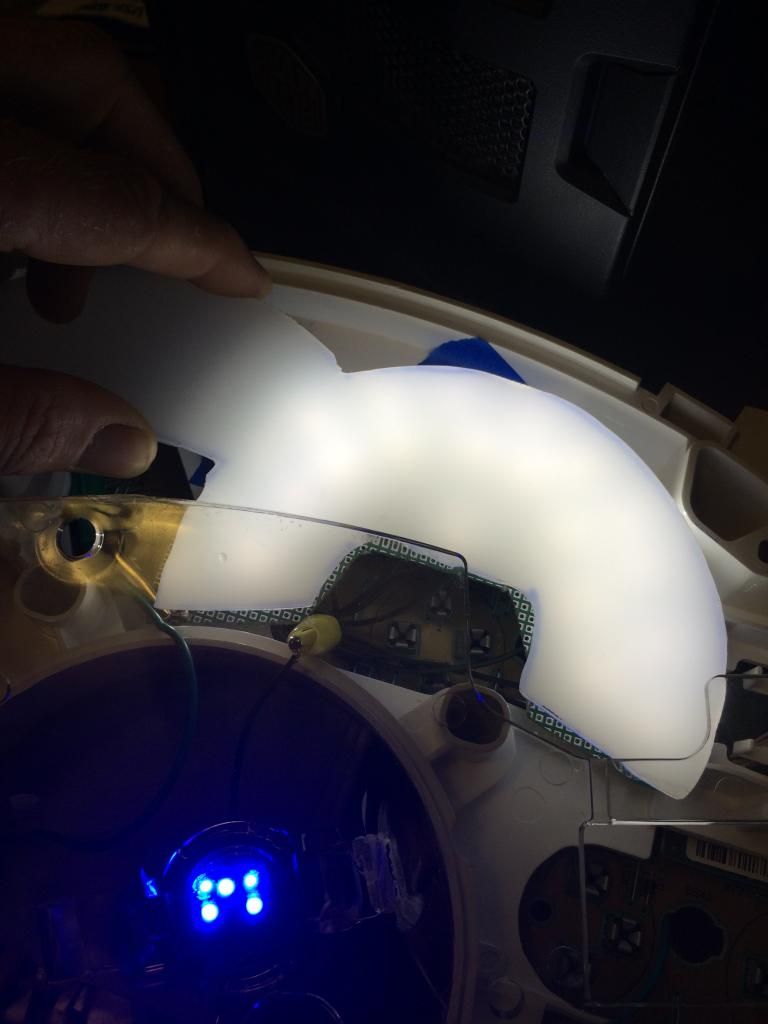
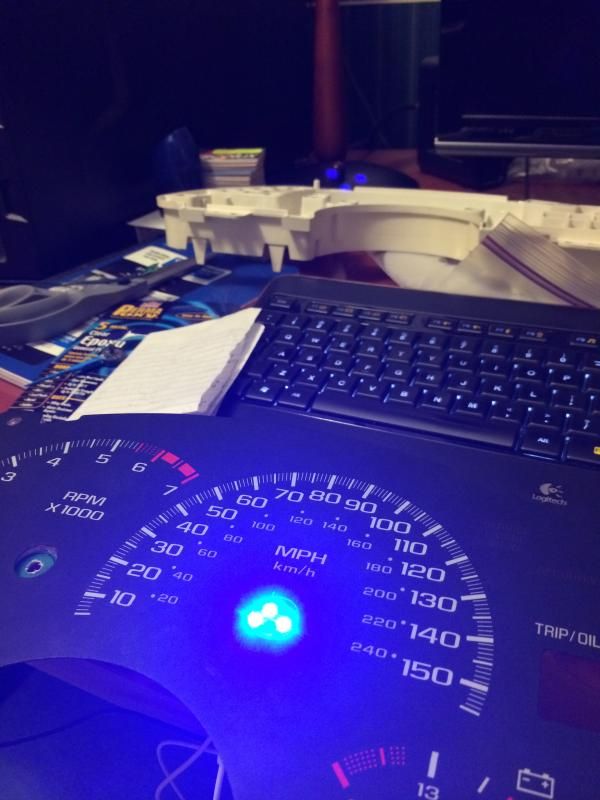
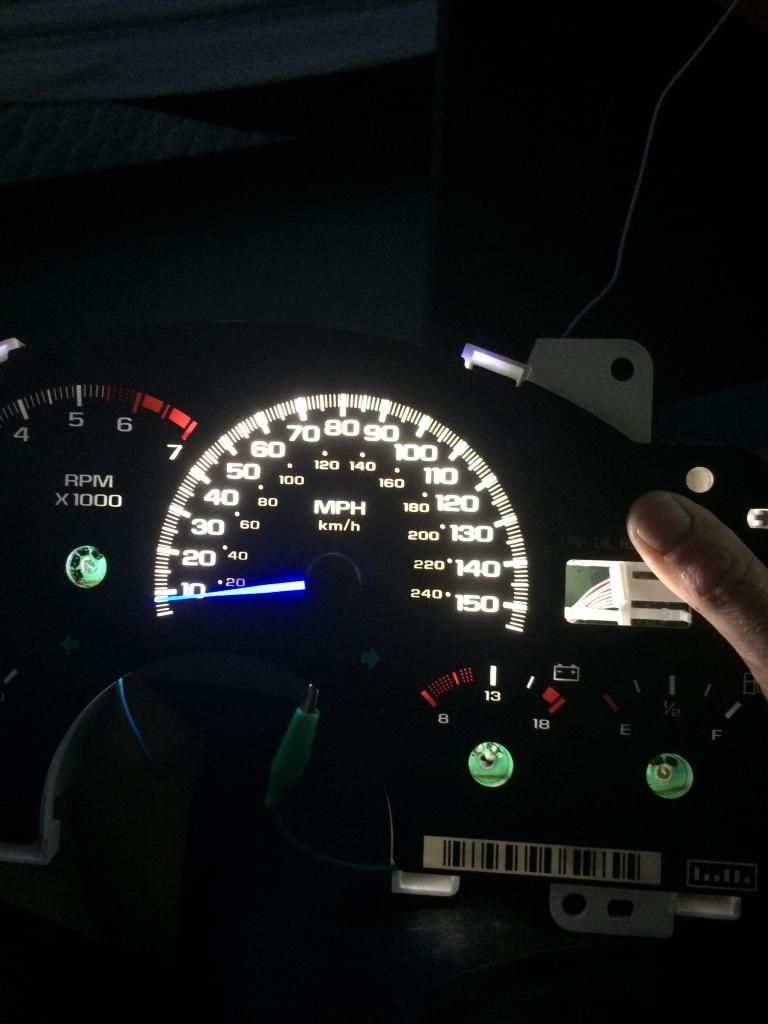
It looks kickass lit up. Not to bright , no hot or cold spots, the blue in the needle is super rich, bright and even all the way to the tip.
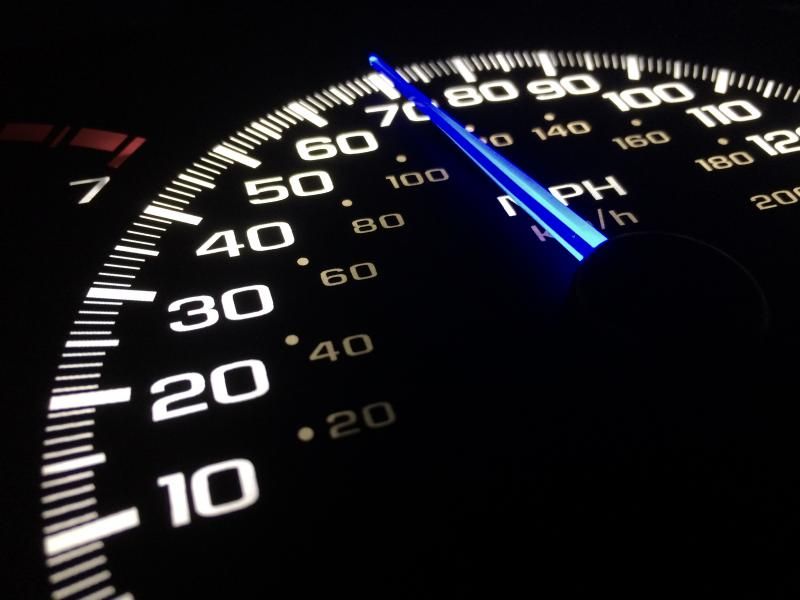

At this angle, my iphone cam is making the white look waaay brighter than it really is.
Not ready to show anything on the OLED screen, but Im getting other aspects of the cluster worked out. Namely the blue needles and the lighting. Since there's quite a bit of custom aspects of this cluster, the new gauge face is the last thing I will have made. In the meantime, I scraped off the blue tint on the back of a stock face and am using it for now.
Needles- It took alot of work to get the blue how I wanted. Benchmark was the VW Golf R color. First off was getting new needles. I didnt feel like spending alot of money on this, so I looked in GM's parts bin by going through a local u-pick junkyard. Turns out the 2000'ish Chevy Venture/Olds Silhouette minivans use the exact needles as the Camaro/Firebirds, except they are white. Downside, you cant get a full set of needles from one cluster, you need 2. The minivan clusters have a tach, speedo and 2 smaller gauges. The tach needles is smaller, so you need 2 speedo needles, and the 2 smaller gauge needles from each cluster to make the full set of 6 we need. Good thing for me this junkyard is u-pick in a true sense, they could care less if you take apart a cluster for the needles only. Went up to pay and the guy laughed and said have a nice day. Score...cost $0.
You do need to swap the black caps though with the F-car caps. On the minivan caps, the stems are much longer and the spindle hole is much smaller.
Getting the caps off is not a biggie. They are plastic welded on so you need to cut the smashed plastic cap off each post. Super easy as the plastic is really thin. To reapply a VERY small amount of epoxy and they will never come.
One cap cut off the post.

Comparison between Camaro and Venture Speedo needles diassembled.

Heres the smaller needles. Note, the Venture needles dont come with the weight the Camaro has.

Sooo, you need to swap it over. Its stupid easy, just push the weight out of the Camaro needles and install into the Venture needle. You will need pliers to squeeze it in. The weights are splined and designed to be pressed in.

Done

Now the mechanics are settled, time to paint. Took awhile to find the exact color I wanted. Settled on Tamiya transparent blue polycarbonate paint and Tamiya clearcoat.
Just ran a zip tie thru the holes on the center of each needles to they were stable to paint.

Because I could I weighed them, the painted needle weighs 1.5 grams just like the unpainted one.


Done


Heres where it get a little interesting. I wanted to make the needle lighting independent to the backlighting. The stock light guides suck making the light distribution through the needles terrible. Time for a solution. I drilled out the area where the needles are.

Next I made little circuit boards and used Osram plcc2 smd leds in true blue. The work is messy, theyre just proto's for light placement. For the finished products I will etch surface mount pcb's so it will nice and tidy and professionally done.

Lit up

Then onto fabbing the main backlighting. Right now I only have the speedo done. Im doing all the gauges independent right now for led placement. The finished product though will be 1 very thin surface mount pcb (.062") That pcb will house the white backlighting, turn signal leds and all the re-located warning light leds.
Again, messy for the proto lol. I did not want to use this many LEDs, but the area is so slim its impossible to get the full potential spread of light these leds are capable of. Just playing around, if I was about 6" away I could light the whole speedo with 4 of these little leds and the light filter. Leds again are Osram plcc2 smds, this time in pure white, 5600 kelvin to be exact. Most of the white leds are 6500 kelvin and above, I didnt want the bluish white they make. These 5600K leds ended up being perfection, pure white, no bluish hue or yellowish hue.

Next step with the backlighting is making sure theres no hot or cold spots like the stock lighting. I also did not want blinding bright light. I used a Optix light filter from Plaskolite made for diffusing led light. Its a translucent white polycarbonate. It did its job perfectly.

It looks kickass lit up. Not to bright , no hot or cold spots, the blue in the needle is super rich, bright and even all the way to the tip.


At this angle, my iphone cam is making the white look waaay brighter than it really is.

 08-05-2014, 07:42 AM
#91

Badass work, man! You really took this far - I am very impressed. I did something similar last winter...I stripped off the blue filter, and I ended up adding some NEO-3 LED's around the perimeter of the housing to take care of the hot spots (really, I just lit up the cold spots). Badass job on making your own boards and using that diffuser!
Also, really interested in what you did with the needles. Drives me nuts that my needles are so dark while the rest of my cluster is bright. I may have to do something similar. I don't mind the orange coloring on the needles, so really, if I can make them brighter, I'll be damn happy.
Lastly - I couldn't stand not being able to dim the LEDs. They do ever so slightly, but not enough. I'm not electrically inclined...I can follow directions, but they need to be in laymen's terms and perfectly laid out for me...I ended up finding a PWM kit mentioned on HIDplanet...it's a Bakatronics kit. Most PWM's won't work with a common ground. With minor modification, this kit allows for a common ground to be used. I have the circuit built and have bench tested it. I did get a custom McNord dimmer overlay made as I couldn't find a good way to get the potentiometer integrated into the stock dimmer wheel. Even if it physically fit, the "sweep" wouldn't work properly. I basically need to get the custom dimmer switch assembly completed and installed, and I should have full dimming capability on the dash lights again. All have been swapped over to LED, so the current draw is minimal and this PWM circuit *should* be able to support it.
Really badass work! I am thinking I'd love to swap in your OLED and do the scangauge as well, and finally bite the bullet on a custom McNord overlay.
08-05-2014, 10:24 AM
#92
Thanks guys
Nice job on the dimmer man. Thats one area I have not even adressed yet , but plan to. You mind shooting me a link to hid planet article? I was going to do something similar with pwm circuit and run off the stock dimmer wheel, but it was more custom work that was willing or wanted to do to have the stupid dimmer wheel "look" stock. Im "told" that using the 12 volts going thru the OE dimmer wheel for the supply voltage to the pwm circuit will work. Then as you decrease voltage supply to pwm board, the leds will dim properly. I have not verified it yet. If that doesnt work Im just going to ditch the headlight switch/dimmer wheel and fab in a switch/dimmer from a GM car that uses all LEDs inside.
Heres the assembly I want to try to make work. Its from a 07-14 Escalade

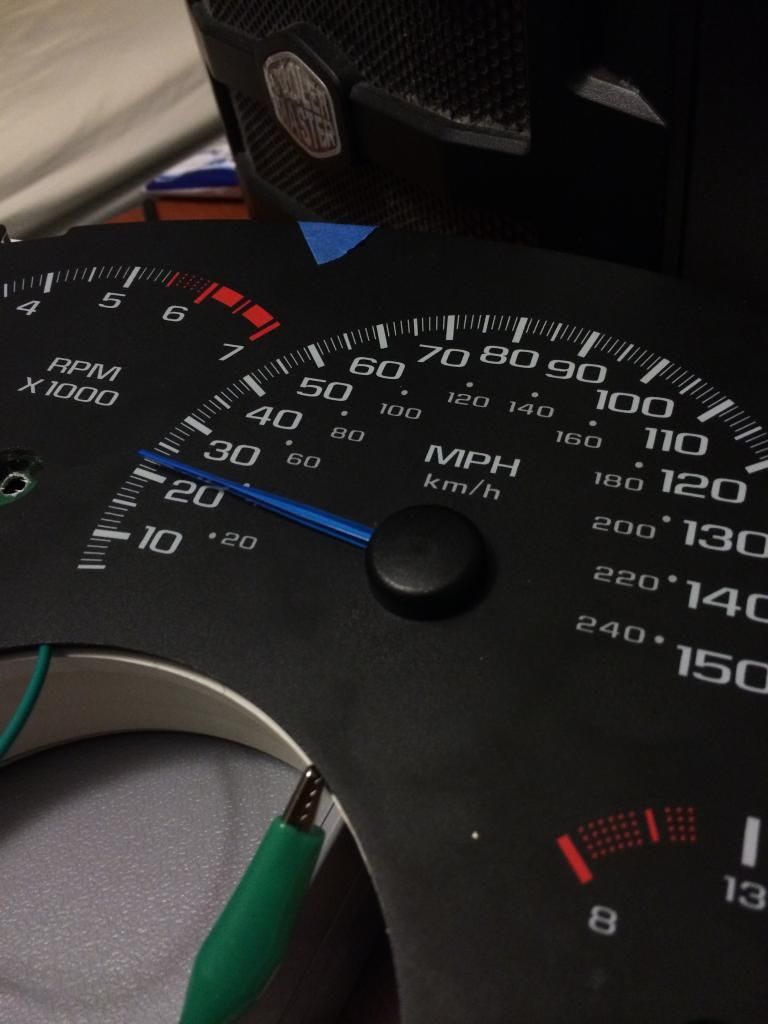
When the needle lighting is done completely I am gonna make a tutorial. It is quite tedious as you dont have much room to work with and everything has to be compact enough to not interfere with the big and bulky old school air cores that drive the gauge needles. Hole through's wont work here, has to be surface mount stuff. On the upside, your needles wouldnt be washed out anymore. They look orange because they're being lit up with white light.
Heres the stock red needle lit up with a hyper red led.
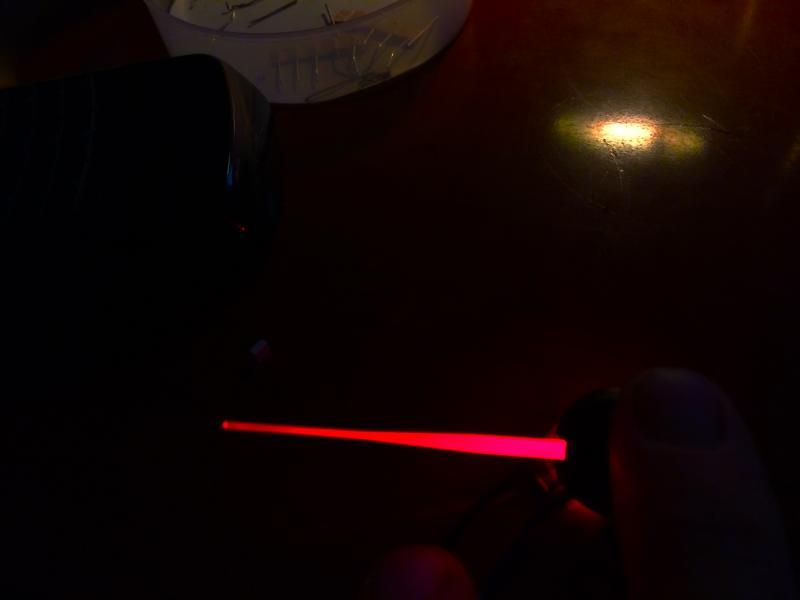
Im about to order the scan gauge, its been out of stock for months and months grrr. I found out it uses the exact same screen as the one I got for my ODO.
Nice job on the dimmer man. Thats one area I have not even adressed yet , but plan to. You mind shooting me a link to hid planet article? I was going to do something similar with pwm circuit and run off the stock dimmer wheel, but it was more custom work that was willing or wanted to do to have the stupid dimmer wheel "look" stock. Im "told" that using the 12 volts going thru the OE dimmer wheel for the supply voltage to the pwm circuit will work. Then as you decrease voltage supply to pwm board, the leds will dim properly. I have not verified it yet. If that doesnt work Im just going to ditch the headlight switch/dimmer wheel and fab in a switch/dimmer from a GM car that uses all LEDs inside.
Heres the assembly I want to try to make work. Its from a 07-14 Escalade
When the needle lighting is done completely I am gonna make a tutorial. It is quite tedious as you dont have much room to work with and everything has to be compact enough to not interfere with the big and bulky old school air cores that drive the gauge needles. Hole through's wont work here, has to be surface mount stuff. On the upside, your needles wouldnt be washed out anymore. They look orange because they're being lit up with white light.
Heres the stock red needle lit up with a hyper red led.

Im about to order the scan gauge, its been out of stock for months and months grrr. I found out it uses the exact same screen as the one I got for my ODO.
 08-07-2014, 08:10 AM
#95

Awesome work so far!!
Im really jealous of your ability to work with the screens. A couple years back, I tried to disect and install a PID center screen from a Grand Prix into the overhead console in my thirdgen LS1 swap. I figured since it had a serial input, it might pull the info that I need from the PCM and work. And it did...sorta. But there were too many missing inputs due to the different PCMs.
I would LOVE to add custom screens, or at least one custom screen in the overhead. Its way beyond me. haha.
J.
08-07-2014, 05:14 PM
#98
Awesome work so far!!
Im really jealous of your ability to work with the screens. A couple years back, I tried to disect and install a PID center screen from a Grand Prix into the overhead console in my thirdgen LS1 swap. I figured since it had a serial input, it might pull the info that I need from the PCM and work. And it did...sorta. But there were too many missing inputs due to the different PCMs.
I would LOVE to add custom screens, or at least one custom screen in the overhead. Its way beyond me. haha.
J.
Im really jealous of your ability to work with the screens. A couple years back, I tried to disect and install a PID center screen from a Grand Prix into the overhead console in my thirdgen LS1 swap. I figured since it had a serial input, it might pull the info that I need from the PCM and work. And it did...sorta. But there were too many missing inputs due to the different PCMs.
I would LOVE to add custom screens, or at least one custom screen in the overhead. Its way beyond me. haha.
J.
Thanks for the good words guys. Its been alot of work, but its paying off. When this is done and all the bugs worked out, I will be making the code for the oled available for free if anyone would like to tackle the project themselves, along with tutorials to program it, the independantly lit needles and the cluster illumination with plcc2 surface mount leds.
08-07-2014, 09:50 PM
#99
Staging Lane
Join Date: Jul 2009
Posts: 85
Likes: 0
Received 0 Likes
on
0 Posts
As stated above I'm super jealous of your ability. I wouldn't have the time nor the patience to be that tedious but I am loving all the work being done can't wait to see the finished product.