


Custom Firebird TCS Switch Panel
Thread Starter
Copy & Paste Moderator


Joined: Apr 2002
Posts: 9,764
Likes: 208
From: Eastern MA
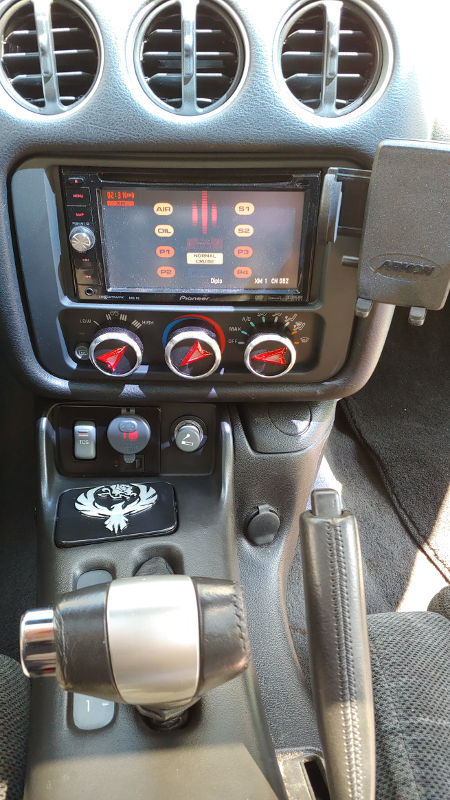
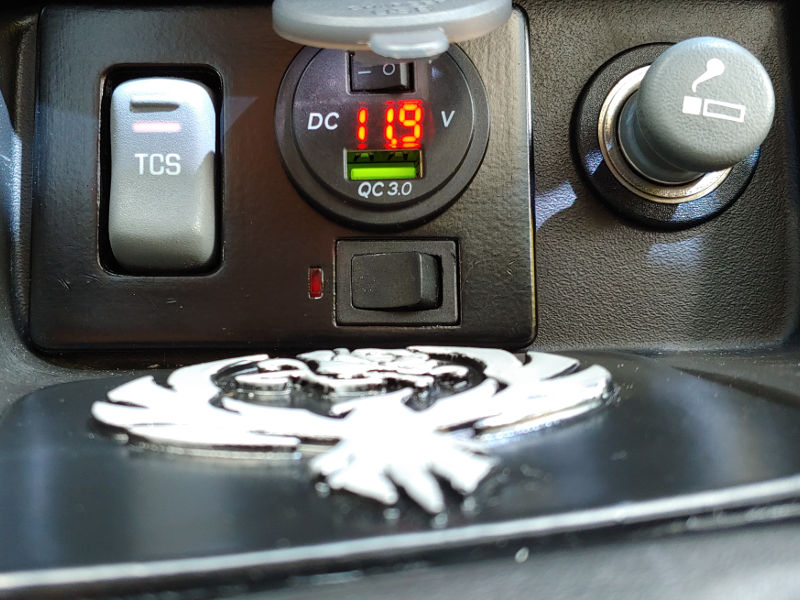
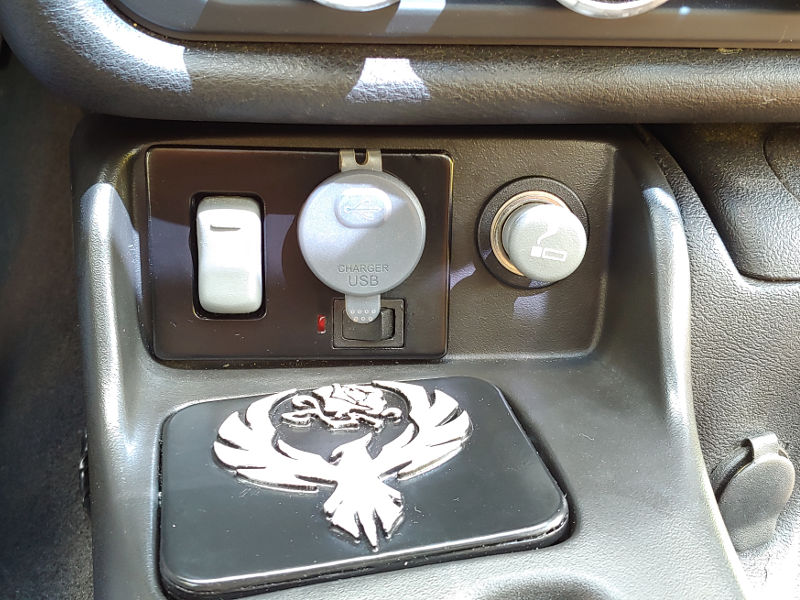
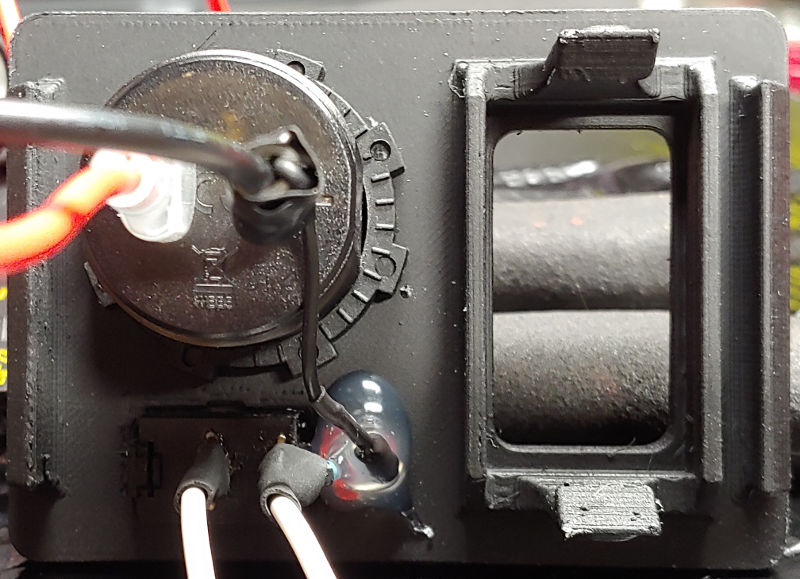
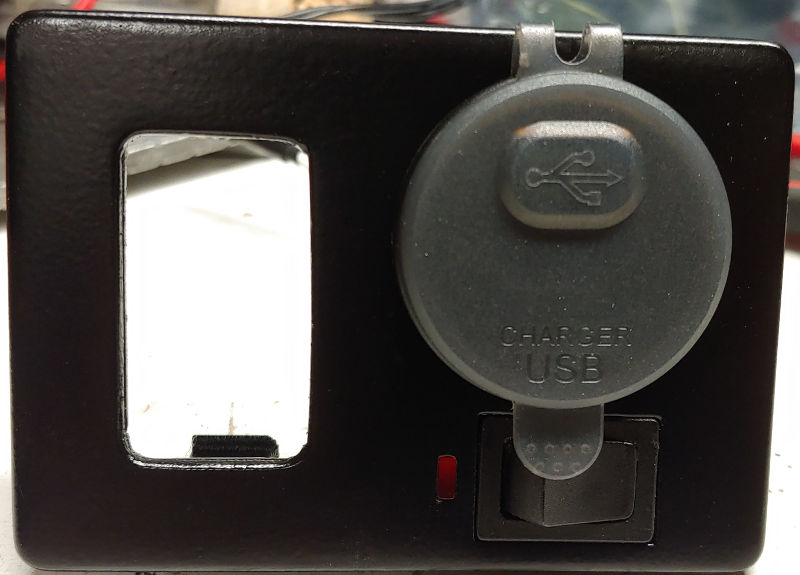
3D Modeled and Printed a new custom TCS switch panel to hold the stock TCS switch, USB Charge Port, Volt Gauge, and Antenna switch.
The TCS Switch is the original/stock switch.
The USB Charge Port I bought on Amazon. It has a built-in Volt Gauge and the switch on it kills all power to it (Gauge and USB).
The unlabeled switch is to keep the Antenna down and the the LED next to it is only lit when the Antenna is up.
It is a bit of a prototype now since I think I need to redesign/reinforce the tabs that hold the TCS Switch.
http://www.fadingarrow.net/images/Fi...lled - Far.jpg
https://www.fadingarrow.com/images/F...lled - Far.jpg
http://www.fadingarrow.net/images/Fi...Open - Lit.jpg
https://www.fadingarrow.com/images/F...Open - Lit.jpg
http://www.fadingarrow.net/images/Fi... - Covered.jpg
https://www.fadingarrow.com/images/F... - Covered.jpg
http://www.fadingarrow.net/images/Fi...ront - Lit.jpg
https://www.fadingarrow.com/images/F...ront - Lit.jpg
http://www.fadingarrow.net/images/Fi...nel - Rear.jpg
https://www.fadingarrow.com/images/F...nel - Rear.jpg
Last edited by VIP1; Dec 8, 2020 at 06:23 PM.
Thread Starter
Copy & Paste Moderator
Joined: Apr 2002
Posts: 9,764
Likes: 208
From: Eastern MA
I have an average printer, but that's plenty of sanding and painting on the front side. The back side is not sanded. I also used a satin clear instead of high gloss.
Thread Starter
Copy & Paste Moderator
Joined: Apr 2002
Posts: 9,764
Likes: 208
From: Eastern MA
I printed and painted that ash tray cover too, and the HVAC *****.
I've been trying to keep busy 3D modelling, designing, printing lightsabers. The printer I have is a smaller one (Monoprice Select Mini Pro). I'm tempted to take a look at a Creality Ender 3 or a PRUSA or maybe a higher model when they have a sale. For now, it does what I need alight.
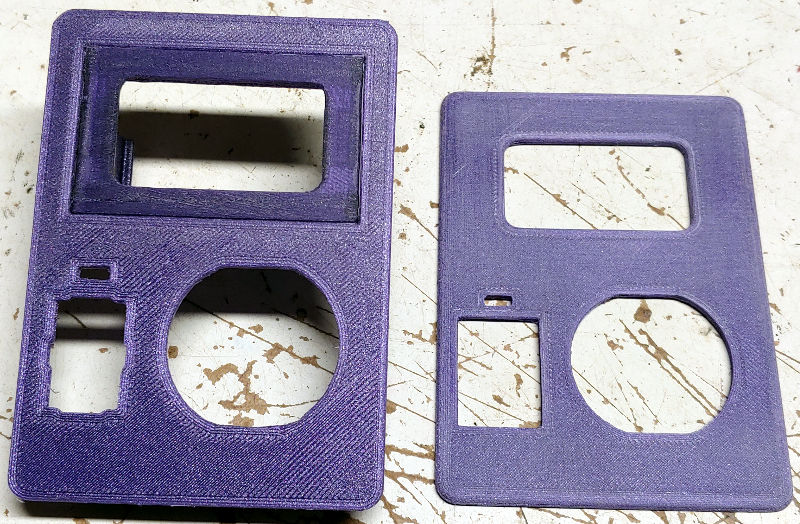
Version 2 of this TCS Switch Panel is being painted right now. The layer lines made the tabs that hold the switch weak in the one above (one tab broke). So I split up the model into 3 pieces so I can print them in different orientations for improved strength and then slot them back together and glue. The new one is much stronger. I printed the front piece "fine" (0.1313 mm layer height) and the rear half "normal" (0.175 mm layer height) settings in CURA so the front would need less sanding and I don't care if the rear looks rougher.
EDIT: Added layer heights from CURA
I've been trying to keep busy 3D modelling, designing, printing lightsabers. The printer I have is a smaller one (Monoprice Select Mini Pro). I'm tempted to take a look at a Creality Ender 3 or a PRUSA or maybe a higher model when they have a sale. For now, it does what I need alight.
Version 2 of this TCS Switch Panel is being painted right now. The layer lines made the tabs that hold the switch weak in the one above (one tab broke). So I split up the model into 3 pieces so I can print them in different orientations for improved strength and then slot them back together and glue. The new one is much stronger. I printed the front piece "fine" (0.1313 mm layer height) and the rear half "normal" (0.175 mm layer height) settings in CURA so the front would need less sanding and I don't care if the rear looks rougher.
EDIT: Added layer heights from CURA
Last edited by VIP1; Jul 21, 2020 at 07:08 PM.
I've not looked into them in a while when I was heavy Into resin casting i did, but the resolution wasn't great at the scale I worked with. We use it often at my daily job for prototyping I messed with solid works and Google sketch up for a bit but never made it to secondary software used to 3d print..... I wasn't good making parts solid beneath the surface
Thread Starter
Copy & Paste Moderator
Joined: Apr 2002
Posts: 9,764
Likes: 208
From: Eastern MA
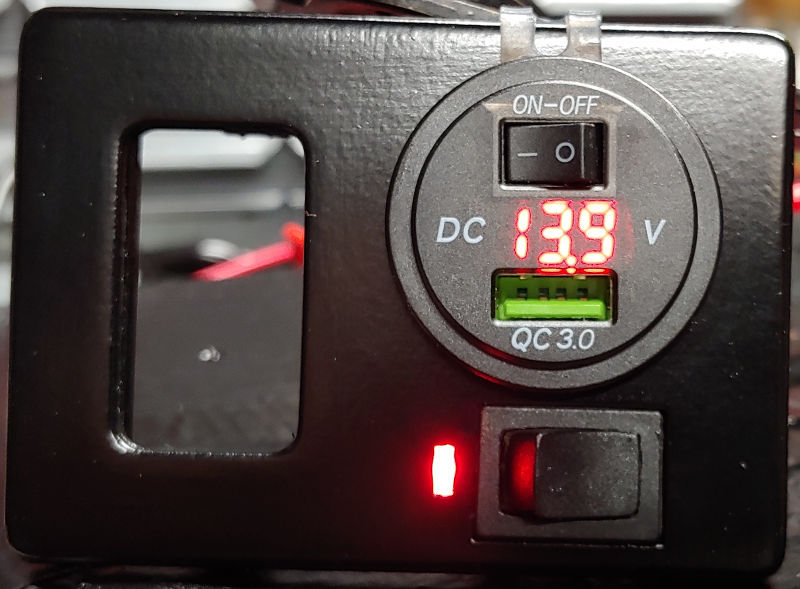
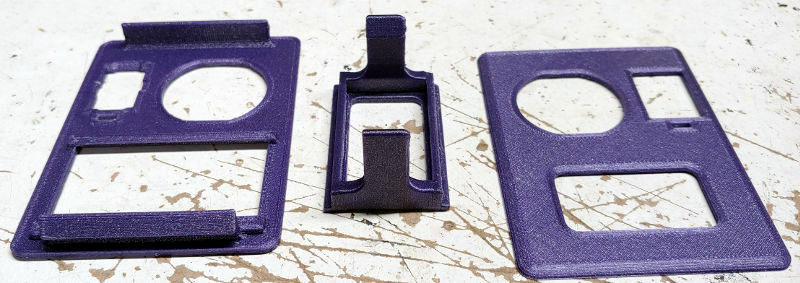
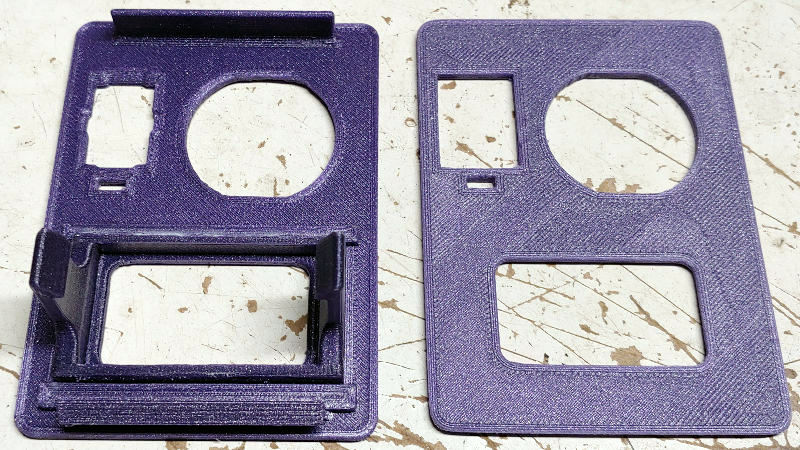
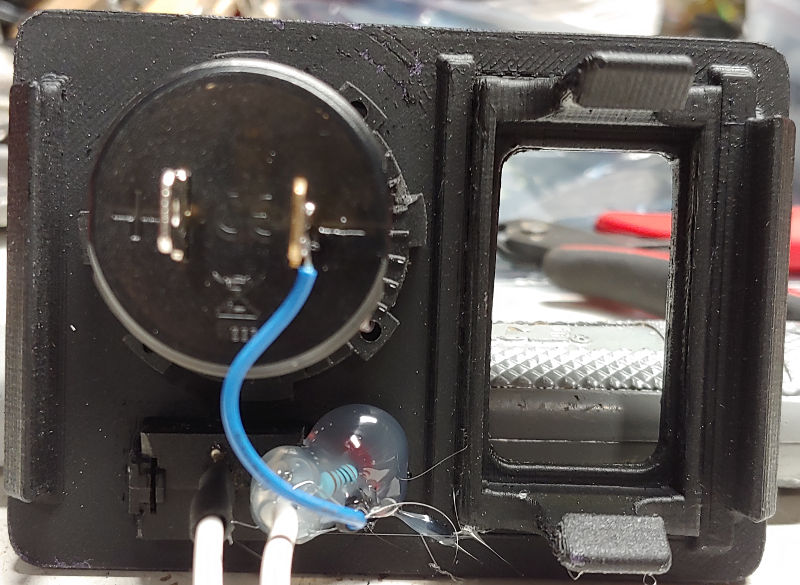
Here is V2 of the panel before being painted. I split it into 3 pieces. the main front and back pieces were printed flat. The piece that holds the TCS switch was printed sideways so the layer lines go along the tabs top-to-bottom instead of across. This makes it much stronger. That section also has small wings and matching notches in the back half so it slides in and gives more gluing surface. When its all glued together that part is basically sandwiched in place.
Final coat of clear is drying now, but assembled and painted it looks pretty much like the previous one above. I'll swap over the switches and USB port tomorrow.
(these are lain on my workbench, not the printer)
http://www.fadingarrow.net/images/Fi... in Pieces.jpg
https://www.fadingarrow.com/images/F... in Pieces.jpg
http://www.fadingarrow.net/images/Fi...ued - Back.jpg
https://www.fadingarrow.com/images/F...ued - Back.jpg
http://www.fadingarrow.net/images/Fi...ed - Front.jpg
https://www.fadingarrow.com/images/F...ed - Front.jpg
(Last pic, I already started sanding the front half.)
Last edited by VIP1; Dec 8, 2020 at 06:25 PM.
Trending Topics
Thread Starter
Copy & Paste Moderator
Joined: Apr 2002
Posts: 9,764
Likes: 208
From: Eastern MA
3D Filament Printers have improved quite a bit in the last few years.
There are also Resin Printers out now. However, they need more caution when using and can't print as large. But they produce smoother prints.
I've only been 3D modeling and 3D printing for around 9 months so I'm no expert on this.
I've been using Fusion 360 for 3D modeling.
There are also Resin Printers out now. However, they need more caution when using and can't print as large. But they produce smoother prints.
I've only been 3D modeling and 3D printing for around 9 months so I'm no expert on this.
I've been using Fusion 360 for 3D modeling.
Last edited by VIP1; Jul 21, 2020 at 07:09 PM.
LS1 Tech Stories
The Best V8 Stories One Small Block at Time

6 Common C5 Corvette Failures and What's Involved In Repairing Them
Pouria Savadkouei
Retro Modern Bandit Pontiac Trans AM Comes With Burt Reynolds' Autograph
Verdad Gallardo
Top 10 Greatest Cadillac V Series Performance Models Ever, Ranked
Pouria Savadkouei
Top 10 Most Powerful Chevy Trucks Ever Made!

Hennessey's New Supercharged Silverado ZR2 Has 700 HP
Verdad Gallardo
Coachbuilt N2A Anteros Is an LS2-Powered C6 Corvette In Italian Clothes
Verdad Gallardo
Awesome K5 Blazer Restomod Comes With C7 Corvette Power
Verdad Gallardo
10 Camaros You Should Never Buy

10 LS Engine Myths That Refuse to Die
Verdad Gallardo Thread Starter
Copy & Paste Moderator
Joined: Apr 2002
Posts: 9,764
Likes: 208
From: Eastern MA
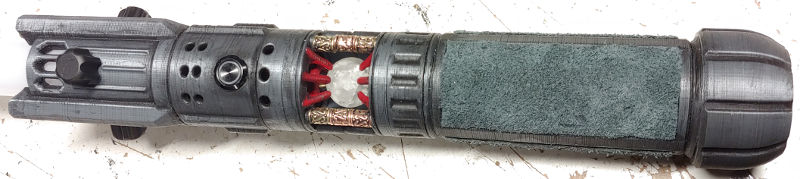
This is one of the lightsabers that I designed and printed.
It has lights & sounds and holds a blade.
Its printed in multiples pieces assembled with threaded rod.
http://www.fadingarrow.net/images/Li...Lightsaber.jpg
https://www.fadingarrow.com/images/L...Lightsaber.jpg
It has lights & sounds and holds a blade.
Its printed in multiples pieces assembled with threaded rod.
http://www.fadingarrow.net/images/Li...Lightsaber.jpg
https://www.fadingarrow.com/images/L...Lightsaber.jpg
Last edited by VIP1; Dec 8, 2020 at 06:26 PM.
Right on! Yeah I made repo and custom.parta for transformers. Sculpted stuff by hand or kitbashed a final part to make impressions from. Looked into resin printers scale size was about right for what I did. Form1 I think was the one I was most interested in, but cost stopped me. This was 5-6 years ago still had a 25 micron print layer which was not bad but still required work to make a mold from. Then that tech exploded! I keep saying I'll get into it again one day, but never quite get back Into it
I've heard good things about fusion
I've heard good things about fusion
Thread Starter
Copy & Paste Moderator
Joined: Apr 2002
Posts: 9,764
Likes: 208
From: Eastern MA
V2 Painted and Installed.
Here are pics of the panel assembled and painted.
http://www.fadingarrow.net/images/Fi...ed - Front.jpg
https://www.fadingarrow.com/images/F...ed - Front.jpg
http://www.fadingarrow.net/images/Fi...ted - Back.jpg
https://www.fadingarrow.com/images/F...ted - Back.jpg
Here are pics of the panel assembled and painted.
http://www.fadingarrow.net/images/Fi...ed - Front.jpg
https://www.fadingarrow.com/images/F...ed - Front.jpg
http://www.fadingarrow.net/images/Fi...ted - Back.jpg
https://www.fadingarrow.com/images/F...ted - Back.jpg
Last edited by VIP1; Dec 8, 2020 at 06:26 PM.


Thread Starter
Copy & Paste Moderator
Joined: Apr 2002
Posts: 9,764
Likes: 208
From: Eastern MA
I have NET & COM Domains. I updated my post #11 to use the COM domains for the pics and posted both versions of the URLs under the pics. Let me know if this works. I also added the URL under the pics in the other posts as well.
Last edited by VIP1; Jul 26, 2020 at 03:10 PM.
