Project "ObseSSed"


 07-28-2008, 12:18 AM
#282
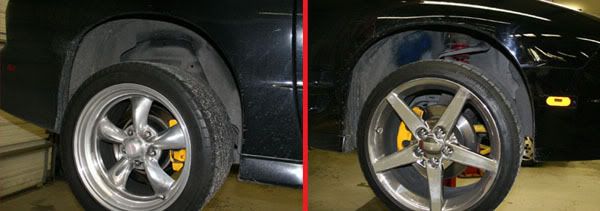
Did you ever mention the size of your front rim and tire? (kenny)
I think mine stick out more than yours so I may have to cut more along the outside edges.
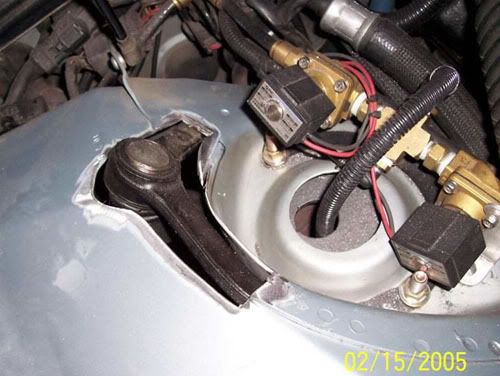
Did you consider adding some clearance so you could turn the wheels more when your real low? It looks possible except for the area right in front of the vacuum booster. Is that gap needed to be able to replace the booster?
I was toying with the idea of switching it over to a hydroboost setup. It's shorter, but I think it will still hit the A-arm.
I did however come up with a way to have my Koni adjustors accessed from under the hood, but that's top secret.
I think mine stick out more than yours so I may have to cut more along the outside edges.
Did you consider adding some clearance so you could turn the wheels more when your real low? It looks possible except for the area right in front of the vacuum booster. Is that gap needed to be able to replace the booster?
I was toying with the idea of switching it over to a hydroboost setup. It's shorter, but I think it will still hit the A-arm.
I did however come up with a way to have my Koni adjustors accessed from under the hood, but that's top secret.
Last edited by JasonWW; 07-28-2008 at 01:11 AM.
 07-28-2008, 08:45 PM
#286
TECH Fanatic
Thread Starter
iTrader: (1)
Join Date: Oct 2003
Location: Marrero/ New Orleans
Posts: 1,018
Likes: 0
Received 0 Likes
on
0 Posts

Did you ever mention the size of your front rim and tire? (kenny)
I think mine stick out more than yours so I may have to cut more along the outside edges.
Did you consider adding some clearance so you could turn the wheels more when your real low? It looks possible except for the area right in front of the vacuum booster. Is that gap needed to be able to replace the booster?
I was toying with the idea of switching it over to a hydroboost setup. It's shorter, but I think it will still hit the A-arm.
I did however come up with a way to have my Koni adjustors accessed from under the hood, but that's top secret.
the front tire is 245/35/20
yea the booster get a lil tight going in and out
07-29-2008, 05:25 AM
#287
Do you realize you're kept the stock front suspension geometry? Kudo's.
I've just been mapping it out and since your ride height is lower than most folks your getting more negative camber gain under compression as well as more positive camber under extension. That's all good stuff as far as handling goes.
My thoughts about only shorting the top of the spindle, the other hand, would hurt the handling. The only way I'd shorten the spindle is if I can increase the distance from the hub to the lower balljoint by an equal amount and that would be by welding on the spindle.
I think from a cost and safety standpoint I'm going to have to ditch my drop spindle idea and go with your style and notch the upper arms (which is what you actually did).
A bumpster correction kit would be a good idea to minimize toeing in the tires under compression. You want to keep the tie rods parallel to the ground at ride height.
I've just been mapping it out and since your ride height is lower than most folks your getting more negative camber gain under compression as well as more positive camber under extension. That's all good stuff as far as handling goes.
My thoughts about only shorting the top of the spindle, the other hand, would hurt the handling.
The only way I'd shorten the spindle is if I can increase the distance from the hub to the lower balljoint by an equal amount and that would be by welding on the spindle.I think from a cost and safety standpoint I'm going to have to ditch my drop spindle idea and go with your style and notch the upper arms (which is what you actually did).
A bumpster correction kit would be a good idea to minimize toeing in the tires under compression. You want to keep the tie rods parallel to the ground at ride height.
Last edited by JasonWW; 07-29-2008 at 05:35 AM.
07-29-2008, 05:59 AM
#288
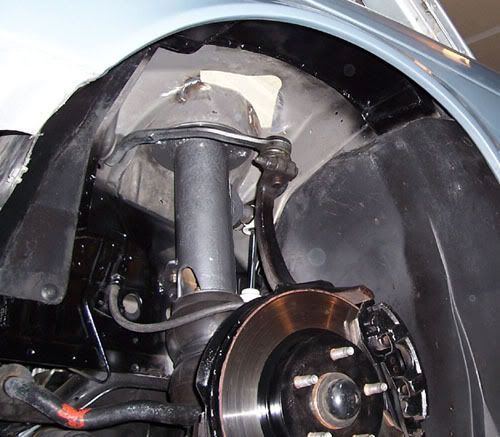
How did you determine how high to move the upper balljoints up?
As much as possible without hitting the hood?
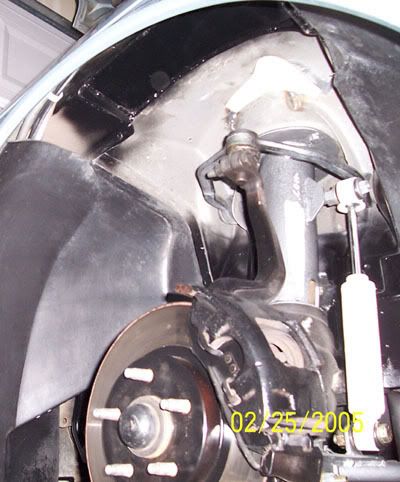
One thing that has always bothered me was the angle of your lower balljoints. Did you tip the top of them inward? It seems like they should be angled slightly outward.
On my setup I'm going to be keeping roughly the same stroke. So I'll be able to go down 2" more than stock and lift up 2" less than stock. I may have to angle both balljoints to make sure they don't bind at either extreme.
I think 2" less of this should be fine.
As much as possible without hitting the hood?
One thing that has always bothered me was the angle of your lower balljoints. Did you tip the top of them inward? It seems like they should be angled slightly outward.
On my setup I'm going to be keeping roughly the same stroke. So I'll be able to go down 2" more than stock and lift up 2" less than stock. I may have to angle both balljoints to make sure they don't bind at either extreme.
I think 2" less of this should be fine.
Last edited by JasonWW; 07-29-2008 at 06:23 AM.
07-29-2008, 10:09 AM
#289
TECH Fanatic
Thread Starter
iTrader: (1)
Join Date: Oct 2003
Location: Marrero/ New Orleans
Posts: 1,018
Likes: 0
Received 0 Likes
on
0 Posts
How did you determine how high to move the upper balljoints up?
As much as possible without hitting the hood?
One thing that has always bothered me was the angle of your lower balljoints. Did you tip the top of them inward? It seems like they should be angled slightly outward.
On my setup I'm going to be keeping roughly the same stroke. So I'll be able to go down 2" more than stock and lift up 2" less than stock. I may have to angle both balljoints to make sure they don't bind at either extreme.
I think 2" less of this should be fine.
so i did every thing 2". i didnt want 2 go 2 mutch because then i would be hitten the hood hinges and the hood
y not jusy buy the drop spindle from the sponsor======>http://www.racecraft.com/proddetail.php?prod=300107
but u will have 2 run a diff. brake setup
i wish that i would have seen that before i did what i did
07-29-2008, 11:12 PM
#290
y not jusy buy the drop spindle from the sponsor======>http://www.racecraft.com/proddetail.php?prod=300107
but u will have 2 run a diff. brake setup
i wish that i would have seen that before i did what i did
but u will have 2 run a diff. brake setup
i wish that i would have seen that before i did what i did
Or I could just notch the upper arm like you did.
07-30-2008, 01:41 AM
#291
Here's another potential issue for me. I held a mirror to show the tire to spindle clearance.
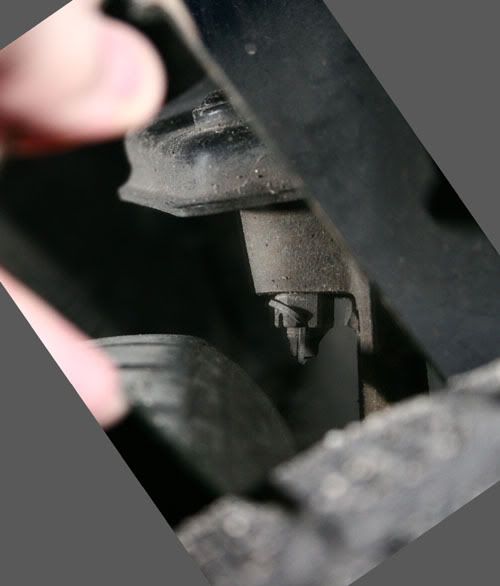
Moving the wheel 2" higher on the spindle might cause contact. A thin spacer might fix it, but I'm kind of iffy on the whole thing.
A spindle adapter to run 4th gen rotors on a 3rd gen spindle costs $135 pr. So that's $685 were up to plus shipping.
Another unknown is whether the drop spindle plus hub adapter is going to push the wheel out further. A little would be good (so I could clear the upper A-arm) but too much will keep me from tucking the wheels under the fenders.
I really do think modding the upper arms is better for my particular rims and so forth. I'm going to be cutting and welding up there anyway.
 07-30-2008, 01:25 PM
#296
I'm pretty sure that's not true. You can reshape the arms all kinds of different ways, but as long as the inner and outer pivot points are in the same location, then the geometry is not changed. All you did up top was make the upper arm dip under the cylinder. There's nothing wrong with that.
Yes, I know about the joints. I'll probably have to tweak the balljoint angles as well as that caster bushing to match their new range of motion.
Yes, I know about the joints. I'll probably have to tweak the balljoint angles as well as that caster bushing to match their new range of motion.
Last edited by JasonWW; 07-30-2008 at 11:07 PM.