

Chopping the truck pan
 12-28-2010 | 09:09 AM
#1

Thread Starter
On The Tree
Joined: Nov 2010
Posts: 169
Likes: 5
From: carlsbad
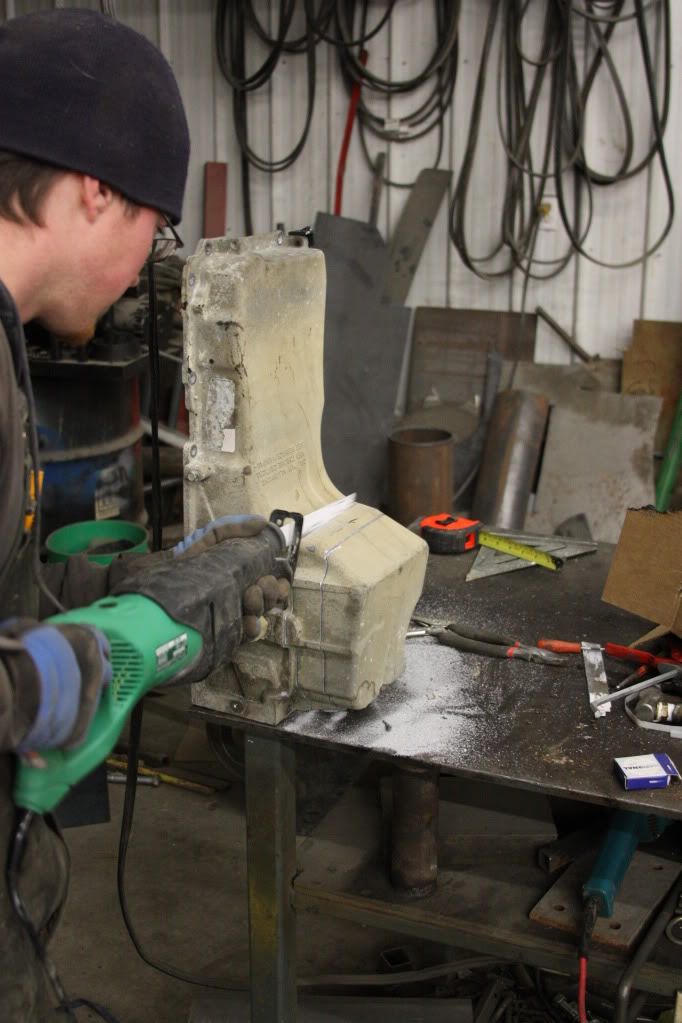
Was wondering what the most people have shortened the truck pan. I can do the job successfully myself. I can even make the pan sump longer to regain some oil capacity if needed. I basically need the pan to hang no longer than a 1/2" past the flywheel. It would mean taking about 2.5" out of it.
12-28-2010 | 09:50 AM
#2
I shortened mine about an inch and a half and lost about 1.3 quarts of oil capacity. The truck holds about a quart more than the fbody so my pan holds just a little less than the fbody at the same oil level. I overfill it a little to compensate
At 2.5" I would guess that you'd be right around 4 -4.25 quarts of oil in the pan
At 2.5" I would guess that you'd be right around 4 -4.25 quarts of oil in the pan
12-28-2010 | 10:01 AM
#5
Thread Starter
On The Tree
Joined: Nov 2010
Posts: 169
Likes: 5
From: carlsbad
I shortened mine about an inch and a half and lost about 1.3 quarts of oil capacity. The truck holds about a quart more than the fbody so my pan holds just a little less than the fbody at the same oil level. I overfill it a little to compensate
At 2.5" I would guess that you'd be right around 4 -4.25 quarts of oil in the pan
At 2.5" I would guess that you'd be right around 4 -4.25 quarts of oil in the pan


Trending Topics
12-28-2010 | 11:39 AM
#8
Thread Starter
On The Tree
Joined: Nov 2010
Posts: 169
Likes: 5
From: carlsbad
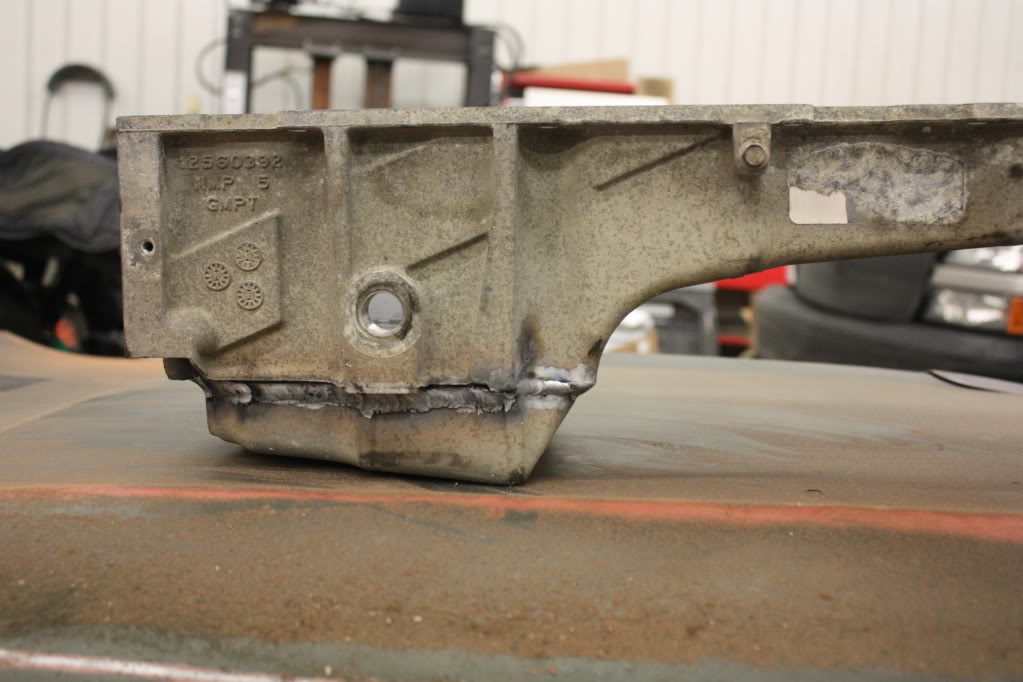
First off, Nice cuts with the sawzall! Looks really good but can I give you a few pointers?
On your welding, you'll get better results cleaning the aluminum before you weld. (Stainless wire brush) See the far right part of the weld, the white edges along the weld is actually the cleaning effect of the A/C cycle. You want that to be as close to your weld as possible. You would adjust your balance to more "penetration" to shrink that cleaning closer to the toe lines of the weld. It looks as if you adjusted it too much as the rest of the weld I see doesn't have the "sugar" next to it. Balance and metal prep is key when welding aluminum. With cast aluminum car parts, you need every advantage you can get.
Sorry, I'm a College welding professor by trade, not trying to knock your skills by any means.
https://ls1tech.com/forums/tools-fab...-my-azz-2.html
something else that I posted awhile ago.
maybe I should do a full on how to
Last edited by sandeggo; 12-28-2010 at 11:47 AM.
12-28-2010 | 01:50 PM
#10
waiting on sadegggo for pixes...
i found good post>>>> Jasnsnova's post
https://ls1tech.com/forums/conversio...l#post13193632
i found good post>>>> Jasnsnova's post
https://ls1tech.com/forums/conversio...l#post13193632
12-28-2010 | 01:57 PM
#11
Thread Starter
On The Tree
Joined: Nov 2010
Posts: 169
Likes: 5
From: carlsbad
Cleaning the pan, inside and out
bake in oven at about 2-300 degrees to bake the oil out (don't use your home oven)
wire brush where I'll cut it
Cut it
Turn on miller dynasty 300
grab some 4043 or 5356 depending on what i have on hand
tack it together
then weld it.
When I just welded my valve covers, I de-greased and baked them, and used 4043 with very good results.
5356 works better in higher stress areas, and for castings with higher Silicon ratings.
But for this oil pan which isn't getting annodized, either will work
FWIW if I'm welding parts that will be annodized, I wont use 4043 because it will be a different color than the rest of the part. 5356 works better in that application.
If you're welding an aluminum casting that just won't get clean no matter what, an old trick is to "weld" it first without using filler, which brings contaminants to the surface. Re-clean it, and then properly weld it.
Last edited by sandeggo; 12-28-2010 at 02:06 PM. Reason: added more
12-28-2010 | 02:07 PM
#12
Thread Starter
On The Tree
Joined: Nov 2010
Posts: 169
Likes: 5
From: carlsbad
waiting on sadegggo for pixes...
i found good post>>>> Jasnsnova's post
https://ls1tech.com/forums/conversio...l#post13193632
i found good post>>>> Jasnsnova's post
https://ls1tech.com/forums/conversio...l#post13193632
 12-28-2010 | 07:36 PM
#14

First off, Nice cuts with the sawzall! Looks really good but can I give you a few pointers?
On your welding, you'll get better results cleaning the aluminum before you weld. (Stainless wire brush) See the far right part of the weld, the white edges along the weld is actually the cleaning effect of the A/C cycle. You want that to be as close to your weld as possible. You would adjust your balance to more "penetration" to shrink that cleaning closer to the toe lines of the weld. It looks as if you adjusted it too much as the rest of the weld I see doesn't have the "sugar" next to it. Balance and metal prep is key when welding aluminum. With cast aluminum car parts, you need every advantage you can get.
Sorry, I'm a College welding professor by trade, not trying to knock your skills by any means.
https://ls1tech.com/forums/tools-fab...-my-azz-2.html
something else that I posted awhile ago.
maybe I should do a full on how to
On your welding, you'll get better results cleaning the aluminum before you weld. (Stainless wire brush) See the far right part of the weld, the white edges along the weld is actually the cleaning effect of the A/C cycle. You want that to be as close to your weld as possible. You would adjust your balance to more "penetration" to shrink that cleaning closer to the toe lines of the weld. It looks as if you adjusted it too much as the rest of the weld I see doesn't have the "sugar" next to it. Balance and metal prep is key when welding aluminum. With cast aluminum car parts, you need every advantage you can get.
Sorry, I'm a College welding professor by trade, not trying to knock your skills by any means.
https://ls1tech.com/forums/tools-fab...-my-azz-2.html
something else that I posted awhile ago.
maybe I should do a full on how to
I'm the one who cut and welded my brothers pan in the pics above. First off thanks, I'm like a surgeon with a sawzall. Second, I read that linked post and it seems to explain why my tungsten was balling so much. It now occurs to me the high cleaning setting had something to do with it. I tried a bunch of different settings the there nothing seemed drastically better than anything else. Probably 5% of my welding is aluminum, and most of that was new aluminum, so my goal here was mostly to have no leaks. For preping for the weld i went over the area surounding the cut with an aluminum burr die grinder to take it down to bare aluminum. Does that work or is a stainless wire wheel a better option. I sayed away from a sanding disc or grinding wheel cause I thought I heard those can hold contaminants in them.
12-28-2010 | 07:56 PM
#15
Thread Starter
On The Tree
Joined: Nov 2010
Posts: 169
Likes: 5
From: carlsbad
Ok you want to clean and brush the aluminum with a stainless steel wire brush or wire wheel. Then mark it only for aluminum. That way you don't cross contaminate it with other metals. I have 3 sets of each. 1for Stainless, 1 for aluminum, and 1 for carbon steel. I even clean new aluminum with the wire brush before I weld it.
When aluminum is made, it forms an oxide layer over the metal. That's why you need the cleaning/penetration setting on the machine. The cleaning portion is what blasts through the oxide layer and allows you to form a puddle. Pre weld cleaning allows you to use LESS of the cleaning part of the AC cycle which results in better penetration and a stonger, cleaner weld. The oxide layer on the surface of aluminum has a higher melting point than the actual aluminum underneath it. That's what gives people a hard time when welding aluminum because They gotta use too much heat to get through the oxide layer and they end up overheating the material.
Cleaning and penetration go hand in hand on most Tig setups, which means when you adjust one higher, the other lowers and vice-versa.
More cleaning=less penetration.
Really the only thing I see wrong with what you did is the lack of metal prep. It looks good and I'm sure it'll hold just fine. But more metal prep will make your life much much easier.
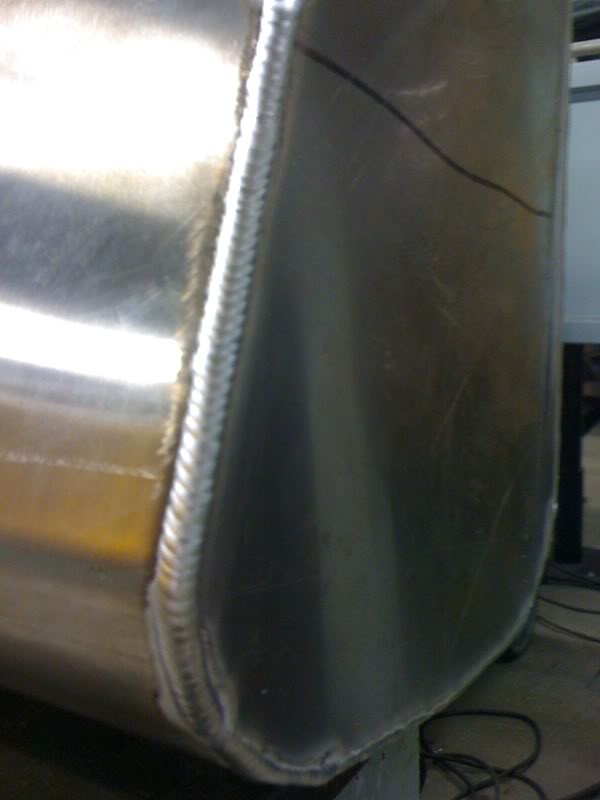
Oh and heres a gas tank I did for my boat last year(excuse the phone camera)
 12-29-2010 | 06:19 PM
#16
Just a few comments-
- I took a piece of 6061 sheet and made a bottom for the pan - it is a little easier than welding two casting pieces back together. If you wanted to grind the welds and sandblast the bottom you probably couldn't tell it was welded. Get your fitup as close as you can, clamp it and then tack it about every two inches before you weld it. Be prepared for a little porosity in the casting.
-I cut out the oil plug from the casting and welded it into the 6061 plate on the bottom
-Cleaning the pan in the dishwasher helps a lot. I left it in there all week and had it run through a bunch of cycles, maybe four or five times (and yes there was some bitching about it - stand your ground - its your dishwasher too!)
-Welded on a Lincoln 175 Tig. Brush the area to be welded thourghly with a stainless wire brush. Cleaned the welding rod with a little sandpaper to make sure there was no oxidation getting into the puddle from that
-I didn't constrain the pan when I welded it and I didn't have any warpage problems
-I shortened the truck oil pickup tube by cutting the old pickup off and welding a large washer with the hole the same diameter as the tube on the oil pickup end. I welded a piece of pipe about a half inch long to the washer such that there was about .25 inches to the bottom of the pan. I put a metal screen over the pipe secured with a high quality stainless hose clamp- it looks a little ghetto but it gets the job done
-Sat the completed pan on the workbench overnight filled with water with some paper underneath so I could see if it dripped any - it did - filled a couple of pin holes and it was good to go.
I can post some pictures if somebody wants to see them
Here is something else to think about. After the exhaust system was built, the cats hang about 1.5" below the bottom of the pan. If I do this again I might just build a deflector ahead of the pan to keep road debris from shattering it and forget about shortening it!
12-29-2010 | 08:12 PM
#17

I would love to see the pan but more importantly the new pick up set up. So
i take it there is now modification to the windage tray needed? I have not taken my pan off to check it out yet.
i take it there is now modification to the windage tray needed? I have not taken my pan off to check it out yet.
Just a few comments-
- I took a piece of 6061 sheet and made a bottom for the pan - it is a little easier than welding two casting pieces back together. If you wanted to grind the welds and sandblast the bottom you probably couldn't tell it was welded. Get your fitup as close as you can, clamp it and then tack it about every two inches before you weld it. Be prepared for a little porosity in the casting.
-I cut out the oil plug from the casting and welded it into the 6061 plate on the bottom
-Cleaning the pan in the dishwasher helps a lot. I left it in there all week and had it run through a bunch of cycles, maybe four or five times (and yes there was some bitching about it - stand your ground - its your dishwasher too!)
-Welded on a Lincoln 175 Tig. Brush the area to be welded thourghly with a stainless wire brush. Cleaned the welding rod with a little sandpaper to make sure there was no oxidation getting into the puddle from that
-I didn't constrain the pan when I welded it and I didn't have any warpage problems
-I shortened the truck oil pickup tube by cutting the old pickup off and welding a large washer with the hole the same diameter as the tube on the oil pickup end. I welded a piece of pipe about a half inch long to the washer such that there was about .25 inches to the bottom of the pan. I put a metal screen over the pipe secured with a high quality stainless hose clamp- it looks a little ghetto but it gets the job done
-Sat the completed pan on the workbench overnight filled with water with some paper underneath so I could see if it dripped any - it did - filled a couple of pin holes and it was good to go.
I can post some pictures if somebody wants to see them
Here is something else to think about. After the exhaust system was built, the cats hang about 1.5" below the bottom of the pan. If I do this again I might just build a deflector ahead of the pan to keep road debris from shattering it and forget about shortening it!
- I took a piece of 6061 sheet and made a bottom for the pan - it is a little easier than welding two casting pieces back together. If you wanted to grind the welds and sandblast the bottom you probably couldn't tell it was welded. Get your fitup as close as you can, clamp it and then tack it about every two inches before you weld it. Be prepared for a little porosity in the casting.
-I cut out the oil plug from the casting and welded it into the 6061 plate on the bottom
-Cleaning the pan in the dishwasher helps a lot. I left it in there all week and had it run through a bunch of cycles, maybe four or five times (and yes there was some bitching about it - stand your ground - its your dishwasher too!)
-Welded on a Lincoln 175 Tig. Brush the area to be welded thourghly with a stainless wire brush. Cleaned the welding rod with a little sandpaper to make sure there was no oxidation getting into the puddle from that
-I didn't constrain the pan when I welded it and I didn't have any warpage problems
-I shortened the truck oil pickup tube by cutting the old pickup off and welding a large washer with the hole the same diameter as the tube on the oil pickup end. I welded a piece of pipe about a half inch long to the washer such that there was about .25 inches to the bottom of the pan. I put a metal screen over the pipe secured with a high quality stainless hose clamp- it looks a little ghetto but it gets the job done
-Sat the completed pan on the workbench overnight filled with water with some paper underneath so I could see if it dripped any - it did - filled a couple of pin holes and it was good to go.
I can post some pictures if somebody wants to see them
Here is something else to think about. After the exhaust system was built, the cats hang about 1.5" below the bottom of the pan. If I do this again I might just build a deflector ahead of the pan to keep road debris from shattering it and forget about shortening it!
12-29-2010 | 10:55 PM
#18
No change to the windage tray.
Can't find the photos on my computer, but I posted them on another site a few months back. Here's a link to them.
http://www.jag-lovers.org/snaps/snap...?id=1247802058
This pan was cut to fit a LM7 in a 88 Jaguar XJs
Can't find the photos on my computer, but I posted them on another site a few months back. Here's a link to them.
http://www.jag-lovers.org/snaps/snap...?id=1247802058
This pan was cut to fit a LM7 in a 88 Jaguar XJs

