


LQ4 in a 1971 Nova
X2 on what crosstraining said!!! Nice!!! I am about to pull the trigger on the same A/C unit. DSE sells a bracket that is supposed to make installing the evap unit alot easier. Have you heard about this any???
http://www.detroitspeed.com/1967-196...mgnm-brkt.html
http://www.detroitspeed.com/1967-196...mgnm-brkt.html
Cool in more than one sense of the word! Look forward to seeing what you come up with. AC in AZ must be virtually mandatory this time of year.
The seats look great too. I put some Nissan seats in my Nova that also sit too high.
The seats look great too. I put some Nissan seats in my Nova that also sit too high.
Tony, I heard about that bracket at Steve's Nova Site. The evap is a serious pain (did a VA system on my GTO last summer), so I say if you've got the coin to do it.
I'm also thinking of putting down some Dynamat-esque stuff. Any reason not to use the Fat Mat rattletrap stuff on eBay?
EDIT: 74nova is in PHX, so he meant to check out his car in person. the fact that it's an AWD build was intriguing enough in & of itself, but the sound deadener and AC bracket are further reason to check it out.
Last edited by hookemdevils22; Aug 5, 2011 at 10:56 AM.

TECH Regular
Joined: Jan 2010
Posts: 497
Likes: 4
https://ls1tech.com/forums/conversio...going-awd.html
Also about the sound deadening, I own a little company that sells sound deadening mat, though i nolonger keep much in stock, its just a side gig, come check out the deadening in my ride, its quieter than my escalade. Fatmat will work depending on how thick it is and its core materials.
Also about the sound deadening, I own a little company that sells sound deadening mat, though i nolonger keep much in stock, its just a side gig, come check out the deadening in my ride, its quieter than my escalade. Fatmat will work depending on how thick it is and its core materials.
LS1 Tech Stories
The Best V8 Stories One Small Block at Time

6 Gifts Neither Your Dad Nor Grad Will Shove Into the 'Trinket Drawer'
Brett Foote
Topdon ONE vs. Artidiag 800 BT2: Which is the Diagnostic Tablet For You?
Pouria Savadkouei
Gas Monkey Built a 6-Wheel Ferrari Testarossa With a Corvette LT4 Engine
Verdad Gallardo
7 Most Reliable High-Performance Engines GM Has Ever Built
Verdad Gallardo
Amazing '71 Camaro Restomod Is Modern Muscle Car Under the Skin
Verdad Gallardo
6 Common C5 Corvette Failures and What's Involved In Repairing Them
Pouria Savadkouei
Retro Modern Bandit Pontiac Trans AM Comes With Burt Reynolds' Autograph
Verdad Gallardo
Top 10 Greatest Cadillac V Series Performance Models Ever, Ranked
Pouria Savadkouei
Top 10 Most Powerful Chevy Trucks Ever Made!
It's from a mid-90s 3.8L Taurus. The fan is a 2-speed... I initially ran it on low, but my 350 ran a little warm (though cooler than the flex fan that was on it before), so I swapped to high speed when I did the LSx swap. I also bought a Mark VIII fan (which flows more), but it was too deep.
Here's a pic. The underside of the shroud (below the fan in the pic) has an odd cutout that I epoxied a cover over. Note that there's another, less desirable, Taurus fan that has a taller motor and straight blades. You don't want that one.
These are plentiful in the JY... I saw a guy pull about 15 of these one day while I was out looking for a fan seupt for my GTO.
PS - The VA system is supposedly on the way. I'll likely begin tearing it down next week to do the install. Stay tuned for further updates...
Last edited by hookemdevils22; Aug 30, 2011 at 04:41 PM.


got a nice birthday present last night... though it took a bit longer than I was hoping. at least it's cooled off enough so I can work on the car more (and won't be needing AC for a few months, haha). I'm doing some work to my Jeep this week (and still in the process of moving/cleaning up the new place) but hope to start the AC swap this weekend. I'll also be putting in some sound deadening material (thank you Richard) and designing my own compressor bracket.
Last edited by hookemdevils22; Sep 27, 2011 at 09:27 AM.
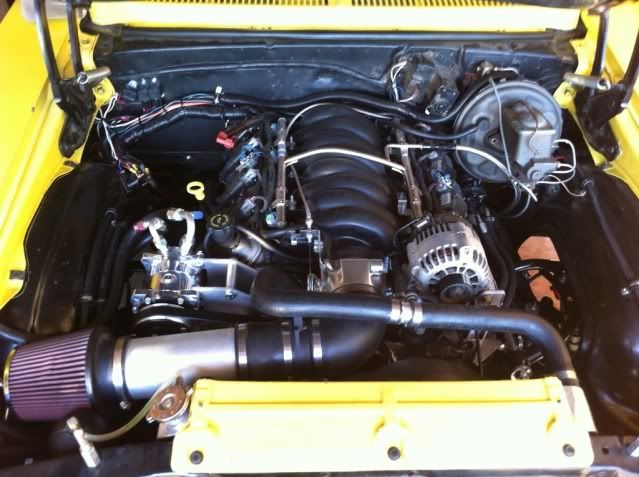
And it's in! The VA kit took all of two weeks to install, so the bulk of time was figuring out the AC bracket. The cool thing is that this bracket should work with truck accessories running car intakes as well as those retaining the truck intake, and you have the option of running an idler pulley if you want a different belt routing. In fact, I had all but the belt figured out last weekend, but I was in Alabama for business all week. I finally got it finished yesterday (all but two spacers, at least, but I used a couple others as temps), and we took her out to a show in Mesa last night. The heat works awesome, and I'm charging the AC this morning. Anyway, onto the pictures:
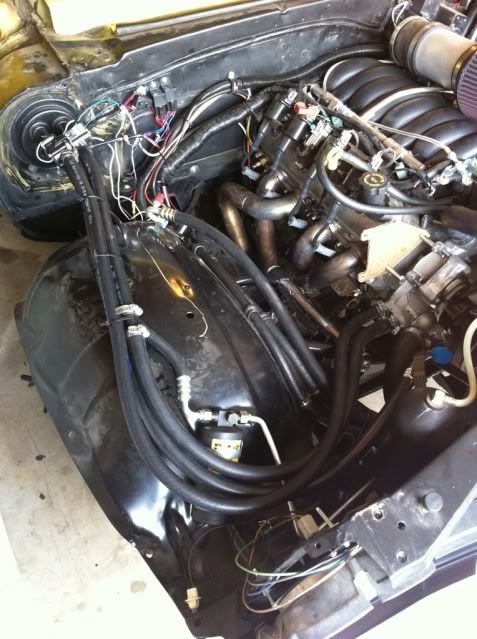
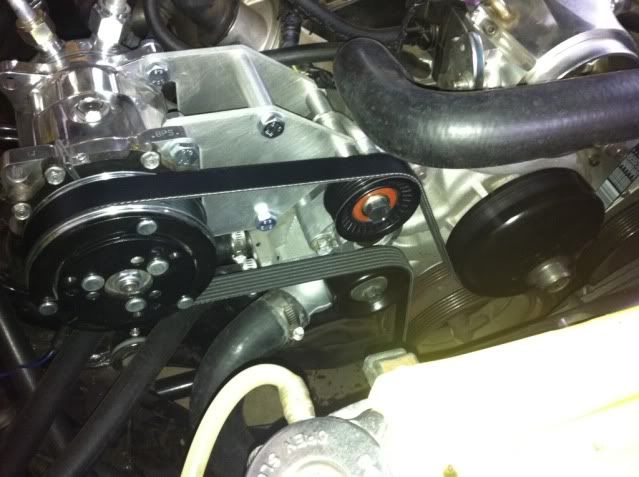
My 'Warren Bros' bracket retains the 'car intake with truck accessories' belt routing.
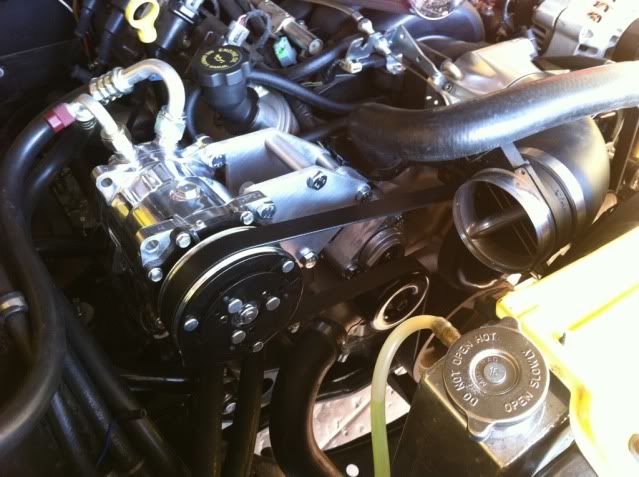
Plenty of clearance between the belt and the TB/water pump pulley.
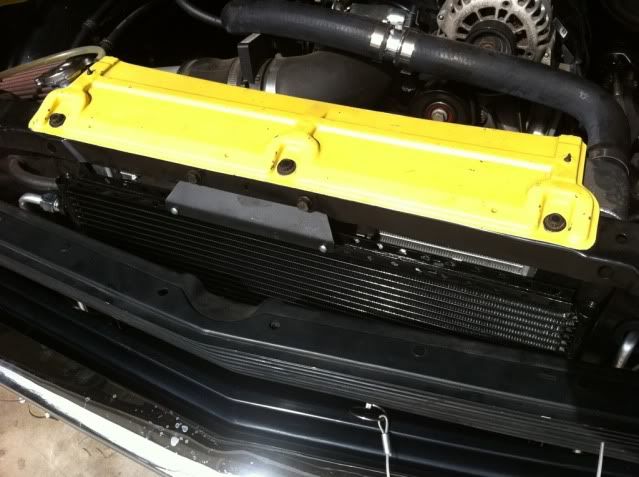
Condenser fit perfectly, especially with no hood latch.
Accumulator/dryer tucked in the passenger fender.
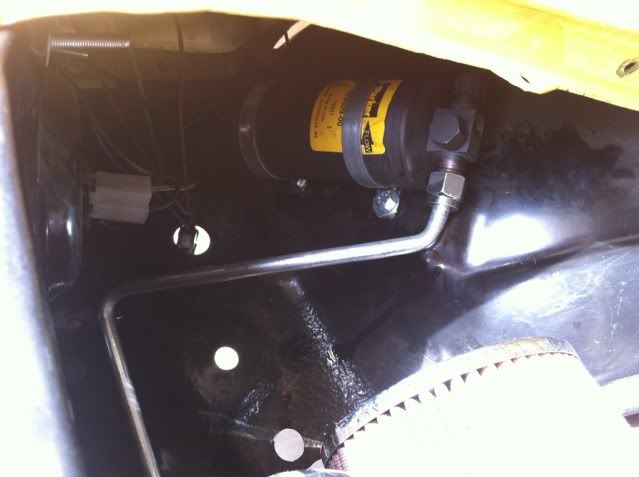
The hoses are also routed inside the passenger fender...
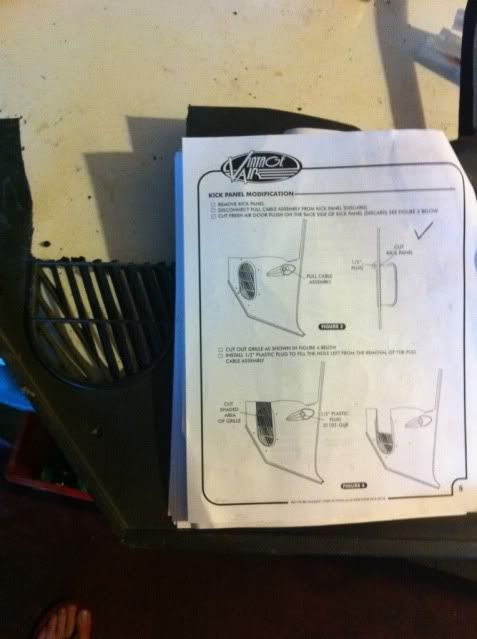
...and they enter the cabin through the kick panel.
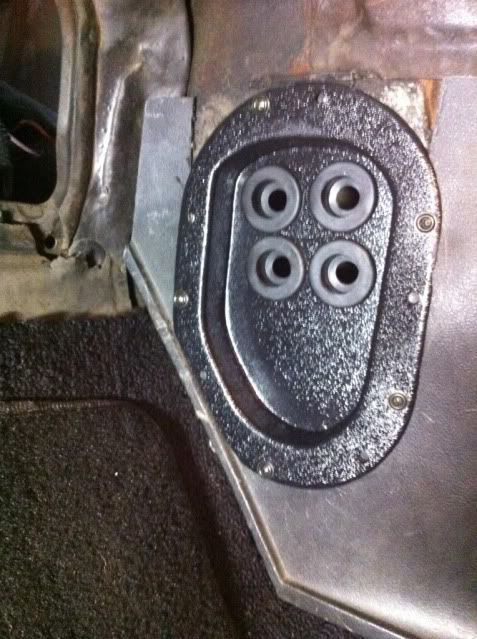
The kick panel was the biggest pain of the install, as the VA instructions are incorrect. There's no way it fits per the instructions, nor do the screw holes align.
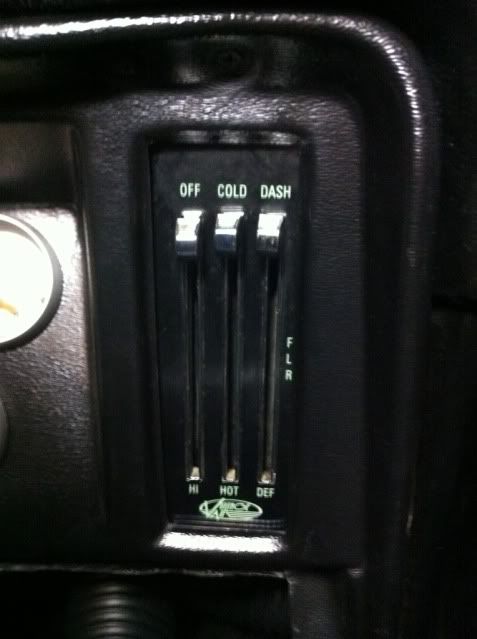
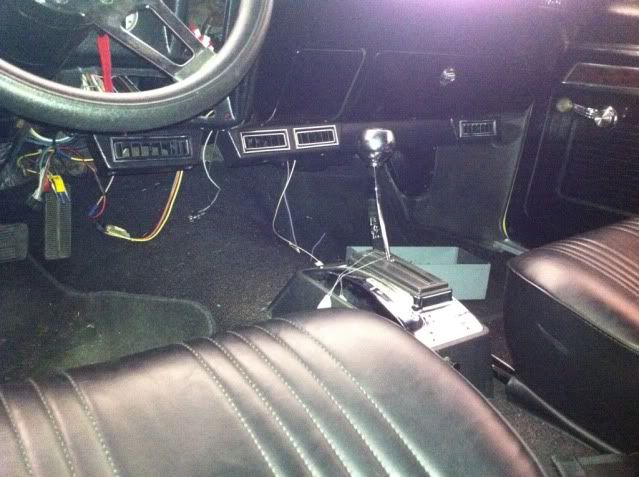
VA kit retains the OEM controls, but gets rid of the cables.
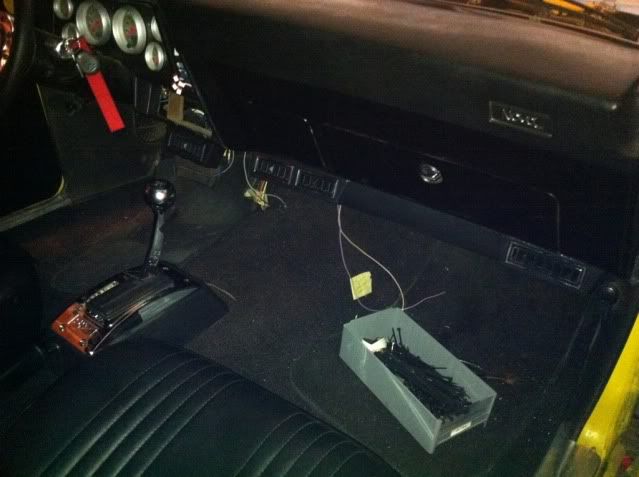
Ducting tucked in well.

The driver's side vent (far left) was relocated to the right of the steering wheel due to my OBD port being on the other side.
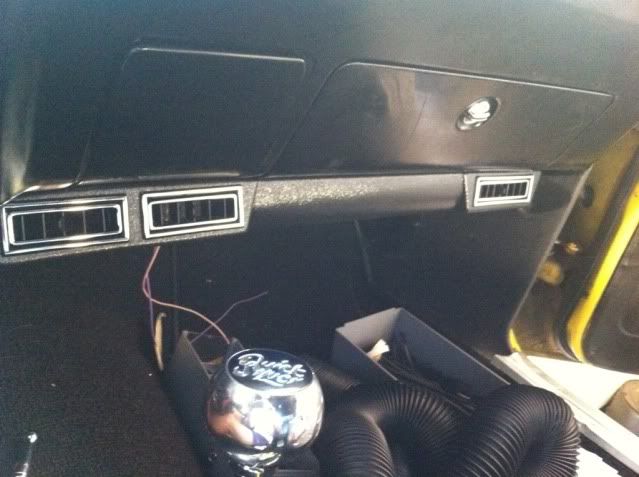
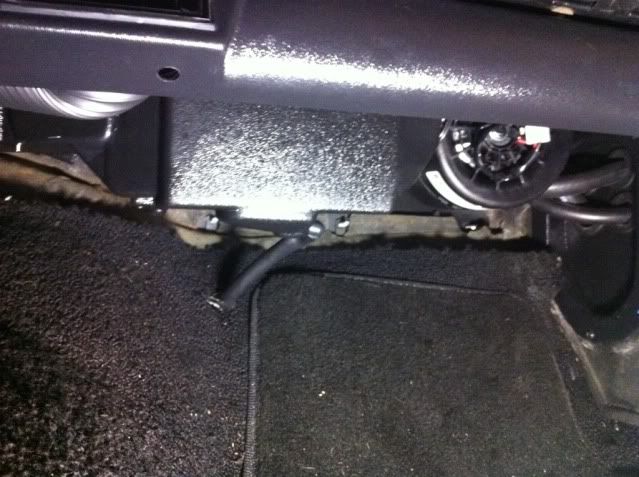
Clean install, for the most part. The evaporator tucks away nicely behind the vents (it is installed in this pic).
Evaporator as installed. I didn't check when drilling the drain hole, and put it over the passenger side header. I had to rotate the outlet slightly and add a small length of hose to ensure it doesn't drip over the header.
My 'Warren Bros' bracket retains the 'car intake with truck accessories' belt routing.
Plenty of clearance between the belt and the TB/water pump pulley.
Condenser fit perfectly, especially with no hood latch.
Accumulator/dryer tucked in the passenger fender.
The hoses are also routed inside the passenger fender...
...and they enter the cabin through the kick panel.
The kick panel was the biggest pain of the install, as the VA instructions are incorrect. There's no way it fits per the instructions, nor do the screw holes align.
VA kit retains the OEM controls, but gets rid of the cables.
Ducting tucked in well.
The driver's side vent (far left) was relocated to the right of the steering wheel due to my OBD port being on the other side.
Clean install, for the most part. The evaporator tucks away nicely behind the vents (it is installed in this pic).
Evaporator as installed. I didn't check when drilling the drain hole, and put it over the passenger side header. I had to rotate the outlet slightly and add a small length of hose to ensure it doesn't drip over the header.
Great job on the VA system. You will love it! I am soooo glad I have heat and air now. It just adds to the modern convenience of these cars. I can leave my windows closed now and listen to the radio. No more carrying a towel around wiping off the inside of the windshield.
Nice work! That belt routing is exactly what I was talking about. It's great you can eliminate that upper idler that Kwik normally uses. It just doesn't seem necessary with the truck-style belt routing. I'm trying to come up with a way to do that kind of routing with my FEAD because I really like how the truck-routing zig-zags & fully wraps both the crank and the waterpump.
I love how the gen IV integrates with the factory controls. It looks really clean. Great work.
I love how the gen IV integrates with the factory controls. It looks really clean. Great work.
it works wonderfully. the AC was at 40� and the heat at 120� out of the vents when we charged it. I will say this - I am a little concerned that the belt kisses the water pump pulley during transient operation at higher rpm's with the AC on. I'm going to monitor and maybe switch to another style belt routing.
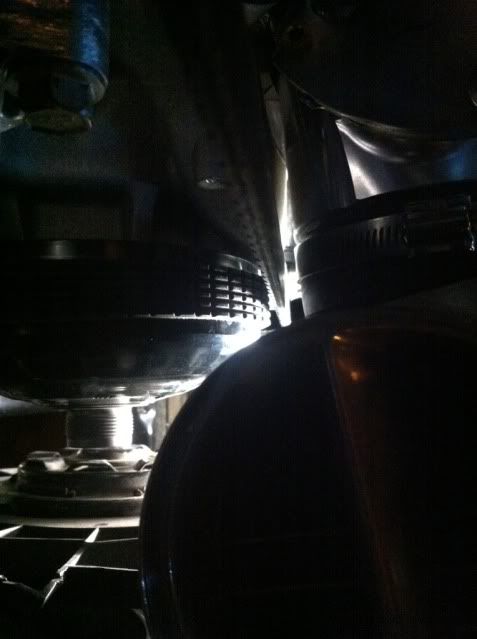
small update... I switched the belt routing due to the rubbing issue. It now has less contact around the crank, but doesn't rub anywhere like it did with the previous routing. Unfortunately, it appears that rotating inertia of the AC compressor would slacken the belt between it and the idler pulley during rpm drops with the AC on. It would then droop and contact the portion of the belt riding on the water pump pulley. While it was a quick touch-and-go, it was still enough to warrant new routing. On the bright side, I eliminated the idler just below the alternator. Had I run the truck intake I would've been able to do without 'my' idler altogether.
Look ma, no idler!
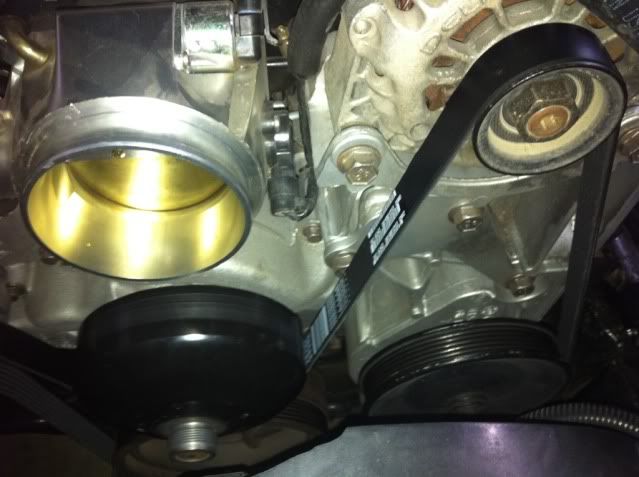
Look ma, no idler!