

kst8engineer - '71 Chevelle LS1/T56 build thread
 07-20-2009, 01:09 PM
#141
On The Tree
Thread Starter
iTrader: (6)

Join Date: Mar 2006
Location: Kansas
Posts: 192
Likes: 0
Received 0 Likes
on
0 Posts

Here's a website that gives quite a bit of info regarding this swap on a 1st-gen F-body. They also show a template to produce the brackets yourself. I purchased mine from Rich Hoag on the pro-touring.com forums.
http://www.pozziracing.com/12_corvet...es_on_fgen.htm
On the page linked to above, I just noticed that they say the same brackets will work for 67-69 Camaro, 64-72 Chevelle, 68-74 Nova.
http://www.pozziracing.com/12_corvet...es_on_fgen.htm
On the page linked to above, I just noticed that they say the same brackets will work for 67-69 Camaro, 64-72 Chevelle, 68-74 Nova.
Last edited by kst8engineer; 07-20-2009 at 01:16 PM. Reason: added compatibility info for brackets
 07-20-2009, 03:29 PM
#142
On The Tree

I used brackets from BRP Hot rods (I think they are a site sponsor). Look up their website. It is really an easy swap for a drum brake A-Body, and the Brakes are great! Also look at the site kst8engineer recommended. It is a great reference, and where I got my initial information for doing this swap.
07-20-2009, 11:35 PM
#143
On The Tree
Thread Starter
iTrader: (6)
Join Date: Mar 2006
Location: Kansas
Posts: 192
Likes: 0
Received 0 Likes
on
0 Posts
I tried to pick up some 20 gauge steel sheet today to fabricate the fuel pump cover, but the sheetmetal shop I went to didn't have 20 gauge other than galvanized. So, I picked up some galvanized 20 gauge, and I'll consider this one a temporary cover. It's good practice anyway.
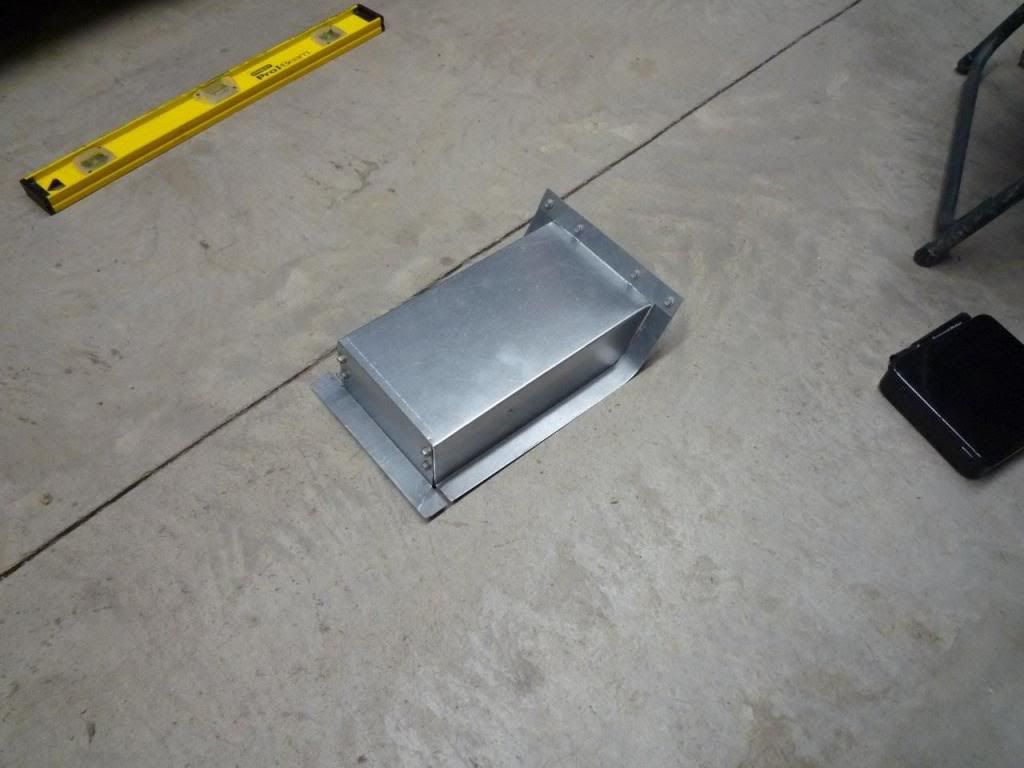
When I get some non-galvanized sheet for the permanent cover, I'll probably weld the areas that I screwed together on the temporary cover. Since I'm not going to weld the galvanized one, I'll probably have to use some liquid sealer to seal up the corner joints, etc.
When I get some non-galvanized sheet for the permanent cover, I'll probably weld the areas that I screwed together on the temporary cover. Since I'm not going to weld the galvanized one, I'll probably have to use some liquid sealer to seal up the corner joints, etc.
 07-21-2009, 08:45 PM
#145
TECH Resident
iTrader: (3)

Join Date: Sep 2005
Location: Edmond, Oklahoma
Posts: 796
Likes: 0
Received 0 Likes
on
0 Posts
That looks clean I like it. You could go ahead and weld it up just wear a charcoal filter while you do it. Or you can make another one practice makes perfect  .
.
.
07-21-2009, 11:13 PM
#146
On The Tree
Thread Starter
iTrader: (6)
Join Date: Mar 2006
Location: Kansas
Posts: 192
Likes: 0
Received 0 Likes
on
0 Posts
Pistol, I thought about welding it up wearing a filter as you mentioned, but there's always the painting issue also. I imagine I'd need to etch the surface first with something. Would a self-etching primer grip well on galvanized material?
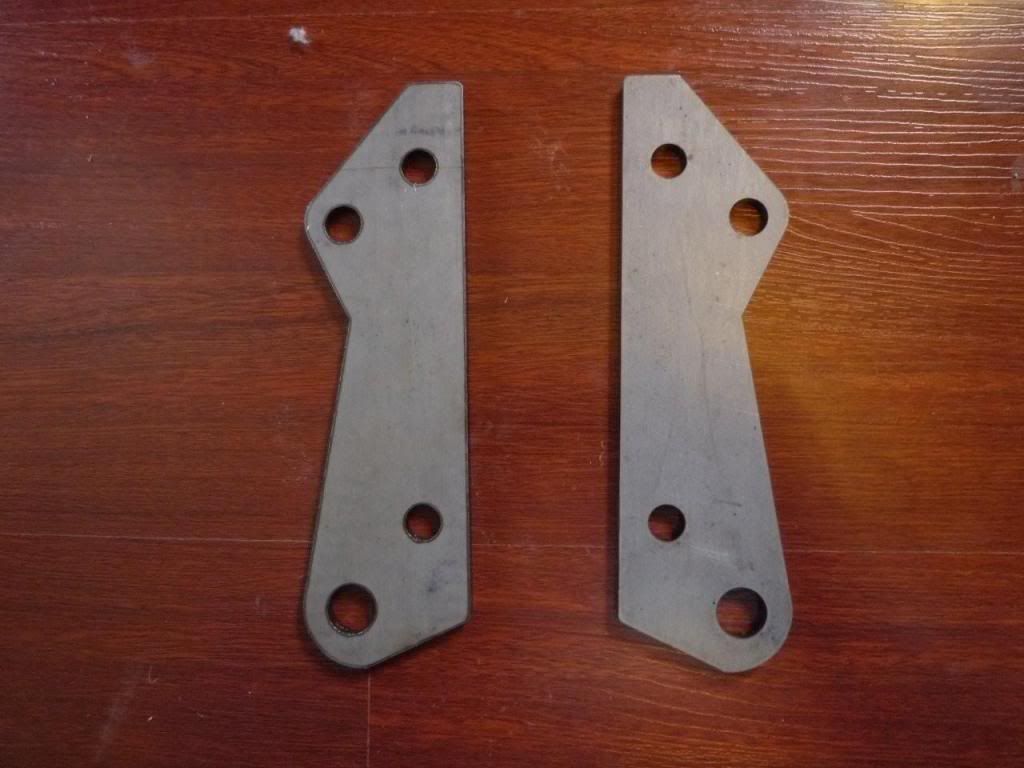
I received the adapter brackets to mount the F-body front calipers to the Chevelle spindles today. They look great -- the quality is nice and they appear to be laser cut.
 07-21-2009, 11:20 PM
#147
TECH Resident
iTrader: (3)
Join Date: Sep 2005
Location: Edmond, Oklahoma
Posts: 796
Likes: 0
Received 0 Likes
on
0 Posts
I would think if you scuffed it with a DA with like some 120 or even just scotch brite and then used an etching epoxy primer it would be good to go for color. Its not like you have alot to lose I assume your just gonna rattle can it right?
07-21-2009, 11:42 PM
#148
On The Tree
Thread Starter
iTrader: (6)
Join Date: Mar 2006
Location: Kansas
Posts: 192
Likes: 0
Received 0 Likes
on
0 Posts
It'll probably get a rattle can to start with, anyway. I might use the same Raptor Liner in the trunk that I used on the undercarriage eventually, but that's a ways down the road.
07-25-2009, 11:44 PM
#149
On The Tree
Thread Starter
iTrader: (6)
Join Date: Mar 2006
Location: Kansas
Posts: 192
Likes: 0
Received 0 Likes
on
0 Posts
Darren came down and helped again today and we were able to get the cam replaced and the Comp 918 springs installed. It's running great, and the starting issues are completely gone!
08-16-2009, 05:07 PM
#150
On The Tree
Thread Starter
iTrader: (6)
Join Date: Mar 2006
Location: Kansas
Posts: 192
Likes: 0
Received 0 Likes
on
0 Posts
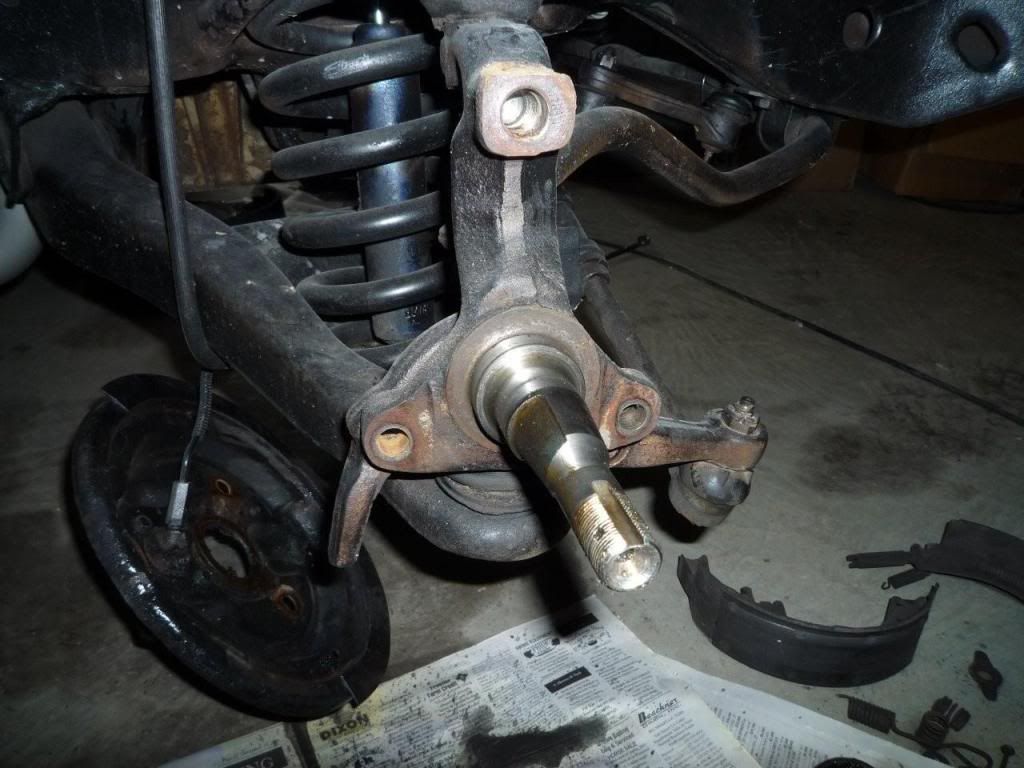
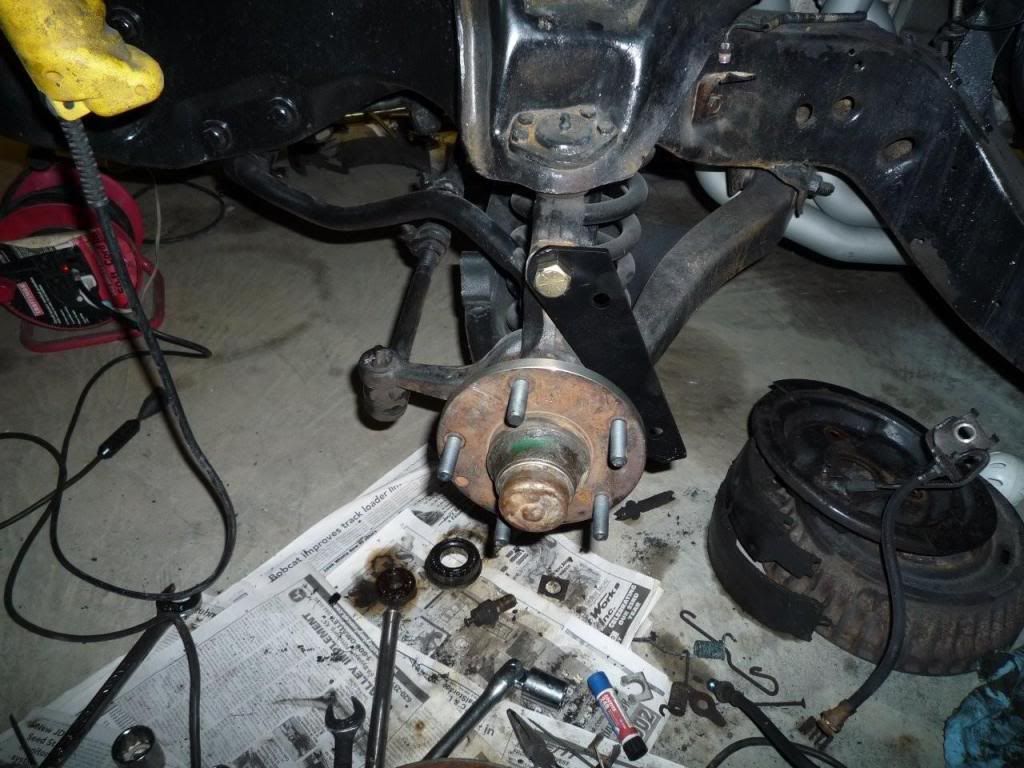
I've got the front brakes all torn down right now. Here you can see the original drum brake spindle, the original hub after turning the OD down to fit into the "tophat" of the F-body brake rotor and after installing the new (longer) wheel studs, and a photo showing how the adapter bracket will mount in place.
The new wheel studs are Dorman #610-259 from the local parts store. I picked up a new set of Timken wheel bearings and seals, but I haven't gotten them installed yet.
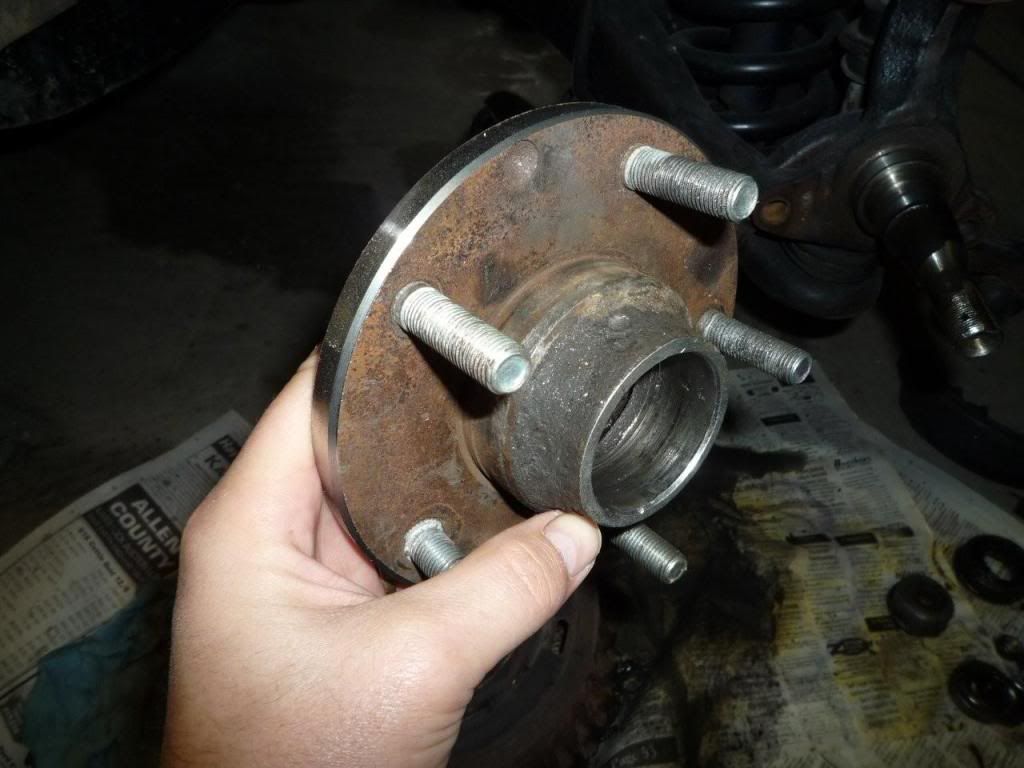
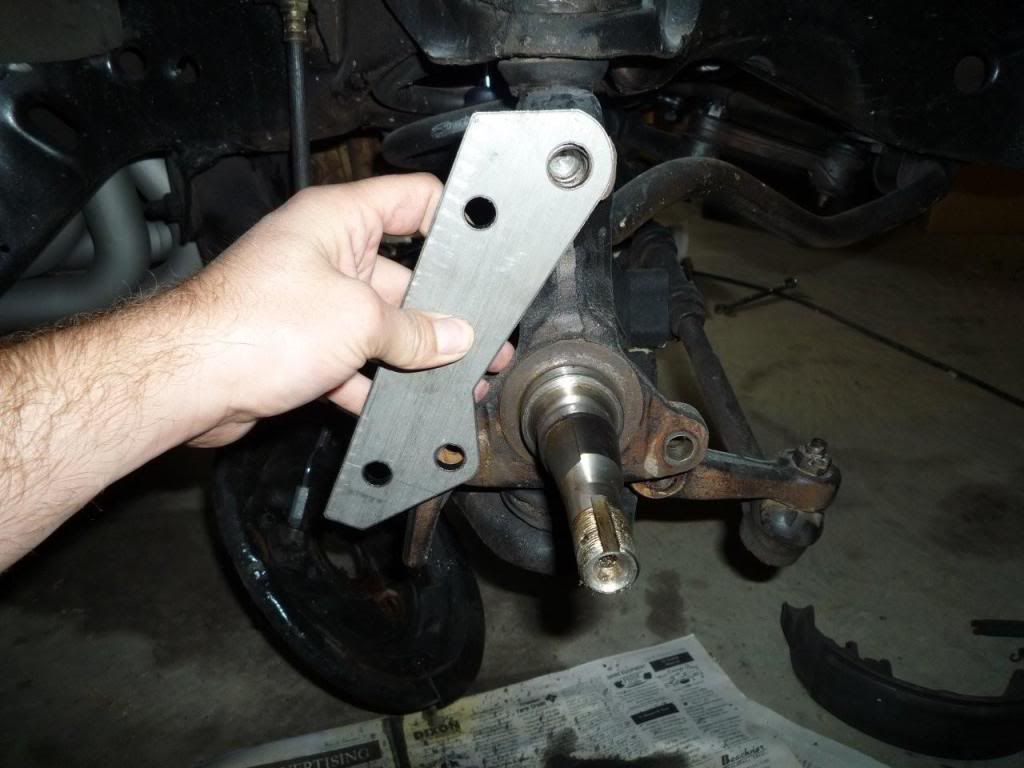
The new wheel studs are Dorman #610-259 from the local parts store. I picked up a new set of Timken wheel bearings and seals, but I haven't gotten them installed yet.
08-30-2009, 04:32 PM
#151
On The Tree
Thread Starter
iTrader: (6)
Join Date: Mar 2006
Location: Kansas
Posts: 192
Likes: 0
Received 0 Likes
on
0 Posts
I finally got the front brakes all put back together. To simplify things a bit for the next guy, here's a few things I learned.
I used the Chevelle's original drum-brake wheel hubs and spindles. After you remove the drum brake backing plate from the spindle, you'll need to grind approximately 1/8" of material off of the top mounting bolt surface on the spindle in order to allow the adapter bracket to sit flat across the spindle's mounting surfaces.
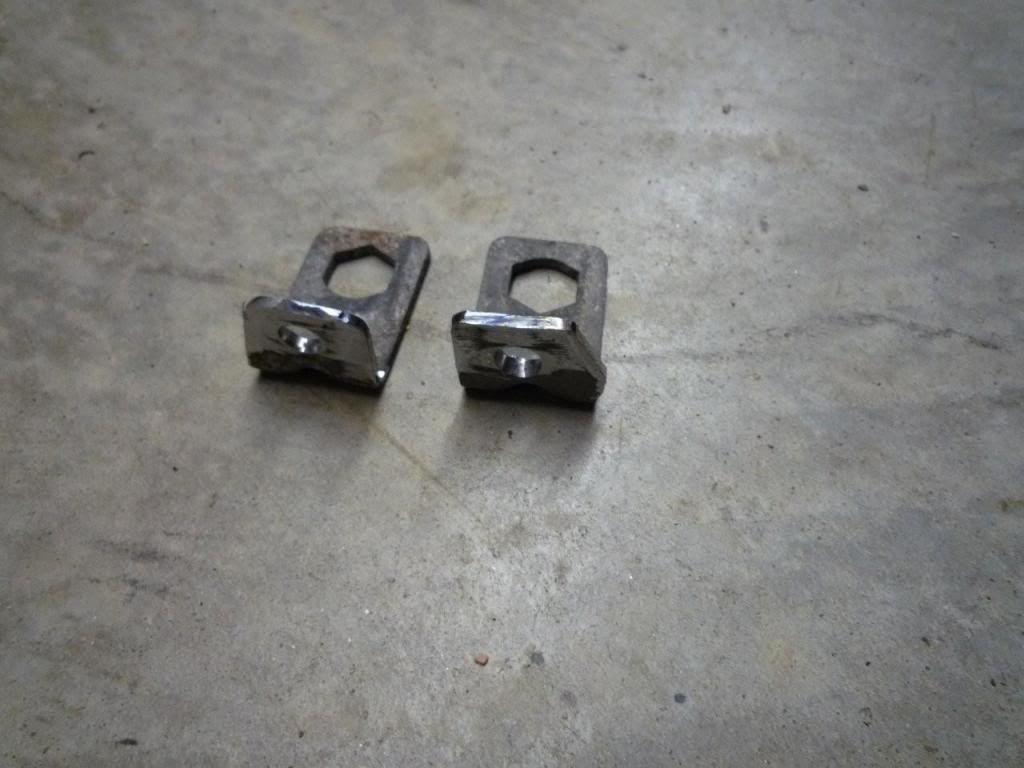
I used the rubber brake lines, brake rotors, calipers, and caliper baskets from the 4th-gen F-body. I also used the mounting bracket from the Trans Am that secures the upper end of the rubber brake line to the chassis. I drilled a mounting hole in it and removed some excess material from the bracket to make it work a little better on the Chevelle chassis (see pic). I used an Edelmann #271300 brake line adapter fitting to mate the 4th-gen F-body rubber brake line to the original Chevelle hard line (ordered them through my local O'Reilly's store).
To mount the caliper basket to the adapter plates, you'll need to pick up a couple of M12 x 25 mm bolts (I don't remember what the thread pitch was, but take your old bolts to the store to match it up). Of the three bolt pattern that fastened the old drum brake backing plate to the spindle, the top bolt is a large stud used for mounting some of the drum brake hardware. You'll need to buy a 1" long bolt to replace this one (1-1/4" would be ideal, but good luck finding one at the local hardware store). I used grade 8 bolts for the English stuff and grade 10.9's for the metric stuff.
You'll also need to chuck the wheel hubs up in a lathe and turn the OD of the hub down to allow it to slide inside the 4th-gen F-body rotor. I turned the OD down to 5.73".
Here are a few pics of the process:
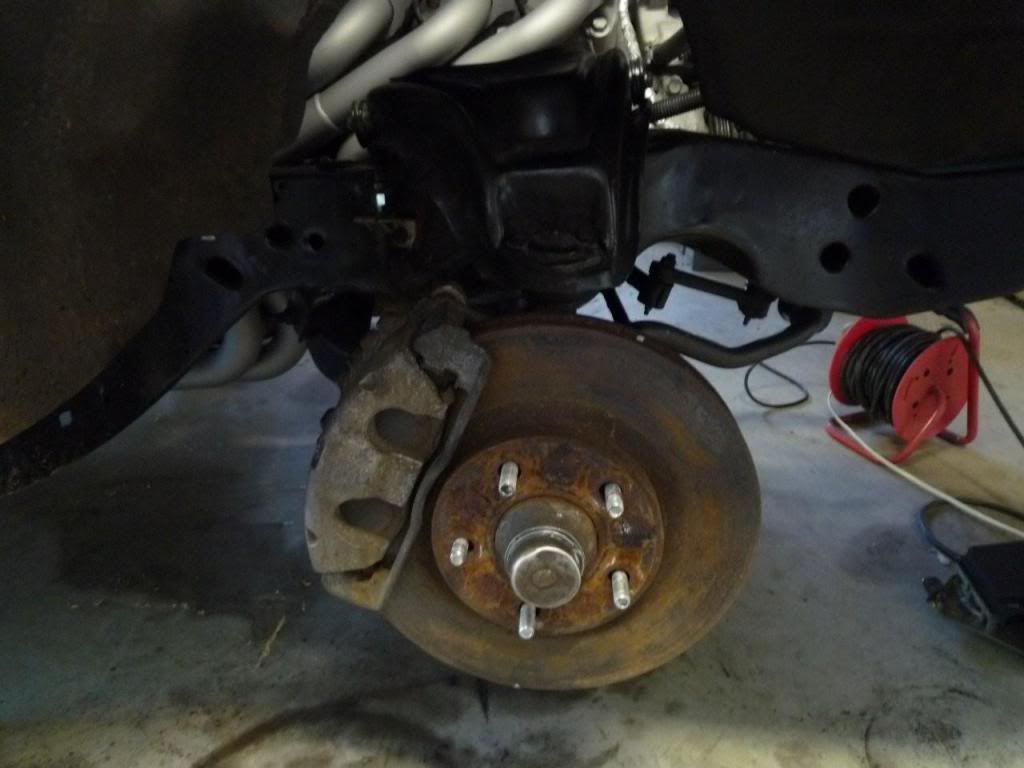
Excuse the crusty-looking calipers and rotors. As much as I'd like to have some nice cross-drilled rotors, they weren't in the budget right now. I'll probably clean up the calipers a bit and call it good for now.
I used the Chevelle's original drum-brake wheel hubs and spindles. After you remove the drum brake backing plate from the spindle, you'll need to grind approximately 1/8" of material off of the top mounting bolt surface on the spindle in order to allow the adapter bracket to sit flat across the spindle's mounting surfaces.
I used the rubber brake lines, brake rotors, calipers, and caliper baskets from the 4th-gen F-body. I also used the mounting bracket from the Trans Am that secures the upper end of the rubber brake line to the chassis. I drilled a mounting hole in it and removed some excess material from the bracket to make it work a little better on the Chevelle chassis (see pic). I used an Edelmann #271300 brake line adapter fitting to mate the 4th-gen F-body rubber brake line to the original Chevelle hard line (ordered them through my local O'Reilly's store).
To mount the caliper basket to the adapter plates, you'll need to pick up a couple of M12 x 25 mm bolts (I don't remember what the thread pitch was, but take your old bolts to the store to match it up). Of the three bolt pattern that fastened the old drum brake backing plate to the spindle, the top bolt is a large stud used for mounting some of the drum brake hardware. You'll need to buy a 1" long bolt to replace this one (1-1/4" would be ideal, but good luck finding one at the local hardware store). I used grade 8 bolts for the English stuff and grade 10.9's for the metric stuff.
You'll also need to chuck the wheel hubs up in a lathe and turn the OD of the hub down to allow it to slide inside the 4th-gen F-body rotor. I turned the OD down to 5.73".
Here are a few pics of the process:
Excuse the crusty-looking calipers and rotors. As much as I'd like to have some nice cross-drilled rotors, they weren't in the budget right now. I'll probably clean up the calipers a bit and call it good for now.
09-01-2009, 10:47 PM
#152

Good job on your build. Iv got a 71 monte here w/ disk brakes on it, I'd made ya a good deal on the used parts to put put right on your chevelle...Oh well, always a day late....
Iv got the new quarters, wheel houses,and trunk in on my 71. Should have it in primer soon....
Rick
Iv got the new quarters, wheel houses,and trunk in on my 71. Should have it in primer soon....
Rick
09-30-2009, 10:54 AM
#153
Registered User

Join Date: Sep 2009
Location: Beggs oklahoma
Posts: 7
Likes: 0
Received 0 Likes
on
0 Posts
I got the new smooth firewall panel tacked in place. I plan on welding/grinding/finishing the curved edge on the driver's side of the panel, and the other three edges will probably be finished with seam sealer. If anybody is interested in one of these panels, send me a PM and let me know.
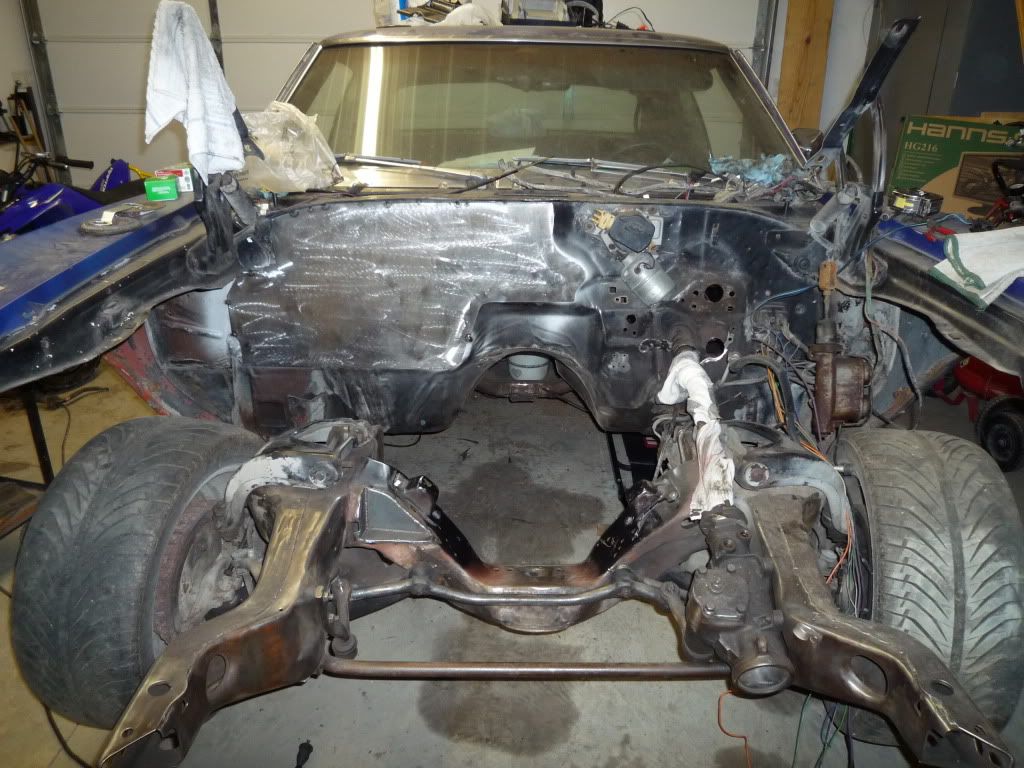
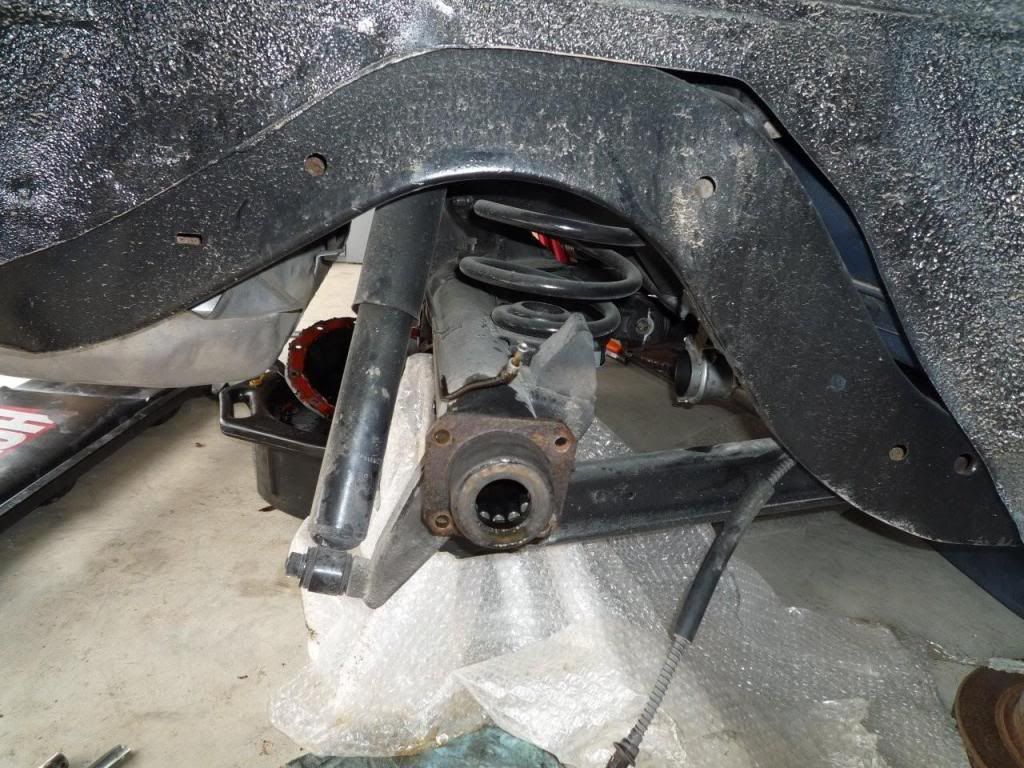
I had the chassis and floorpans blasted last week. As much as I would love to be able to do a true "frame off", the timeline just doesn't allow. So, this is as close as I can get for now.
I sprayed Eastwoods' rust converter on the frame, floorpans, and trunk pan. This picture shows the chassis and front suspension after the rust converter had been applied.
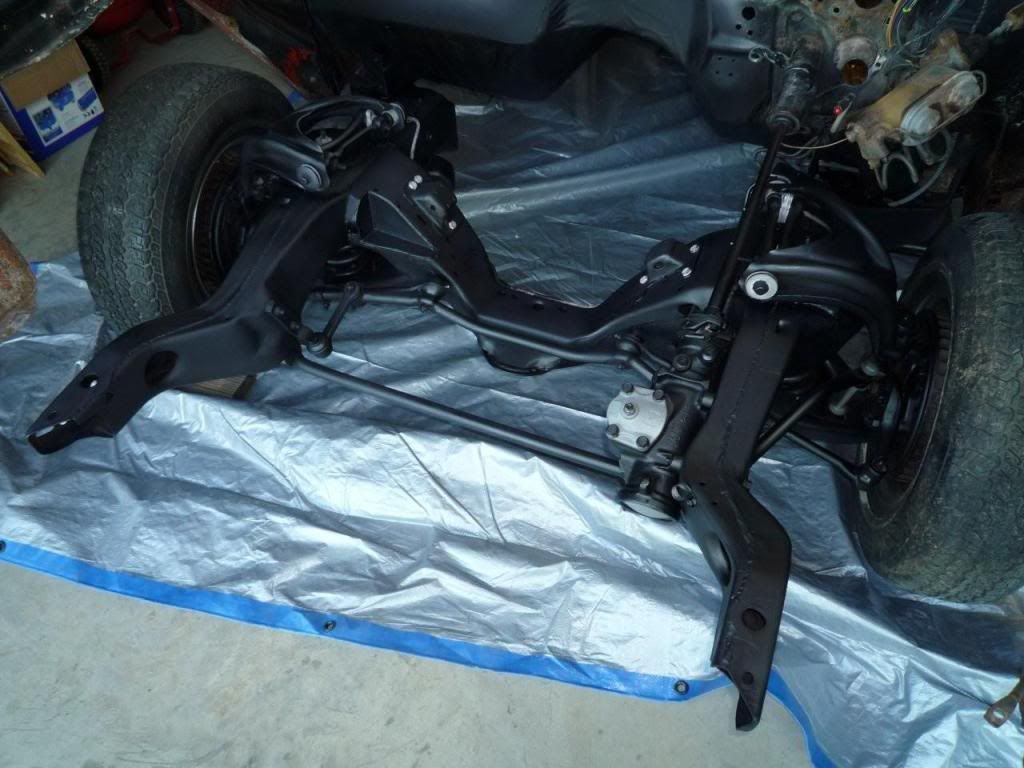
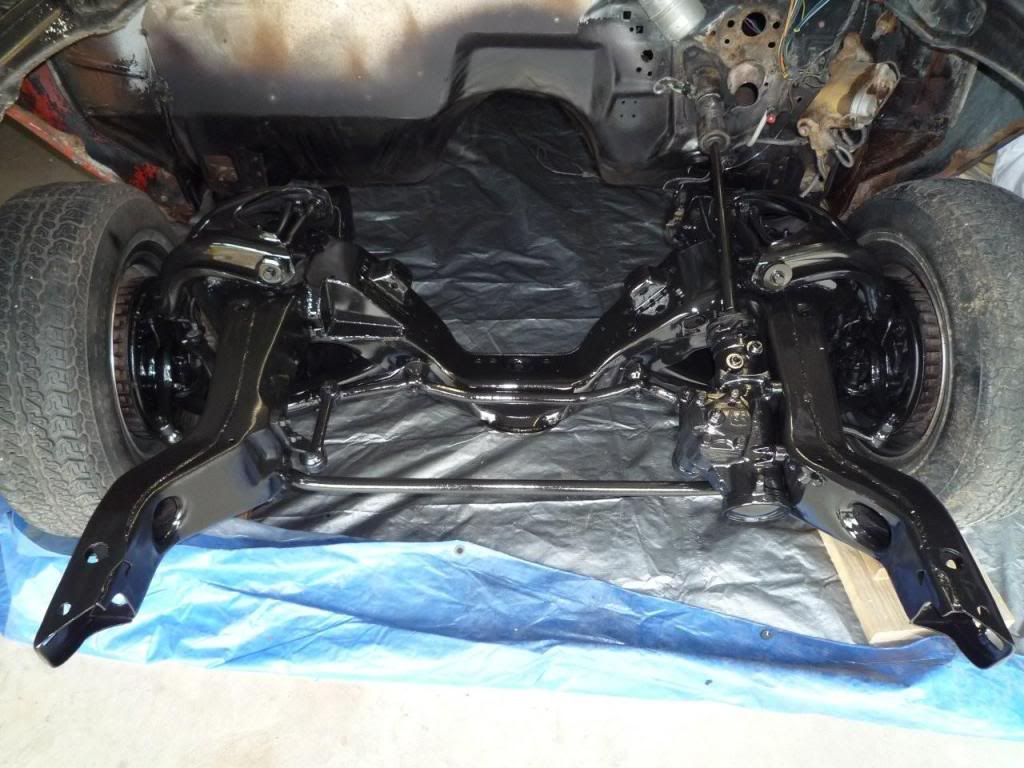
After the rust converter, I sprayed Eastwoods' Extreme Chassis Black on the frame and suspension.
I had the chassis and floorpans blasted last week. As much as I would love to be able to do a true "frame off", the timeline just doesn't allow. So, this is as close as I can get for now.
I sprayed Eastwoods' rust converter on the frame, floorpans, and trunk pan. This picture shows the chassis and front suspension after the rust converter had been applied.
After the rust converter, I sprayed Eastwoods' Extreme Chassis Black on the frame and suspension.
Im interested in one of those panels if u shoot me a price! thanks
03-16-2010, 03:42 PM
#156
On The Tree
Thread Starter
iTrader: (6)
Join Date: Mar 2006
Location: Kansas
Posts: 192
Likes: 0
Received 0 Likes
on
0 Posts
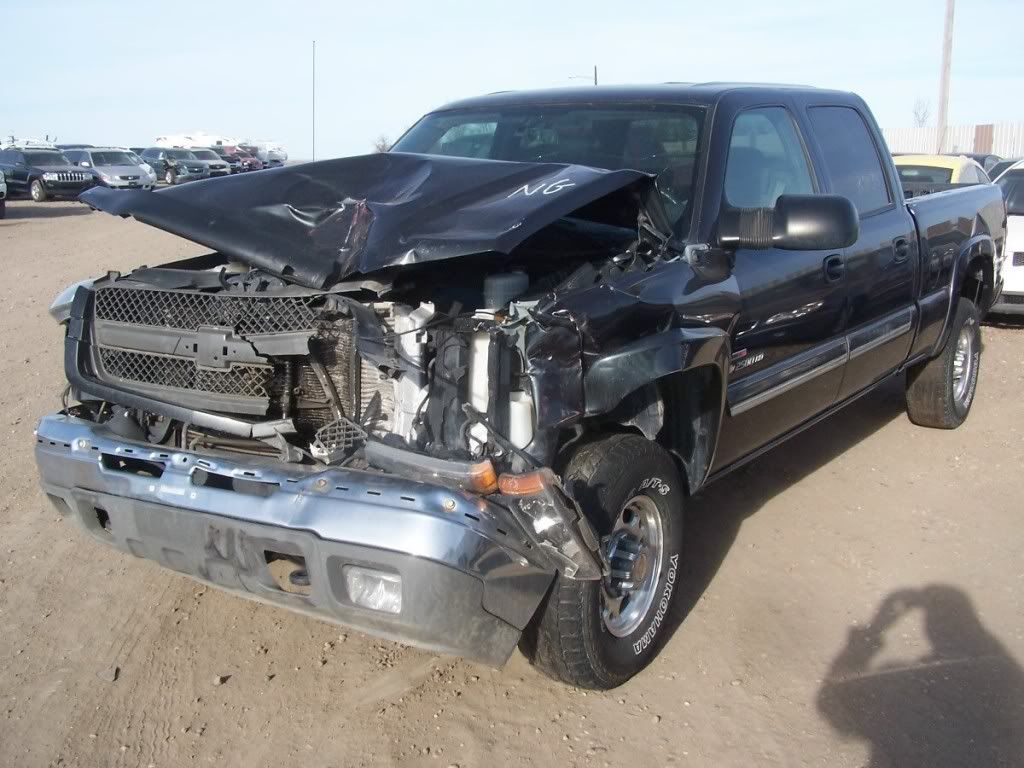
I haven't worked on the Chevelle much this winter. Most of my "project time" over the past few months went to rebuilding a wrecked '04 Duramax crew-cab (basically the closest thing our family is getting to a mini-van).

Last weekend, I sold the Salt Flat Special wheels that were on the Chevelle, so I'm in the market for some new tires and wheels. The options are endless, but when the budget is factored in, the choices become much more limited.
With that said, springtime is here, the weather is nice, and I'm itchin' to have the Chevelle back on the road. I loaded up the Trans Am parts car this weekend, pulled the rear axle out from underneath it, and hauled the car off for scrap yesterday.
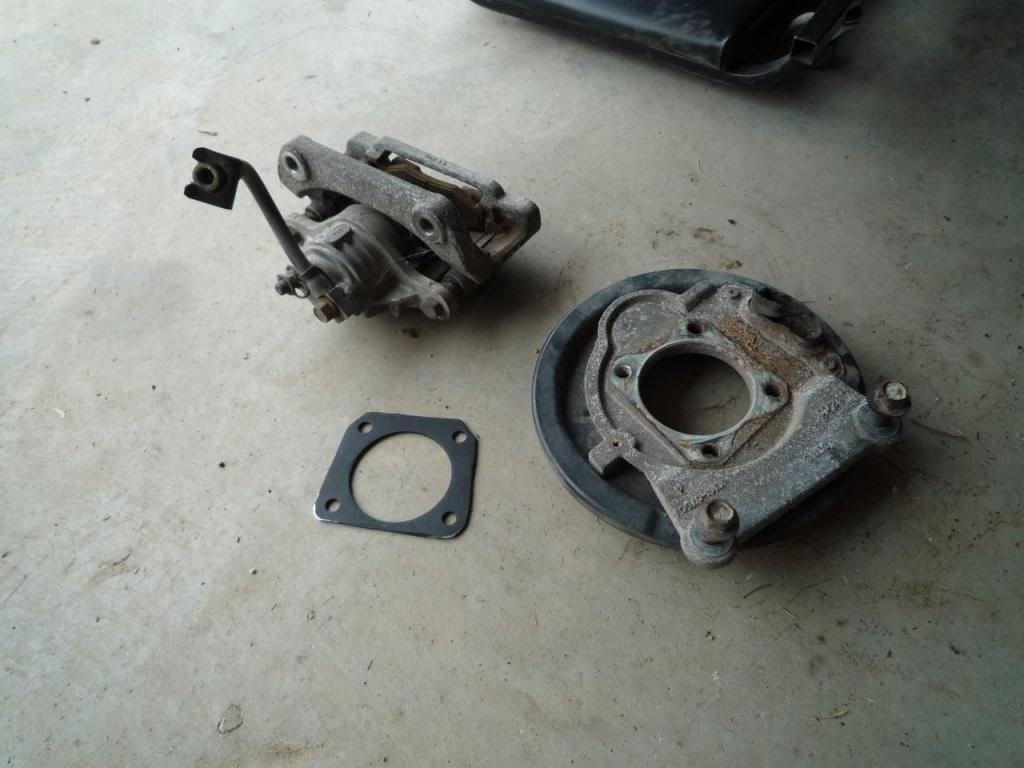
I removed the rear disc brakes from the T/A axle, and I also stripped the drum brakes off the 12-bolt in the Chevelle. I fabricated spacer plates out of the old drum brake backing plates. I need to pick up some new caliper bolt boots, brake pads, and the rubber covers for the e-brake mechanism.
Last weekend, I sold the Salt Flat Special wheels that were on the Chevelle, so I'm in the market for some new tires and wheels. The options are endless, but when the budget is factored in, the choices become much more limited.
With that said, springtime is here, the weather is nice, and I'm itchin' to have the Chevelle back on the road. I loaded up the Trans Am parts car this weekend, pulled the rear axle out from underneath it, and hauled the car off for scrap yesterday.
I removed the rear disc brakes from the T/A axle, and I also stripped the drum brakes off the 12-bolt in the Chevelle. I fabricated spacer plates out of the old drum brake backing plates. I need to pick up some new caliper bolt boots, brake pads, and the rubber covers for the e-brake mechanism.
07-22-2010, 11:59 PM
#159
On The Tree
Thread Starter
iTrader: (6)
Join Date: Mar 2006
Location: Kansas
Posts: 192
Likes: 0
Received 0 Likes
on
0 Posts
I also sold the Salt Flat 17" wheels and tires, and I picked up a new set of 18" wheels. I haven't bought the new tires yet, so the Chevelle is sitting on some ugly rollers in the meantime.
I'm using the '98-'02 F-body radiator. It's a great fit into the A-body core support. I drilled a couple new holes in the bottom of the core support (if I remember right, one for the rubber piece that the radiator sits on and one for the drain / petcock). I fabbed a couple little sheetmetal tabs that hold the top of the radiator to the upper radiator support cross-piece, and then I installed the original A-body cover piece over the top to make it all look nice and original. I'm using the F-body compressor, and I'm planning to use a Southern Air / Southern Rods flat firewall evaporator setup to tie in with it.
07-23-2010, 07:26 AM
#160
you dont know how long i searched last night to find out if f body radiator could fit in an A body!!!! all i found were into first gen f body. i found a radiator and fan for 125 bucks but i dont know if its out of a vette or f body.do u have any pics of yours or how you got it to fit in there?