

5.3(lm4) aluminum block in a C3 Corvette:Swap Thread!
 05-04-2009 | 09:10 PM
#1
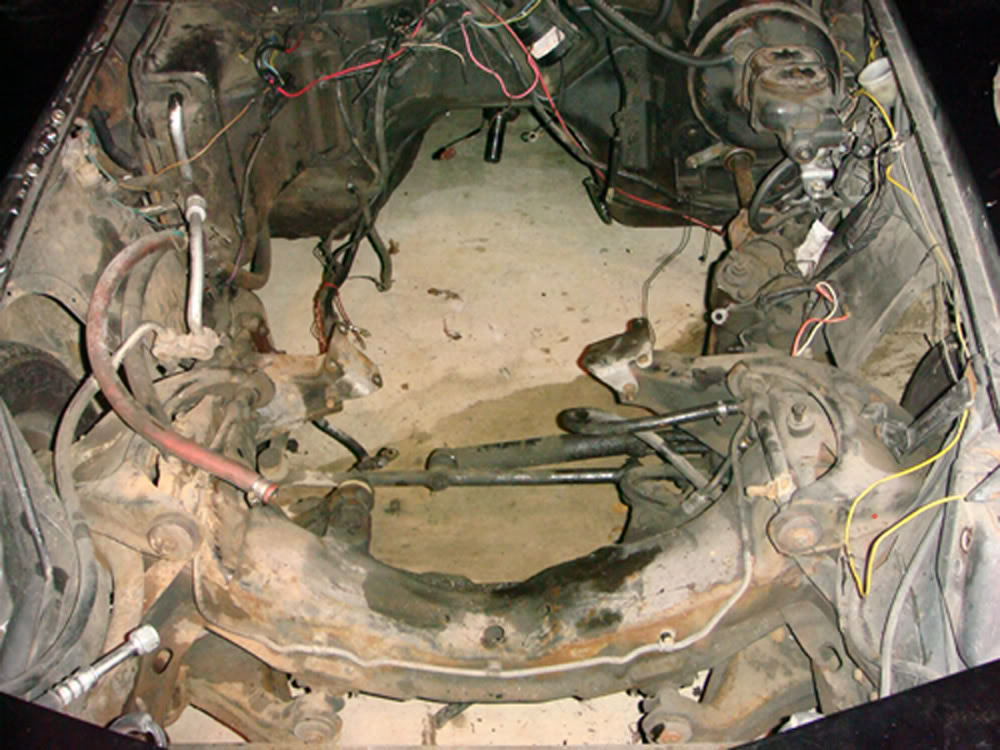
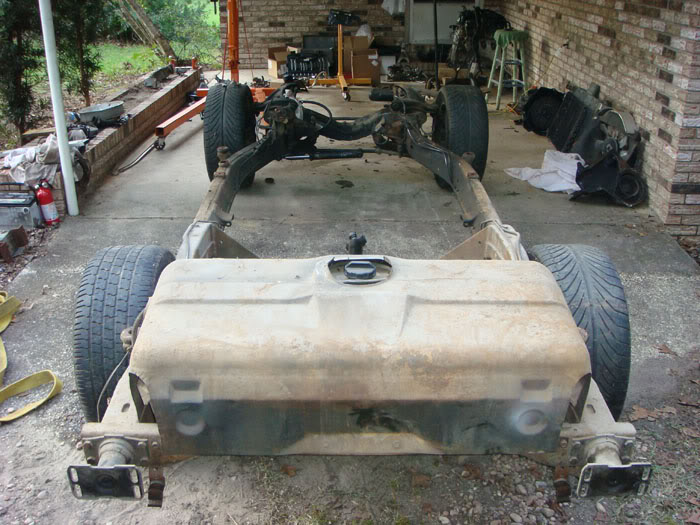
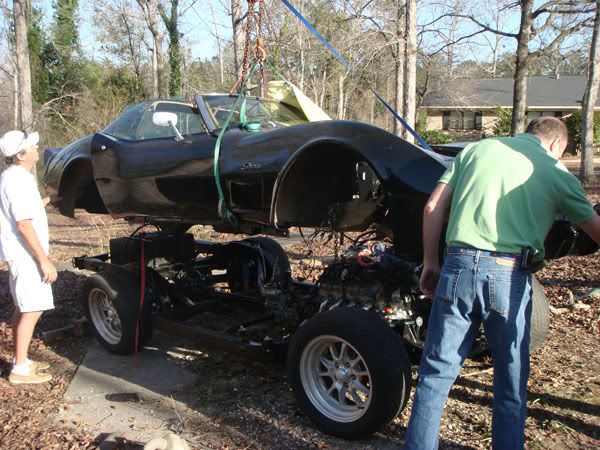
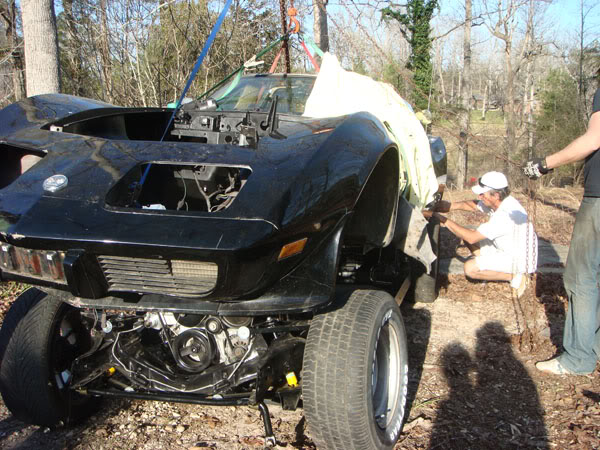
Well I waited and waited to post about my swap and now I have 200+ pictures to share with you guys. Im gonna try my best to break it down into several phases. I started out with the intentions of only swapping the motor in. I planned on mating it to a WCT5 transmission, but opted to buy a busted t56 and rebuild it with all the upgraded components. What started as a motor swap turned into a frame off restoration. Here is what I started with:
1976 L-48 Cpe
3600 curb weight


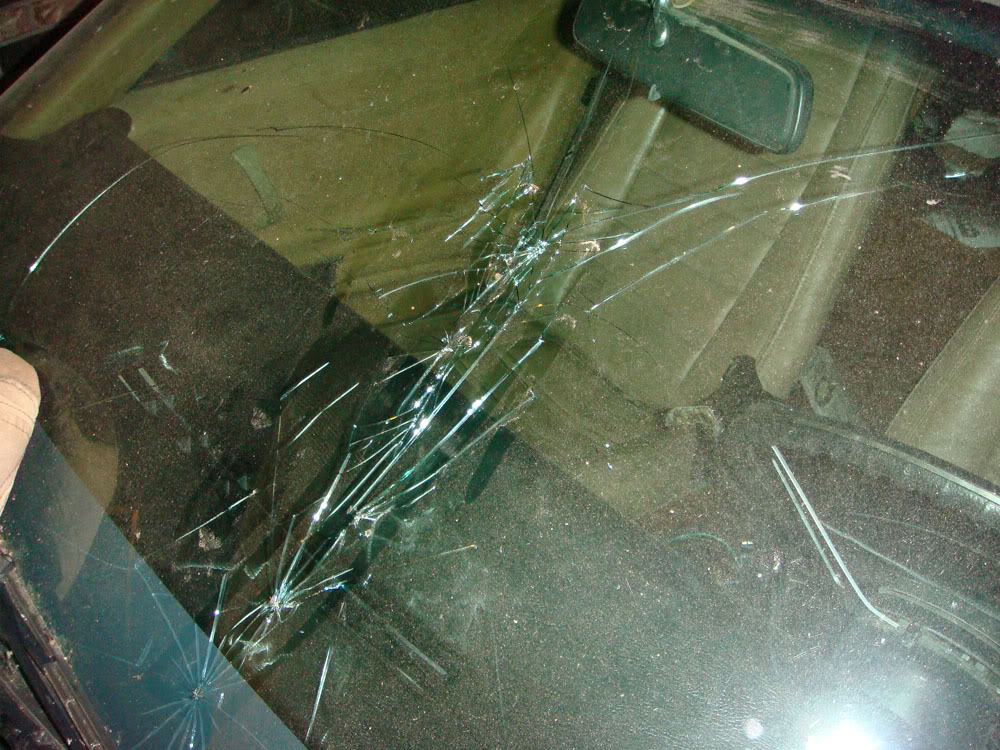
What can happen if the chain breaks on a motor lift! Thats 250+ dollars you dont feel like spending...
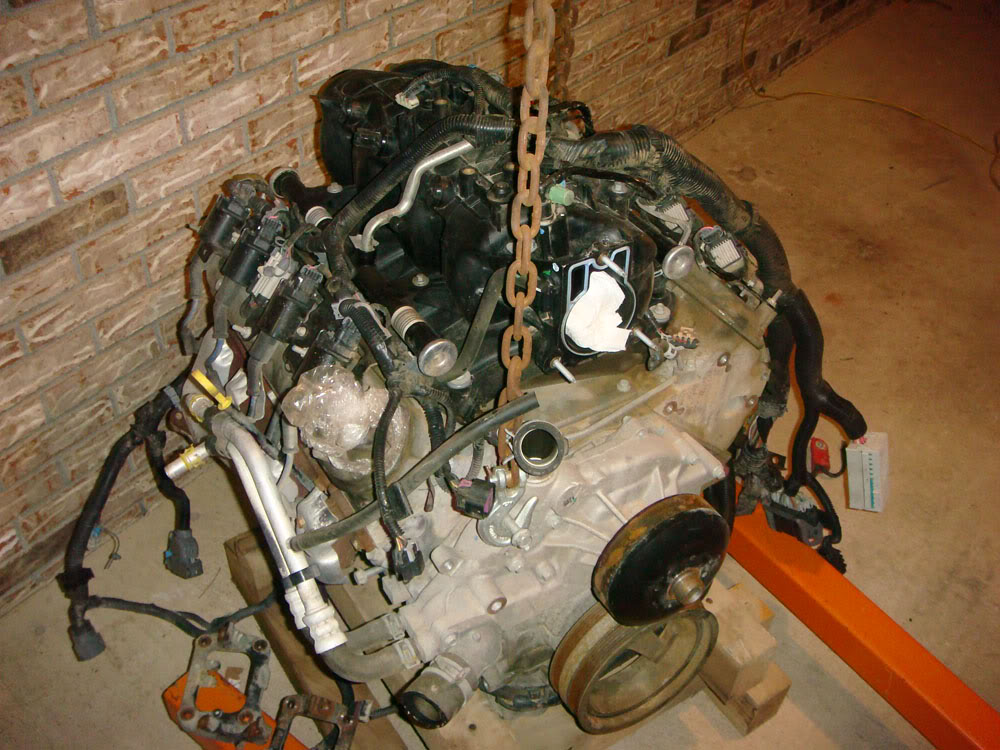
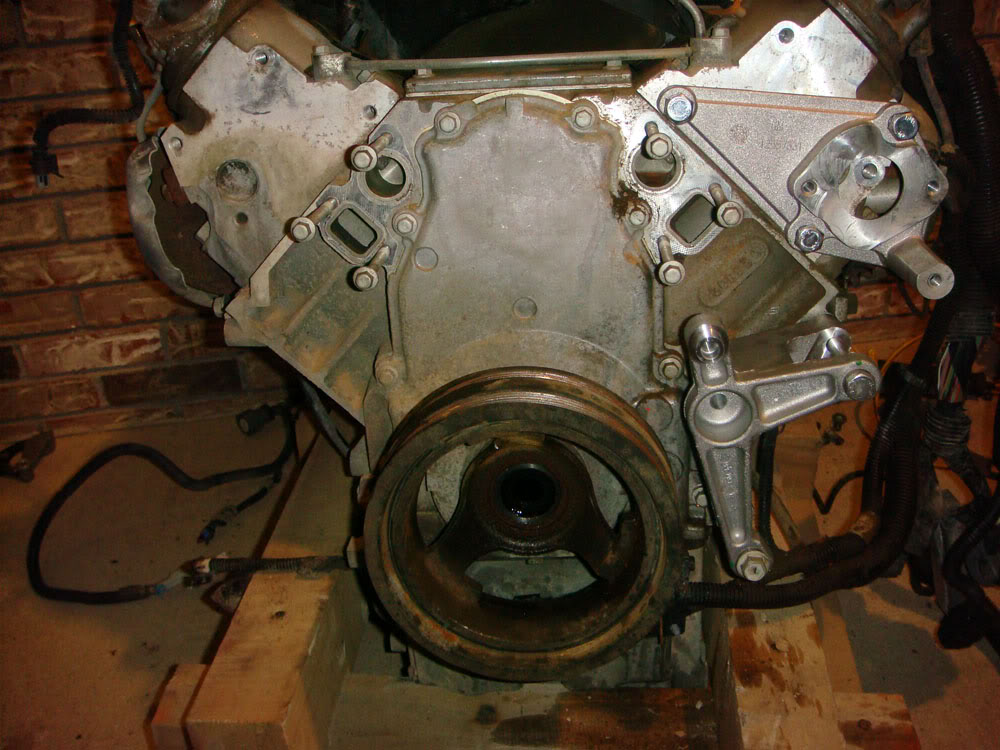
The new motor-5.3 LM4-Aluminum block
Truck altenator on the Fbody bracket. Something handy to know in case you cant find an fbody altenator. Iv put 800+ miles on mine with no problems.

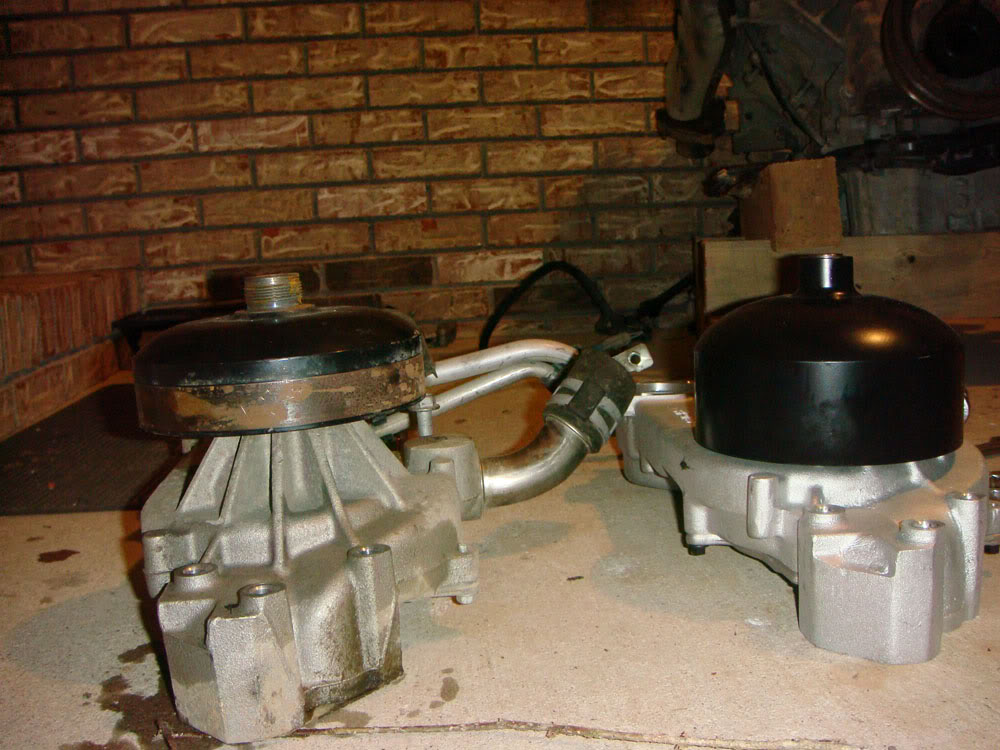
Fbody water pump and Truck water pump-notice the differences
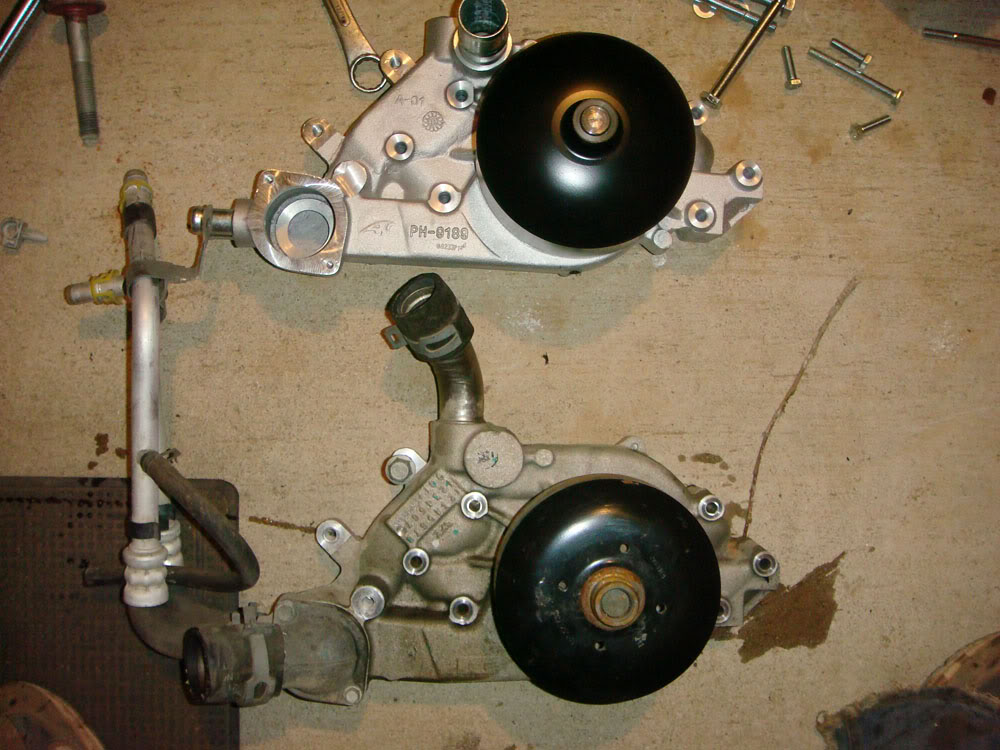
another pic of the pumps
1976 L-48 Cpe
3600 curb weight
What can happen if the chain breaks on a motor lift! Thats 250+ dollars you dont feel like spending...
The new motor-5.3 LM4-Aluminum block
Truck altenator on the Fbody bracket. Something handy to know in case you cant find an fbody altenator. Iv put 800+ miles on mine with no problems.
Fbody water pump and Truck water pump-notice the differences
another pic of the pumps
05-04-2009 | 09:26 PM
#2
Removed all the Buick Rainer brackets and began replacing them with fbody accessories and brackets.
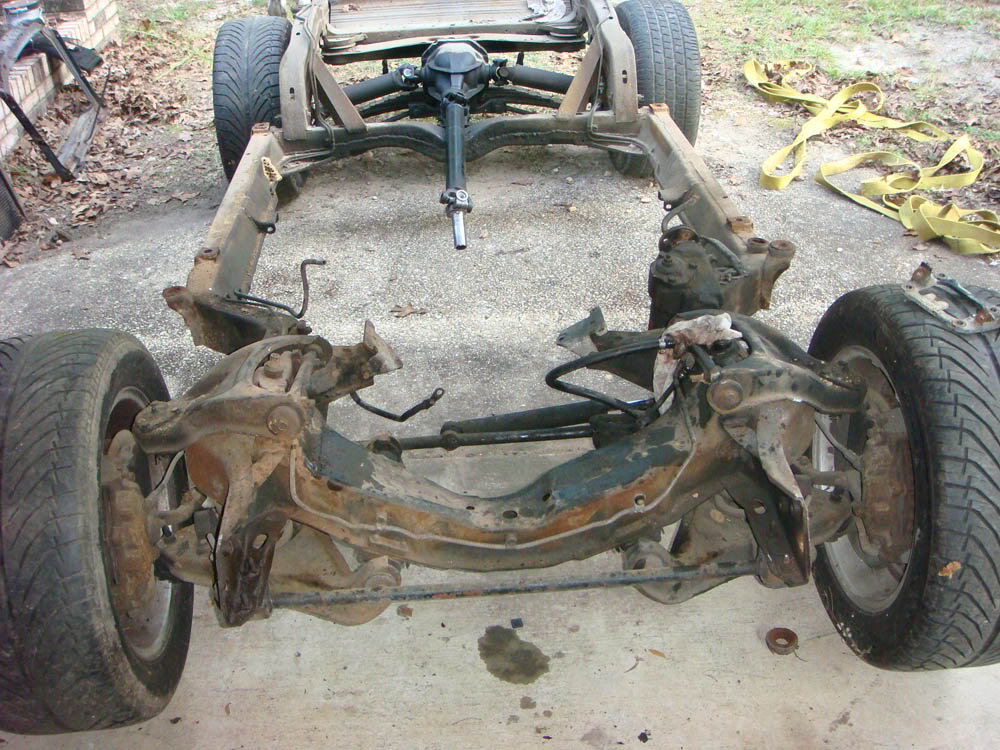
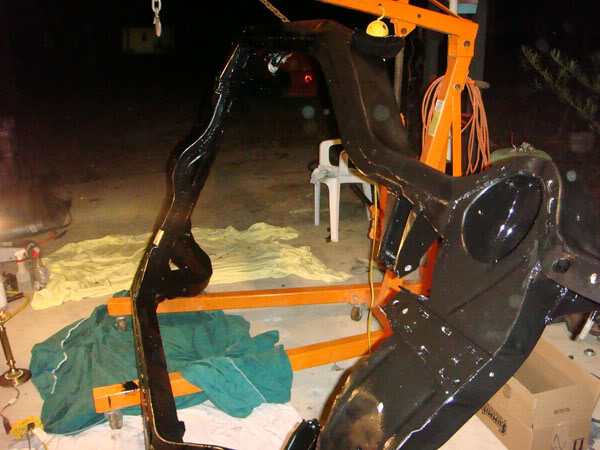
Sandblasted the frame myself(who am I kidding I did everything by myself!)
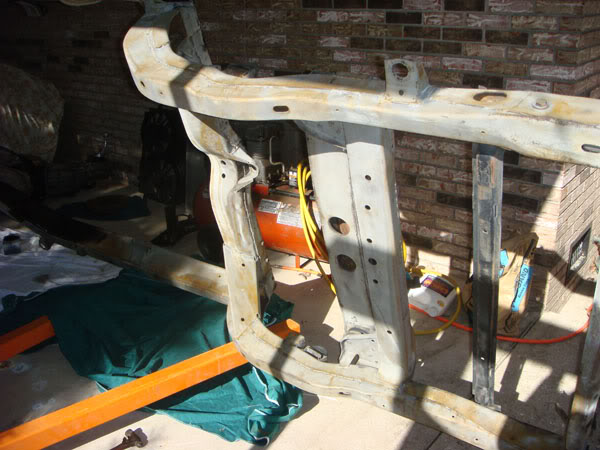
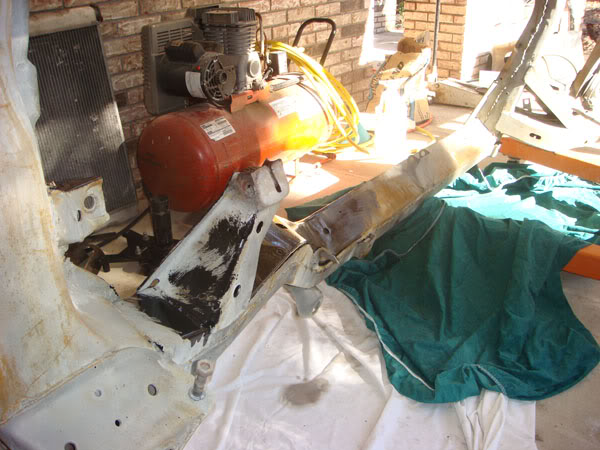
1st coat of POR-15 I recommend this product to anyone. Great stuff
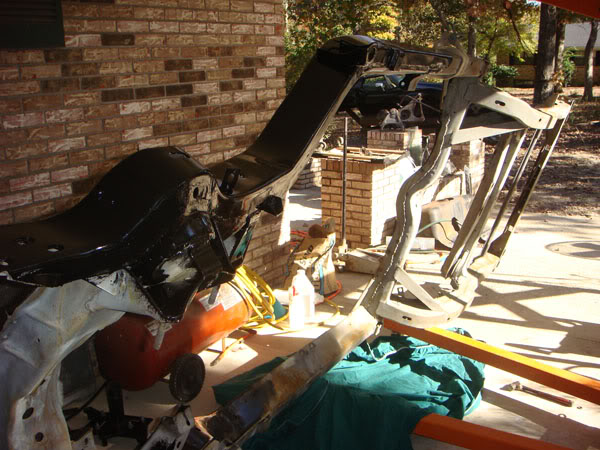
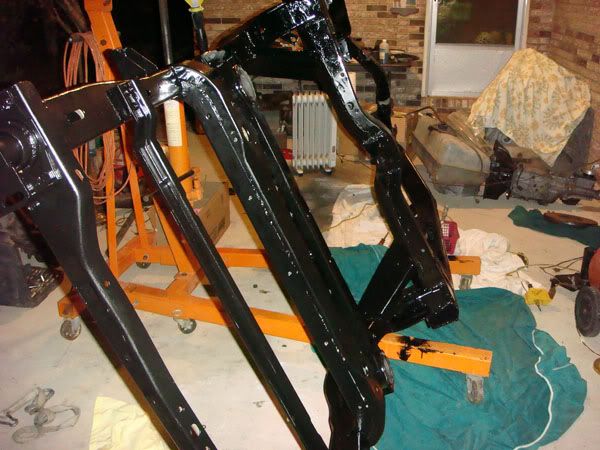
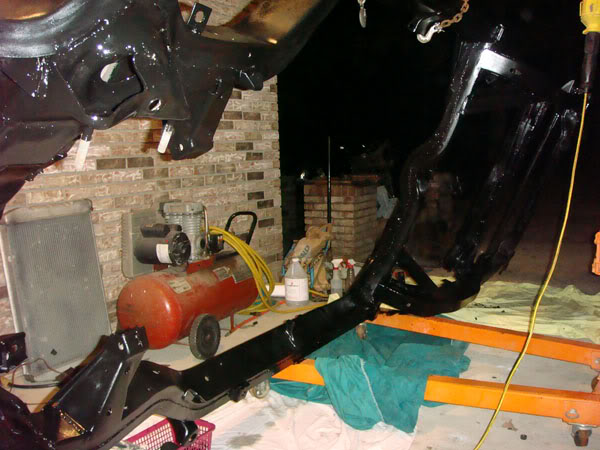
Frame coated with por-15. Now its time for Chassis coat black
VBandP performance Plus suspension. Shot of the front adjustable monospring.
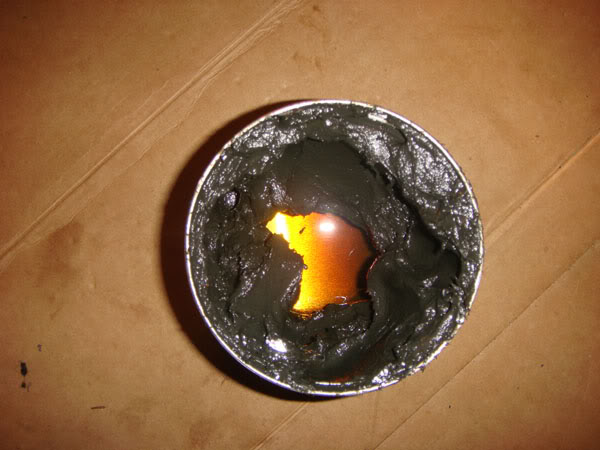
New wheel bearings up front. Had to redo both sides because of a bad tub of valvoline synthetic wheel bearing grease. There were puddles of oil under each wheel from the grease seperating. That will **** you off.
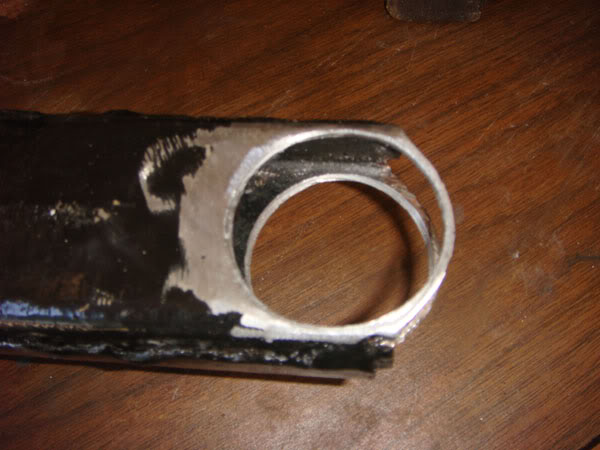
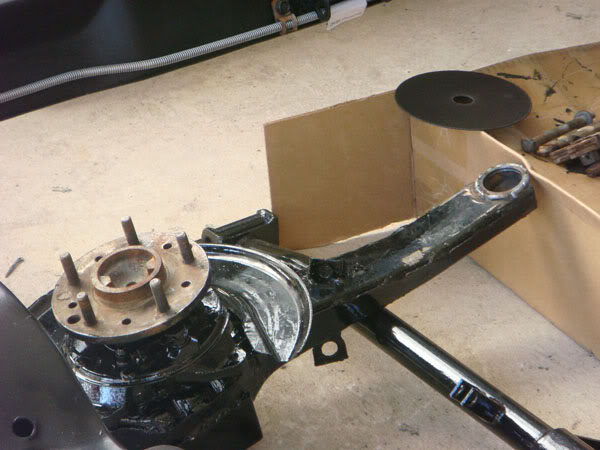
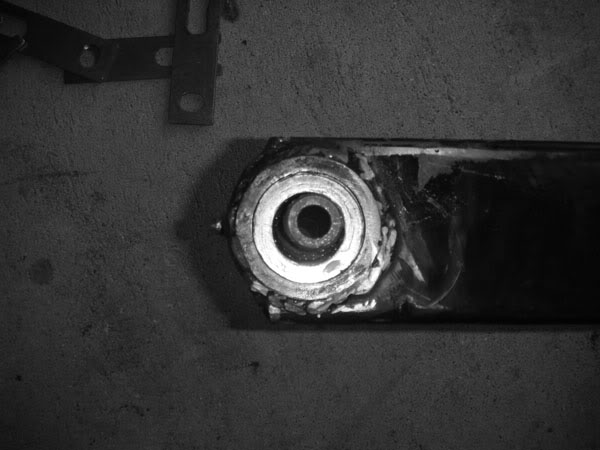
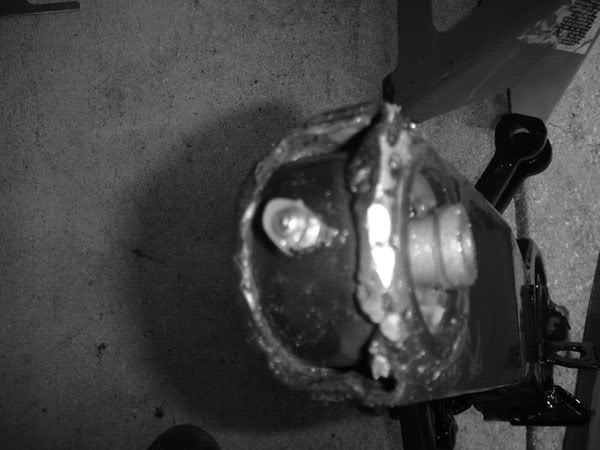
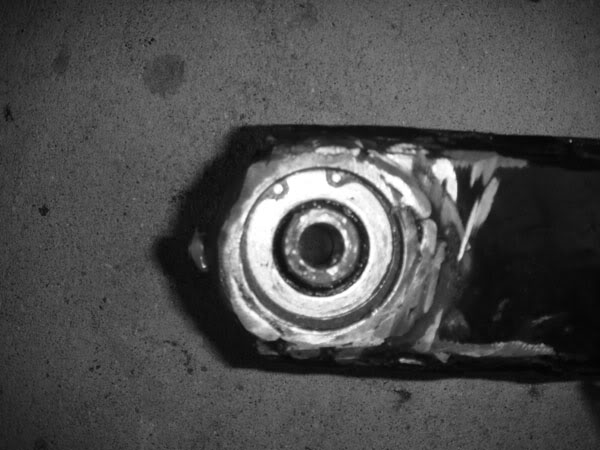
Decided to upgrade the stock trailing arm bushings to Johnny joints. I took a 2" hole saw and cut the old bushing out. I then welded in the 2" Johnny joints

Sandblasted the frame myself(who am I kidding I did everything by myself!)
1st coat of POR-15 I recommend this product to anyone. Great stuff
Frame coated with por-15. Now its time for Chassis coat black
VBandP performance Plus suspension. Shot of the front adjustable monospring.
New wheel bearings up front. Had to redo both sides because of a bad tub of valvoline synthetic wheel bearing grease. There were puddles of oil under each wheel from the grease seperating. That will **** you off.
Decided to upgrade the stock trailing arm bushings to Johnny joints. I took a 2" hole saw and cut the old bushing out. I then welded in the 2" Johnny joints
05-04-2009 | 09:53 PM
#3
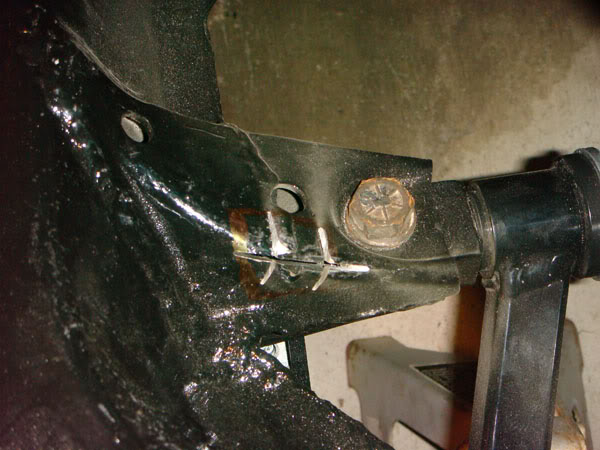
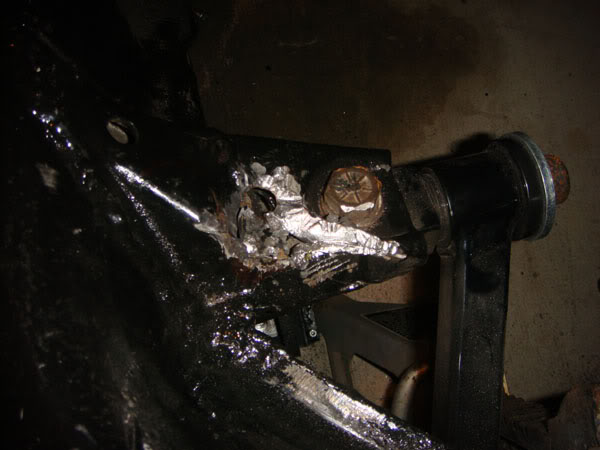
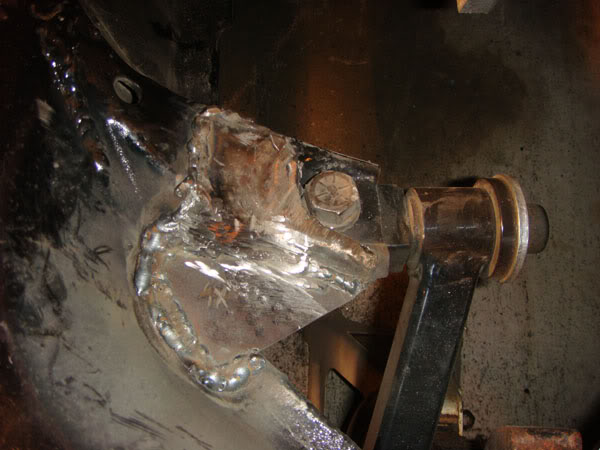
Altenator was hitting the lower control arm mount. So I made some cuts and hammered in an indentions. I then welded it back up and welded in an 1/8inch steel triangle to keep the strength
I bought some carshop inc adapters and energy suspension poly mounts
I had to modify the C5 dipstick, so I welded a bracket onto the tube. The 5.3lm4 dipstick is on the oil pan. There is a boss on the block that must be drilled out to the proper size to fit the c5 dipstick/fbody dipstick
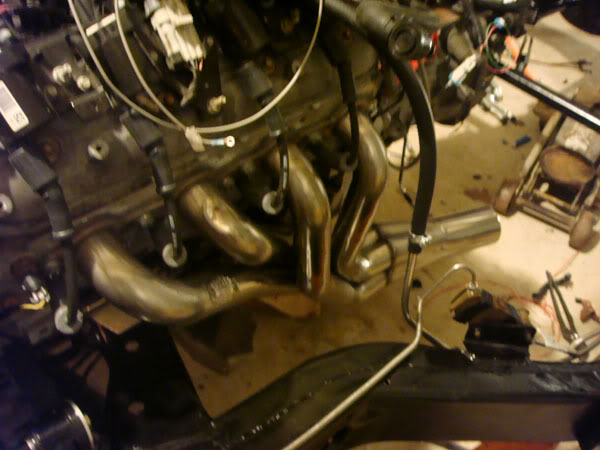
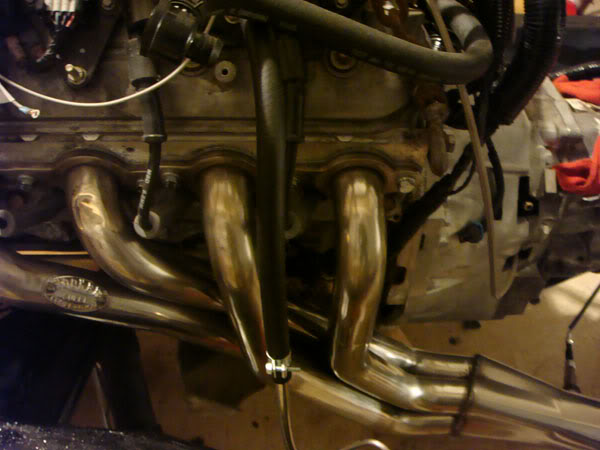
I bought a set of ls1 1-3/4 summit header flanges. I cut my sbc super comp headers up and planned on welding them up, but I backed out. Way to much work and I would still need to get them coated. I decided to buy 2002 fbody hooker super comp stainless headers instead
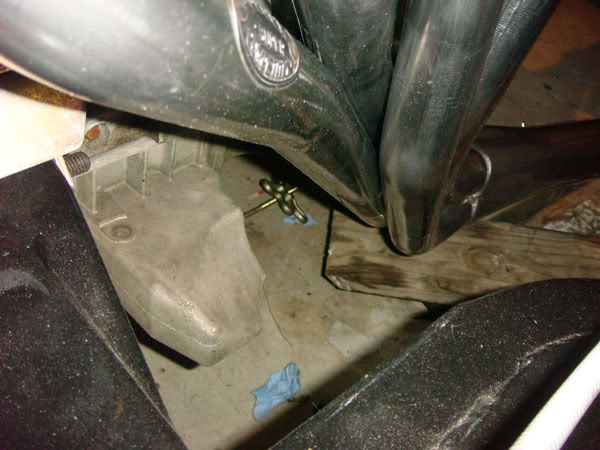
Much sexier! They fit perfect. Great clearance all around. I am running a rack and pinion setup, so you guys with the standard steering gear box may have a problem. I do believe I have seen where it will work with the steering box, but dont quote me
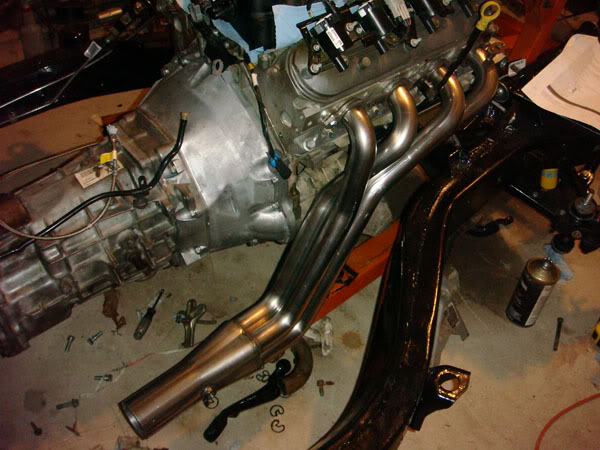
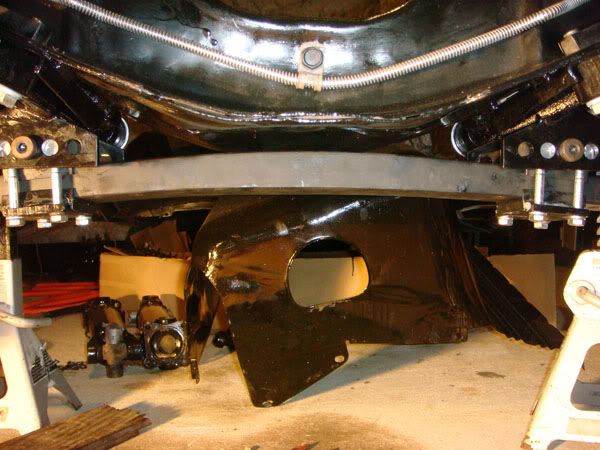
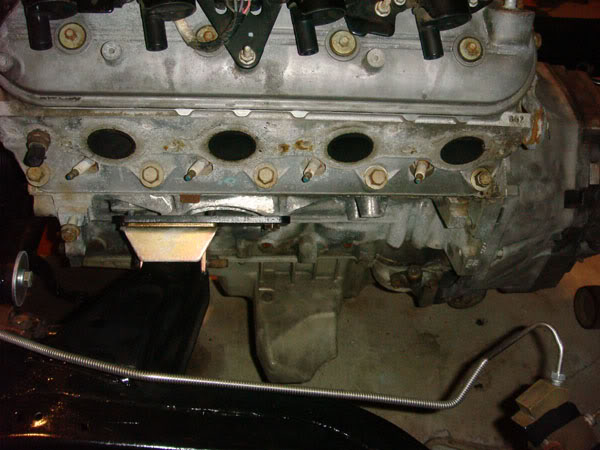
The fbody headers work great with the C5 batwing oil pan. They dont even come close. Here is proof! Dont let anyone tell you otherwise!
I bought some carshop inc adapters and energy suspension poly mounts
I had to modify the C5 dipstick, so I welded a bracket onto the tube. The 5.3lm4 dipstick is on the oil pan. There is a boss on the block that must be drilled out to the proper size to fit the c5 dipstick/fbody dipstick
I bought a set of ls1 1-3/4 summit header flanges. I cut my sbc super comp headers up and planned on welding them up, but I backed out. Way to much work and I would still need to get them coated. I decided to buy 2002 fbody hooker super comp stainless headers instead
Much sexier! They fit perfect. Great clearance all around. I am running a rack and pinion setup, so you guys with the standard steering gear box may have a problem. I do believe I have seen where it will work with the steering box, but dont quote me
The fbody headers work great with the C5 batwing oil pan. They dont even come close. Here is proof! Dont let anyone tell you otherwise!

 05-04-2009 | 10:17 PM
#5
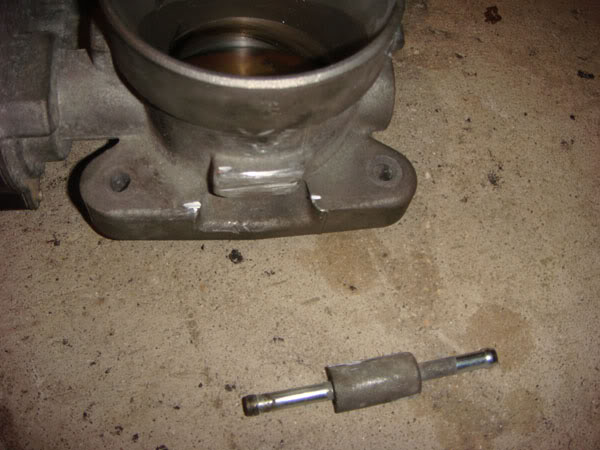
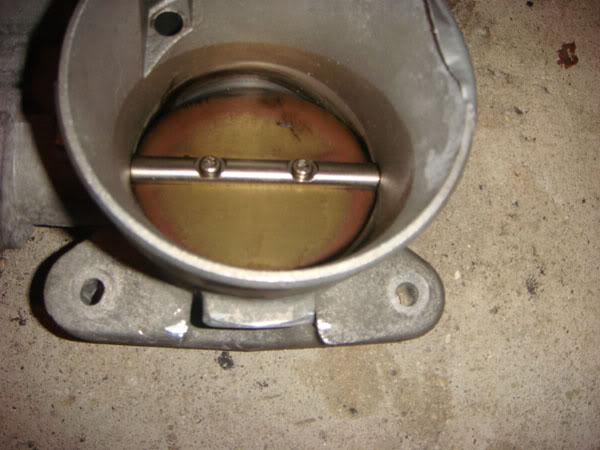
The rainier/trailblazer/envoy throttle body has a coolant line that interferes with the fbody water pump.
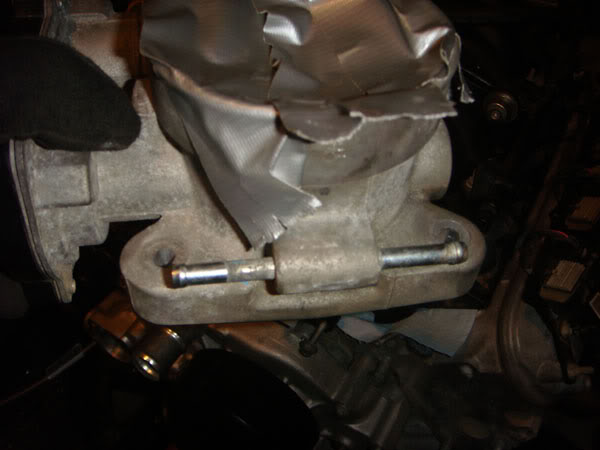
A simple cut and some filing. I dont want hot coolant flowing through my throttle body anyway. I live in the south.
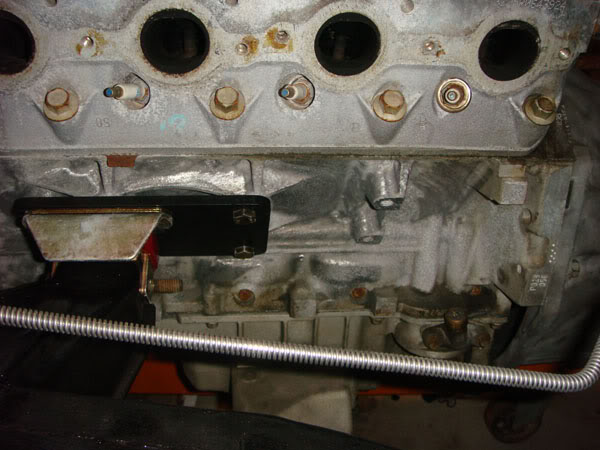
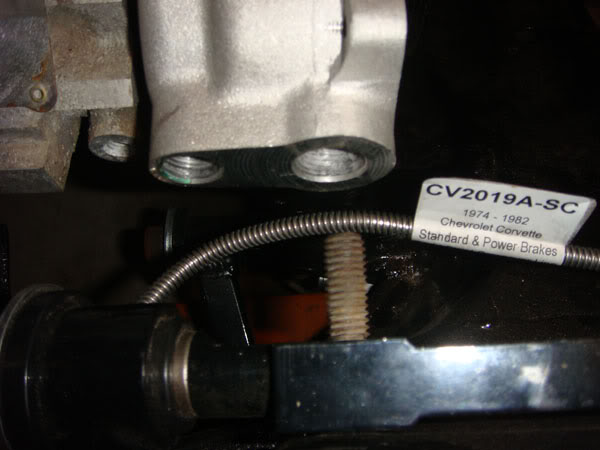
The heater fittings on the water pump interfere with the upper control arm. So I removed the old fittings with a set of channel locks and tapped them out with a 3/8th npt tap and a 1/2"npt tap. I then drilled and tapped the area right above each plug with the corresponding barb fitting size. I cant find a pic for that!
Taps and fittings needed! You can see the oil pressure sensor and the oil fitting that bolts right above the filter. I tapped it out to a 1/4npt and then used a bushing down to the oil sensors 1/8th npt
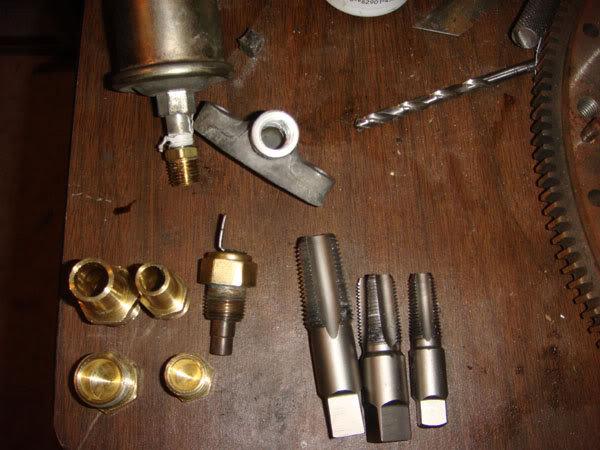
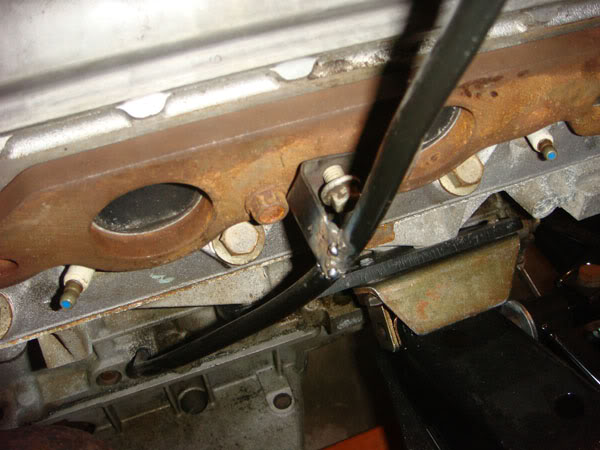
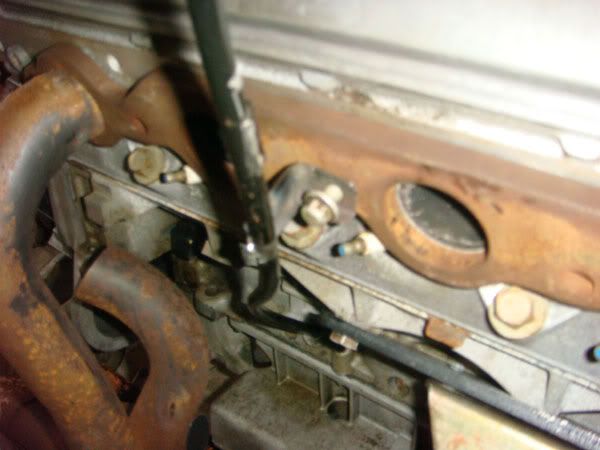
I drilled and tapped the passenger side head to 3/8npt to accommodate the temperature sending unit. worked out nicely. Just used grease and took it slow, so i wouldnt get any shavings in the cooling system.
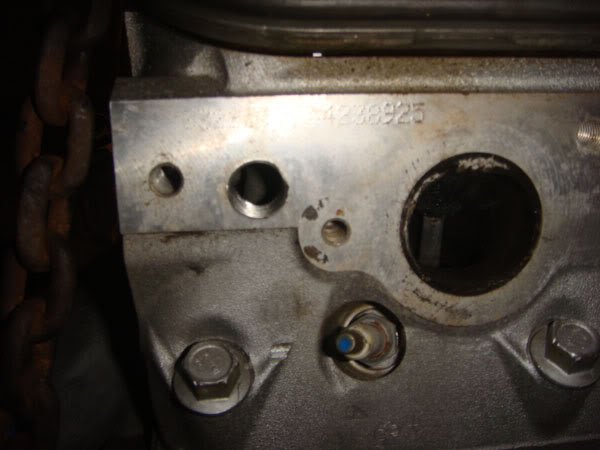
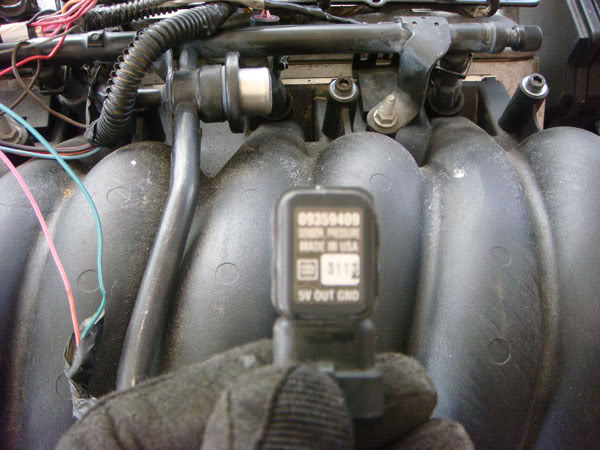
I didnt know what this hole was at first. I bought the ls6 intake from a guy off of the forum and he must have kept the sensor. I thought it was a vaccuum port of some sort, but figured out it was for the MAP sensor.
A new map sensor cost around 50 bucks from the parts store!! I took the map out of the trailblazer intake and modified it with the dremel. The trailblazer map has two clips that hold it in place, so it has lips. The ls6 map only has one lip that clips in. I took the dremel and shaped it down until it fit into the back of the ls6 manifold and clipped in
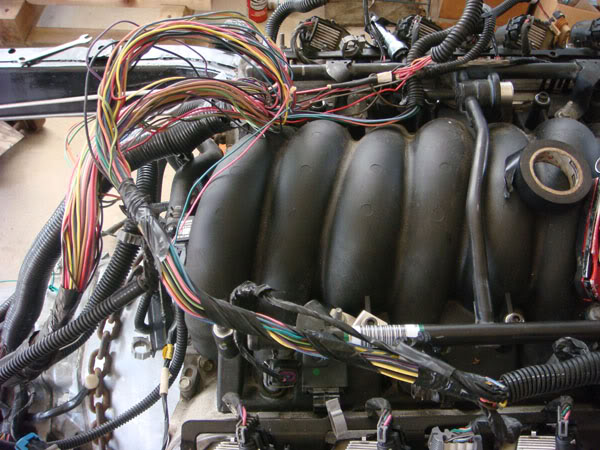
I had the LM4 harness modifed by speartech. Great customer service and great product. The lm4/truck harness is freakin ugly, so I just unwrapped it and ran it where I wanted it to go
A simple cut and some filing. I dont want hot coolant flowing through my throttle body anyway. I live in the south.
The heater fittings on the water pump interfere with the upper control arm. So I removed the old fittings with a set of channel locks and tapped them out with a 3/8th npt tap and a 1/2"npt tap. I then drilled and tapped the area right above each plug with the corresponding barb fitting size. I cant find a pic for that!
Taps and fittings needed! You can see the oil pressure sensor and the oil fitting that bolts right above the filter. I tapped it out to a 1/4npt and then used a bushing down to the oil sensors 1/8th npt
I drilled and tapped the passenger side head to 3/8npt to accommodate the temperature sending unit. worked out nicely. Just used grease and took it slow, so i wouldnt get any shavings in the cooling system.
I didnt know what this hole was at first. I bought the ls6 intake from a guy off of the forum and he must have kept the sensor. I thought it was a vaccuum port of some sort, but figured out it was for the MAP sensor.
A new map sensor cost around 50 bucks from the parts store!! I took the map out of the trailblazer intake and modified it with the dremel. The trailblazer map has two clips that hold it in place, so it has lips. The ls6 map only has one lip that clips in. I took the dremel and shaped it down until it fit into the back of the ls6 manifold and clipped in
I had the LM4 harness modifed by speartech. Great customer service and great product. The lm4/truck harness is freakin ugly, so I just unwrapped it and ran it where I wanted it to go
05-04-2009 | 10:53 PM
#6
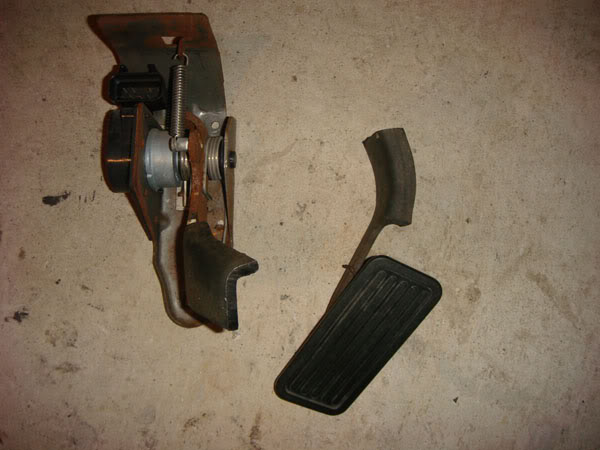
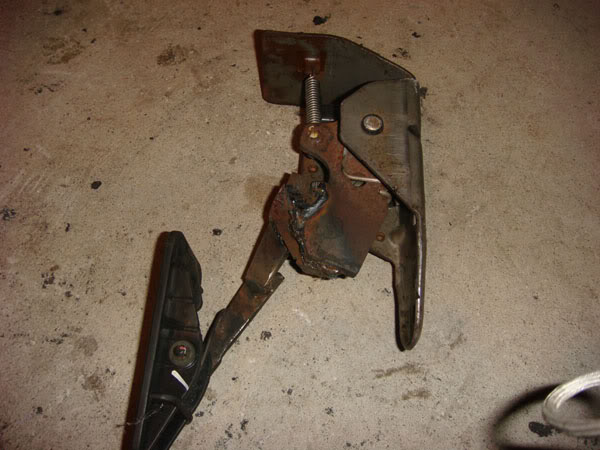
DBW pedal assembly. I cut and welded the pedal to fit into the footbox of the vette. Throttle response is amazing. Dont be afraid of DBW. Its simple and easy.
I welded everything up and bolted it to the firewall. I ground down all the bad edges and painted it up(not pictured)
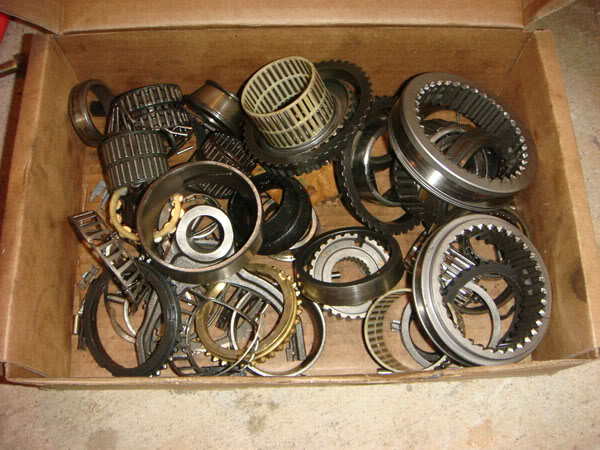
Aftermath of the trans rebuild. Steel forks. billet keys. etc etc. Thanks to Jason at Texas Drivetrain and performance(sponser) Great guy. Super helpful and does great work on that mainshaft mod.
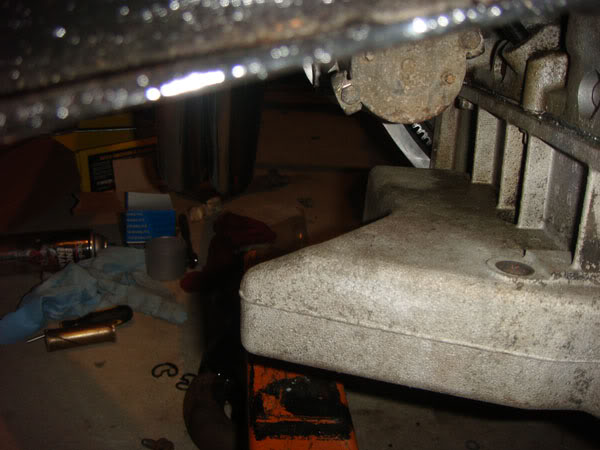
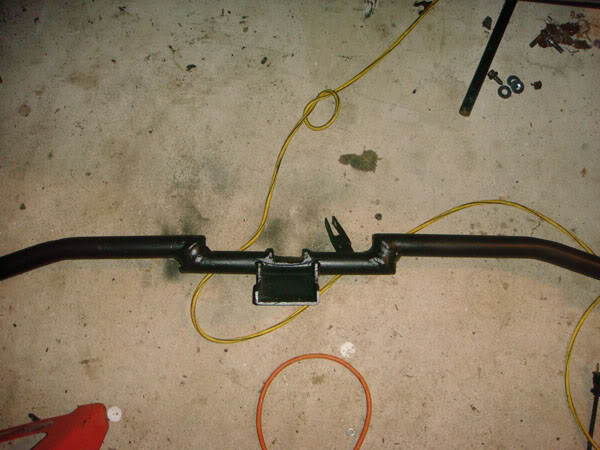
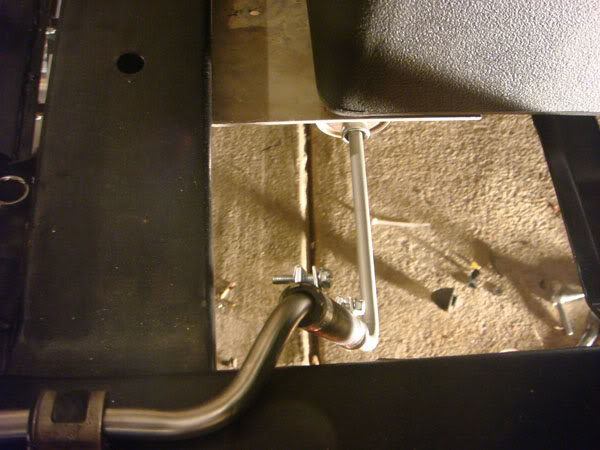
I had a tubular crossmember from bowtie overdrives that I used a long time ago in a 700r4 swap. I decided to modify it.
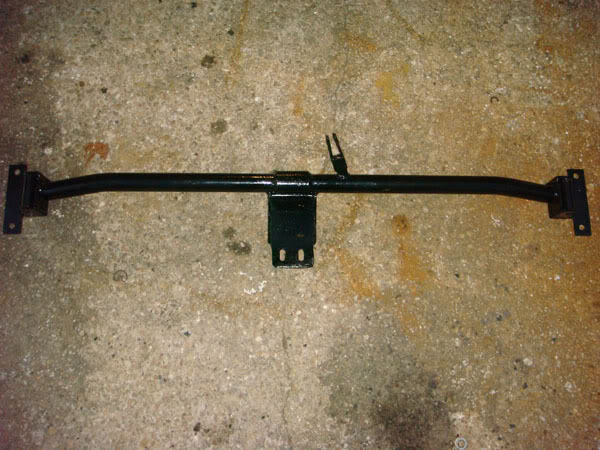

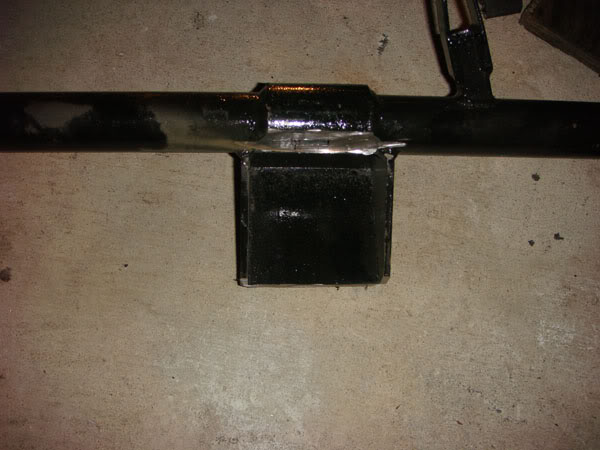
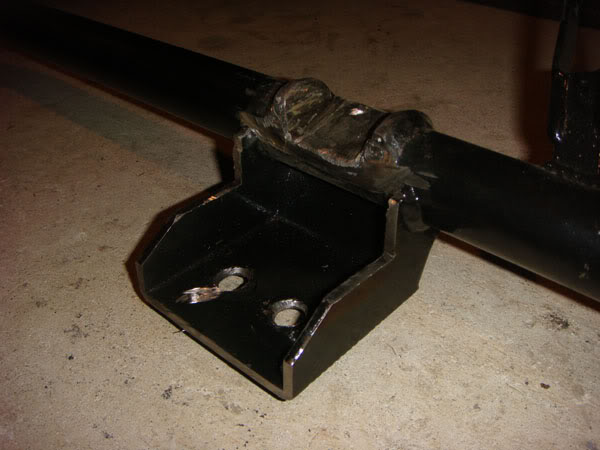
When I put the body back on the car, the trans was jammed in the tunnel, so I had to drop it about an inch or so to get the angles right and get more clearance. Here is what the finished crossmember looks like
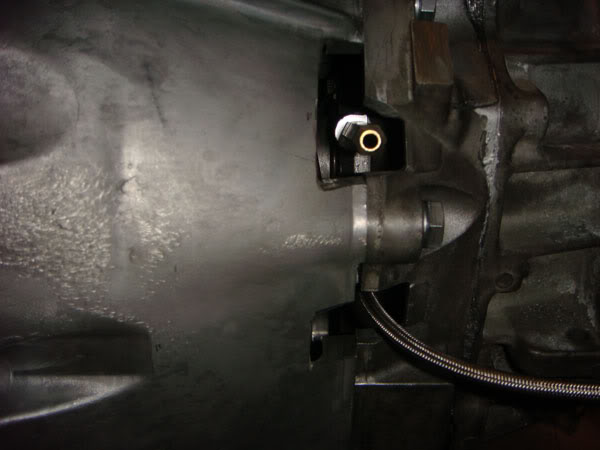
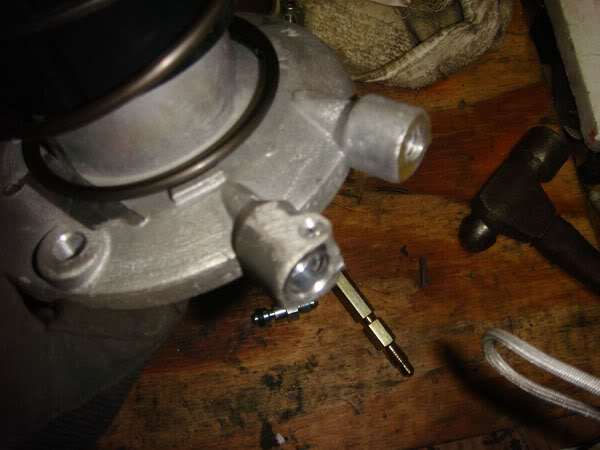
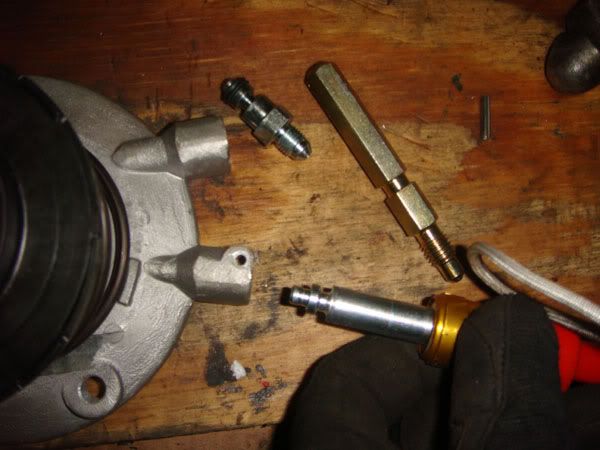
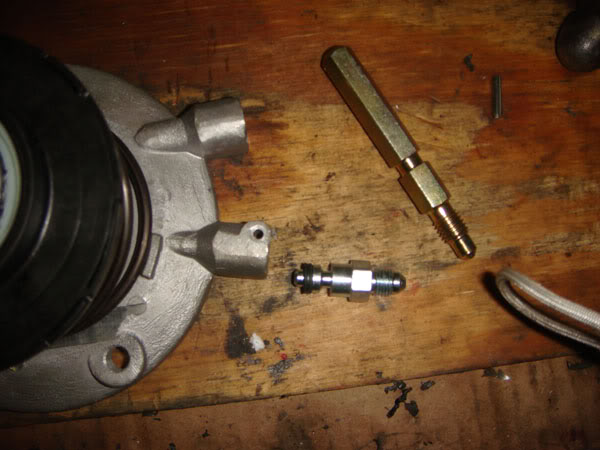
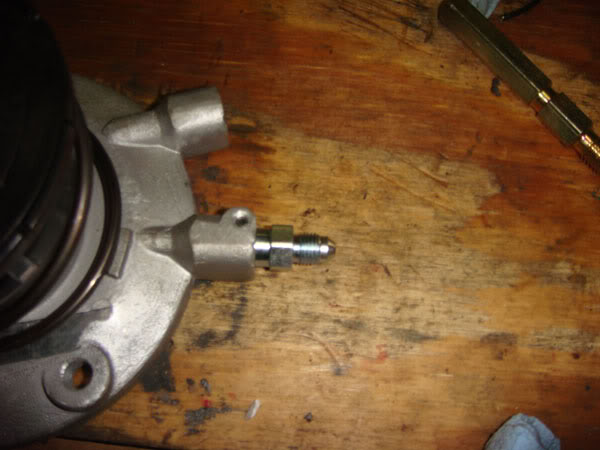
I modified the bell to make it a little easier to get to the bleeder screw. I have a good bit of room in the tunnel so I felt I could save a little money and not buy a remote bleeder. Worked out nicely
I welded everything up and bolted it to the firewall. I ground down all the bad edges and painted it up(not pictured)
Aftermath of the trans rebuild. Steel forks. billet keys. etc etc. Thanks to Jason at Texas Drivetrain and performance(sponser) Great guy. Super helpful and does great work on that mainshaft mod.
I had a tubular crossmember from bowtie overdrives that I used a long time ago in a 700r4 swap. I decided to modify it.
When I put the body back on the car, the trans was jammed in the tunnel, so I had to drop it about an inch or so to get the angles right and get more clearance. Here is what the finished crossmember looks like
I modified the bell to make it a little easier to get to the bleeder screw. I have a good bit of room in the tunnel so I felt I could save a little money and not buy a remote bleeder. Worked out nicely
05-04-2009 | 11:19 PM
#7
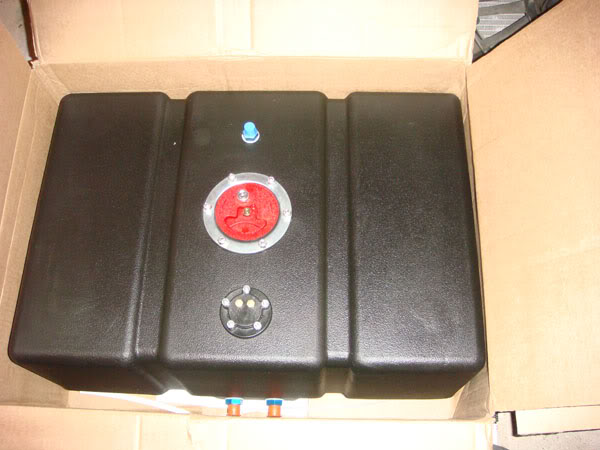
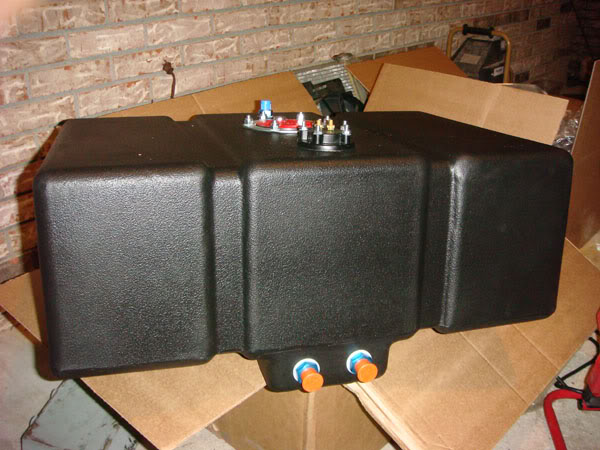
I first bought a competition eng. sump from summit. I had it welded in to the stock tank. The guy that tacked it in suggested his friend tig it up to make sure it wouldnt leak, so I said why not! I get the tank back a few days later and it looked like a 3rd grader had used a STICK welder. They handed me the tank like it was no big deal, jb weld globbed on. sooooo i decided to toss the stock tank and fit a 16gallon summit fuel cell with foam, sump and a gm 90ohm sending unit.
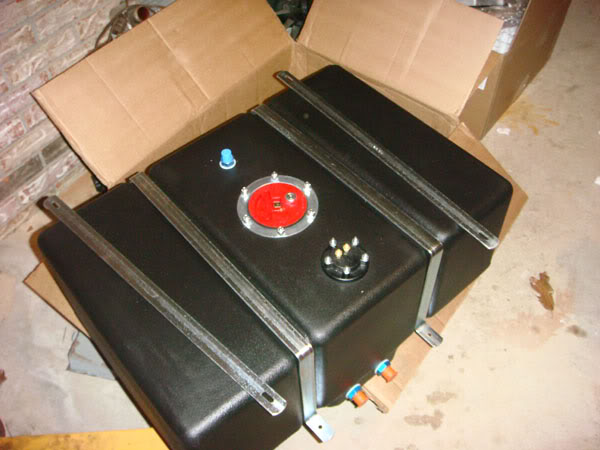
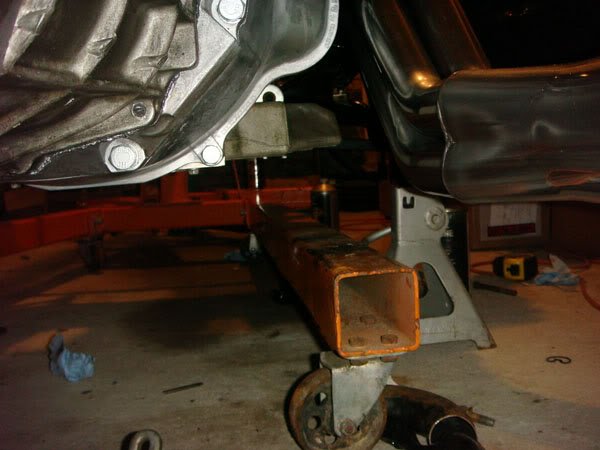
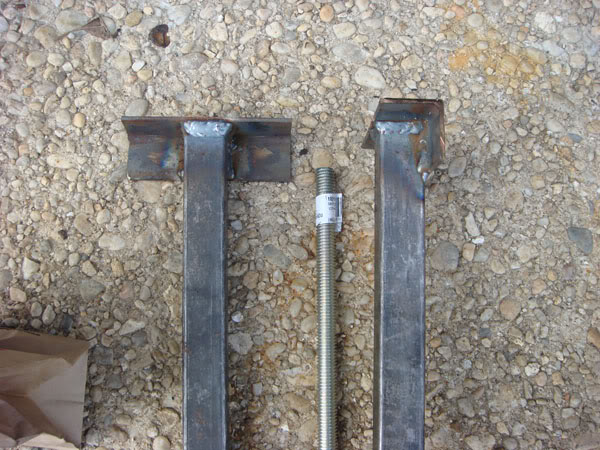
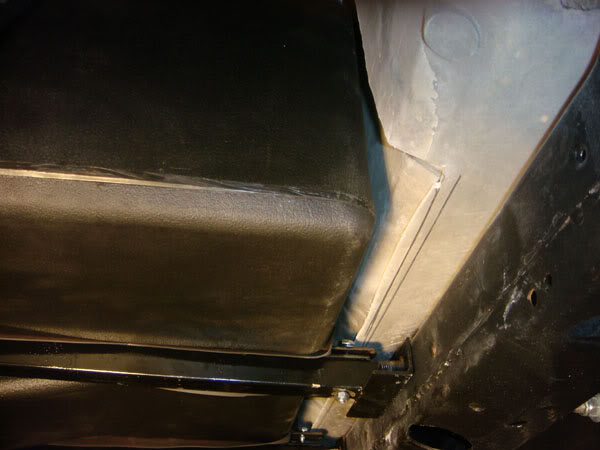
I bought some 1" square tubing. I think it was two 5 foot stalks. I took a piece of 1" angle iron, cut and welded it to the end of the tube for a mounting flange. I used a 4ft+ piece of all thread and made some hangers for the back of the tubing
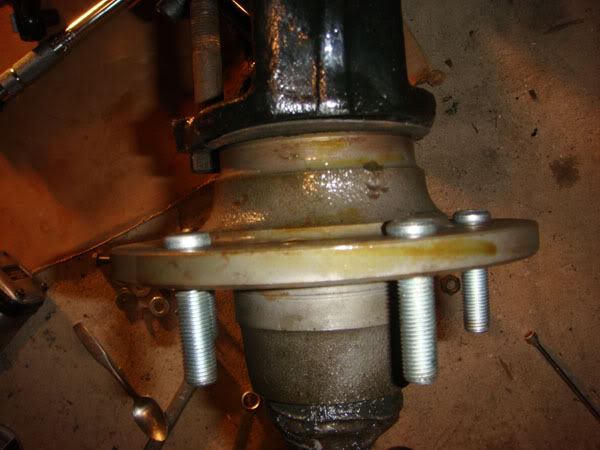
Here you can see the all thread and how I used it to hang the back of the tank.
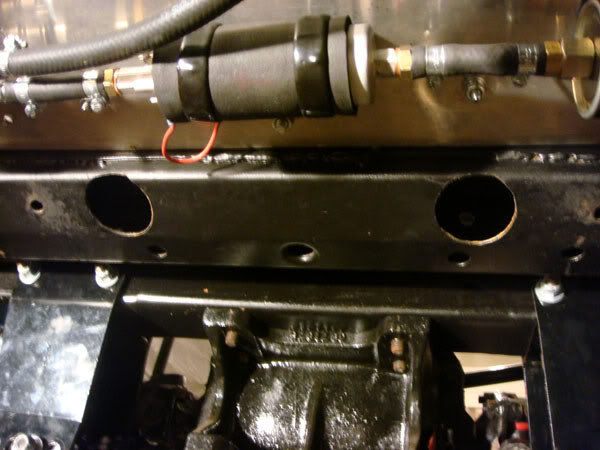
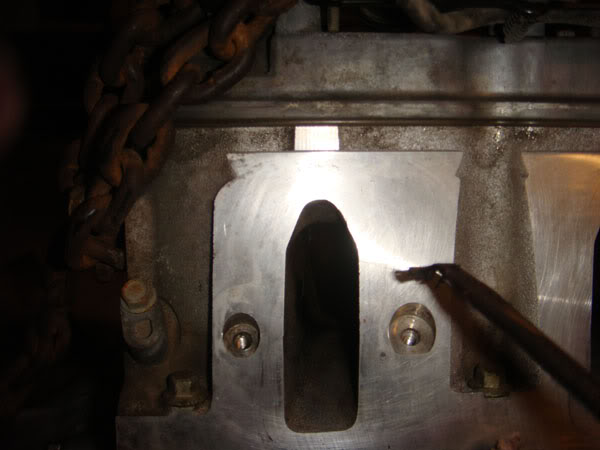
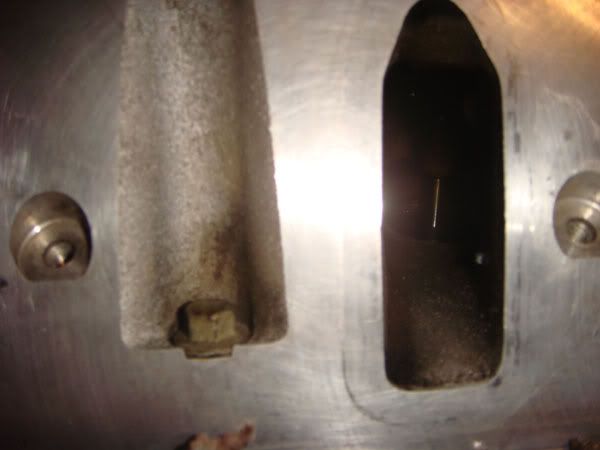
I took a 2" whole saw and cut two holes in the cross member where the bracket flanges mounted. This served as an access hole so I could tighten the bolts to the brackets
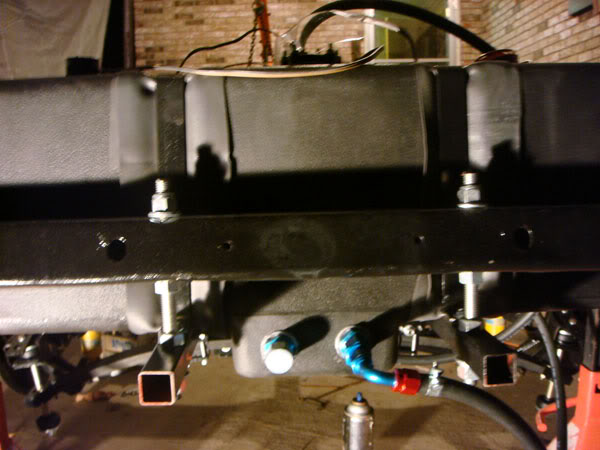
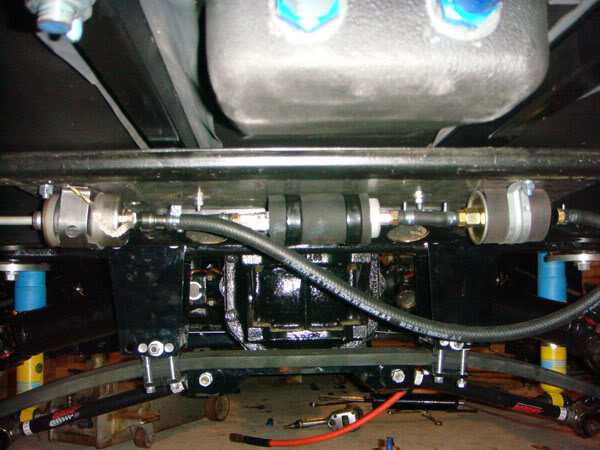
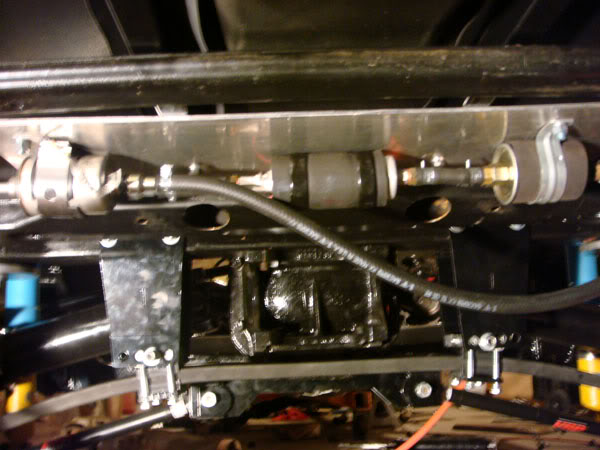
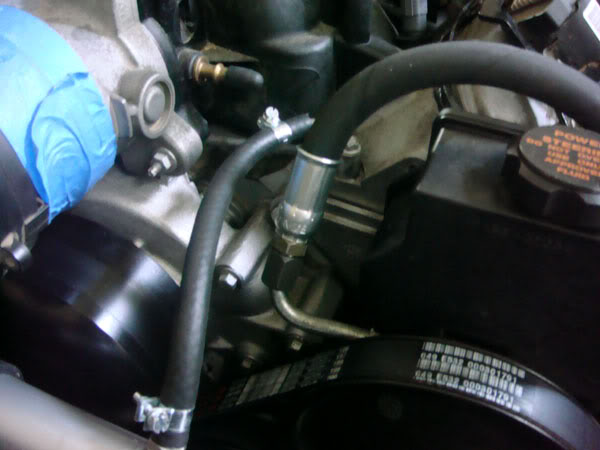
I mounted the fuel pump/filter/regulator on an aluminum plate/bracket I made. The fuel filter is from a 2004 Range rover. Its the only fuel injection filter I could find that used screw in fittings instead of the quick disconnect style
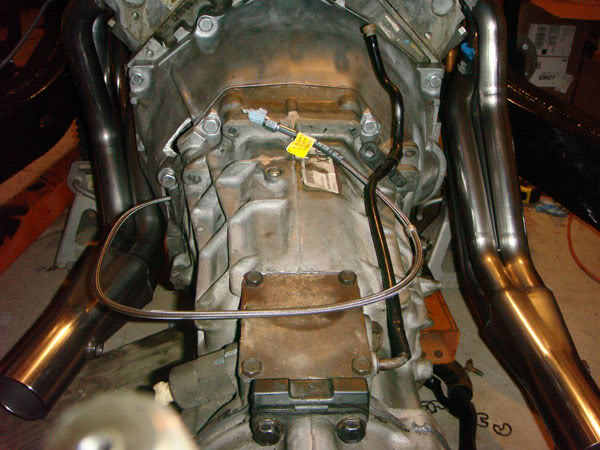
I bought a 20' roll of stainless 3/8 fuel line from summit and bent it myself. The stock vette fuel lines run on the passenger side, but I opted to run it on the driver side since thats what side the fuel rail hooks up.

Later when I put the body on and began hooking up the steering joints the line had to be bent slightly, but it was no big deal. Its not even close to any header heat.
I bought some 1" square tubing. I think it was two 5 foot stalks. I took a piece of 1" angle iron, cut and welded it to the end of the tube for a mounting flange. I used a 4ft+ piece of all thread and made some hangers for the back of the tubing
Here you can see the all thread and how I used it to hang the back of the tank.
I took a 2" whole saw and cut two holes in the cross member where the bracket flanges mounted. This served as an access hole so I could tighten the bolts to the brackets
I mounted the fuel pump/filter/regulator on an aluminum plate/bracket I made. The fuel filter is from a 2004 Range rover. Its the only fuel injection filter I could find that used screw in fittings instead of the quick disconnect style
I bought a 20' roll of stainless 3/8 fuel line from summit and bent it myself. The stock vette fuel lines run on the passenger side, but I opted to run it on the driver side since thats what side the fuel rail hooks up.
Later when I put the body on and began hooking up the steering joints the line had to be bent slightly, but it was no big deal. Its not even close to any header heat.
Trending Topics
05-04-2009 | 11:39 PM
#8
Finally some oil! I cranked it briefly to make sure it wasnt a dud motor  . I bought the engine from certified used auto in ardmore, al. They were recently featured on hp tv. They have a super nice facility and a great staff. My motor had 40k miles and a 6month warranty
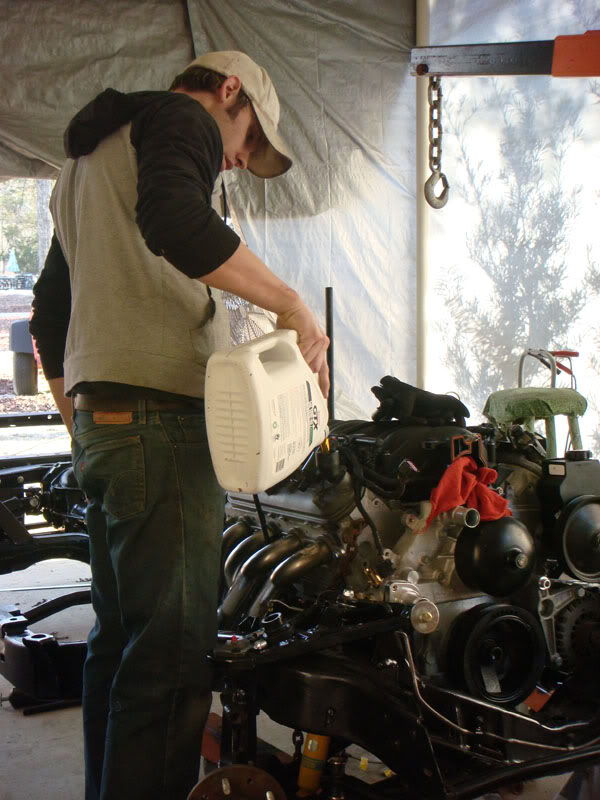
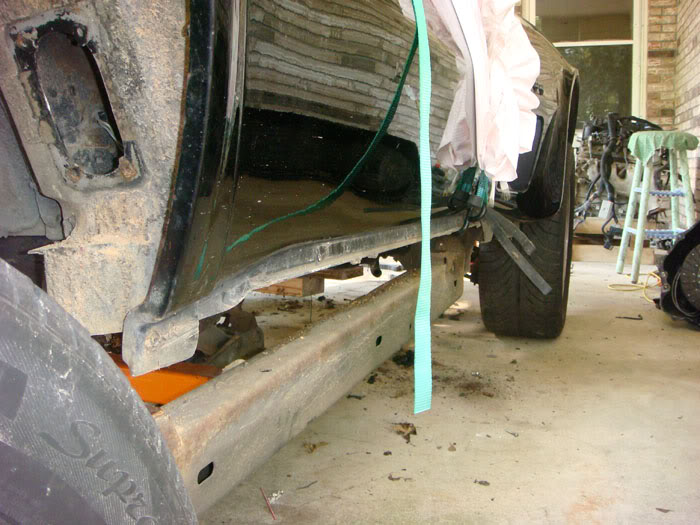
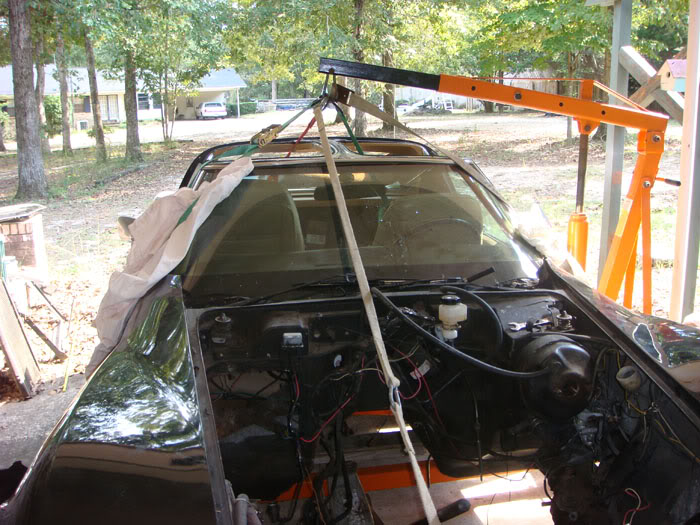
Finally time to drop the body back on. Luckily my girlfriends dad and her uncle stopped by on their motorcycle cruise to help out. My dad also showed up to give me a hand. If you are wondering what the body is hanging from...its hanging from a cable suspended between two trees..I like to incorporate nature into my work
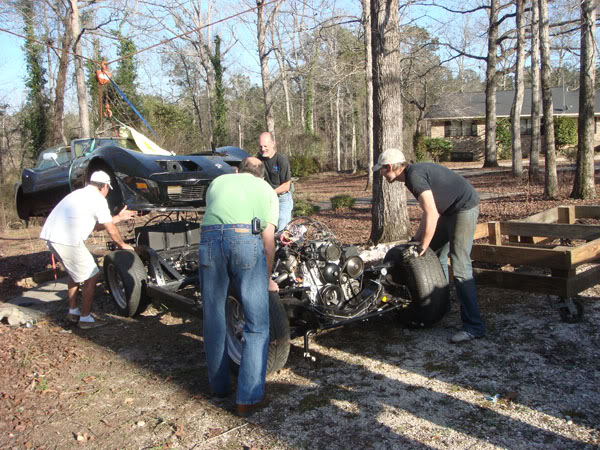
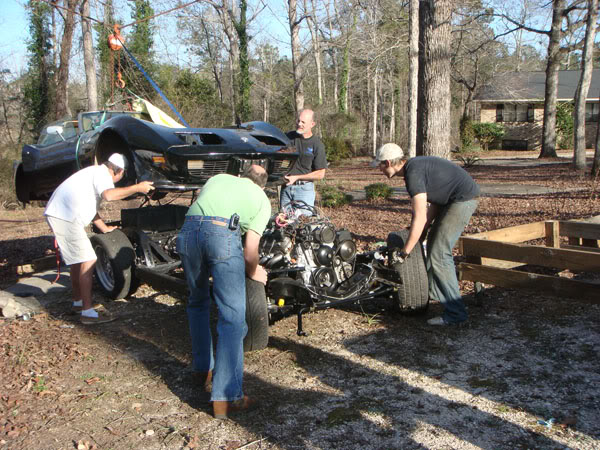
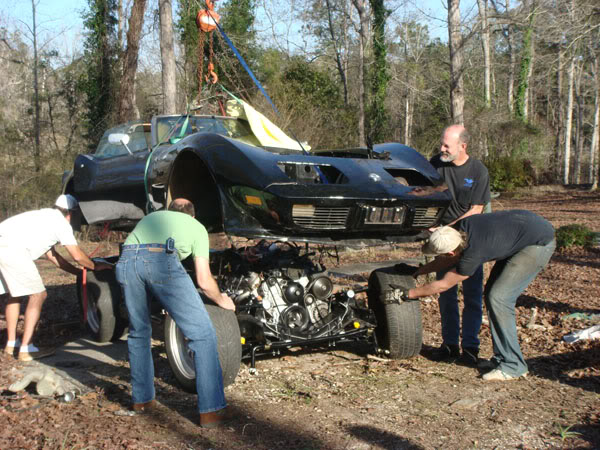
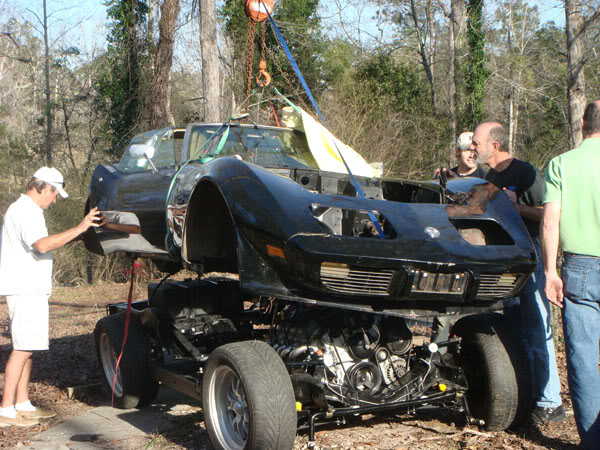
The fuel cell was tight, so we had to let the back down over it first.
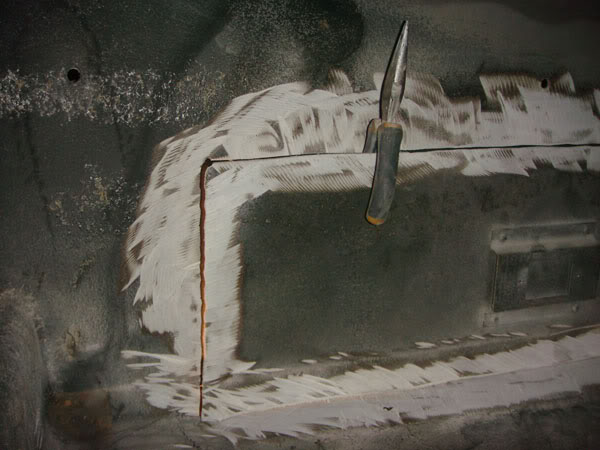
Someone didnt measure right! i had to notch the back compartment about an 2inches to give the tank clearance. This is where having a fiberglass body is so great. A dremel, resin and chop mat and I was good to go again

. I bought the engine from certified used auto in ardmore, al. They were recently featured on hp tv. They have a super nice facility and a great staff. My motor had 40k miles and a 6month warrantyFinally time to drop the body back on. Luckily my girlfriends dad and her uncle stopped by on their motorcycle cruise to help out. My dad also showed up to give me a hand. If you are wondering what the body is hanging from...its hanging from a cable suspended between two trees..I like to incorporate nature into my work
The fuel cell was tight, so we had to let the back down over it first.
Someone didnt measure right! i had to notch the back compartment about an 2inches to give the tank clearance. This is where having a fiberglass body is so great. A dremel, resin and chop mat and I was good to go again
05-04-2009 | 11:56 PM
#9
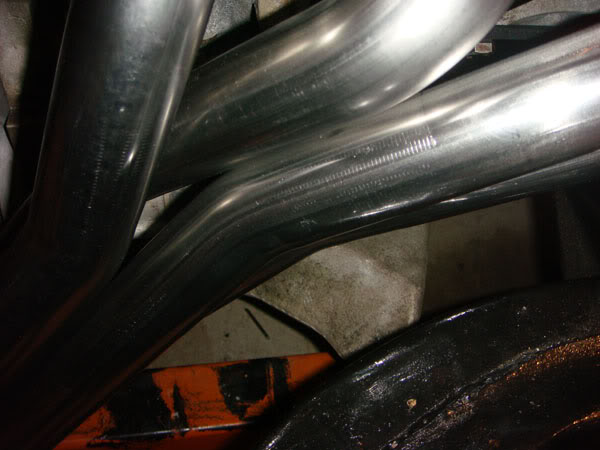
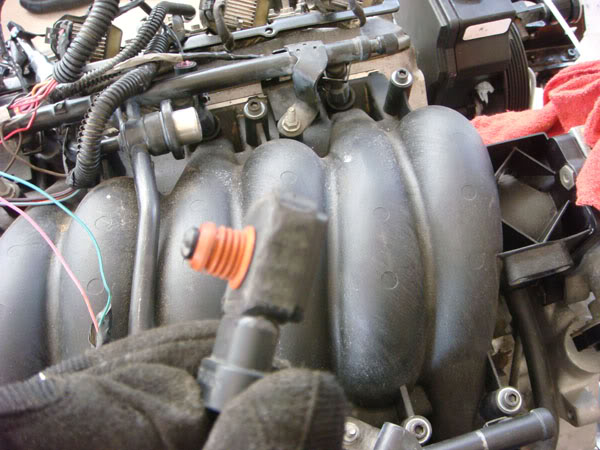
Before I put the ls6 manifold on I wanted to make sure the runners looks ok...thanks to the stock pcv they were coated in gunk. so I gave them a good starter fluid toothbrush bath. This stuff was super sticky.
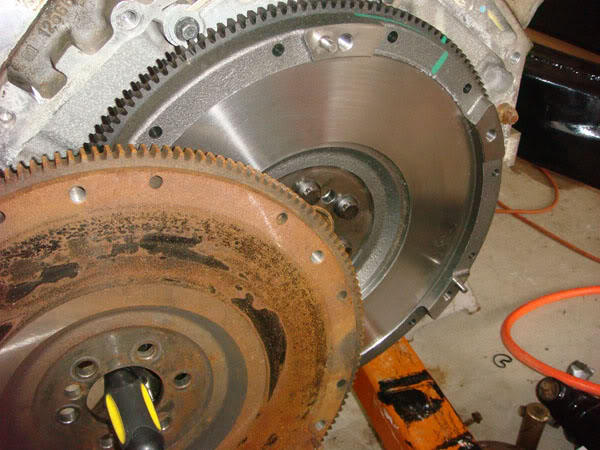
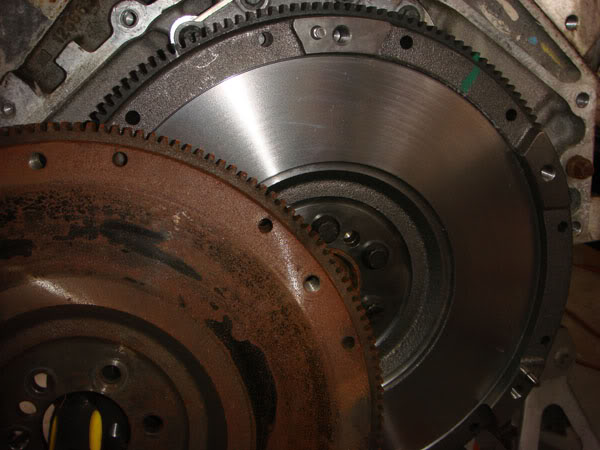
The guy I bought the trans from threw in an ls6 clutch flywheel and pressure plate, but I opted to go with an ls7 clutch and a new hyd. throwout bearing
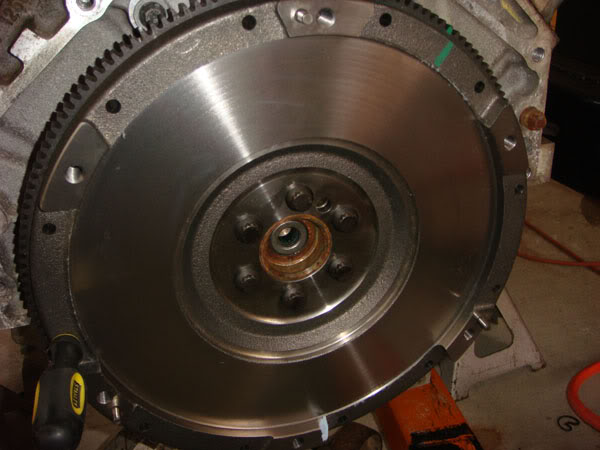
ls6-ls7

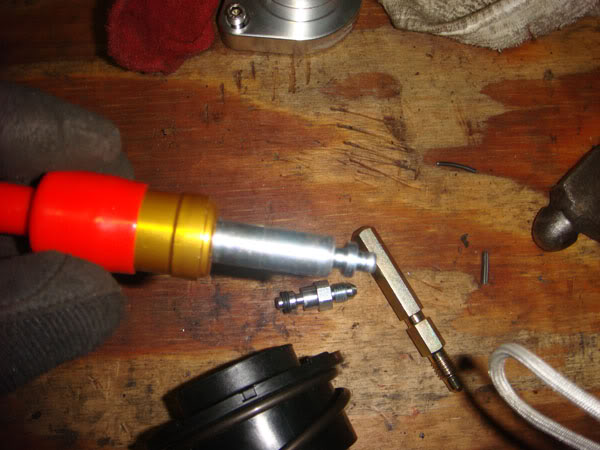
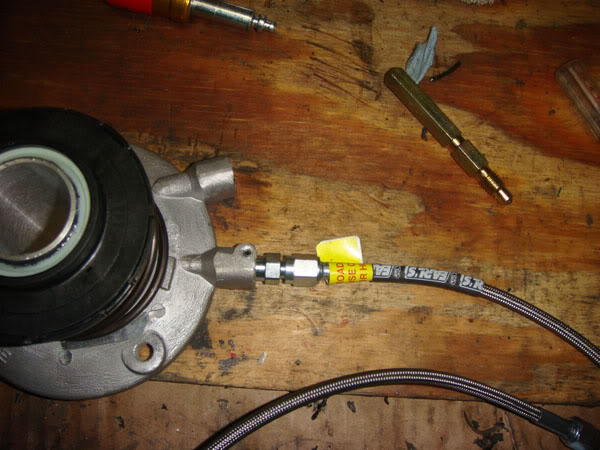
I am running a wilwood remote master cylinder, so I didnt need the stock fbody hydraulic TOB quick disconnect. I went with a russel fitting that is held in by the stock roll pin
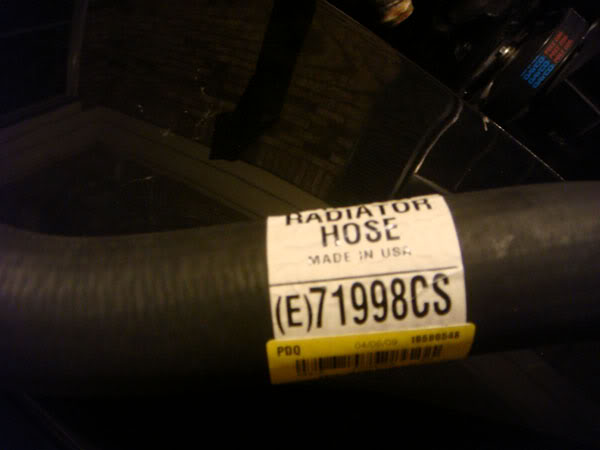
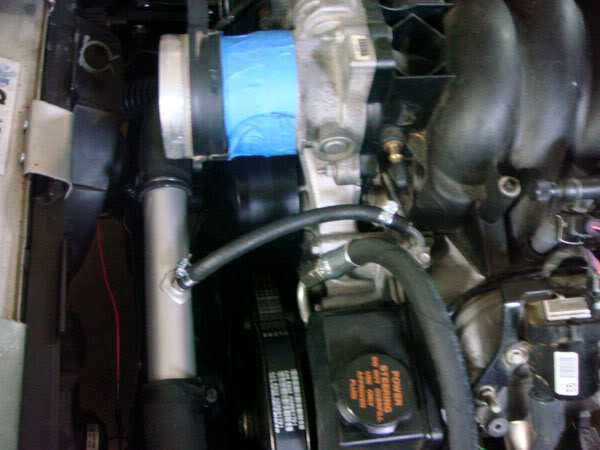
I was going to cap the steam hose and not worry about it, but I decided I may as well make it functional. It can only help. I used a flex hose for the lower radiator hose and bought this hose. Advance has some regular 90s that will do the trick. I used this hose, a piece of 1-1/2 pipe and bought a 90. You could probably get away with two 90s and a longer piece of pipe.

Steem hose run. I tapped the pipe to 1/4"npt and used a barb fitting with a 1/4" hose
The guy I bought the trans from threw in an ls6 clutch flywheel and pressure plate, but I opted to go with an ls7 clutch and a new hyd. throwout bearing
ls6-ls7
I am running a wilwood remote master cylinder, so I didnt need the stock fbody hydraulic TOB quick disconnect. I went with a russel fitting that is held in by the stock roll pin
I was going to cap the steam hose and not worry about it, but I decided I may as well make it functional. It can only help. I used a flex hose for the lower radiator hose and bought this hose. Advance has some regular 90s that will do the trick. I used this hose, a piece of 1-1/2 pipe and bought a 90. You could probably get away with two 90s and a longer piece of pipe.
Steem hose run. I tapped the pipe to 1/4"npt and used a barb fitting with a 1/4" hose
05-05-2009 | 12:11 AM
#11
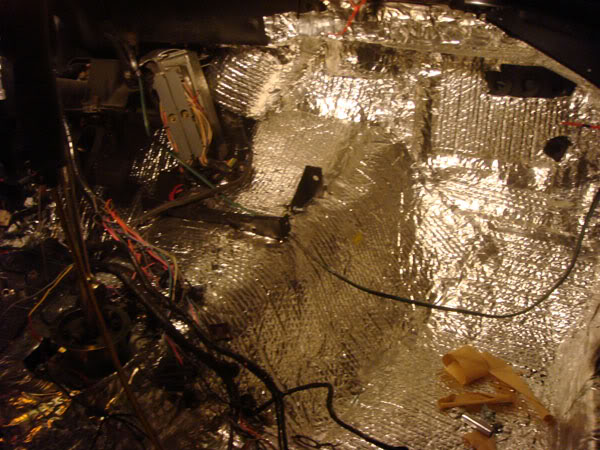
I used peel and seal and reflectix to kill some of the heat and noise. Pretty cheap alternative and works great. I cant even feel a bit of heat on through the carpet anymore. It used to be almost unbearable
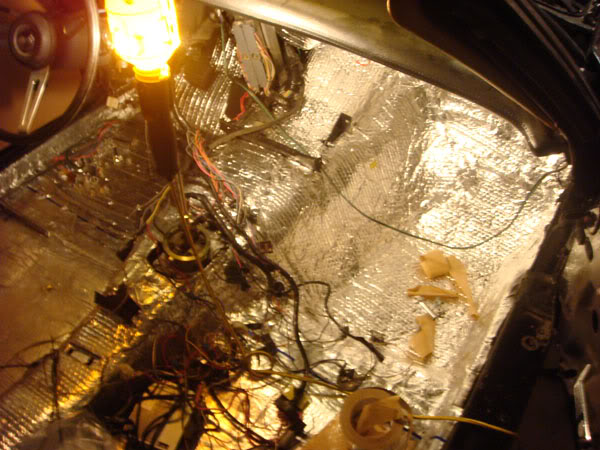
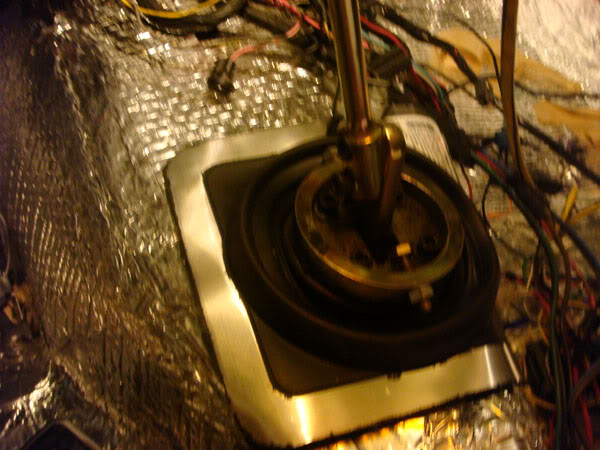
While I was picking up building supplies I picked up the oatey roofing jack. You just choose the diameter hole you want and cut it out. boom, instant lower shifter boot
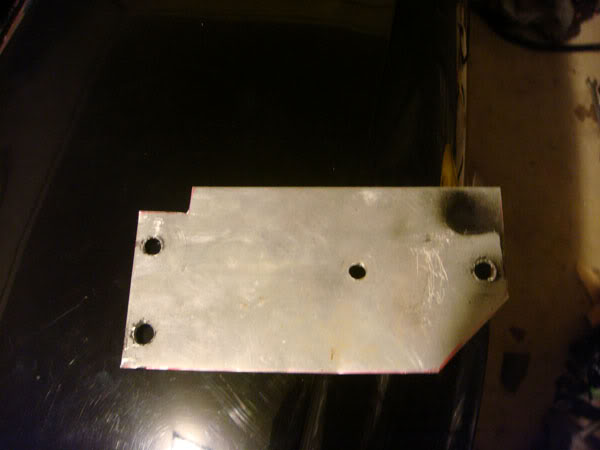
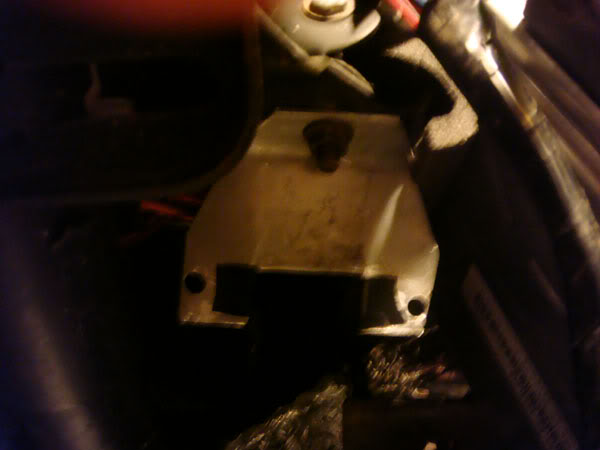
Since I wasnt using my windshield washer tank I removed it and made a plate to put my DBW TAC module
Under the dash I made a bracket for the speartech fuse panel
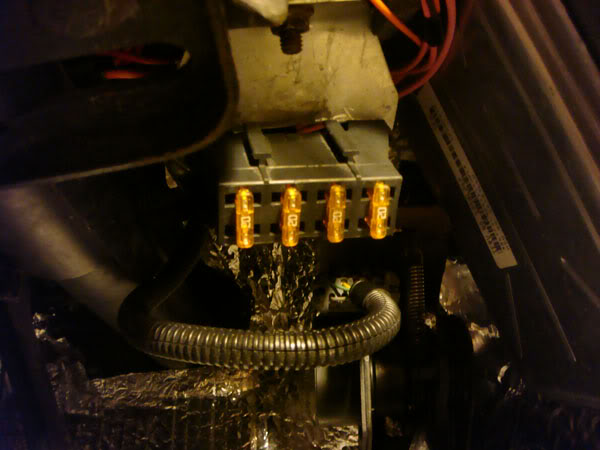
Supplied by a fellow forum member, this is the diagram I used to make my relay panel and wire my ls1 fboy fans in

My power steering was a jumble of bad info. I was told it wasnt any higher psi than fuel injection line...WRONG..That shiz is pushing 2000 psi maybe more. I went to napa and had a line cut to length and hydraulic fittings crimped on with steel ferrel. You can really tighten down as hard as you want..good stuff
While I was picking up building supplies I picked up the oatey roofing jack. You just choose the diameter hole you want and cut it out. boom, instant lower shifter boot
Since I wasnt using my windshield washer tank I removed it and made a plate to put my DBW TAC module
Under the dash I made a bracket for the speartech fuse panel
Supplied by a fellow forum member, this is the diagram I used to make my relay panel and wire my ls1 fboy fans in
My power steering was a jumble of bad info. I was told it wasnt any higher psi than fuel injection line...WRONG..That shiz is pushing 2000 psi maybe more. I went to napa and had a line cut to length and hydraulic fittings crimped on with steel ferrel. You can really tighten down as hard as you want..good stuff
Last edited by Ellis Juan; 09-30-2009 at 04:39 PM.
05-05-2009 | 12:15 AM
#12
Those fittings are from russel comes in a pack of two.
RUS-640281
http://store.summitracing.com/egnsea...0+115&y=7&x=23
RUS-640281
http://store.summitracing.com/egnsea...0+115&y=7&x=23
 06-19-2009 | 06:32 AM
#14
Just a little update. I have put 3800 miles on the car since may 2nd. Im getting around 22 miles to the gallon with my setup. Thats not a bunch of interstate miles either. Thats a bunch of hwy 69 and back-***-woods roads that beat the car to death. Thanks blue locktite  Only problem Iv really had was last night, trying to get the oil filter off. haha
Only problem Iv really had was last night, trying to get the oil filter off. haha
06-19-2009 | 07:55 AM
#15


stock cam? I'll have a similar set up if so and your thread has been an inspiration. What do you think of the performance with the 5.3, gears, and t56?
nice screen name btw, almost missed it.
nice screen name btw, almost missed it.
 09-30-2009 | 04:37 PM
#17
Just to update..Everything is running good and I just clicked over 9000 miles. Only problem to date was the fuel pump dying on me at 6500 miles. Mainly because I ran the car out of gas-pumped died shortly after. Luckily I had some summit bucks.
ErikSOCAL-Thanks man, that was the whole point of this thread. To give people a little inspiration. Especially when you get late in the project and you get frustrated.
Im running the stock right now. I have a cam up for sale that I had specd out by patrick G, but I dont think Im going to install it. Just stay stock. The car feels really quick with the gearing. I really need to get it tuned. Should make around 300rwhp, but I only weigh 3k pounds.
09-30-2009 | 07:53 PM
#19

Awsome work on your 76! The only extra work you did was the oil pressue since the 1 wire ls1 sensors work great with our stock guages.
Just curious on the AC system did you just buy there bracket and use the stock stuff, or how involved was it, what about hood clearance?
Just curious on the AC system did you just buy there bracket and use the stock stuff, or how involved was it, what about hood clearance?
10-02-2009 | 10:49 PM
#20
Ill get some pics tomorrow of the intake. I just used a 90 and then a reducer.
Thanks! Im really enjoying driving the car. I drive it roughly 40 miles a day. I didnt know that about the oil pressure sensor! That would have been much easier.
I bought an AC "kit" from hot rod air. It was supposedly made for a c3 corvette, but I had a lot of problems having to modify the "kit". Their service was also poor. It came with a sanden compressor and I bought brackets from kwik performance. It blows pretty decent for an under dash mount fan. Lots of hood clearance.