
1965 Skylark LQ9 Retrofit / Swap - Build Thread
 03-29-2011, 07:53 PM
#121
The transmission, cross-member and drive shaft are in. Looking at the driveshaft at the tail-shaft, it is immediately obvious that the Edelbrock motor mounts do not put the engine in the stock location. The engine appears to be 1/2" to 3/4" forward of the stock location.
Moving the engine back 1/2 to 1 full inch from where the Edelbrock adapters locate the engine will solve the header hitting on the left lower control arm saddle problem. There appears to be plenty of room to move it back with no penalty whatsoever.
The inner tie rod hitting the oil pan problem will not go away unless the engine is raised 1/2 to 1". There is just no way around it.
Moving the engine back will eliminate the header hitting the steering shaft problem, but raising the engine will bring that problem right back again. The header will have to be dimpled where the number 5 cylinder tube touches the steering shaft. In looking at the header design, there was plenty of room to have routed the header further from the steering shaft, it would make a nice design improvement for the Doug's.
My mission now is to find a motor mount set up that moves the engine up and back about 1". If I recall correctly, that is exactly what the BRP setup does. I will do a little research. If nothing obviously correct shows up for me, I will doing a little custom fabrication.
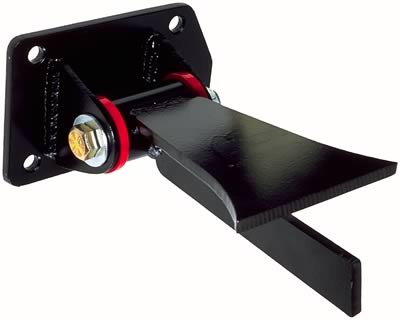
Here is a picture that may help you. I did not measure from the oil pan, but from the inside of the starter pad to the nearest header tube is 4".
Moving the engine back 1/2 to 1 full inch from where the Edelbrock adapters locate the engine will solve the header hitting on the left lower control arm saddle problem. There appears to be plenty of room to move it back with no penalty whatsoever.
The inner tie rod hitting the oil pan problem will not go away unless the engine is raised 1/2 to 1". There is just no way around it.
Moving the engine back will eliminate the header hitting the steering shaft problem, but raising the engine will bring that problem right back again. The header will have to be dimpled where the number 5 cylinder tube touches the steering shaft. In looking at the header design, there was plenty of room to have routed the header further from the steering shaft, it would make a nice design improvement for the Doug's.
My mission now is to find a motor mount set up that moves the engine up and back about 1". If I recall correctly, that is exactly what the BRP setup does. I will do a little research. If nothing obviously correct shows up for me, I will doing a little custom fabrication.
Here is a picture that may help you. I did not measure from the oil pan, but from the inside of the starter pad to the nearest header tube is 4".
 03-30-2011, 03:24 AM
#122

Thanks for the pics  , question..what small block chevelle mounts are you using, from my understanding they had the short and wide mounts but also tall and narrow sbc mounts which everyone uses. Could this solve the problem? Depending on if you use those and maybe re locate them on the crossmember could solve your problem. Just a thought
, question..what small block chevelle mounts are you using, from my understanding they had the short and wide mounts but also tall and narrow sbc mounts which everyone uses. Could this solve the problem? Depending on if you use those and maybe re locate them on the crossmember could solve your problem. Just a thought
03-30-2011, 07:39 AM
#123
Thanks for the pics , question..what small block chevelle mounts are you using, from my understanding they had the short and wide mounts but also tall and narrow sbc mounts which everyone uses. Could this solve the problem? Depending on if you use those and maybe re locate them on the crossmember could solve your problem. Just a thought
, question..what small block chevelle mounts are you using, from my understanding they had the short and wide mounts but also tall and narrow sbc mounts which everyone uses. Could this solve the problem? Depending on if you use those and maybe re locate them on the crossmember could solve your problem. Just a thoughtFrom an engineering standpoint, the simplest thing to do is just take out the frame stand bolts and slide the engine back to the desired location, then lift the engine enough so that the steering clears the oil pan and make a plate/spacers. Once everything is in a happy place, mark the cross-member for new holes.
I looked at a picture of the Doug's motor plates that are supposed to go with the headers and they do not appear to be a solution. dimensionally they look nearly the same as the Edelbrock adapters, but they have two engine position options. Unfortunately, the 2nd position is even further forward.
I also looked around the net at the various other adapters. They are typically even further forward than the others. I don't know how this works out for other years, but for 64 & 65 cars, this not going to work well.
03-30-2011, 08:08 AM
#124
On The Tree
iTrader: (3)

Join Date: Oct 2004
Location: Alta Loma, CA
Posts: 166
Likes: 0
Received 0 Likes
on
0 Posts

I think i would make some new plates with the engine setback you want, sell the E-brocks, and make your own frame stands.
With the number of combinations of parts out there, I think thats what i'll do to get the engine right where i want it.oOr just buy all the BRP stuff.
With the number of combinations of parts out there, I think thats what i'll do to get the engine right where i want it.oOr just buy all the BRP stuff.
03-30-2011, 08:25 AM
#125
I think i would make some new plates with the engine setback you want, sell the E-brocks, and make your own frame stands.
With the number of combinations of parts out there, I think thats what i'll do to get the engine right where i want it.oOr just buy all the BRP stuff.
With the number of combinations of parts out there, I think thats what i'll do to get the engine right where i want it.oOr just buy all the BRP stuff.
However, I did see this at summit. It may be an excellent solution. Nice and clean:
http://www.summitracing.com/parts/TRD-4501/?rtype=10
 03-30-2011, 09:48 AM
#127
The TransDapt mounts are steel and not pretty, but they work. I just used them in a 5.3 swap in a Suburban w/an OEM SBC and everything lined up perfectly. JEGS and Summit both have them in stock for around $52.
If you feel the need to raise the motor, a 1/4"-3/8" spacer between the engine mount brackets and the frame should do the trick when combined with the adapter plates. You may have to elongate the motor mount holes a bit in the engine mount brackets with a die grinder, but it's not enough to weaken them and the holes are hidden by the motor mounts.
Consideration must also be given to engine/transmission angle and resultant changes to driveline relationships.
Poly mounts sag less that rubber mounts and are better where clearance is an issue.
03-30-2011, 10:36 AM
#128
I will likely just customize or fabricate to locate the motor where it works for me.
 03-30-2011, 03:15 PM
#131
On The Tree
iTrader: (3)
Join Date: Oct 2004
Location: Alta Loma, CA
Posts: 166
Likes: 0
Received 0 Likes
on
0 Posts
I just bought a 2003 6.0 from a local wrecking yard today, and will be taking my t56 to the shop for a go-thru tomorrow. Finally might make some progress on my car..WOOT.
03-30-2011, 04:16 PM
#133
I would have thought that the Buick frame would have been very similar to a Chevelle frame of the same year, but I guess not.
They do transmit quite a bit more vibration than a "conventional" type mount unless you use a very soft durometer material for the bushings. I put a set of nicely fabricated round-bushing mounts on my V and later removed them due to the vibration and noise transmission.
Do an internet search and look at C5 Corvette motor mount brackets. They can be used with early ('32-'48) Ford mount biscuits for a very durable (and comfortable) system.
Last edited by scatillac; 03-30-2011 at 04:29 PM.
03-30-2011, 04:32 PM
#134
I would just honestly use spacers to get to desired height and dont use existing frame holes with the perches. I would just position everything and weld the frame stands once its in place. BRP does sell there stuff seperately you just have to call him but your right its a gamble not using their headers. I never heard of edelbrock not working though on your year.
03-30-2011, 09:30 PM
#136
On The Tree
iTrader: (3)
Join Date: Oct 2004
Location: Alta Loma, CA
Posts: 166
Likes: 0
Received 0 Likes
on
0 Posts
Go to the following thread. There are pics of different motor mount plates with dimensions, one of them being a 1" setback plate.
https://ls1tech.com/forums/conversio...t-adapter.html
https://ls1tech.com/forums/conversio...t-adapter.html
03-30-2011, 10:11 PM
#137
Go to the following thread. There are pics of different motor mount plates with dimensions, one of them being a 1" setback plate.
https://ls1tech.com/forums/conversio...t-adapter.html
https://ls1tech.com/forums/conversio...t-adapter.html
No worries, I will create an arrangement that works.
03-30-2011, 11:38 PM
#138
TECH Regular
iTrader: (5)

Join Date: Mar 2010
Location: Vancouver area, West coast Canada
Posts: 402
Likes: 0
Received 30 Likes
on
20 Posts
Mod/cut/weld the oil pan ! It needs those 'bulges' removed from each side. Don't screw up your driveline angle. You're already going to have to beat the floorpan a bit for the servo on that 200-4r ?
So what do the mount Mfgr's consider moved ? the front face or bellhousing face of the engine ? LSX engines being about 1-1/4" shorter block than the 'ol smallblock chevy.
That's what ya get for starting with a Buick. I thought Dentists drove those ?
So what do the mount Mfgr's consider moved ? the front face or bellhousing face of the engine ? LSX engines being about 1-1/4" shorter block than the 'ol smallblock chevy.
That's what ya get for starting with a Buick. I thought Dentists drove those ?
Last edited by gjestico; 03-30-2011 at 11:43 PM.
03-31-2011, 07:40 AM
#139
Mod/cut/weld the oil pan ! It needs those 'bulges' removed from each side. Don't screw up your driveline angle. You're already going to have to beat the floorpan a bit for the servo on that 200-4r ?
So what do the mount Mfgr's consider moved ? the front face or bellhousing face of the engine ? LSX engines being about 1-1/4" shorter block than the 'ol smallblock chevy.
That's what ya get for starting with a Buick. I thought Dentists drove those ?
So what do the mount Mfgr's consider moved ? the front face or bellhousing face of the engine ? LSX engines being about 1-1/4" shorter block than the 'ol smallblock chevy.
That's what ya get for starting with a Buick. I thought Dentists drove those ?
The transmission has ample clearance all around. No problems there. You on the other hand are due for a root canal!
 03-31-2011, 08:12 AM
#140
Launching!
iTrader: (1)
Join Date: Mar 2005
Location: Katy, Tx
Posts: 220
Likes: 0
Received 0 Likes
on
0 Posts
Would the Dirty Dingo sliders work? They are 1/4" higher than others (so they say), and you should have plenty of adjustability.
http://dirtydingo.com/store/product_...oducts_id=1318
http://dirtydingo.com/store/product_...oducts_id=1318