

LQ4/T56 into my 69 Camaro
 01-21-2011, 02:44 PM
#181

Bandit- I hope there was no confusion on the stands. The stands I have measured 2 1/8" tall on the passenger side and 1 7/8" tall on the drivers side. Compared to the 302/350 stands they are tall. If I have misled anyone on this I am sorry. Appreciate the correction. I have included a description of the mounts from Energy Suspension. I have the 1 3/4" tall by 2 5/8" mounts.

 01-23-2011, 09:01 AM
#183

Interesting about the frame stands. I talked to three other members on here that used 1 inch back plates on first gen camaros and they worked. It looks like the 1 inch back position will work on yours too. Very Smart move buying the adjustable plates! My car came from the factory with a 350 and the tall and narrow mounts fit my frame stand perfect, so I guess I ommited a critical question when doing my homework. Nice Install!
01-23-2011, 10:11 AM
#184
Futureuser= I see you have made some progress on the Green Machine. Seems you have moved right along. I could have went back an inch but this would moved my shifter back another inch, and I would have had to extend my tranny X-member.
Bandit= I have clearance to the right and left lock to lock. Here are a few photos of the clearance. I appreciate you mentioning the clearance issues as I totally forgot about it and would have had a terrible mess if the ends would have made contact. I would have had to remove the headers, lift the engine, move the mounts, reinstall the engine and headers. That is if I caught it before making the X-member, cut the hole for the shifter location, and started the exhaust work. I thank you for the attention to detail. I was lucky as I have the inner tie rod ends that have the grease fitting on the back side.
Left side=
[IMG] [/IMG]
Right side=
[IMG] [/IMG]
Bandit= I have clearance to the right and left lock to lock. Here are a few photos of the clearance. I appreciate you mentioning the clearance issues as I totally forgot about it and would have had a terrible mess if the ends would have made contact. I would have had to remove the headers, lift the engine, move the mounts, reinstall the engine and headers. That is if I caught it before making the X-member, cut the hole for the shifter location, and started the exhaust work. I thank you for the attention to detail. I was lucky as I have the inner tie rod ends that have the grease fitting on the back side.
Left side=
[IMG]
[/IMG]Right side=
[IMG]
[/IMG]
01-23-2011, 10:28 AM
#185
I purchased a length of bar stock 1/2" x 5" x 30" from Fishel Steel and decided to make my own tranny X-member using the Trans-Dapt universal X-member for parts. The Trans-Dapt universal X-member is exactly that, it was never to be used in my car without modification. I tried to shorten it and use it between the frame rails but the parking brake cable bracket was all in the way. So I study this stupid thing for however long and got a game plan. Of course my game plan wouldn't have won no championships but it was a good foundation to build upon. I had my Torpedo heater running, the stereo blasting, the beer a flowing, and 4 drop cords connceted to various tools and away we go. I laid on my back for hours fitting, unbolting, rebolting, modifying, on and on and on. Even with the room temprature in the 65-70 degree mark the concrete was still cold. My best friend was the halogen flood light I had laid on its side for a wide light and the heat toasting my back. The cross member didnt turn out exactly like I wanted but it is strong and didnt flinch when the weight of the transmission was lowered onto it. So please dont poke fun at my welds as they were welded, cutoff, rewelded, reground and rewelded. Sometimes **** doesnt work out thats why they make torches and cutoff wheels.
[IMG] [/IMG]
Into this:
[IMG] [/IMG]
[IMG] [/IMG]
[IMG] [/IMG]
[IMG] [/IMG]
[IMG]
[/IMG]Into this:
[IMG]
[/IMG][IMG]
[/IMG][IMG]
[/IMG][IMG]
[/IMG]
01-23-2011, 10:52 AM
#186
I used a factory style tranny mount with the two bolt holes rather than using the LS style with the one stud. I used what I used for a couple of reasons:
1) two is better than one 2) the price was $6.00 and is readily available at any parts store 3) with the bolt style versus the stud, I will make it easier to slide off the X-member 4) I am not 100% on this but I think it is shorter in height than the LS version. The only mod required to use the bolted version was to elongate the member about 3/8" to right and left. If I had it to do all over again I may have purchased an entire kit to prevent all of the B-S work. What a pain in the *** the X-member was. If I could have ordered one and jnew for sure it would have fit I would have did so yesterday. I guess it these type of projects that allow us to stay busy while we wait on parts or money for the parts. So enough bitching as I am heading back out to the garage to mark the tunnel for the hole for the shifter, mark the left side of the tunnel for some piece that hangs off at the shifter go to beat it over a little. What is this piece. I am guessing it has something to do with the skip shift. Can I just remove it? Gotta measure the distance for the new driveshaft. Maybe just maybe if I get a wild hair up my *** I may swap gas tanks out. I need to do some investigating on some fuel line. Any suggestions??? I need the adapters to the stock GM setup. I had talked to Futureuser and wanted to run the OEM fuel line. I have access to all I need and they even have the fiittings, line, and tools to complete the job for a small fee. I have debated this with fellow LS1tech's and we have tossed around the pros and cons and it is unclear of which way I want to go. If I go braided stainless its a lot more costly, harder to work with, and there is no real way of telling when it starts to collapse internally. If I go OEM it cheap, easy to run, easy to spot any defects, but seems to be flimpsy. I know its tough and should be just fine but looking at it in comparison to the braided it looks weak. So feel free to give me your opinion and if you have facts please include that as well. I have my own opinions and am happy to share them as some of you know.
1) two is better than one 2) the price was $6.00 and is readily available at any parts store 3) with the bolt style versus the stud, I will make it easier to slide off the X-member 4) I am not 100% on this but I think it is shorter in height than the LS version. The only mod required to use the bolted version was to elongate the member about 3/8" to right and left. If I had it to do all over again I may have purchased an entire kit to prevent all of the B-S work. What a pain in the *** the X-member was. If I could have ordered one and jnew for sure it would have fit I would have did so yesterday. I guess it these type of projects that allow us to stay busy while we wait on parts or money for the parts. So enough bitching as I am heading back out to the garage to mark the tunnel for the hole for the shifter, mark the left side of the tunnel for some piece that hangs off at the shifter go to beat it over a little. What is this piece. I am guessing it has something to do with the skip shift. Can I just remove it? Gotta measure the distance for the new driveshaft. Maybe just maybe if I get a wild hair up my *** I may swap gas tanks out. I need to do some investigating on some fuel line. Any suggestions??? I need the adapters to the stock GM setup. I had talked to Futureuser and wanted to run the OEM fuel line. I have access to all I need and they even have the fiittings, line, and tools to complete the job for a small fee. I have debated this with fellow LS1tech's and we have tossed around the pros and cons and it is unclear of which way I want to go. If I go braided stainless its a lot more costly, harder to work with, and there is no real way of telling when it starts to collapse internally. If I go OEM it cheap, easy to run, easy to spot any defects, but seems to be flimpsy. I know its tough and should be just fine but looking at it in comparison to the braided it looks weak. So feel free to give me your opinion and if you have facts please include that as well. I have my own opinions and am happy to share them as some of you know.
01-24-2011, 03:16 AM
#187
On The Tree
iTrader: (4)
Join Date: Dec 2010
Location: Detroit, MI
Posts: 134
Likes: 0
Received 0 Likes
on
0 Posts

You will be fine with that cam and 1.7 rocker arms. The stock rockers are 1.7's so no worries there. You have less duration so the valves will not stay open as long and with a 114 LSA you should be even better yet. The tighter the LSA the more clearance issues you will run into. Tighter meaning less. If your cam had a 106 LSA I would be worried. Make sure you get a strong set of springs though. I bought the Patriot Extremes since the valves in these heads are so heavy they need a good spring to overcome the mass. You can get a set of the Patriots for around $255. That comes with Titanium retainers and all other parts necessary to complete the change over.
01-24-2011, 11:59 AM
#188
TECH Apprentice
Great build thread, love the pics, VERY helpful with my 67 Camaro LS1/T56 conversion! Keep the info and details coming! I am also debating the stock fuel line for as far as I can run it. Why is that a bad idea??? I'll stay tuned
01-24-2011, 02:51 PM
#189
Let me clear up what I said. When I mentioned OEM line I was talking about the newer style sort of plastic/rubber line. I did not mean the steel factory line. Sorry for any confusion on this. The newer cars have a lets say non-metallic line that the factories use for weight savings, cost reduction and prolonged life. I hope I didnt lead anyone astray. Sorry MisterD. I appreciate the kind words as well. I choose not to use the existing hard line from the factory as mine is 42 years old and is steel. I had thought about what Speedtigger said and use new hard lines but I am afraid of a leak at the compression fitting as there will be several joints. Two between the tank and filter/reg, two between the return and the tank, and two more from the front side of the filter/reg to the fuel rail. So that makes six joints all using compression fittings if I choose to use hard line. Now braided lines seem to have a good reputation for being liquid tight but you cant tell until you pressurize everything and then you may or may not have leaks, the OEM (plastic) line is almost a sure bet it wont leak but has its down sides to. I am getting ready to "**** or get off of the pot". I will have to make a decision for sure within the next week or so because I will be ready to fire her up. There is a lot of work to do between then and now. Lets go clean up a firewall and repaint the engine compartment today Yippeeeee!
01-24-2011, 03:18 PM
#190
I had thought about what Speedtigger said and use new hard lines but I am afraid of a leak at the compression fitting as there will be several joints. Two between the tank and filter/reg, two between the return and the tank, and two more from the front side of the filter/reg to the fuel rail. So that makes six joints all using compression fittings if I choose to use hard line.
01-24-2011, 03:55 PM
#191
Is that also called a double flare or is that something else all together? Not that I will be using hard line anyway just wondering. Thanks Speedtigger! We need you to get that dog gone oil pan so we can meet and drag. I will hopefully be on the road in the next few weeks. Talked to the driveshaft man today and have plans tomorrow to have my driveshaft shortened for the hopefully last time. I had it shortened 2 years ago when I changed rear ends I used a Corporate 10 bolt and it had the #1350 yoke which was longer than the #1310. According to the driveshaft man he said the #1350 was the strongest thing from the factory. So I did some thinking last night while tearing everything back out of my car. If the 1350 is stronger why not have them on both ends of the driveshaft. So thats the game plan, cut off the front of the driveshaft and add in the 1350 joint while shortening the whole assembly. He had the matching yoke and all. $60 to shorten it and balance it, $40 for the yoke, so worst case I am looking at $100-150. Not too bad of a deal. Damn with two #1350 joints and a shorter driveshaft it shouldnt be the weak link in the driveline. Hold on T56 I think you just made the top of the list of weaklings!!! About a 5000rpm launch with slicks and we will find out where the weakest link is. Like hell I am. It has taken every spare dime I own to get to this point I will have to baby her until the funds get built back up.
Last edited by tsnow678; 01-25-2011 at 05:11 PM. Reason: I do not have a #1350 in the rear rather a Saginaw which is equivalent to a #1335 still stronger than the factory #1310.
01-24-2011, 04:07 PM
#192
Is that also called a double flare or is that something else all together? Not that I will be using hard line anyway just wondering. Thanks Speedtigger! We need you to get that dog gone oil pan so we can meet and drag. I will hopefully be on the road in the next few weeks. Talked to the driveshaft man today and have plans tomorrow to have my driveshaft shortened for the hopefully last time. I had it shortened 2 years ago when I changed rear ends I used a Corporate 10 bolt and it had the #1350 yoke which was longer than the #1310. According to the driveshaft man he said the #1350 was the strongest thing from the factory. So I did some thinking last night while tearing everything back out of my car. If the 1350 is stronger why not have them on both ends of the driveshaft. So thats the game plan, cut off the front of the driveshaft and add in the 1350 joint while shortening the whole assembly. He had the matching yoke and all. $60 to shorten it and balance it, $40 for the yoke, so worst case I am looking at $100-150. Not too bad of a deal. Damn with two #1350 joints and a shorter driveshaft it shouldnt be the weak link in the driveline. Hold on T56 I think you just made the top of the list of weaklings!!! About a 5000rpm launch with slicks and we will find out where the weakest link is. Like hell I am. It has taken every spare dime I own to get to this point I will have to baby her until the funds get built back up.
01-24-2011, 09:11 PM
#195
Future- Thanks! you asked a tricky question about the restoration. I did the bottom of the car, rebuilt the rearend, rebuilt the front suspension, installed new subframe bushings, put all of the glass in, mouldings on, interior complete front to back, rebuilt the engine, wired it, installed all the lights, radiator support, rebuilt the door hinges, I did everything but hang the sheetmetal and do the body work. So yeah I had a hand in it but I did not complete it. If I had it to do all over I would have got the body done first before I did anything to the car. My theory is this: Once you have the body done everything else is mere bolt ons. Which can be bought a little at a time. If you choose to get it running first you have spent most of your money on the drivetrain and that leaves the largest expense which has to be done all at once so that prolongs the whole deal. I chose to do the drivetrain first so 16 years later I have a running driving car. Man I drug that out, sorry. $8000 in paint and labor and Randy had my car looking the best it has ever looked even from the factory. To be 42 years old she has spent the last 17 years of it in the dry. Never been rained on but all of that is fixing to change as I want to drive this like I intended on in the first place. I guess the $8000 spent on preventing rust and dents has made me over-cautious.


 01-25-2011, 01:33 PM
#198
I like it! I like the silver grille also. Maybe when you get yours done we can take some comparison photos. Everybody has a different way of doing things and thats what makes this hobby so great. Keep up the good work and send me a link to your thread when you start. Maybe I can be of some help to you or vice-versa.
01-25-2011, 05:43 PM
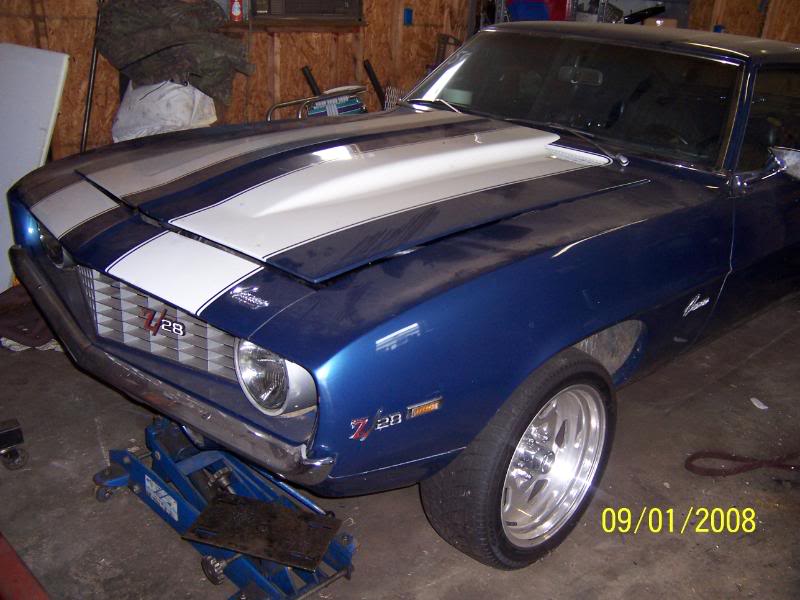
#199

.....Gotta love a LaMans blue 69 Camaro with white stripes.....
01-26-2011, 07:33 PM
#200
I stopped by Oliver's driveshaft today and picked up my driveshaft. I had the assembly shortened on the tranny side and replaced with a #1350 weld-in yoke and a new #1350 slip yoke added. It was balanced and trued. I had thought the rear yoke was a #1350 but come to find out it is a Saginaw joint. It is stronger than a #1310 but not quite up to par with a #1350. I was told it was comparable to a #1335. The new slip yoke is also longer for better spline engagment.
[IMG] [/IMG]
[IMG]
[/IMG]