
LS into 190e 16v


 02-27-2013, 02:08 PM
#104
On The Tree
Thread Starter
iTrader: (2)
Join Date: Mar 2008
Location: Nashvegas
Posts: 136
Likes: 0
Received 0 Likes
on
0 Posts

I know I haven't updated in a while, but I have been working on my steering arms when I have had time. Here is what I have so far. Right now I am thinking about having them milled out of mild. I got a buddy who owes me a favor and he happens to own a CNC mill. I may switch to a welded setup, but I'm not sure.
08-26-2013, 10:25 PM
#105
On The Tree
Thread Starter
iTrader: (2)
Join Date: Mar 2008
Location: Nashvegas
Posts: 136
Likes: 0
Received 0 Likes
on
0 Posts
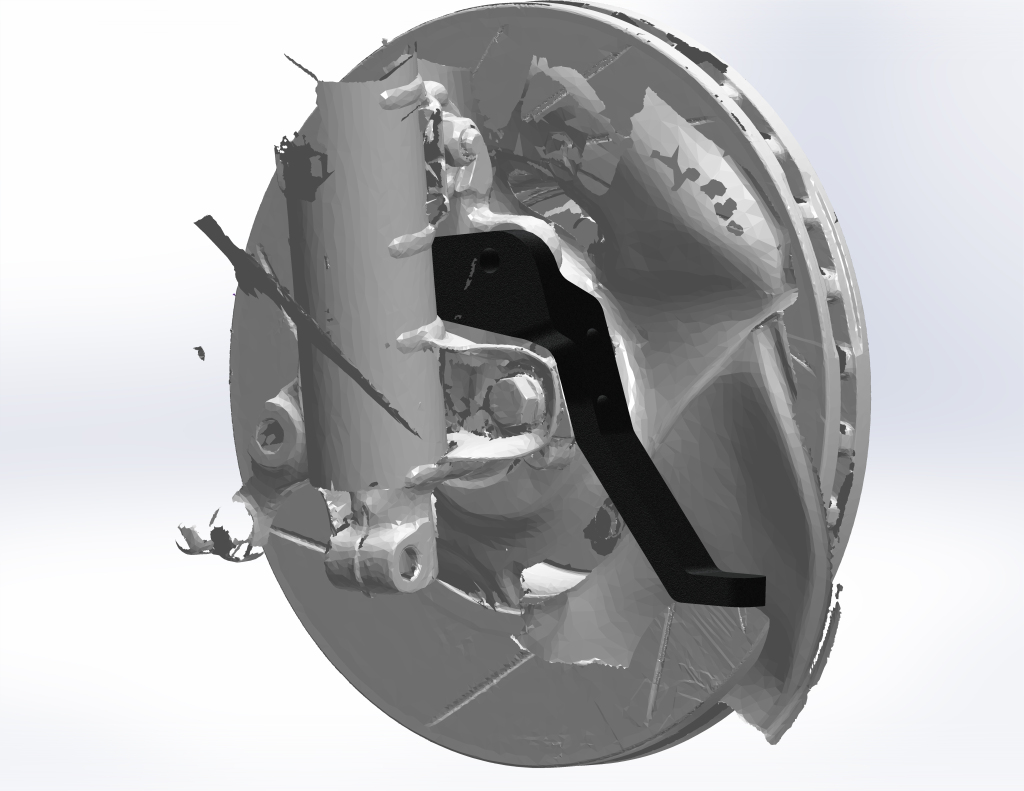
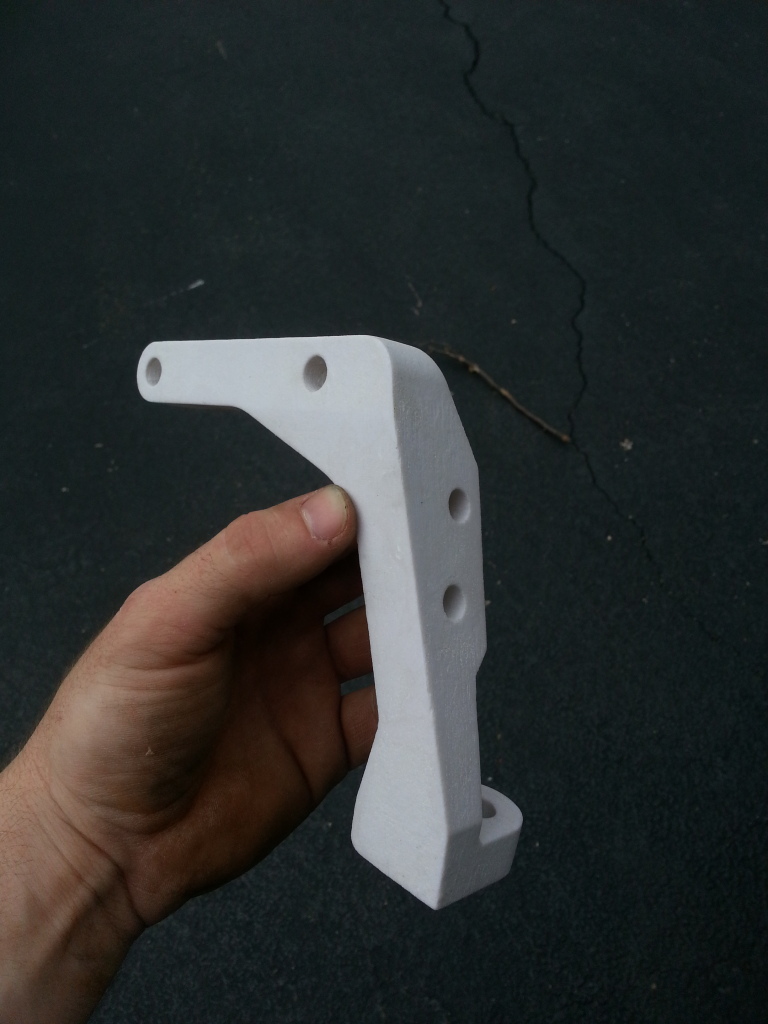
Alright time for another thread revival. I haven't been working on the car very much over the past 6 months. I moved into the city of Chicago and was about an hour away from the car with no way to work on it without having my boss let me into the shop on the weekends and asking someone to come in and work on the car with me. Plus there are way more fun things to do in the city like drink, so the car pretty much sat all spring and summer. Pretty much the only thing I got done was I designed and had my buddy 3d print my new steering arms. They came out nice and I am pleased with the design. They have enough stock that I can machine some material off the bottom or add shims to adjust the bumpsteer. The same friend will be machining the arms sometime in the fall hopefully.

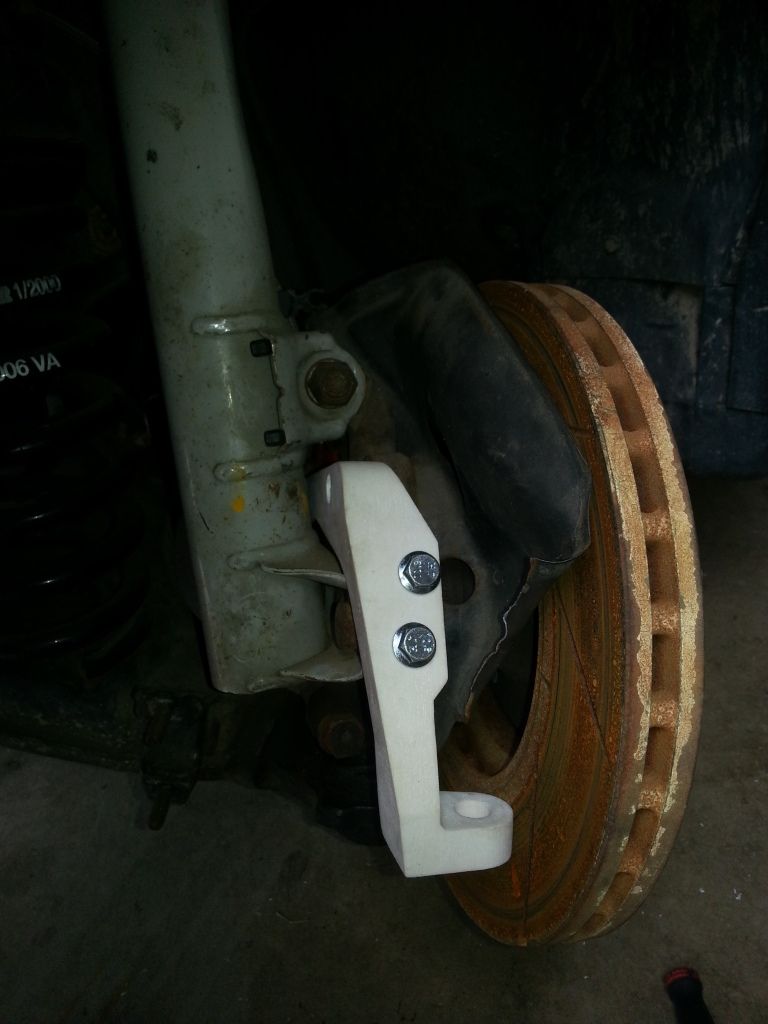
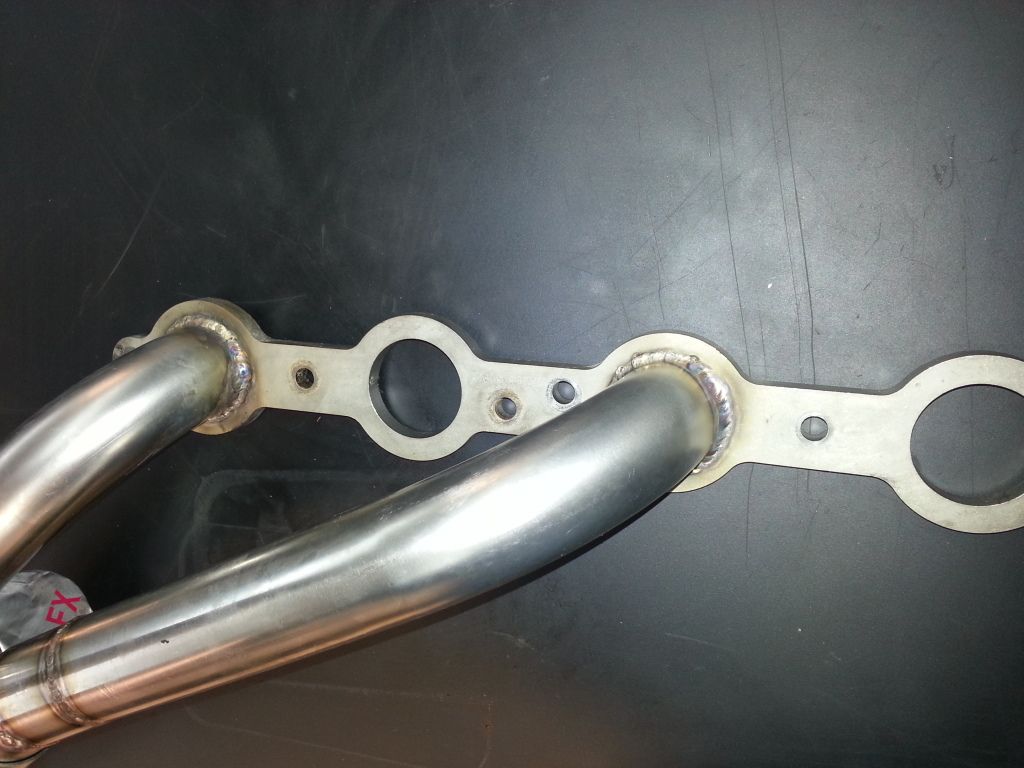
This side gets bolted to the knuckle
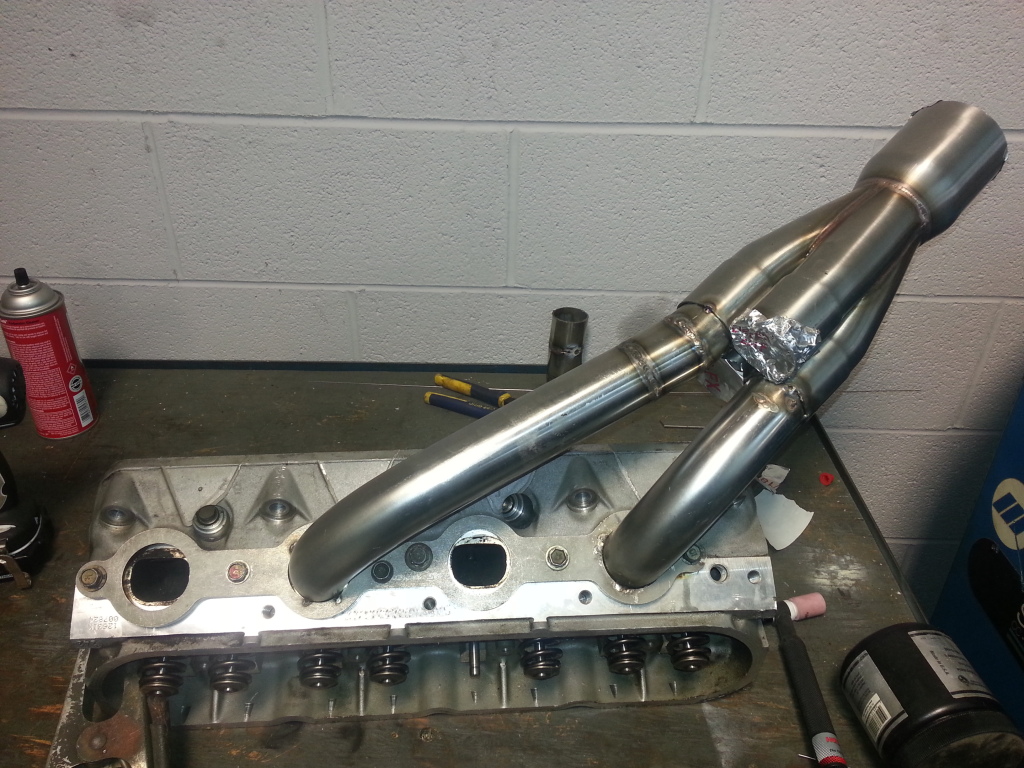
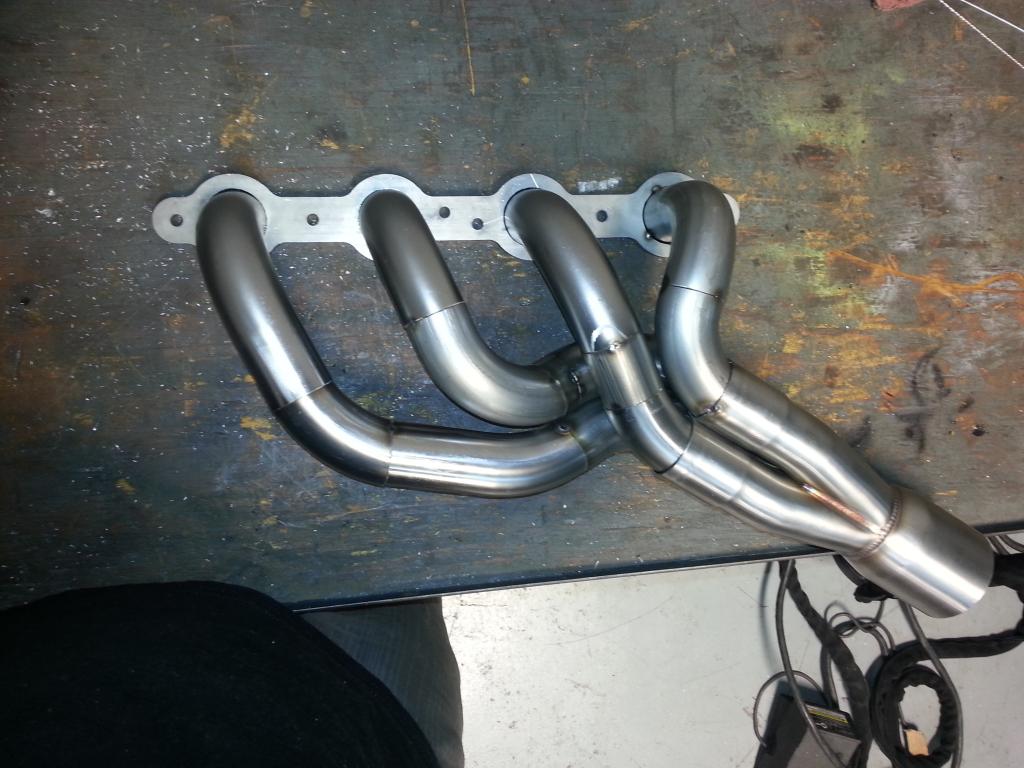
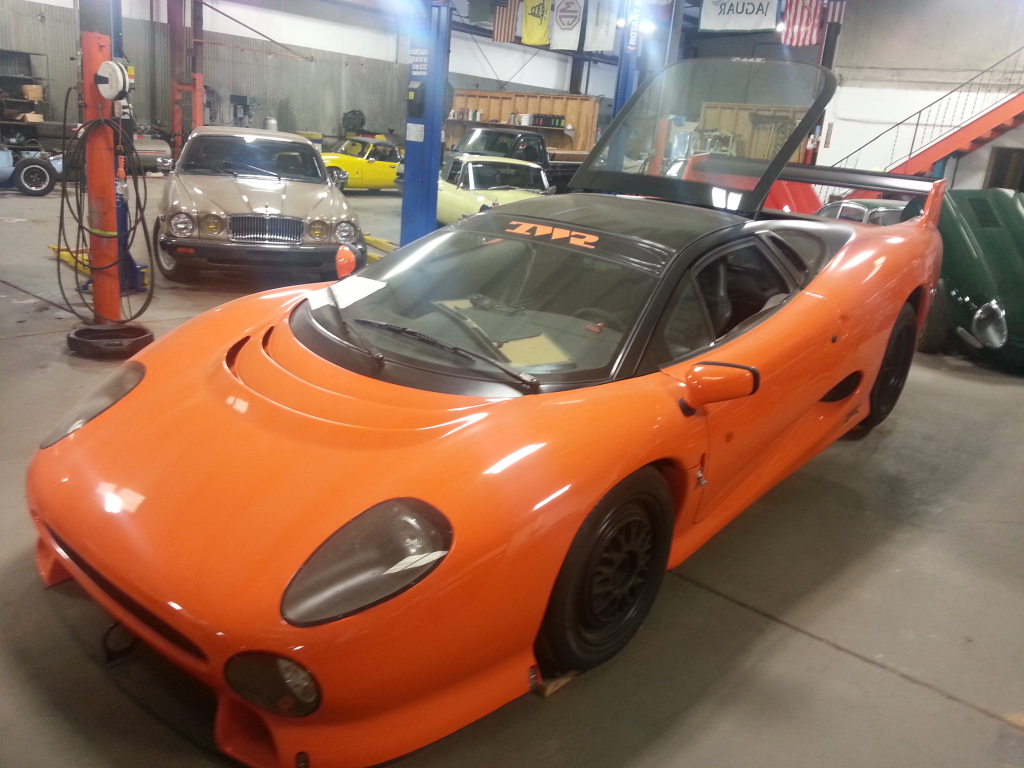
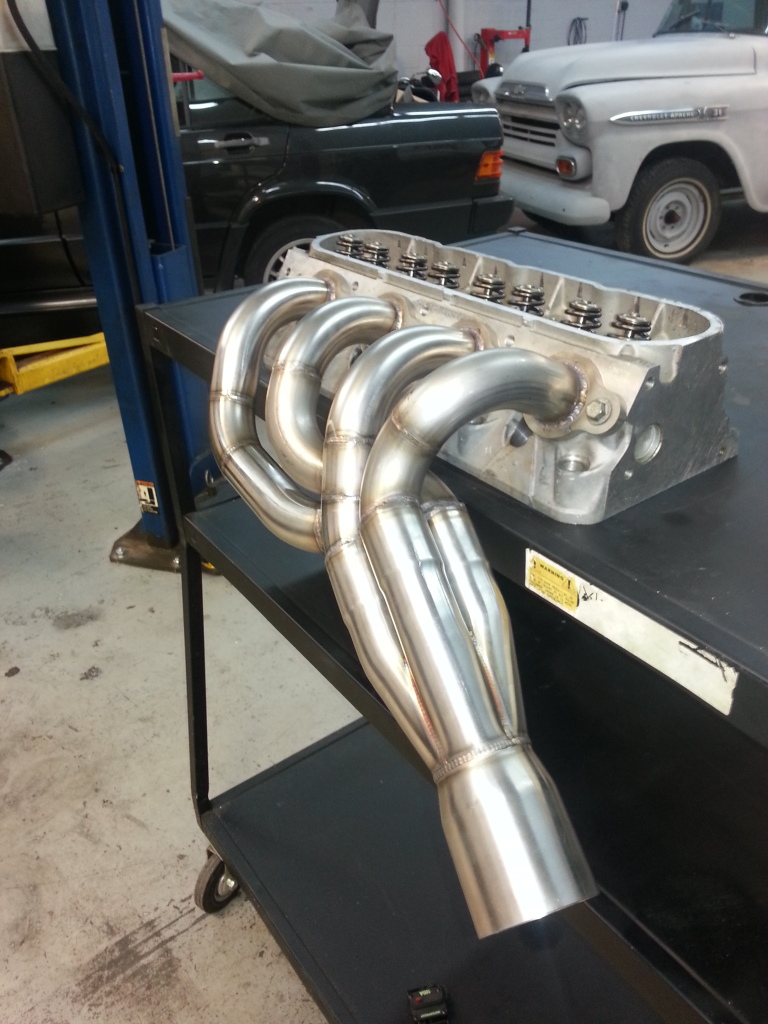
My girlfriend got into school in Atlanta, and I wanted to move closer to friends and family, so we decided to move to Atlanta at the end if July. Now I get to go all the Tech games again, which means I probably work on the car as much as I should. I moved the car to a friend's shop in Nashville, TN. I used to work there in high school. Even though the car is now 3 hours away, it's nice having it somewhere where I can have a shop to myself for an entire weekend. I can go there to get away from everything and put in some quality time. I was able to head up there this past weekend and start working on my headers. I got the passenger side all tacted up. It went fairly smoothly. In debating paying someone to final weld it, so I don't **** it up. Haha. I'm dreading doing the driver's side. It's so much tighter with the footwell being farther forward and the steering column being in the way. I may have to move the steering column to get the headers to fit. And before anyone asks, the runners are 1-3/4" and I bought the collectors from Vibrant.
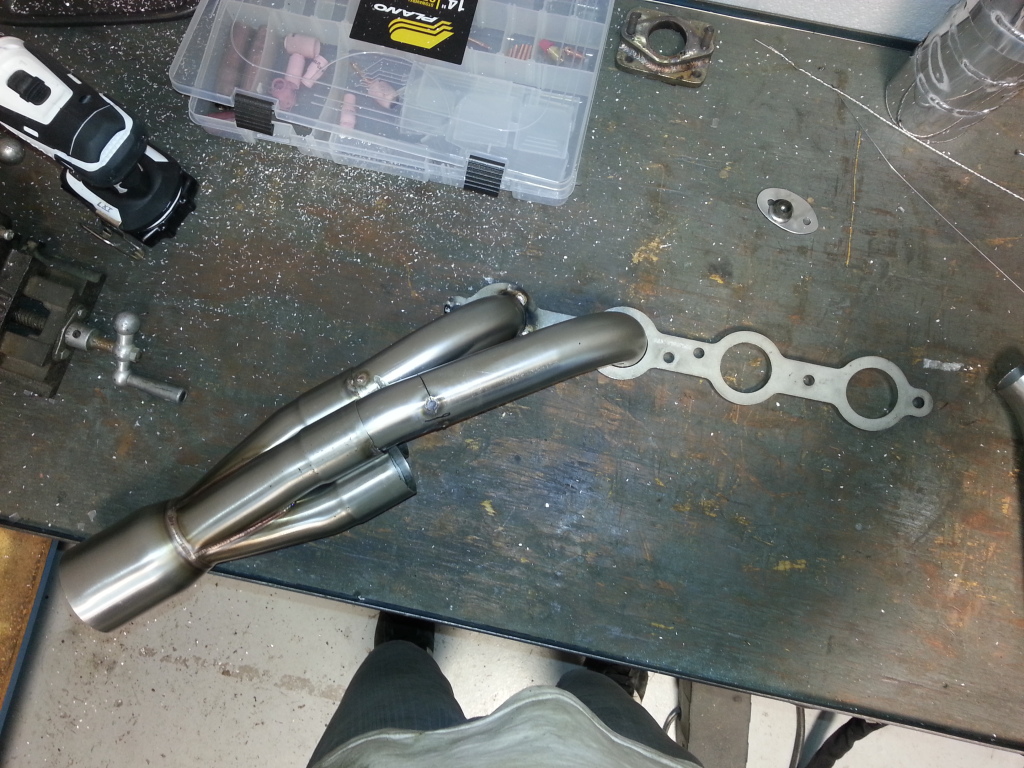
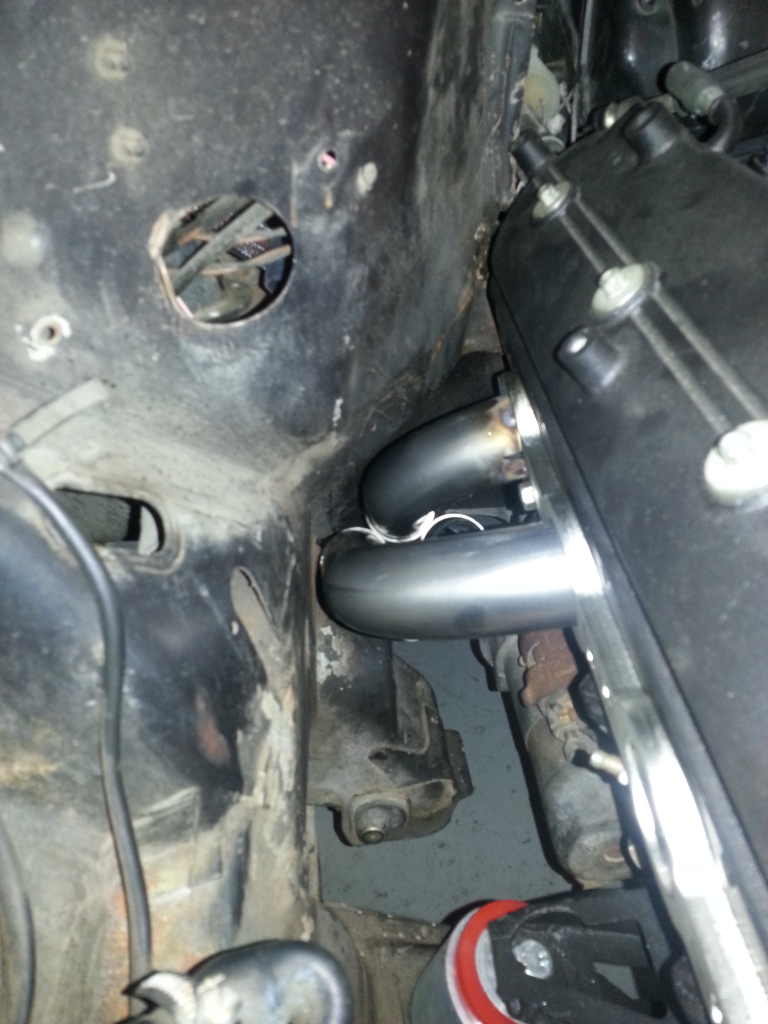
How I positioned the collector
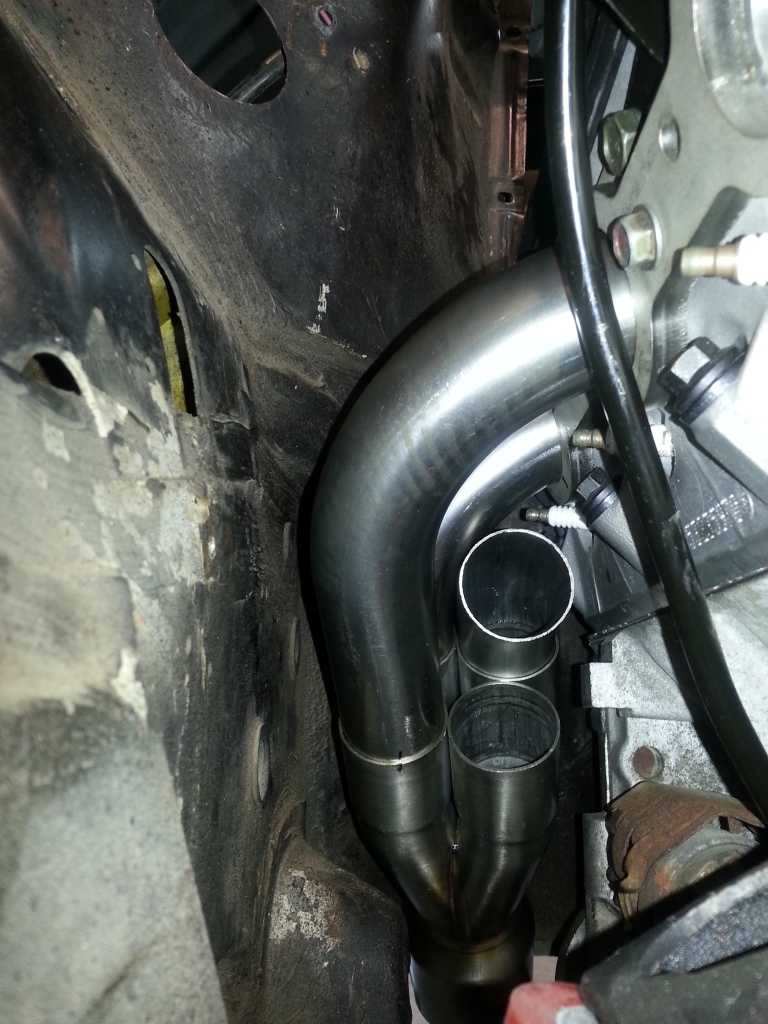
Closer

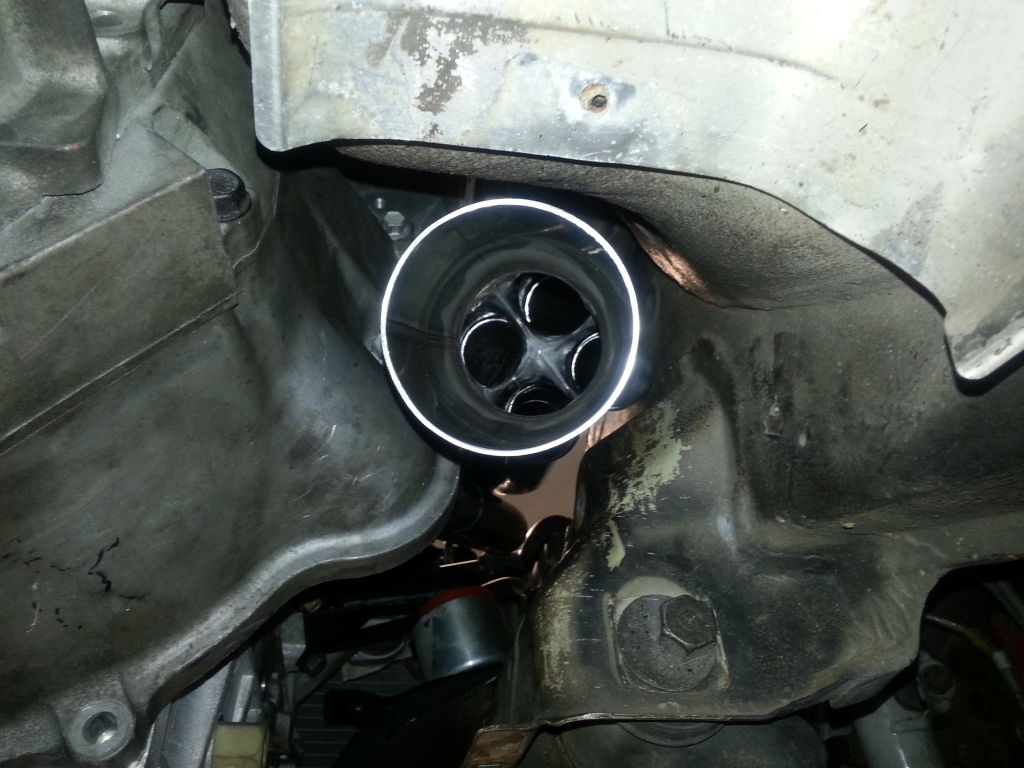


Finished
I'm going back to Nashville again in two weeks to work on the driver's side. I need to buy some tighter radius bends for that side. I'll probably get some Columbia River bends. I used all vibrant bends for the driver's side. I hope I can easily move the steering column and make everything work. It should be a cluster ****, but oh well, this whole build has been one. Haha
As always feel free to ask any questions you might have.
Thanks
Clayton
This side gets bolted to the knuckle
My girlfriend got into school in Atlanta, and I wanted to move closer to friends and family, so we decided to move to Atlanta at the end if July. Now I get to go all the Tech games again, which means I probably work on the car as much as I should. I moved the car to a friend's shop in Nashville, TN. I used to work there in high school. Even though the car is now 3 hours away, it's nice having it somewhere where I can have a shop to myself for an entire weekend. I can go there to get away from everything and put in some quality time. I was able to head up there this past weekend and start working on my headers. I got the passenger side all tacted up. It went fairly smoothly. In debating paying someone to final weld it, so I don't **** it up. Haha. I'm dreading doing the driver's side. It's so much tighter with the footwell being farther forward and the steering column being in the way. I may have to move the steering column to get the headers to fit. And before anyone asks, the runners are 1-3/4" and I bought the collectors from Vibrant.
How I positioned the collector
Closer
Finished
I'm going back to Nashville again in two weeks to work on the driver's side. I need to buy some tighter radius bends for that side. I'll probably get some Columbia River bends. I used all vibrant bends for the driver's side. I hope I can easily move the steering column and make everything work. It should be a cluster ****, but oh well, this whole build has been one. Haha
As always feel free to ask any questions you might have.
Thanks
Clayton
09-08-2013, 02:40 PM
#107
On The Tree
Thread Starter
iTrader: (2)
Join Date: Mar 2008
Location: Nashvegas
Posts: 136
Likes: 0
Received 0 Likes
on
0 Posts
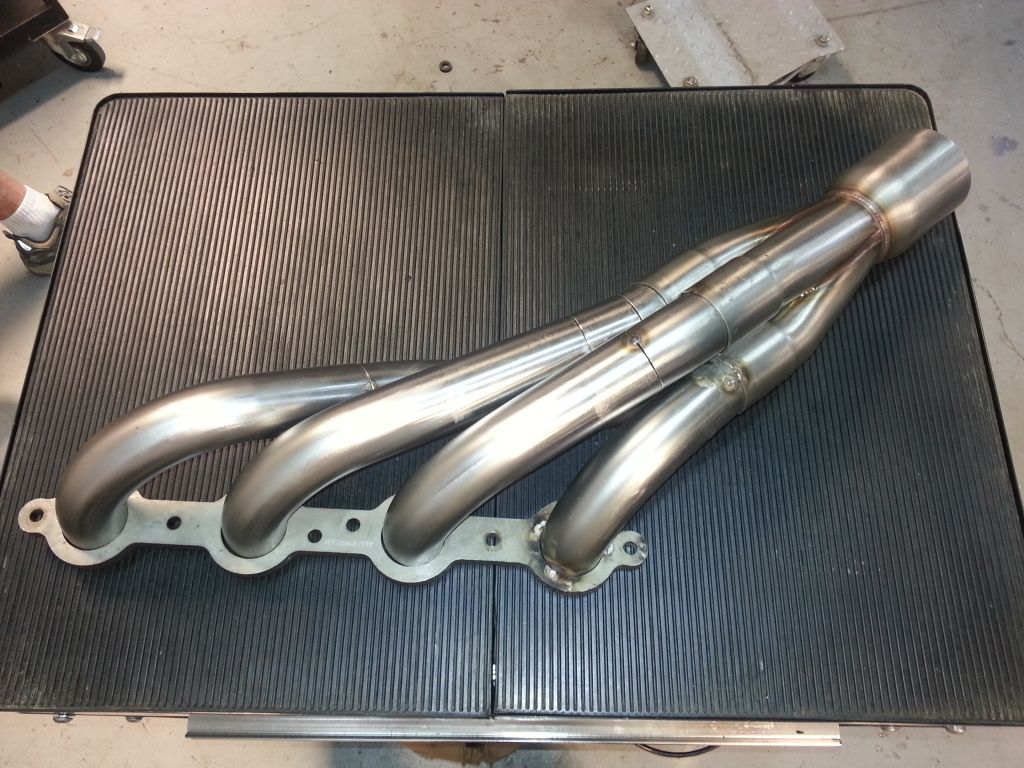
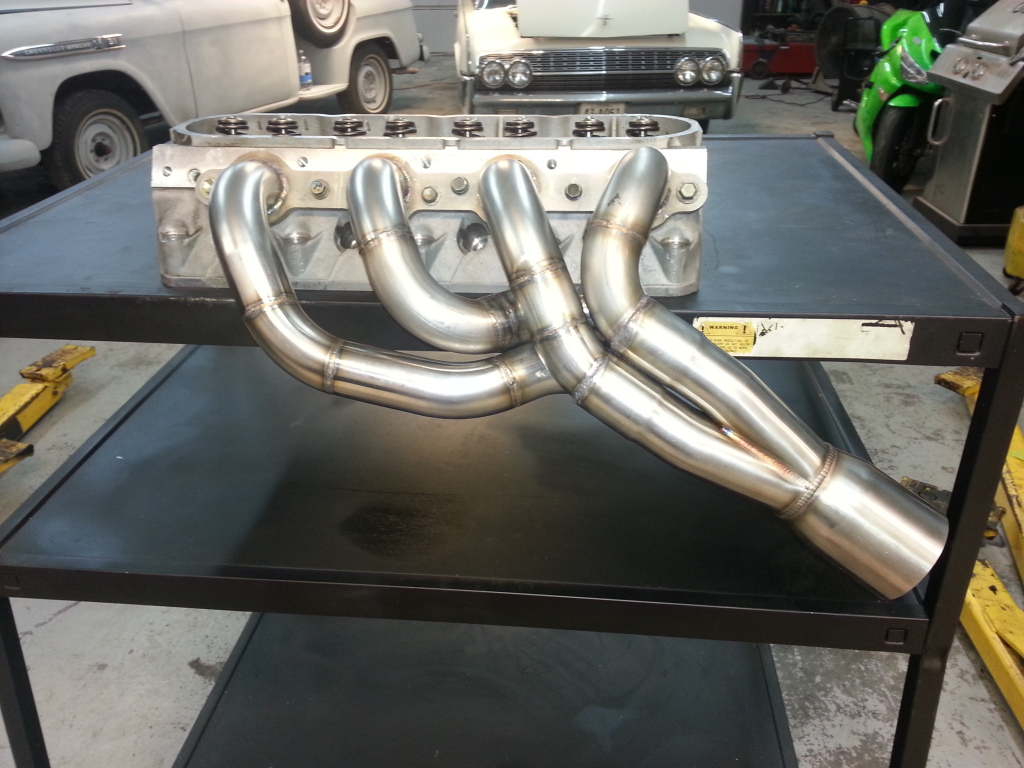
I finished welding the passenger side header this weekend. Here are some pics
Runners welded
Welding to the collector. I backed purged everything as well as I could
Not the prettiest welds, but they will do
Making sure nothing moved

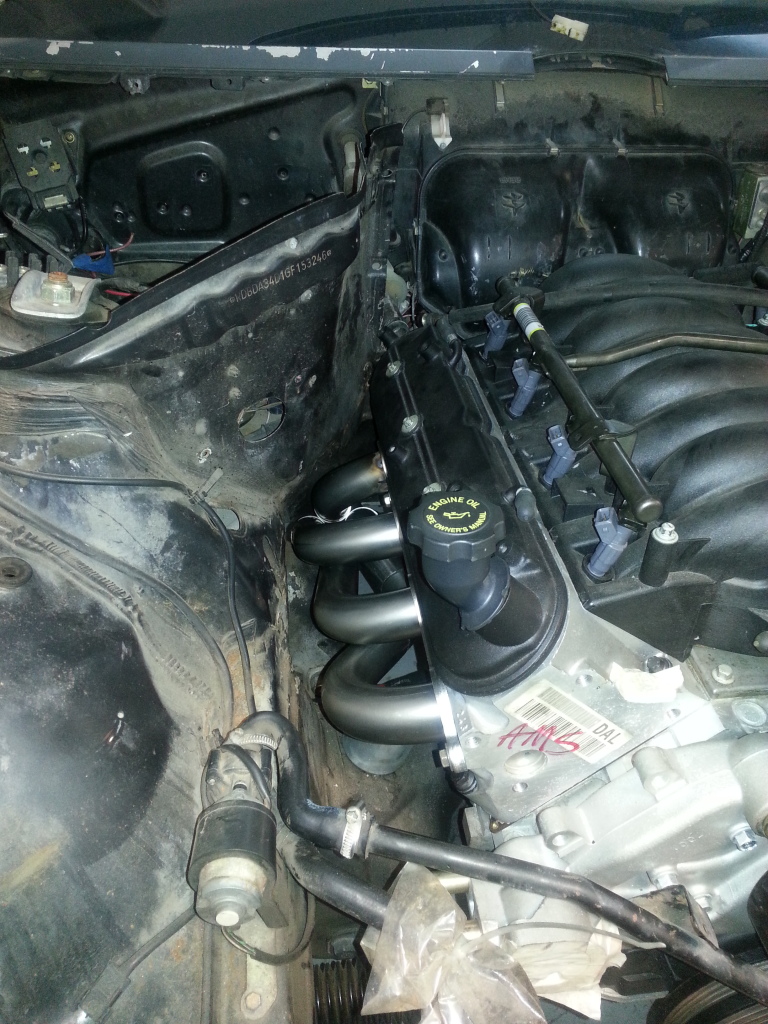
Finished
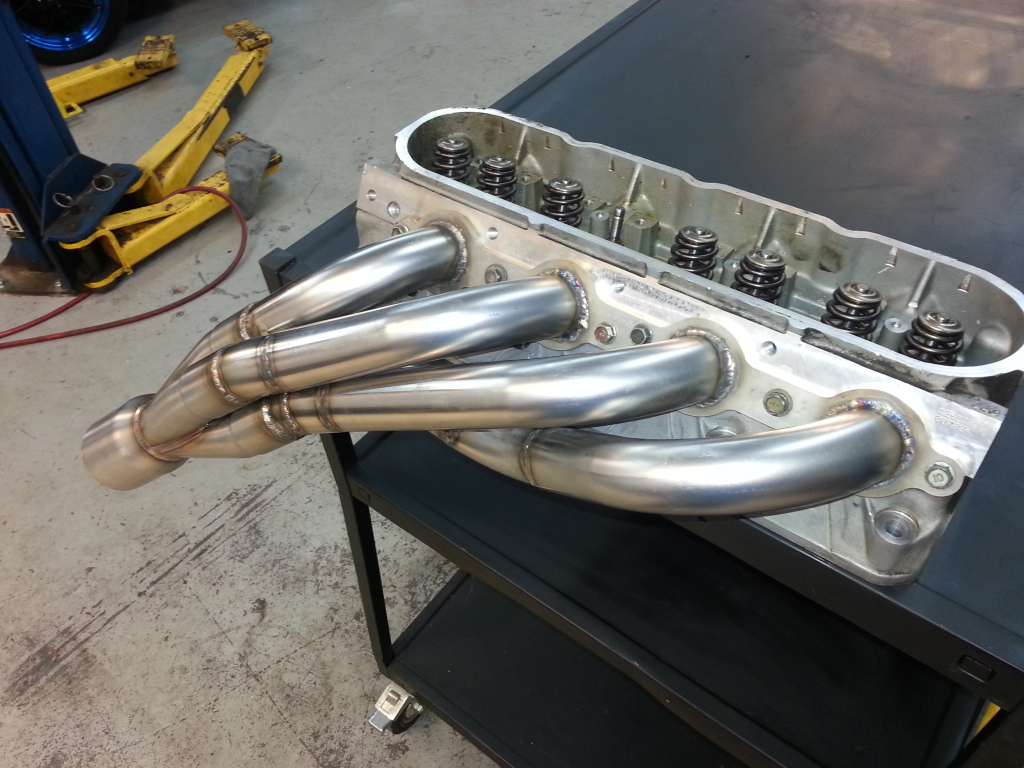
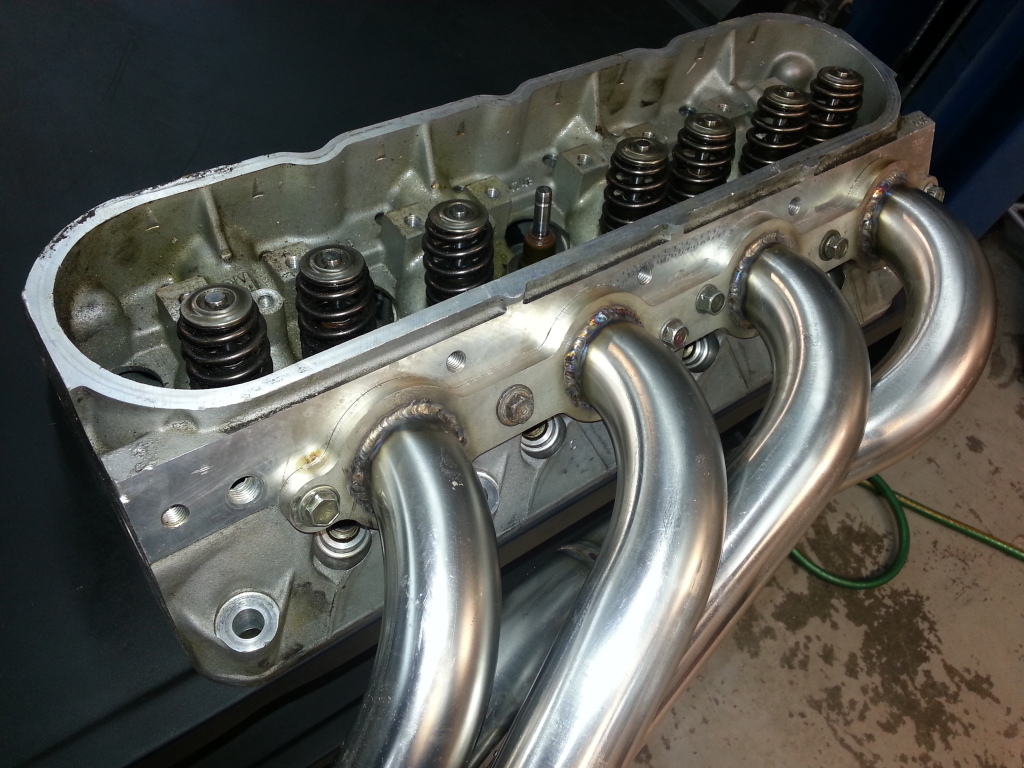

And a final test fit. I can install it with the motor bolted up. I can also get to all the spark plugs, so that's cool

Runners welded

Welding to the collector. I backed purged everything as well as I could

Not the prettiest welds, but they will do

Making sure nothing moved

Finished


And a final test fit. I can install it with the motor bolted up. I can also get to all the spark plugs, so that's cool
 10-01-2013, 10:38 AM
#109
On The Tree
Thread Starter
iTrader: (2)
Join Date: Mar 2008
Location: Nashvegas
Posts: 136
Likes: 0
Received 0 Likes
on
0 Posts
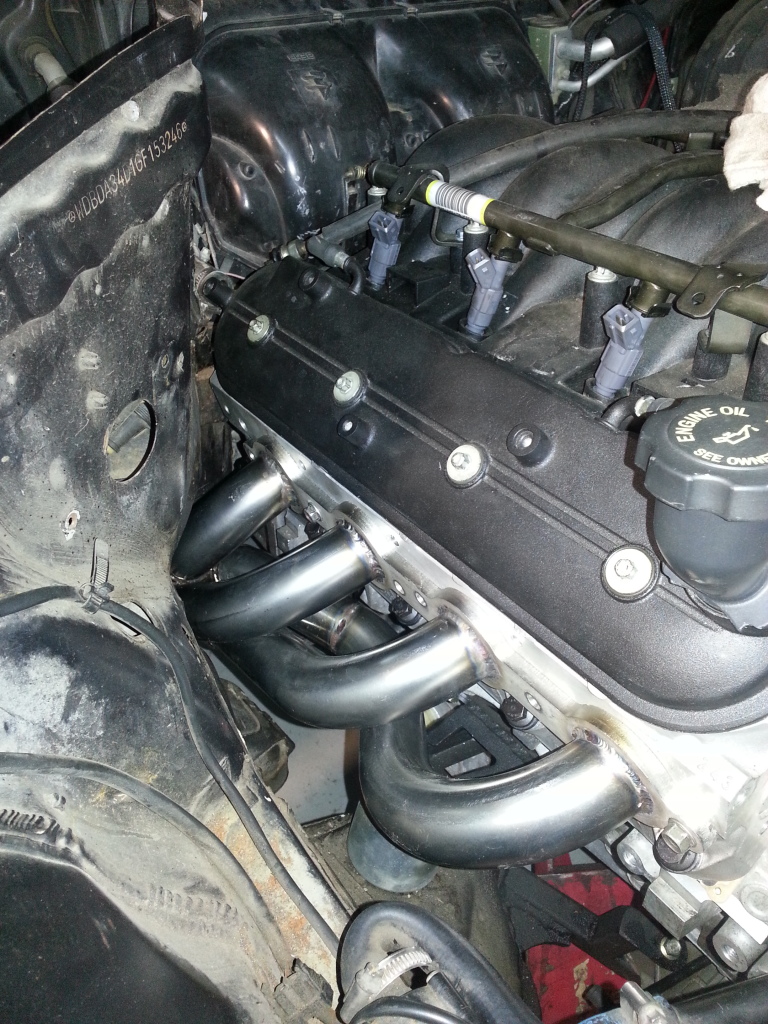
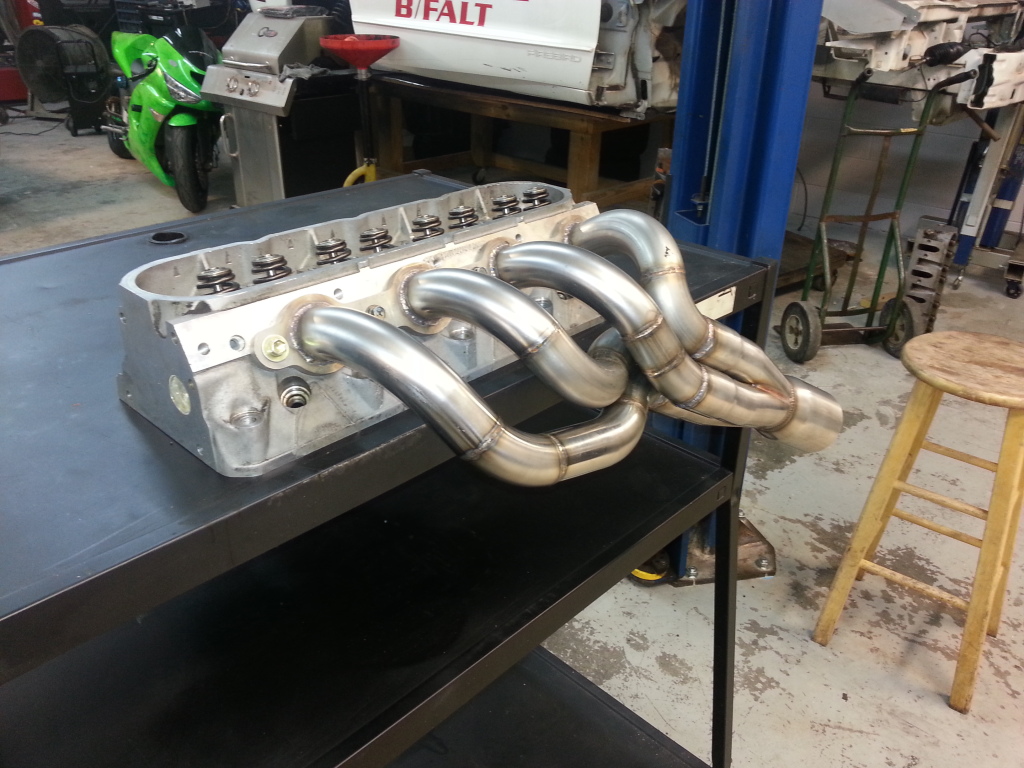
Well I got a little done on the car this past weekend. I was able to get the driver's side header tacted up. Here are some pics.

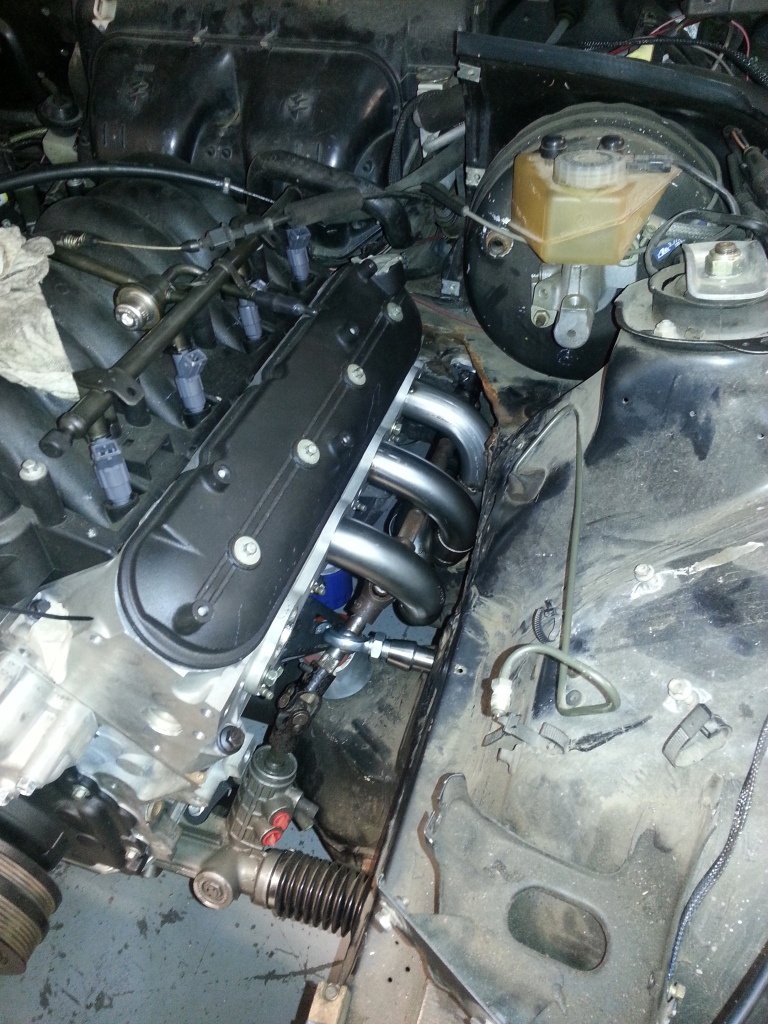
3 runners done. I also replaced my old steering column brace with a new one. I bought a bung and a heim from QS components and tacted it in place.
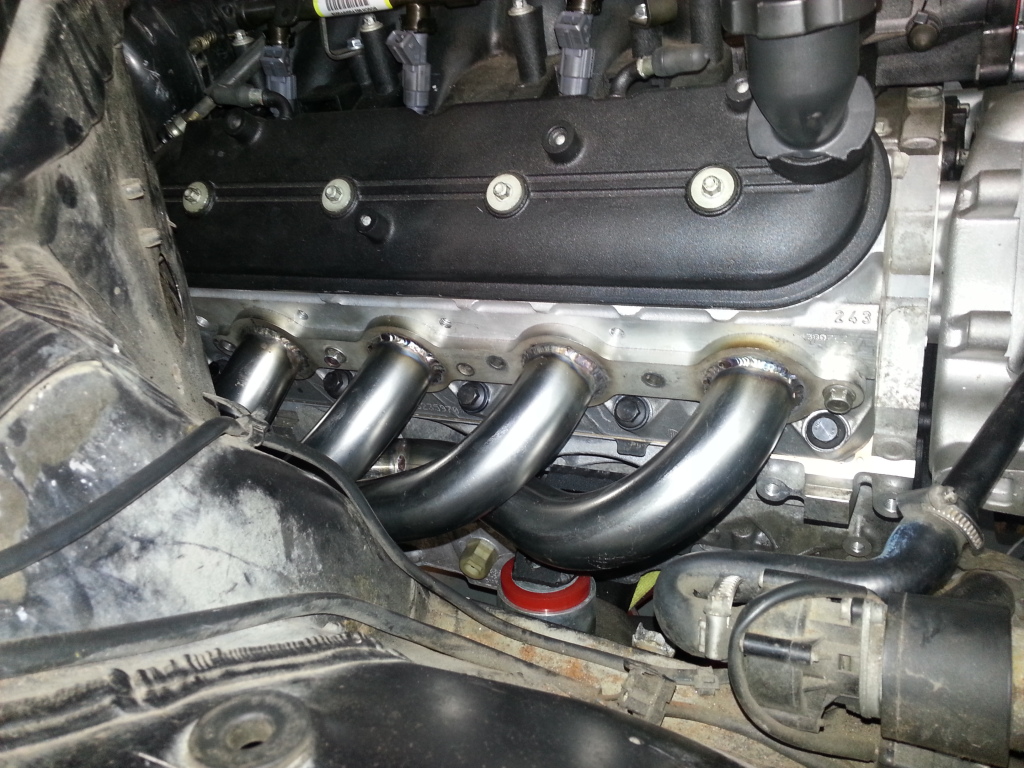
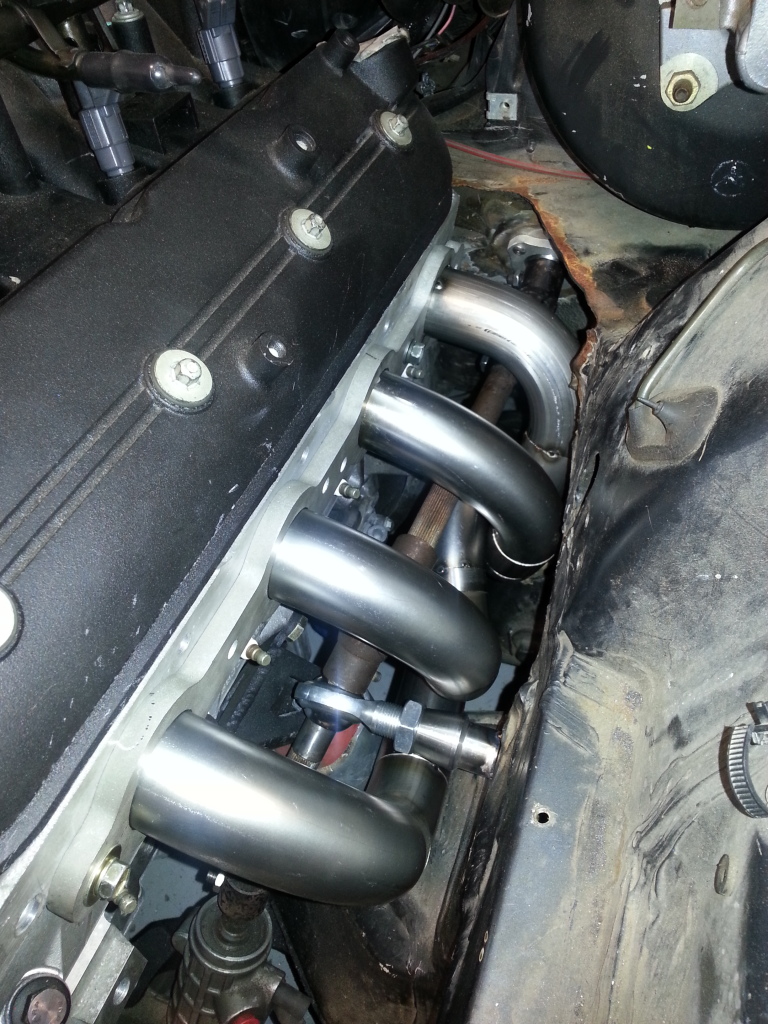
4th runner done. This one isn't quite as nice as the passenger side, but I am still pleased with it with the tight space I was working with.

You can see in this picture on the left hand side, to the left of the bottom left runner, I had to cut a large piece of the rear a-arm mounting feature off. This was where the drag link in the old steering system mounted. I will cover this with a piece of sheet metal next time the motor comes out. There is a piece of cardboard in the hole so I knew how much room I had.
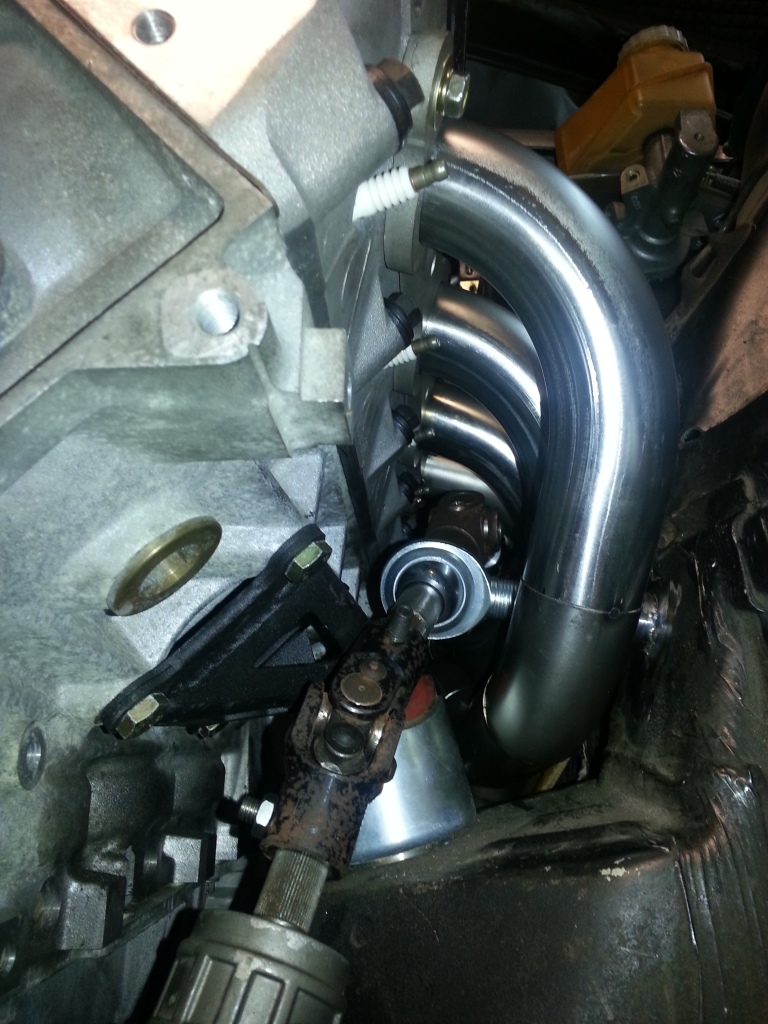
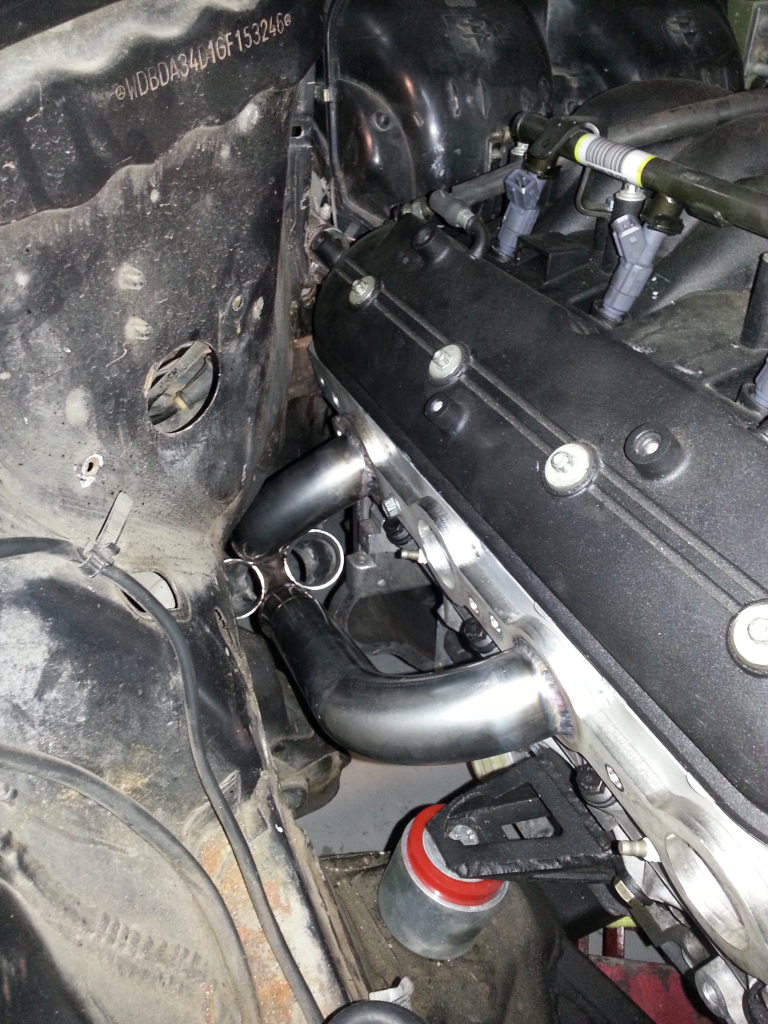
Looking back at the firewall. I have at least .125" of clearance between the header and the steering column. the .125" clearance is right next to engine mount where engine movement should be minimal.
Header installed.
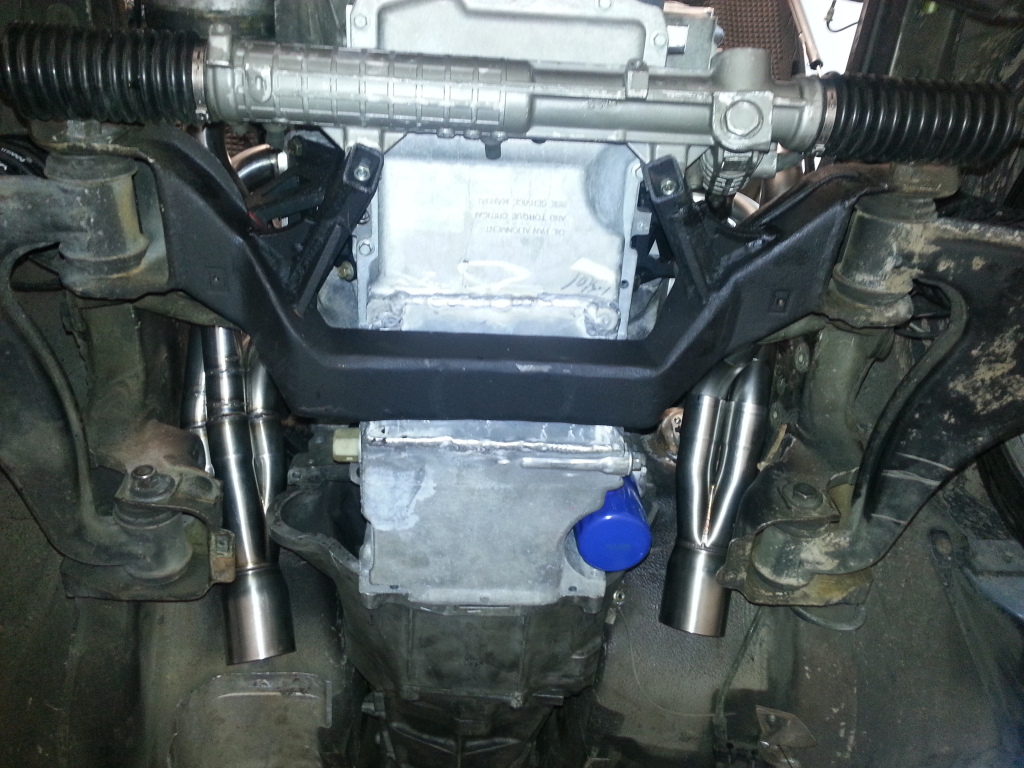
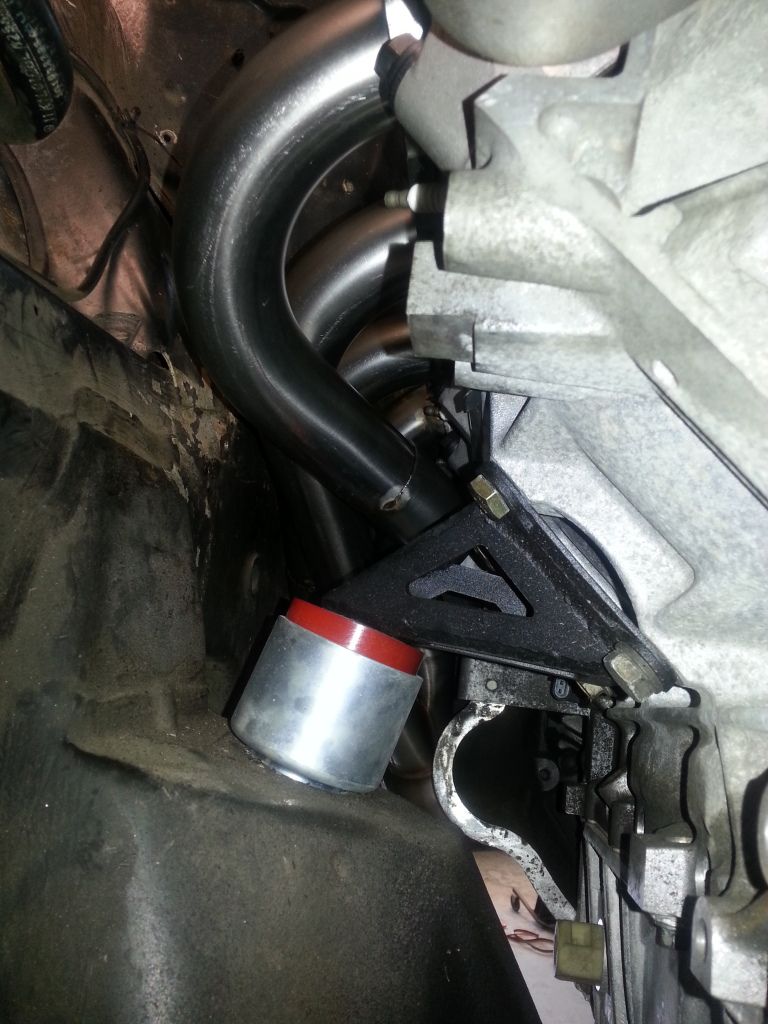
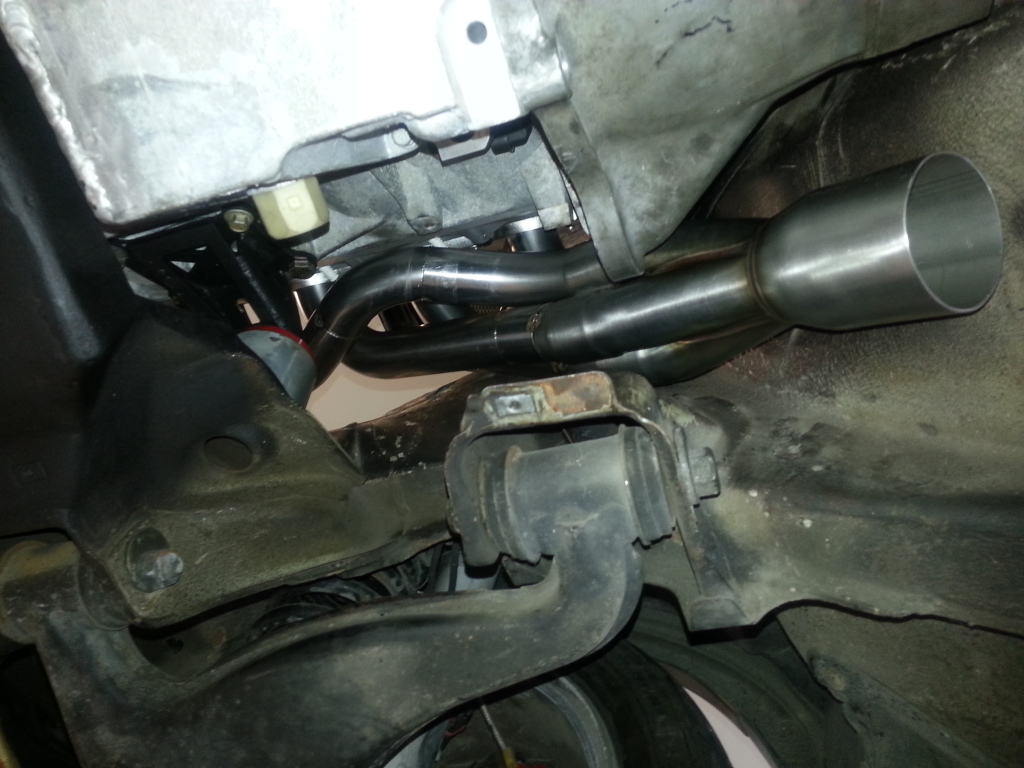
Under the car. The passenger head sits further back in the engine bay b/c the floorboard is pushed back farther on the passenger side to clear the stock exhaust.

Under the car looking towards the front. I should be able to put either v-bands or 3 bolt flanges on the collectors and then go right into a 45� bend and then back into the trans tunnel. I will probably run dual 2.5" tubes back into a 2 into 1 muffler and then 3.5" back to a single hidden tip on the driver's side. it's not ideal, but it will make more enough power, and I really don't have room for anything else.
I got to swing by my buddies shop while I was home. I saw something that you don't see everyday.
Pretty cool. Basically a race with street tires on it.
http://www.youtube.com/watch?v=wekbxaQXz50 I should be going next weekend to finish welding up the header. I will have more pictures then.


3 runners done. I also replaced my old steering column brace with a new one. I bought a bung and a heim from QS components and tacted it in place.

4th runner done. This one isn't quite as nice as the passenger side, but I am still pleased with it with the tight space I was working with.

You can see in this picture on the left hand side, to the left of the bottom left runner, I had to cut a large piece of the rear a-arm mounting feature off. This was where the drag link in the old steering system mounted. I will cover this with a piece of sheet metal next time the motor comes out. There is a piece of cardboard in the hole so I knew how much room I had.

Looking back at the firewall. I have at least .125" of clearance between the header and the steering column. the .125" clearance is right next to engine mount where engine movement should be minimal.

Header installed.

Under the car. The passenger head sits further back in the engine bay b/c the floorboard is pushed back farther on the passenger side to clear the stock exhaust.

Under the car looking towards the front. I should be able to put either v-bands or 3 bolt flanges on the collectors and then go right into a 45� bend and then back into the trans tunnel. I will probably run dual 2.5" tubes back into a 2 into 1 muffler and then 3.5" back to a single hidden tip on the driver's side. it's not ideal, but it will make more enough power, and I really don't have room for anything else.
I got to swing by my buddies shop while I was home. I saw something that you don't see everyday.

Pretty cool. Basically a race with street tires on it.
http://www.youtube.com/watch?v=wekbxaQXz50 I should be going next weekend to finish welding up the header. I will have more pictures then.
10-07-2013, 09:49 AM
#110
On The Tree
Thread Starter
iTrader: (2)
Join Date: Mar 2008
Location: Nashvegas
Posts: 136
Likes: 0
Received 0 Likes
on
0 Posts
Got my headers welded up this weekend. They came out alright. I wish I was a little better at laying uniform beads, but all in all I'm pleased.


I won't have a chance to work on the car for the next couple of weeks. I hope to have much of the exhaust ordered by the end of the month and to start fabbing it in early November.
Clayton


I won't have a chance to work on the car for the next couple of weeks. I hope to have much of the exhaust ordered by the end of the month and to start fabbing it in early November.
Clayton
10-07-2013, 09:49 AM
#111
On The Tree
Thread Starter
iTrader: (2)
Join Date: Mar 2008
Location: Nashvegas
Posts: 136
Likes: 0
Received 0 Likes
on
0 Posts
Got my headers welded up this weekend. They came out alright. I wish I was a little better at laying uniform beads, but all in all I'm pleased.

I won't have a chance to work on the car for the next couple of weeks. I hope to have much of the exhaust ordered by the end of the month and to start fabbing it in early November.
Clayton
I won't have a chance to work on the car for the next couple of weeks. I hope to have much of the exhaust ordered by the end of the month and to start fabbing it in early November.
Clayton
02-05-2014, 07:09 AM
#112
On The Tree
Thread Starter
iTrader: (2)
Join Date: Mar 2008
Location: Nashvegas
Posts: 136
Likes: 0
Received 0 Likes
on
0 Posts
Alright, time for another small update. Since my last post, I have changed jobs and moved again. haha I need to stop that. I'm back in Nashville now and I actually less than 30 mins away from the car for the first time in 2 years. Kinda crazy.
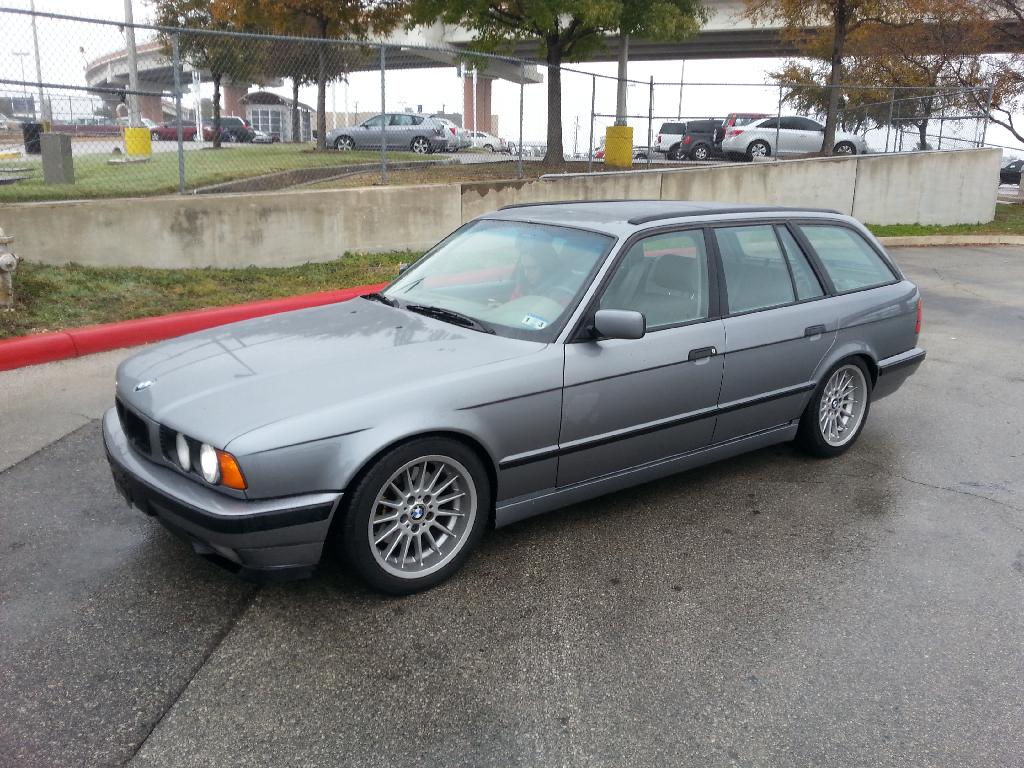
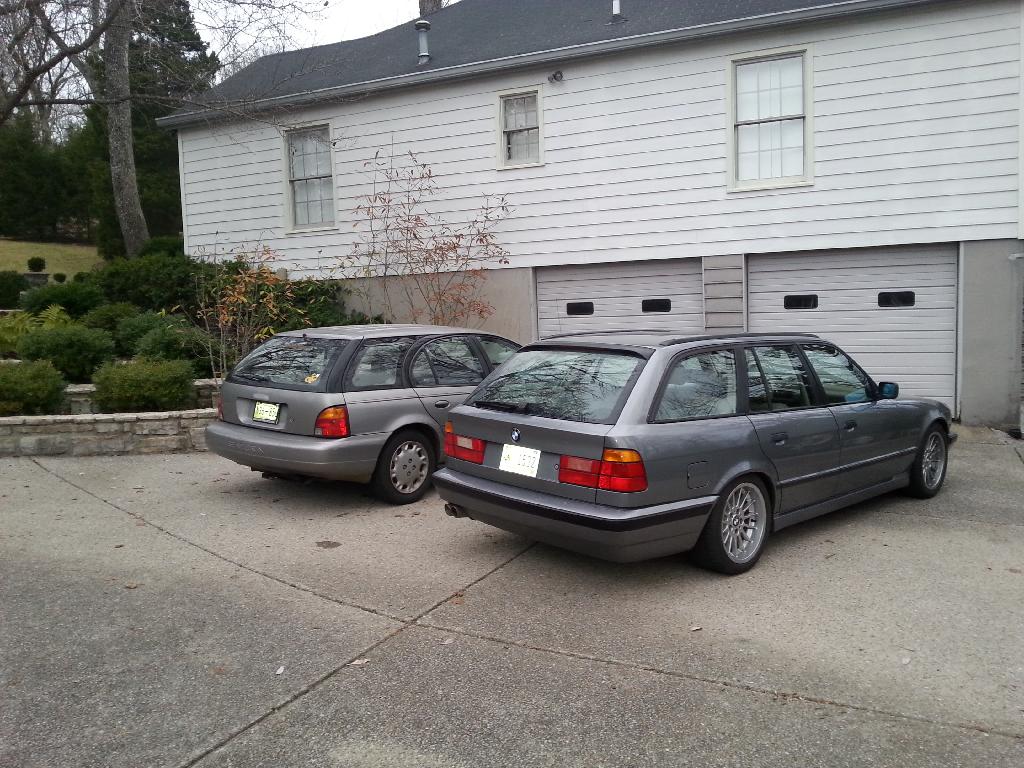
Anyways, also since my last post I bought another car. Oops. Also need to stop doing that. I sold the CTS-V and bought a 1994 540it/6. It's a swapped car that started as a 530it-auto, but now has a 4.0l m60 and a 6 speed.
I got into the shop last night and got my ECU mounted. I used a mount from Binks Fabrication (http://www.pirate4x4.com/forum/misce...ecu-mount.html). It's a pretty nice piece.
ECU Installed

I mounted the ECU in the factory location.
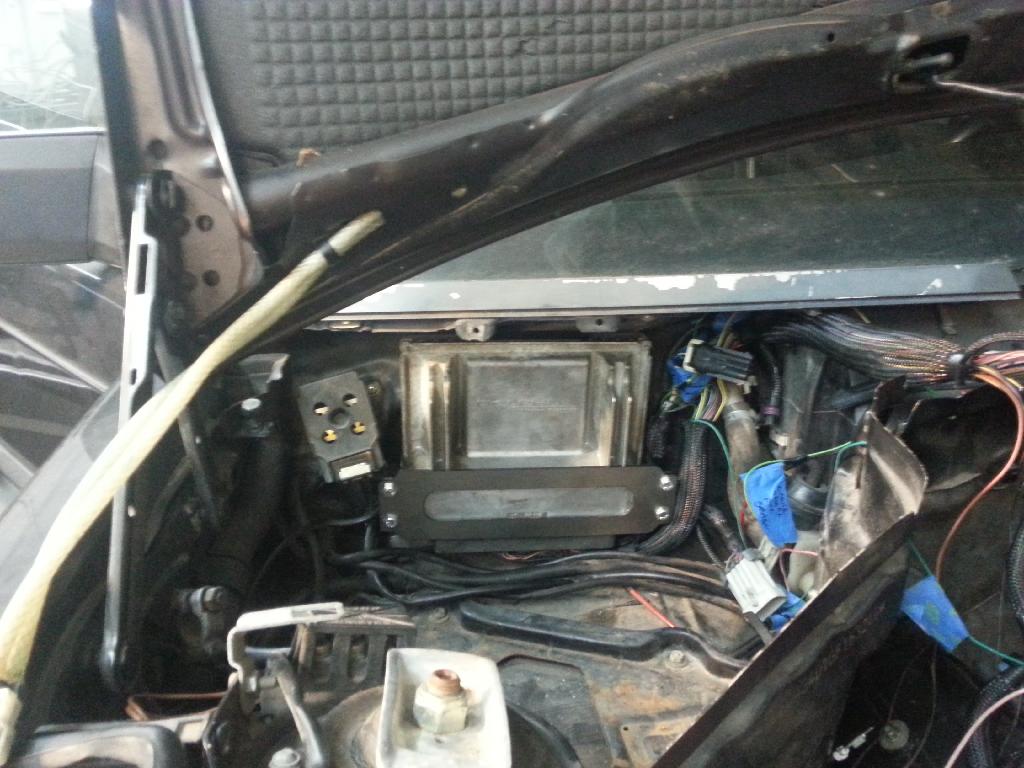
I drilled two holes in the mount and in the firewall. I will rivet the mount to the firewall after I get the mount powdercoated.
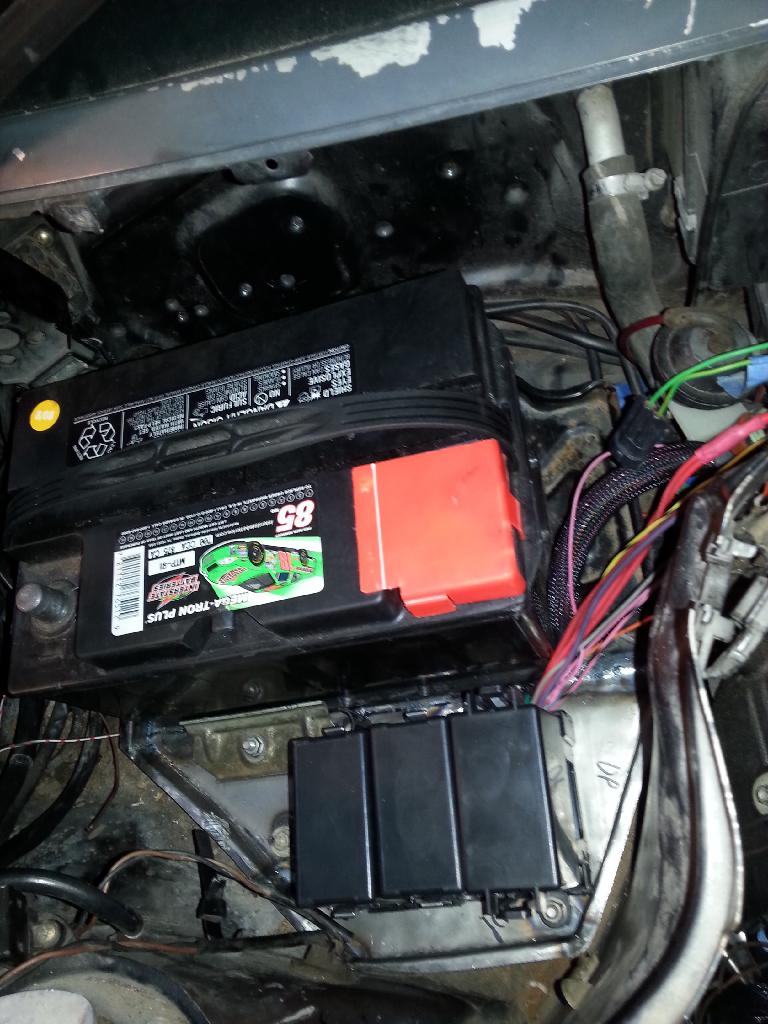
I also rotated the battery try to allow room for the fuse box. Everything should drop in pretty nicely.


I will need to spend some time this weekend doing some metal work on the battery tray to get it finished. I also need to make up a mounting block for the fuse box that will get riveted to the battery compartment floor. I hope to have more updates after this weekend.
Anyways, also since my last post I bought another car. Oops. Also need to stop doing that. I sold the CTS-V and bought a 1994 540it/6. It's a swapped car that started as a 530it-auto, but now has a 4.0l m60 and a 6 speed.


I got into the shop last night and got my ECU mounted. I used a mount from Binks Fabrication (http://www.pirate4x4.com/forum/misce...ecu-mount.html). It's a pretty nice piece.

ECU Installed

I mounted the ECU in the factory location.

I drilled two holes in the mount and in the firewall. I will rivet the mount to the firewall after I get the mount powdercoated.
I also rotated the battery try to allow room for the fuse box. Everything should drop in pretty nicely.


I will need to spend some time this weekend doing some metal work on the battery tray to get it finished. I also need to make up a mounting block for the fuse box that will get riveted to the battery compartment floor. I hope to have more updates after this weekend.
 02-10-2014, 12:25 PM
#114
On The Tree
Thread Starter
iTrader: (2)
Join Date: Mar 2008
Location: Nashvegas
Posts: 136
Likes: 0
Received 0 Likes
on
0 Posts
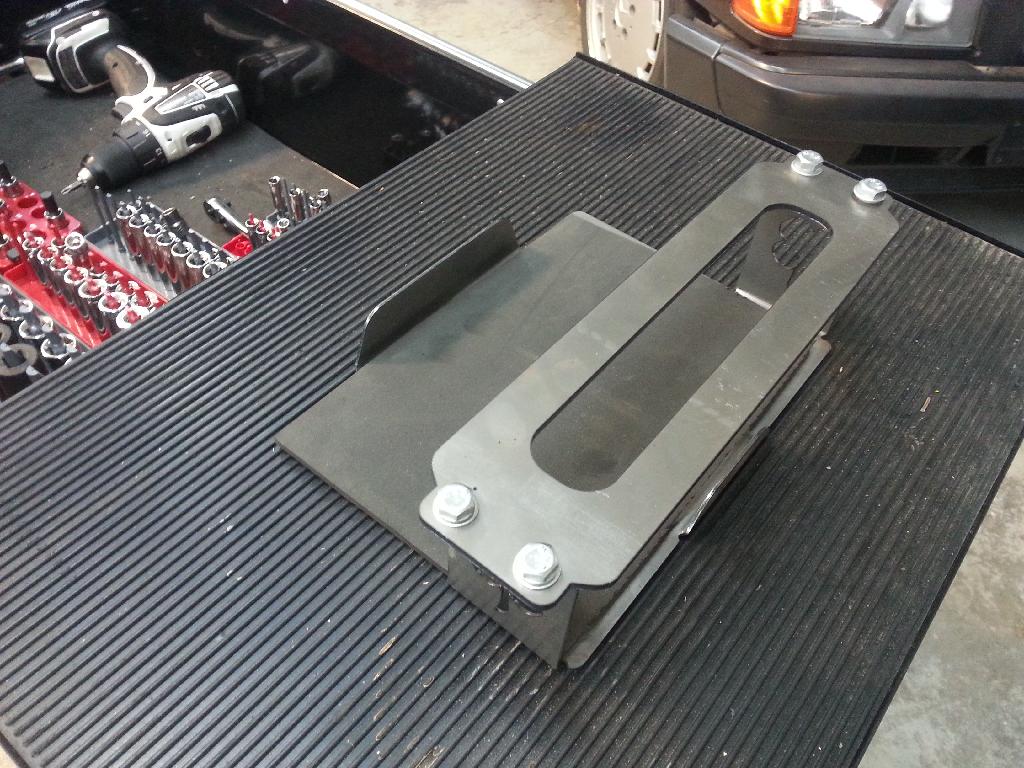
Got some work done on my modified battery tray and fuse box holder. All in all I think it came out pretty good. I will have it powder coated black, which clean it up quite a bit. The tray still mounts on the original studs but has additional studs for the battery hold down and the fuse box.
I used a template to get the shape right
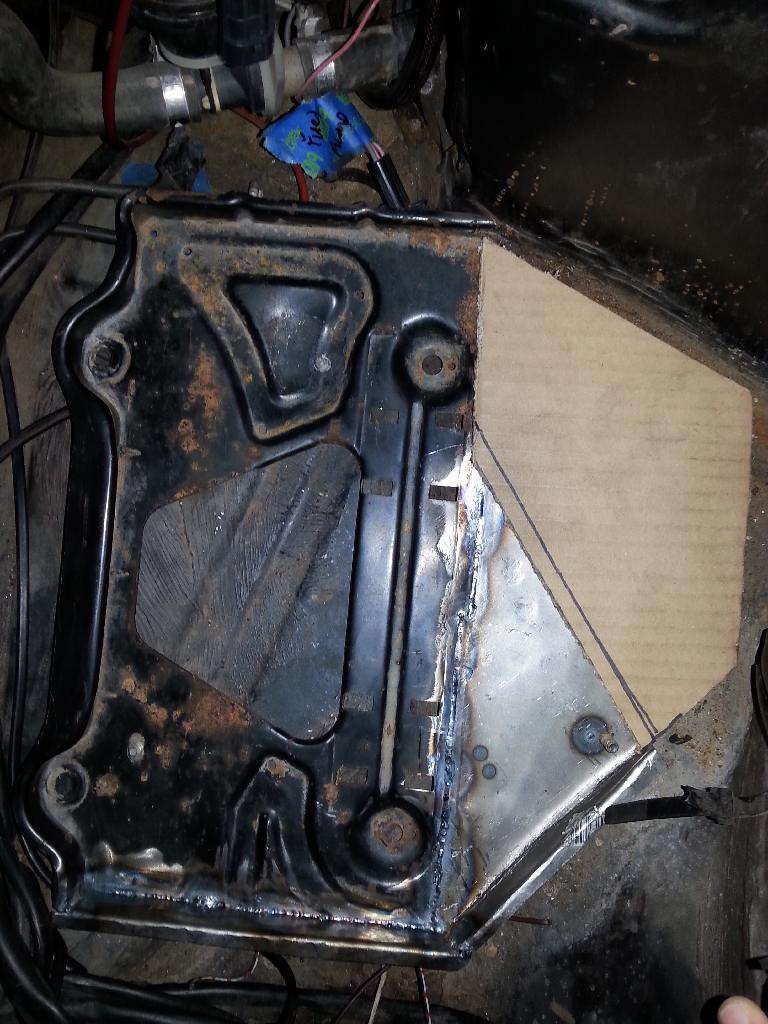
Transferred to metal

Tacked
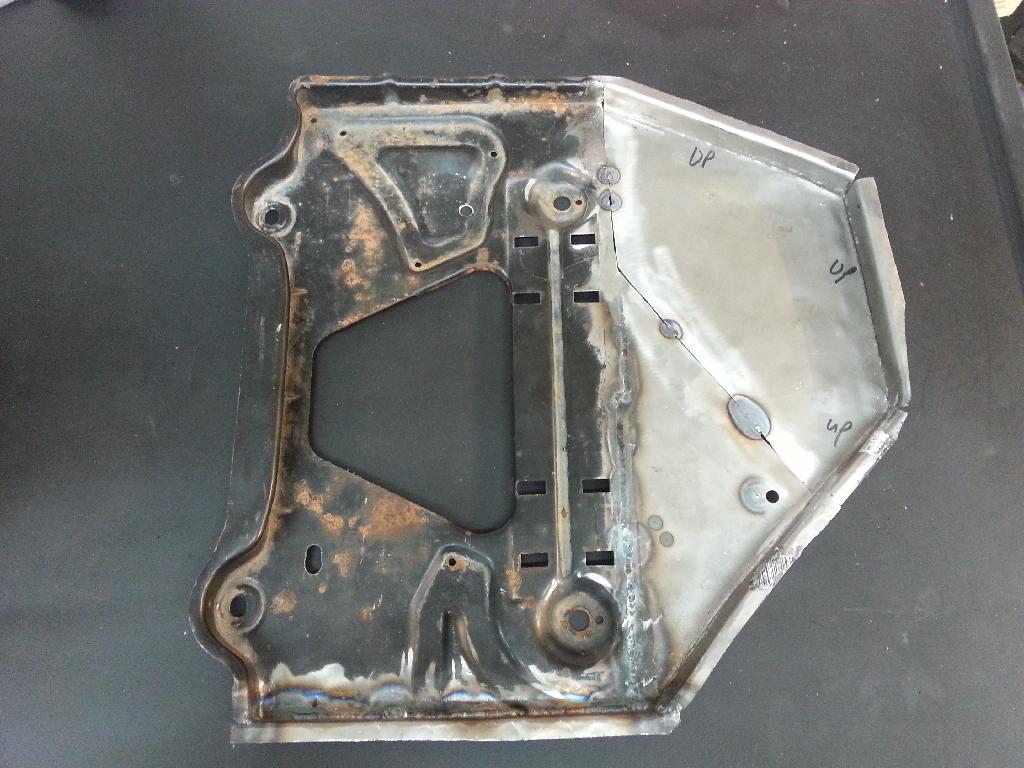
Test Fit
Fully Welded

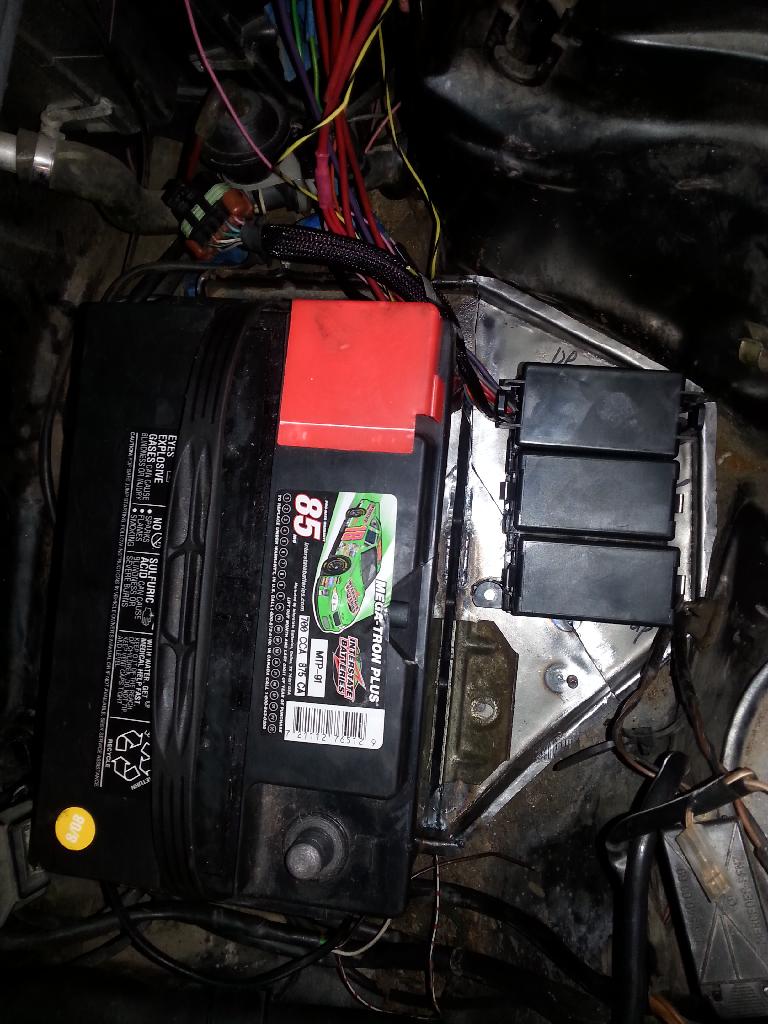
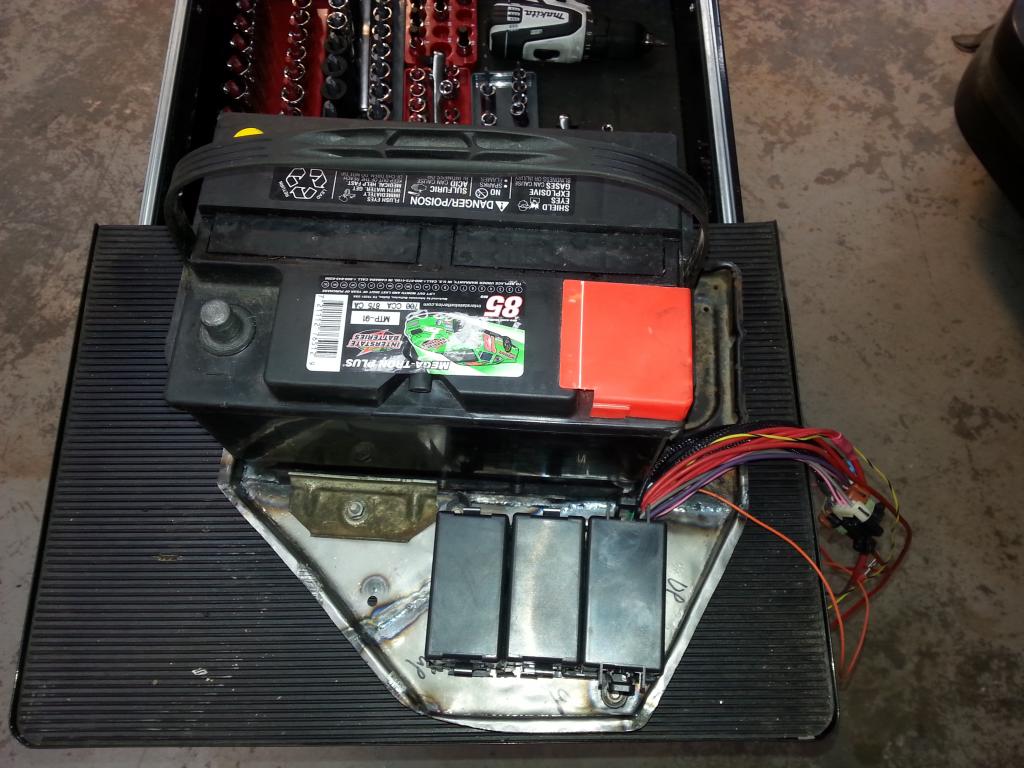
Battery and fuse box installed
Installed in the car
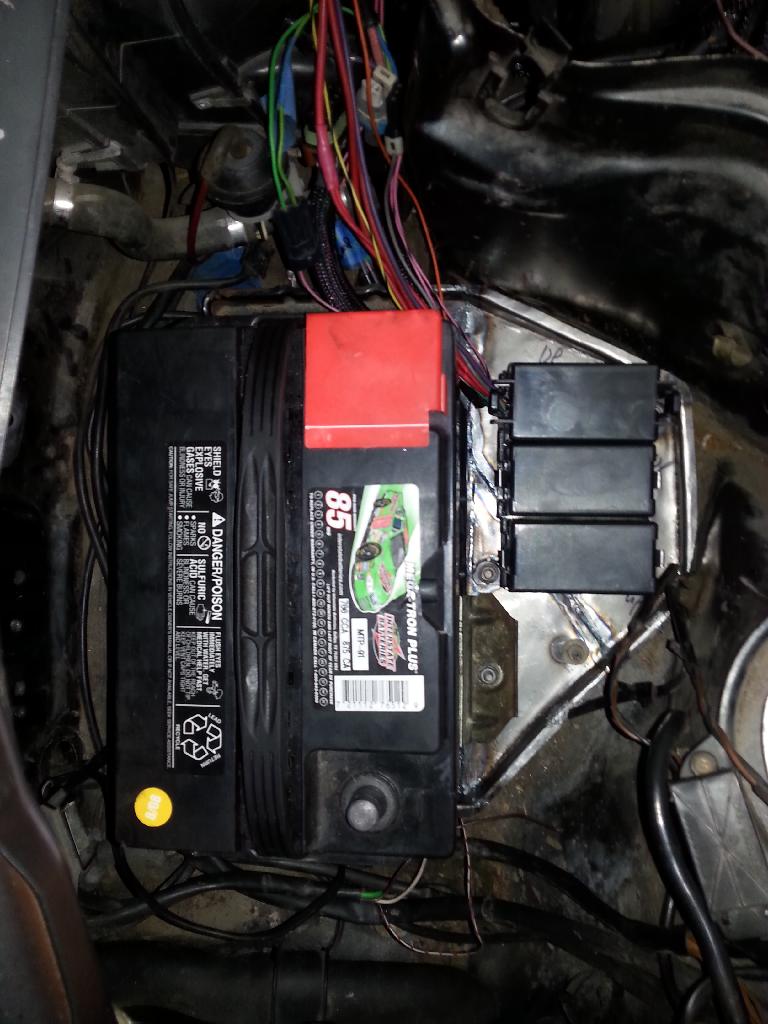
I also figured out where I am going to place to O2 sensor bungs and wired in the O2 sensor connectors. I drilled a hole in the battery compartment to pass the wiring harness through, and I ordered up the last fuel system components this week. Getting closer.
I used a template to get the shape right

Transferred to metal

Tacked

Test Fit

Fully Welded

Battery and fuse box installed

Installed in the car


I also figured out where I am going to place to O2 sensor bungs and wired in the O2 sensor connectors. I drilled a hole in the battery compartment to pass the wiring harness through, and I ordered up the last fuel system components this week. Getting closer.
02-10-2014, 11:55 PM
#115
On The Tree
Thread Starter
iTrader: (2)
Join Date: Mar 2008
Location: Nashvegas
Posts: 136
Likes: 0
Received 0 Likes
on
0 Posts
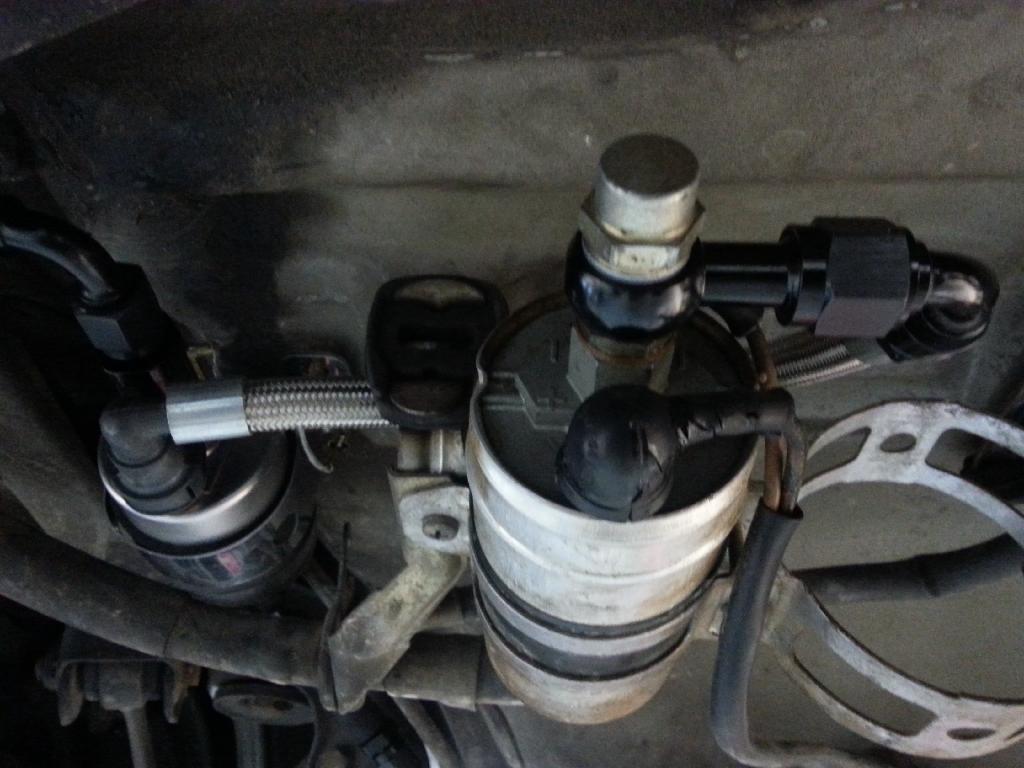
Got my fuel lines figured out.
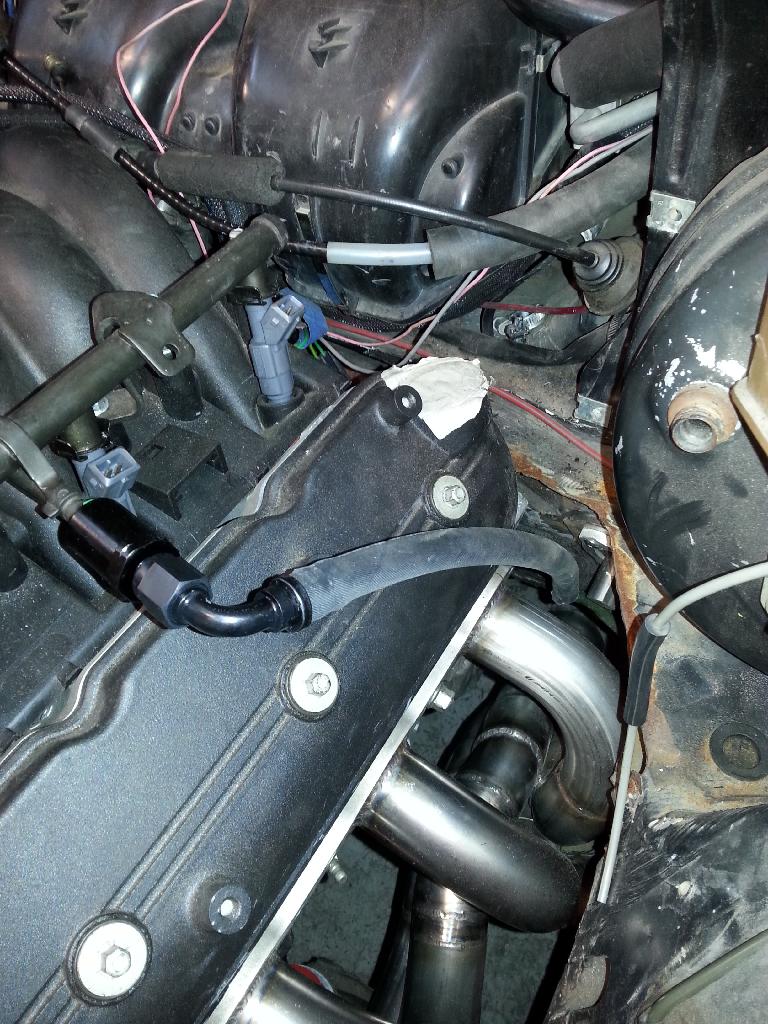
Pump to fuel rail

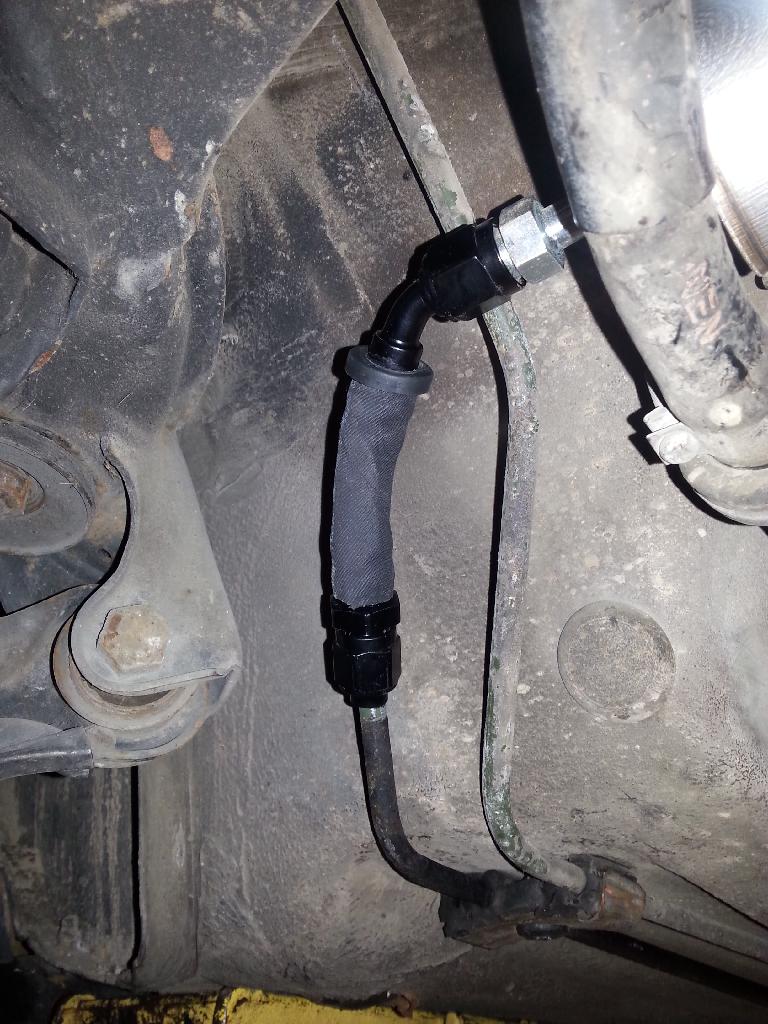
Tank to pump. I need to get a 12mm banjo to -6an male fitting. As you can see, I've removed the stock filter and accumulator. I'll run the factory fuel pump banjo bolt to maintain the check valve in the bolt. For the return I'll run a -6 line back to the tank. Got to go to the junkyard tomorrow to find a fuel line to steal the fitting so I can finish the fuel system in the engine bay.
I might actually be able to fire this thing up pretty soon.

Pump to fuel rail

Tank to pump. I need to get a 12mm banjo to -6an male fitting. As you can see, I've removed the stock filter and accumulator. I'll run the factory fuel pump banjo bolt to maintain the check valve in the bolt. For the return I'll run a -6 line back to the tank. Got to go to the junkyard tomorrow to find a fuel line to steal the fitting so I can finish the fuel system in the engine bay.
I might actually be able to fire this thing up pretty soon.
 02-13-2014, 11:41 PM
#116
On The Tree
Thread Starter
iTrader: (2)
Join Date: Mar 2008
Location: Nashvegas
Posts: 136
Likes: 0
Received 0 Likes
on
0 Posts
Got more fuel lines routed. I'm using all Aeroquip -6 socketless line and -6an fittings.
Factory Mercedes hard line to fuel rail.
Return

I decided to get rid of the stock Mercedes fuel line fittings and go with -6 an tube nuts for the soft line to factory hard line connection points on the feed side of the fuel system. I ordered them from Summit, but bc of the snow in ATL they won't be here until after this weekend. I was hoping to do a test fire this weekend, but it doesn't look like that will happen. Oh well, I should be able to get some more work done this weekend. I figured out all the starter and oil pressure wiring. I also made an adapter from the LS1 oil pressure sender to run the Mercedes oil pressure sensor in the factory GM location. Hopefully I will have more updates after this weekend.
Factory Mercedes hard line to fuel rail.

Return

I decided to get rid of the stock Mercedes fuel line fittings and go with -6 an tube nuts for the soft line to factory hard line connection points on the feed side of the fuel system. I ordered them from Summit, but bc of the snow in ATL they won't be here until after this weekend. I was hoping to do a test fire this weekend, but it doesn't look like that will happen. Oh well, I should be able to get some more work done this weekend. I figured out all the starter and oil pressure wiring. I also made an adapter from the LS1 oil pressure sender to run the Mercedes oil pressure sensor in the factory GM location. Hopefully I will have more updates after this weekend.
02-21-2014, 11:44 PM
#117
On The Tree
Thread Starter
iTrader: (2)
Join Date: Mar 2008
Location: Nashvegas
Posts: 136
Likes: 0
Received 0 Likes
on
0 Posts
Small Update.
I got the fuel lines done. I painted the factory hard line. All I have left to do is seal off the factory line that came off the pump feed and went to the accumulator.
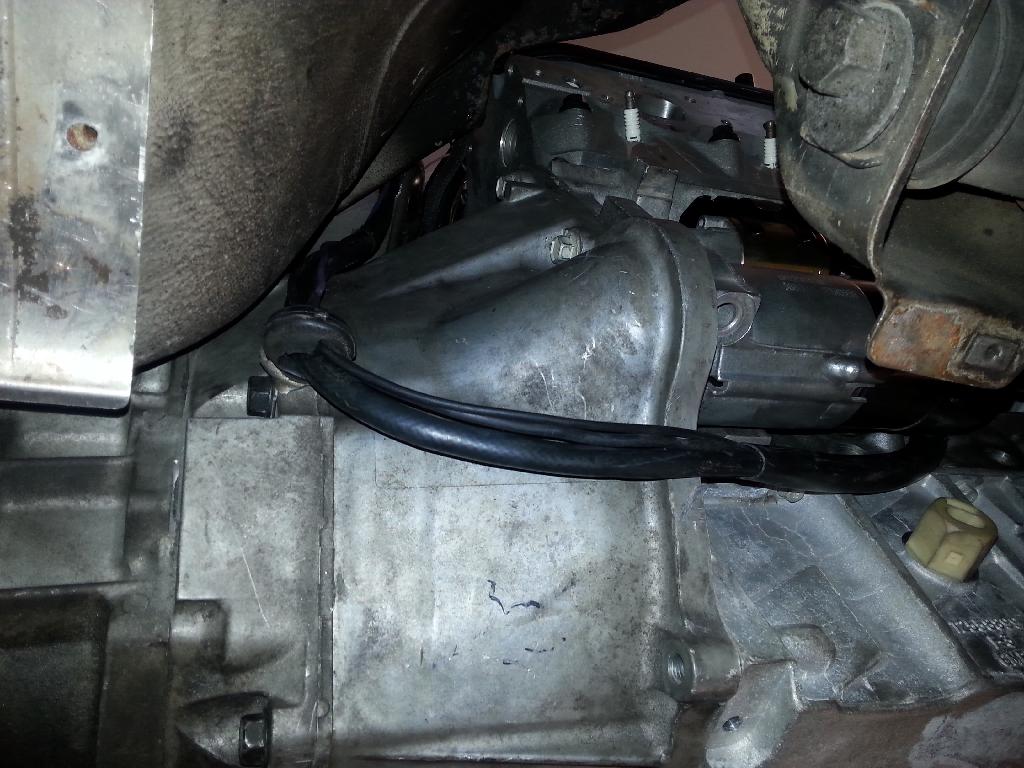
Here are some shots of the starter wiring. I connected all the wiring and actually heard the starter turn over for the first time in over 3 years tonight. Pretty awesome. I already ordered some heat sleaving that I will be using on this wiring. I also plan on making a small heat shield.

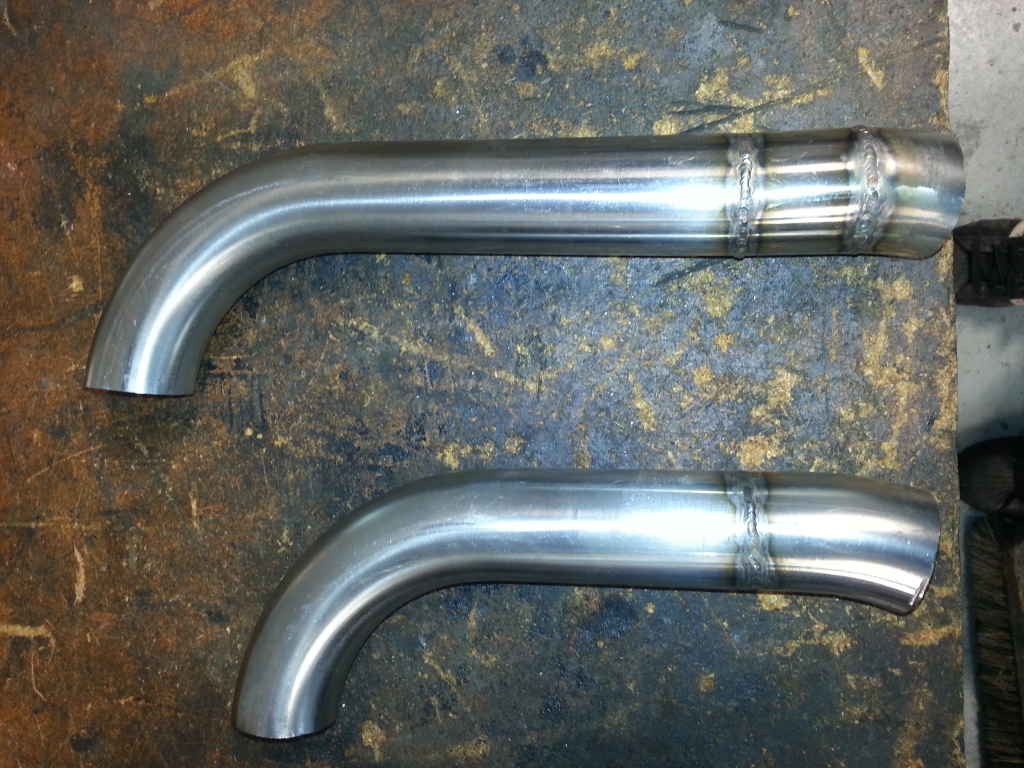
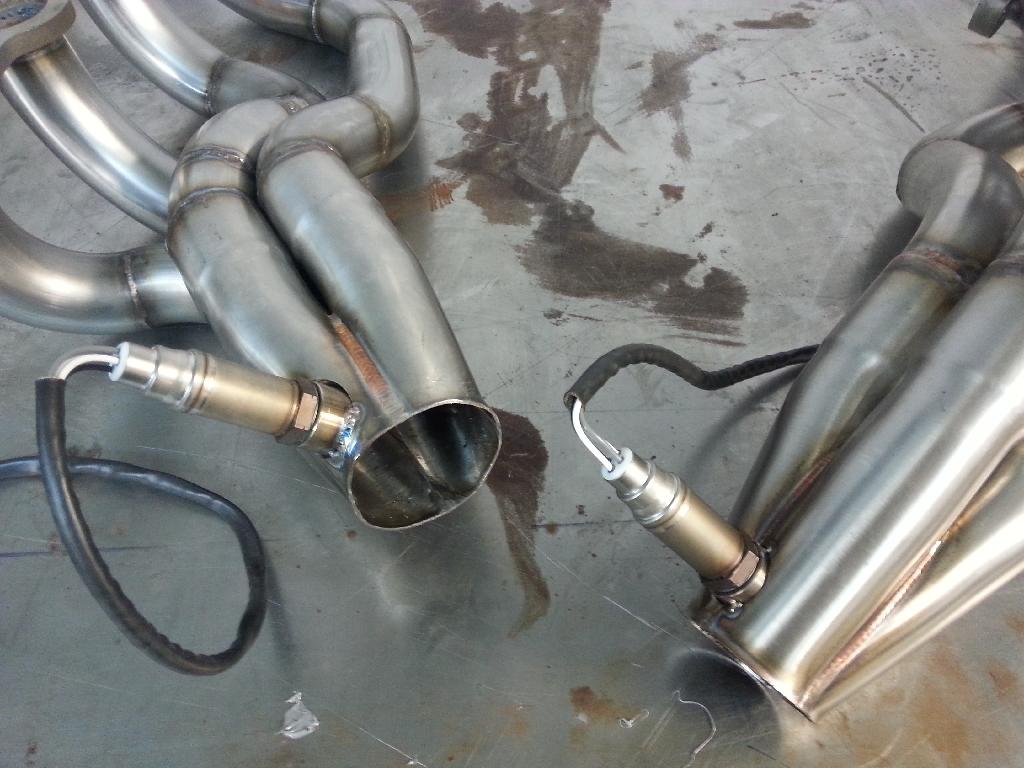
I also got my O2 bungs tacted in. Confirmed that you can uninstall the sensor with the headers in the car.
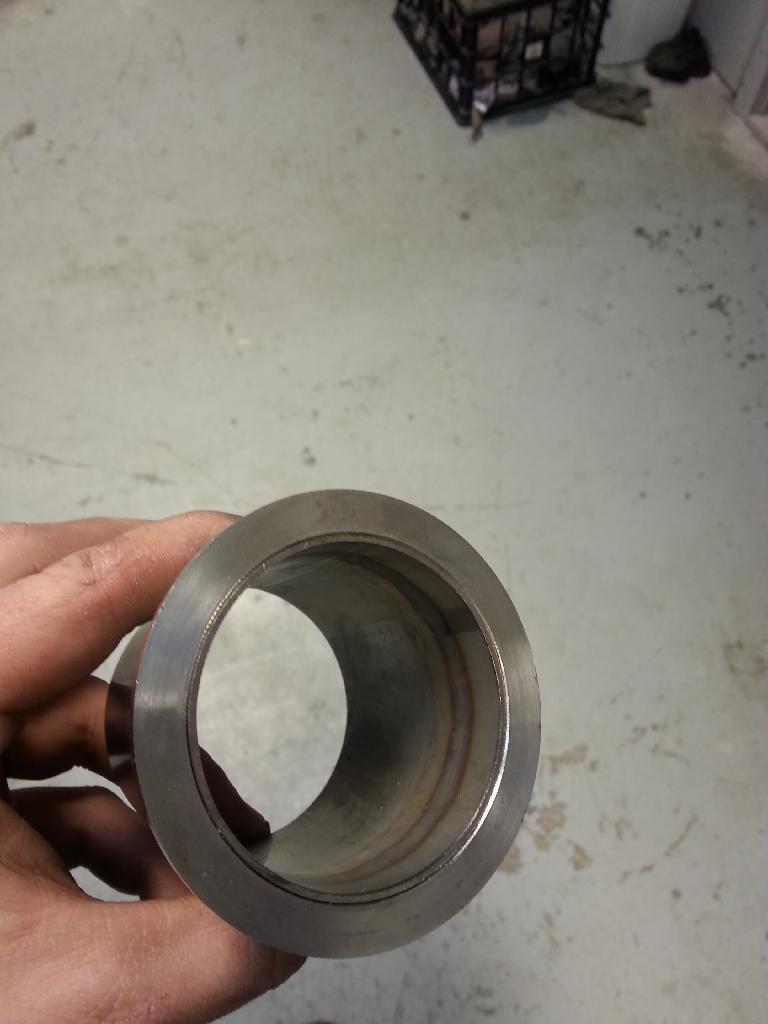
Up next is modifying the Columbia river V-Band flanges I bought. They didn't come with an alignment ring, so I am going to try and machine one in. We will see how that goes.
I hope to have some more updates after the weekend.
I got the fuel lines done. I painted the factory hard line. All I have left to do is seal off the factory line that came off the pump feed and went to the accumulator.


Here are some shots of the starter wiring. I connected all the wiring and actually heard the starter turn over for the first time in over 3 years tonight. Pretty awesome. I already ordered some heat sleaving that I will be using on this wiring. I also plan on making a small heat shield.


I also got my O2 bungs tacted in. Confirmed that you can uninstall the sensor with the headers in the car.

Up next is modifying the Columbia river V-Band flanges I bought. They didn't come with an alignment ring, so I am going to try and machine one in. We will see how that goes.

I hope to have some more updates after the weekend.
 .
02-24-2014, 11:06 PM
.
02-24-2014, 11:06 PM
#119
On The Tree
Thread Starter
iTrader: (2)
Join Date: Mar 2008
Location: Nashvegas
Posts: 136
Likes: 0
Received 0 Likes
on
0 Posts
Well, I ran into some trouble today. I'm hoping someone can give be some advice. I think that I fried my pcm. I got all my wiring done last night and I went to flash the pcm toda,y but I couldn't connect to the pcm. Hp tuners would only say "can't locate vcm." I checked that I have 12v power and ground at the obdii plug and that pin 2 on the obdii plug is connected to the blue pin 58 on the pcm connector. When I check the voltage across the serial pin with the key in the on position, it fluctuates between 25-300mV. I have power and ground to the pcm. I did check the mil pin (red 46) and there is no continuity to ground. I think that this should be a grounded pin with the key in the on position I'm order to light up the cel.
When I first went to flash the pcm I hooked the battery charger up to the car and accidentally put it on the 40amp setting. I had the pcm power fused with a 10amp fuse. The fuse blew immediately. I wonder if that killed the pcm. Does anyone know of any other way to check the pcm? Thanks
Clayton
When I first went to flash the pcm I hooked the battery charger up to the car and accidentally put it on the 40amp setting. I had the pcm power fused with a 10amp fuse. The fuse blew immediately. I wonder if that killed the pcm. Does anyone know of any other way to check the pcm? Thanks
Clayton