

LS1 350z Drift Build 'Nuff Said'


 08-12-2012, 02:11 PM
#184
Launching!
Thread Starter

Join Date: Oct 2009
Posts: 218
Likes: 0
Received 0 Likes
on
0 Posts

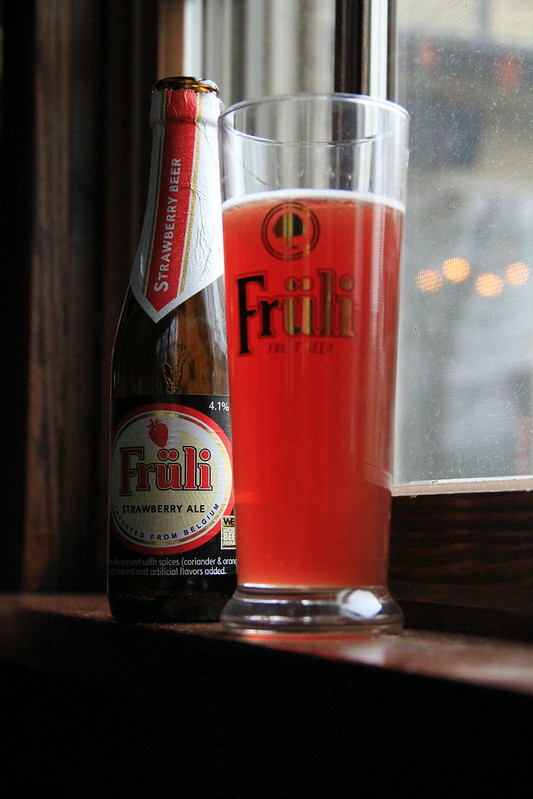
Okay lets get this party started shall we. I forgot to take a pic of a beer this week but I borrowed this pic from Idrinkgoodbeer.com (which everyone should go check them out). This beer has just hit the US and I am dieing to try it out. Its called Fruli, it is a Belgian fruit beer - a unique blend of wheat beer and strawberry juice that compliment one another, giving you a flavorful, refreshing, and drinkable beer perfect for those summer days.
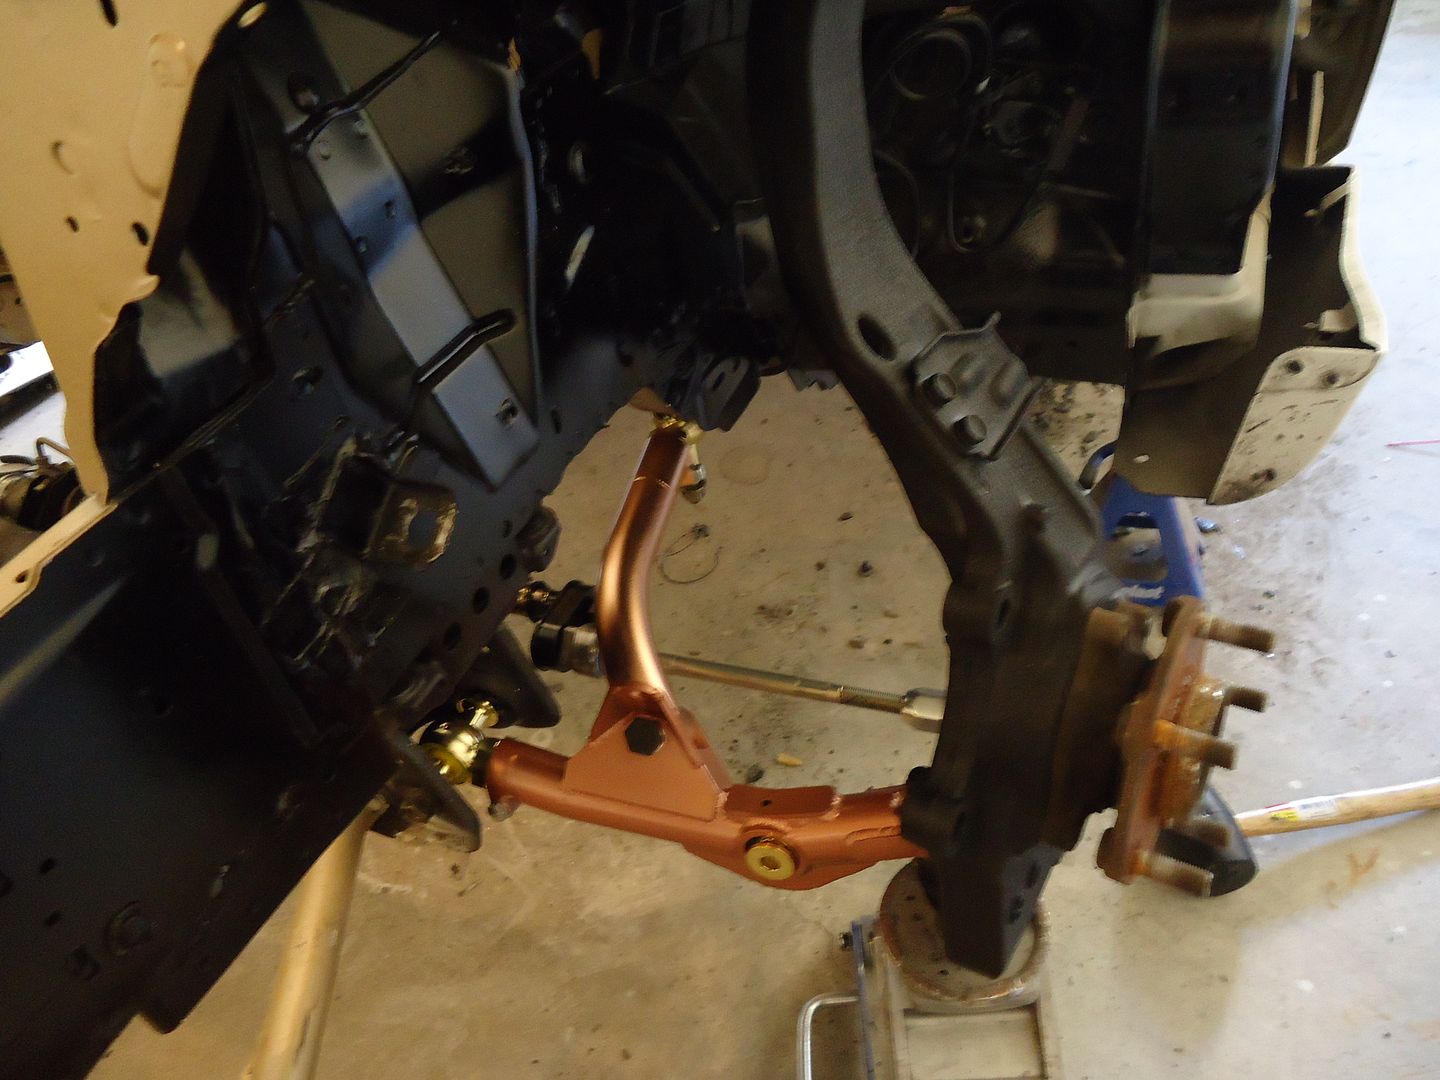
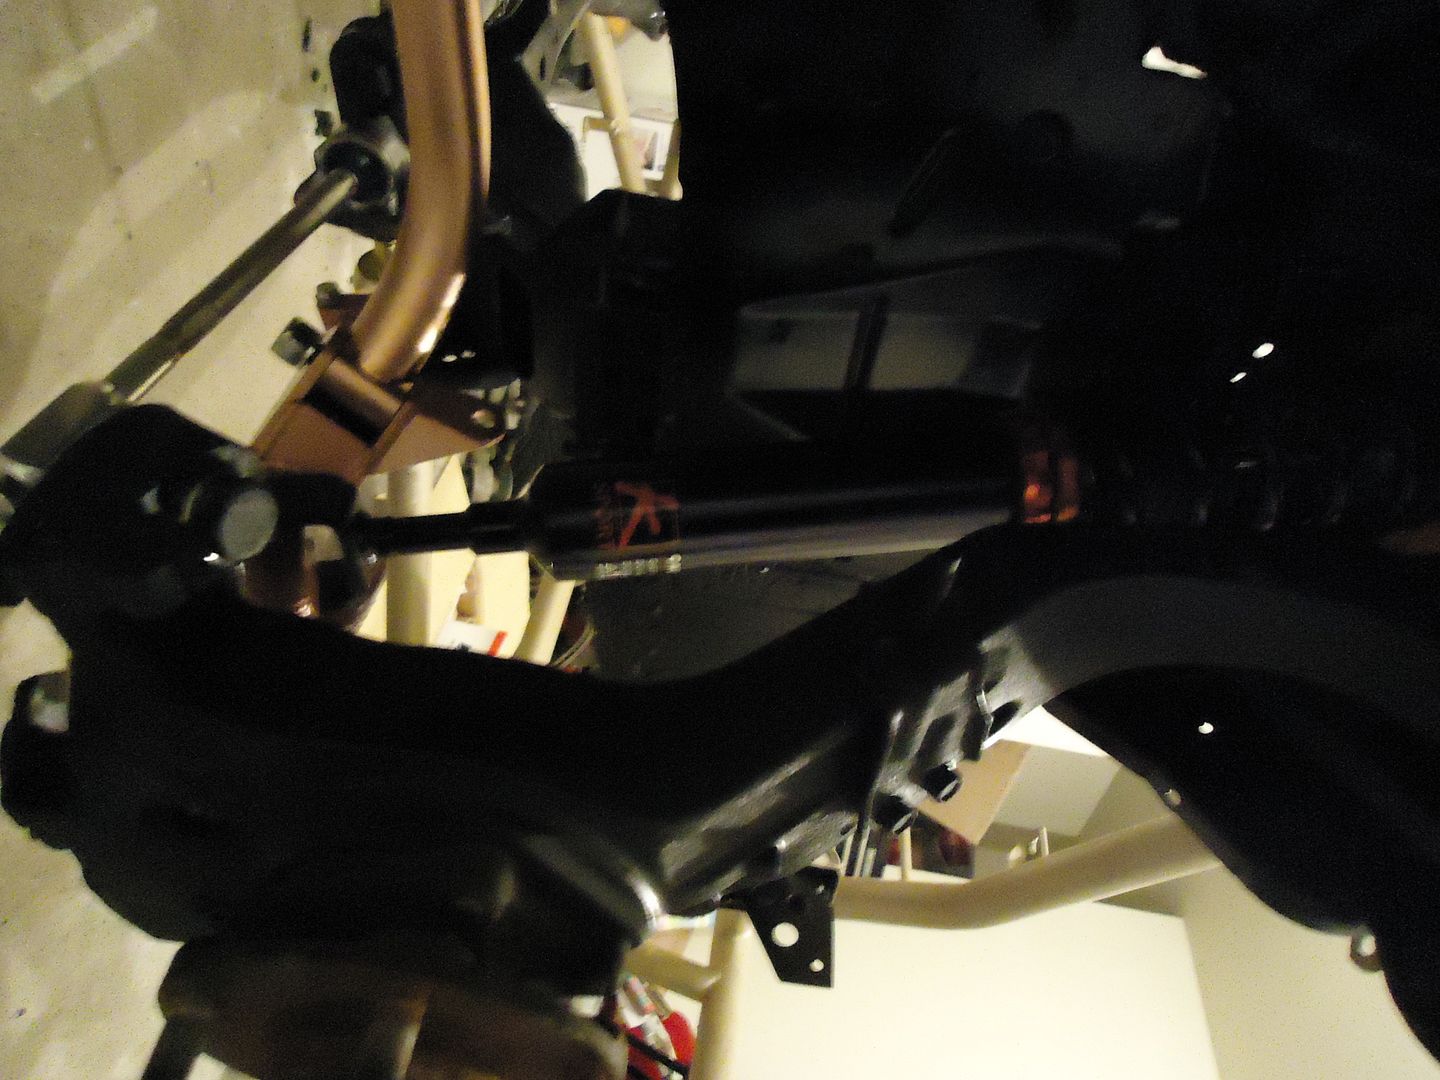
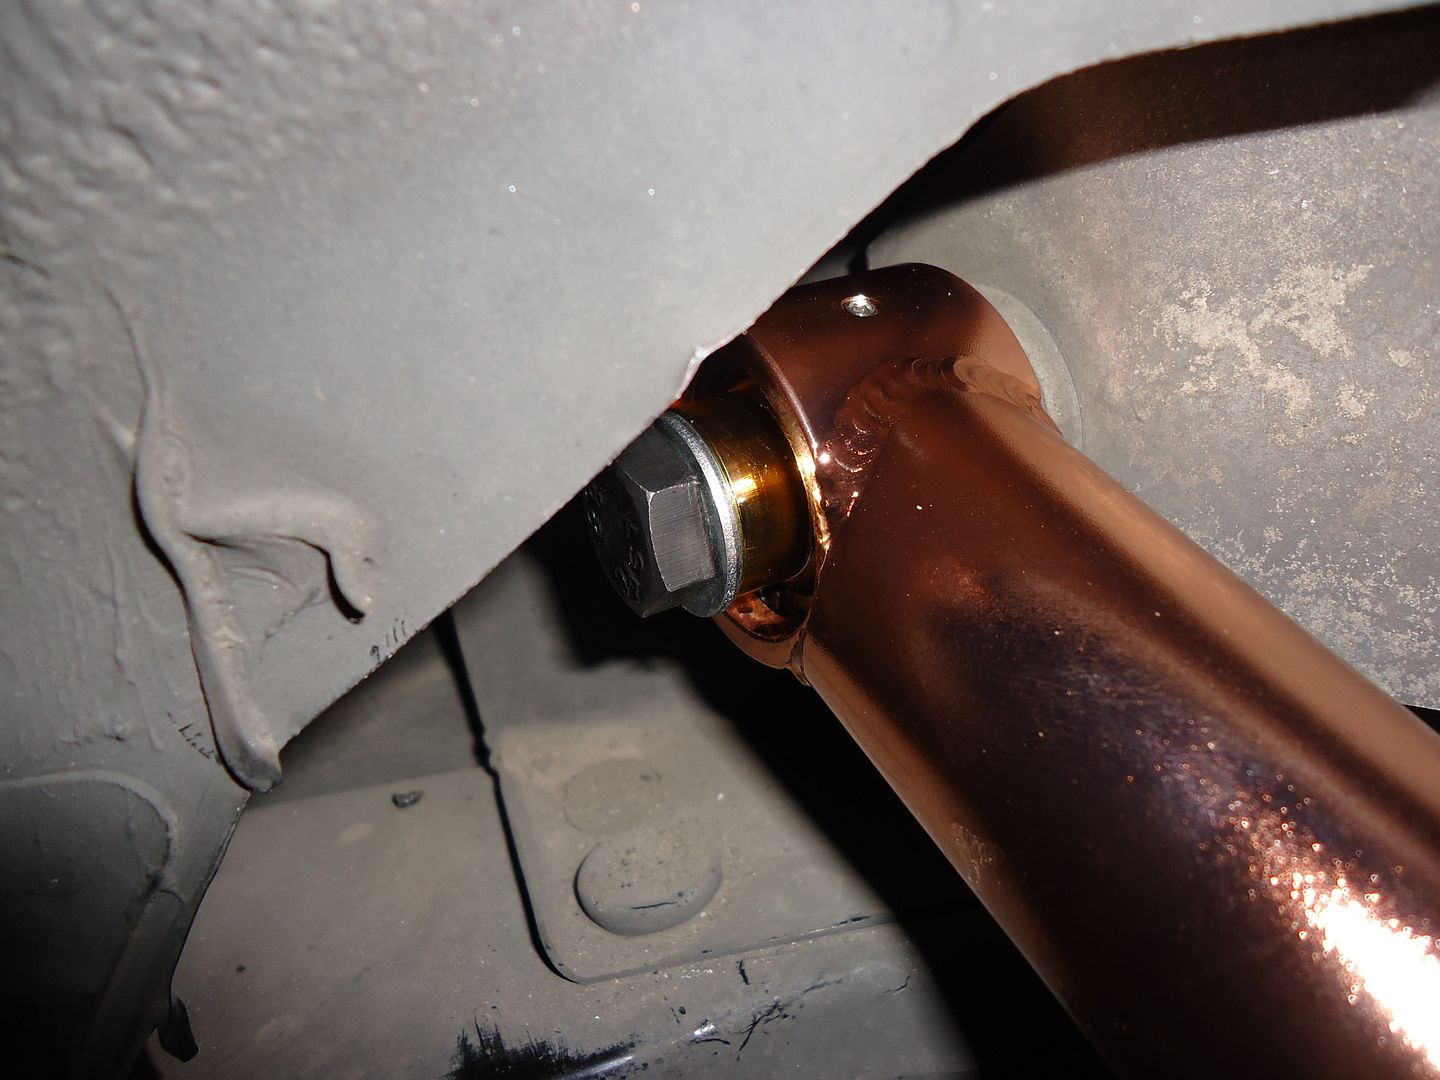
So first up is the install of my SAK (Super Angle kit) by Part Shop Max.
This thing is so freaking sexy... The quality of this thing is really good,and the best part is if something breaks they can replace it for you. :thumbup:
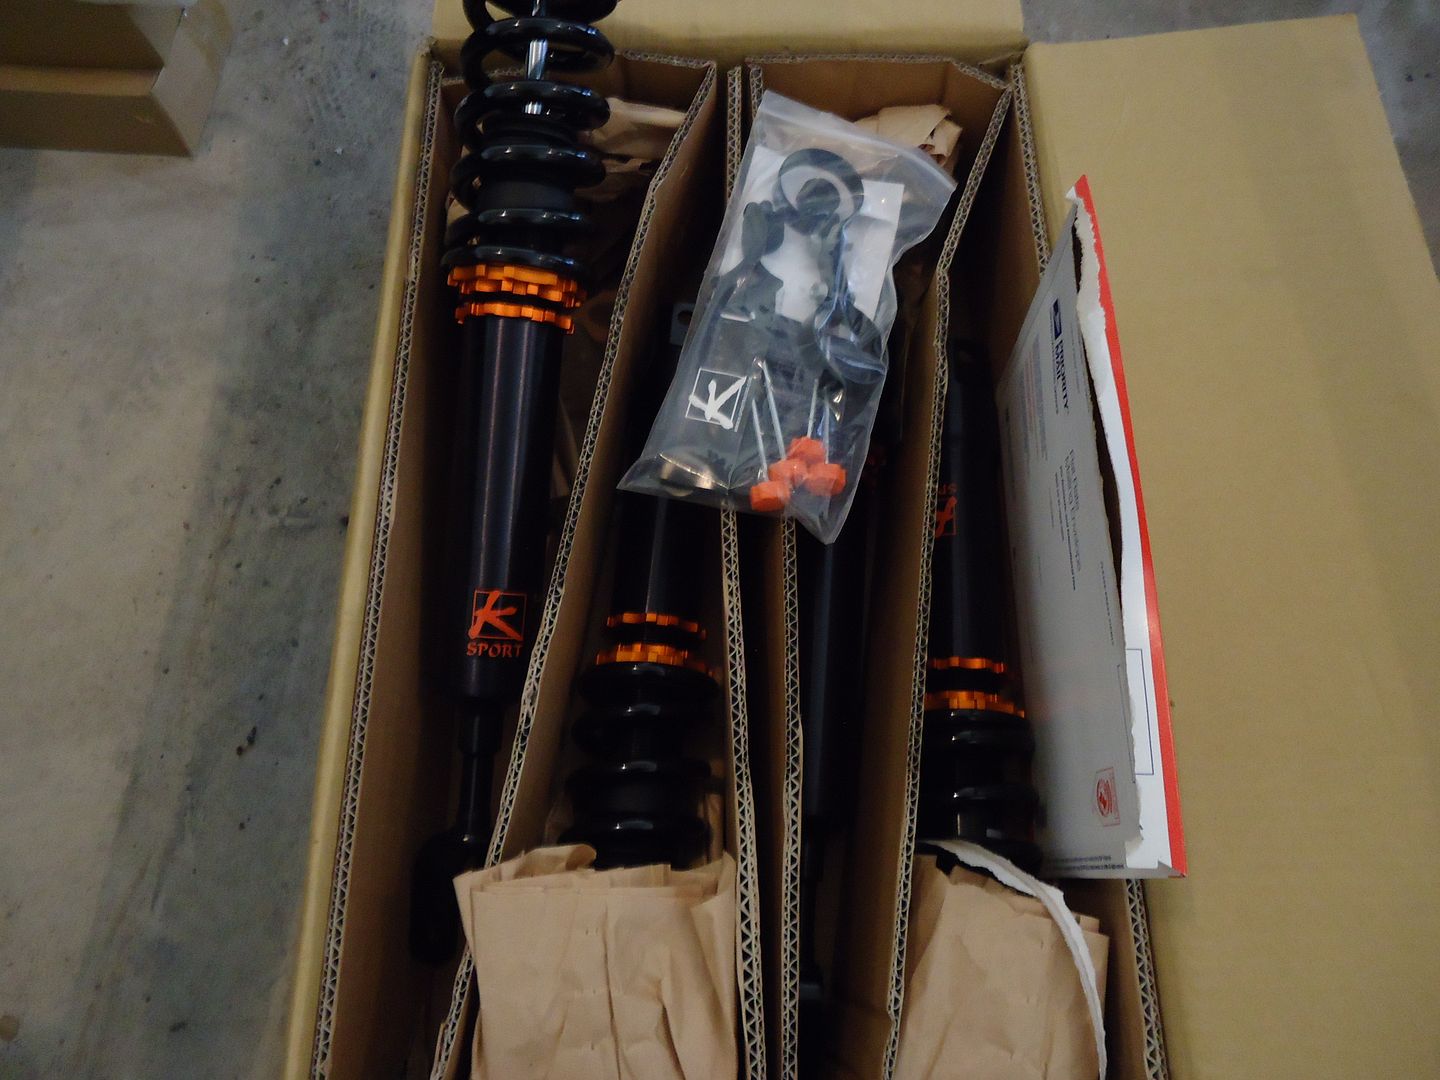
I paired that up with some K-Sport Slide Kontrol suspension. Which will give me the support I need to get the job done at the track.
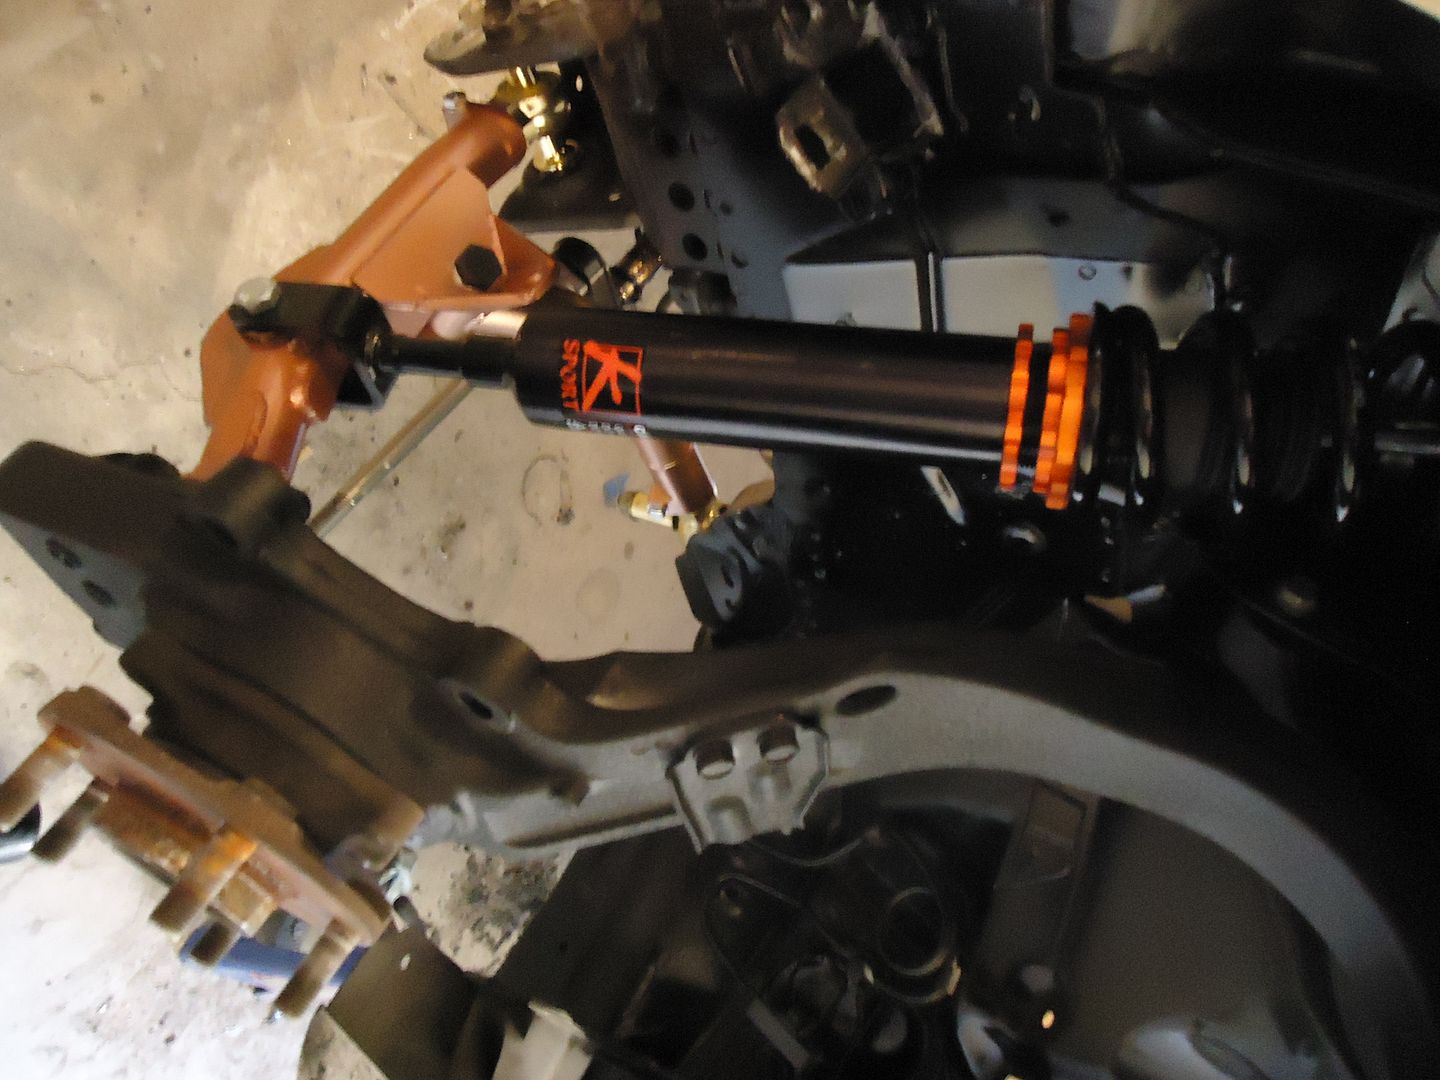
Install is short, quick and simple. Parts look good together.

36 levels of damping adjustment allow you to fine-tune the ride to your handling and comfort needs
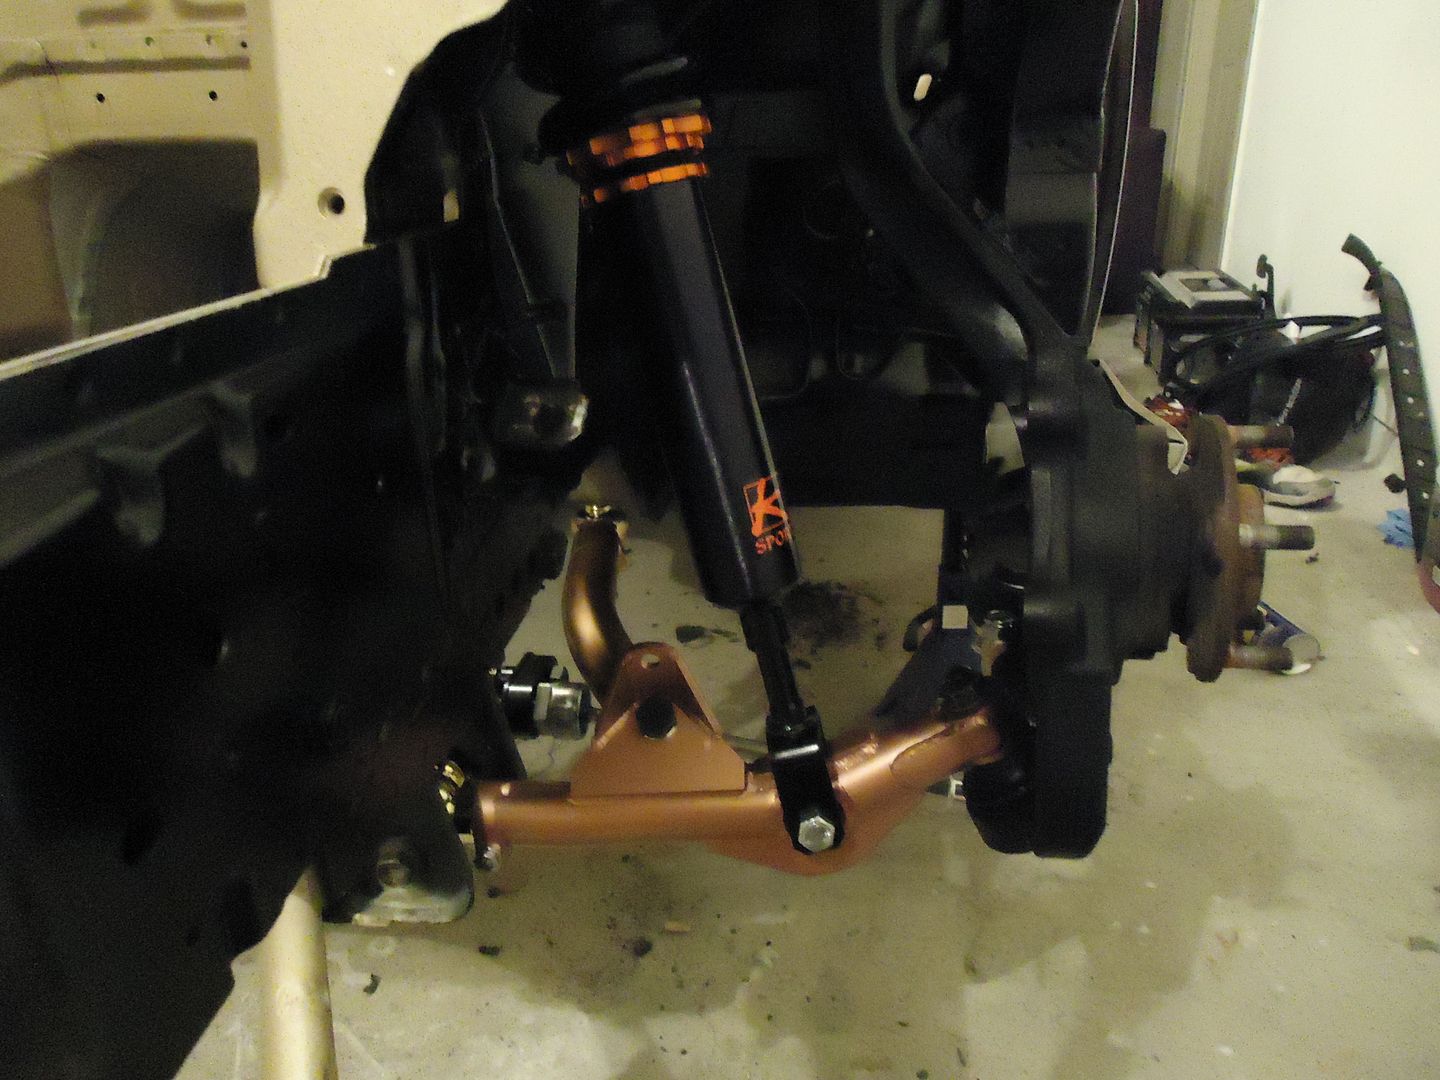
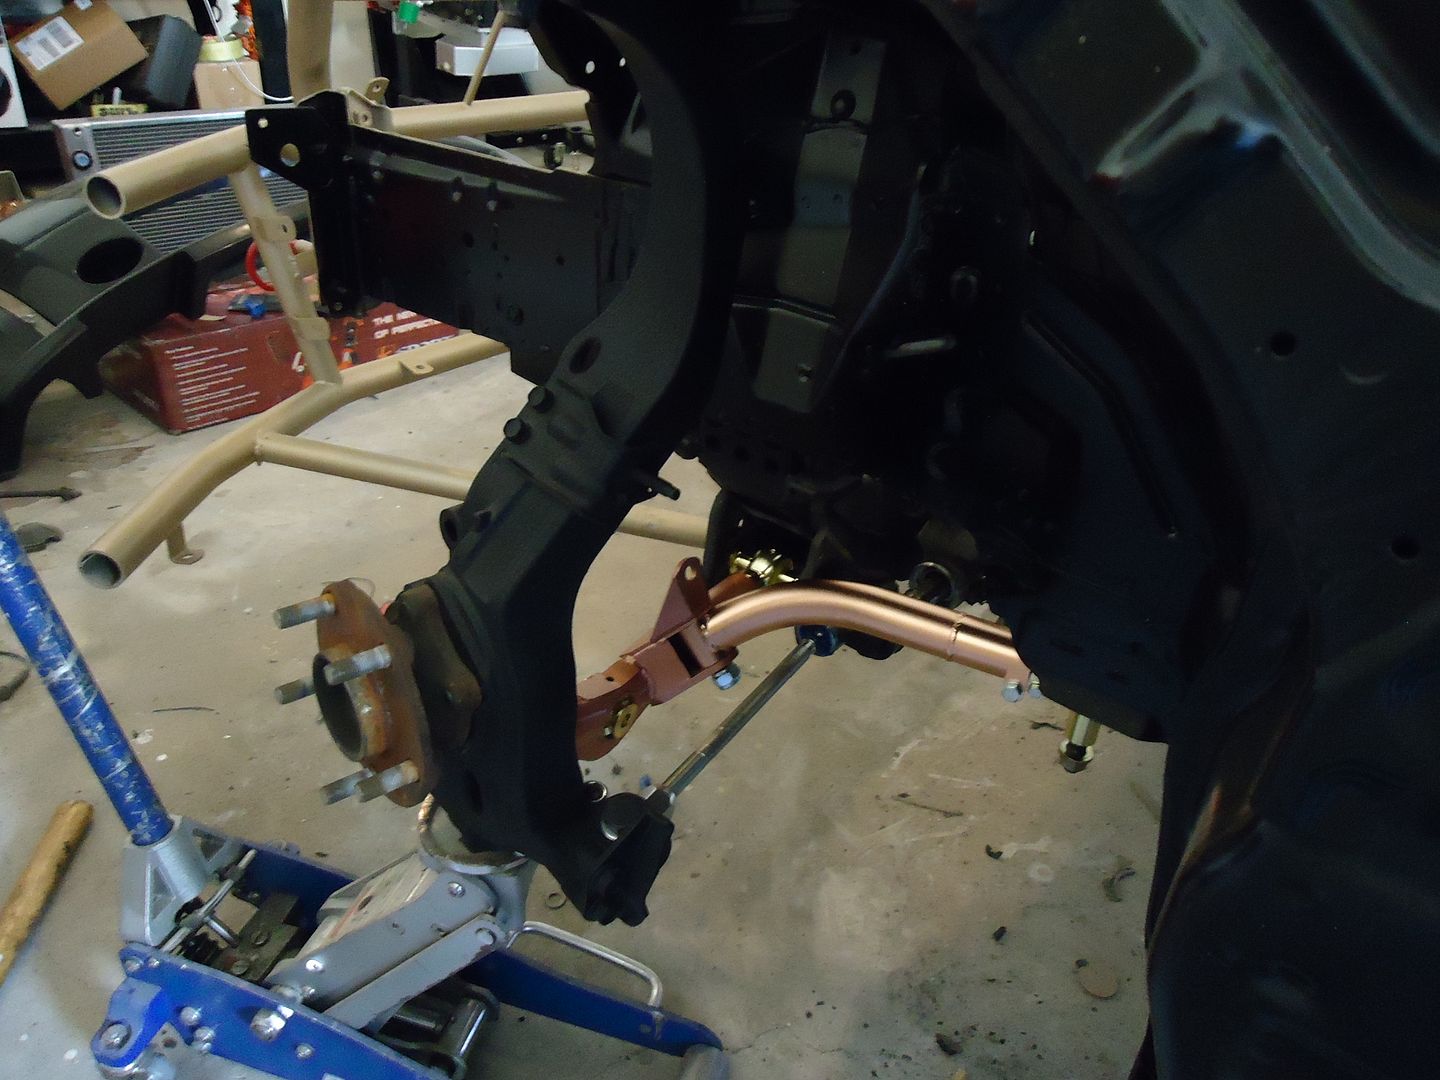
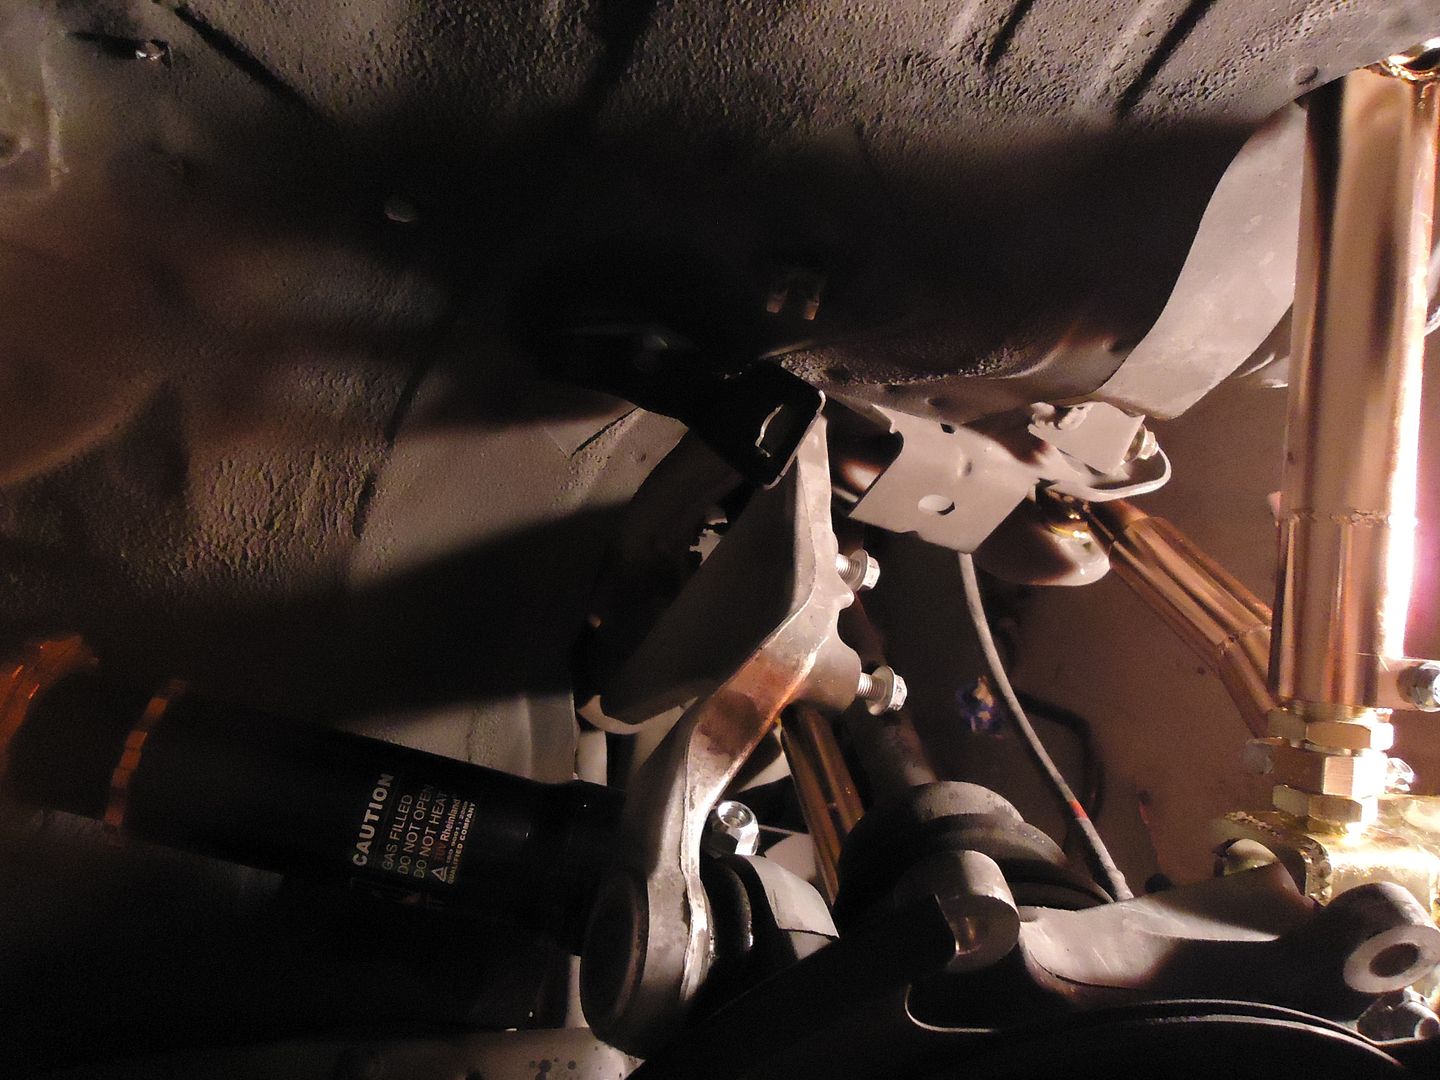
A better angle of the suspension set up I will be running. All is there except the sway bars that I am still waiting on. Its funny how clean and simple every thing looks now compared to stock.
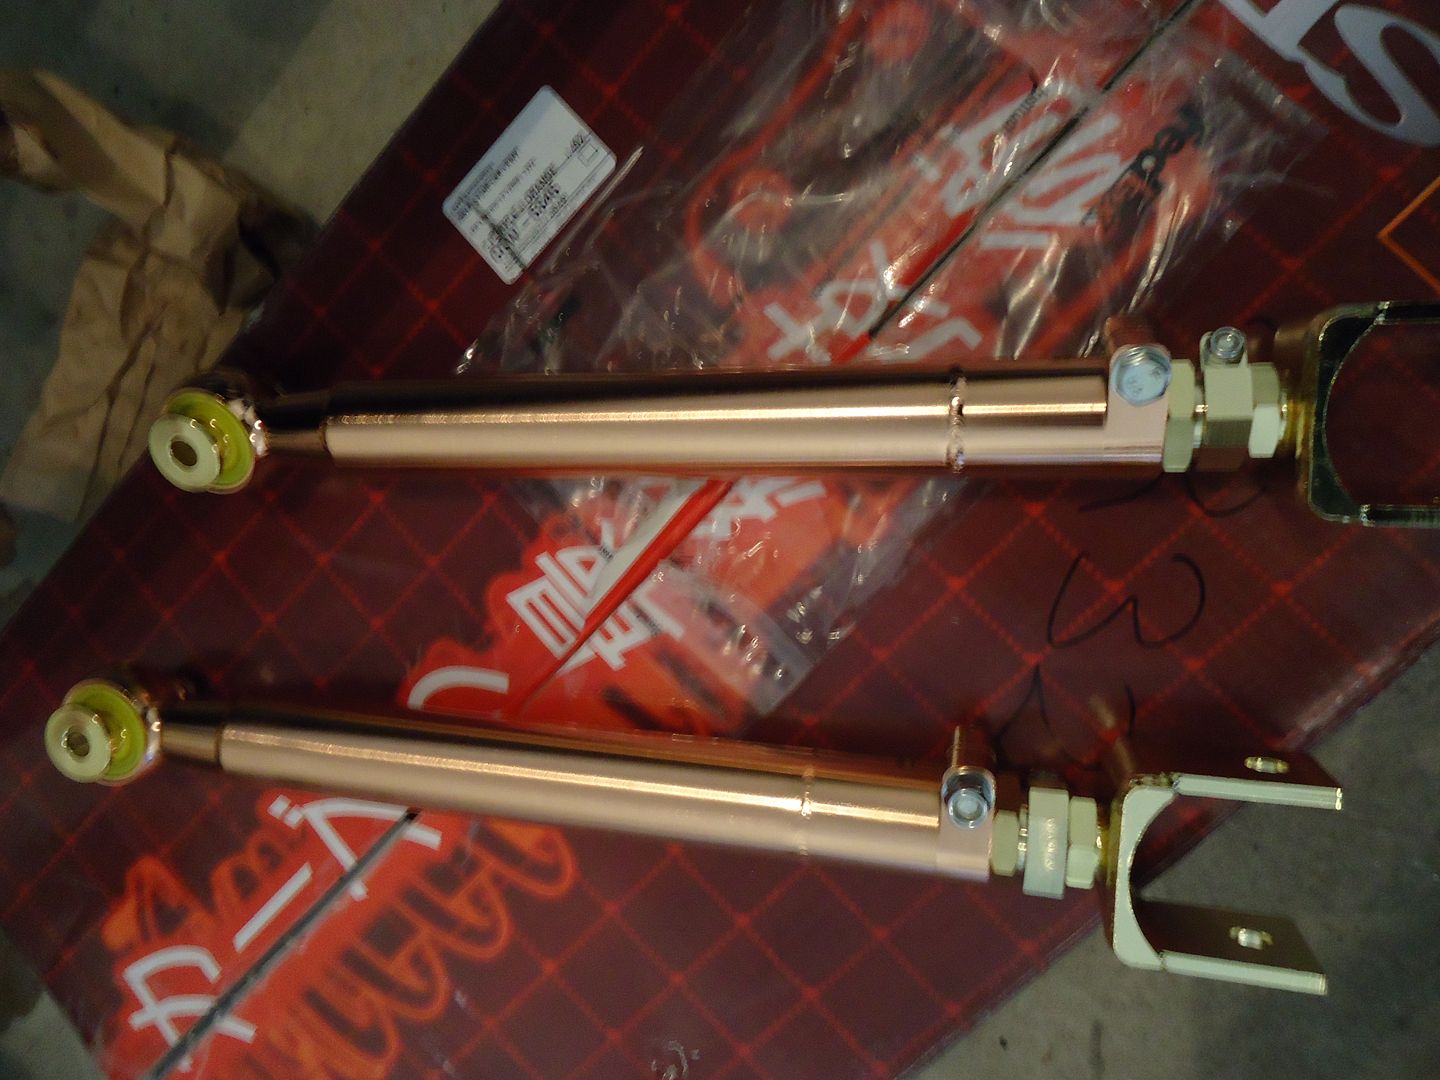
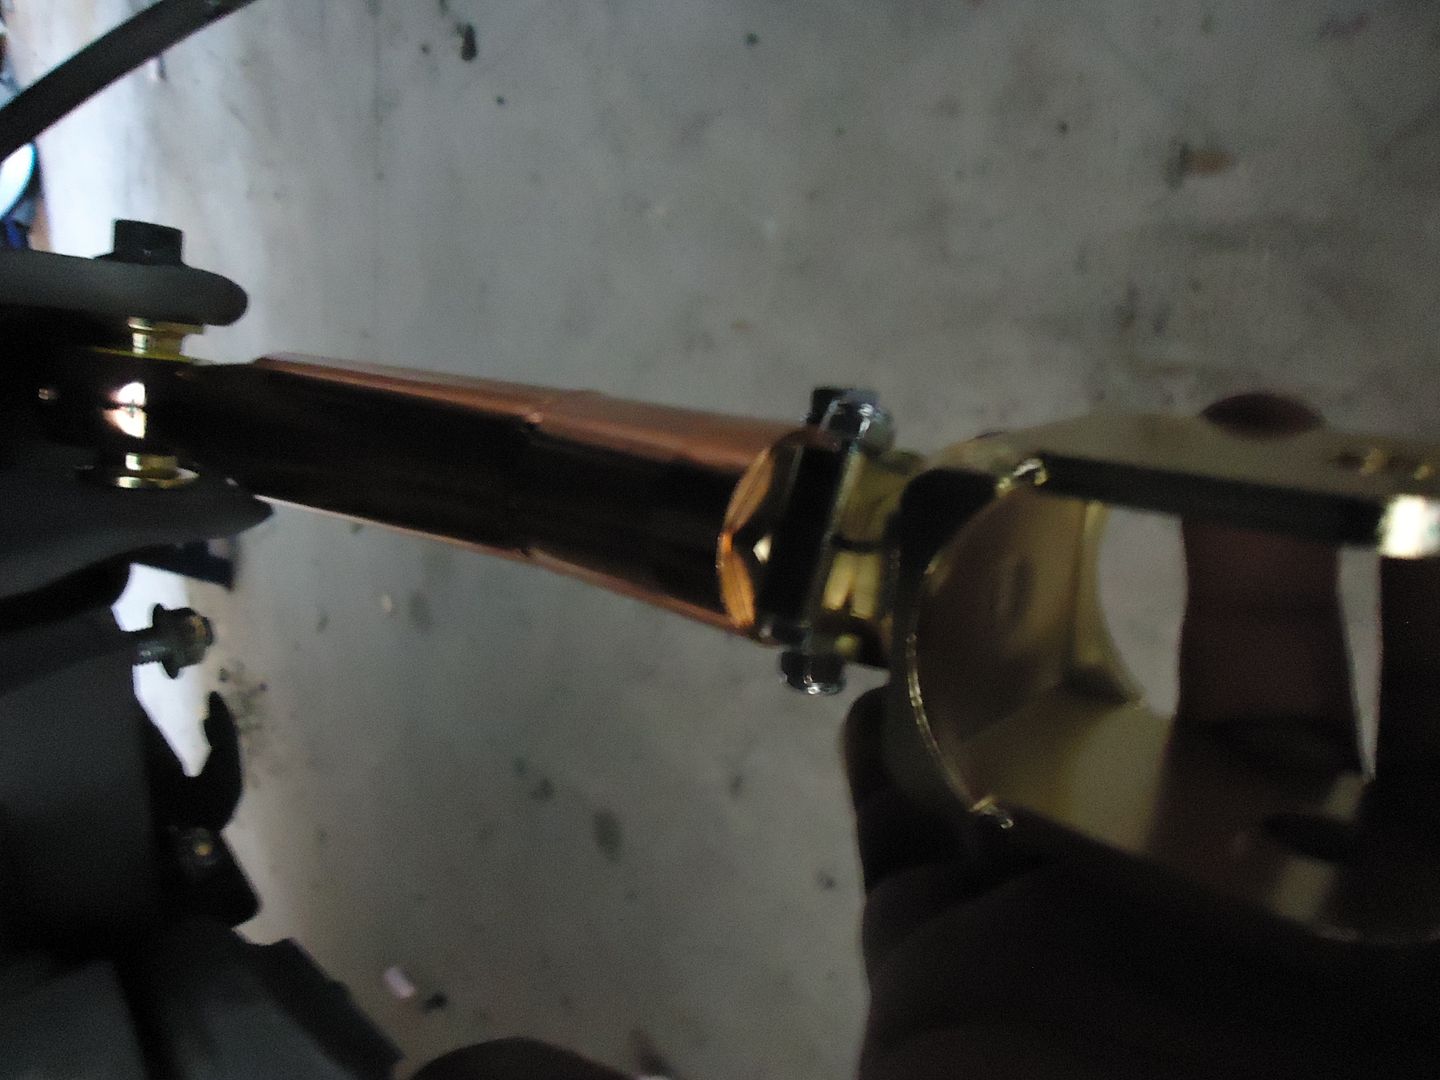
Next up is the rear suspension setup. First on the list is PBM toe arms.
top notch quality right there.
BAM!! installed in its new home.
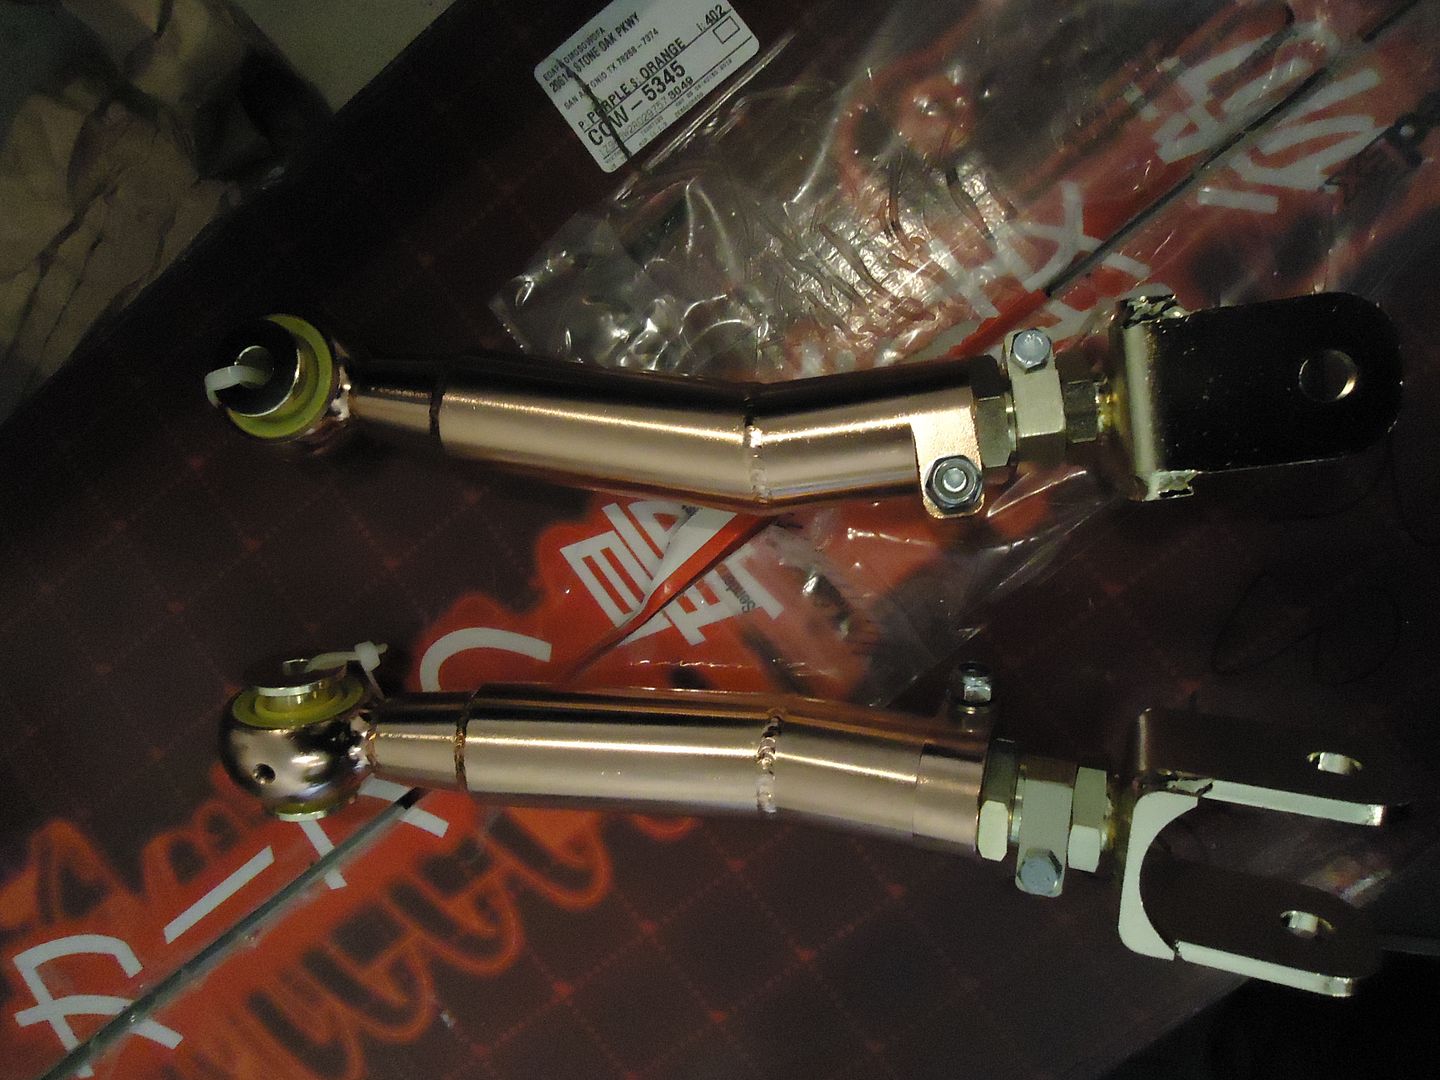
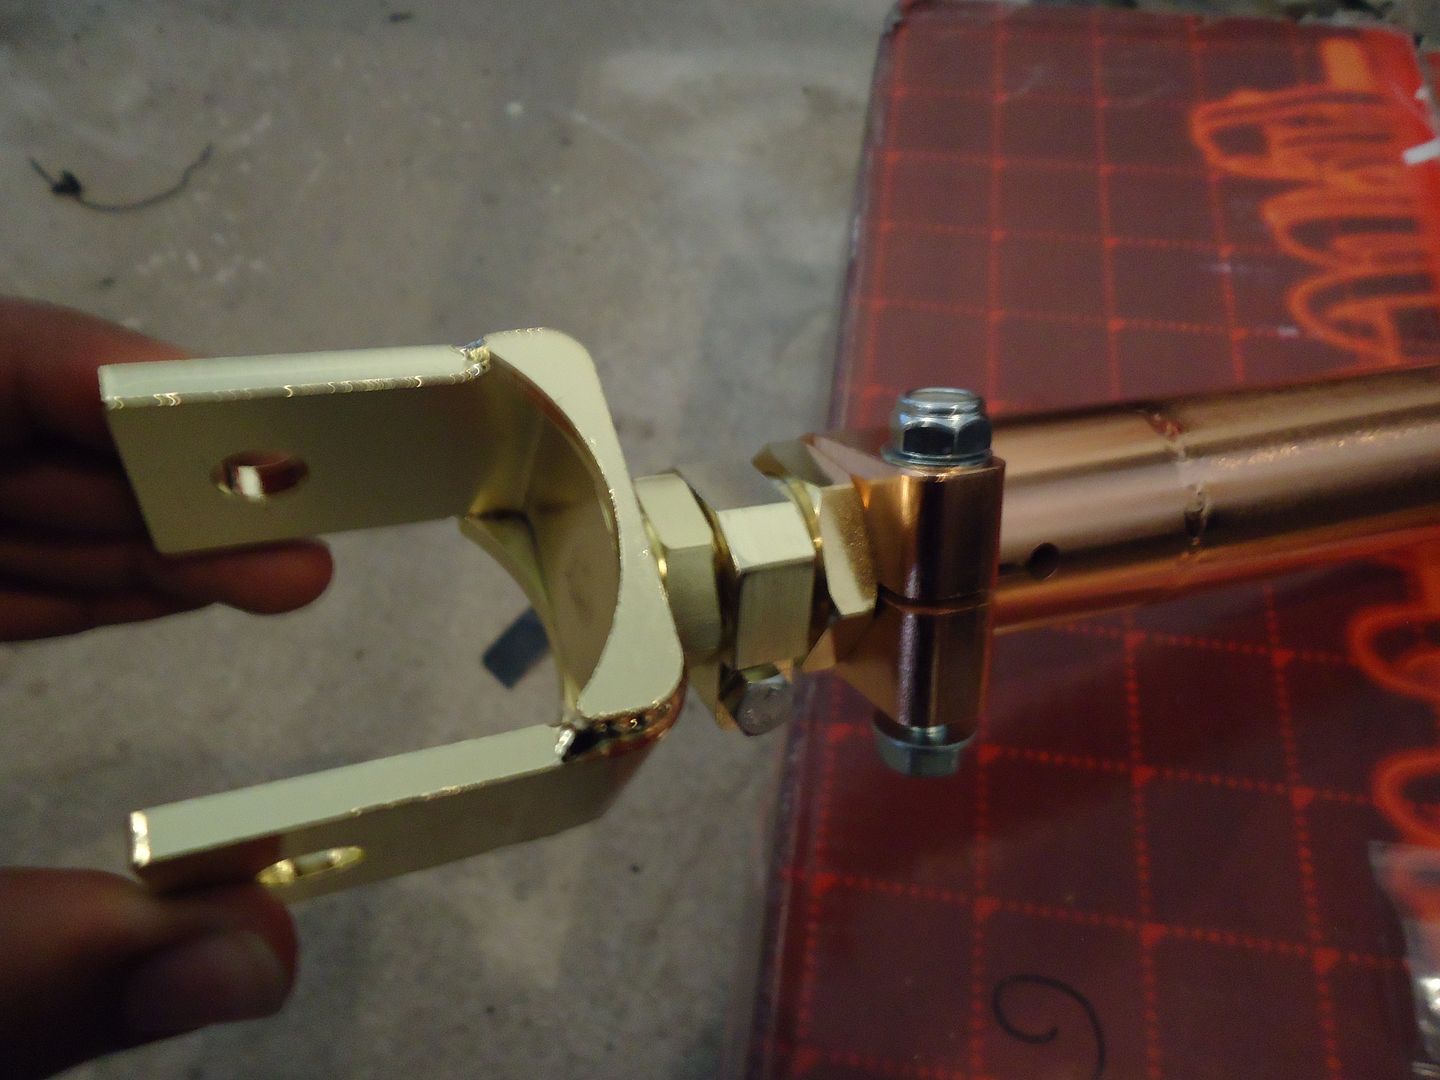
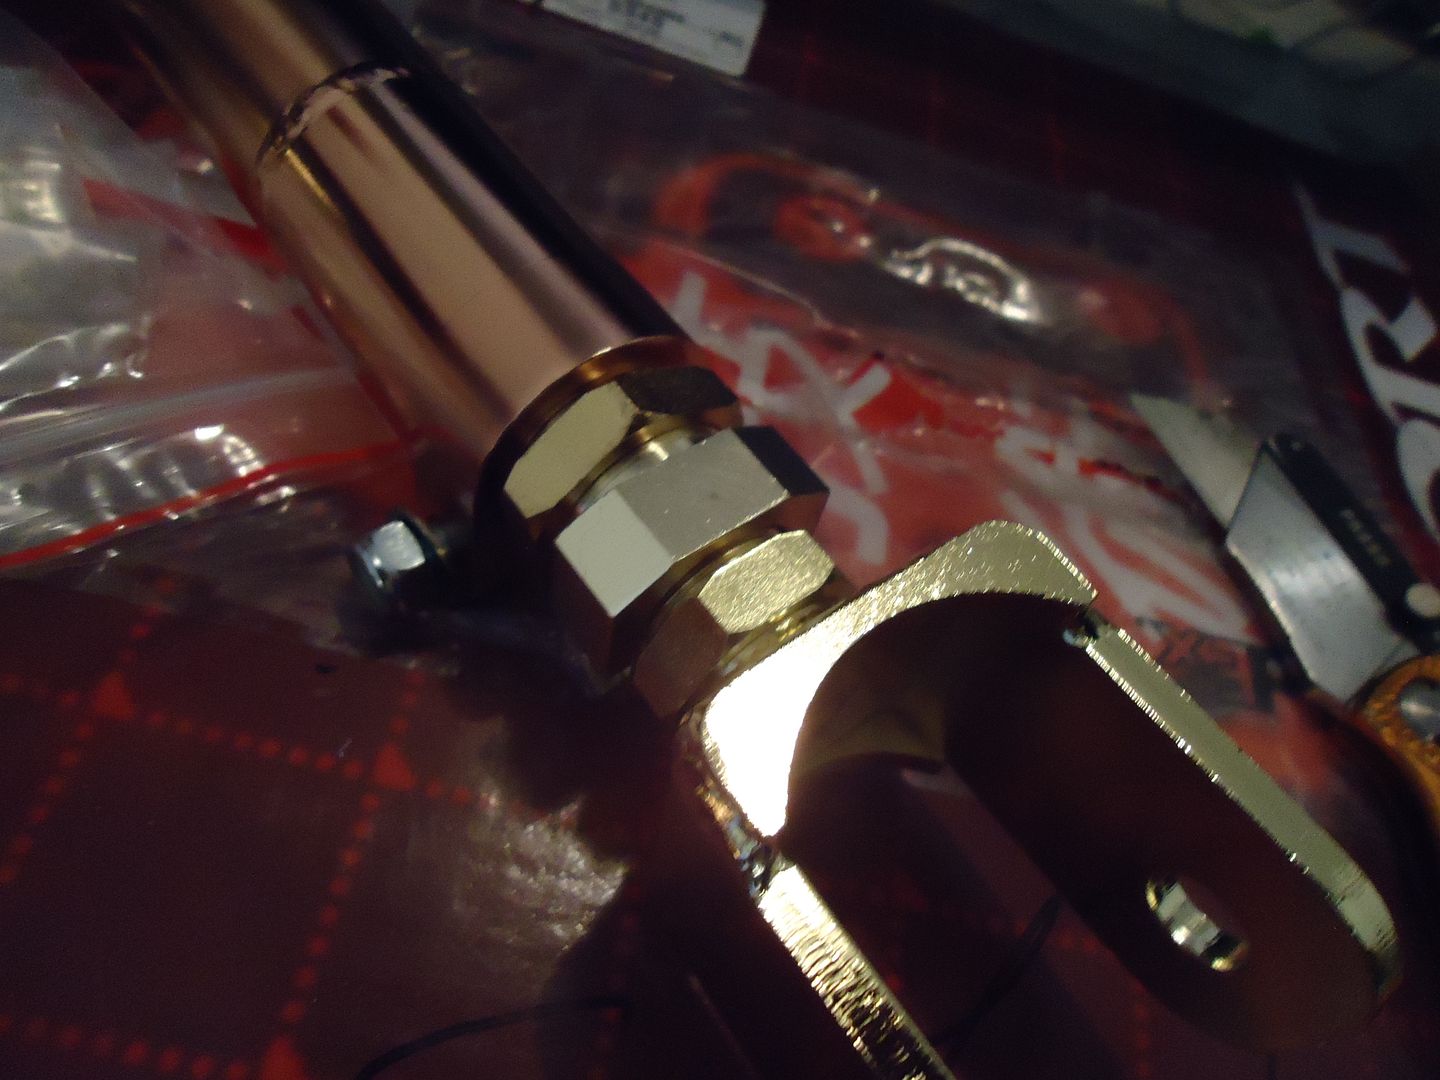
next up we have PBM camber arms
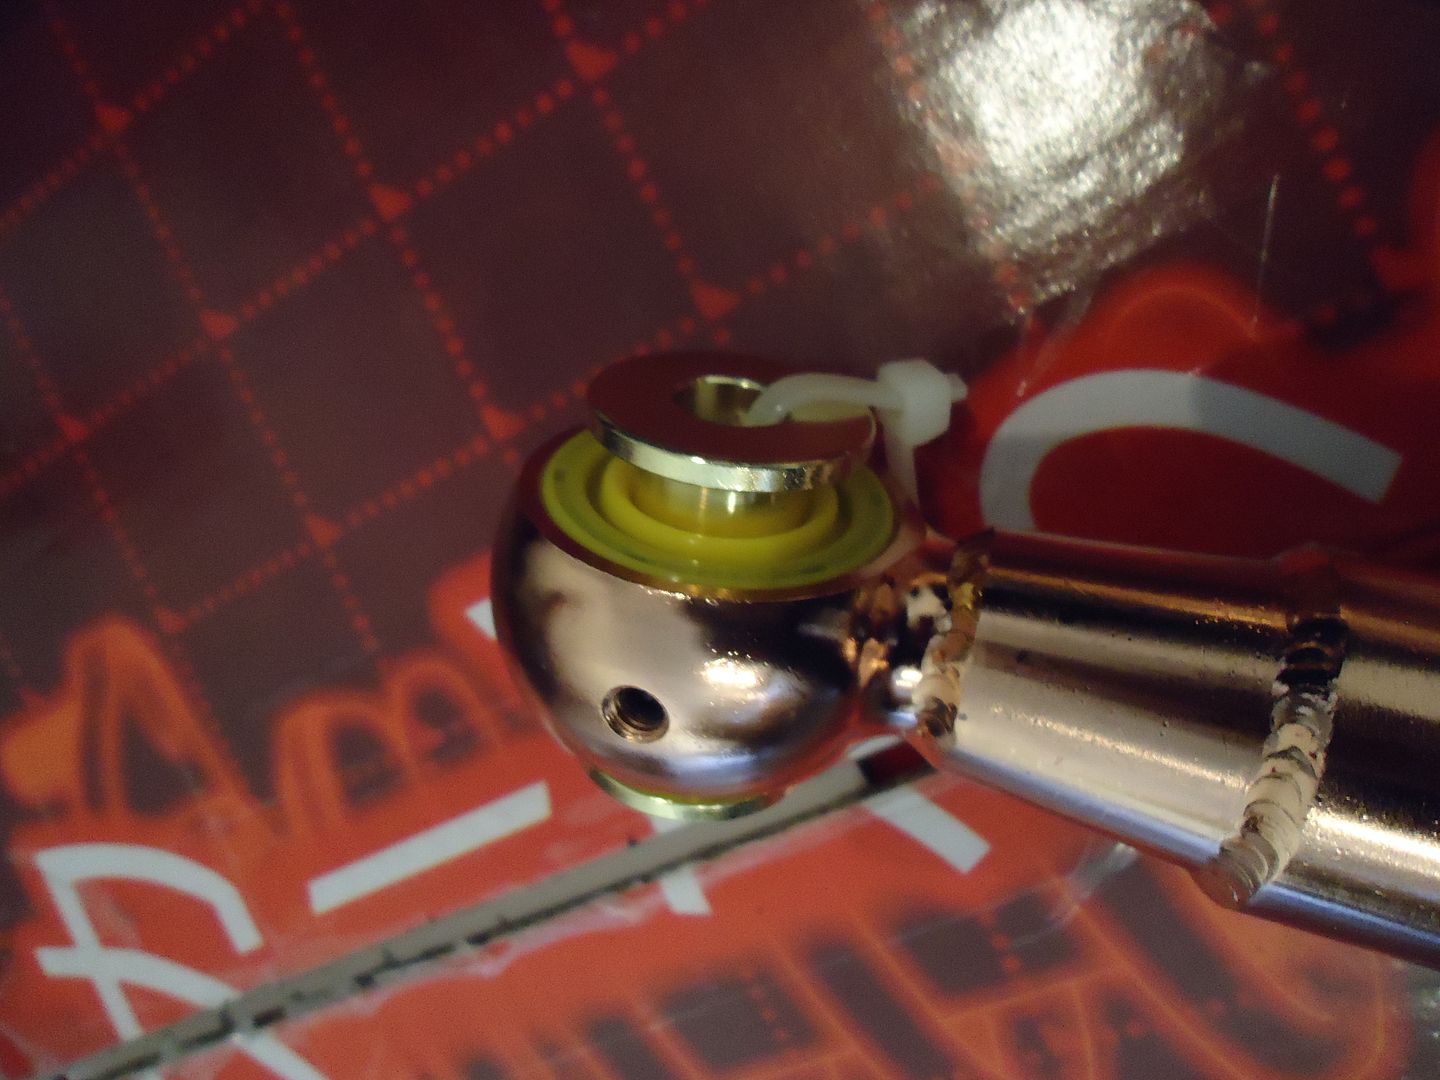
Same quality as the toe arms, these things will keep my specs in check.
Installed and ready to rock..
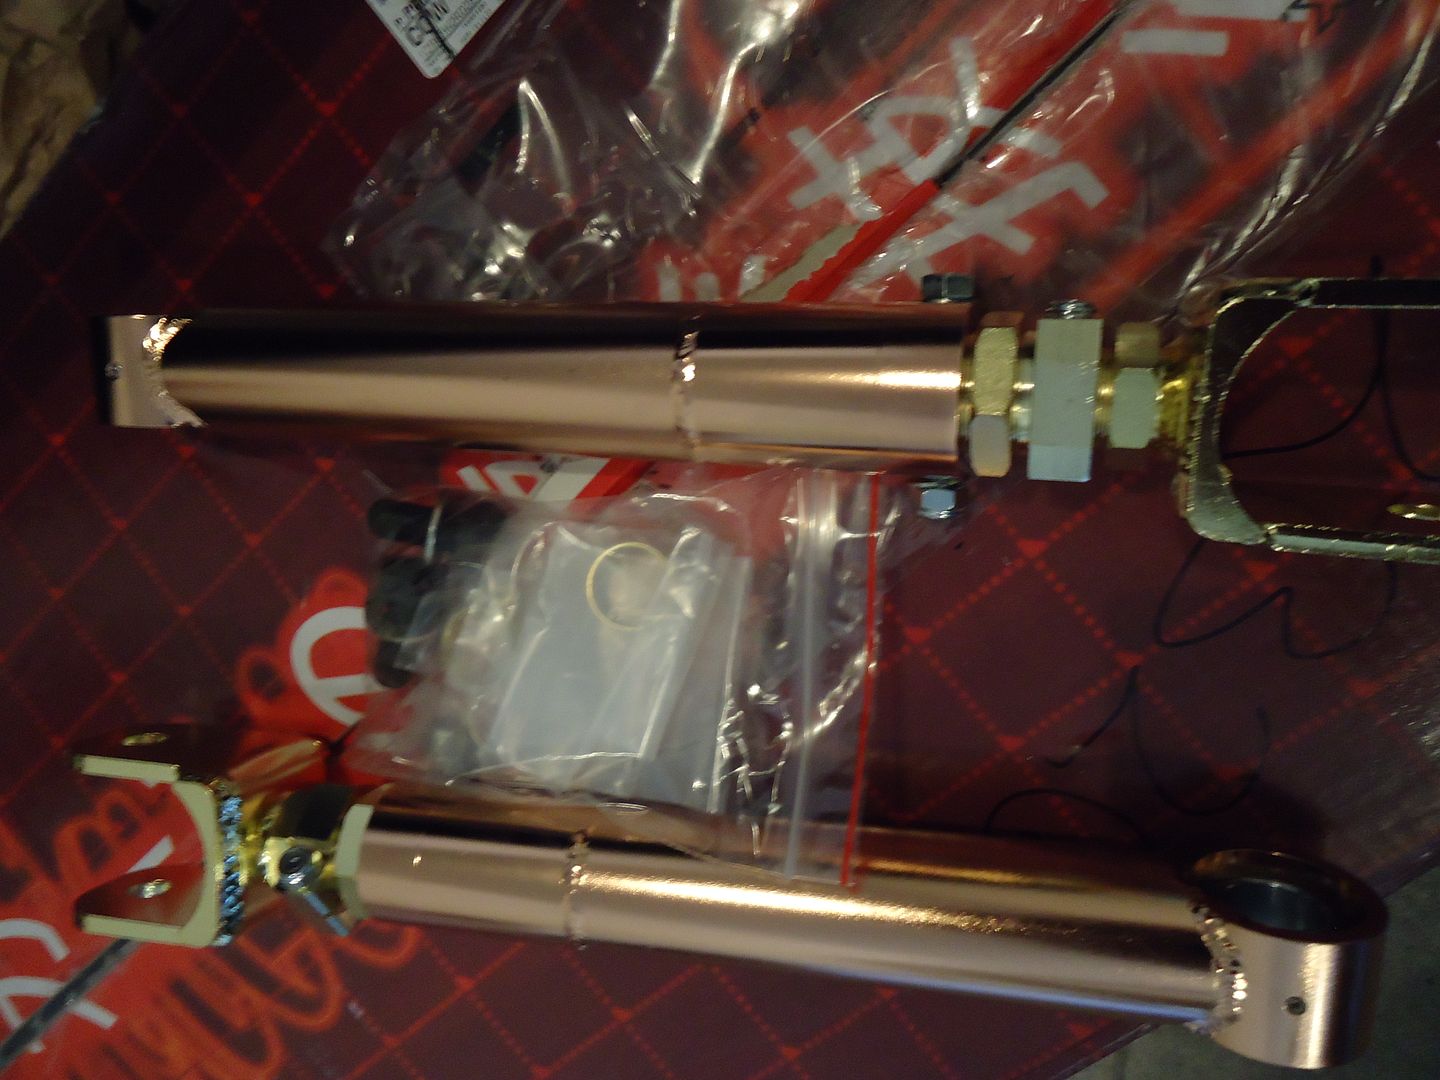
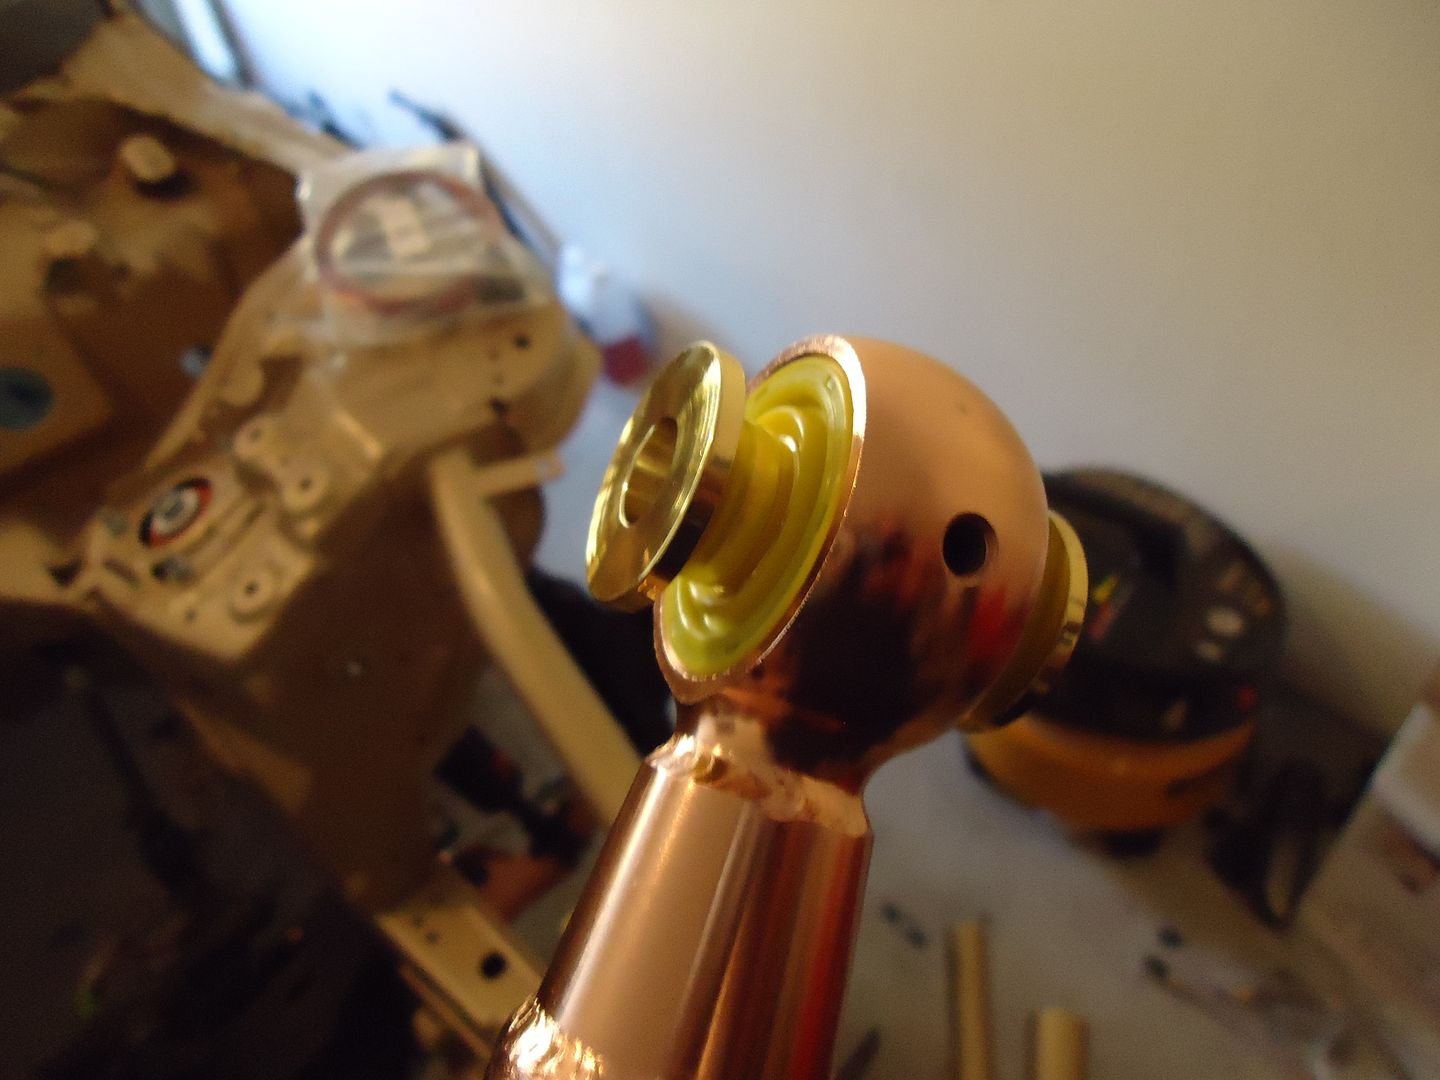
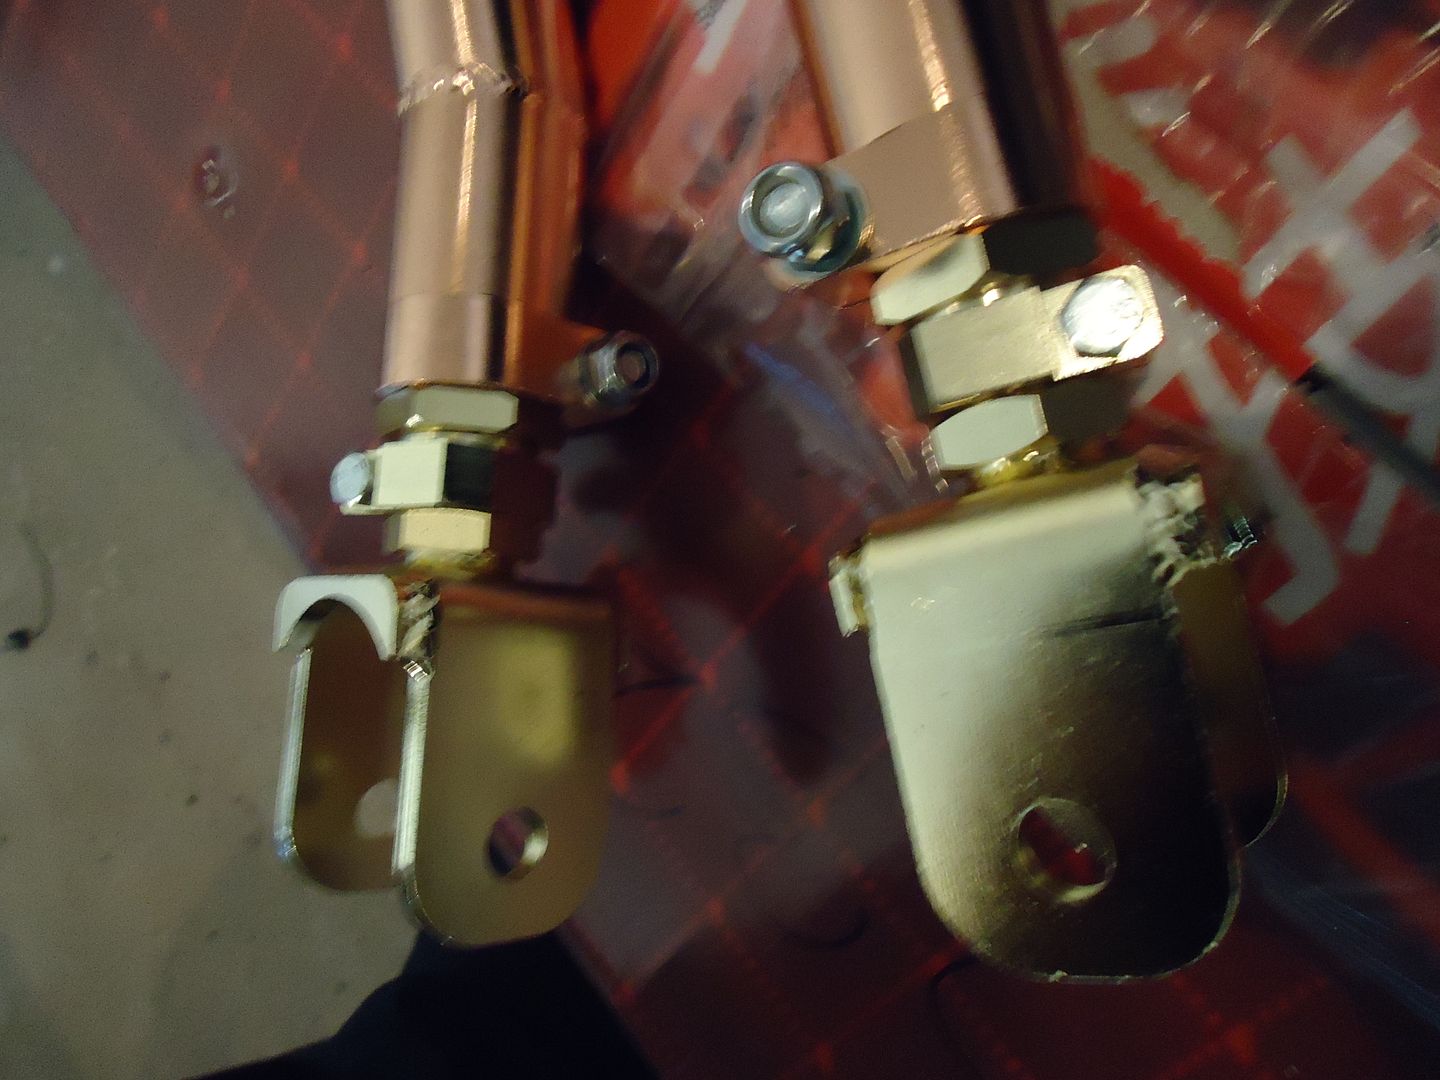
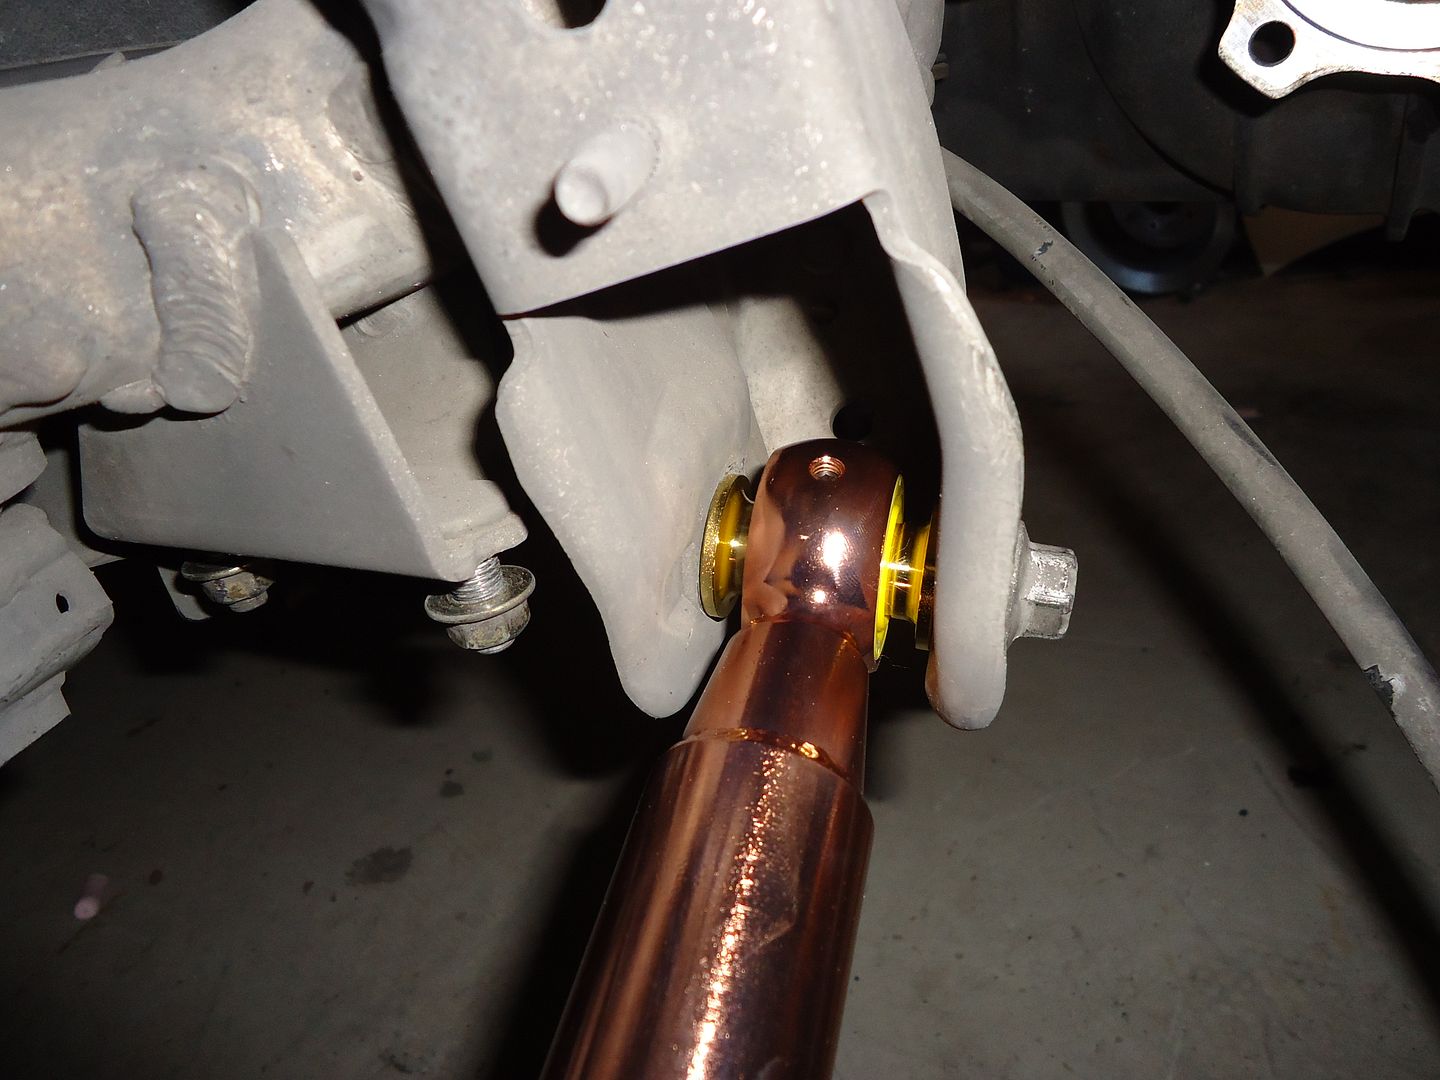
Last but not least is the PBM traction arms..
You have to install this first and then the rod and then another ring and bolt.
first part in stalled.
Then arm..
Then bolt, and your done...
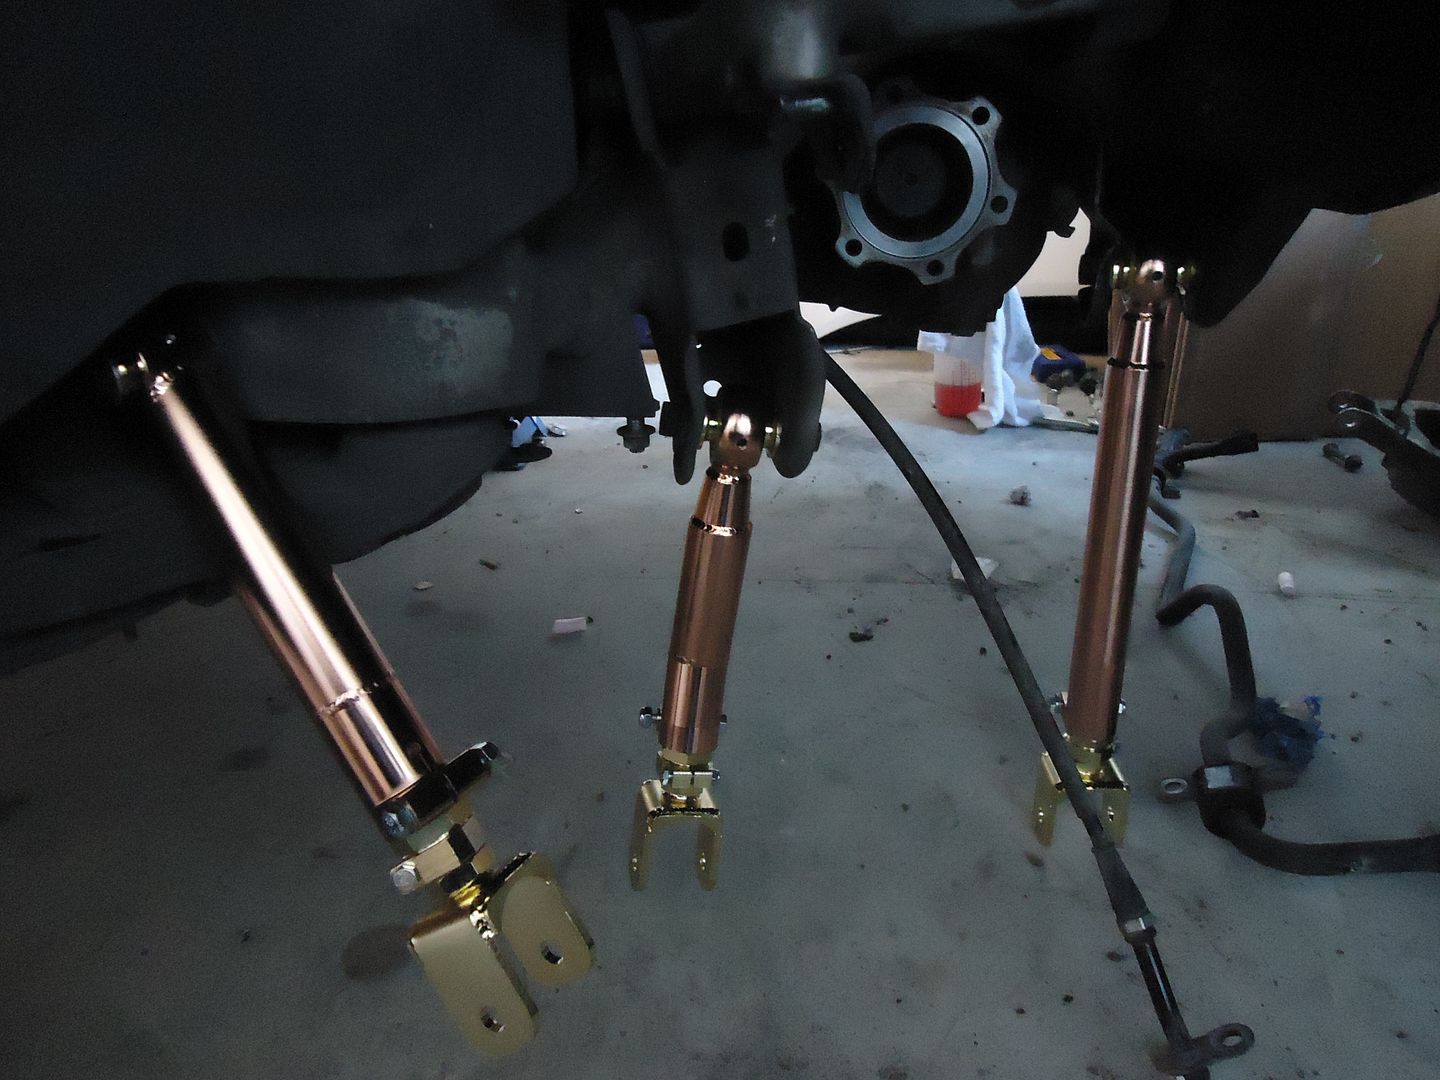
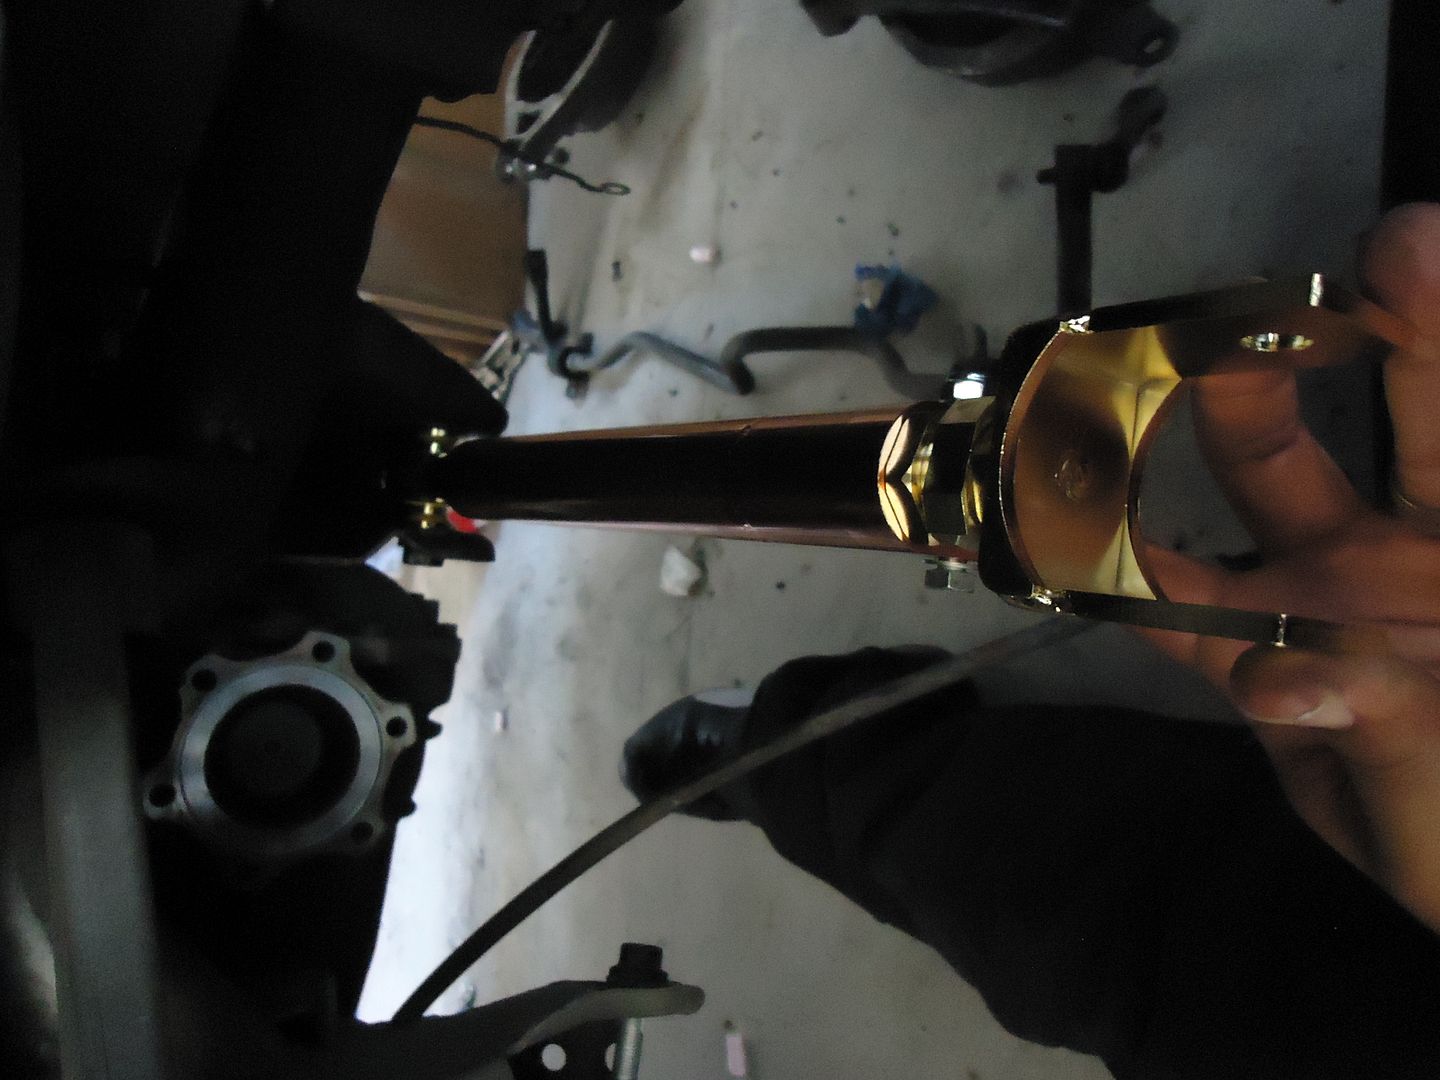
The whole gang hanging out and awaiting the rest of the parts.
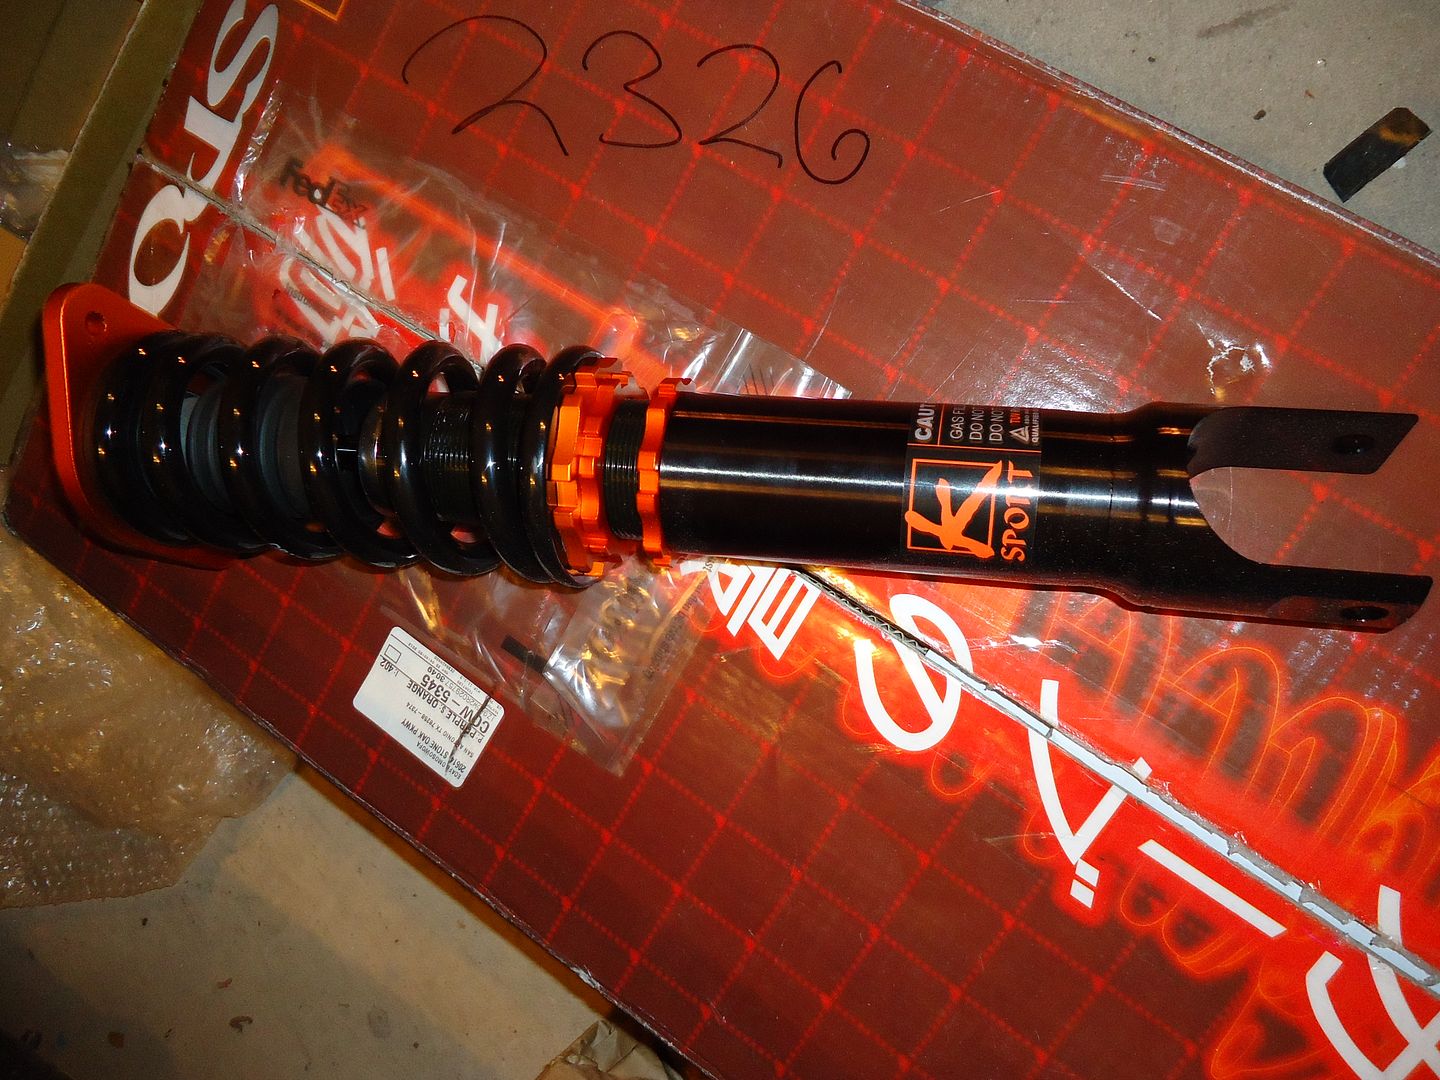
Next up is the rear K-Sport Coliovers. The suspension install is really straight forward. So I will just let the pics do the talking.


So I test fitted my front DPE Wheels which are 19x11 0 offset. **** looks mean...
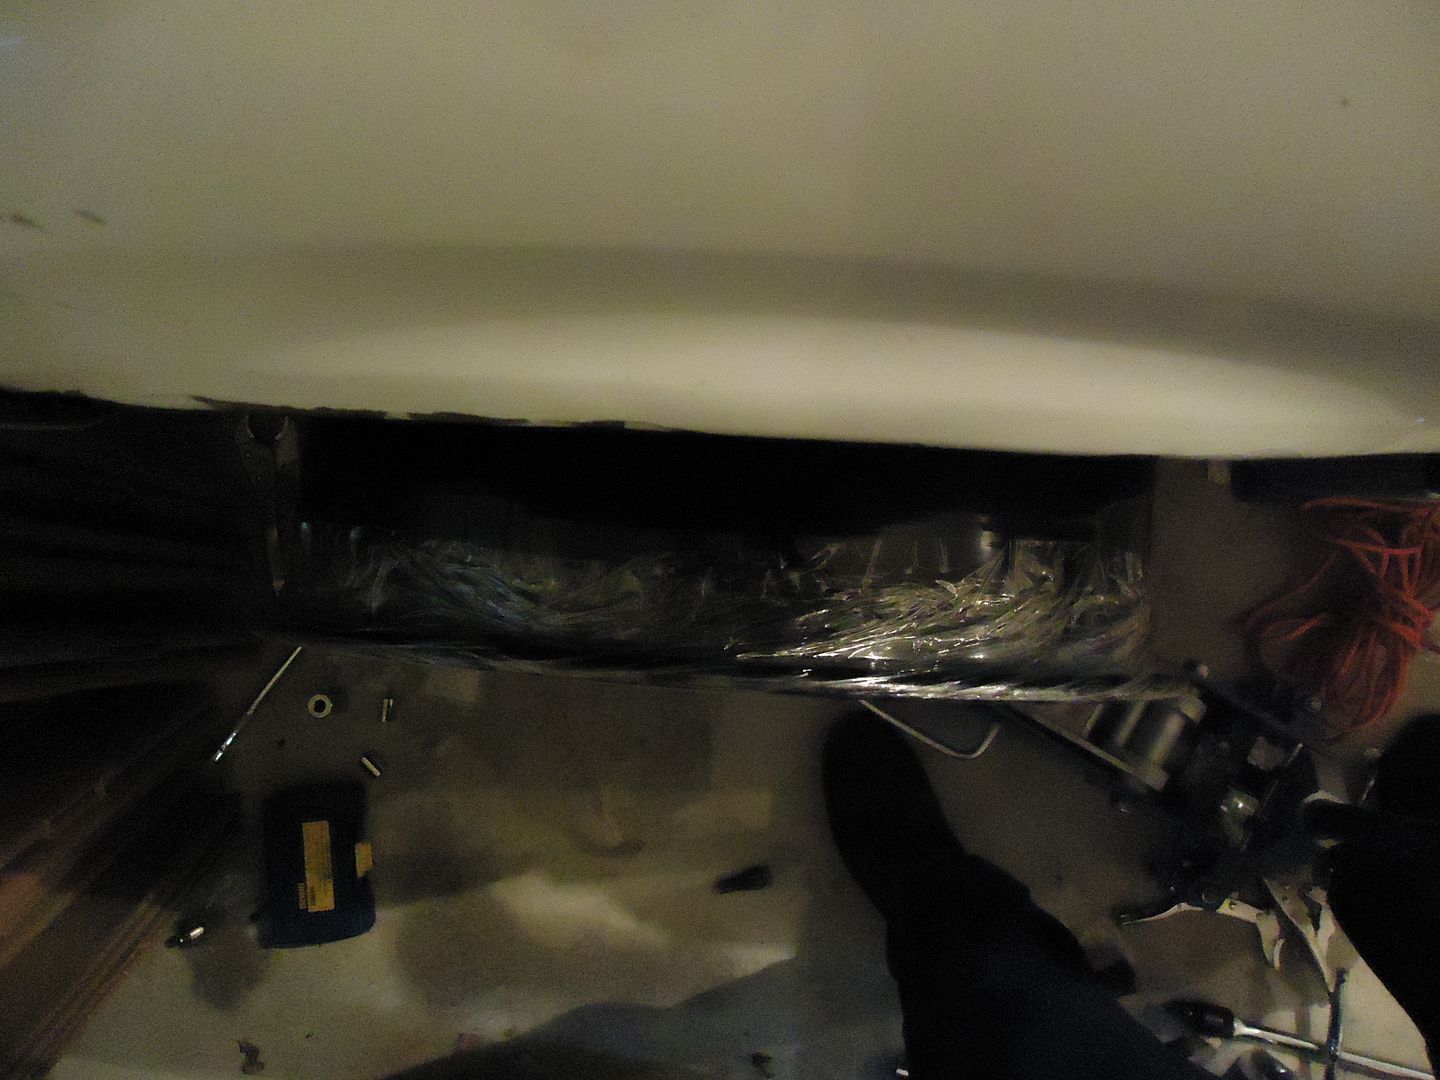
Test the angle out with the 19s. differentially going to rub with the 19s. its a really good thing that I am getting 18s in better sizes to take full us of the angle that the PBM SAK will give me.
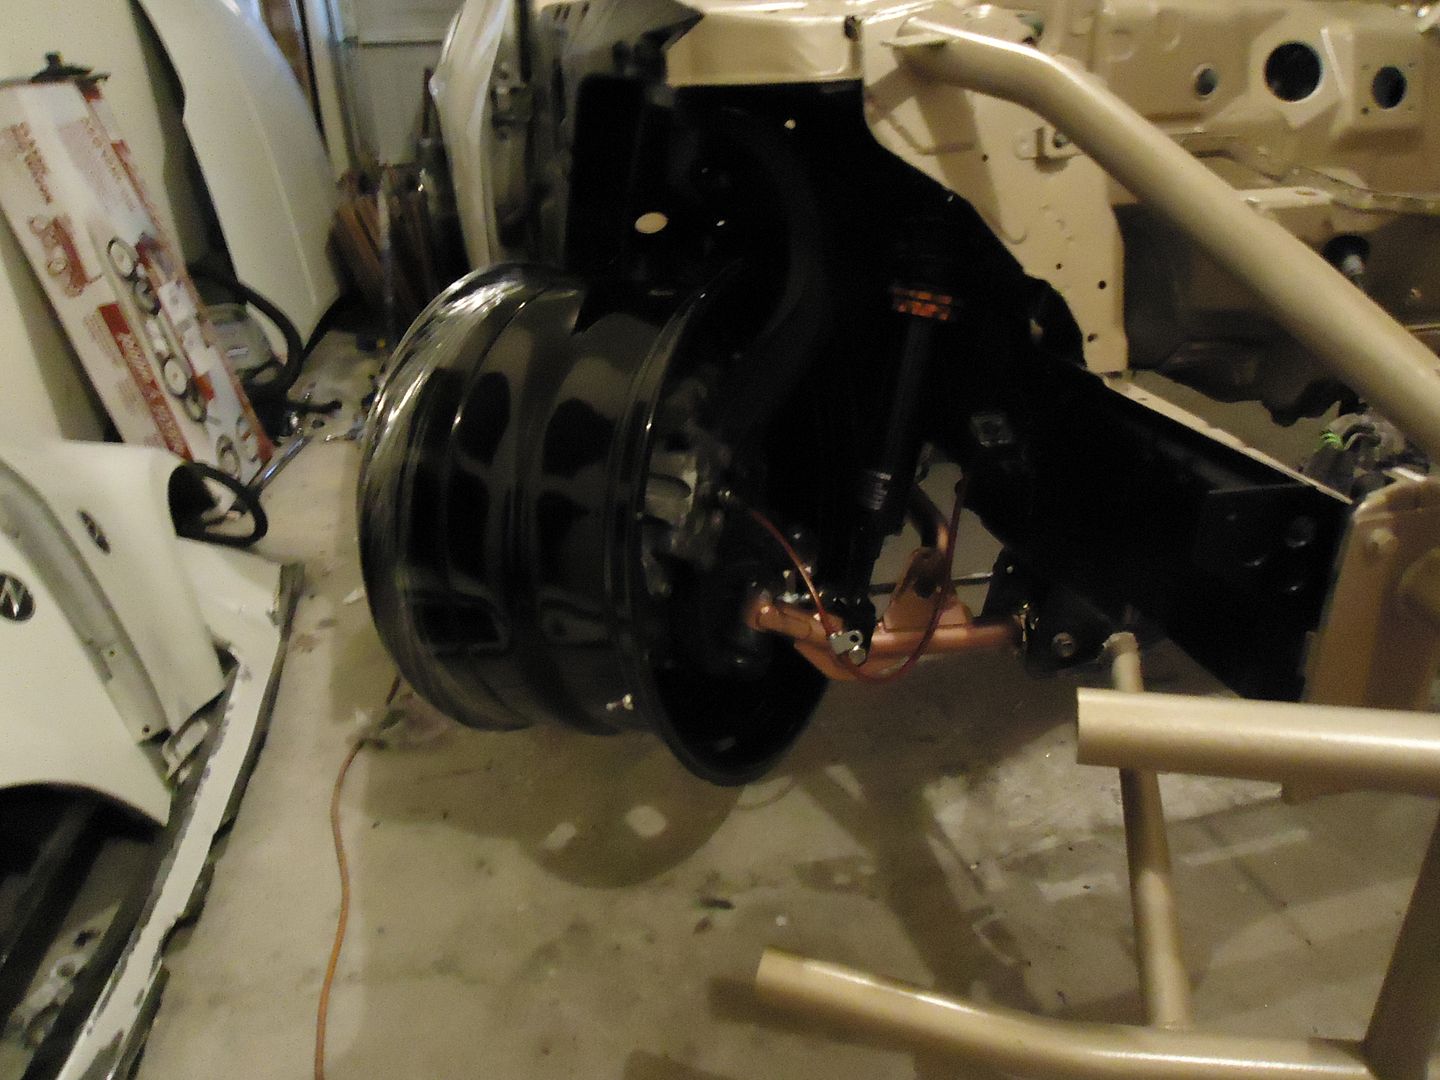
Close up shot of that angle, **** looks so sexy. Going to have to zip tie those brake lines but you get the idea.
I also test fitted my rears with out the over fenders, and by the looks of it. Should not be a issue fitting them.
Also the only thing missing from the suspension was my new Sway Bars from Motodyne that I am still waiting on.. Paring that up with Whiteline endlinks.
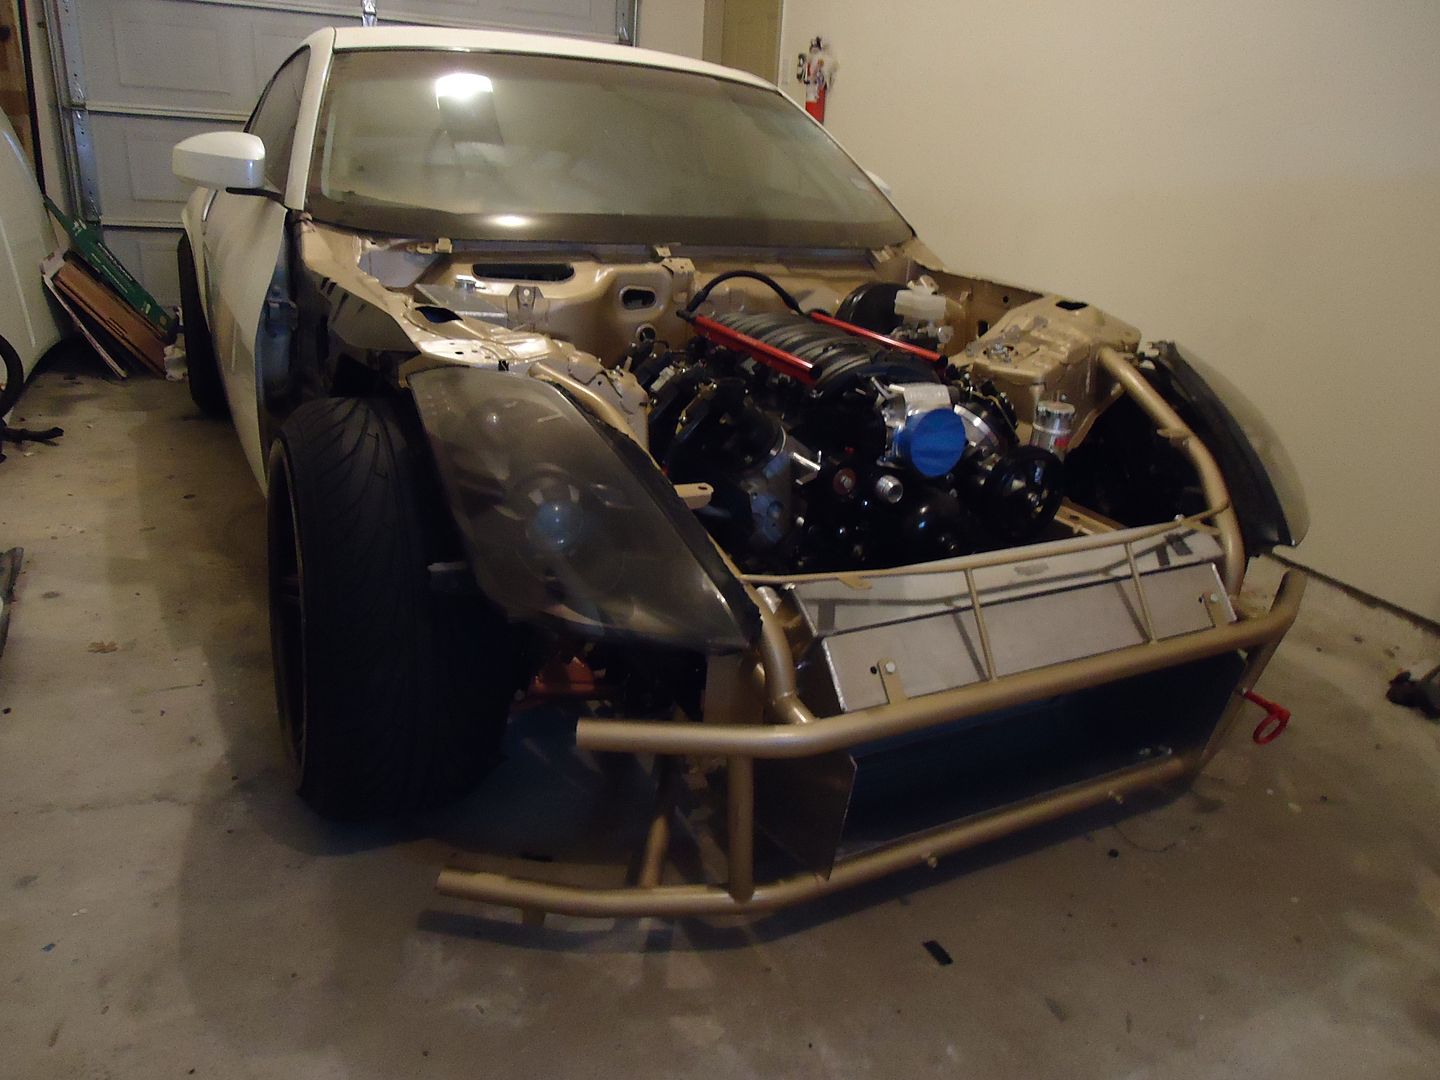
Next update should be with the engine in the bay and getting ready for fittings and plumbing.. :thumbup:
New price update:
Part Shop Max Z33 Camber Arms: $250.00
Part Shop Max Z33 Traction Arms: $280.00
Part Shop Max Z33 Toe Arms: $250.00
K-Sport Slide Control Suspension: $1365.00
Total on Build: $21,467.13
 08-18-2012, 10:43 AM
#186
Launching!
Thread Starter
Join Date: Oct 2009
Posts: 218
Likes: 0
Received 0 Likes
on
0 Posts
^^^ hahahaha..
Here is a little tease of what I have been doing last night. Car is ready for its new home now...
Sidenote: (those are not my wheels, had to borrow my friends to move)
Here is a little tease of what I have been doing last night. Car is ready for its new home now...
Sidenote: (those are not my wheels, had to borrow my friends to move)
08-26-2012, 12:41 PM
#187
Launching!
Thread Starter
Join Date: Oct 2009
Posts: 218
Likes: 0
Received 0 Likes
on
0 Posts
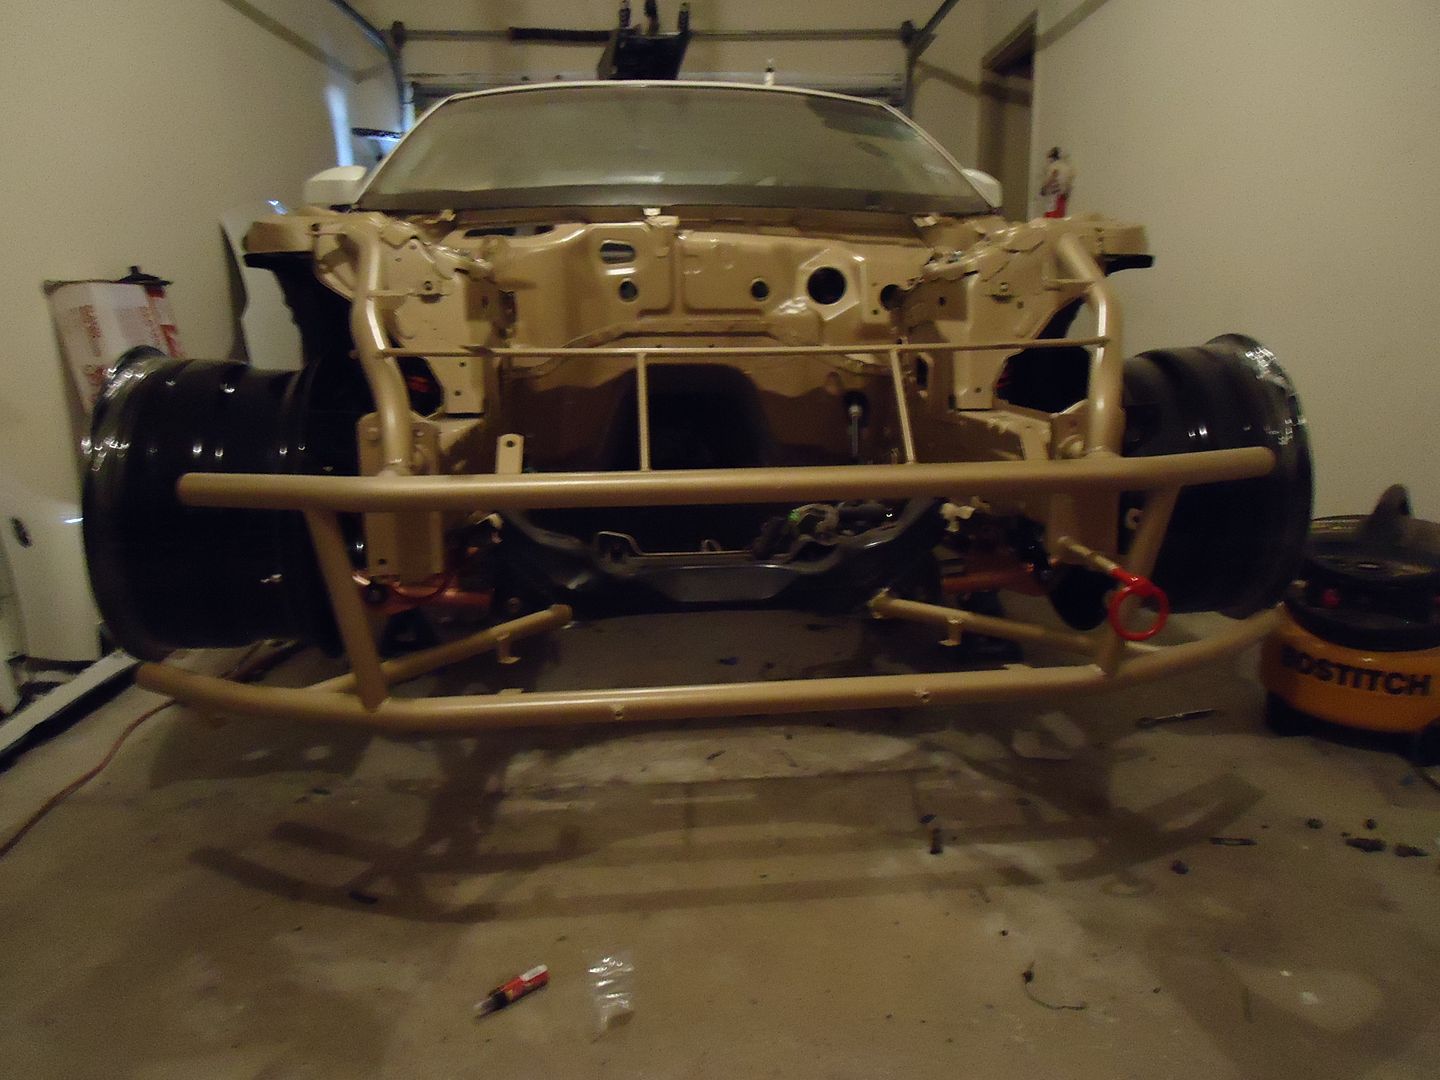
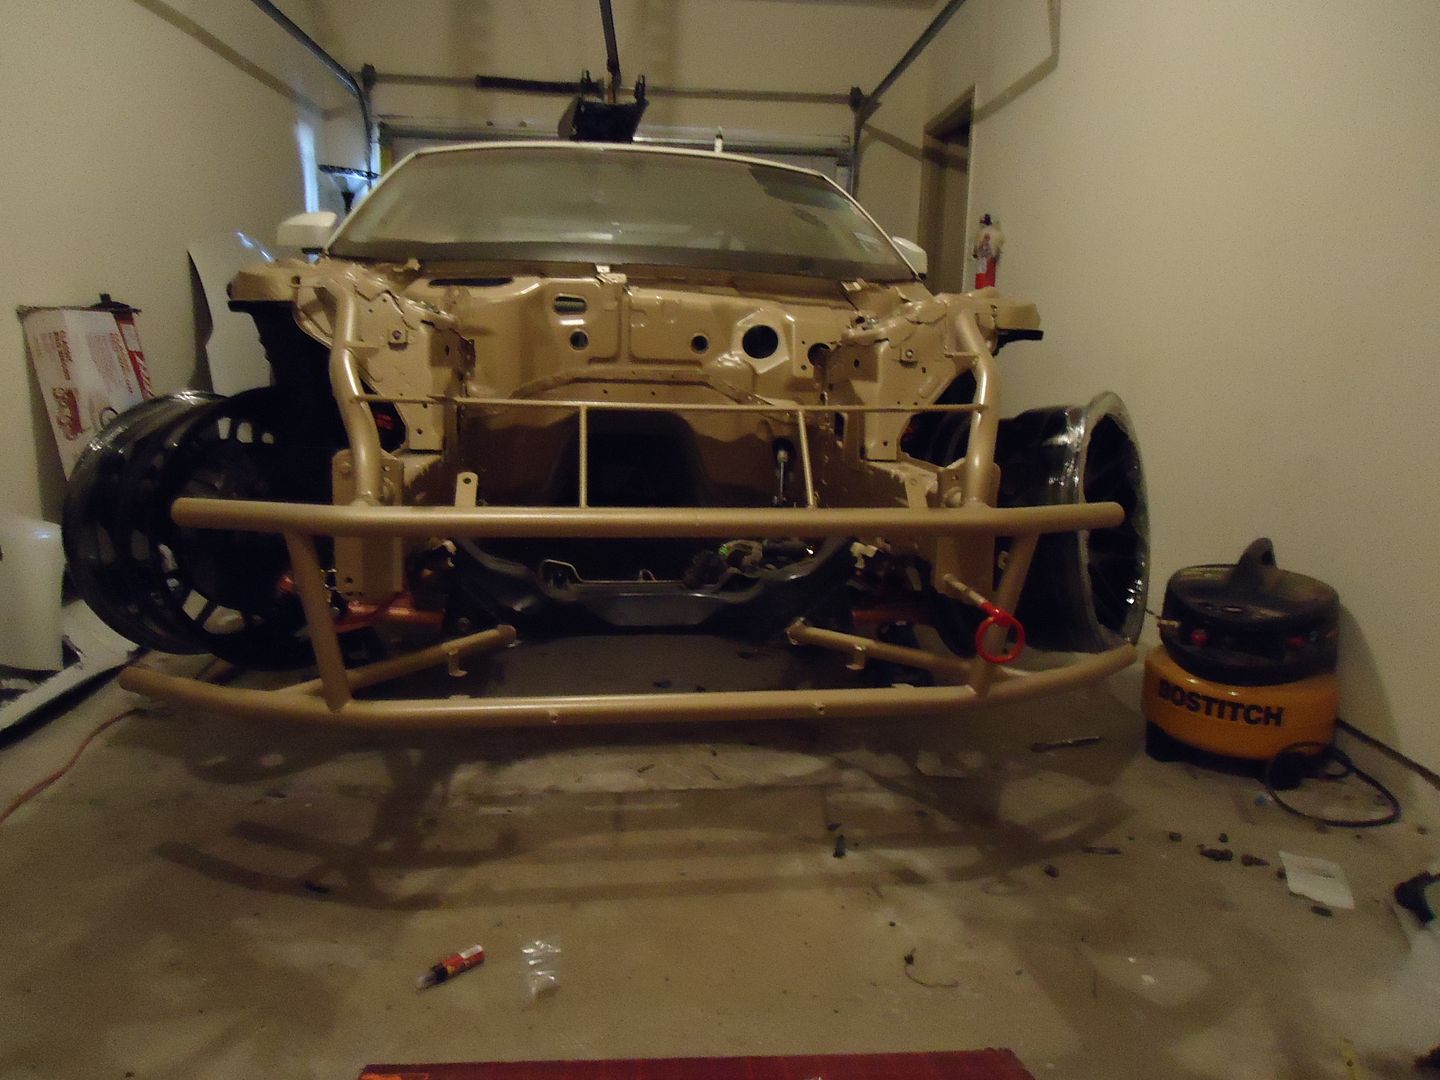
Just a little tease of what was done this weekend.. Nothing much just put everything in to move my car to its new home, which is my new house. Garage is stupid dirty due to the move need to clean it and epoxy the floor, but its home for now.. Next update will involve all the fittings and running the hoses.

First time the car has seen light in the past months.


Loaded up on the trailer and heading to its new home.. And Tow hook works, so that was a good test...lol

Packed away in its new two car garage. Can't wait to re-Epoxy the floor and clean it up. Also I know my wheels are backwards, just placed them on to move the car.
First time the car has seen light in the past months.
Loaded up on the trailer and heading to its new home.. And Tow hook works, so that was a good test...lol
Packed away in its new two car garage. Can't wait to re-Epoxy the floor and clean it up. Also I know my wheels are backwards, just placed them on to move the car.


 09-03-2012, 02:51 AM
#191
Registered User

Join Date: Jul 2012
Posts: 1
Likes: 0
Received 0 Likes
on
0 Posts
This build is so official. I look at the price and I see that I need to bump up my budget. Then again if I spend 21K on my S14 I don't have a clue what my old lady is gonna say or do to me lmao. I love this build can't wait to see more and see it done. I know I'm going to be so disappointed when you're done because I will have to spend my time looking for a new build that will spark my interest like this one did.
09-04-2012, 09:02 AM
#192
Launching!
Thread Starter
Join Date: Oct 2009
Posts: 218
Likes: 0
Received 0 Likes
on
0 Posts
^^ Wow man thanks for the kind words. And trust me it is hard keeping the wife happy when all this is going on.....lol
Also once the build is done I will keep on updating this thread with new add ones and what not.. Cause you know a build is never truly done.
Also once the build is done I will keep on updating this thread with new add ones and what not.. Cause you know a build is never truly done.
 09-04-2012, 04:31 PM
#194
Launching!
Thread Starter
Join Date: Oct 2009
Posts: 218
Likes: 0
Received 0 Likes
on
0 Posts
 09-29-2012, 08:21 PM
#196
Launching!
Thread Starter
Join Date: Oct 2009
Posts: 218
Likes: 0
Received 0 Likes
on
0 Posts
just a tease until I get all my interior pieces back..

This is my new Hydro E-brake handle. Custom Ebony and Ivory wood Can't wait to see it mounted up..
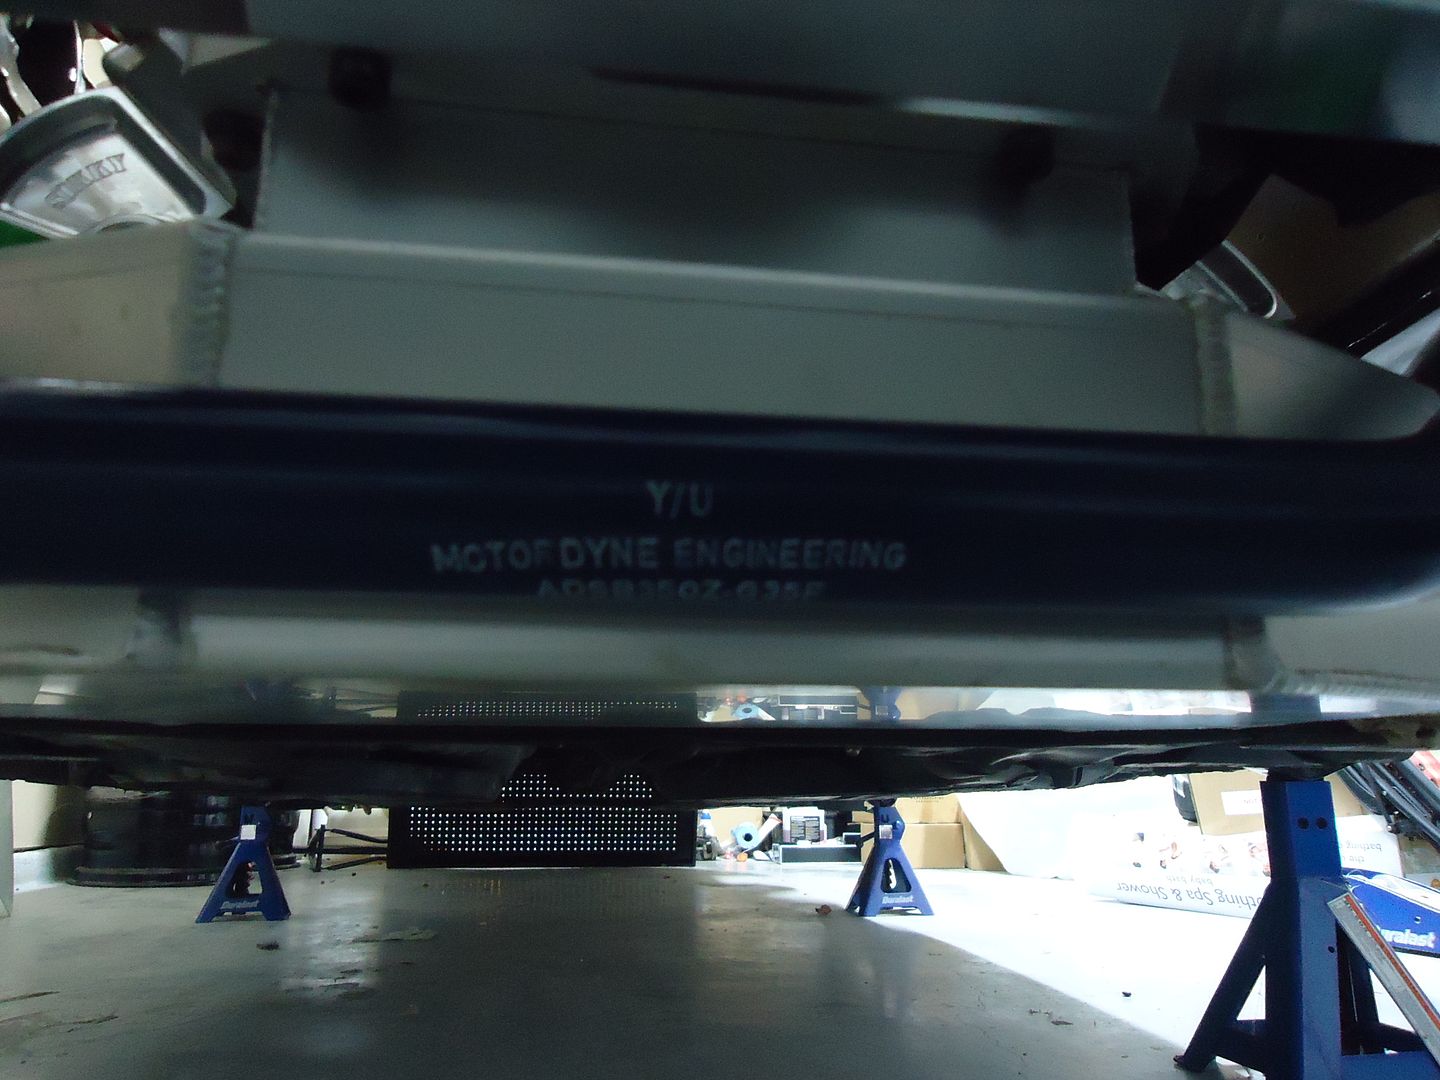
I also got my Motordyne sway bars in..
This is my new Hydro E-brake handle. Custom Ebony and Ivory wood Can't wait to see it mounted up..
I also got my Motordyne sway bars in..


 ! i need one for my stroker s14 build XD!
10-30-2012, 04:55 PM
! i need one for my stroker s14 build XD!
10-30-2012, 04:55 PM
#200
Launching!
Thread Starter
Join Date: Oct 2009
Posts: 218
Likes: 0
Received 0 Likes
on
0 Posts
Okay everyone here I am with another update, Sorry it took so long to bring you another update just been really busy. So to let everyone know I am getting close to start up on this thing, just need to go pick up my T56 in Houston, then head to my Fab guy to make my custom oval exhaust and then head to stew's house for final wiring. I would say a good 4k will finish the project. So hopefully very soon.

So lets kick this off with a beer shall we. Beer of choice is Circus Boy "The Hefeweizen" by Magic Hat. Now if you know me by now, you would know I love Hefeweizen beers, so this is no different. A very good beer.

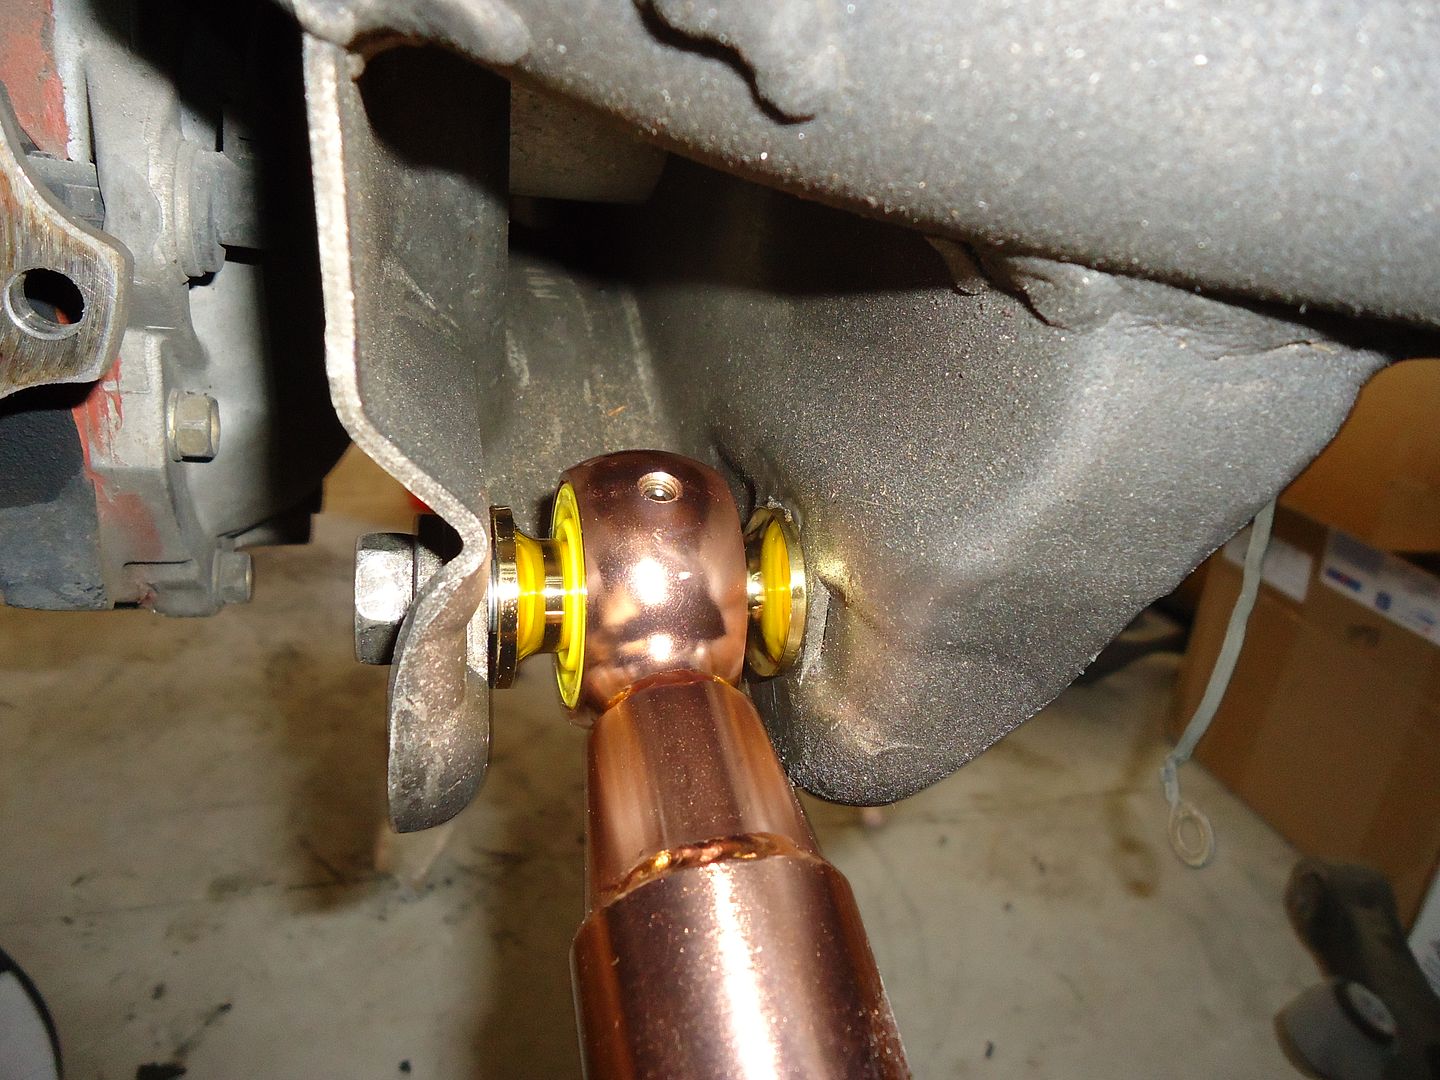
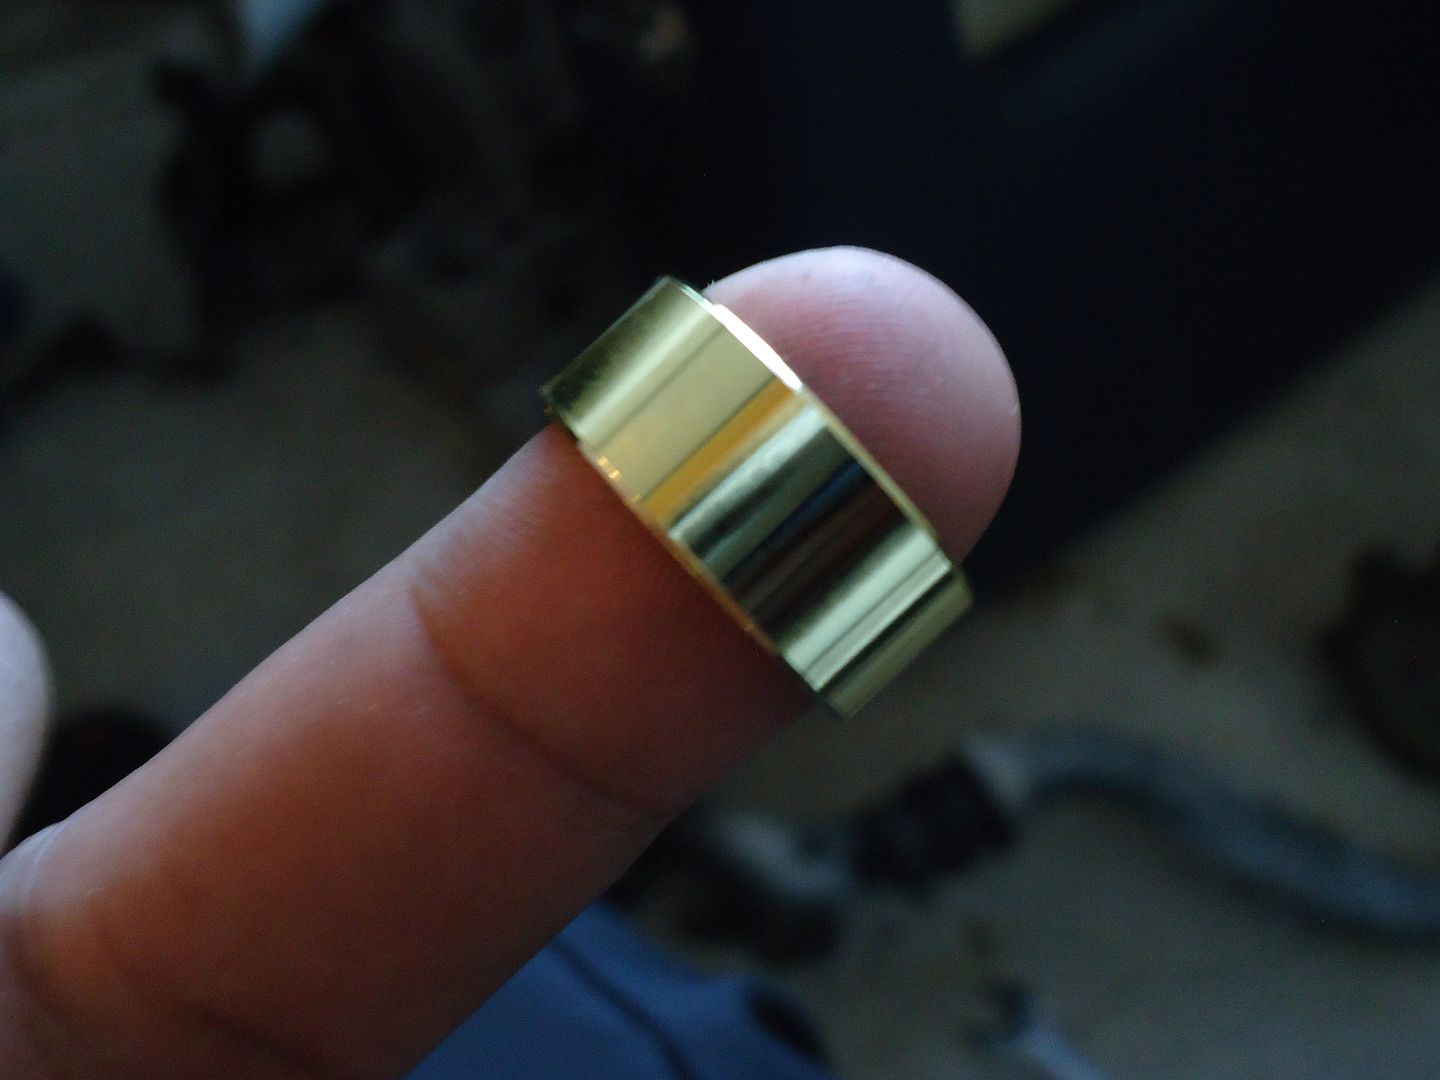
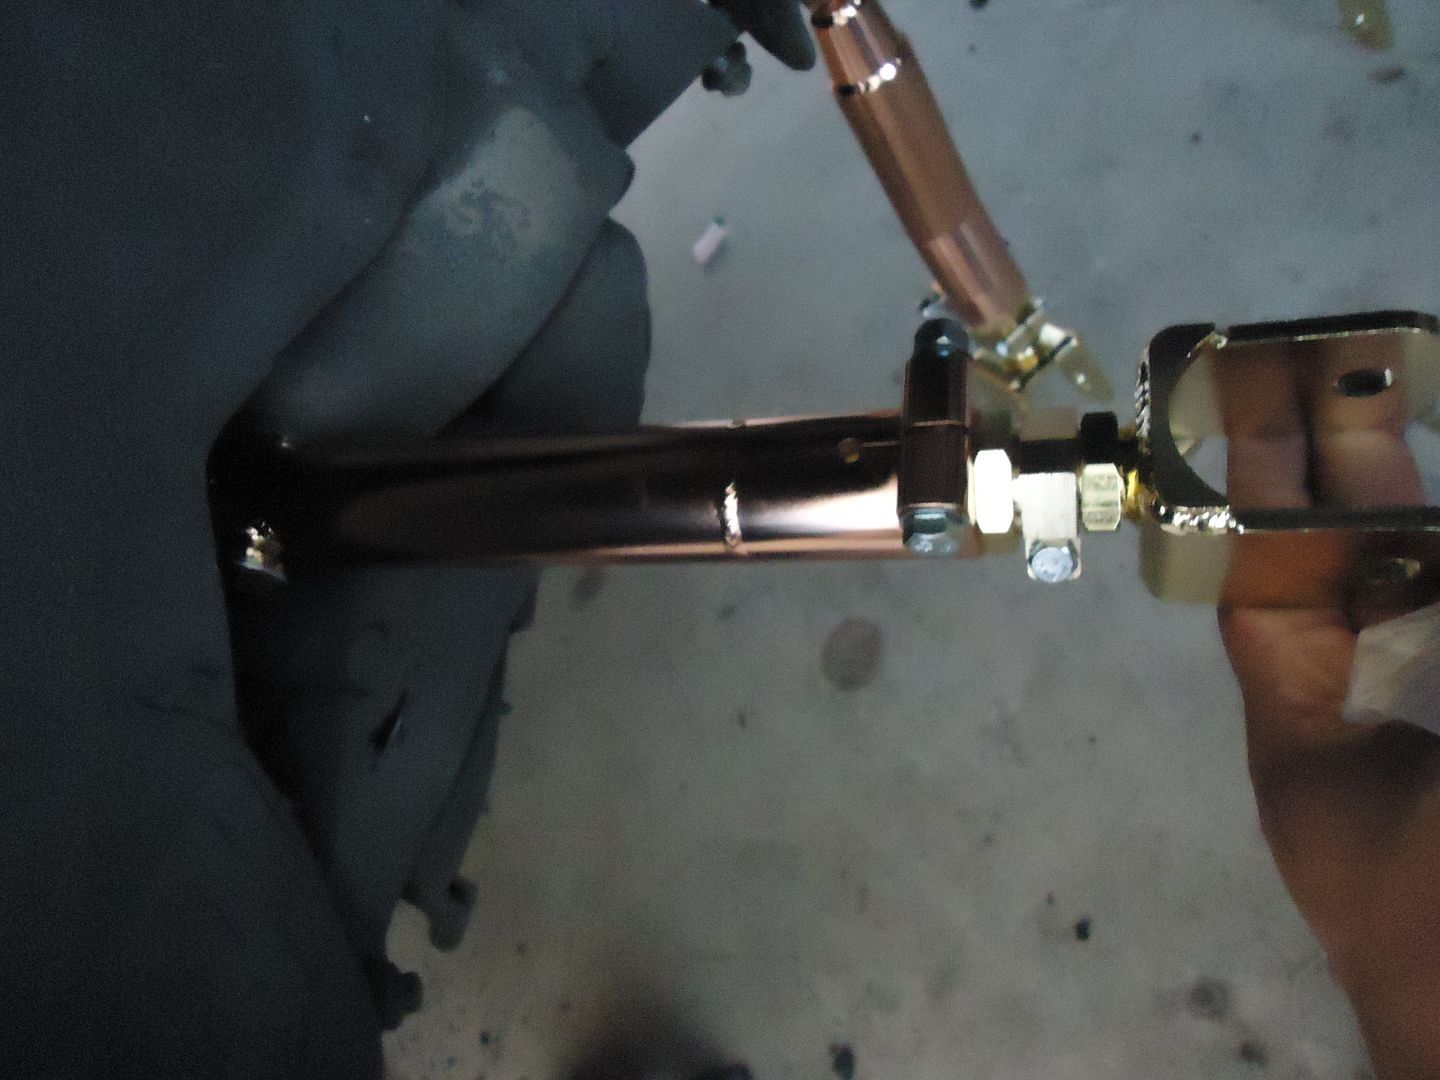
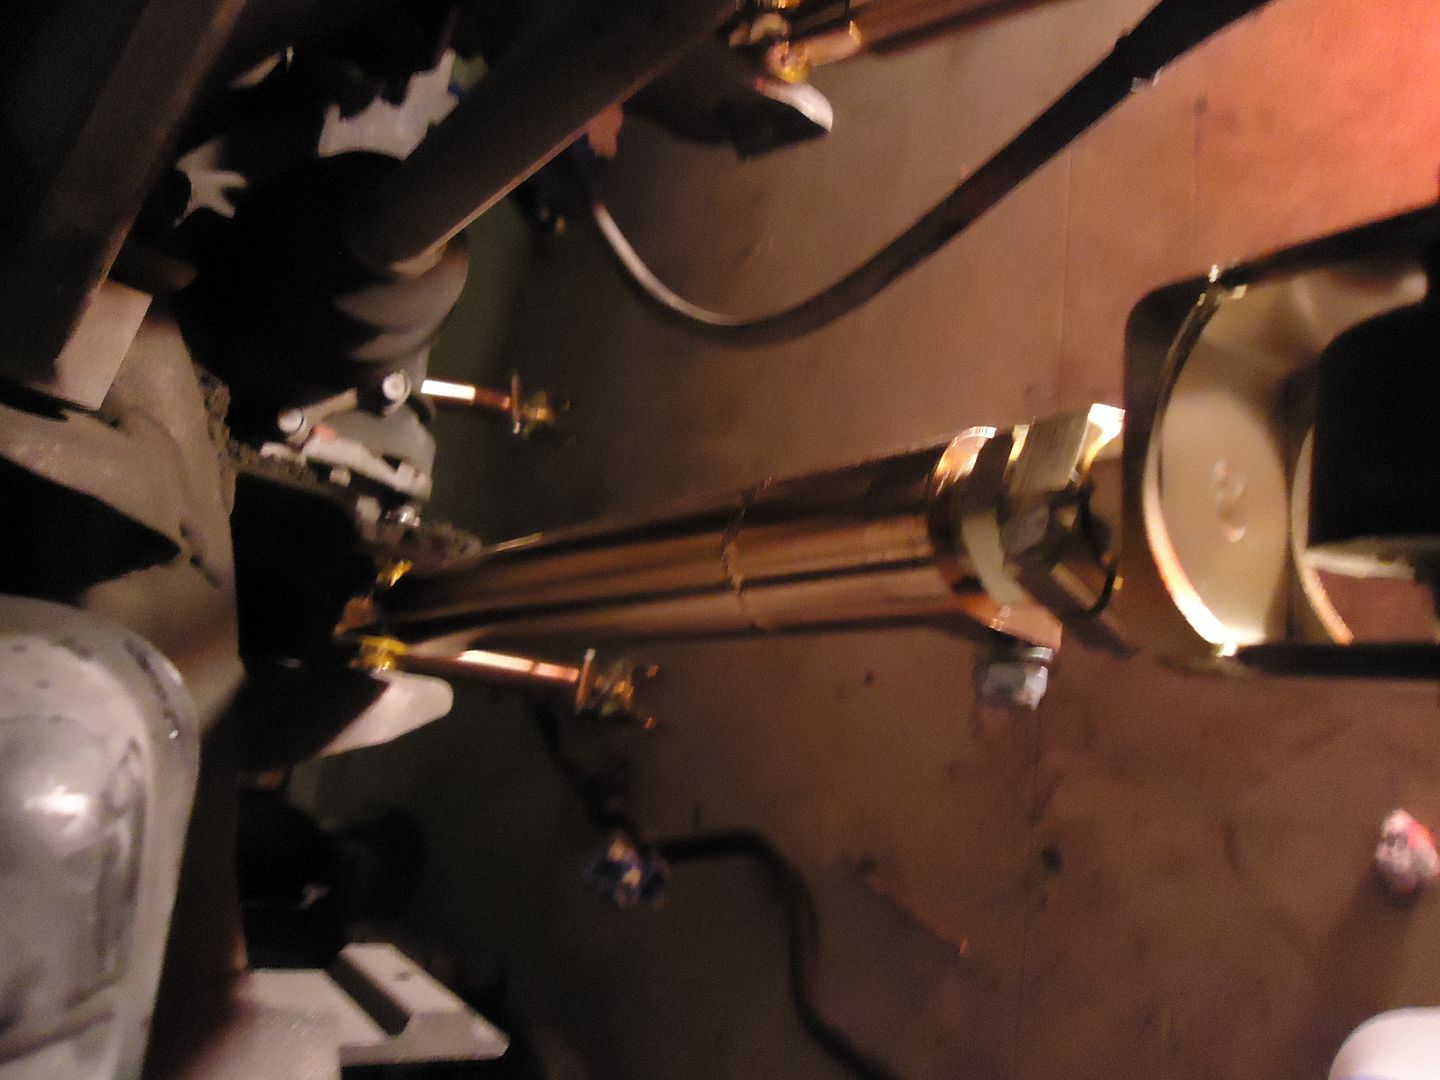
First up to bat were my new sway bars. Motordyne hooked it up with a nice setup sway bars I must say. The quality of these things are top notch.

I paired the sway bars with some Whiteline endlinks.. Love the gold...lol

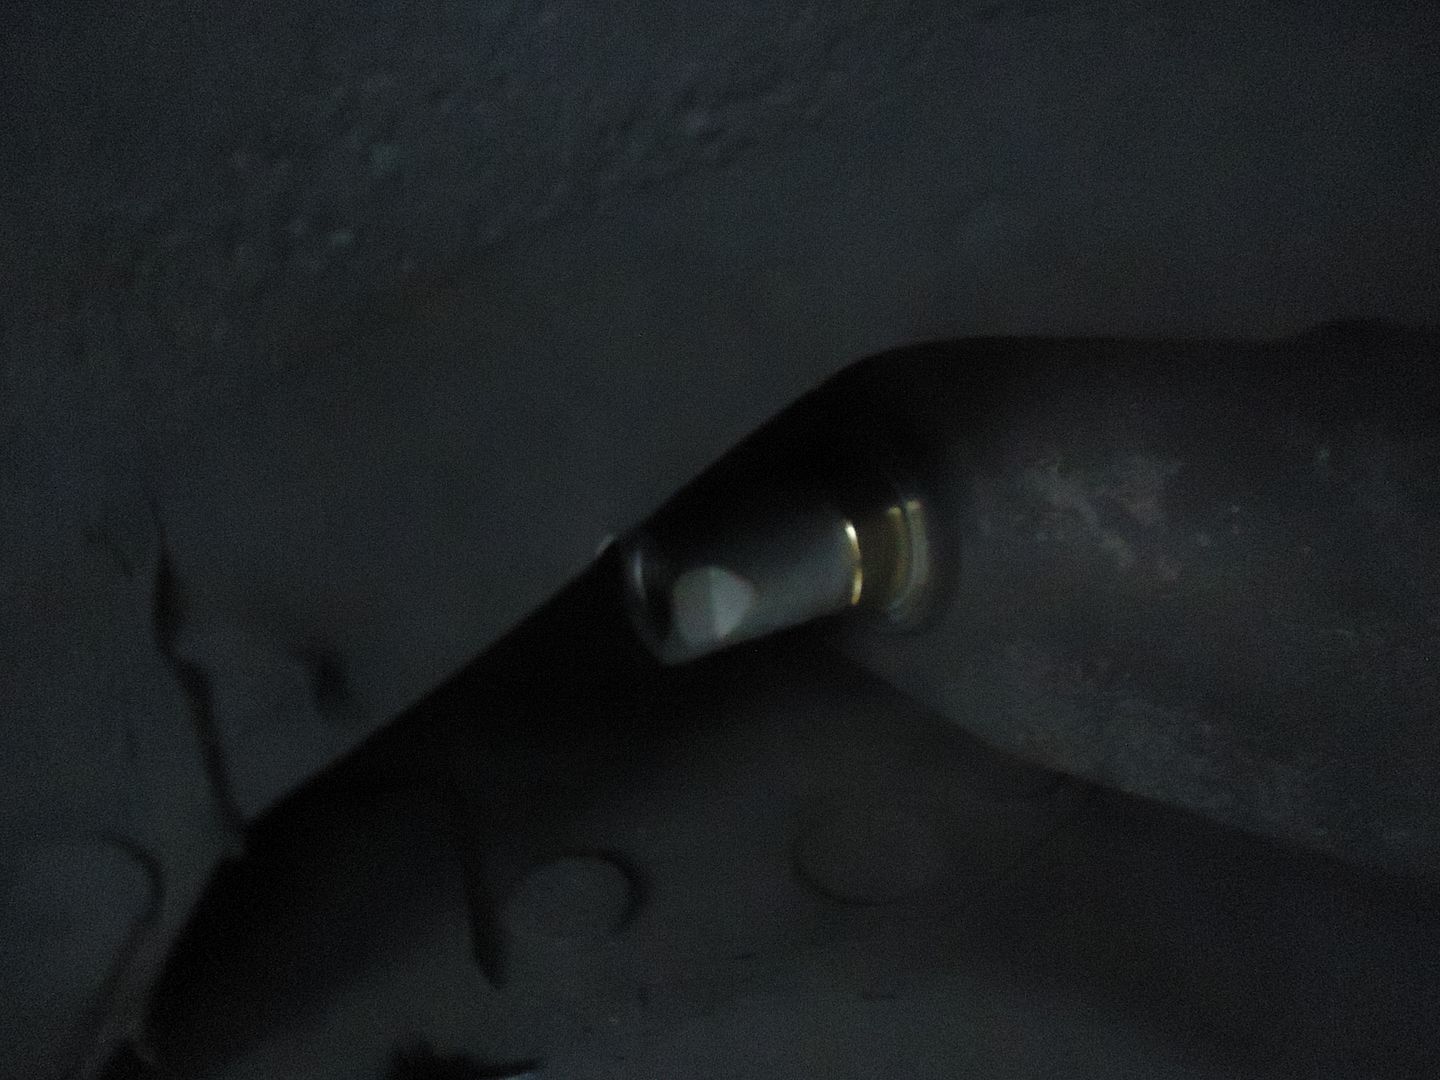
Fit is money, have to test my -20 AN fitting just to make sure it fits. I will post pic later when I do.

Good clearance..
Stamp of approval right here..


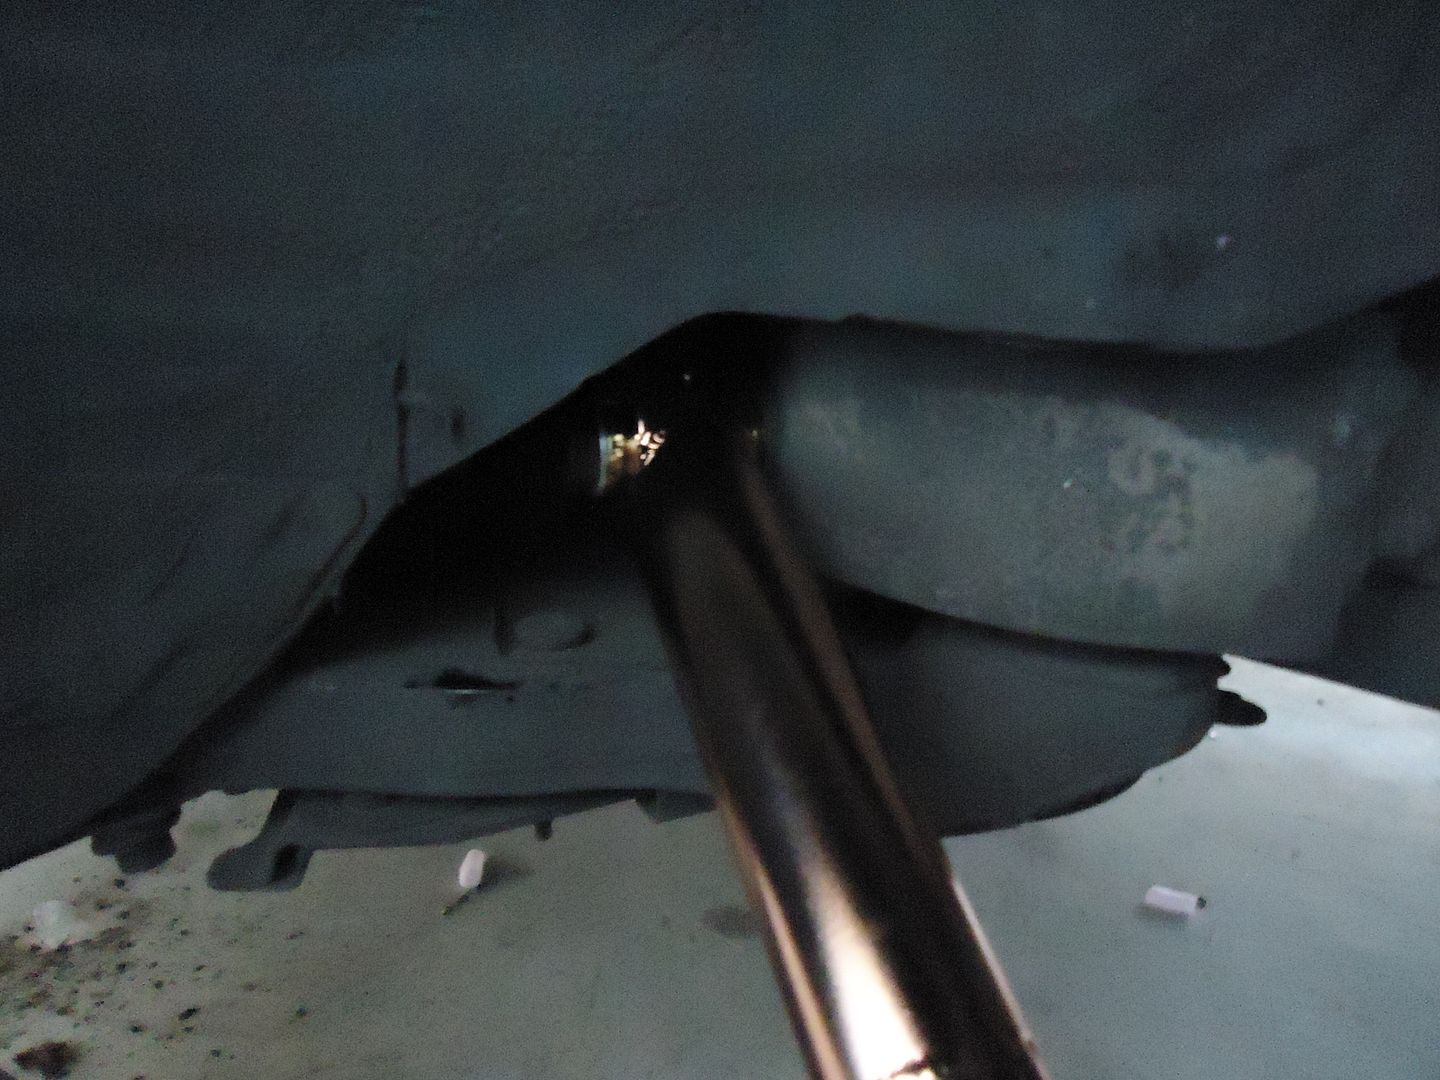
I think these Whiteline endlinks just look so fresh.. I did how ever have to drill the holes out some to fit them, probably due to powder coating but they fit like a glove now.
I thought I took a pic of the rear to but I guess I did not, I will have to post that up later as well.
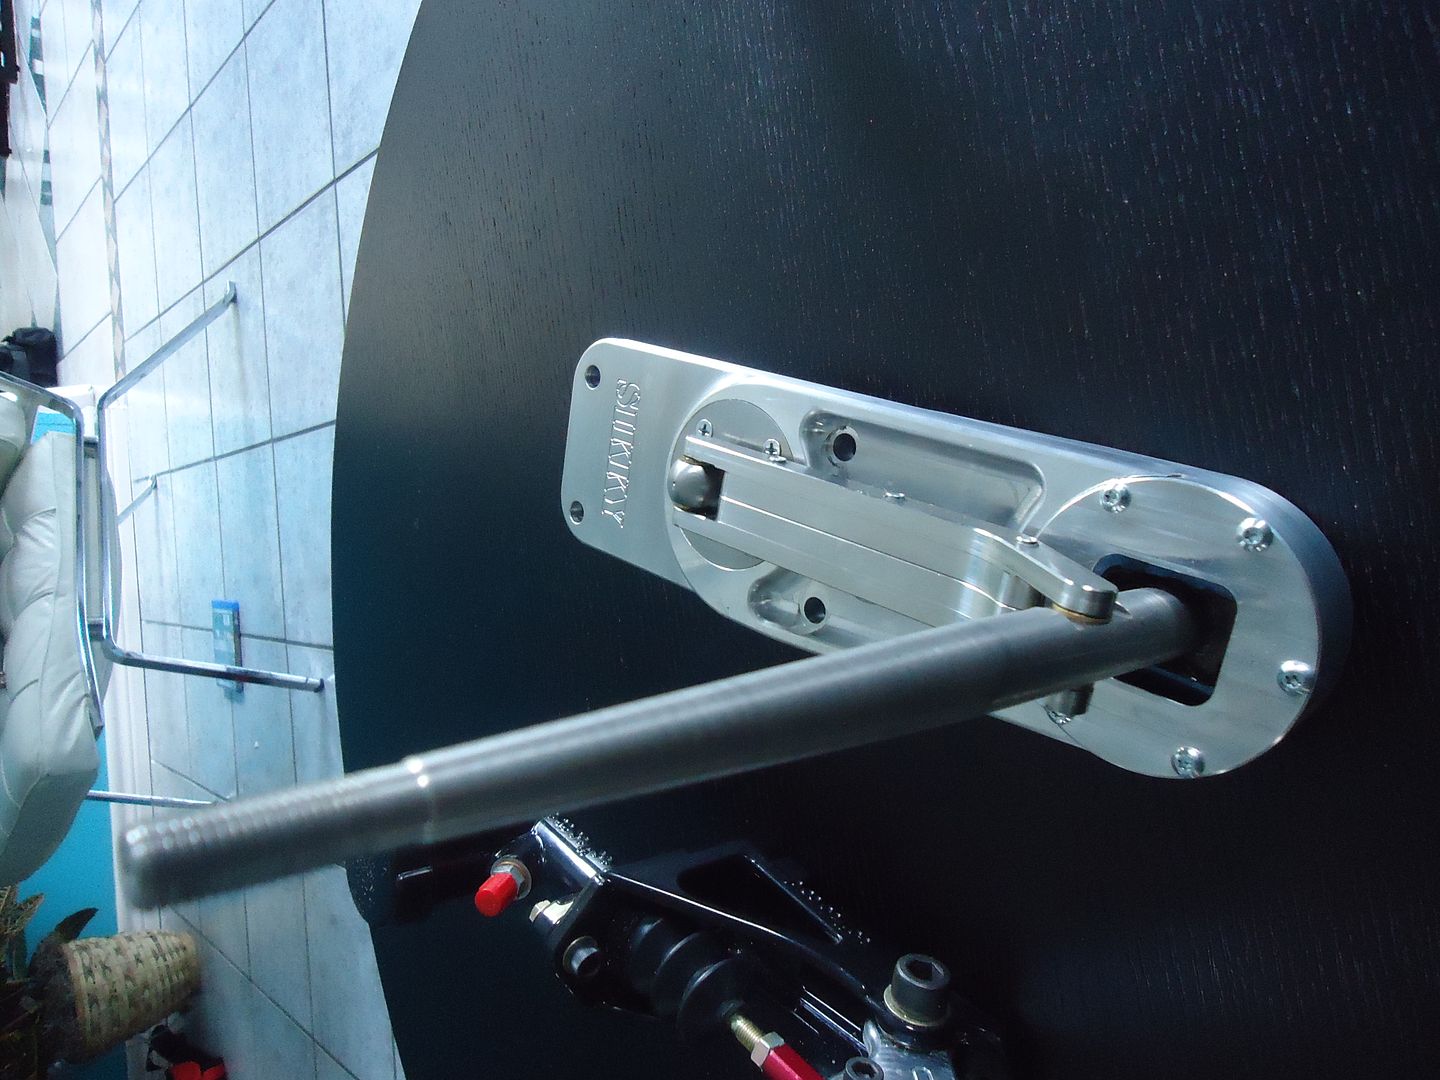
Now I don't think I have posted up the Sikky Shifter yet, so here it is.

The quality on this thing is flawless in my opinion. I also love the fact that they made the thread work with Nissan 350z pattern.

The only down fall to this shifter is that they made it to work with all GTO T56 transmissions. Which causes some problems for guys running Camaro T56s. It tends to pop out of gear due to the difference in shifter location on the transmission.. To solve this problem you will have to purchase the new guild plate from a GTO and also mod the mounting points to make it work with your application. At the moment they are working on the solution for this and I will be sure to update my blog when they do.

Other then that I think this thing looks sick...
Next up is my new custom Ebony and Ivory wood shifter. Made by Andrew Martin. A work of Art this thing is, to me its the little things like this that make a car stand apart and the two pieces Andrew made me did just that in my opinion.
I mean look at the detail,,

Close up... So crazy to think something like this started from a block of wood.
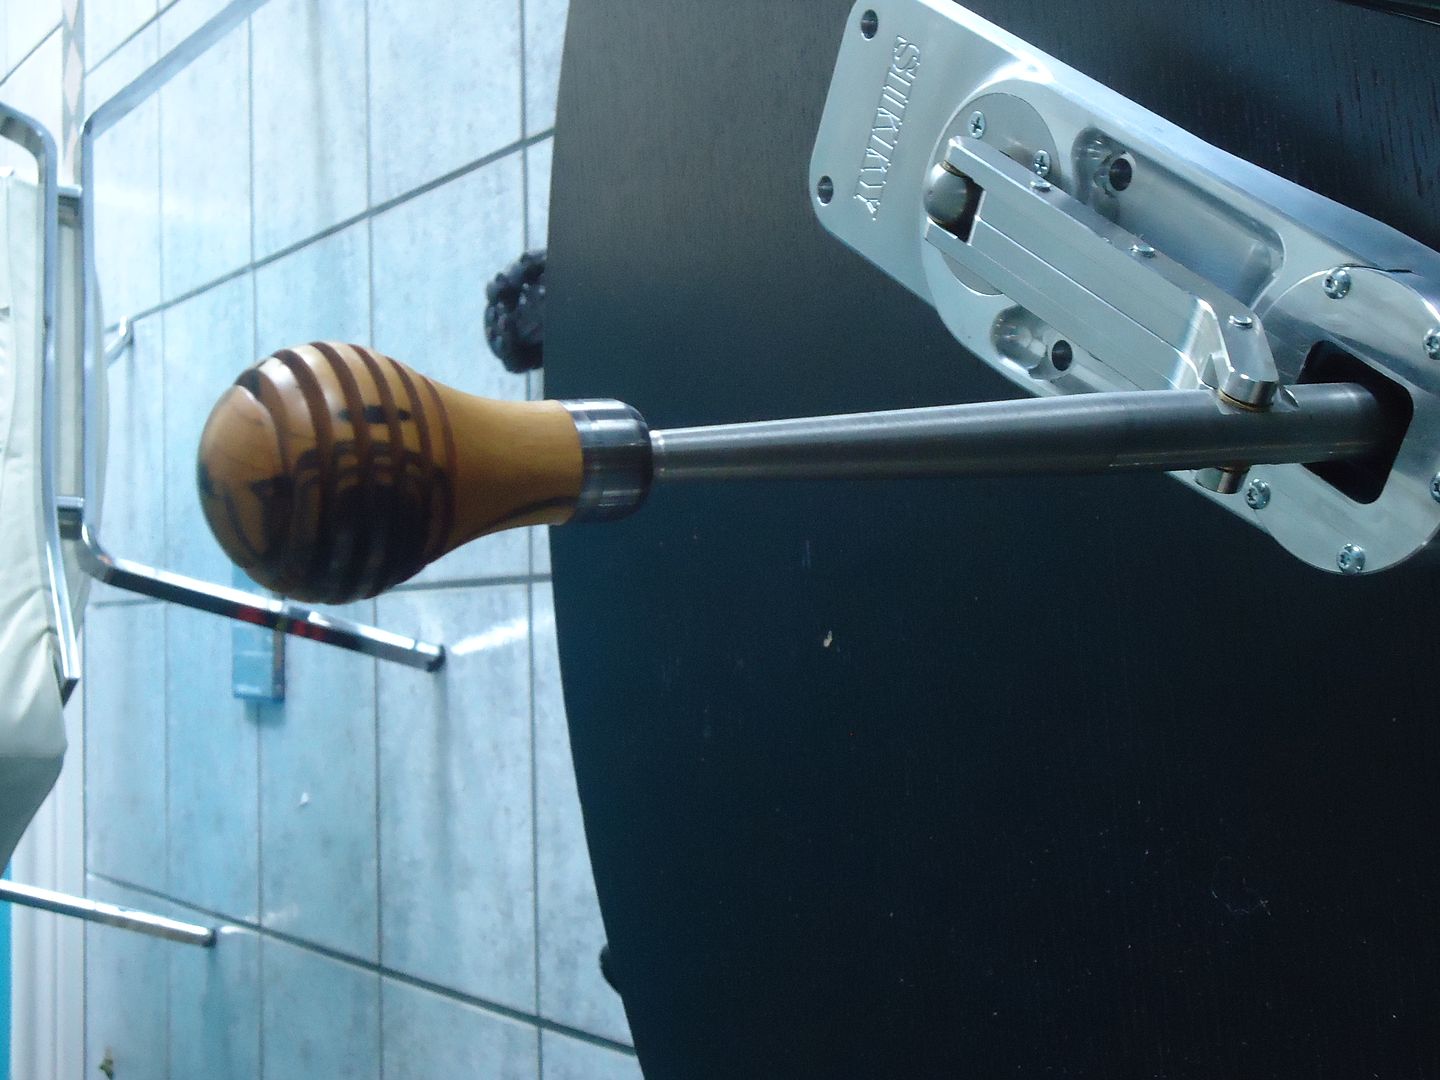
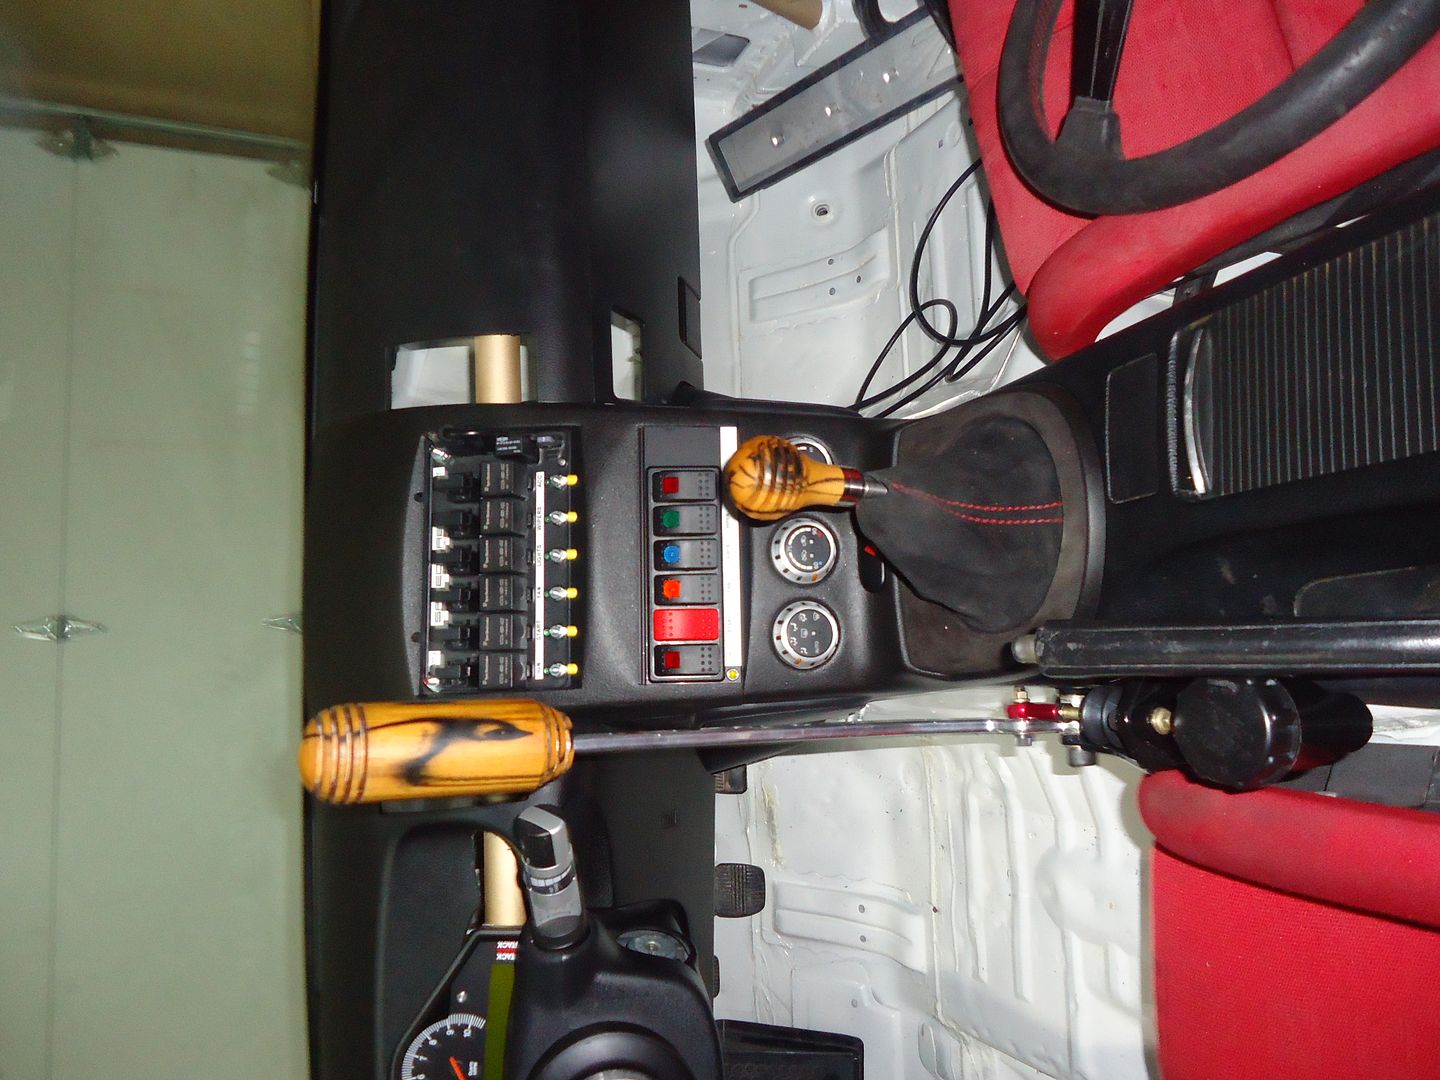
Mounted on the shifter, it just looks like it belongs there.
No words...
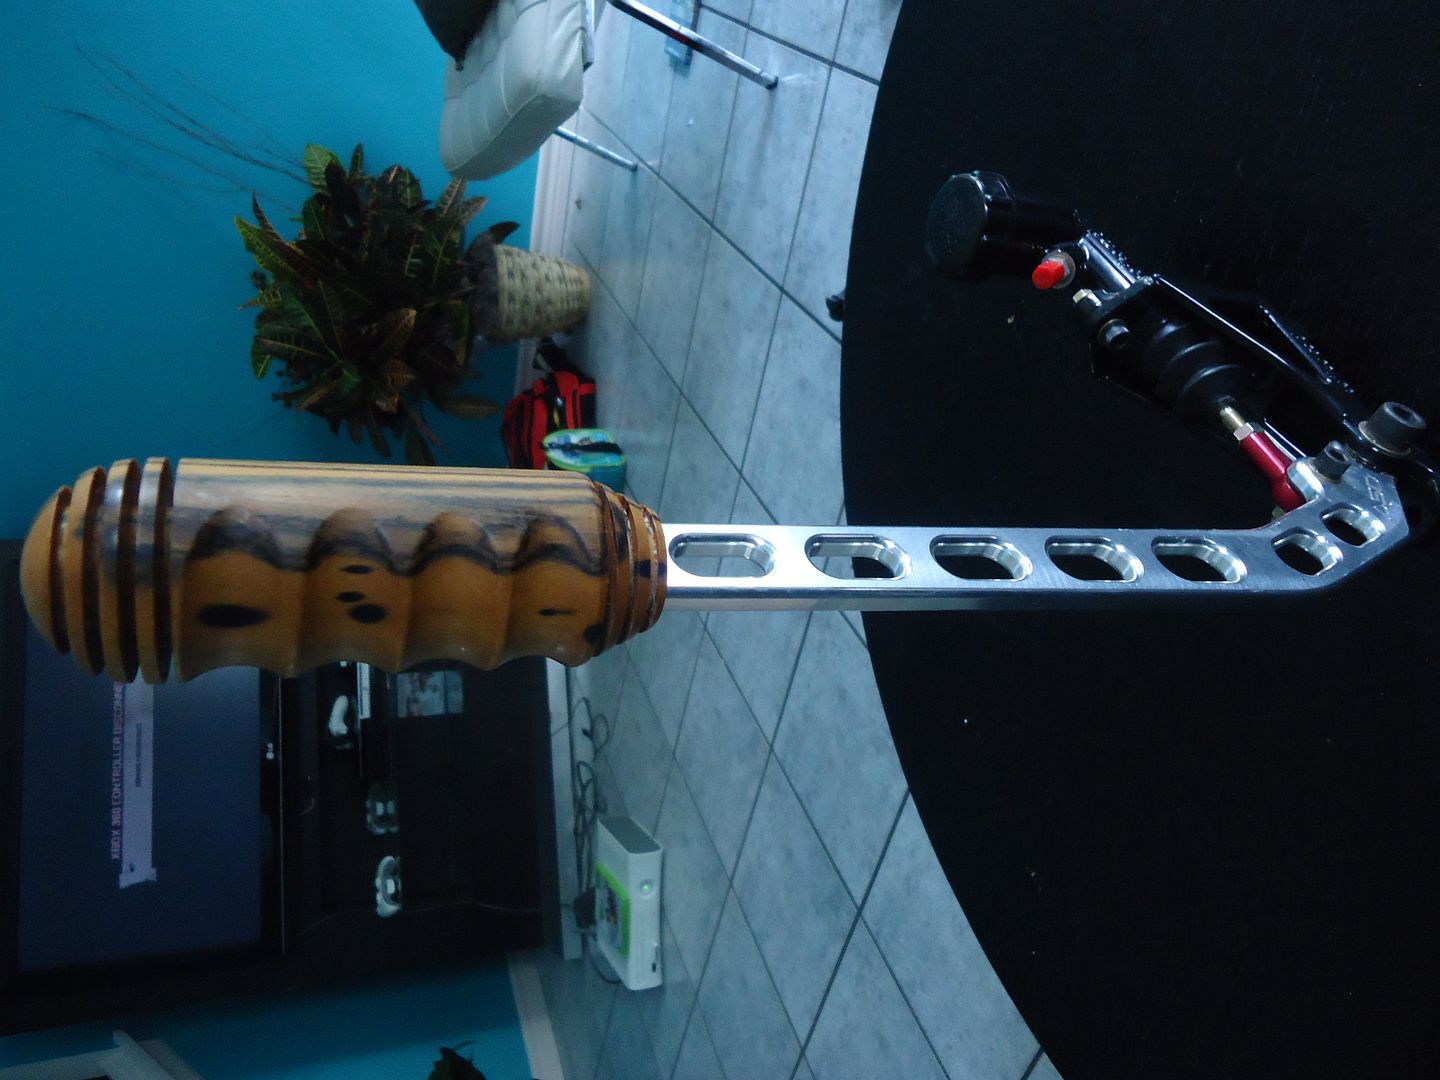
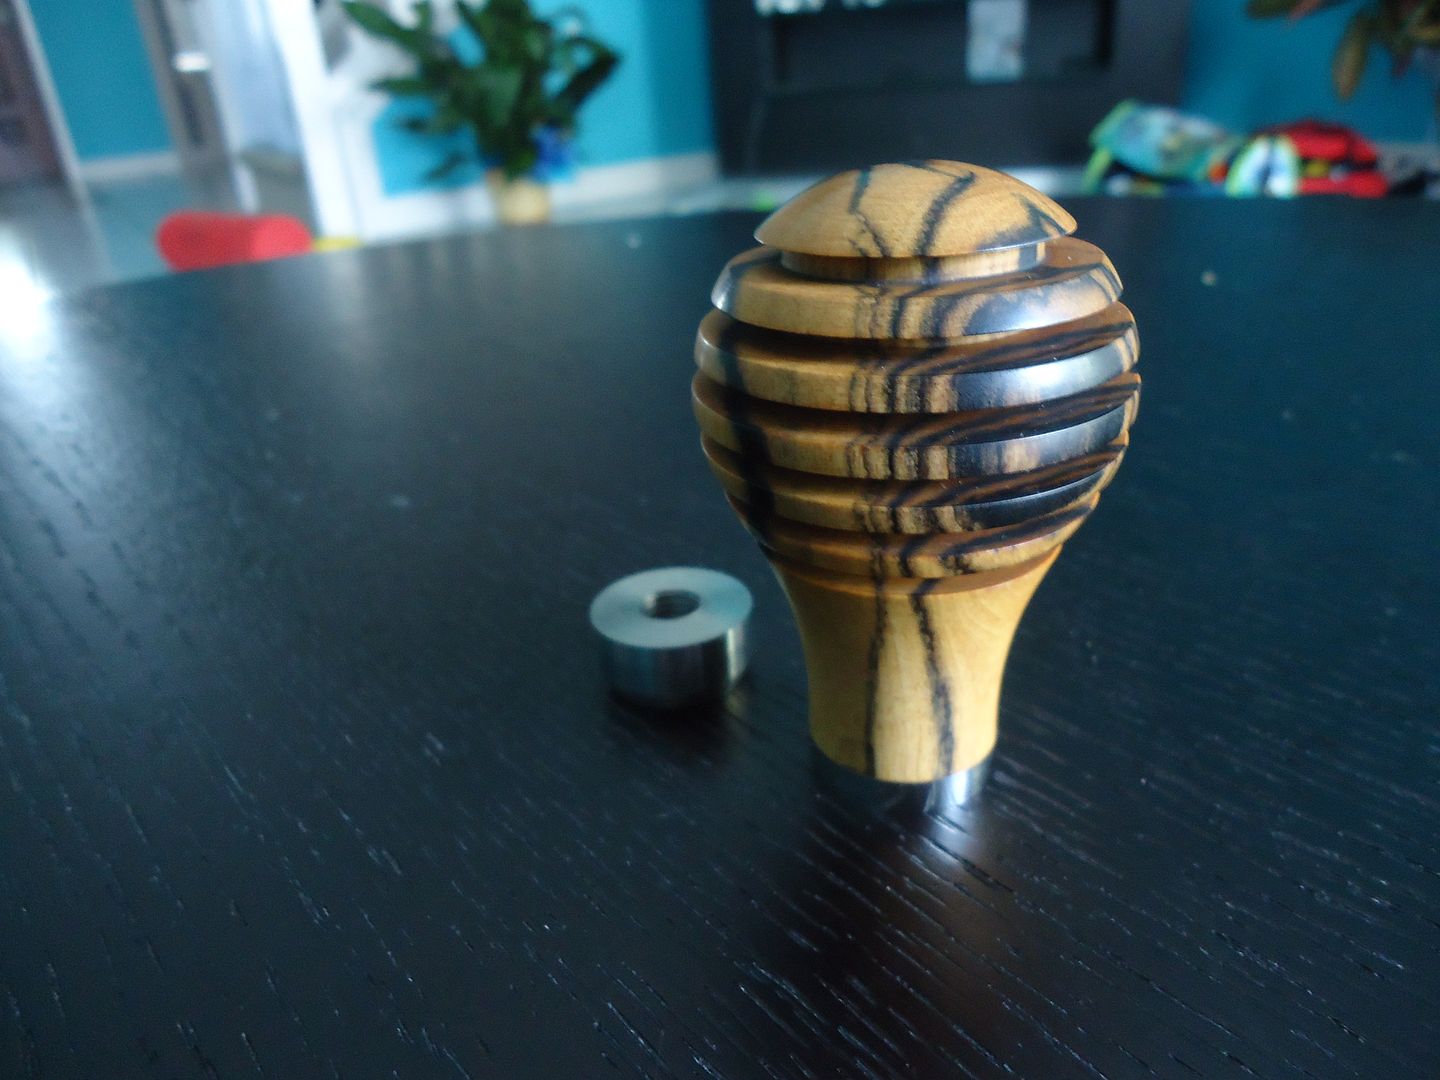
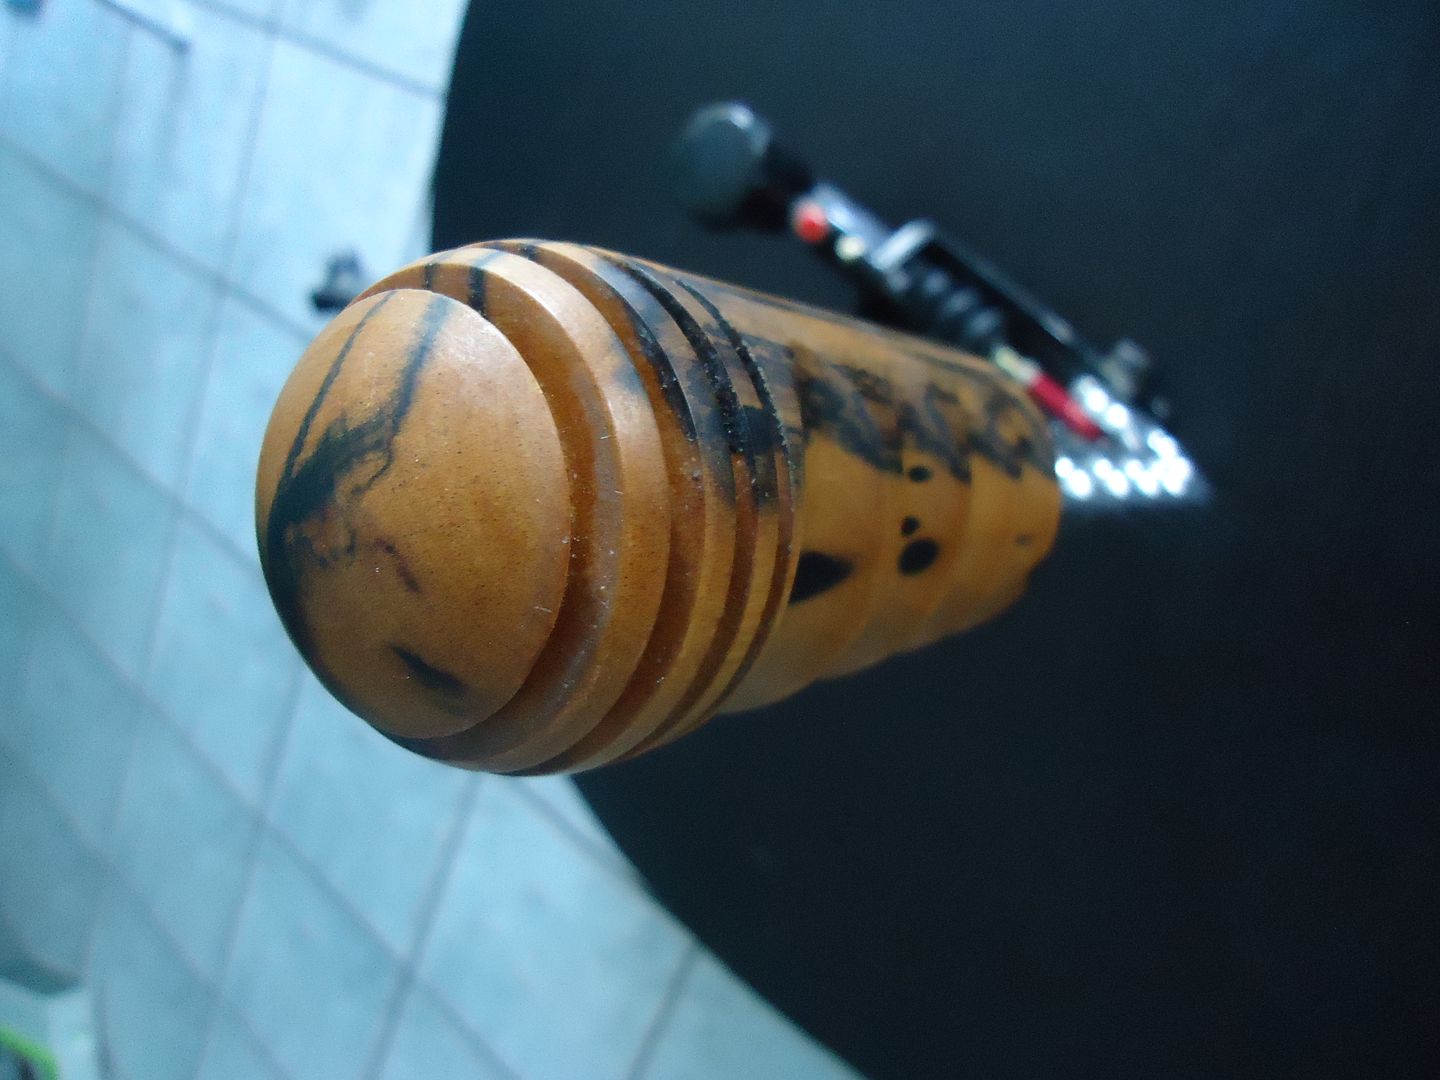
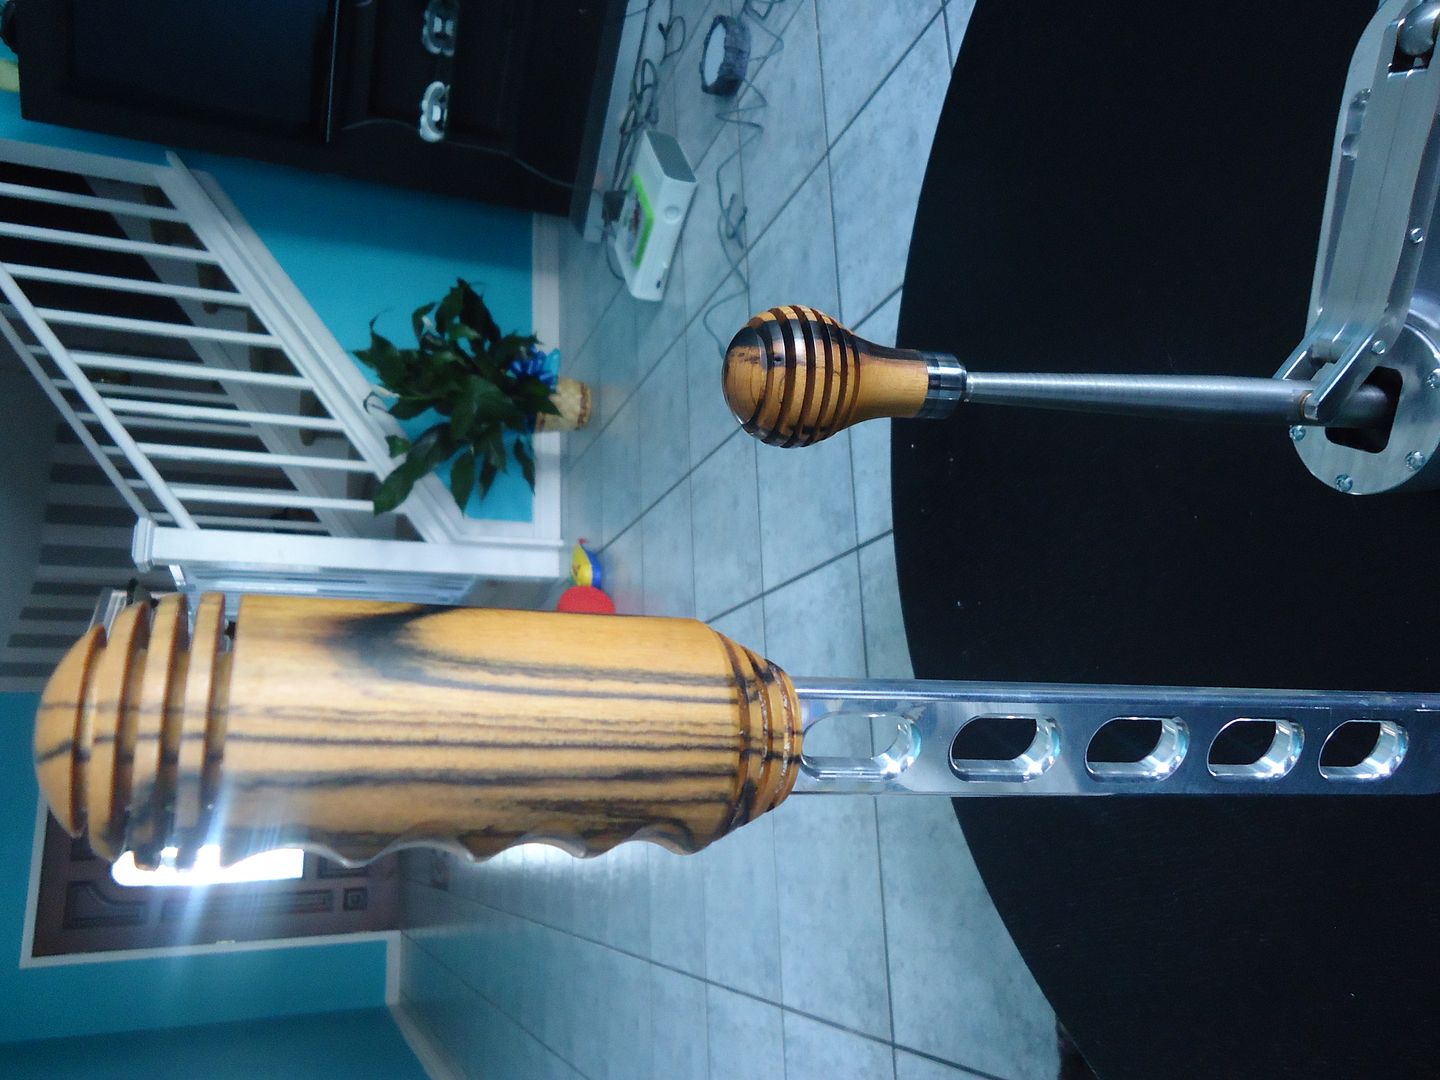
Next item Andrew made for me was my Hydro grip. I wanted it to match my shifter so Ebony and Ivory wood was selected again.
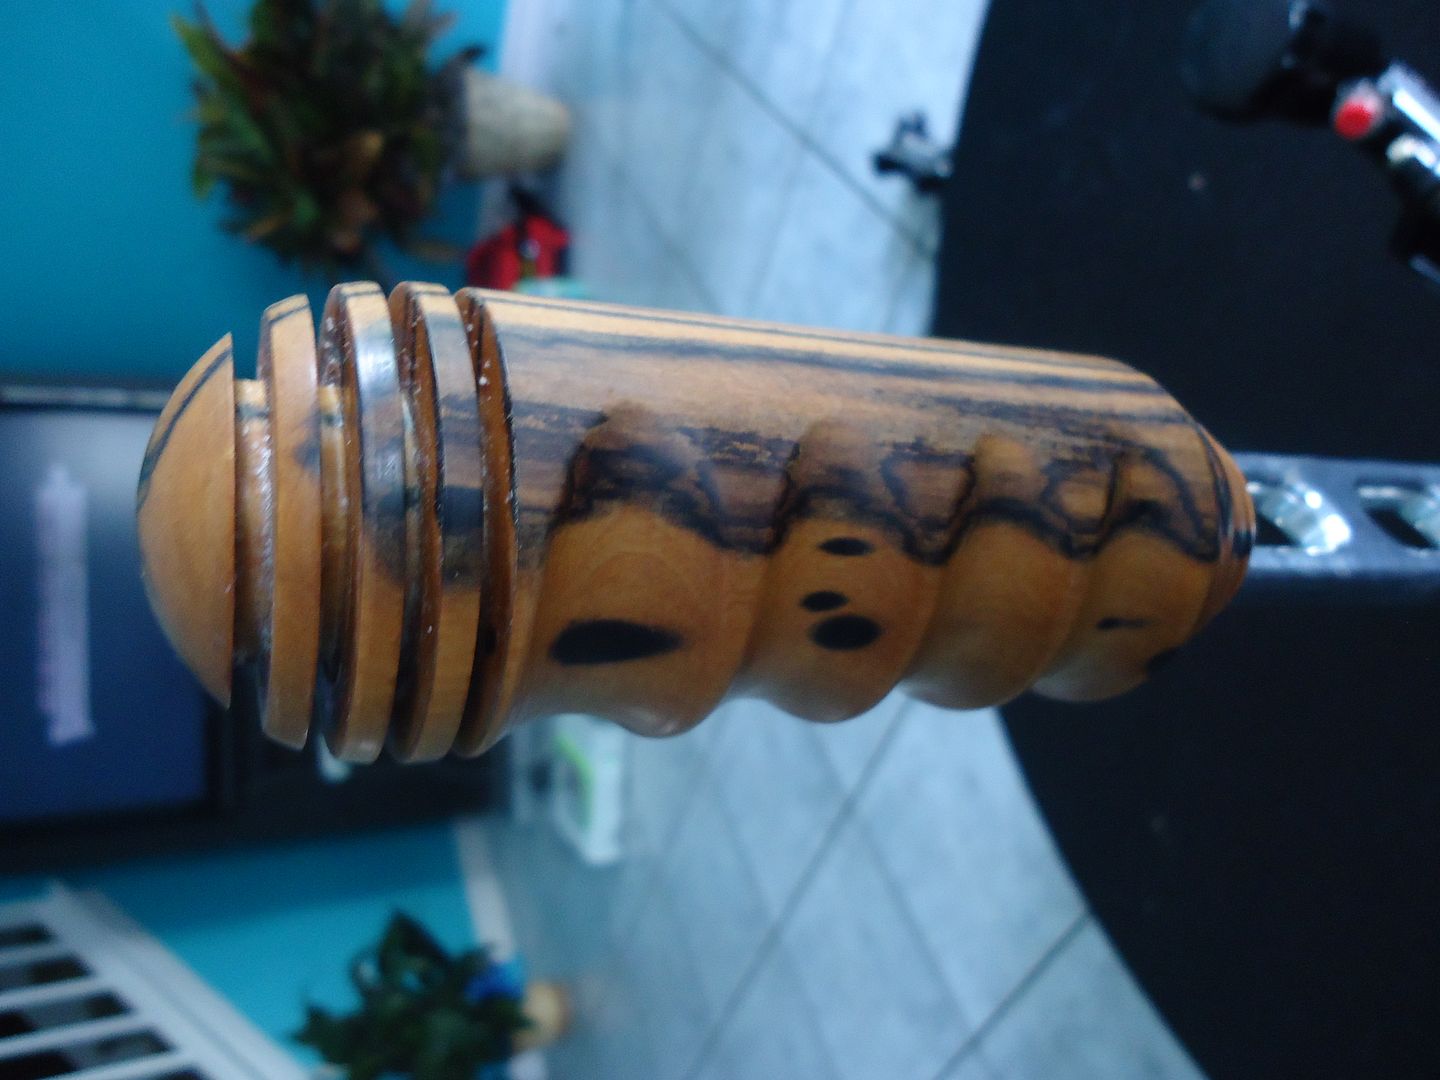
And yet again Andrew out did his self with this damn thing...

I mean seriously look at this thing...
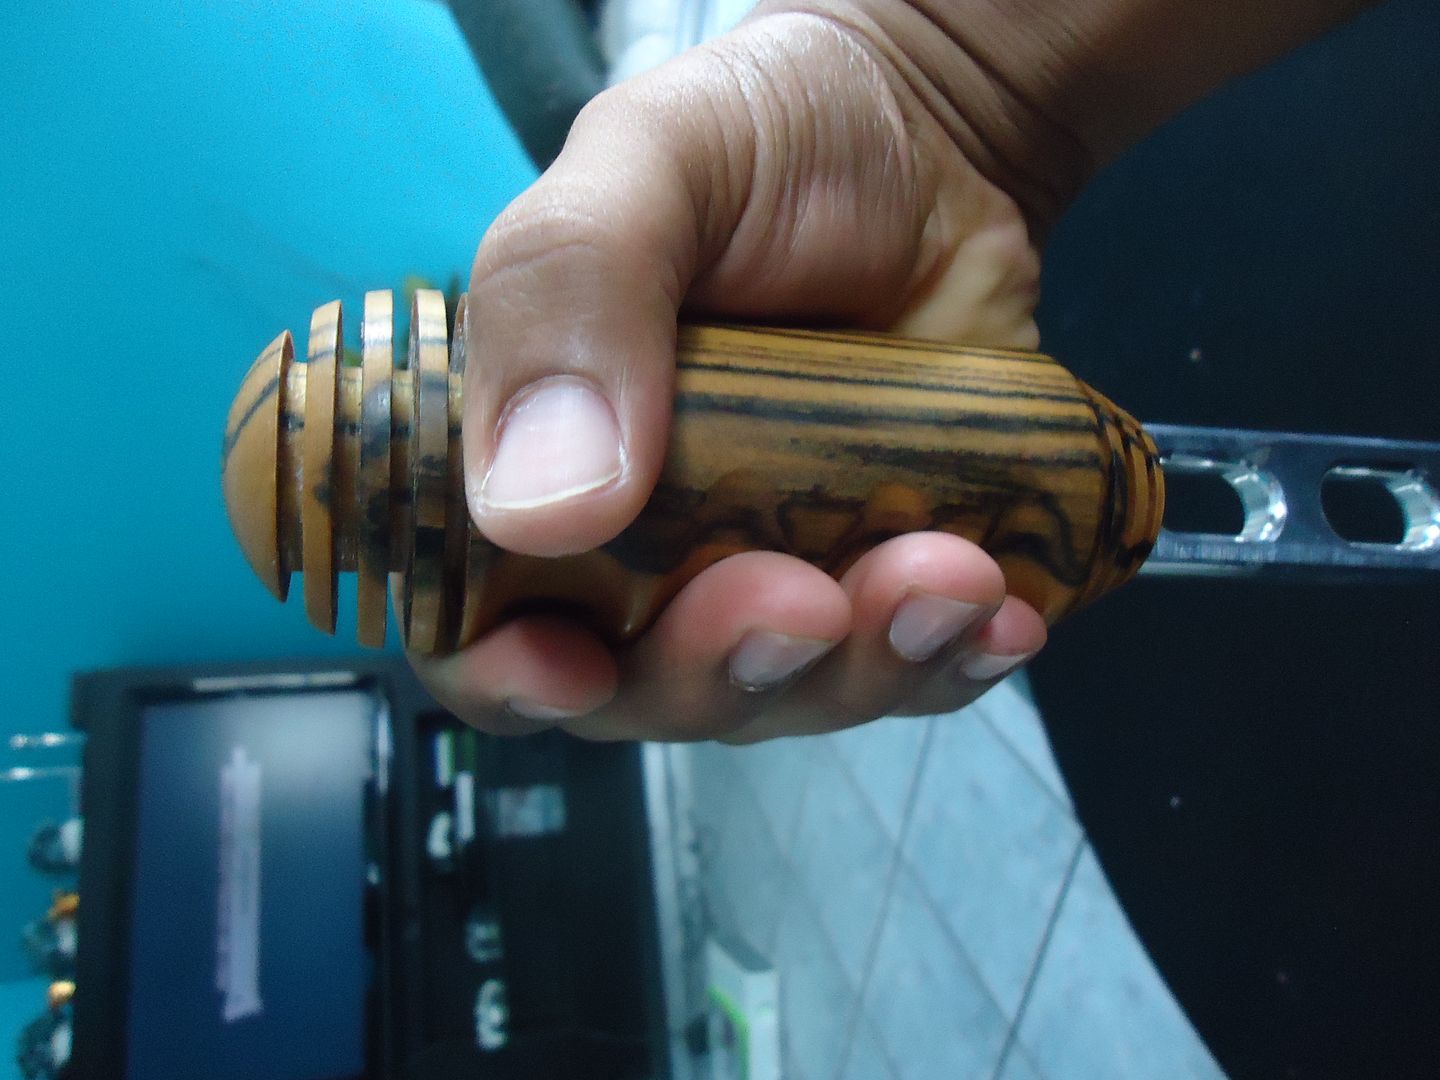
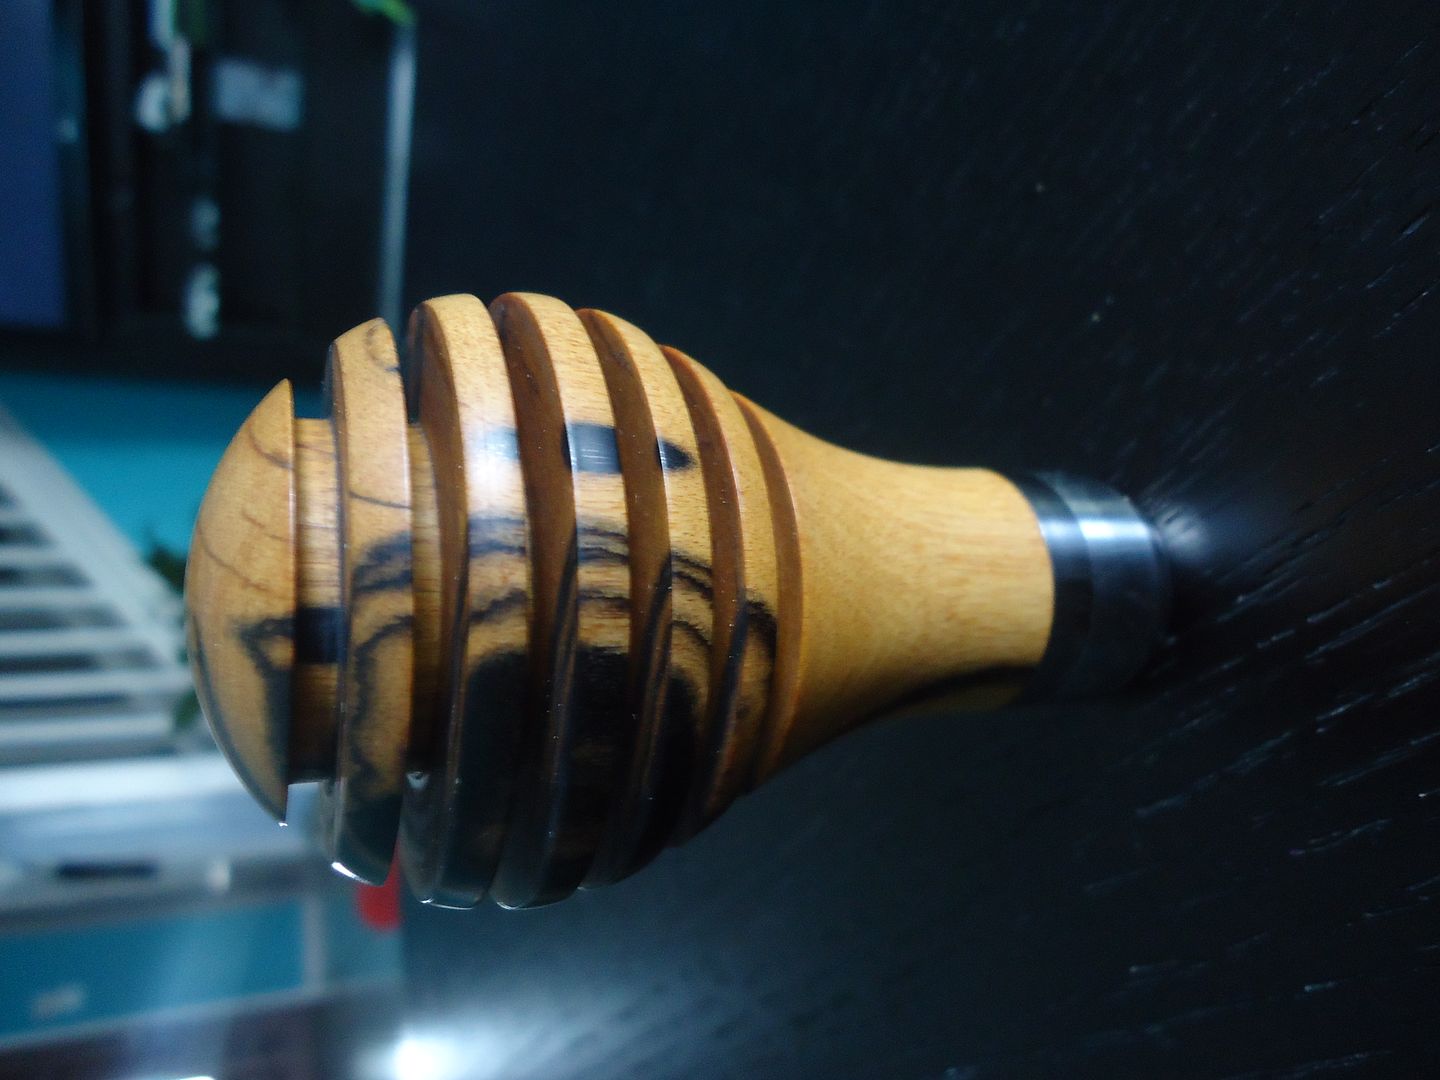
Here is a good pic to show you how big it really is. From pics it looks too big to grab but it fits my hands perfectly (that is what she said)... I know someone was thinking it....lol
Top view

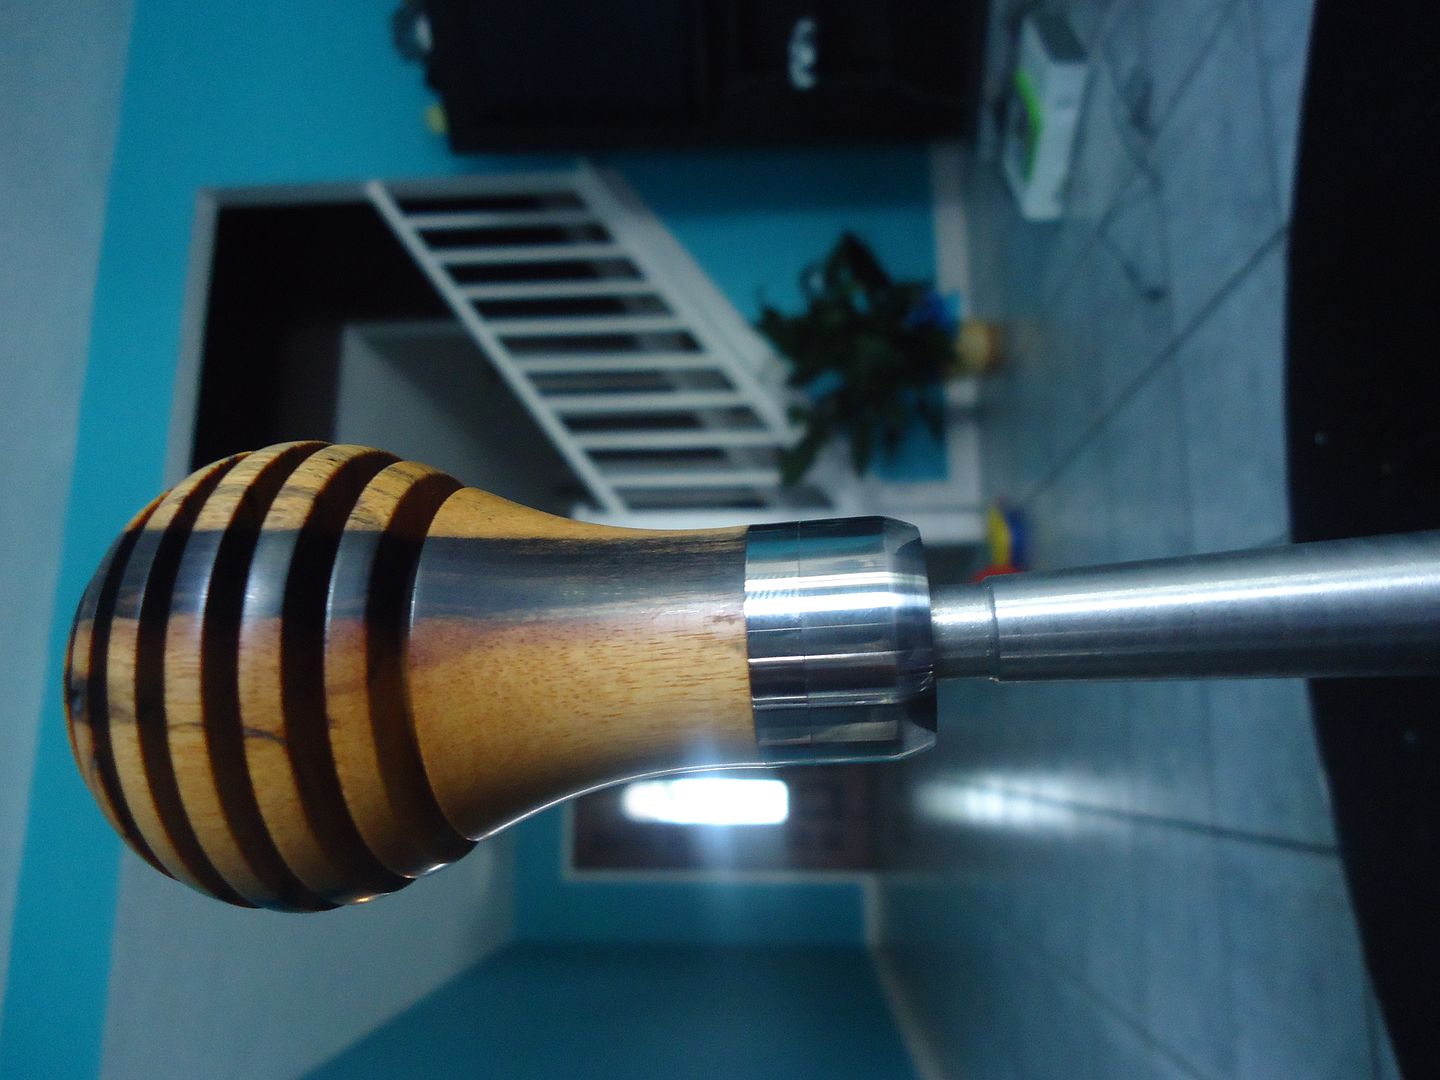
Side by side view of both

Perfect match up....

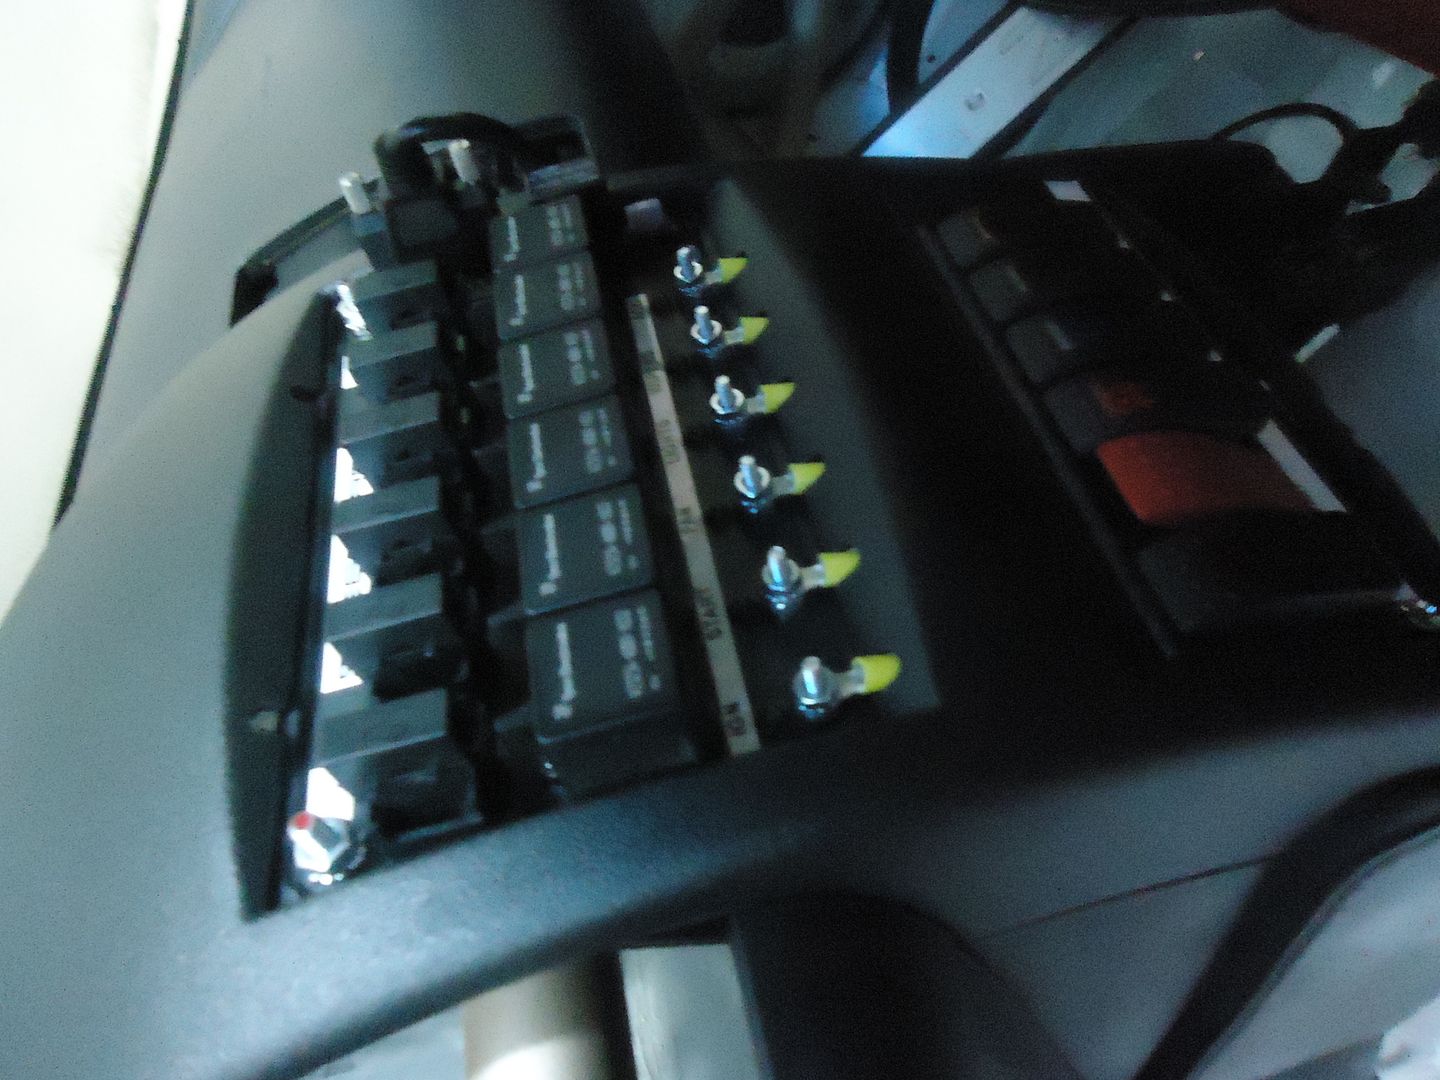
So I have been working on finishing up my interior.. Only things left are my CF door panels (Which I have to cut) and make some floor boards so my feet can set level and then I can place my floor mate were they need to be.

Again its the little things that make the car...
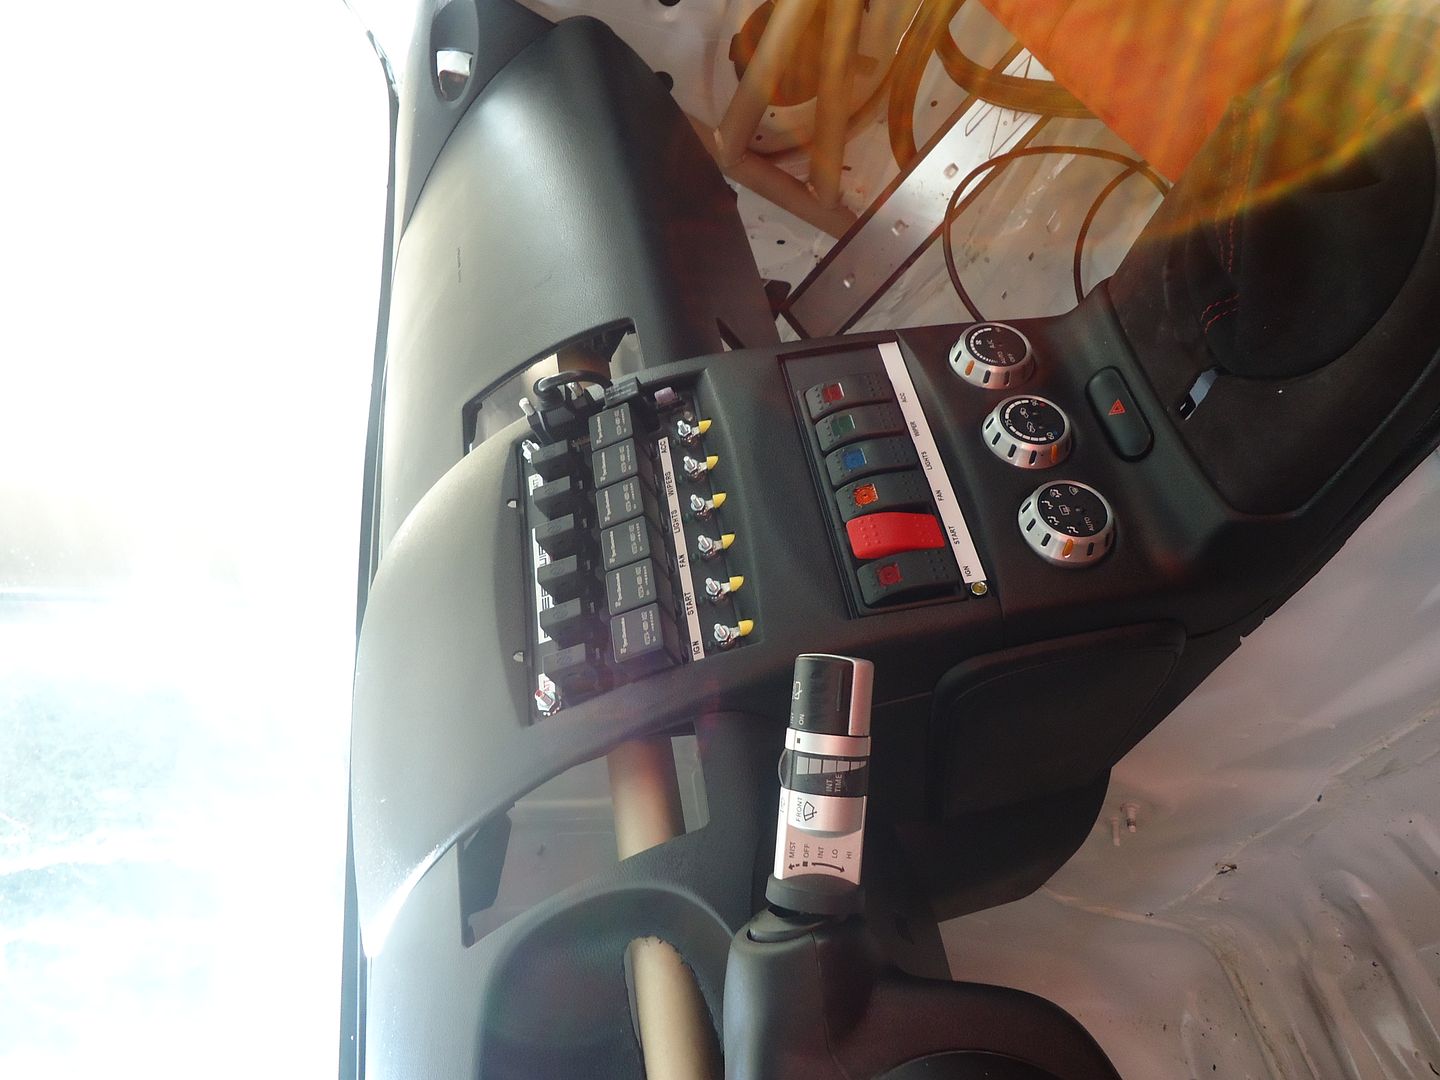
And the work that Tobby did on my dash just completed and complemented the look I was trying to go for. Clean and simple.

Tobby in my opinion makes nothing but art when it comes to his dash work. He takes on each piece like its his own and I for one can really appreciate that.

So thanks Tobby for making something I will use day end and day out..
Here is a striaght on pic with my hydro and shifter mocked up... Looks good
So before I can call the interior done, I have to do a few things like: re-wrap my shifter cover and fix the whole that I have there now. Which was used for my old CNC hydro. And also clean up all the edges I cut to fit the dash or and center console


Also I mocked up my Stack gauge just to give me a idea how it will look. I will be making a bracket to raise it up some but you get the idea from this pic.
So that is it for the update today. Hopefully I can do another update soon and something that is more exciting.
But I would like to thank Andrew and Tobby for making some awesome pieces for my build. I think those little items will set the car apart.
If you guys are interested in any wood work please hit up Andrew Martin on FaceBook: https://www.facebook.com/profile.php...ref=ts&fref=ts and check out his website: http://drewbuildsstuff.blogspot.com/
And if you are interested in getting any work done by Tobby, check out his website: http://broadfield.wordpress.com/
So lets kick this off with a beer shall we. Beer of choice is Circus Boy "The Hefeweizen" by Magic Hat. Now if you know me by now, you would know I love Hefeweizen beers, so this is no different. A very good beer.
First up to bat were my new sway bars. Motordyne hooked it up with a nice setup sway bars I must say. The quality of these things are top notch.
I paired the sway bars with some Whiteline endlinks.. Love the gold...lol
Fit is money, have to test my -20 AN fitting just to make sure it fits. I will post pic later when I do.
Good clearance..
Stamp of approval right here..
I think these Whiteline endlinks just look so fresh.. I did how ever have to drill the holes out some to fit them, probably due to powder coating but they fit like a glove now.
I thought I took a pic of the rear to but I guess I did not, I will have to post that up later as well.
Now I don't think I have posted up the Sikky Shifter yet, so here it is.
The quality on this thing is flawless in my opinion. I also love the fact that they made the thread work with Nissan 350z pattern.
The only down fall to this shifter is that they made it to work with all GTO T56 transmissions. Which causes some problems for guys running Camaro T56s. It tends to pop out of gear due to the difference in shifter location on the transmission.. To solve this problem you will have to purchase the new guild plate from a GTO and also mod the mounting points to make it work with your application. At the moment they are working on the solution for this and I will be sure to update my blog when they do.
Other then that I think this thing looks sick...
Next up is my new custom Ebony and Ivory wood shifter. Made by Andrew Martin. A work of Art this thing is, to me its the little things like this that make a car stand apart and the two pieces Andrew made me did just that in my opinion.
I mean look at the detail,,
Close up... So crazy to think something like this started from a block of wood.
Mounted on the shifter, it just looks like it belongs there.
No words...
Next item Andrew made for me was my Hydro grip. I wanted it to match my shifter so Ebony and Ivory wood was selected again.
And yet again Andrew out did his self with this damn thing...
I mean seriously look at this thing...
Here is a good pic to show you how big it really is. From pics it looks too big to grab but it fits my hands perfectly (that is what she said)... I know someone was thinking it....lol
Top view
Side by side view of both
Perfect match up....
So I have been working on finishing up my interior.. Only things left are my CF door panels (Which I have to cut) and make some floor boards so my feet can set level and then I can place my floor mate were they need to be.
Again its the little things that make the car...
And the work that Tobby did on my dash just completed and complemented the look I was trying to go for. Clean and simple.
Tobby in my opinion makes nothing but art when it comes to his dash work. He takes on each piece like its his own and I for one can really appreciate that.
So thanks Tobby for making something I will use day end and day out..
Here is a striaght on pic with my hydro and shifter mocked up... Looks good
So before I can call the interior done, I have to do a few things like: re-wrap my shifter cover and fix the whole that I have there now. Which was used for my old CNC hydro. And also clean up all the edges I cut to fit the dash or and center console
Also I mocked up my Stack gauge just to give me a idea how it will look. I will be making a bracket to raise it up some but you get the idea from this pic.
So that is it for the update today. Hopefully I can do another update soon and something that is more exciting.
But I would like to thank Andrew and Tobby for making some awesome pieces for my build. I think those little items will set the car apart.
If you guys are interested in any wood work please hit up Andrew Martin on FaceBook: https://www.facebook.com/profile.php...ref=ts&fref=ts and check out his website: http://drewbuildsstuff.blogspot.com/
And if you are interested in getting any work done by Tobby, check out his website: http://broadfield.wordpress.com/