


69 Camaro LS2/4L70E install
Well after years off working off the garage floor, boxes, etc my neighbor (95 Z/28 LT1) and I got together and built some very simple workbenches. We used these instructions, http://www.eaa1000.av.org/technicl/w...l/tablefig.htm , as a based and modified them slightly. I made the base 6' wide and added an 8' long 1.5" thick top. As you can see from the picture I could already use more space!

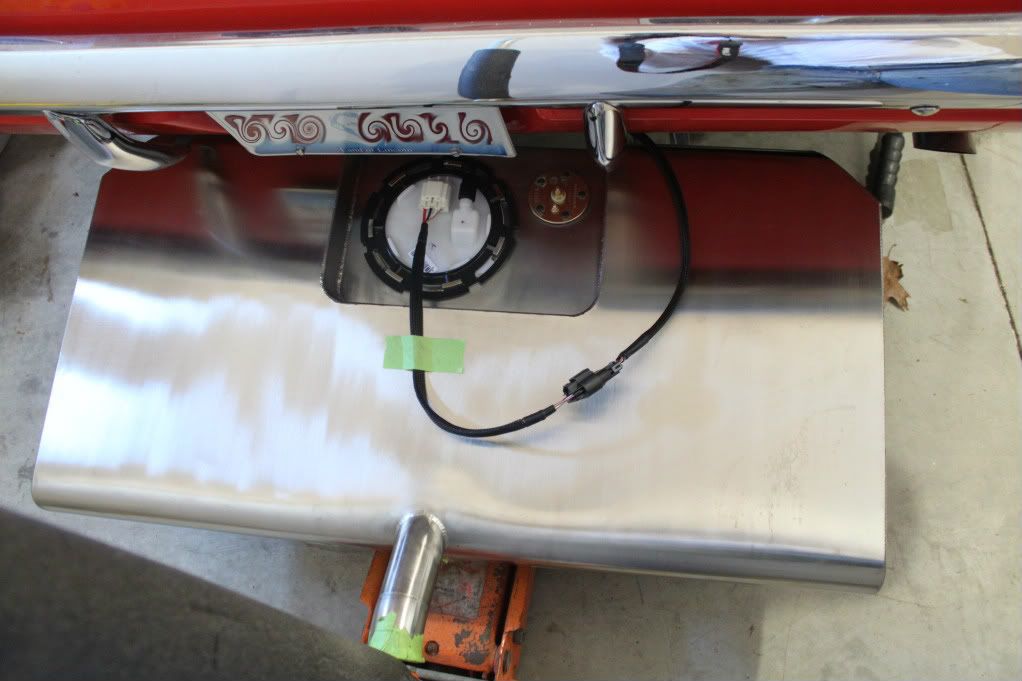
Found some free time to install the gas tank. Prior to installing I have heard from quite a few people that there are issues with the fuel level sending units in these tanks. So to avoid the frustration I replaced it with a 5th gen Camaro in tank fuel level sensor. I bought this and the 5th gen Camaro tank harness from CarlC for $124 shipped.
The new fuel level sensor required a new fuel level gauge, since the signal is not your standard 0-90 ohm, but rather 0-280 ohm. I purchased an Autometer Ultra-lite gauge (p/n 4310) from Summit Racing for $118.
The only thing left is to run my fuel line and and I need to figure out a vent system for the tank. I would like to run a charcoal cansister setup, but that may prove difficult given how close the vent is to the trunk pan.
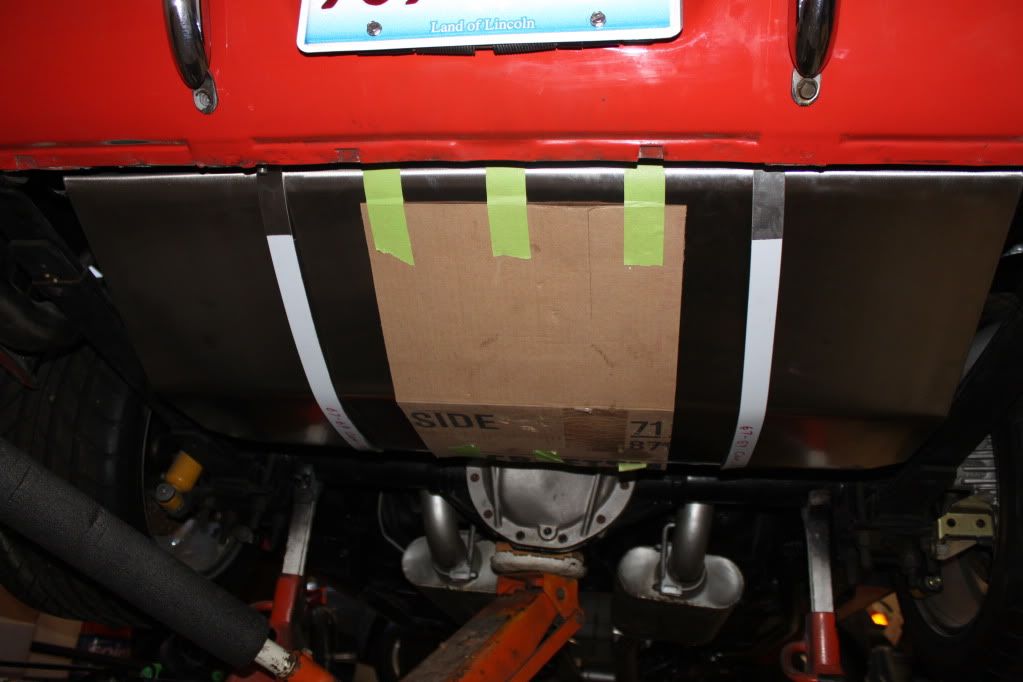
tank installed....I didn't weigh it, but the stainless tanks weigh a ton compared to a stock tank!
The new fuel level sensor required a new fuel level gauge, since the signal is not your standard 0-90 ohm, but rather 0-280 ohm. I purchased an Autometer Ultra-lite gauge (p/n 4310) from Summit Racing for $118.
The only thing left is to run my fuel line and and I need to figure out a vent system for the tank. I would like to run a charcoal cansister setup, but that may prove difficult given how close the vent is to the trunk pan.
tank installed....I didn't weigh it, but the stainless tanks weigh a ton compared to a stock tank!
Last edited by Rocketrod; Sep 30, 2012 at 09:15 AM.
Unless the horsepower bug get a holds of me I should be good. The pump is good for approximately 600hp....we will see.
Last edited by Rocketrod; Feb 4, 2012 at 06:59 PM.
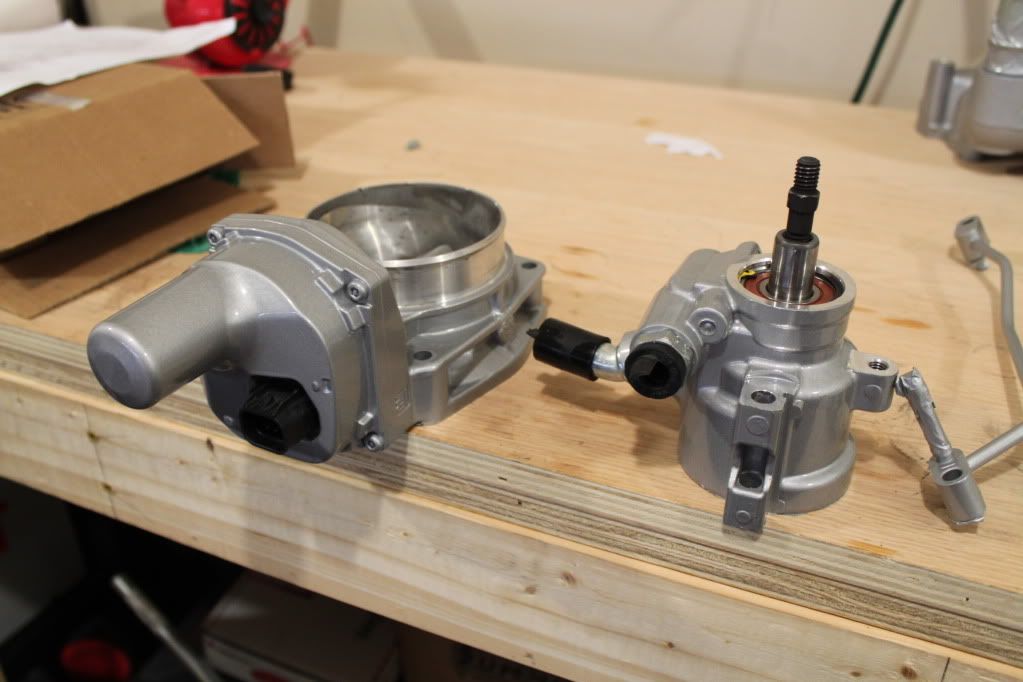
Time for another update. I finally decided to go with the GMPP Corvette accessory drive setup using a 2009-2012 Corvette water pump, which places the upper radiator hose on the driver side. This makes it a little easier to re-use my old radiator setup versus buying a new one.
Last night I got around to painting the accessory drive setup and water pump. It went pretty good considering my detail gun wouldn't work and I had to spray everything with the larger spray gun. There were a couple minor runs, but overall I am very happy with the end results. Unfortunately the pics aren't that good.
After sanding everything with 80 and 180 grits sanding paper, then cleaned I applied a couple light coats of SEM Etching primer to all the pieces
Here is most of the part after 3-4 coats of Shop Line single stage Poly Silver.
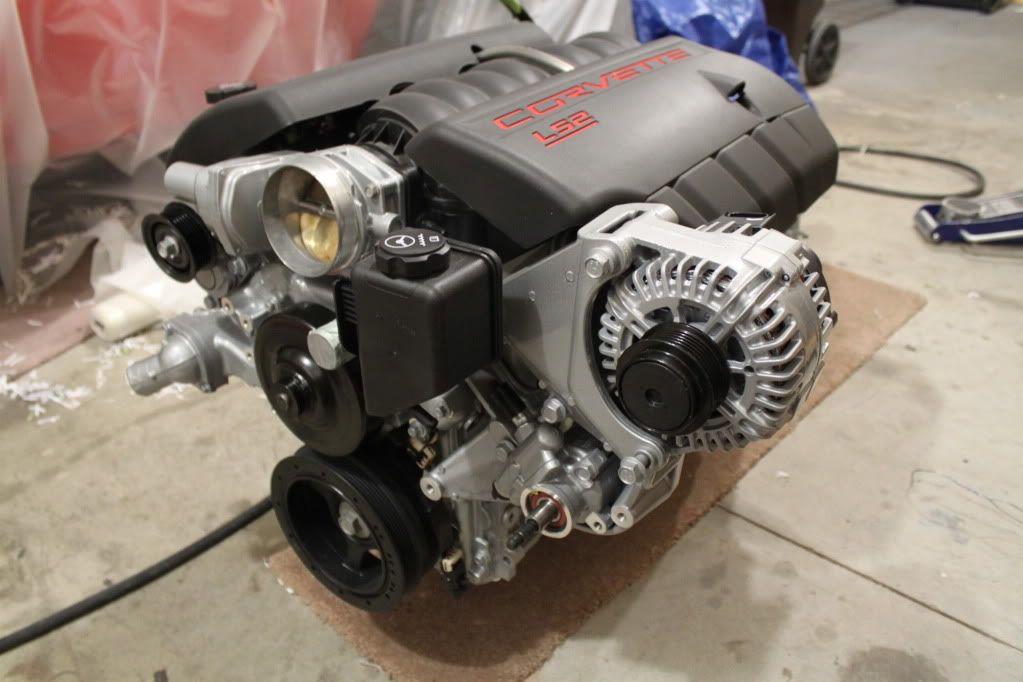
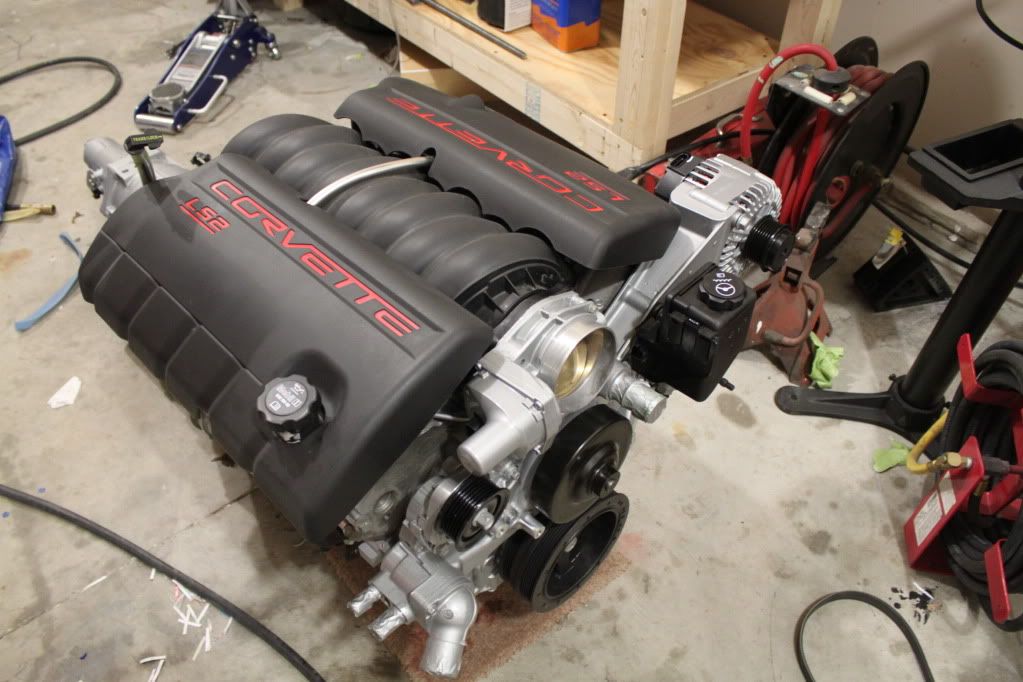
Here is a pick with all the parts mocked up again after painting
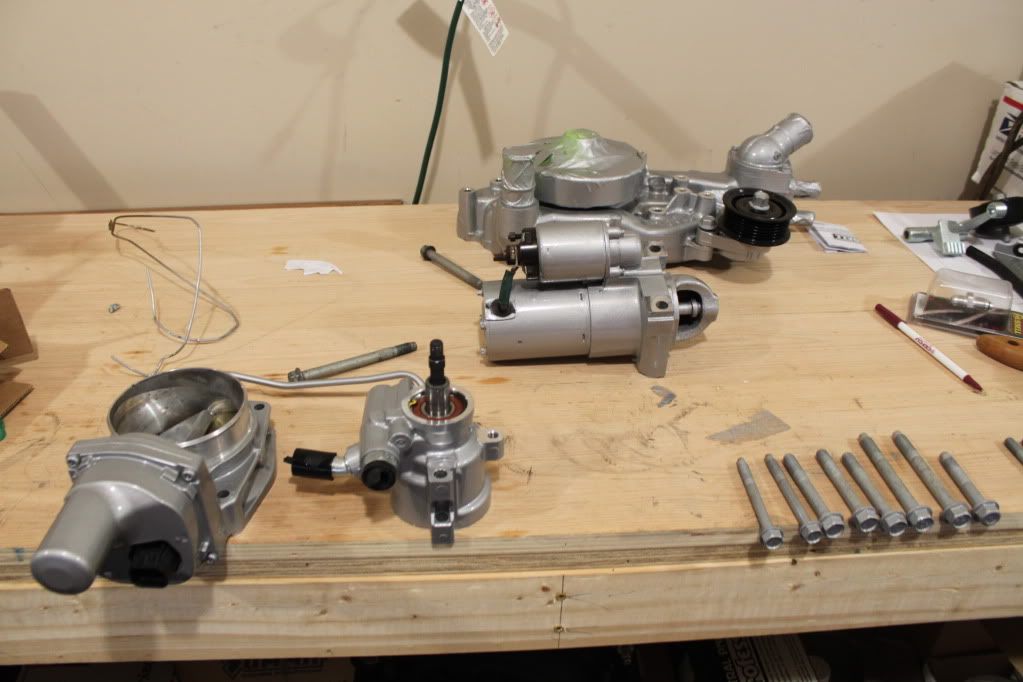
- p/n 19155067 GMPP Corvette Accessory Drive w/ A/C
- p/n 251728 AC Delco Water pump with upper radiator hose outlet on driver side
- p/n 12635649 GM Harmonic Balancer
- p/n 12557840 Balancer bolt
Last night I got around to painting the accessory drive setup and water pump. It went pretty good considering my detail gun wouldn't work and I had to spray everything with the larger spray gun. There were a couple minor runs, but overall I am very happy with the end results. Unfortunately the pics aren't that good.
After sanding everything with 80 and 180 grits sanding paper, then cleaned I applied a couple light coats of SEM Etching primer to all the pieces
Here is most of the part after 3-4 coats of Shop Line single stage Poly Silver.
Here is a pick with all the parts mocked up again after painting
LS1 Tech Stories
The Best V8 Stories One Small Block at Time

Gas Monkey Built a 6-Wheel Ferrari Testarossa With a Corvette LT4 Engine
Verdad Gallardo
7 Most Reliable High-Performance Engines GM Has Ever Built
Verdad Gallardo
Amazing '71 Camaro Restomod Is Modern Muscle Car Under the Skin
Verdad Gallardo
6 Common C5 Corvette Failures and What's Involved In Repairing Them
Pouria Savadkouei
Retro Modern Bandit Pontiac Trans AM Comes With Burt Reynolds' Autograph
Verdad Gallardo
Top 10 Greatest Cadillac V Series Performance Models Ever, Ranked
Pouria Savadkouei
Top 10 Most Powerful Chevy Trucks Ever Made!

Hennessey's New Supercharged Silverado ZR2 Has 700 HP
Verdad Gallardo
Coachbuilt N2A Anteros Is an LS2-Powered C6 Corvette In Italian Clothes
Verdad Gallardo Thanks....yes it should clean things up quite a bit. No I just need to get the clearance issues worked out with my headers and a engine harness, then I can install everything.

TECH Apprentice
Joined: Jul 2011
Posts: 393
Likes: 0
Glad to help! Gives me something to do. Did you ever check on pricing from Travis (daytonayellaz) I like what I have seen from him over on PT.com.
Going back to our PM's I was messing around with my harness again yesterday and the closer I look at it the less I like it. I might end up pulling all the wrapping off of it to try and make things look neater. I really am having a hard time coming up with a way to cleanly mount the computers and the fuse block.
Going back to our PM's I was messing around with my harness again yesterday and the closer I look at it the less I like it. I might end up pulling all the wrapping off of it to try and make things look neater. I really am having a hard time coming up with a way to cleanly mount the computers and the fuse block.
The more I research this and hear from others I am considering just modifying the harness I got, but I am really just not in the mood to mess with it. I need to figure something out soon and driving season isn't too far away.
Will do
Yes I am!! My car has been apart for over FIVE years and I am ready to drive it again! I am sure it will be a night and day experience going from the old 350hp SBC, to the 420hp+ LS2! Hopefully I can take it on a leg, or two of the Hot Rod Power Tour this year!!
Yes I am!! My car has been apart for over FIVE years and I am ready to drive it again! I am sure it will be a night and day experience going from the old 350hp SBC, to the 420hp+ LS2! Hopefully I can take it on a leg, or two of the Hot Rod Power Tour this year!!
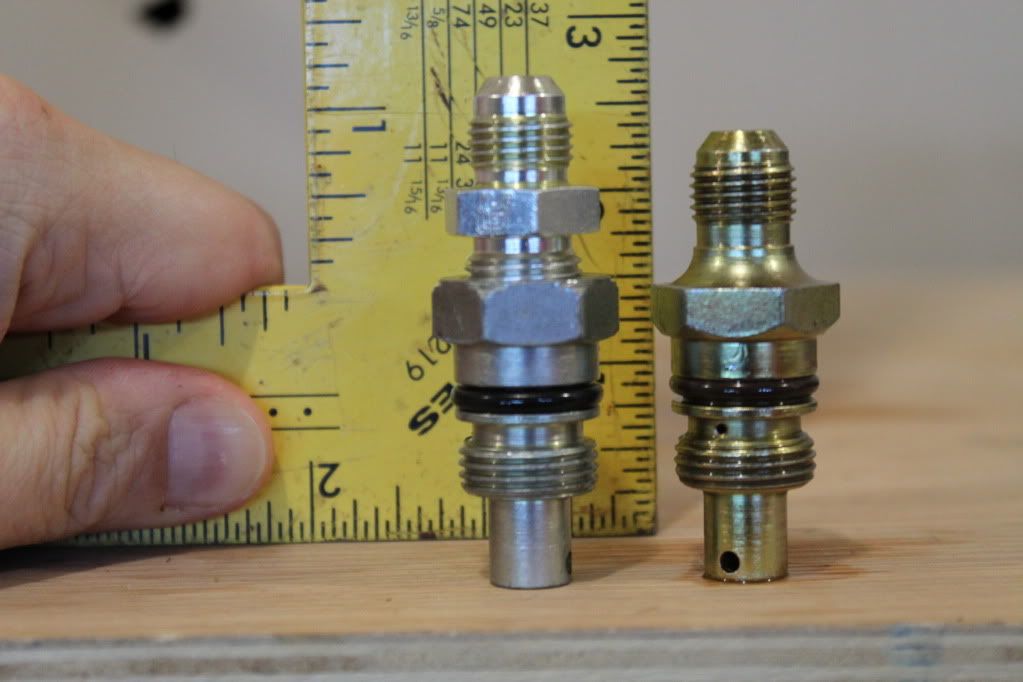
Well after mocking up my corvette accessory drive I had a clearance issue trying to adapt the factory power steering pump fitting to -6AN using a Russells 16mm male to -6an adapter. In the end, I found a custom fitting made by Detroit Speed Eng. p/n 090401. This fitting replaces the factory outlet fitting in the pump with a custom fitting that is converted to a -6AN. It cost $18 plus $11 S&H (ouch)
http://www.detroitspeed.com/1967-196...tlt-fttng.html
Here is a side by side comparison. The DSE fitting on the right is a good 1/4" shorter. Be careful when you remove the factory fitting as there is a spring and plastic cup that you don't want to lose.
Here is a pic with a 90 degree -6AN fitting installed. There is not a ton of clearance, but it will work without removing the pulley to get the hose off.
I got a little time to work on the car this weekend. No progress pics, but I drew up my electrical schematic and got my dbw pedal mounted. I still need weld in some gussets and paint it, but the hard part is done. Now I just need to mount the ECM/TCM and decide which fuse/relay panel I want and order some wire. I also need to figure out what to do about the clearance issue on the high pressure power steering hose. once I get these issues resolved the motor goes in!!