

69 Camaro LS2/4L70E install


 03-30-2012, 05:18 PM
#102
Well I finally pulled the trigger on front suspension upgrades. With the addition of the LS motor I removed 100sh plus pounds off the nose of the car and I need to get the front end back down. So earlier in the week I ordered SC&C Stage 2 UCAs, SPC LCAs, Helwig swaybar and SPC ride height shimpack. For now, I will re-use my Hotchkis coils springs and Bilstien shocks. Depending on how much I drive it I may upgrade the rear suspension to a g-link with coil-overs later in the year, but for now this will suffice. The parts should be here in about 2 weeks!!!
Last edited by Rocketrod; 03-30-2012 at 05:53 PM.
 04-13-2012, 06:25 AM
#105
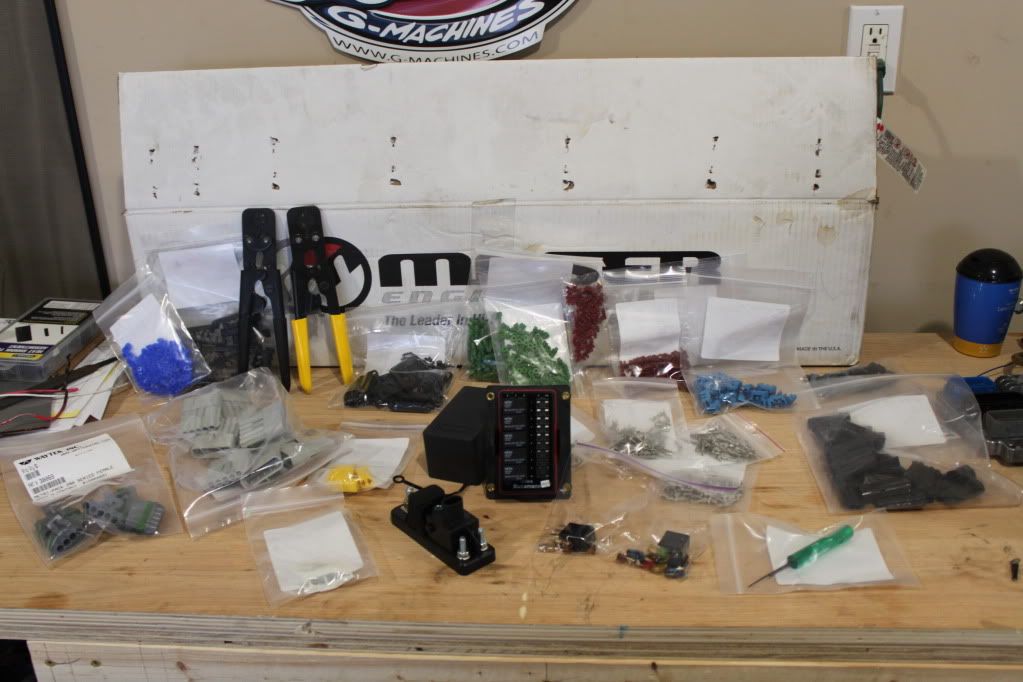
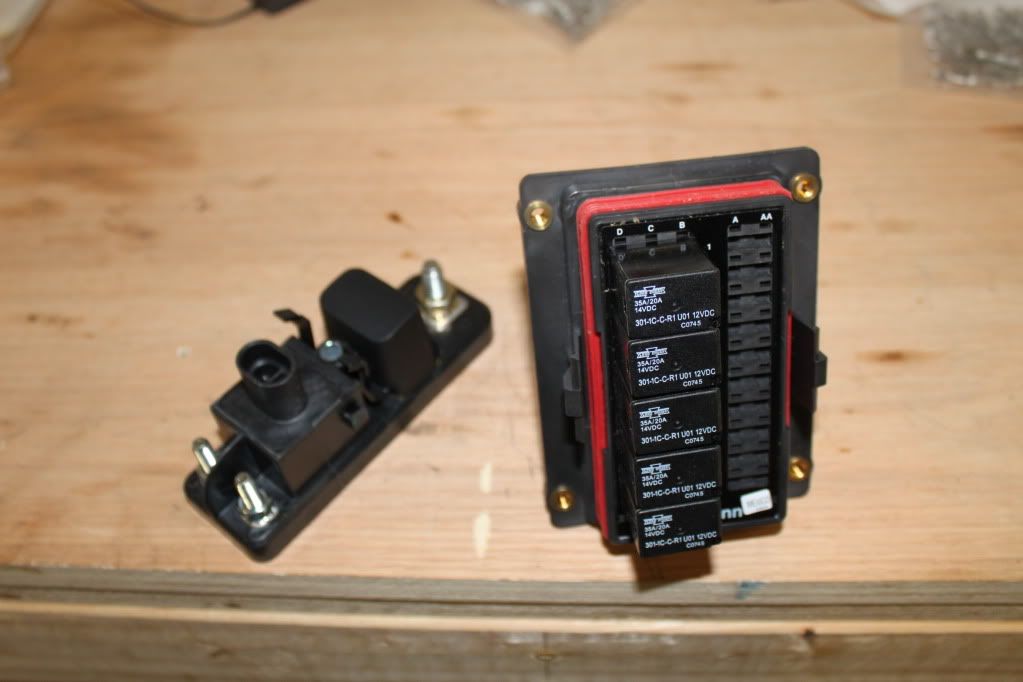
The UPS truck dropped off a package from Waytek. Now I have all the items and tools to create my fusepanel. I will be using a Cooper Bussman RTMR Panel 15303-6-2-4. This panel allows you to us up to 5 micro relays, ISO 280 footprint, and 10 mini-blade fuses. I also ordered a power relay module, an assortment of metri-pack 150 & 280 connectors, terminals & cable seals with the appropriate delphi crimpers. This should keep me busy for a bit/
The fusepanel is extremely compact and measures 4.25" x 3.4"
The fusepanel is extremely compact and measures 4.25" x 3.4"
 04-14-2012, 11:06 AM
#107
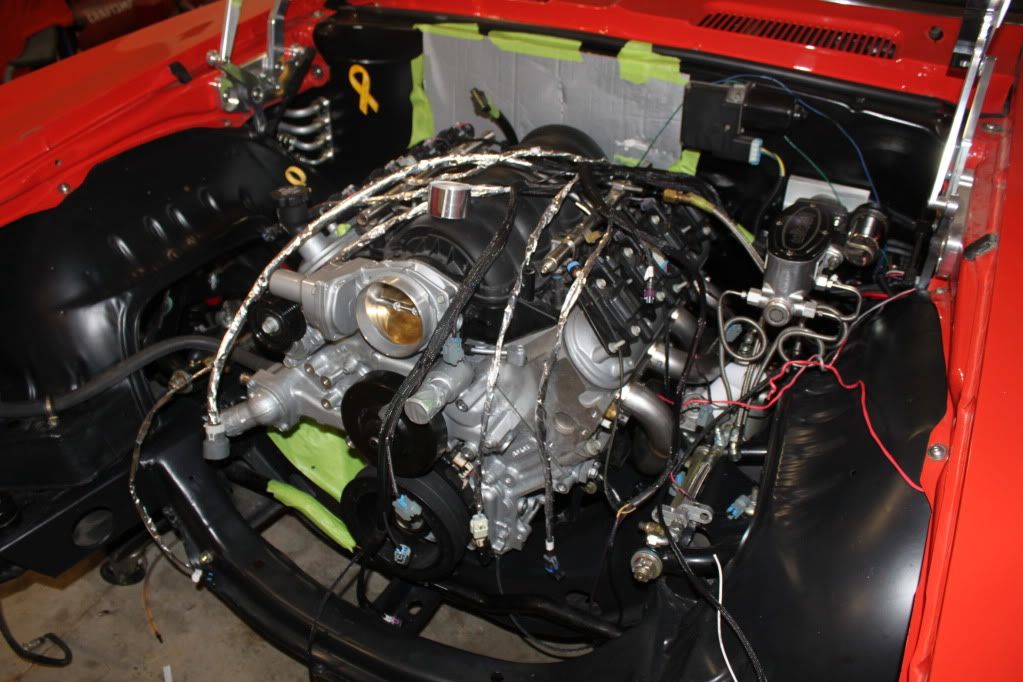
Making more progress. I test fit my harness and after making some minor adjustment the to the harness routing I wrap any part of the harness that is touching or close to a heat source with DEI Cool tape. I bought a 30ft x 1 3/8" wide roll for $30 and have a decent amount left over. It's pretty easy to work with, but at $1 per foot use it wisely. Now I just need to connect everything and secure the harness....then on to the next item on the list.
On another note, I got my harness from SSP wiring and opted for the show car harness wrap. It is black mesh sheathing that encapsulates the entire harness. It looks great, but In hindsight I wish I would have not gotten this. It snags on everything when you install it and you can not access the wire harness if needed. Hopefully I won't have any issues..
On another note, I got my harness from SSP wiring and opted for the show car harness wrap. It is black mesh sheathing that encapsulates the entire harness. It looks great, but In hindsight I wish I would have not gotten this. It snags on everything when you install it and you can not access the wire harness if needed. Hopefully I won't have any issues..
04-15-2012, 05:56 AM
#108
Got a ton of stuff done yesterday and things are moving along nicely!. The plan for today is:
- Loosely install the radiator support and makes mounts for the ecm, tcm & fuse panel. Then the wiring can begin.
- Measure driveshaft length. Will look into getting the stock unit shortened, or a I may just bite the bullet and order a new one.
- Tap water pump heater hose inlet/outlet for AN to NPT adapters
- Install front carpet
- Continue working on an idea for low mount a/c that doesn't require notching the sub frame.
- Order more parts: stover nuts, wire, ls3 coolant crossover tube, etc
04-15-2012, 12:16 PM
#110
Yeah I got going pretty early this morning, but it is just one of those unproductive days. The harder I try the less I seem to get done. I am also struggling with where to mount the ecm, tcm and fuse panel without having everything stacked on top of each other.
05-05-2012, 07:21 AM
#112
Yes! I will be posting details with pics later! I am getting really close!
I still need to find a lower radiator hose that will work with the stock thermostat housing and I need to figure out what to do for a cold air intake setup. The lower radiator hose, NAPA p/n 9006, you suggest looks like it is going to fit like a glove.
I still need to find a lower radiator hose that will work with the stock thermostat housing and I need to figure out what to do for a cold air intake setup. The lower radiator hose, NAPA p/n 9006, you suggest looks like it is going to fit like a glove.
05-05-2012, 08:18 AM
#113
TECH Apprentice

Join Date: Jul 2011
Posts: 393
Likes: 0
Received 0 Likes
on
0 Posts
That's great, can't wait to see the pics.
9006 is the upper hose from Napa.
Someone once told me a 72 Cutlass factory lower hose would work. Based off the looks of it I think they are right. Its napa #7460

I was on Spectre's Website last night and it looks like they have LS swap specific intakes for the old cars for $200. They don't use a MAF though so you would need to do a speed density tune which does add cost when it comes time to have your dyno tune done.
I used a u-build it intake by Airaid in mine. It works for now I guess... Might change it up someday, or maybe smooth and paint the tube.
Good luck today, I'm going out to do some more sanding on my body. Looks like I will be in the paint booth next weekend!
9006 is the upper hose from Napa.
Someone once told me a 72 Cutlass factory lower hose would work. Based off the looks of it I think they are right. Its napa #7460
I was on Spectre's Website last night and it looks like they have LS swap specific intakes for the old cars for $200. They don't use a MAF though so you would need to do a speed density tune which does add cost when it comes time to have your dyno tune done.
I used a u-build it intake by Airaid in mine. It works for now I guess... Might change it up someday, or maybe smooth and paint the tube.
Good luck today, I'm going out to do some more sanding on my body. Looks like I will be in the paint booth next weekend!
05-05-2012, 08:38 AM
#115
TECH Apprentice
Join Date: Jul 2011
Posts: 393
Likes: 0
Received 0 Likes
on
0 Posts
I had some rust holes in the quarter panels and bubbling in other areas. So in an attempt to have a cheap fix I made some simple metal patches that I put in place and then filled in over. Its not going to be show quality by any means, but it will look way better then it was. All told I'm probably "wasting" about $600 but it will make me feel better about the appearance of the car for the next 2 years or so until I can fix the body properly.
Turns out the color on it is not the original Marina Turquoise. I like the color on it better then the factory color so I'm going to have the car scanned and have a custom mix made to match what is there. Going to spray PPG Omni single stage urethane over a PPG CRE industrial primer.
Turns out the color on it is not the original Marina Turquoise. I like the color on it better then the factory color so I'm going to have the car scanned and have a custom mix made to match what is there. Going to spray PPG Omni single stage urethane over a PPG CRE industrial primer.
05-05-2012, 09:59 AM
#116
I had some rust holes in the quarter panels and bubbling in other areas. So in an attempt to have a cheap fix I made some simple metal patches that I put in place and then filled in over. Its not going to be show quality by any means, but it will look way better then it was. All told I'm probably "wasting" about $600 but it will make me feel better about the appearance of the car for the next 2 years or so until I can fix the body properly.
Turns out the color on it is not the original Marina Turquoise. I like the color on it better then the factory color so I'm going to have the car scanned and have a custom mix made to match what is there. Going to spray PPG Omni single stage urethane over a PPG CRE industrial primer.
Turns out the color on it is not the original Marina Turquoise. I like the color on it better then the factory color so I'm going to have the car scanned and have a custom mix made to match what is there. Going to spray PPG Omni single stage urethane over a PPG CRE industrial primer.
05-05-2012, 07:47 PM
#117

Rocketrod. I am interested in what you ordered from Waytek. What I need for my L92 conversion is the relay/fuse block that I don't have with the original wiring harness. For instance I need a run/crank relay with maybe 3 fuses and a PWR/TRN relay with maybe 7 fuses. Still working on that part. I am wondering if that fuse relay terminal box would work in my case? Probably 50 amp relays with some fuses rated at 20 amp.
05-06-2012, 07:51 AM
#118
Rocketrod. I am interested in what you ordered from Waytek. What I need for my L92 conversion is the relay/fuse block that I don't have with the original wiring harness. For instance I need a run/crank relay with maybe 3 fuses and a PWR/TRN relay with maybe 7 fuses. Still working on that part. I am wondering if that fuse relay terminal box would work in my case? Probably 50 amp relays with some fuses rated at 20 amp.
In your setup what requires 50 amps? Or is this just a main power relay for the entire circuit?
Here is a link to a pdf on the Bussman RTMR 15300 Series Fuse/Relay Panel. They can hold up to 5 micro relays and 10 fuses, come in bussed and unbussed versions and each circuit can handle a maximum of 35 amps.