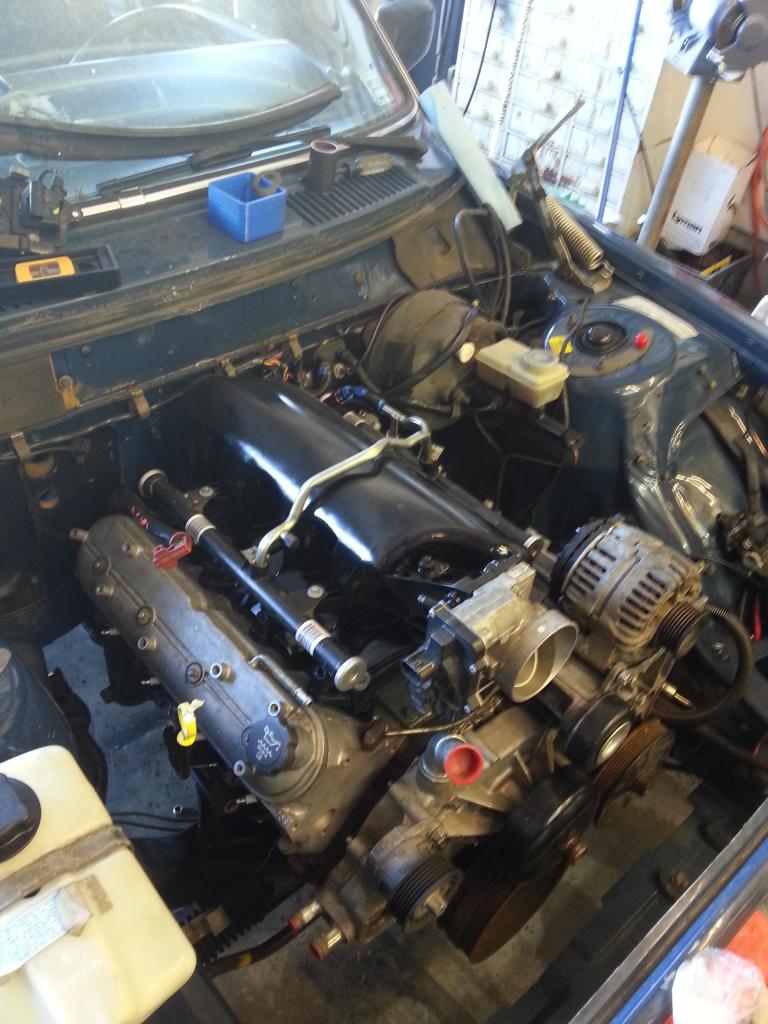
Smoothed Truck Intakes
#221
TECH Enthusiast
iTrader: (5)
Joined: Jan 2010
Posts: 676
Likes: 0
Received 1 Like
on
1 Post
From: Huntsville, Alabama - SA, TX is home
Looking good guys! Awesome thread! Wish I had come across it earlier. I've only read the last 6 pages so far. I need to go back to the beginning now. I hope someone there covers porting the inside because from what I saw on page 6 everything looked pretty smooth already.
I started a thread on this and people have mentioned intake flex under vacuum. I figure may be what the posts inside the intake were for. Maybe to support it from collapsing? IDK. Anyone here cut those posts inside of the intake out and have had no issues?
I'm headed to the beginning to read the rest now.
#222
For general knowledge on the thread topic...heres some information I found on adhesion to nylon 66.
After reading through some plastic engineering forums I've come to this conclusion. From what I understand, Methacrylate is about your only, and best bet for adhesion, as Nylon is classified as a "difficult to bond plastic".
Nylon and Nylon 66 products require a Methacrylate type of glue/epoxy for proper adhesion.
Types I've found: These are both roughly $20 for 50ML. They also come in larger quantity but require the special gun dispensers.
Plexus MA310 and MA330 (pigmented version of MA310)
Devcon Plastic Welder II
ALSO...Loctite Plastic Bonder Epoxy (readily available at most hardware stores) is also composed of Methacrylate. Price 25ML @ $3.97
The following is a pdf from a company called Plexus whom engineers adhesives. The PDf is on plastic adhesive and material types.
http://www.google.com/url?sa=t&rct=j...69837884,d.aWw
Good sections to read, are the following.
Page 31 - Nylon Infomation
Page 7 - Structural or Performance Adhesives
Page 8 - Methacrylate Adhesives
Epoxy Adhesives
I actually went out and grabbed some of the loctite plastic epoxy from Menards. I just used some scrap pieces to test the stuff out on. I glued the faces of 2 flat pieces together to see how they would bond, and also threw a skim coat on another piece to see how that comes out. It should take about 24hrs to cure. So I'll update once I've check them out. All pieces were scuffed/sanded/cleaned before bonding
#223
For general knowledge on the thread topic...heres some information I found on adhesion to nylon 66.
After reading through some plastic engineering forums I've come to this conclusion. From what I understand, Methacrylate is about your only, and best bet for adhesion, as Nylon is classified as a "difficult to bond plastic".
Nylon and Nylon 66 products require a Methacrylate type of glue/epoxy for proper adhesion.
ALSO...Loctite Plastic Bonder Epoxy (readily available at most hardware stores) is also composed of Methacrylate. Price 25ML @ $3.97
I actually went out and grabbed some of the loctite plastic epoxy from Menards. I just used some scrap pieces to test the stuff out on. I glued the faces of 2 flat pieces together to see how they would bond, and also threw a skim coat on another piece to see how that comes out. It should take about 24hrs to cure. So I'll update once I've check them out. All pieces were scuffed/sanded/cleaned before bonding
#225
What kind of repair did you do with the stuff?
Also, Thanks for the input 70camaro! Any pics?
#226
I think I'm going to try and source this stuff and give it a try myself. I was pretty impressed with the results I got from the loctite version. But I'd imagine the Plexus may be a tad superior?
What kind of repair did you do with the stuff?
Also, Thanks for the input 70camaro! Any pics?
What kind of repair did you do with the stuff?
Also, Thanks for the input 70camaro! Any pics?
Attachment 724171
Attachment 724592
Attachment 725110
#227
Wow this thread is full of awesome. I have 5.3 I bought for my 04 Colorado, which I already have a LSXRT intake sitting on, but I still have the original intake in my garage, and I also have a TBSS so I may play around with this.
#228
If you shave off those larger "bungs" lack of better word on the sides of the intake I would fit a piece of scrape nylon to fill the hole and plastic weld it in.
Then take a roloc disc and air grinder or dremel and dremel in a small ditch maybe 1" out in almost all directions of the recessed ditch. I bought this nice thin metal mesh from urethane supply. Then use your plastic welder and try to melt/embed it into the ditch.
The area you grinded out and after embedding the reinforcing metal mesh should be below the surface of the rest of the intake. Get some more donor nylon plastic and melt it over the metal mesh and build it up so you can later grind and sand it down flush with the rest of the intake and you will never know it was there.
#229
On The Tree
iTrader: (1)
I think I'm going to try and source this stuff and give it a try myself. I was pretty impressed with the results I got from the loctite version. But I'd imagine the Plexus may be a tad superior?
What kind of repair did you do with the stuff?
Also, Thanks for the input 70camaro! Any pics?
What kind of repair did you do with the stuff?
Also, Thanks for the input 70camaro! Any pics?
 Then you have to cut it and it gets messy.
 http://www.usplastic.com/catalog/item.aspx?itemid=24934
I had ordered a LS6 intake and it arrived broken from being dropped. The seller sent me a new one at no cost so I gave the repair a shot. I still have the intake on the bench. I decided to paint it to hide the repair so its just in primer right now. Here are some picks of the damage and repair.
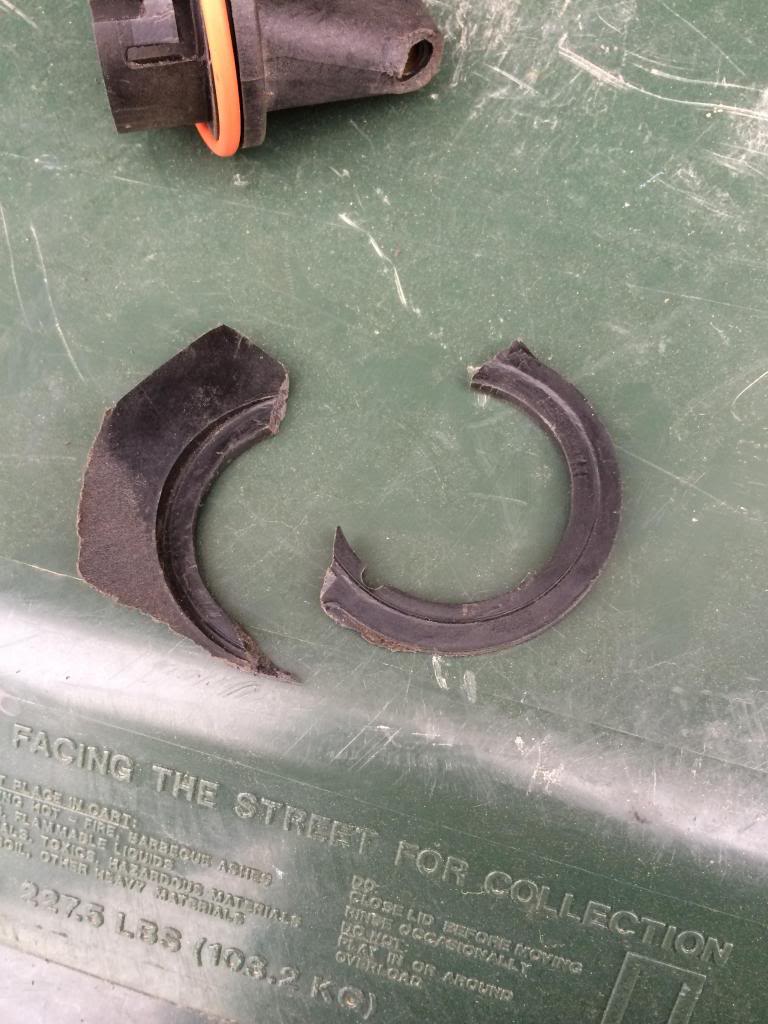
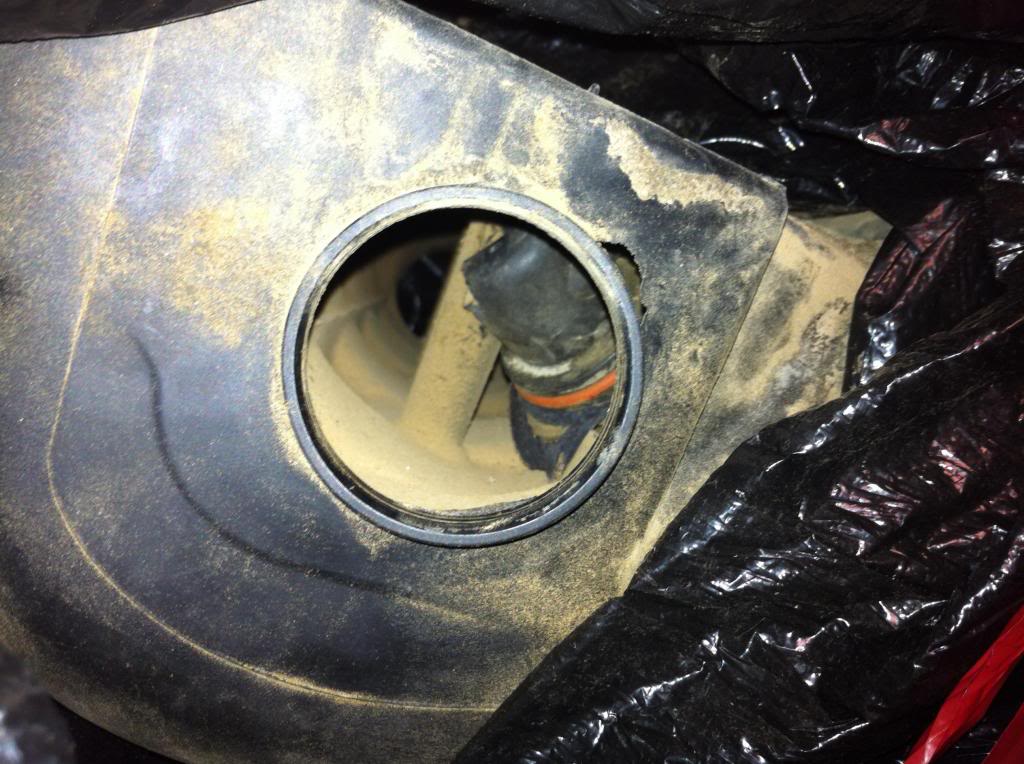
I washed it, then repaired the broken vacuumed nipple (ran a drill bit through after to make sure the hole was open), then repaired the circle the MAP port goes into, and lastly rebounded that circle to the intake from the inside. The way this one broke I was able to get that MAP port out without breaking the tabs.
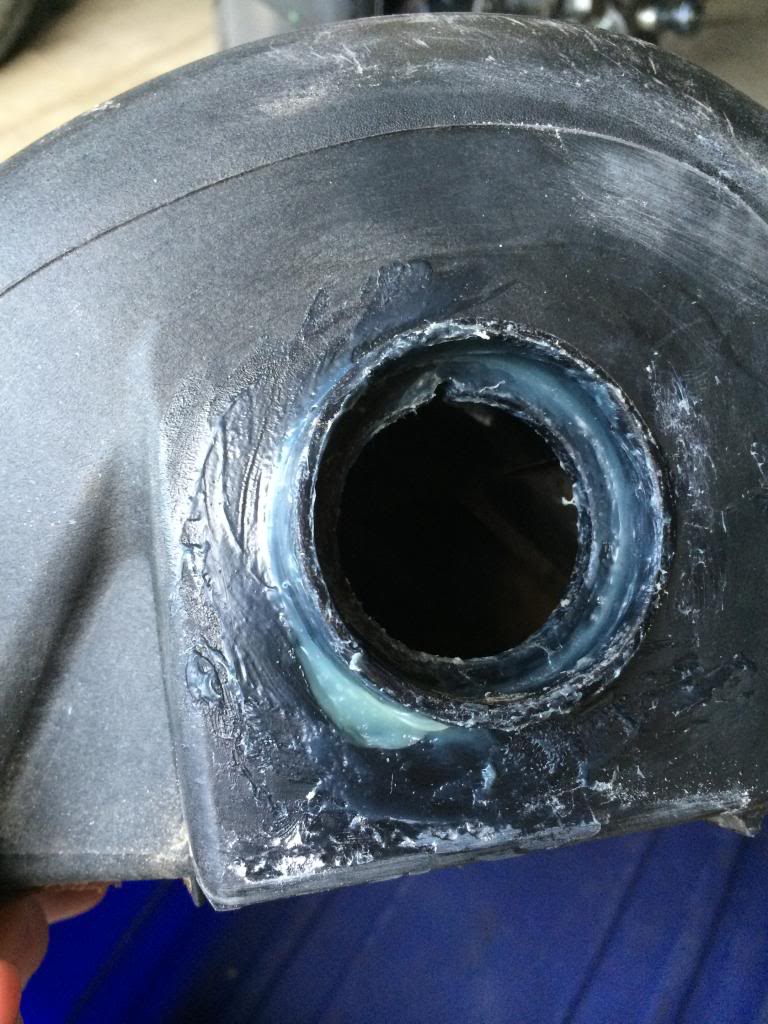
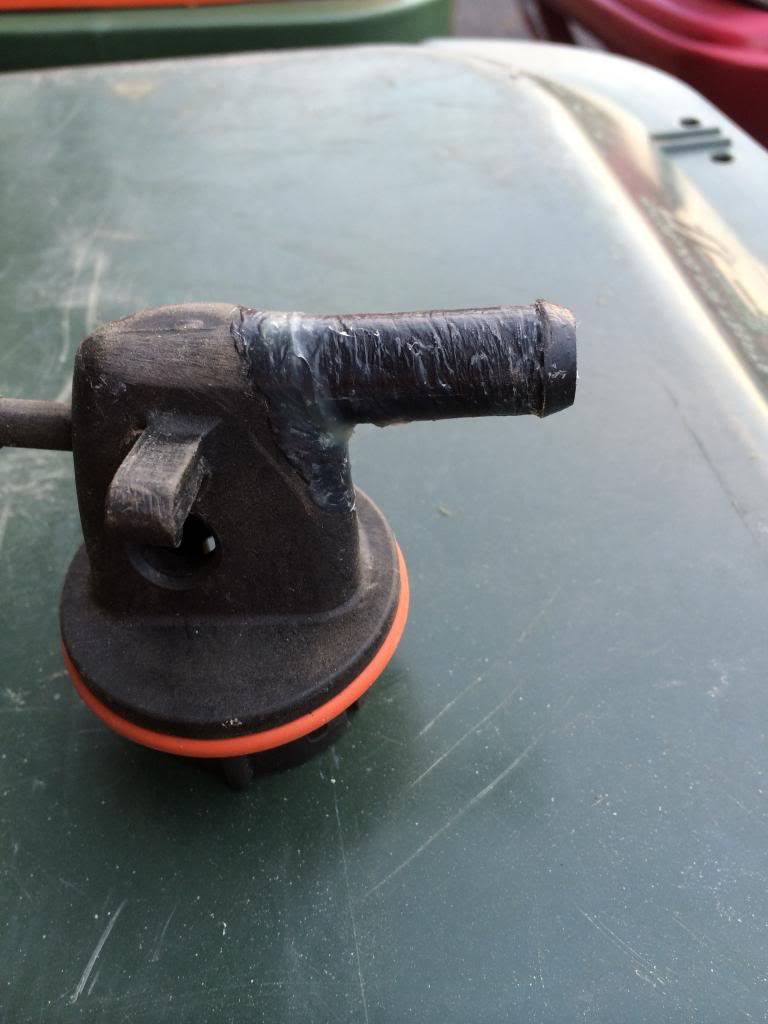
Sand smooth
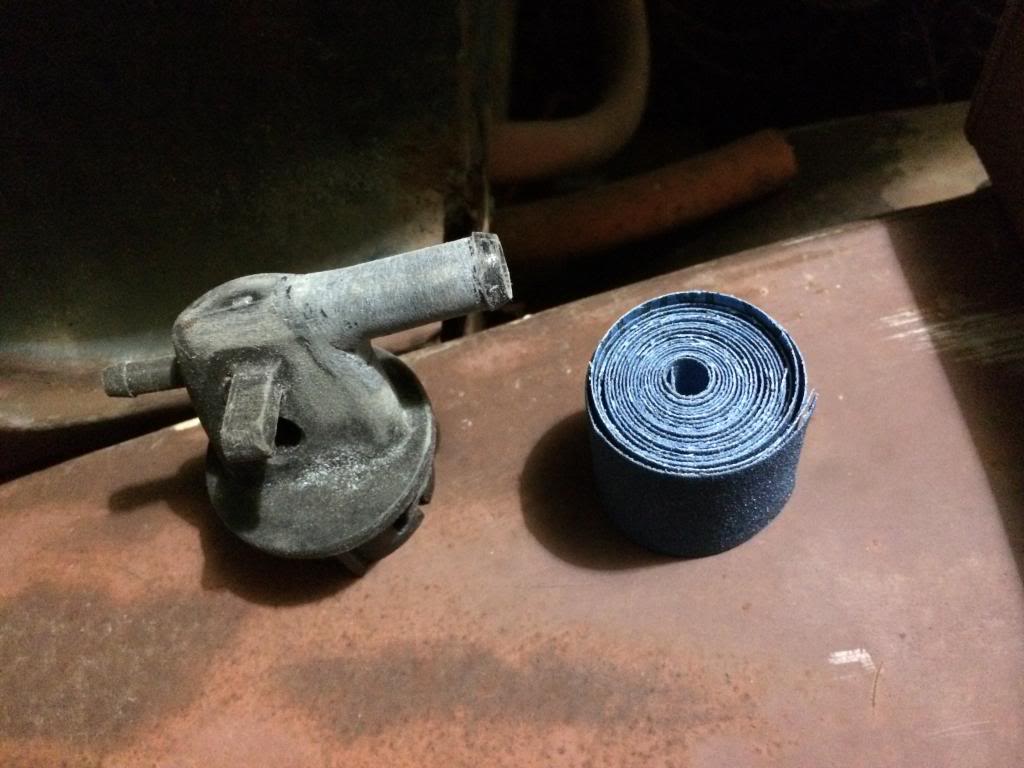
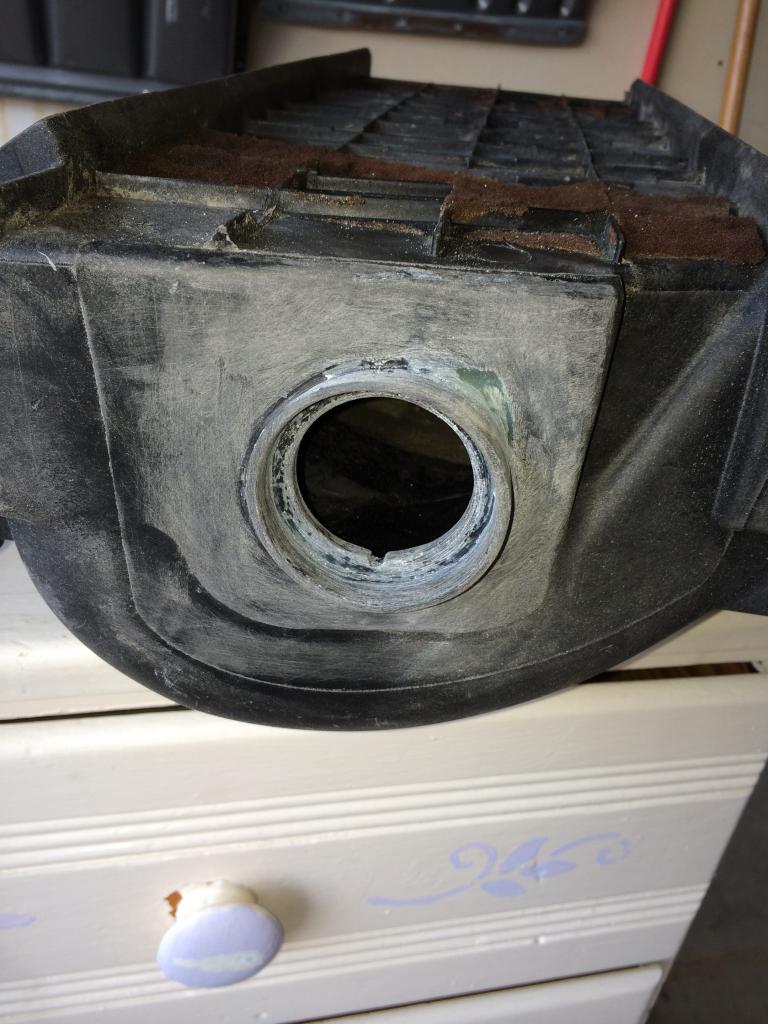
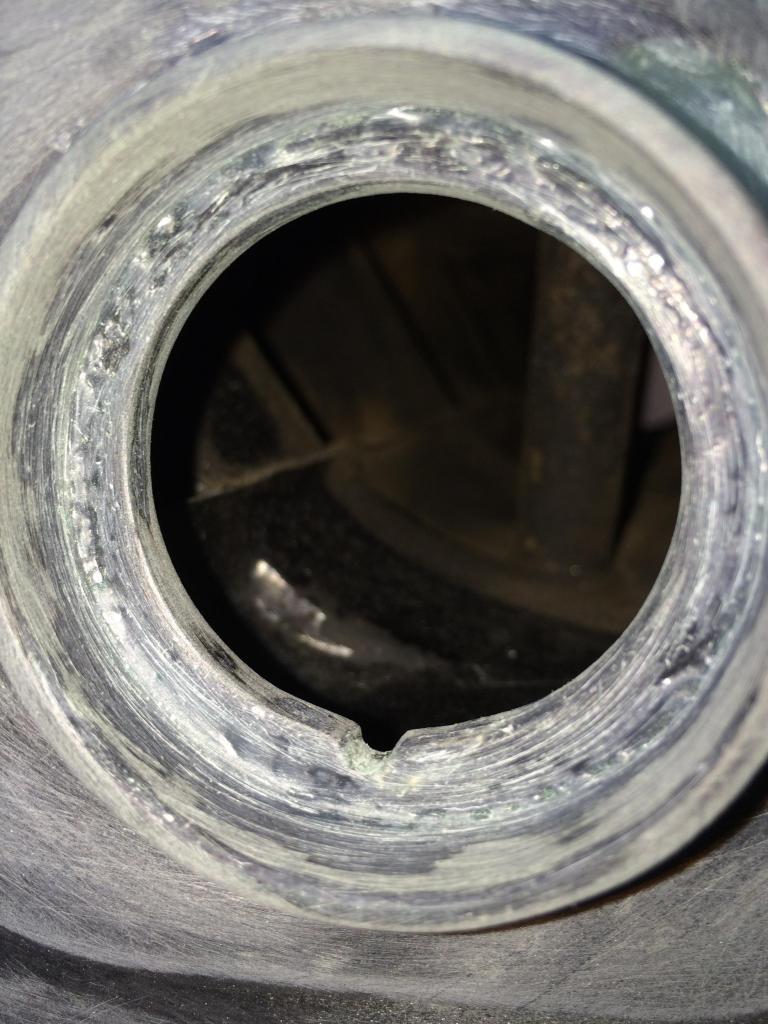
That's where I am at now. I'll paint it and then put the MAP port back in and see how it goes. The Plexus is strong so I think the success or failure will be dependent on me and my ability to get a good seal where the MAP port's o-ring meets my repair.
#230
Its been a while since there has been a post in this thread, and I am wonder from those of you who have done the shaved truck intake manifold, how is it holding up long term?
I have a 325 truck engine myself and had planned to do the intake shaving, but haven't got to it yet.
I had, however, shared this thread with online acquaintances on another forum. Several of them went forward and shaved their intakes. After a few months of usage, a couple of those individuals backed out. One person stated that as he watched his engine run (obviously parked), it appeared that the intake was going to collapse in on itself and ended up with one of those OEM style Dorman intakes. I also had another similar story with worse results, but I question whether it was due to the strength of the shaved intake, or the skillset of the person who performed the intake shaving.
Either way, I suspect that the above incidents are isolated and I am wondering how the shaved intakes are holding up, long term, from those of you who have done this and have them installed on your engine long term?
Thanks for your replies.
Last edited by scout2000; 03-04-2015 at 02:02 PM. Reason: typo
#231
TECH Enthusiast
iTrader: (5)
Joined: Jan 2010
Posts: 676
Likes: 0
Received 1 Like
on
1 Post
From: Huntsville, Alabama - SA, TX is home
Its been a while since there has been a post in this thread, and I am wonder from those of you who have done the shaved truck intake manifold, how is it holding up long term?
I am wondering how the shaved intakes are holding up, long term, from those of you who have done this and have them installed on your engine long term?
Thanks for your replies.
I am wondering how the shaved intakes are holding up, long term, from those of you who have done this and have them installed on your engine long term?
Thanks for your replies.
Only thing that I would do different and will do on my next one, is that instead of using body filler to smooth the top, I will use something called Lab-Metal. It's much stronger. A guy posted a comment below my video of shaving these intakes, that he used Labmetal and has run it on ten pounds of boost so far with no problems. He plans to test it with more boost this summer.
Here's the link to the video:
#233
Staging Lane

My Chevy II Wagon with a shaved 5.3 is my daily driver and it's been on the road for 1-1/2 years, works great and still looks like it did the day I put the car together.
#237
Its been a while since there has been a post in this thread, and I am wonder from those of you who have done the shaved truck intake manifold, how is it holding up long term?
I have a 325 truck engine myself and had planned to do the intake shaving, but haven't got to it yet.
I had, however, shared this thread with online acquaintances on another forum. Several of them went forward and shaved their intakes. After a few months of usage, a couple of those individuals backed out. One person stated that as he watched his engine run (obviously parked), it appeared that the intake was going to collapse in on itself and ended up with one of those OEM style Dorman intakes. I also had another similar story with worse results, but I question whether it was due to the strength of the shaved intake, or the skillset of the person who performed the intake shaving..
#238
TECH Enthusiast
iTrader: (5)
Joined: Jan 2010
Posts: 676
Likes: 0
Received 1 Like
on
1 Post
From: Huntsville, Alabama - SA, TX is home
I also have this concern. I've watched videos on Youtube of guys revving their LS engines with shaved intakes and you can see the top flexing. I have over 30 years of plastics / tool engineering experience in the OEM automotive world and can say from experience that GM designed LS intakes with structural ribbing and gussets for good reason. I really like the look of a shaved truck intake and would like to do it to my set up but not at the expense of reliability.
I've rev'd mine and havent seen any flex. Maybe i need to actually put a camera close to it to catch it, but I couldn't see it while standing over it.
#240
Its been a while since there has been a post in this thread, and I am wonder from those of you who have done the shaved truck intake manifold, how is it holding up long term?
I have a 325 truck engine myself and had planned to do the intake shaving, but haven't got to it yet.
I had, however, shared this thread with online acquaintances on another forum. Several of them went forward and shaved their intakes. After a few months of usage, a couple of those individuals backed out. One person stated that as he watched his engine run (obviously parked), it appeared that the intake was going to collapse in on itself and ended up with one of those OEM style Dorman intakes. I also had another similar story with worse results, but I question whether it was due to the strength of the shaved intake, or the skillset of the person who performed the intake shaving.
Either way, I suspect that the above incidents are isolated and I am wondering how the shaved intakes are holding up, long term, from those of you who have done this and have them installed on your engine long term?
Thanks for your replies.


