
Superdave's 65 Impala SS 5.3 Swap
 07-09-2014, 02:43 PM
#281
TECH Resident
Thread Starter
Thank you! The current column in the car right now is the original 1965 Impala column (non-tilt), however I am fitting a 2005 GTO (tilt) column into the car because it is not comfortable to drive. When I am close enough to the pedals, I am too far from the wheel, etc. Using the GTO column lets me choose the distance and the angle, so I am working on that. I actually have several updates to post but I was waiting until I got more stuff done.
I am still having transmission issues. I have actually taken the car out on the real roads though, so even though it's not running right, it's "official". I did an LS swap.
I am still having transmission issues. I have actually taken the car out on the real roads though, so even though it's not running right, it's "official". I did an LS swap.
 07-09-2014, 08:29 PM
#282
TECH Resident
Thread Starter
Well, I wanted to get more done before doing a real update, but I thought I would just throw some pics at you guys.
Here's the car getting the ride height set. Actually loos a little lower in person, which is good.
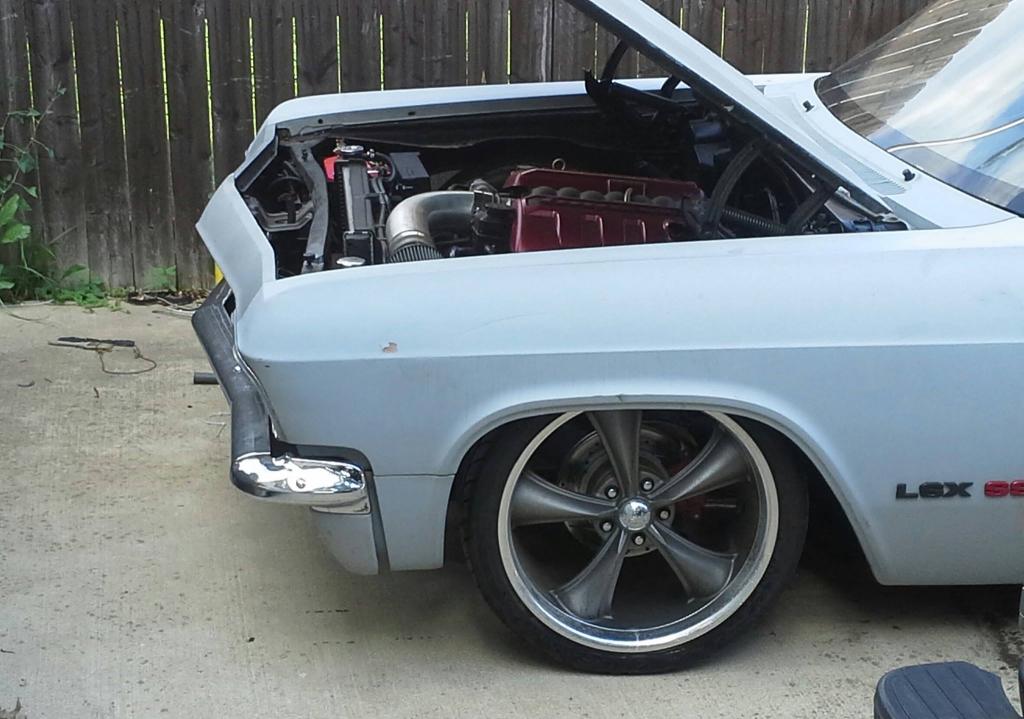
On my first "real" drive in it to the alignment shop

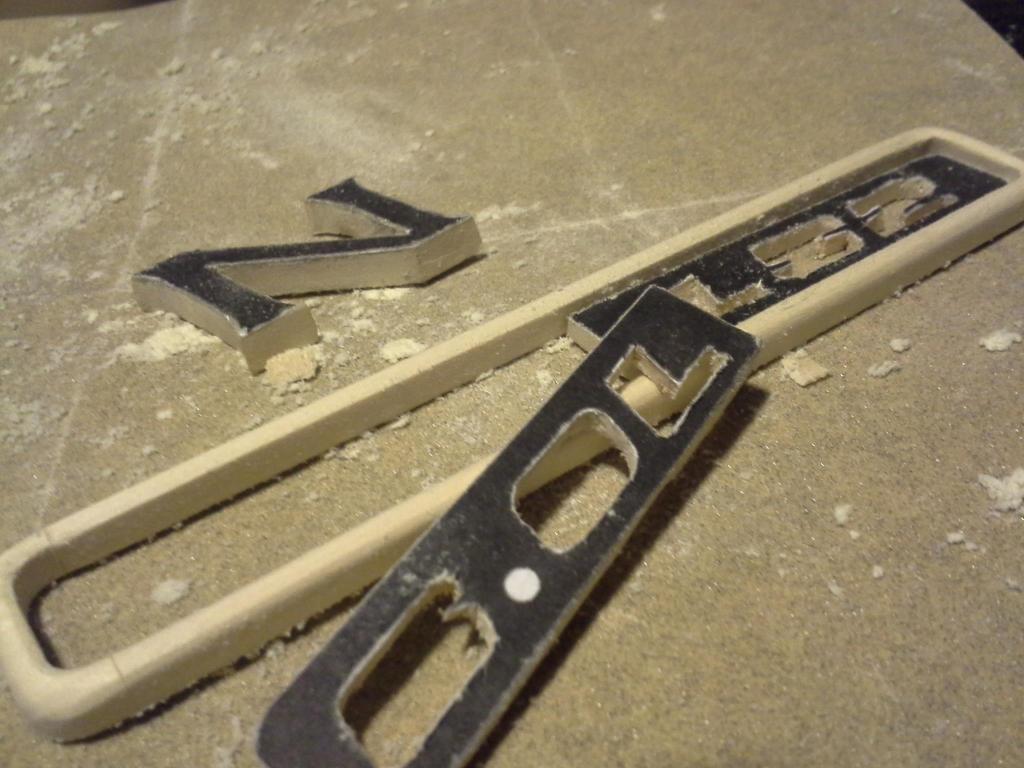
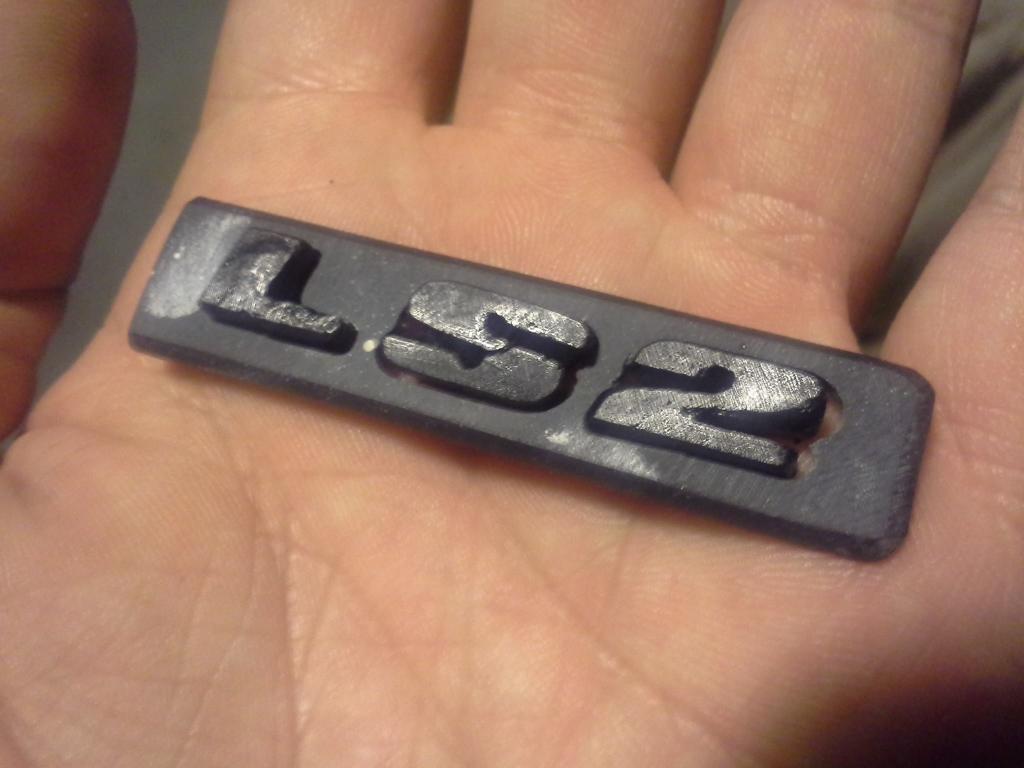
The beginning stages of some new fender emblems. This is wood I am carving by hand. Later a mold is made, and then they are cast in plastic and painted.
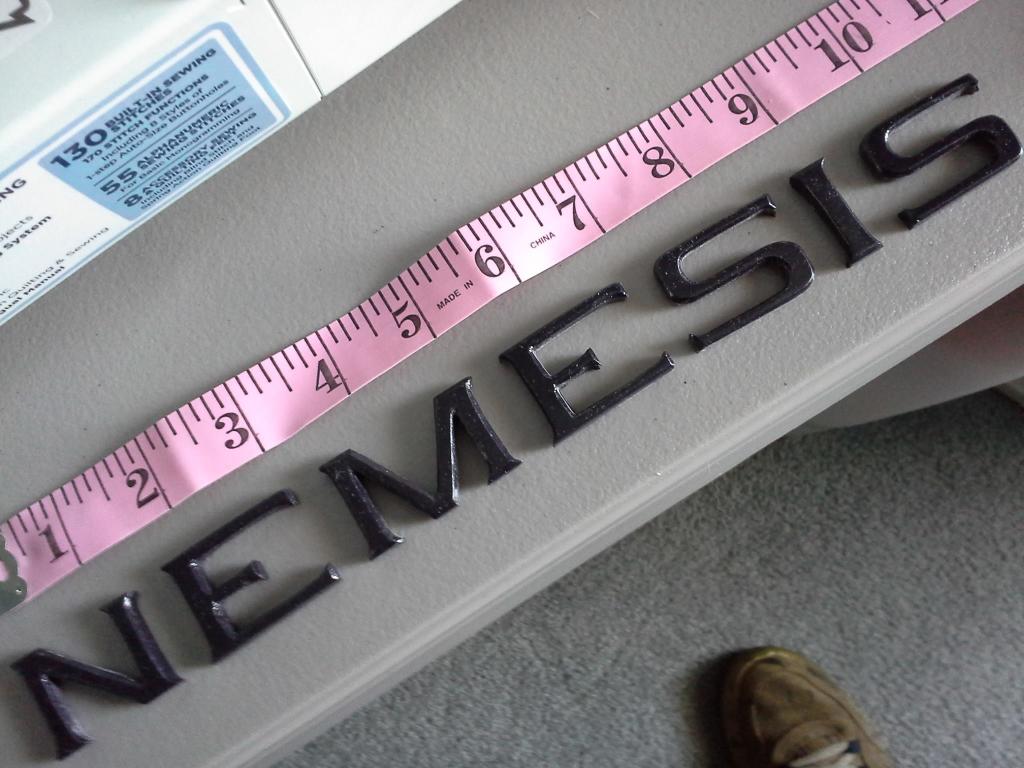
I decided to name the car Nemesis. We are mostly familiar with the word nemesis as being an enemy of relatively equal skill. Nemesis is actually the Greek goddess of revenge (more or less)
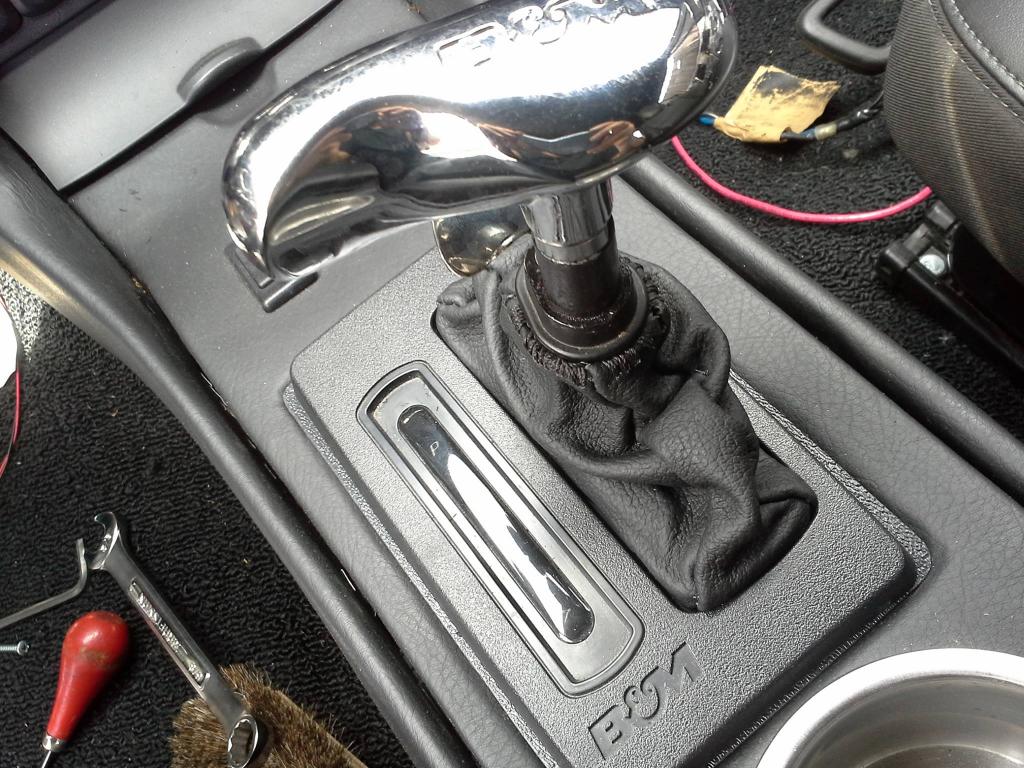
Take a look at this plastic trash B&M calls "leather"
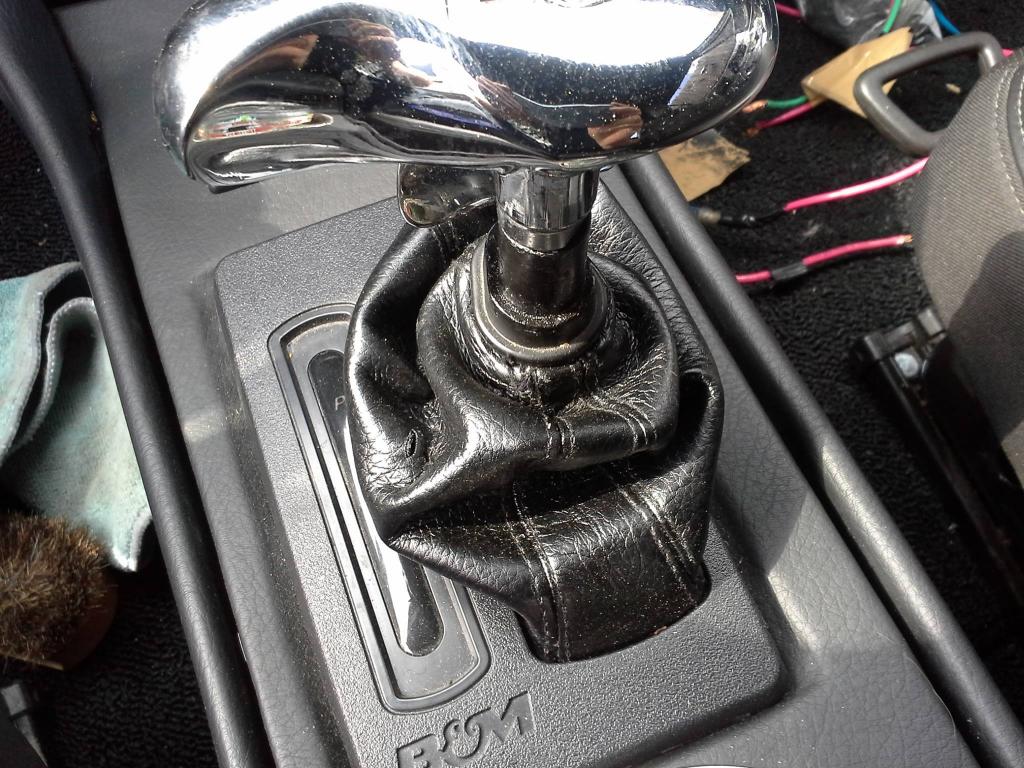
I sewed my own boot up using ACTUAL leather
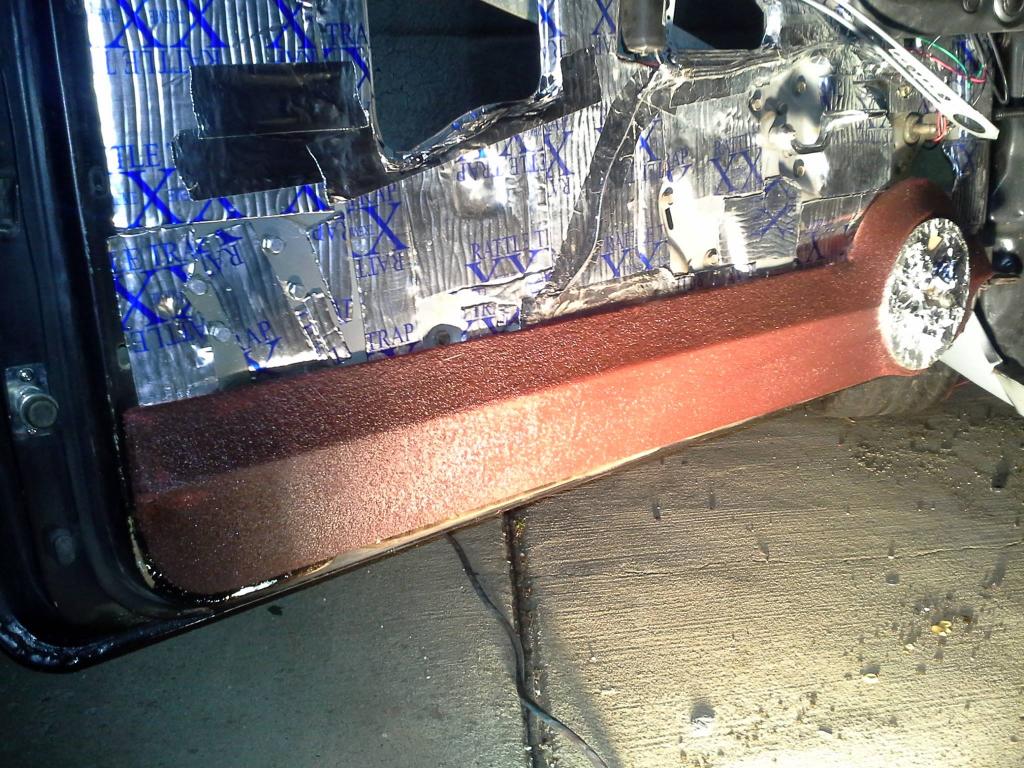
Lower portion of door panel

Aside from getting my transmission working properly, installing the GTO steering column is my next major project
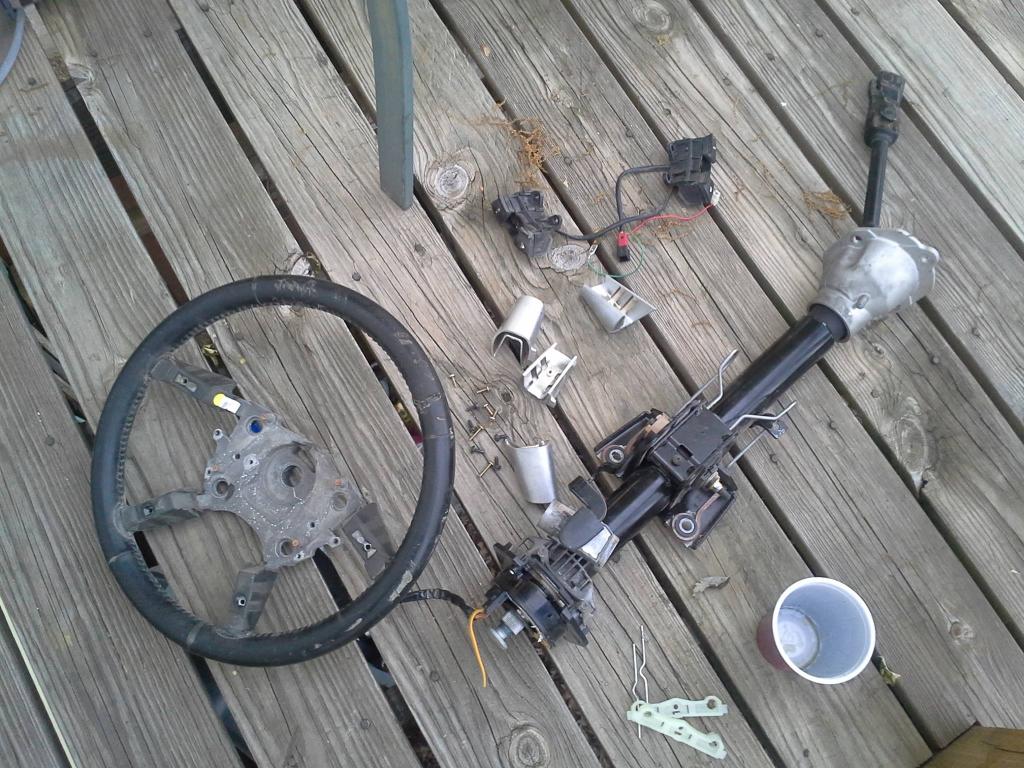
But with a Corvette wheel
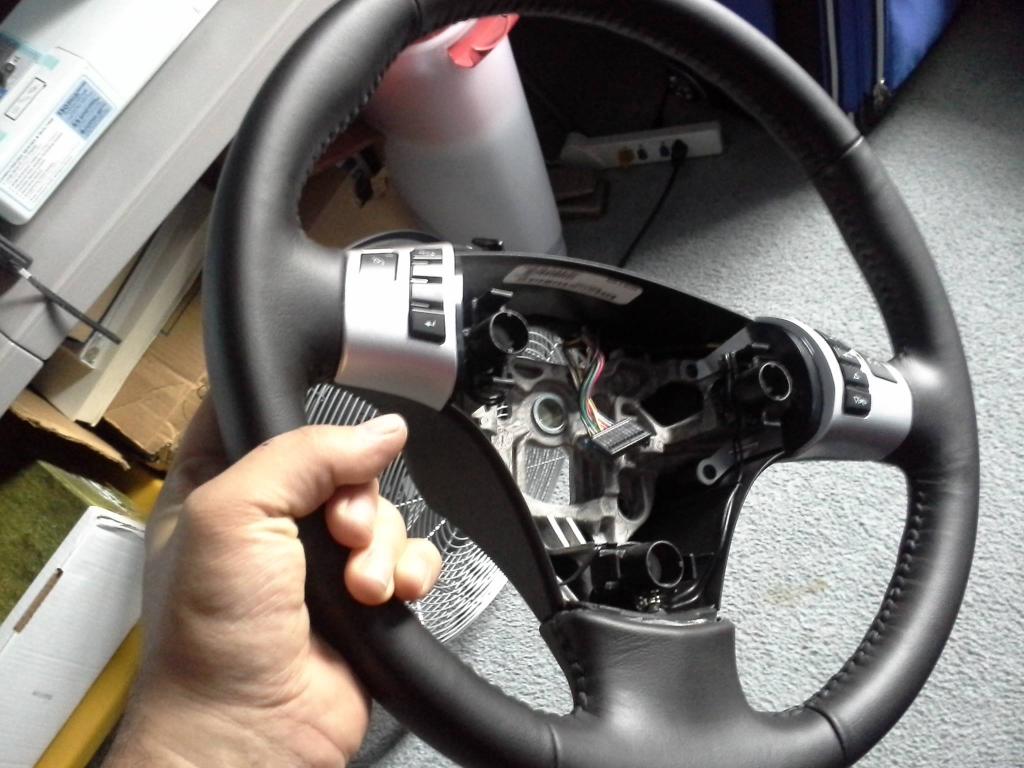
The GTO steering wheel is actually an Australian item, and the splines do not match anything GM makes. To get the Corvette wheel onto the GTO column, it is going to require a lot of work. This stuff is magnesium, and very dangerous to work with, as it is pyrophoric, and can catch fire with a simple spark. So all the cutting is done by hand, not machine.

this is the center section removed from the GTO wheel. I saw in another forum that someone had this machined to bolt to the Corvette wheel, but I definitely do not trust magnesium to thread into. It's a tough metal, but it can be filed easily, and threads would come out eventually in my opinion.

Me in my ummm "machine shop" modifying the Corvette wheel
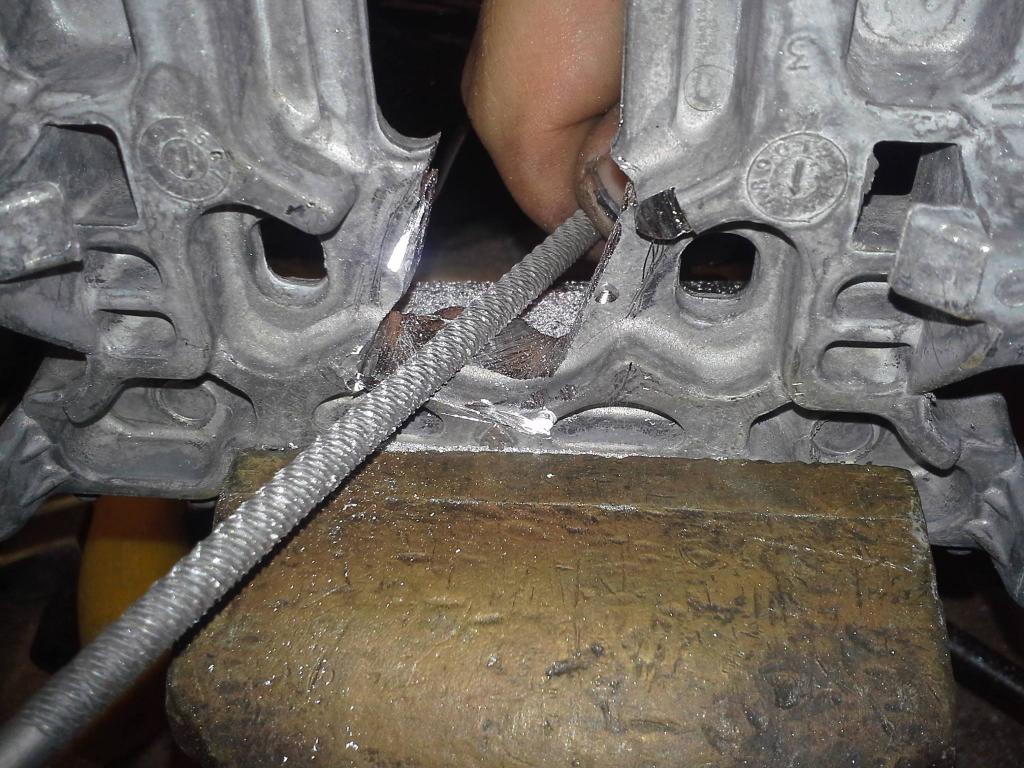
The pieces fit together like this. They will be magnesium welded so that they are a solid unit

All the shrouds and fake airbag painted to match with a special vinyl dye

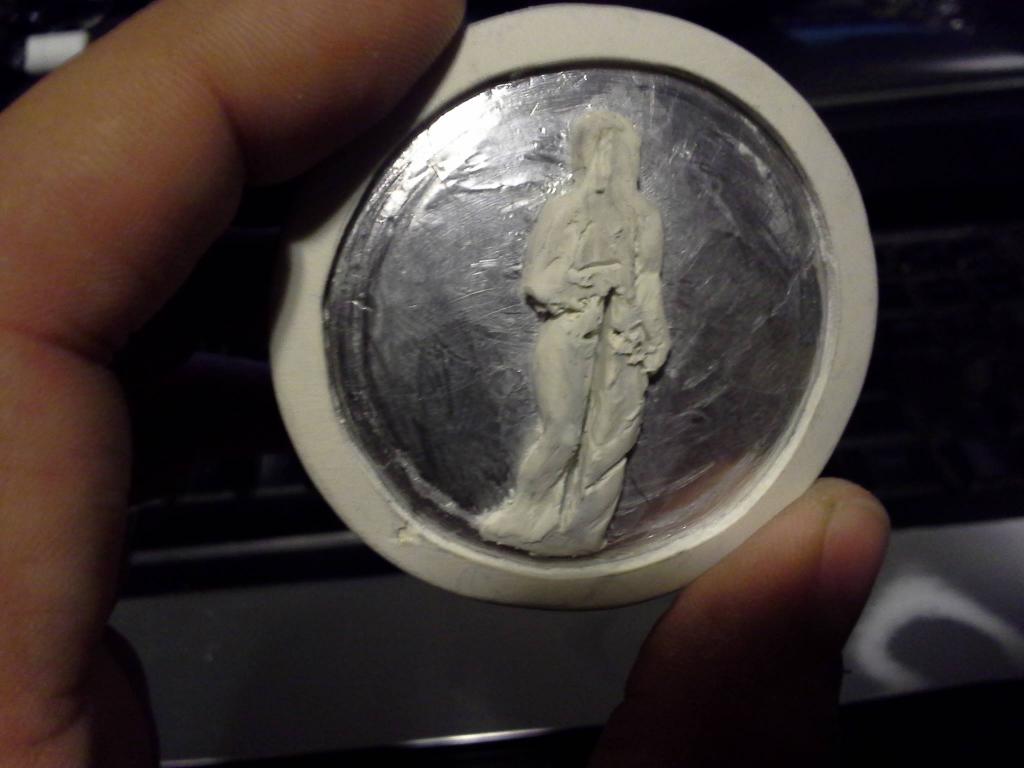
Custom emblem to replace the Corvette logo on the fake airbag. This is the beginnings of Nemesis, who is depicted with wings and a sword. This is clay, which is baked, then painted, and then used to make a mold and cast in plastic
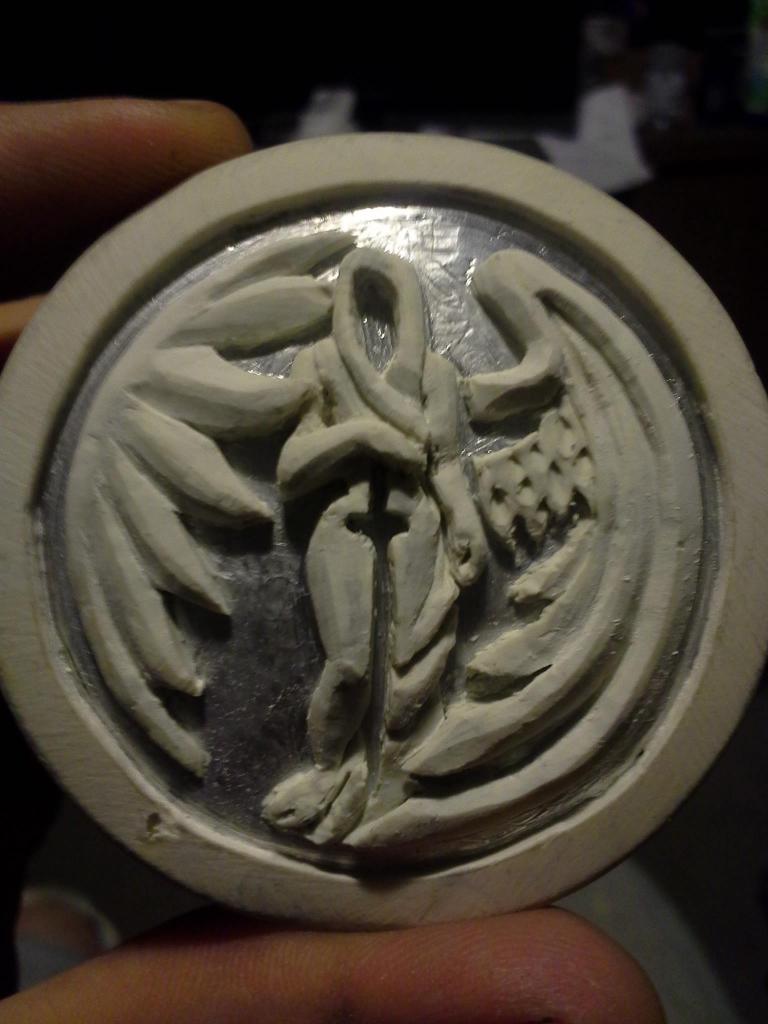
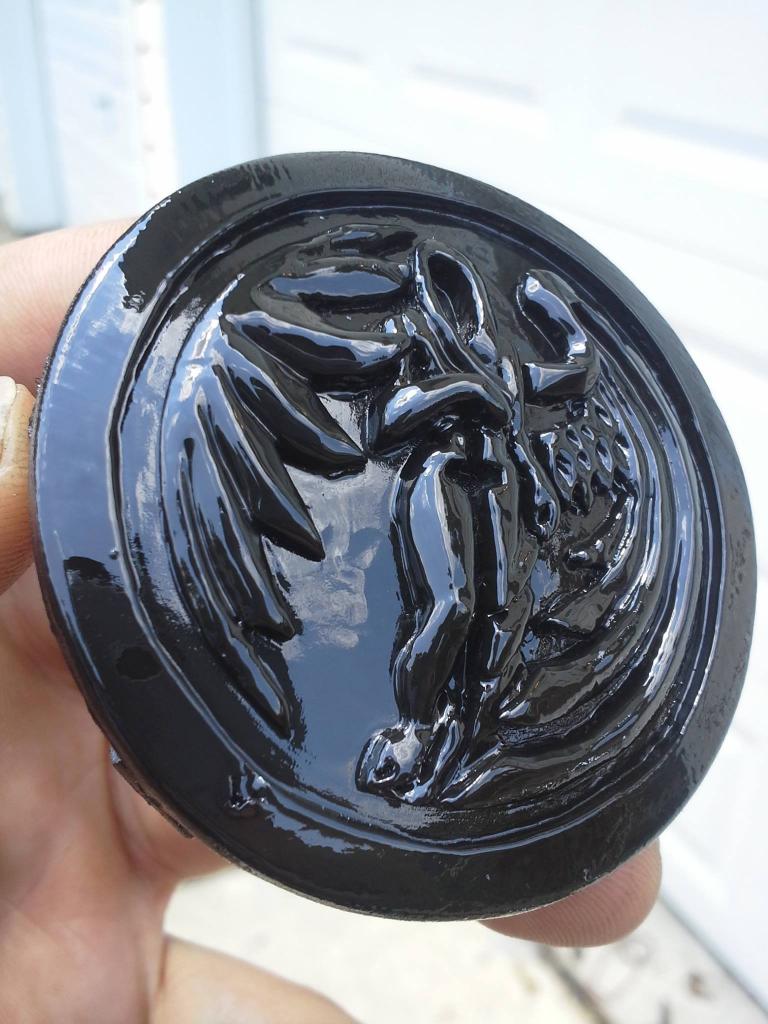
And the finished emblem (although the pic was taken before I attached it to the black background piece...it's just sitting on the airbag)

Here's the car getting the ride height set. Actually loos a little lower in person, which is good.
On my first "real" drive in it to the alignment shop
The beginning stages of some new fender emblems. This is wood I am carving by hand. Later a mold is made, and then they are cast in plastic and painted.
I decided to name the car Nemesis. We are mostly familiar with the word nemesis as being an enemy of relatively equal skill. Nemesis is actually the Greek goddess of revenge (more or less)
Take a look at this plastic trash B&M calls "leather"
I sewed my own boot up using ACTUAL leather
Lower portion of door panel
Aside from getting my transmission working properly, installing the GTO steering column is my next major project
But with a Corvette wheel
The GTO steering wheel is actually an Australian item, and the splines do not match anything GM makes. To get the Corvette wheel onto the GTO column, it is going to require a lot of work. This stuff is magnesium, and very dangerous to work with, as it is pyrophoric, and can catch fire with a simple spark. So all the cutting is done by hand, not machine.
this is the center section removed from the GTO wheel. I saw in another forum that someone had this machined to bolt to the Corvette wheel, but I definitely do not trust magnesium to thread into. It's a tough metal, but it can be filed easily, and threads would come out eventually in my opinion.
Me in my ummm "machine shop" modifying the Corvette wheel
The pieces fit together like this. They will be magnesium welded so that they are a solid unit
All the shrouds and fake airbag painted to match with a special vinyl dye
Custom emblem to replace the Corvette logo on the fake airbag. This is the beginnings of Nemesis, who is depicted with wings and a sword. This is clay, which is baked, then painted, and then used to make a mold and cast in plastic
And the finished emblem (although the pic was taken before I attached it to the black background piece...it's just sitting on the airbag)
07-09-2014, 08:42 PM
#283
Launching!

Wow, Dave, your creativity never ceases to amaze me.
Really, nice work!
I look forward to you ironing out the tranny issues so you can start enjoying driving it!
-Nick
Really, nice work!
I look forward to you ironing out the tranny issues so you can start enjoying driving it!
-Nick
 07-10-2014, 10:12 PM
#287
On The Tree
iTrader: (2)
Join Date: May 2011
Location: Smyrna, TN
Posts: 152
Likes: 0
Received 0 Likes
on
0 Posts

Seeing how this stuff is coming together is really making me want to fab up some stuff for my truck. Amazing man. This build is just plain awesome. I really want to see this thing painted.
James
James
07-11-2014, 04:26 PM
#288
TECH Resident
Thread Starter
I tracked down at least part of my transmission issue today. I apparently had a very sneaky leak right at the dipstick that was giving me trouble, and I though it had been coming out of the vent on top. I fixed the leak and filled it back up to proper level. This time it climbed hills "fine". It certainly had more power than before, but it still felt funny to me. Also, I now notice a pretty obvious shudder/vibration under acceleration. Research leads me to believe this is from a faulty torque converter. I just bought the "ebay special" converter for like $200. I am thinking of dropping the $800 on a Vigilante by PI. I HOPE it's not a bad transmission...but if so, I guess I'll have a new transmission to go with my new converter. Good thing I don't have a wife and kids I guess.
07-12-2014, 12:53 AM
#289
Teching In

Join Date: Oct 2013
Posts: 12
Likes: 0
Received 0 Likes
on
0 Posts
Dave, can you tell me about your cooling system? I am installing an ls1 and 4l60e but an not sure if i can run withthe original 65' radiator or maybe mod dual fans and an aluminum radiator from an f body.
07-12-2014, 01:18 AM
#290
TECH Resident
Thread Starter
If you need measurements from the GTO radiator to check against other radiators, let me know and I will get them sometime tomorrow when the sun is out.
07-12-2014, 12:24 PM
#291
Teching In
Join Date: Oct 2013
Posts: 12
Likes: 0
Received 0 Likes
on
0 Posts
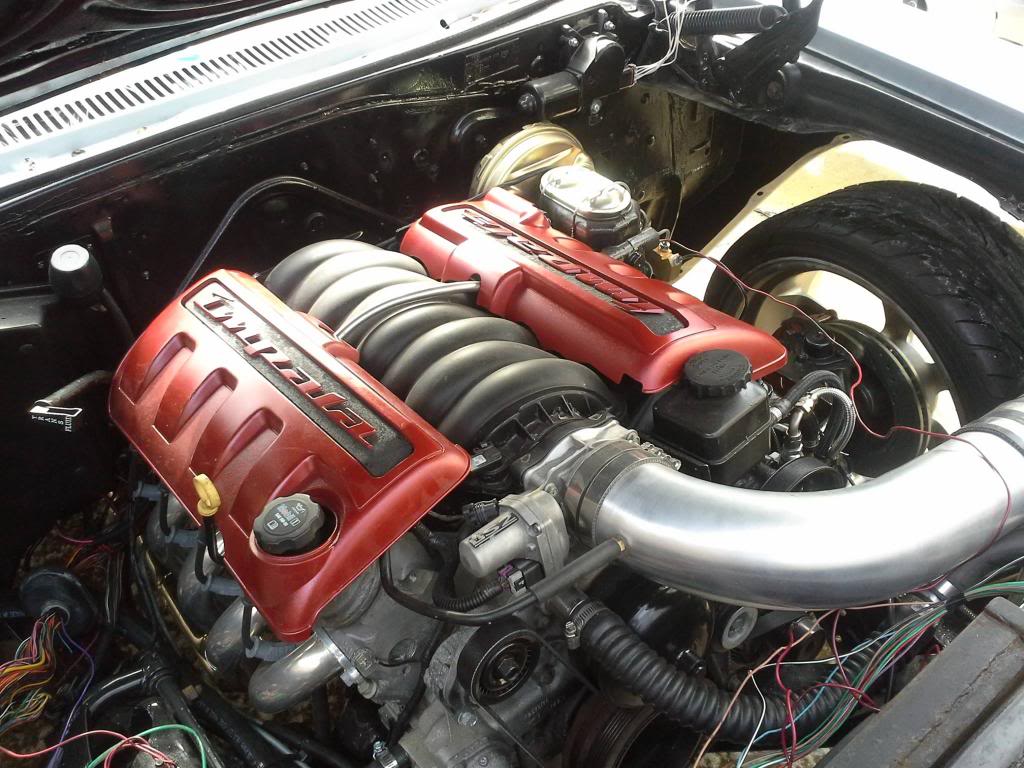
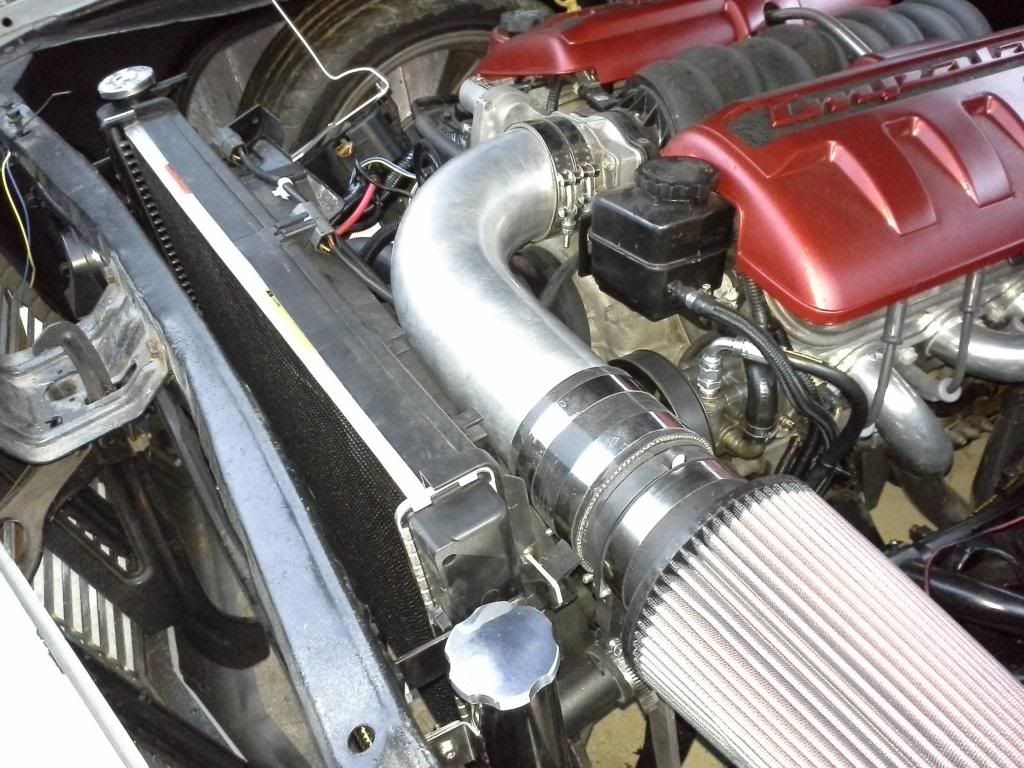
Can't be sure about an F-body radiator as I don't have the measurements from one. I was able to fit the stock GTO radiator and fans into mine, on top of the frame rails. I had to do a little trimming at the frame, but it was nothing. I also had to make some simple metal brackets to hold the radiator in place....also easy. I used the stock GTO upper and lower hoses, and I ran a small hose from the radiator over to the overflow canister (the only non-stock cooling part on the car).
If you need measurements from the GTO radiator to check against other radiators, let me know and I will get them sometime tomorrow when the sun is out.
If you need measurements from the GTO radiator to check against other radiators, let me know and I will get them sometime tomorrow when the sun is out.
07-12-2014, 12:40 PM
#292
TECH Resident
Thread Starter
2005. 2005 and 2006 are exactly the same, and have the top hose coming out of the center of the radiator, driver's side. The 2004 GTO radiator has the top hose coming out at the top of the driver's side. I chose the 2005/2006 one so that it would not interfere with my CAI.
If you look closely you can see the brackets I made to mount it in these pictures:

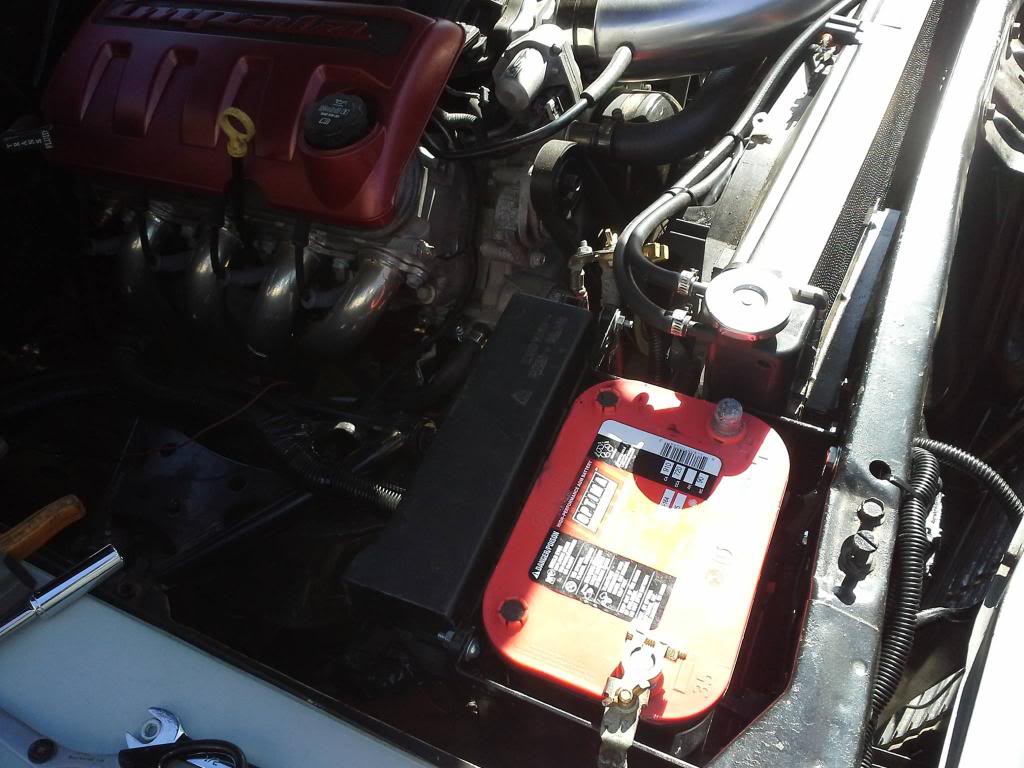
This one shows the temporary setup I had with another radiator (I forget what car it was from). But you can see how the higher hose port interferes with the CAI intake tube
Here are some aluminum options for GTO radiators along with some measurements and stats. I went the cheaper route and used the Spectra one
http://www.mishimoto.com/pontiac-gto...tor-05-06.html
http://www.kollarracingproducts.com/...ORS/Categories
Length: 26.5
Width: 2.22
Height: 17.62
Ron Davis
Length: 31
Width: 2.5
Height: 17
Mishimoto
Width: 26.55"
Width: 1.97"
Height: 17"
If you need the Spectra measurements I can get them for you sometimes today
If you look closely you can see the brackets I made to mount it in these pictures:
This one shows the temporary setup I had with another radiator (I forget what car it was from). But you can see how the higher hose port interferes with the CAI intake tube
Here are some aluminum options for GTO radiators along with some measurements and stats. I went the cheaper route and used the Spectra one
http://www.mishimoto.com/pontiac-gto...tor-05-06.html
http://www.kollarracingproducts.com/...ORS/Categories
Length: 26.5
Width: 2.22
Height: 17.62
Ron Davis
Length: 31
Width: 2.5
Height: 17
Mishimoto
Width: 26.55"
Width: 1.97"
Height: 17"
If you need the Spectra measurements I can get them for you sometimes today
07-12-2014, 01:35 PM
#293
Teching In
Join Date: Oct 2013
Posts: 12
Likes: 0
Received 0 Likes
on
0 Posts
2005. 2005 and 2006 are exactly the same, and have the top hose coming out of the center of the radiator, driver's side. The 2004 GTO radiator has the top hose coming out at the top of the driver's side. I chose the 2005/2006 one so that it would not interfere with my CAI.
If you look closely you can see the brackets I made to mount it in these pictures:

This one shows the temporary setup I had with another radiator (I forget what car it was from). But you can see how the higher hose port interferes with the CAI intake tube
[IMG]http://i173.photobucket.com/albums/w41/lordguyton/1026192_766829543329880_592321166_o_zps30425b84.
Here are some aluminum options for GTO radiators along with some measurements and stats. I went the cheaper route and used the Spectra one
http://www.mishimoto.com/pontiac-gto...tor-05-06.html
http://www.kollarracingproducts.com/...ORS/Categories
Length: 26.5
Width: 2.22
Height: 17.62
Ron Davis
Length: 31
Width: 2.5
Height: 17
Mishimoto
Width: 26.55"
Width: 1.97"
Height: 17"
If you need the Spectra measurements I can get them for you sometimes today
If you look closely you can see the brackets I made to mount it in these pictures:
This one shows the temporary setup I had with another radiator (I forget what car it was from). But you can see how the higher hose port interferes with the CAI intake tube
[IMG]http://i173.photobucket.com/albums/w41/lordguyton/1026192_766829543329880_592321166_o_zps30425b84.
Here are some aluminum options for GTO radiators along with some measurements and stats. I went the cheaper route and used the Spectra one
http://www.mishimoto.com/pontiac-gto...tor-05-06.html
http://www.kollarracingproducts.com/...ORS/Categories
Length: 26.5
Width: 2.22
Height: 17.62
Ron Davis
Length: 31
Width: 2.5
Height: 17
Mishimoto
Width: 26.55"
Width: 1.97"
Height: 17"
If you need the Spectra measurements I can get them for you sometimes today
07-12-2014, 01:42 PM
#294
TECH Fanatic
I am really interested in the door panel project. That is one of my next major undertakings. I am too cheap to pony up $1500 per pair for similar units commercially available, besides they wont fit the drop top.
07-12-2014, 02:45 PM
#295
TECH Resident
Thread Starter
I will take more pictures as I make the rest of the door panels to show how I do it. It's really not all that hard, it just takes me forever. I really need to focus on getting the car running properly, but shortly after that, I will make the rest of the door panel parts. If you want to try it yourself, I am more than happy to walk you through any difficulties you run into.
 07-25-2014, 04:28 PM
#297
TECH Resident
Thread Starter
Next I mix up some silicone rubber compound. I use OOMOO from Smooth-On Inc. Mix the parts in equal amounts, and then pour onto your part. Typically you will not need a mold release agent unless your parts are REALLY complex.
After about 6 hours, the silicone cures, and you can remove the cardboard walls, and then pull the rubber mold from the part.
Flip it over so that you can pour into it, and mix up some resin. I also use Smooth-On brand resin but any plastic resin will work fine. The Smooth-On stuff is easier to mix though, as it's 1:1. After mixing, pour the resin, and while it's still wet, run a straight piece of cardboard or something across the mold (kind of like what you would do with body filler doing bodywork on a car). This leaves you with a flat surface at the back of the part instead of a surface that is kind of rounded and "bubbled out".
For parts that are more intricate than emblems and stuff like that (for instance, a small statue), you might need to make a multi-part mold. There are methods for doing this, but I have never had to do it so I am no expert.
Here's a video I found that explains it better than I can:
Here is the part where they cast the part...however they don't skim the back to make it flat like I do.
07-25-2014, 04:46 PM
#298
TECH Senior Member
iTrader: (7)

Dude...
Your work is really amazing. Can you elaborate on how you did the door speaker pods? I've been debating about moving the speakers from my kick panels into the doors. Any thoughts on what actually might sound better?
Andrew
Your work is really amazing. Can you elaborate on how you did the door speaker pods? I've been debating about moving the speakers from my kick panels into the doors. Any thoughts on what actually might sound better?
Andrew
07-25-2014, 05:18 PM
#299
TECH Resident
Thread Starter
I don't have any real pics of the speaker pod process but I still need to build the other one and I will take pics and put them up after it's done. I can try to explain though....
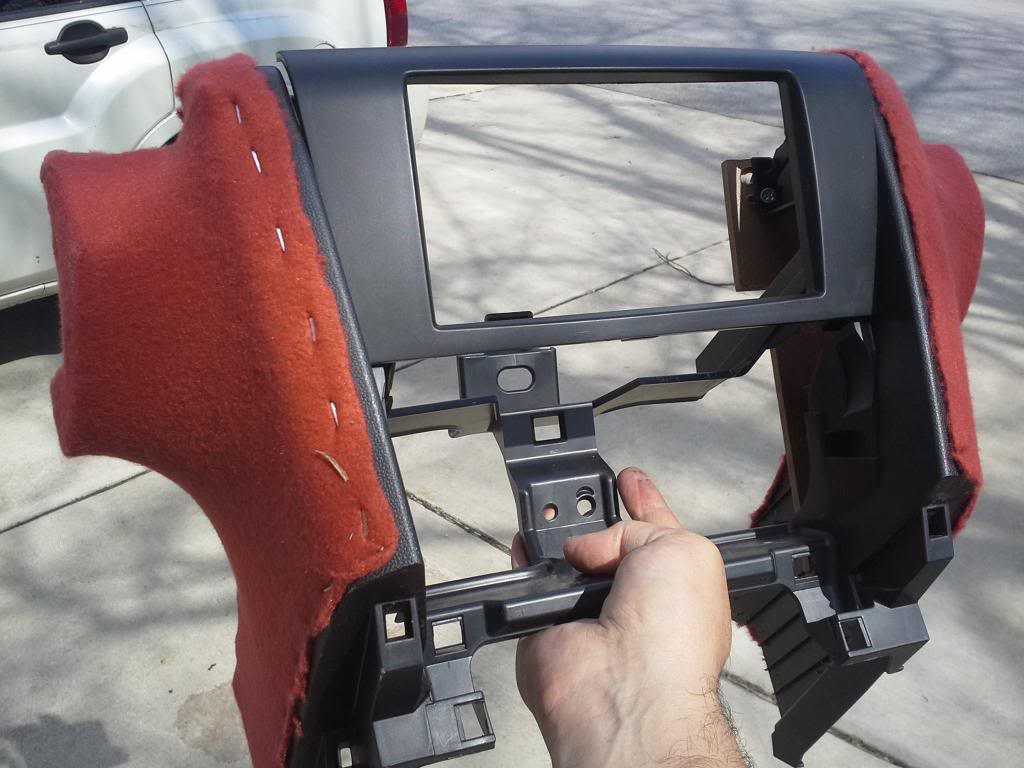
First I had to cut a hole in the door. Had to be very careful about where to make the cut since there's window parts, etc that can be in the way.
I purchased some MDF speaker trim rings for like $12 on Ebay. They allowed me to recess the speaker very slightly into the finished panel. I placed the speaker in the trim ring, and then screwed it onto the door temporarily. This gave me correct hole placement later on.
I removed the trim ring and speaker, and traced them out onto 1/8" hardboard (hardboard, not cardboard). Then using the measurements from the door, I drew out the shape I wanted.
After cutting out the piece of hardboard, I took it over to the door and taped it in place. I then attached the trim ring to the hardboard in the correct place, and found my original holes I had screwed the trim ring into previously. I glued the trim ring to the hardboard with wood glue, and then screwed it to the door.
Next I drilled three larger holes in the hardboard, and straight into the door. These will be used for bolts later, and will provide perfect alignment.
After the glue dried, I removed the panel and started to add a ridge running down the center (kinda like a spine going horizontally). I made this out of 1/4" MDF, which I sharpened a but with a sander to give me a nice sharp edge. I glued the piece onto the center of the hardboard. I had one really long one, and one short one in front of the speaker. The holes I had drilled for bolts were right in line with the spine pieces. In all three locations, I cut away a but of the spine so that it would sit flush. Once the glue dried on the spine, I added fiberglass body filler over the bolts. Once that cured, it locked the bolts in place and locked into the spine as well.
Then I took the whole thing and sprayed contact adhesive on it, and also a piece of fleece. Then i laid the fleece over the part and pulled it all tight. I stapled it from the rear so that it could not come free from the panel.
Then I put it back in the car and bolted/screwed it in place. This is because I did not want it to warp at all when applying the resin. I mixed up some fiberglass resin and brushed it onto the fleece while secured to the car. I let this sit overnight.

All of my interior parts are made in the same way:


The next step is to pull the part out of the car and do a little sanding and bodywork to make sure the surface is flat. It does not have to be anywhere NEAR as flat as exterior bodywork though.
Then it's just a matter of wrapping the part in vinyl. I use 3M interior adhesive, and just pull it all tight. Then I staple everything from the rear like I did with the fleece. Cut openings for the holes and staple that stuff from the rear as well. Now it's ready to bolt to the car.
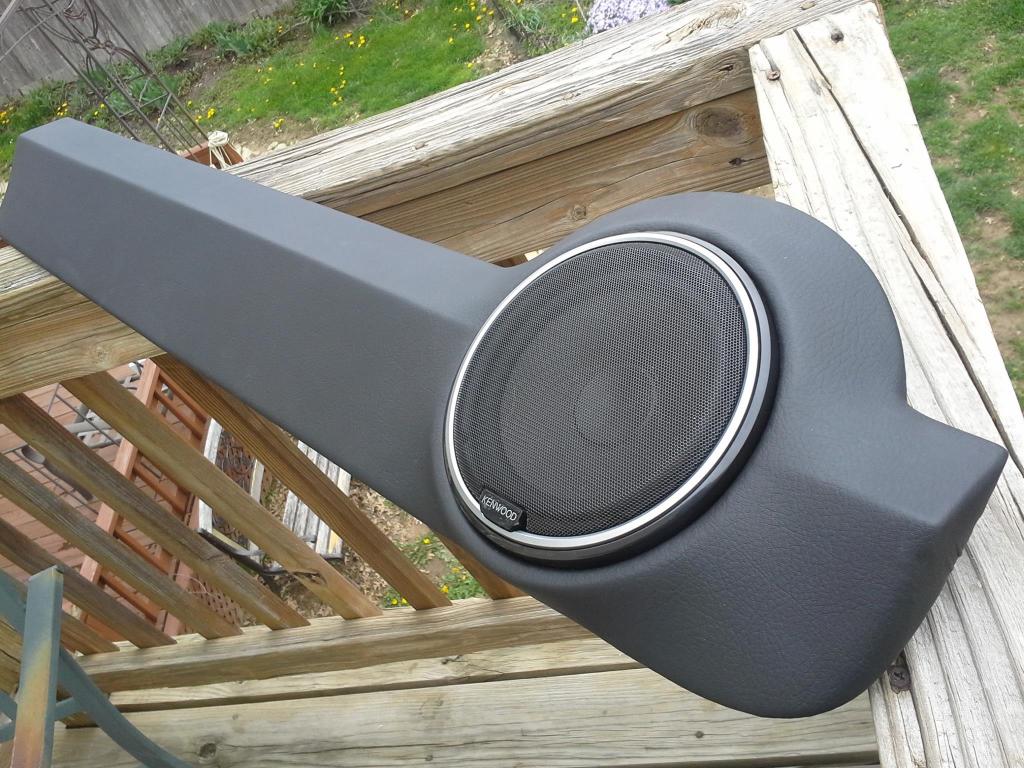
I know it sounds complicated, and it is, I guess.....but I did this in just a few hours. In the end it will be worth all the time I spent on it.
07-25-2014, 08:29 PM
#300
TECH Senior Member
iTrader: (7)
Dave,
That makes perfect sense. It seems similar to the process that I have seen for making fiberglass subwoofer enclosures. Well done!!!
I also love the custom molded plastic. You're an artist.
Andrew
That makes perfect sense. It seems similar to the process that I have seen for making fiberglass subwoofer enclosures. Well done!!!
I also love the custom molded plastic. You're an artist.
Andrew