
S10 Xtreme L33 swap!
 08-09-2012, 10:17 PM
#61
On The Tree
Thread Starter
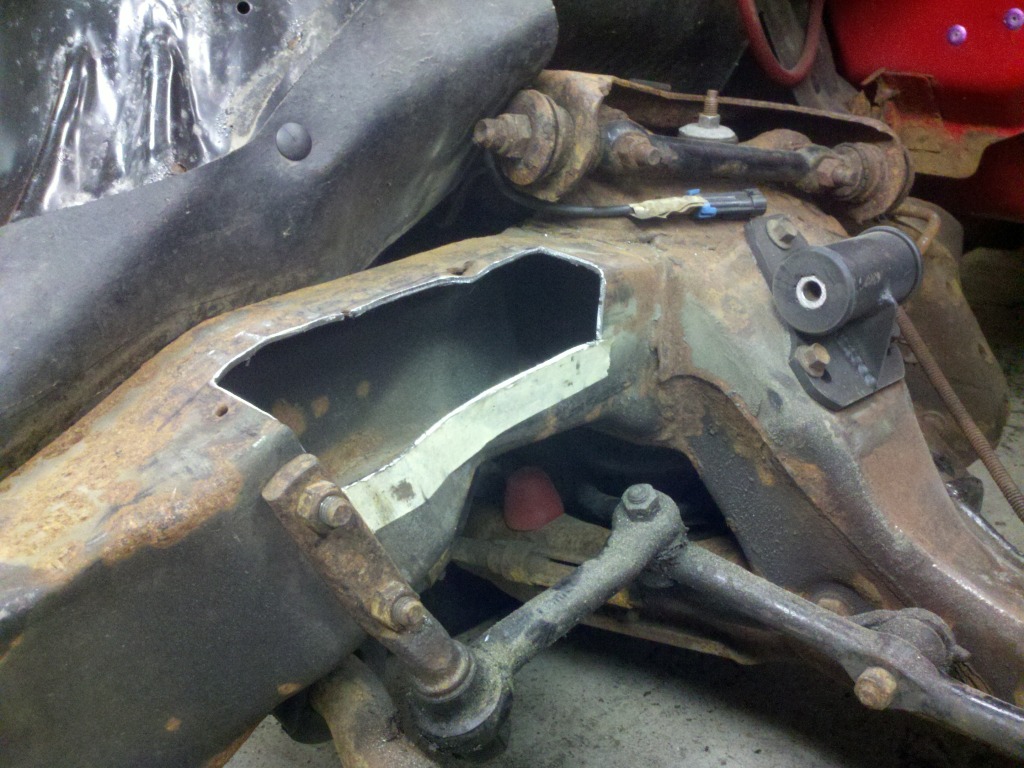
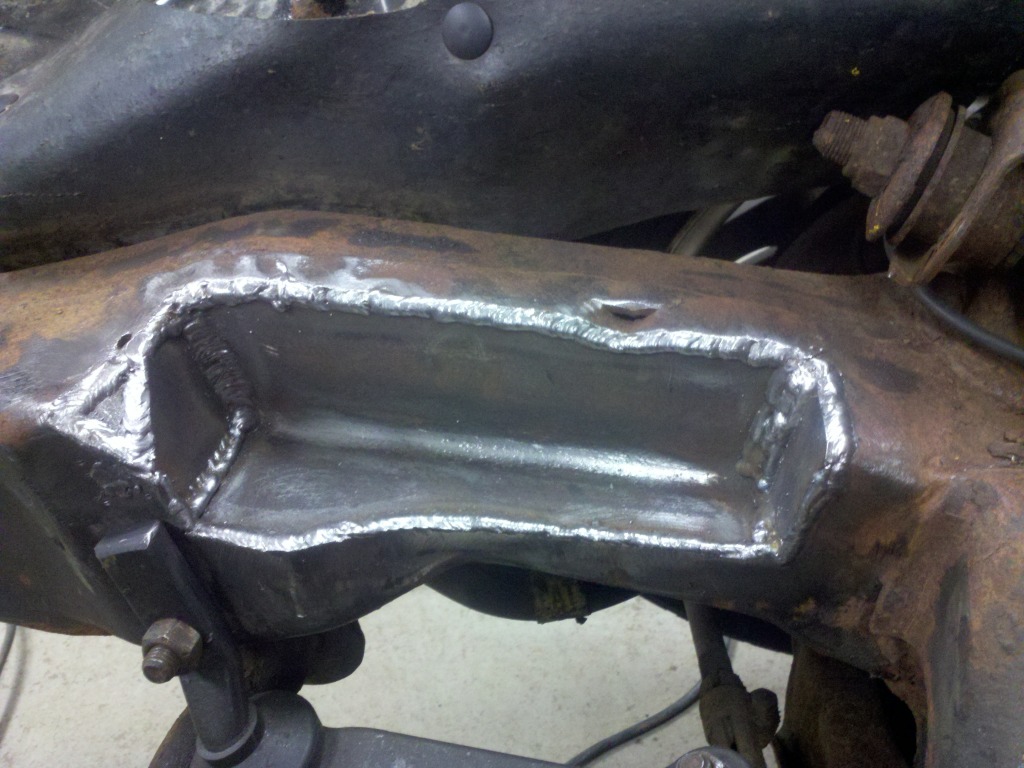
Progress has been slow last few days. Finished my oil pan notch...

And started cutting and test fitting for the AC notch.
Money is starting to run real low on this project, and I'm starting to think about putting the 4 cylinder back in to run it until I come home for winter break from school. It would give me more time and money to buy the things I want like tubular uppers, BRP longtubes, Blazer gas tank, and get my Posi unit installed (bought a zexel torsen, no pics as of right now but may sell to get an auburn instead). I've got just about everything I need to get this in and running, but I'm not crazy about the f-body manifolds and I still need to throw $500-800 at it to get an exhaust built and another $100-150 for the driveshaft modifications to at least get it driving. To what, then swap out the exhaust manifolds and need to re-work my exhaust and have to put a new exhaust on it because of the blazer tank swap. Just seems much more logical to me to just get all my notches done and the motor fit, and then put the 2.2 back in until winter break so I can bank some and get more parts and then do it right.
 08-11-2012, 05:33 PM
#62
On The Tree
Thread Starter
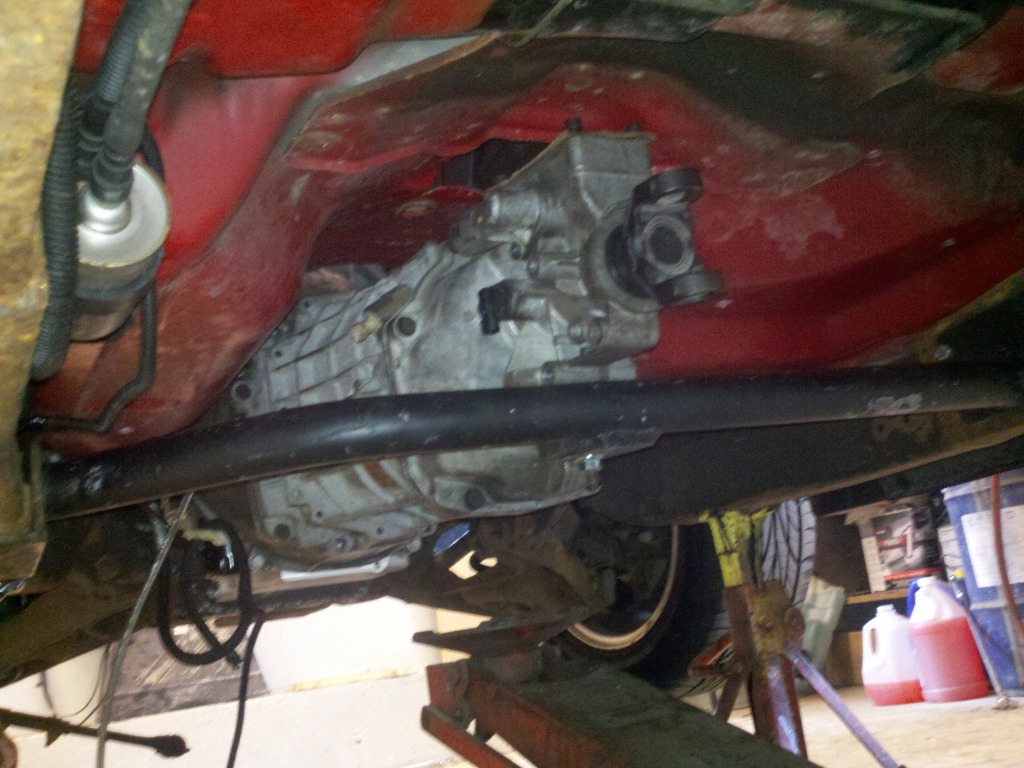
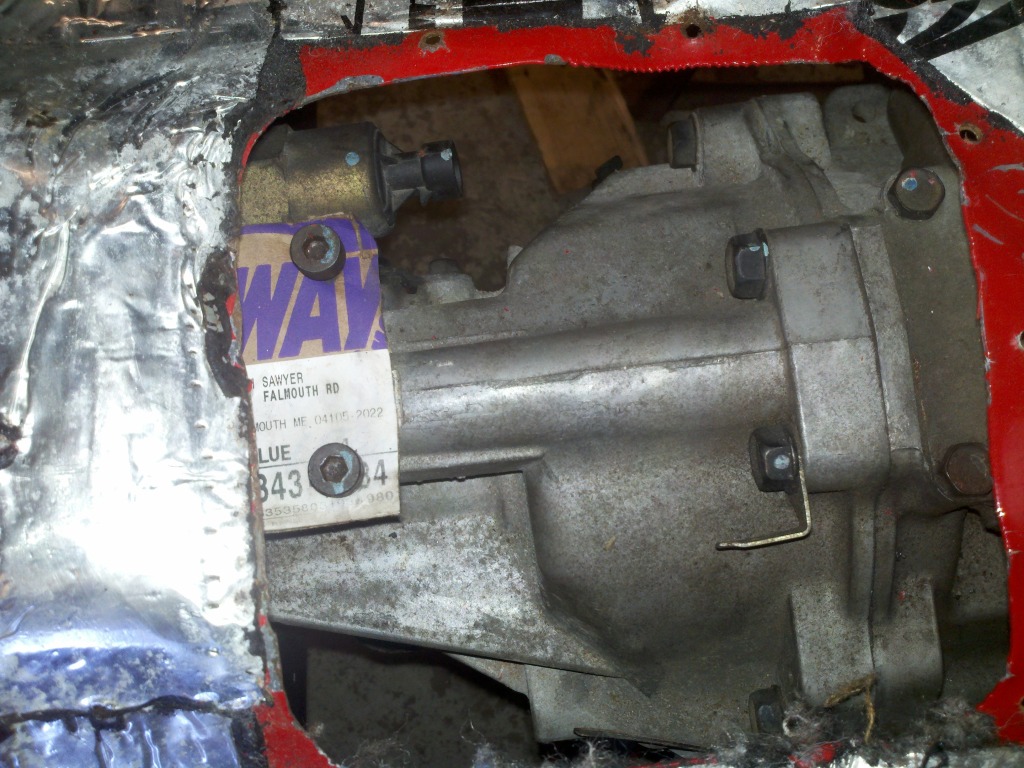
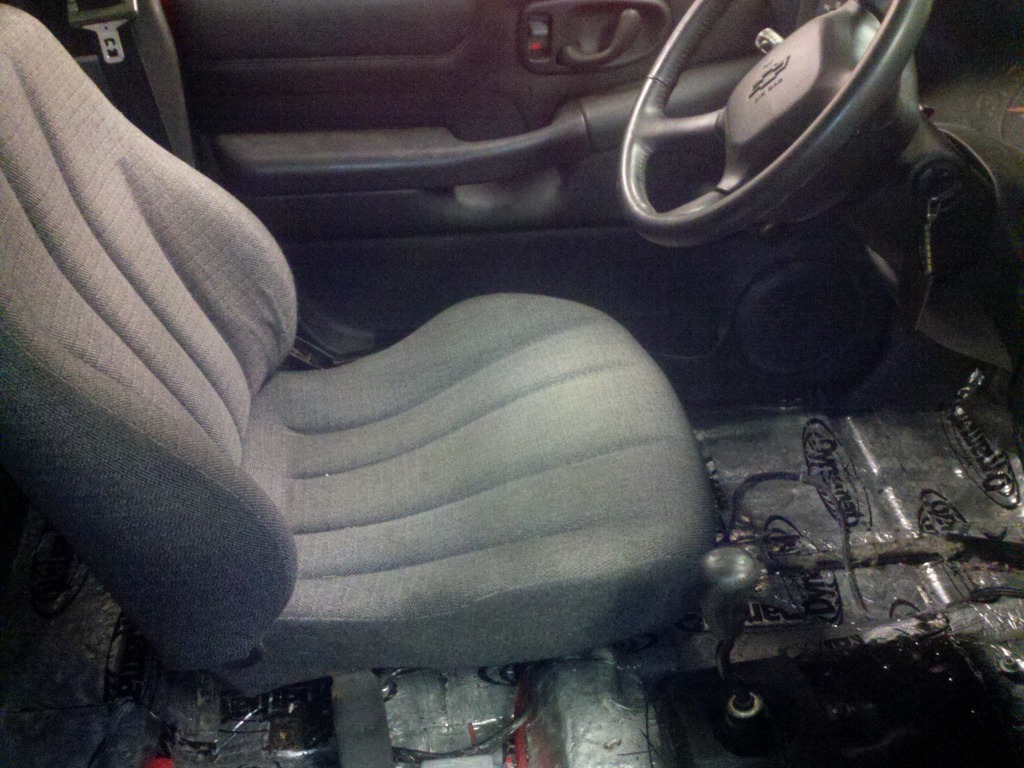
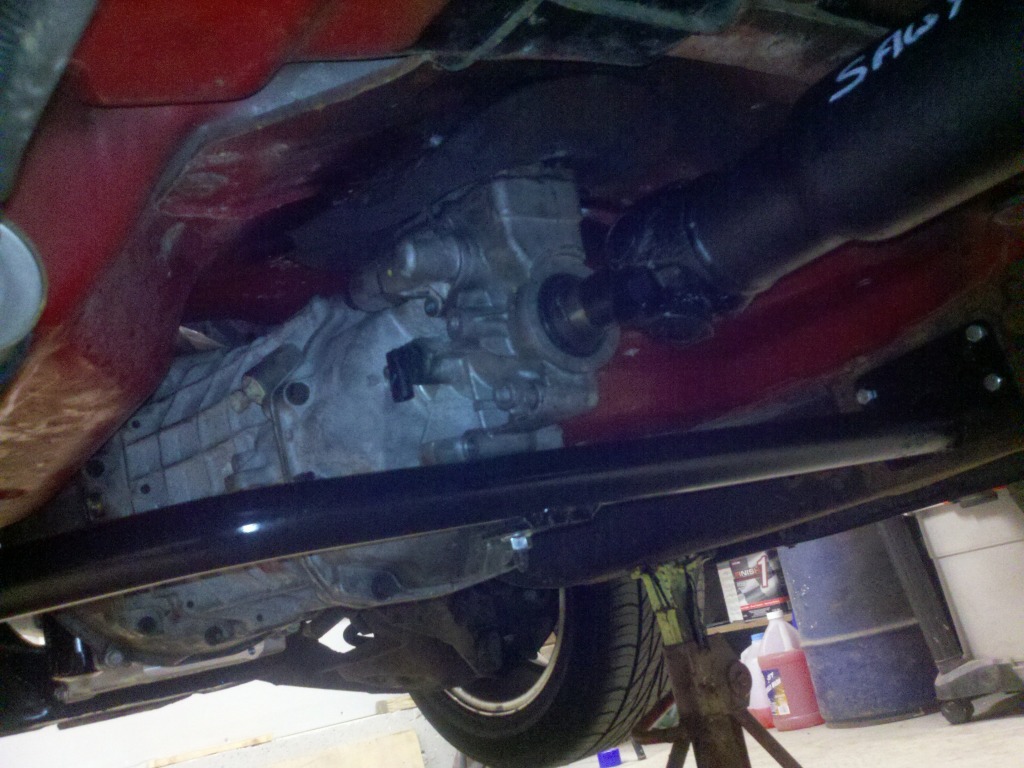
I got some work done today, my trans corss member came in yesterday. So I bolted up the T56 to the engine and fitted the engine. For those wondering, I couldn't get the engine and trans in together, I left the bell housing attached to the block and seperated the transmission, installed the engine and then bolted the trans back up. I also had to pound the lip around the trans tunnel for clearance to get it to fit. If I had done that before hand I may have been able to get the whole package in as one.
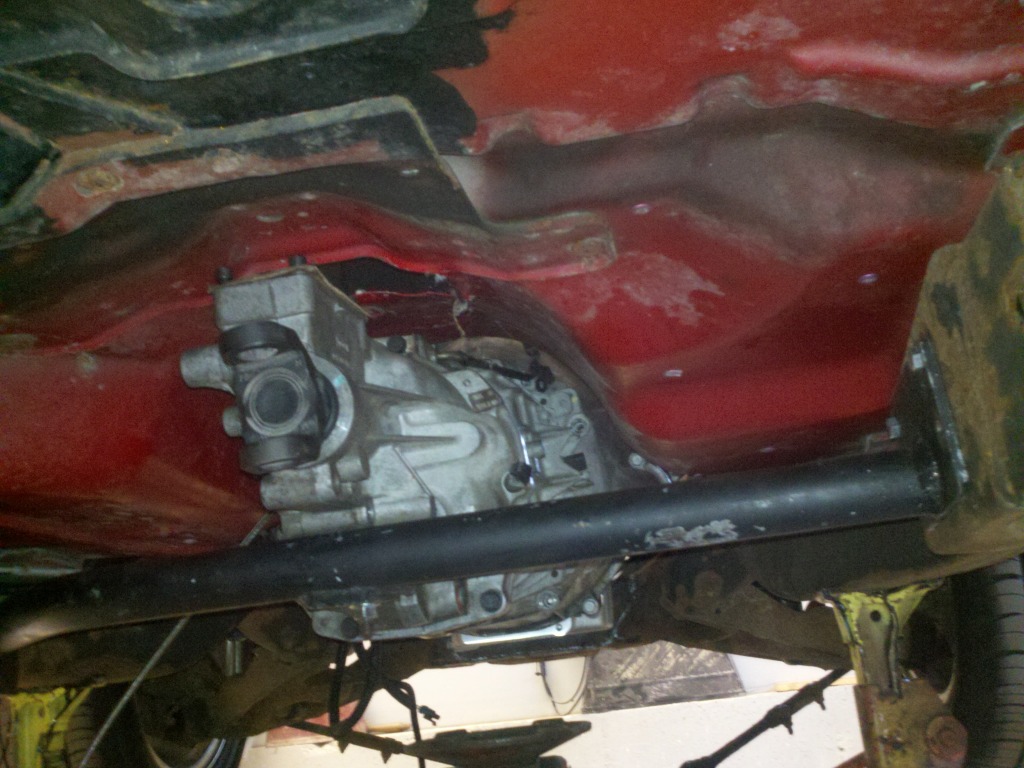
Bought it from a member on S10Forum, it really fit well, only had to elongate the trans mount hole for some wiggle room.
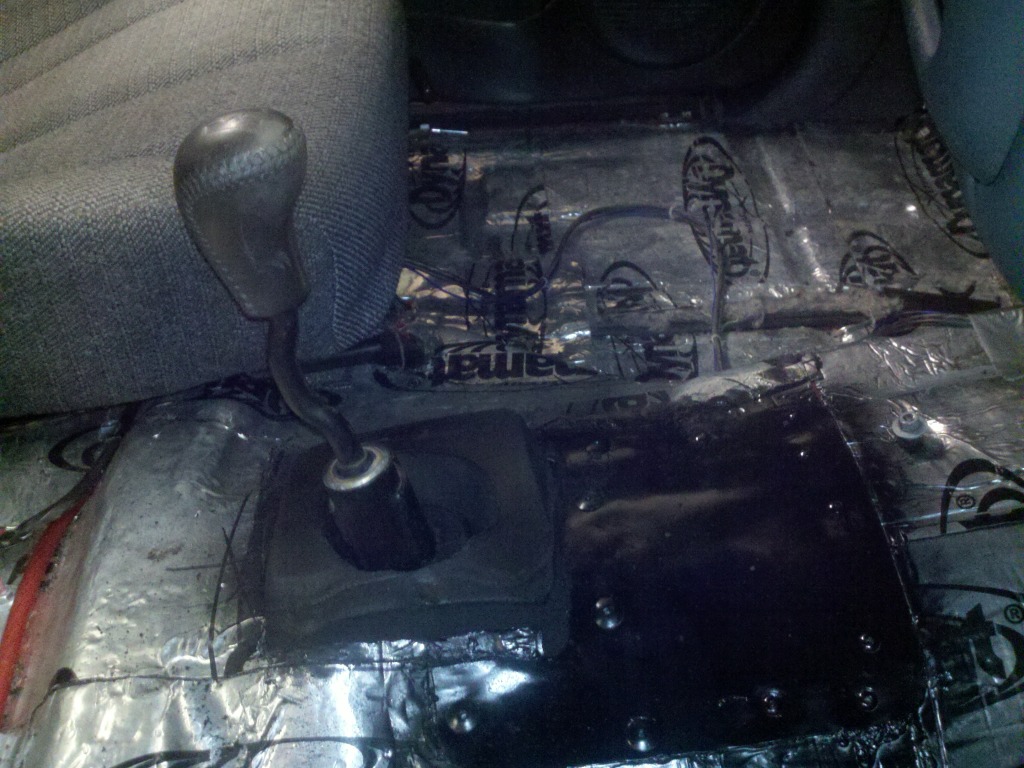
New placement of shifter, have to make a plate to cover up old one and cut the new one.
Test fitted driveshaft, just barely doesn't fit. So I'll have to get that cut.
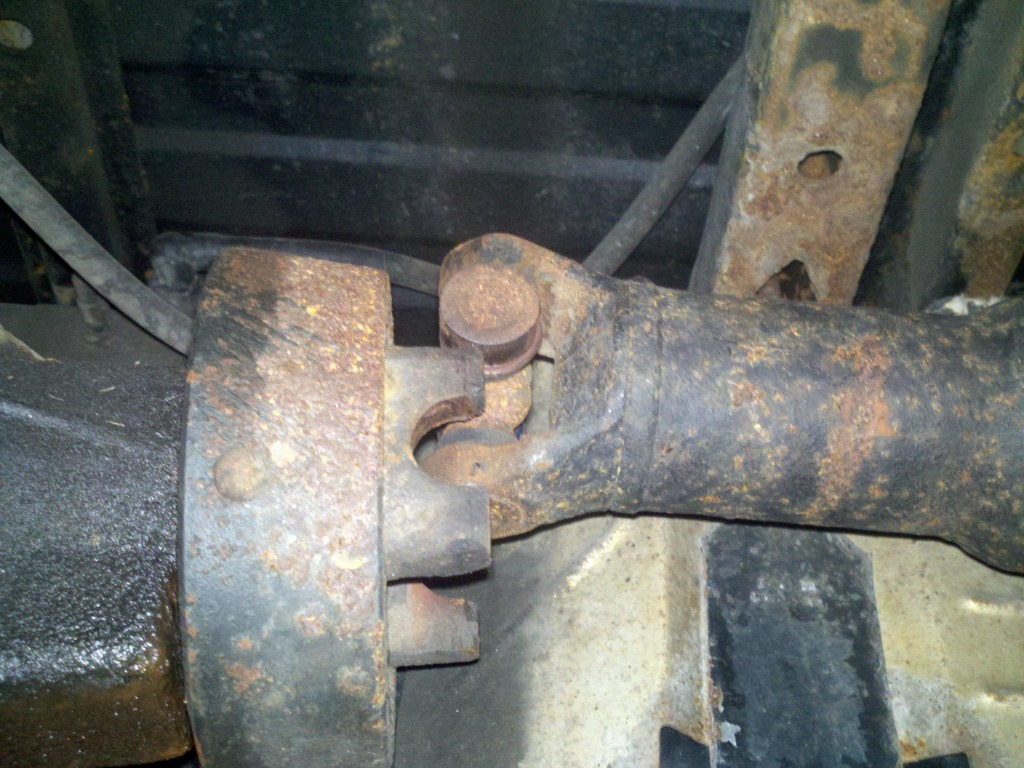
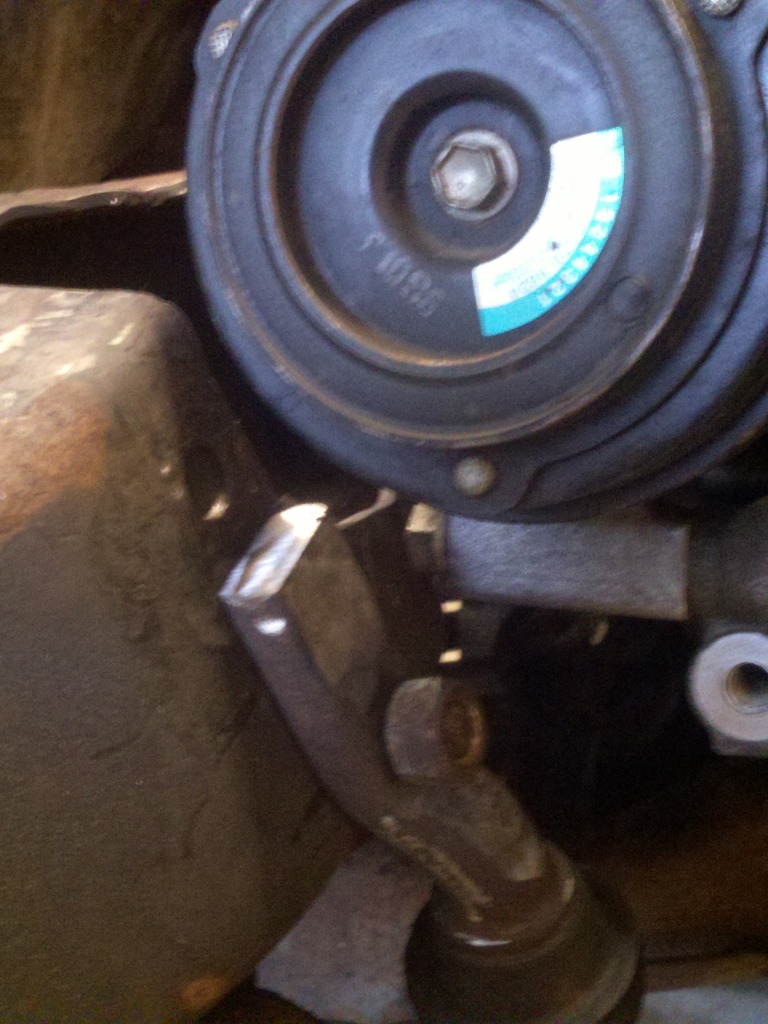
Worked on the AC notch some more and fitting.
Need to angle the notch a bit more to clear the pulley some more. it's tight.
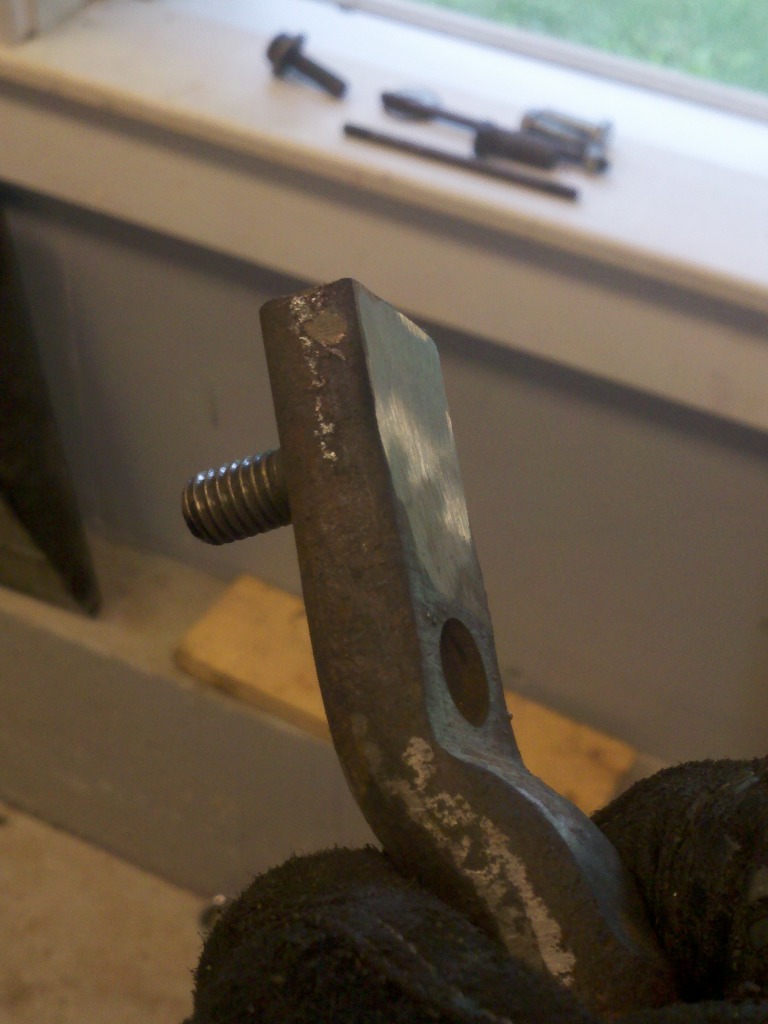
Then modified the idler arm for extra clearance, I need to replace it so this was a mockup one, but I took a bolt and put it on the lathe and rounded the head, drilled a new hole and welded in the bolt and then ground it flush. Also cut it shorter, it came out really good.
Bought it from a member on S10Forum, it really fit well, only had to elongate the trans mount hole for some wiggle room.
New placement of shifter, have to make a plate to cover up old one and cut the new one.
Test fitted driveshaft, just barely doesn't fit. So I'll have to get that cut.
Worked on the AC notch some more and fitting.
Need to angle the notch a bit more to clear the pulley some more. it's tight.
Then modified the idler arm for extra clearance, I need to replace it so this was a mockup one, but I took a bolt and put it on the lathe and rounded the head, drilled a new hole and welded in the bolt and then ground it flush. Also cut it shorter, it came out really good.
 08-20-2012, 07:31 PM
#64
On The Tree
Thread Starter
Here's some pictures of my oil pan clearance with the notch for anyone who wants to reference. CPW poly mounts with the engine all the way forward. Much better, don't know how anyone would be able to run this pan without a notch or some heavy firewall work.
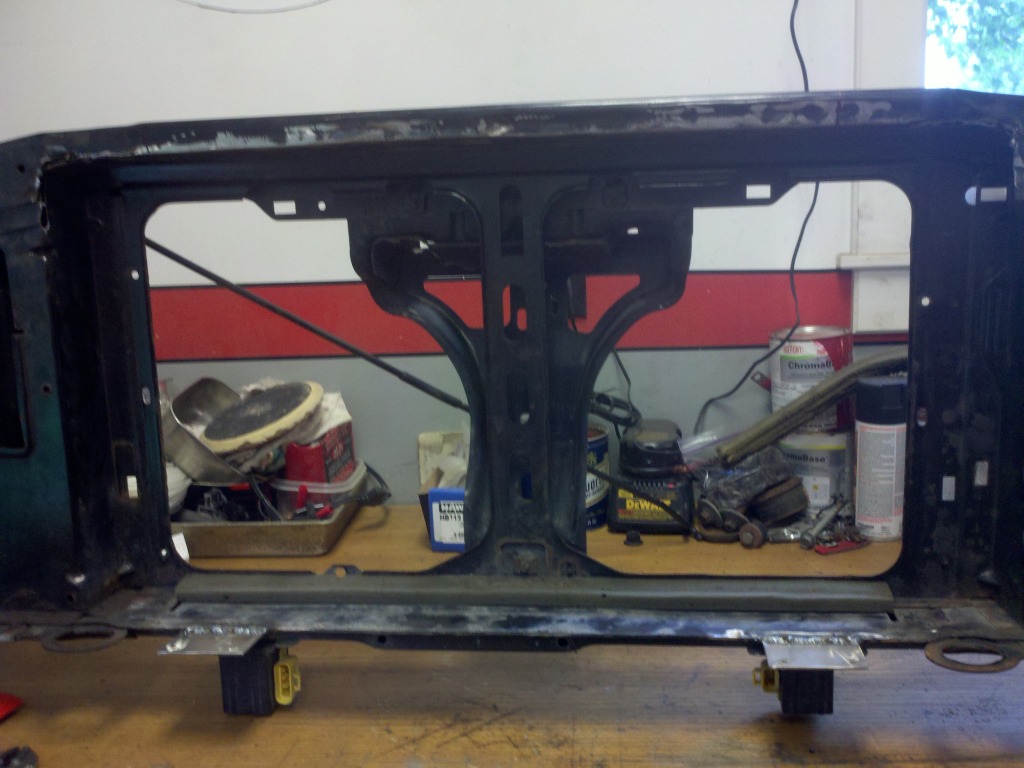
Started working on the core support, trimmed the corners and the upper lip to fit radiator inside, welded back up and ground down. Two plates welded on bottom for mounting points on radiator.
List of crap to do!
Core support painted up, and condensor fit, I put foam on both sides of the condensor and didn't use the stock rubber mounts.
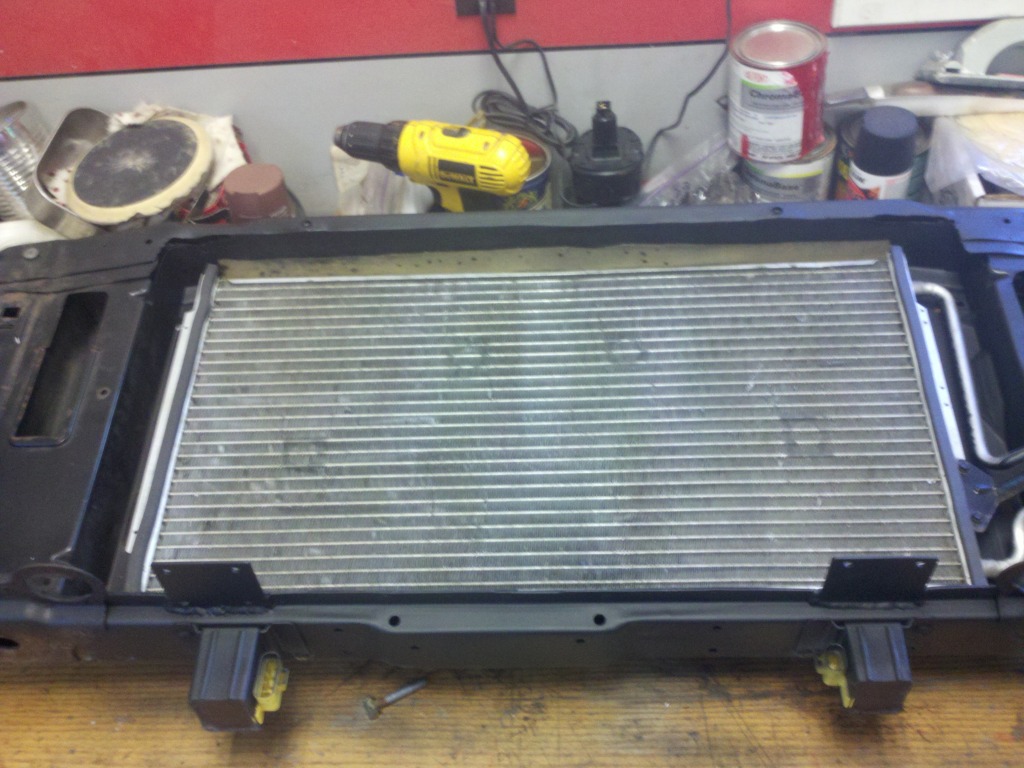
Painted radiator...
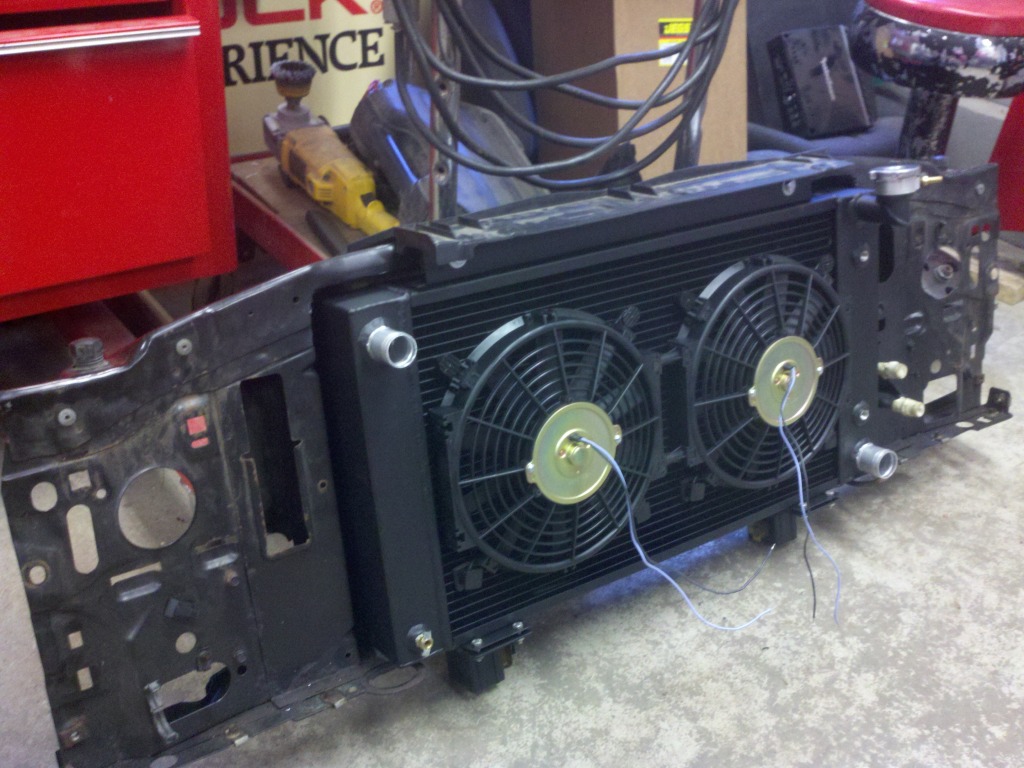
Andddd core support all done, condensor, radiator, and e-fans mounted. Looking at it now I probably didn't save any room over a stock 4.3 rad but this radiator is a hell of a lot beefier haha, shouldn't have any cooling problems. I'm really enjoying learning and working on my fabrication skills as well, definitely need to do more of it.
Trimmed up the stock fan shroud to make it look a little cleaner, still has the 2.2 sticker on it lol
Dropped my driveshaft off to get shortened today, taking 1.5" out of it. Measured 51.5" center to center.
Started working on the core support, trimmed the corners and the upper lip to fit radiator inside, welded back up and ground down. Two plates welded on bottom for mounting points on radiator.
List of crap to do!
Core support painted up, and condensor fit, I put foam on both sides of the condensor and didn't use the stock rubber mounts.
Painted radiator...
Andddd core support all done, condensor, radiator, and e-fans mounted. Looking at it now I probably didn't save any room over a stock 4.3 rad but this radiator is a hell of a lot beefier haha, shouldn't have any cooling problems. I'm really enjoying learning and working on my fabrication skills as well, definitely need to do more of it.
Trimmed up the stock fan shroud to make it look a little cleaner, still has the 2.2 sticker on it lol
Dropped my driveshaft off to get shortened today, taking 1.5" out of it. Measured 51.5" center to center.
Last edited by zdiesel; 08-21-2012 at 02:04 AM.

 08-21-2012, 01:49 AM
#69
On The Tree
Thread Starter
 08-22-2012, 11:17 PM
#72
Do yourself a favor and measure your radiator core and see if you can find a OE fan setup from a front wheel drive car. Aftermarket fans suck and just dont last.
I used a flexalite 210 fan setup on my 6.0 sonoma and had a fan fail on power tour effectively putting a crimp in the trip. I finally found a set for a 03 chrysler 300 that fit my particular setup and the cooling performance and reliability is day and night.
Just saw you are from maine it never gets hot there you may be ok but might still consider the above recommendation.
Last edited by 01WS6/tamu; 08-22-2012 at 11:25 PM.
08-22-2012, 11:48 PM
#73
On The Tree
Thread Starter
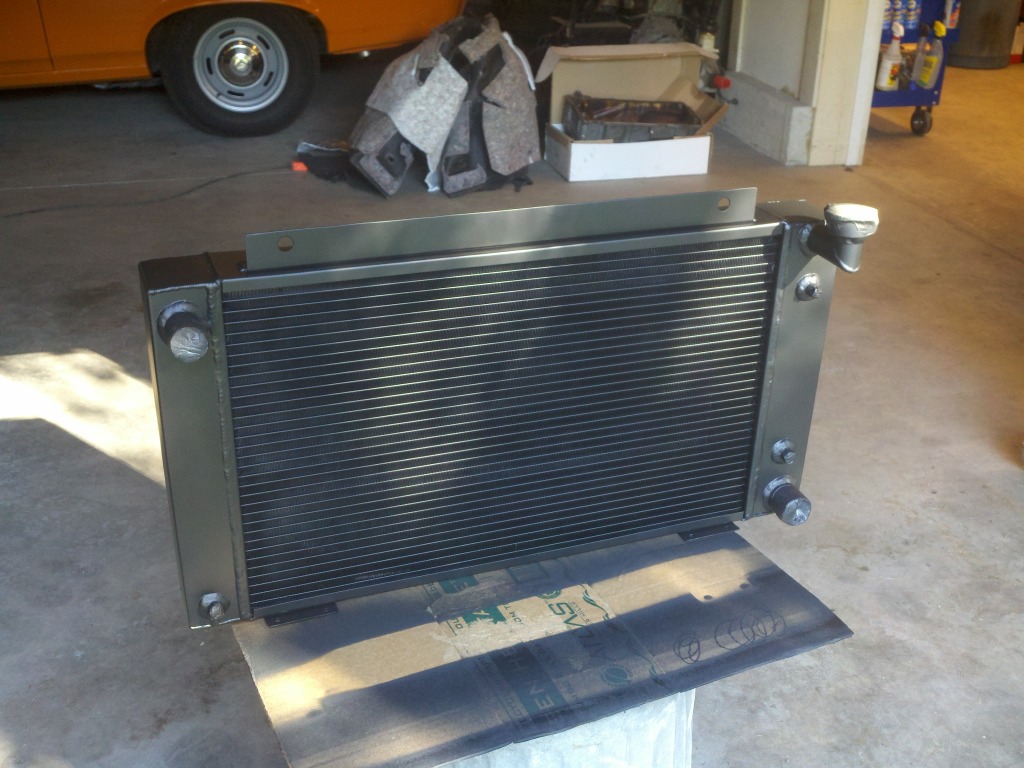
Radiator is from Superior Radiator, I got it for $300 shipped, was cheaper then the CPW $500 radiator, but also required a lot more fabrication in terms of mounting solution. Turned out it's actually designed for a first gen S10 lol
I've been keeping my eye out at the junkyard for some e-fans, I agree though. These were mad cheap fans, like $45 a piece. They'll get me by for now, and with that big radiator in the winter, shouldn't have a problem with heating issues lol
I've been keeping my eye out at the junkyard for some e-fans, I agree though. These were mad cheap fans, like $45 a piece. They'll get me by for now, and with that big radiator in the winter, shouldn't have a problem with heating issues lol
08-24-2012, 10:50 PM
#77
Teching In

Join Date: Aug 2012
Posts: 4
Likes: 0
Received 0 Likes
on
0 Posts
i may have missed it but were did you get the oil pan and what was the part # on it im getting parts together to start on my 94 4.3 to a 6.0 swap im going to be following your build looks good
08-25-2012, 08:39 PM
#78
On The Tree
Thread Starter
Best deal around, fast shipping, no problems.
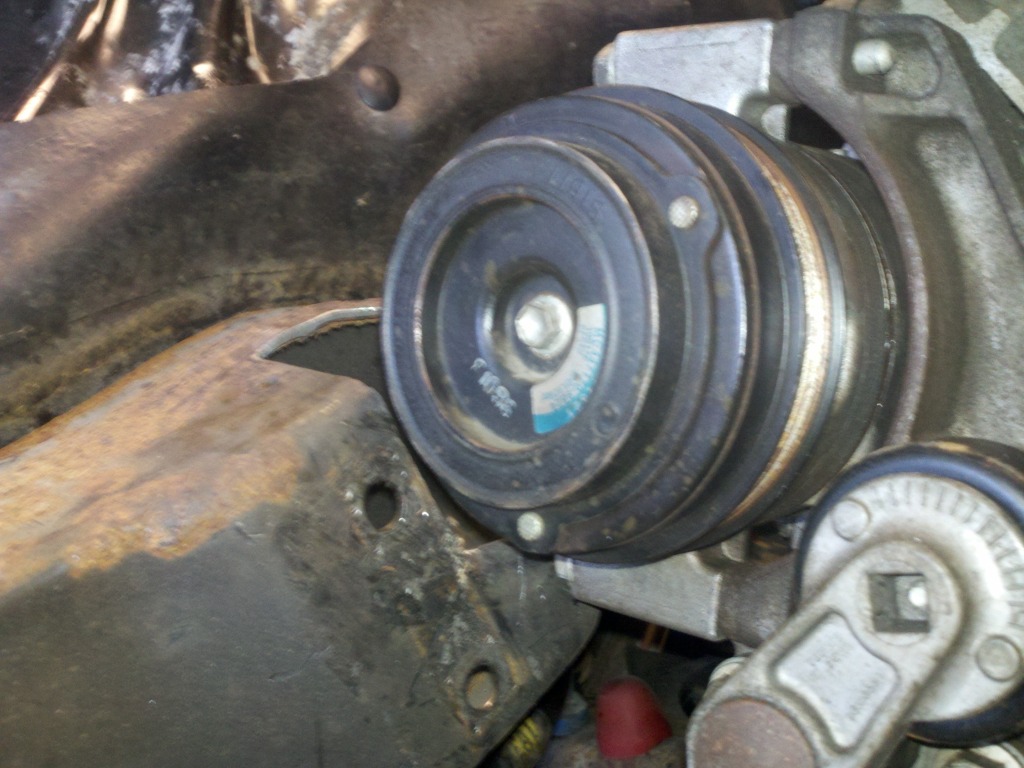
Finished my AC notch, don't make fun of my welding... lol
Motor in for good hopefully.
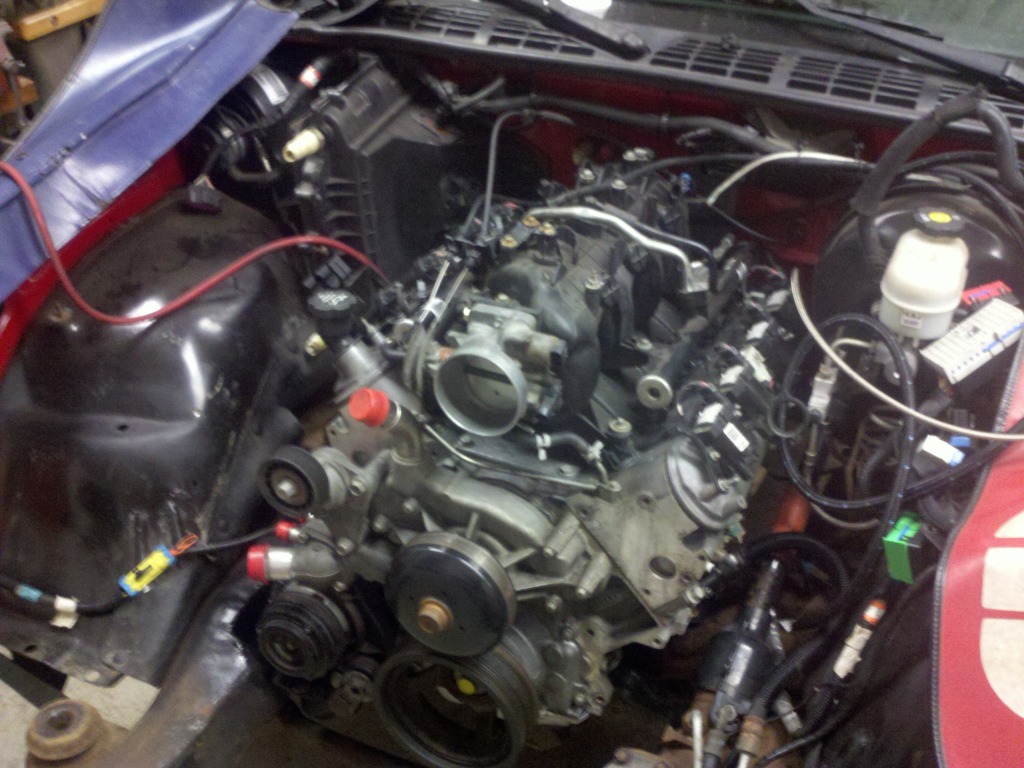
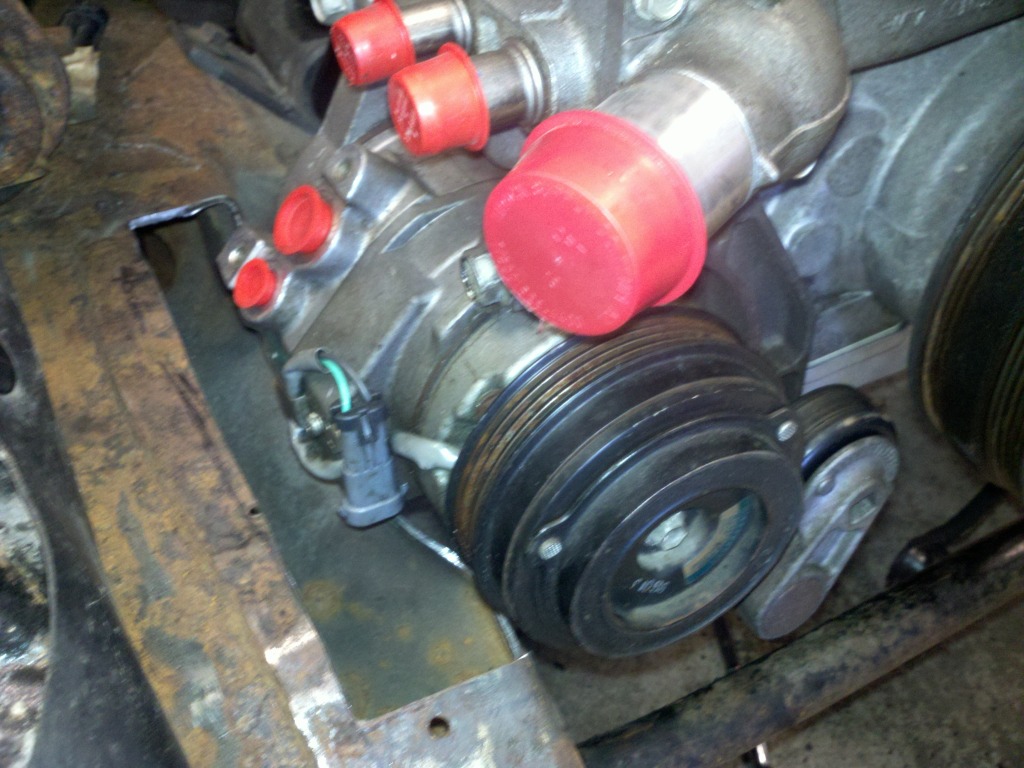
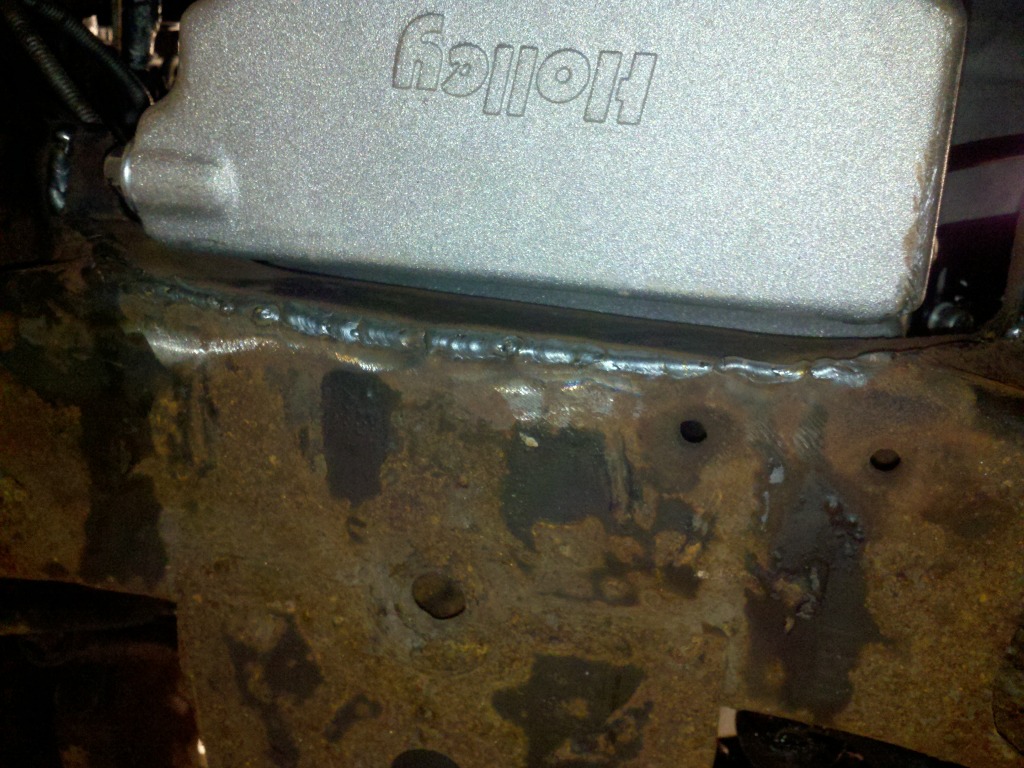
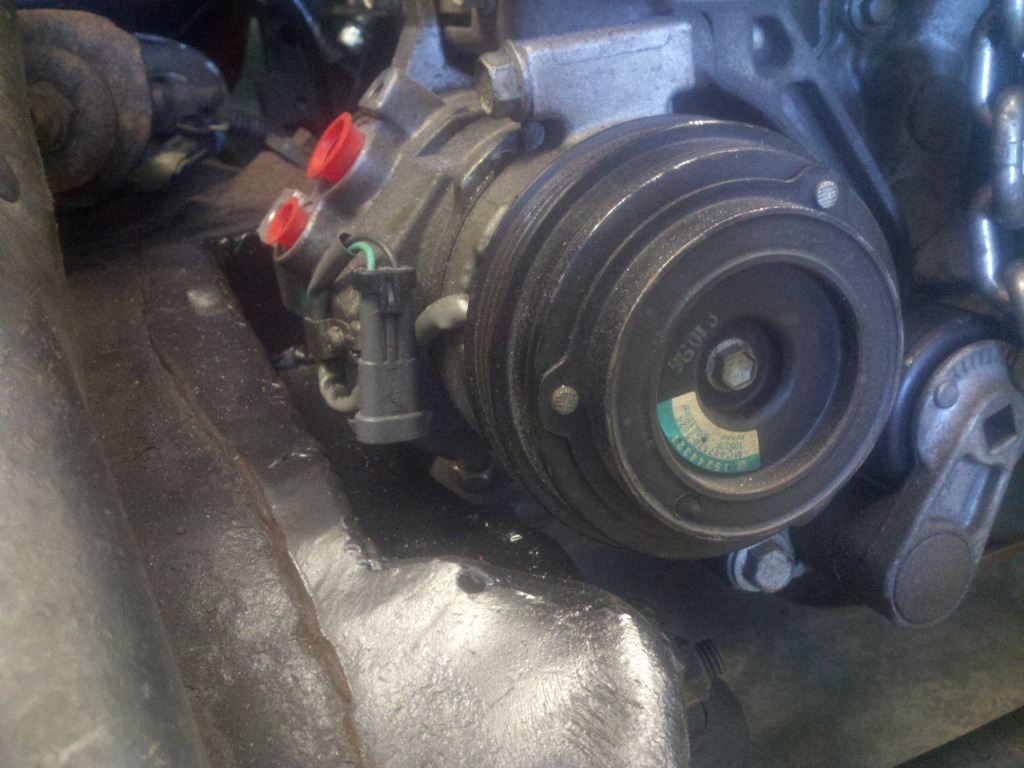
Modified the AC compressor a little bit, front bottom bolt was real close to the frame, so I cut down the mount and used a smaller bolt. Fits mint now...
Cut the hole for the shifter...
Repainted the cross member, got my drive shaft back from being cut.
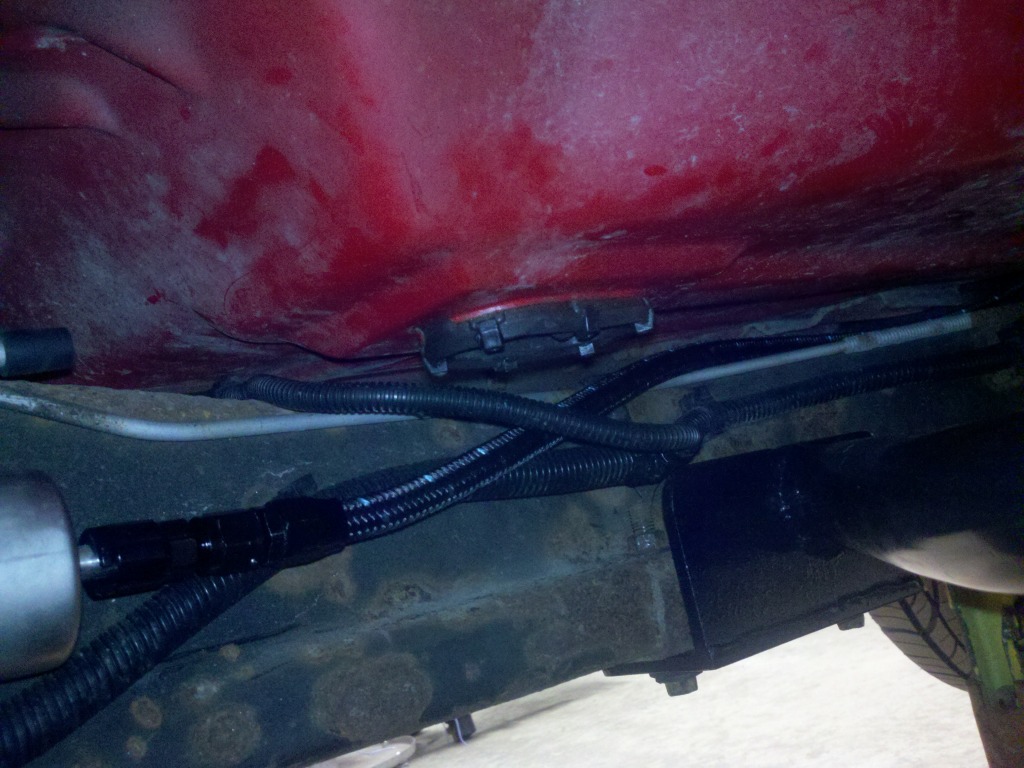
Started fitting my fuel line, turns out both my fuel rail, and fuel filter are 3/8" and I ordered 3/8 and 5/16 quick connects, so ordered another fitting to finish that up.
I really didn't like the F-Body manifolds, so I broke down and bought a set of coated sanderson headers, those should be here wednesday.
08-28-2012, 10:24 PM
#79
On The Tree
Thread Starter
Getting alot of the small stuff done past few days...
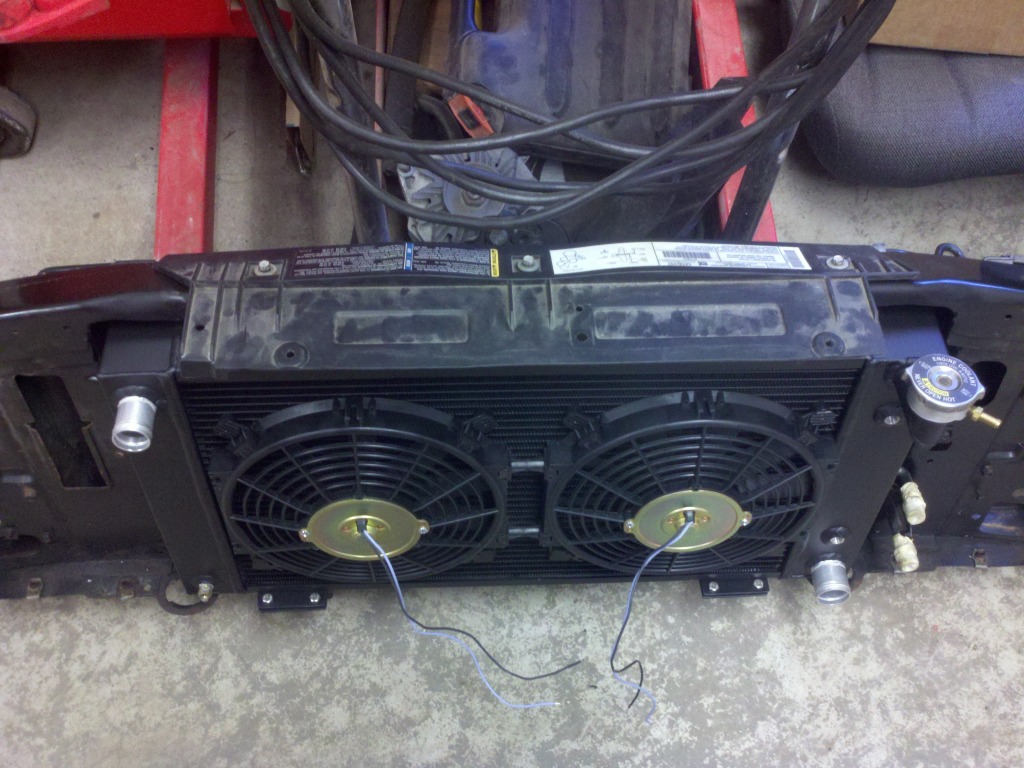
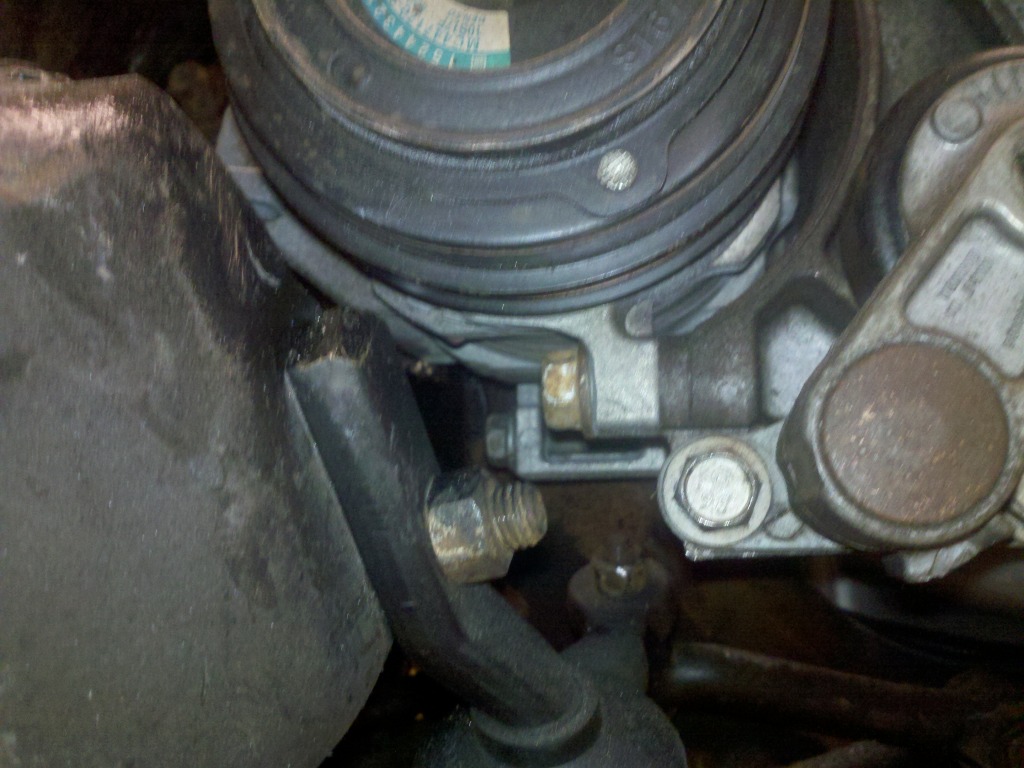
Core support back in place, power steering lines all modified and connected. I used the stock 2.2 high pressure line and just rebent the metal tube until it cleared. Started running the wiring harness and connecting things. Headers, shifter boot, plug wires, and new fuel connector show up tomorrow.
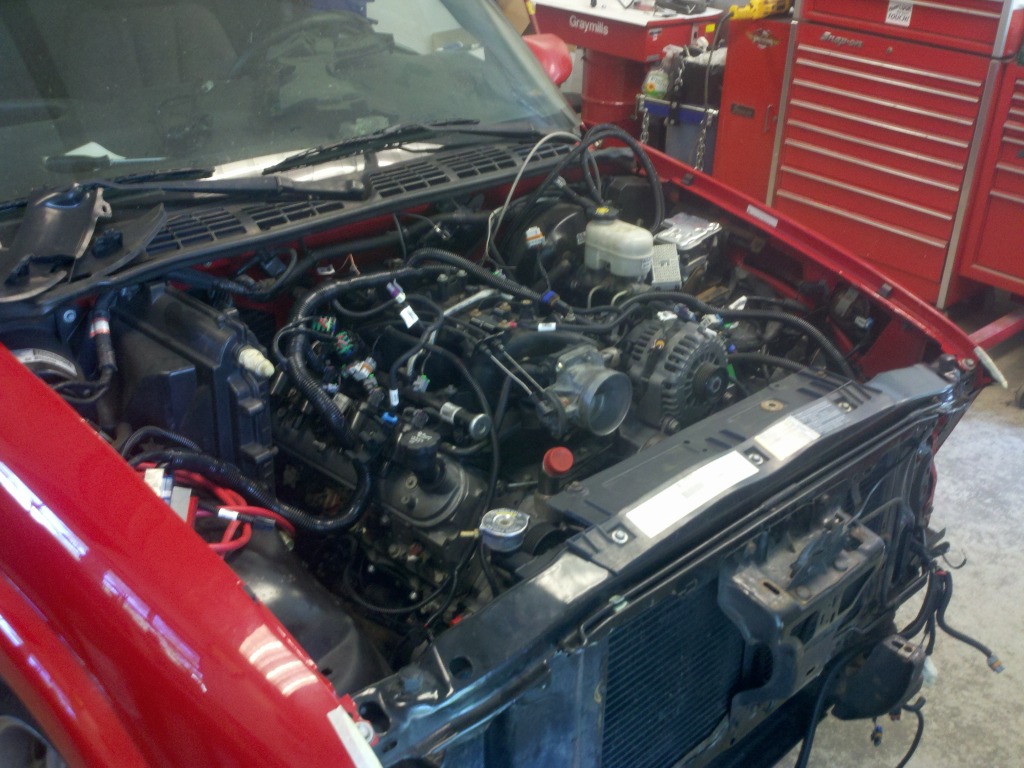
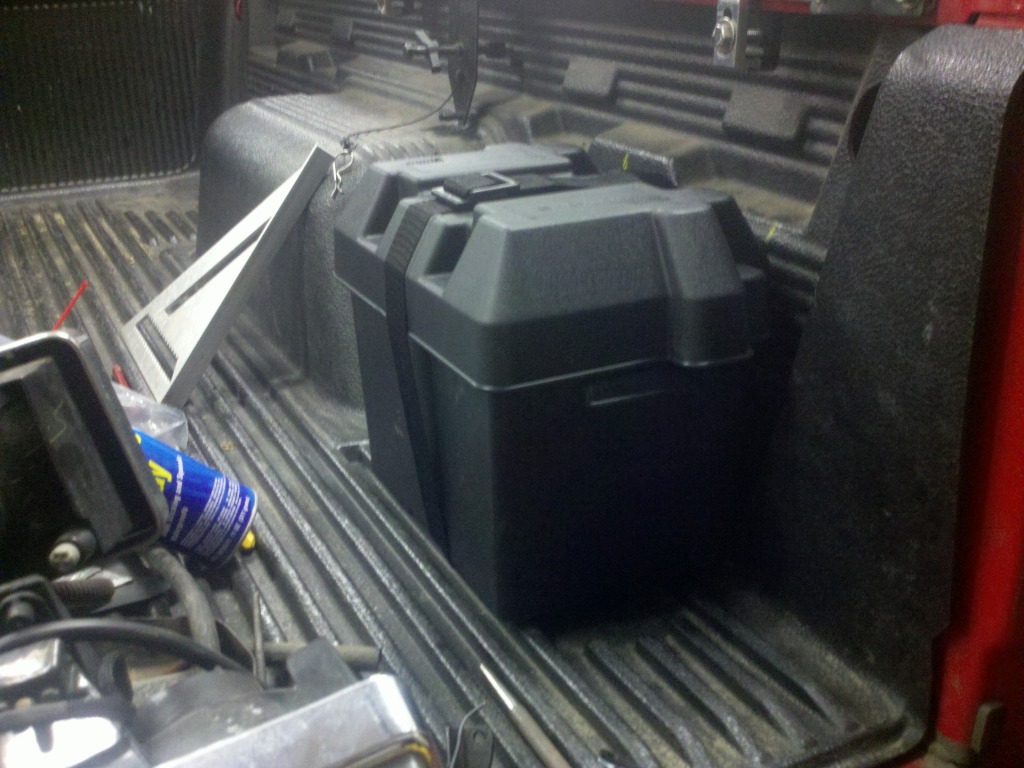
Relocated the battery to the rear, ran all the wires. The biggest pain in the *** though has been finding a way to wire the positive cable into everything together in a simple way, does anyone have suggestions?
And lastly, wtf is this connector?
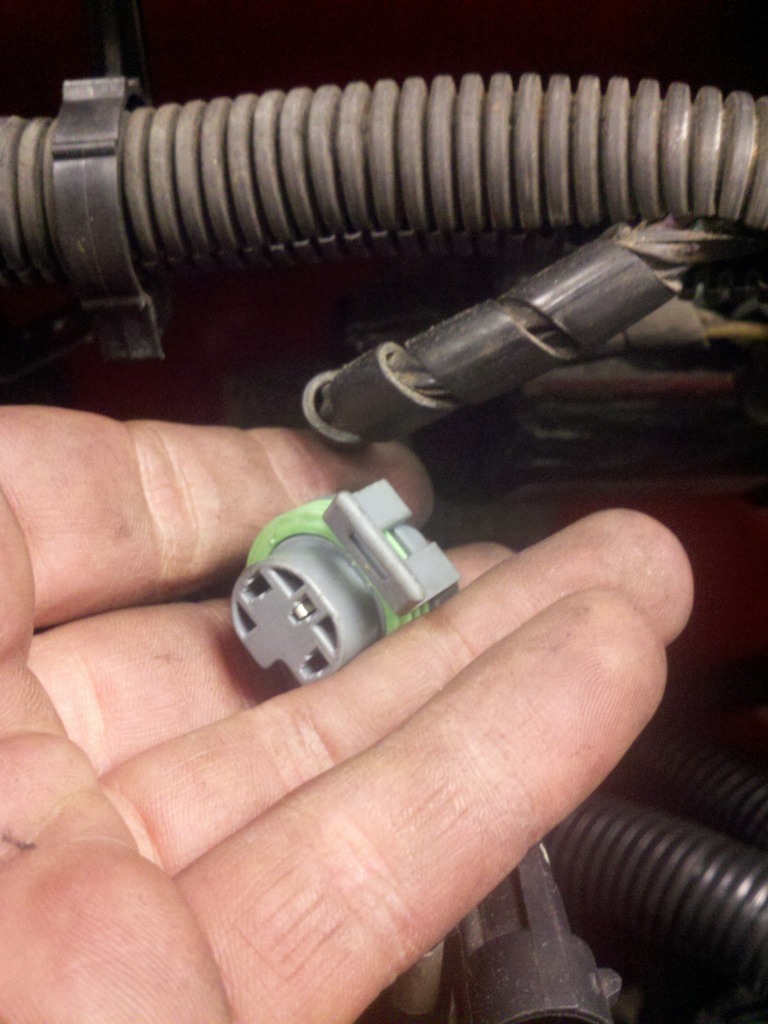
It looks like its suppose to plug into this plug (not the cam position sensor but the tall one), but it doesn't fit. I'm lost.

Core support back in place, power steering lines all modified and connected. I used the stock 2.2 high pressure line and just rebent the metal tube until it cleared. Started running the wiring harness and connecting things. Headers, shifter boot, plug wires, and new fuel connector show up tomorrow.
Relocated the battery to the rear, ran all the wires. The biggest pain in the *** though has been finding a way to wire the positive cable into everything together in a simple way, does anyone have suggestions?
And lastly, wtf is this connector?
It looks like its suppose to plug into this plug (not the cam position sensor but the tall one), but it doesn't fit. I'm lost.
08-29-2012, 04:01 PM
#80
oil pressure sending unit.
I put the battery in the bed on my swap inside a tool box. I used 0/0 cable and ran it to the front and used made the run from the battery to starter in one piece of solid cable. I then took it to a truck shop that makes cables for big trucks and we used a crimp shell they put around the cable before it got to the starter and essentially y'd the cable and ran a loop forward that went up to the power distribution center and put another crimp shell and y connection and made a drop to the alternator.
I ran a 0/0 ground from the battery to the frame. and then a 0/0 ground from frame to block and a 2 gauge ground from block to firewall ground, the cab to frame ground and block to core support ground.
Last edited by 01WS6/tamu; 08-29-2012 at 04:19 PM.