My 1965 Buick Skylark L92/6L80 Swap
 11-20-2012, 07:19 PM
#81

 11-20-2012, 08:47 PM
#83
You would be correct but as of now I am going to have the panels powder coated a satin black including the factory pieces that they mount to as shown in the picture.
Last edited by 1989GTA; 11-20-2012 at 08:53 PM.
11-20-2012, 08:56 PM
#85
Hmmmm, that is interesting. I was talking with a guy at lunch today and he says there is a process that uses wet decals with any "picture" you want on them including wood. I may hold off a little bit and do some more research before making a final decision.
12-04-2012, 05:22 PM
#86
A little update that is picture worthy. Been working on the car almost daily but doing small odds and ends with the wiring and some interior painting. Here is a picture of the almost completed LH dash panel that is completely wired up and ready to plug in and install in the car.
The one thing left to do is the Park, reverse, neutral, drive and drive 1 label that goes in the opening below the speedometer. I went with the semi-gloss black paint as that was the easiest and cheapest to do. Should have the RH panel done by the end of the week. I was a little worried about the 4 screws that hold the panel on but they are stainless steel and did not come out to bad. Here is a picture.
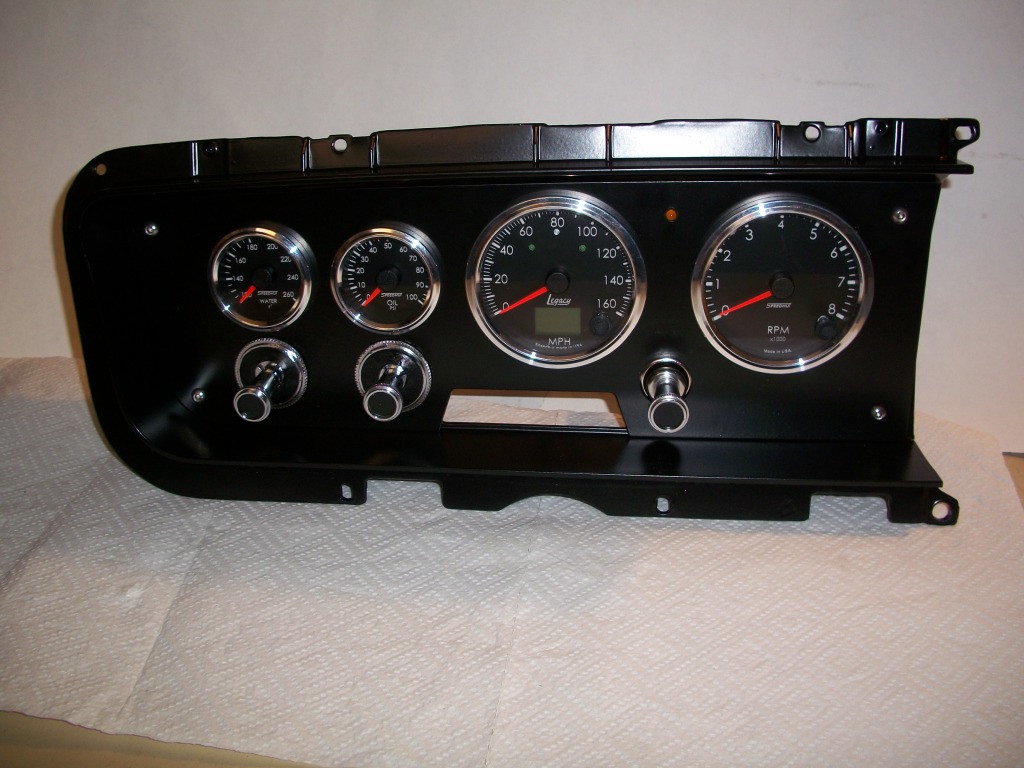
The one thing left to do is the Park, reverse, neutral, drive and drive 1 label that goes in the opening below the speedometer. I went with the semi-gloss black paint as that was the easiest and cheapest to do. Should have the RH panel done by the end of the week. I was a little worried about the 4 screws that hold the panel on but they are stainless steel and did not come out to bad. Here is a picture.
 12-05-2012, 09:26 AM
#88
I might still have the paper cutout. I also had to modify the factory panel. Maybe later today I will show a picture of the backside as it is revealing as to what I did. I have to run for now. Be sure to start a thread on your car.
Last edited by 1989GTA; 12-05-2012 at 02:26 PM.
12-05-2012, 02:33 PM
#90
Well, that is something I thought a lot about and would have liked to have done but in the end it came down to money. So I went with the blacked out look. One of the reasons is I noticed on my car that the plastic mold trim piece that envelopes the gauge panels seems to cover up a portion of that anyways.
12-05-2012, 02:47 PM
#91
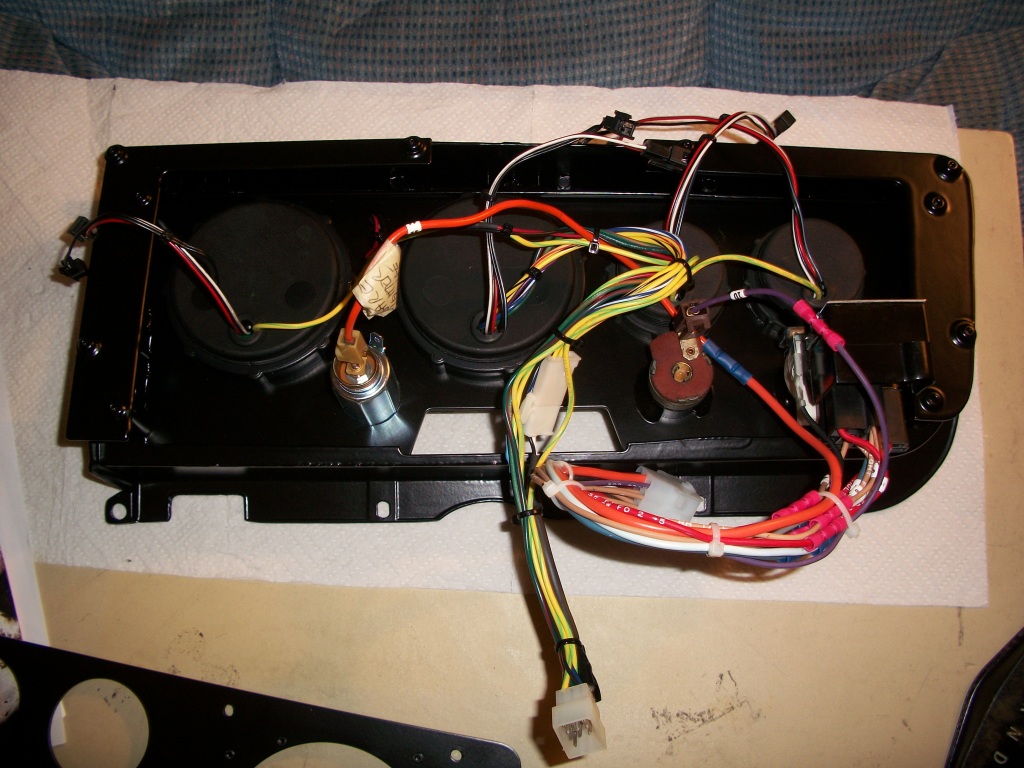
Here is the backside of the panel to show how I mounted the gauges. We made up two L shaped bracked that mounted to 6 screw holes in the original casting. Then there were four spacers that we made up to bolt the new flat guage panel to the L shaped brackets. Hopefully you can see that in the picture. The edge sticking up from the back of the origina panel where the 6 screw holes go was milled down to be in the same plane as the new flat panel. That was so the 4 mounting screws would be on the same plane and not screwed into an angle so to speak. Here is the picture.
 12-11-2012, 09:27 PM
#93
No it's not. I may have to go that route though. As of now I am tapping into the signal that runs from the 6L80 transmission to the E38 ECM. I will have to wait and see if that works. If not maybe the GPS will be the way to go.
12-11-2012, 09:58 PM
#94

If you don't want to swap out your speedo Dakot Digital now has a device that gives you a tach signal and a VSS signal for your speedo. It connects to the OBDII port but I bet you could hard wire it in so that your port was free for a scanner. Pretty slick setup.
12-11-2012, 10:24 PM
#95
Thanks, I will look into that for a plan "B" backup.
12-12-2012, 10:05 PM
#96
Teching In

Join Date: Feb 2012
Posts: 14
Likes: 0
Received 0 Likes
on
0 Posts

Love what you're doing to the Buick. Especially since you're months ahead of me, so I will definitely be following along.
Did your car also have the suspension modified? Curious to know your plans for that.
Did your car also have the suspension modified? Curious to know your plans for that.
12-12-2012, 10:43 PM
#97
So basically that is it for now. My main goal is to get the car on the road and drivable and reliable. I also want to get the stance right. As to shocks and other items they will come down the road.
12-23-2012, 06:58 PM
#98
Teching In
Join Date: Oct 2011
Location: Petaluma
Posts: 12
Likes: 0
Received 0 Likes
on
0 Posts
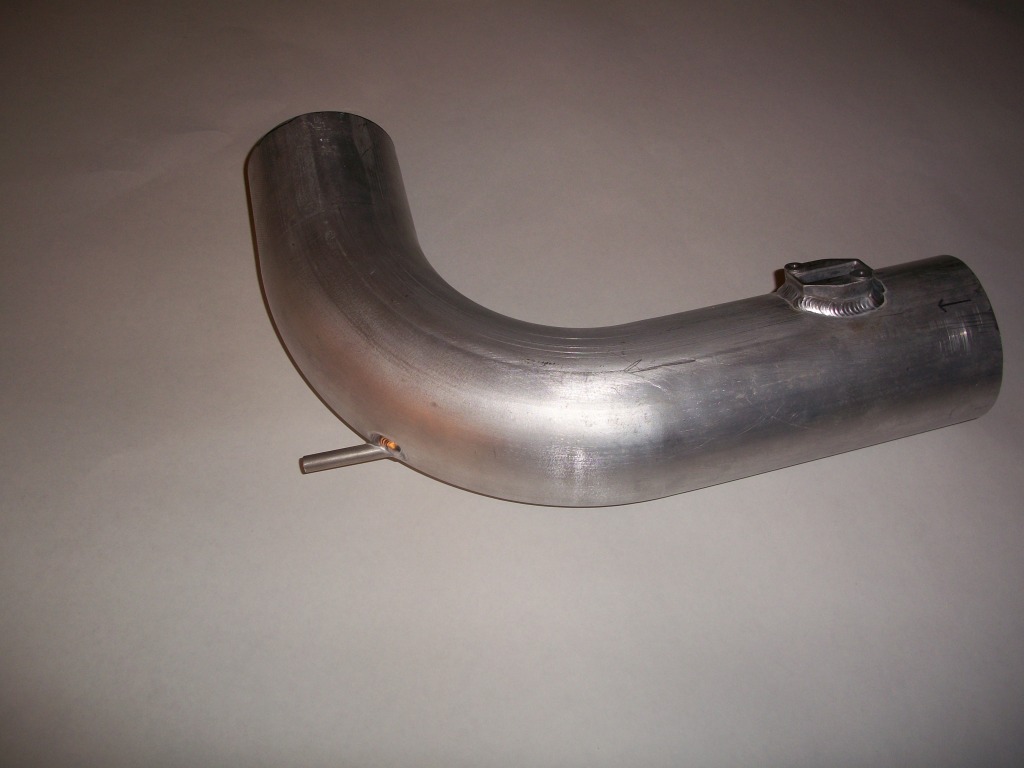
Thanks Old Goat. More information for everyone to use. I have pretty much finished my cold air intake and ECM mounting bracket. On the ECM mounting bracket are the battery voltage terminal strip and the ignition voltage terminal strip.
For the CAI I have to cut out the clear plastic cover that will go on the box portion and get it painted along with a few other parts. I also will have to trim the 4" intake tube once the L92 motor is in place, then I can get an exact measurement. Here are a couple of progress pictures. `


For the CAI I have to cut out the clear plastic cover that will go on the box portion and get it painted along with a few other parts. I also will have to trim the 4" intake tube once the L92 motor is in place, then I can get an exact measurement. Here are a couple of progress pictures. `
12-23-2012, 07:44 PM
#99
I bought all the parts, cut and shaped them and then had them welded up. The aluminum tubing is 4" diameter with a .062" wall and 6" radius. The MAF holder is available from GM. I have since had the parts powder coated and the plastic cover made for the CAI. I also have added the tube for the filtered air supply for the PCV system. It is 3/8" tubing with a 1/4" hole. I will add that picture.