
1985 Monte Carlo SS 6.2l (ls3) / 4l80e swap


 03-14-2014, 05:51 PM
#145
TECH Enthusiast
Thread Starter
iTrader: (5)
Join Date: Aug 2008
Location: Middletown, DE
Posts: 696
Likes: 0
Received 0 Likes
on
0 Posts

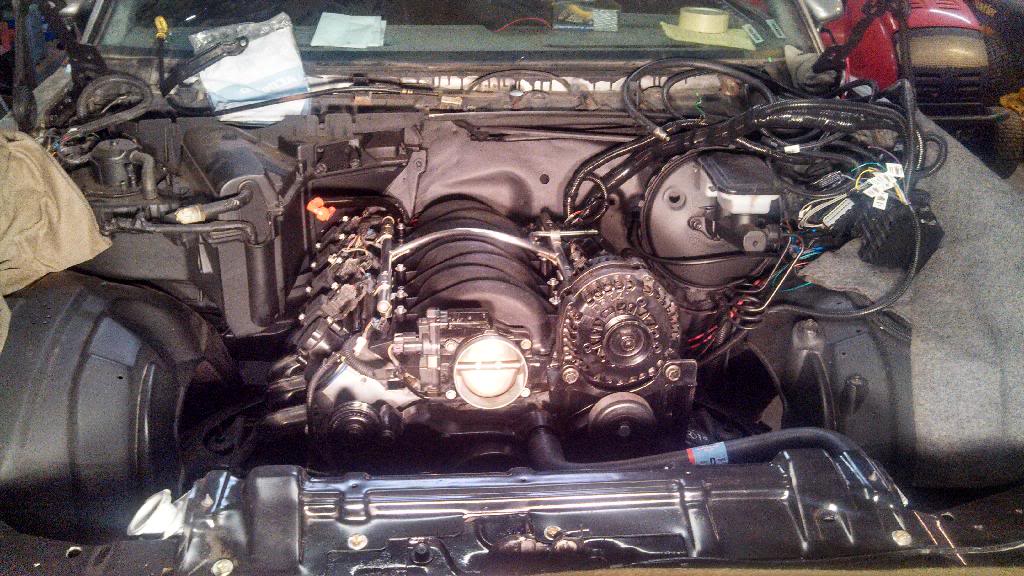
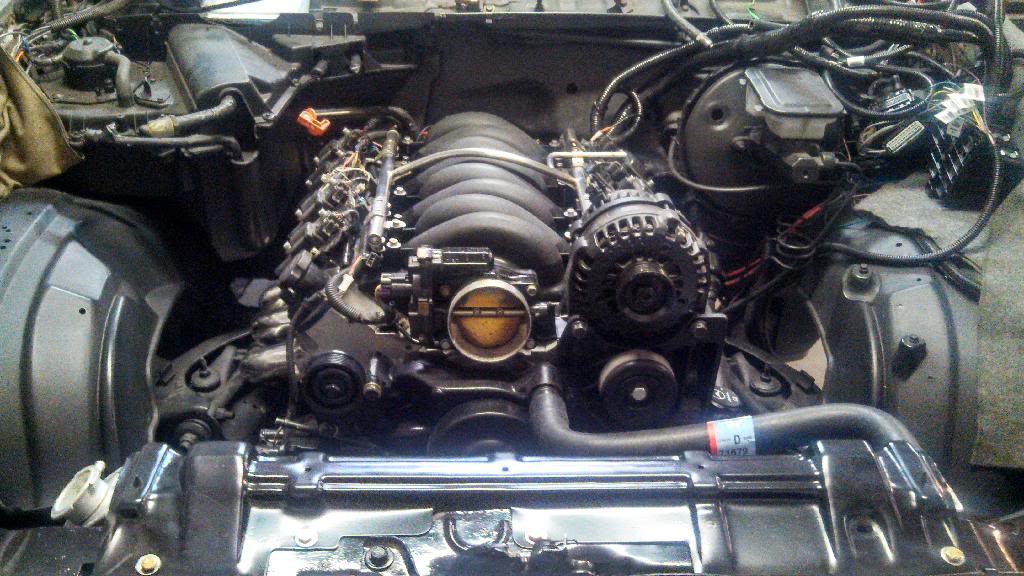
Well got around to get a few days of work on the car and had to back track on some things, and re-do them and other things we got some forward movement.
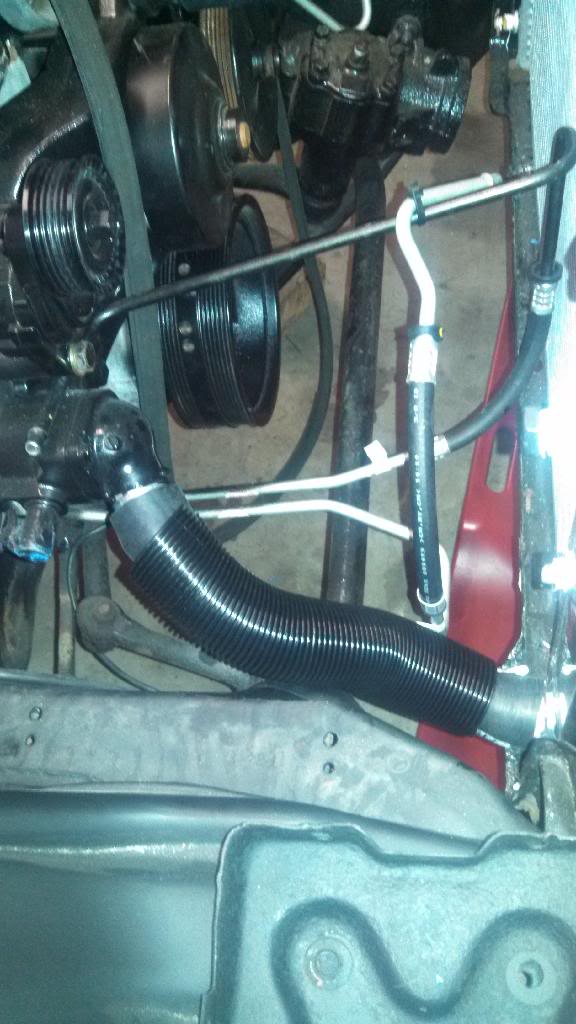
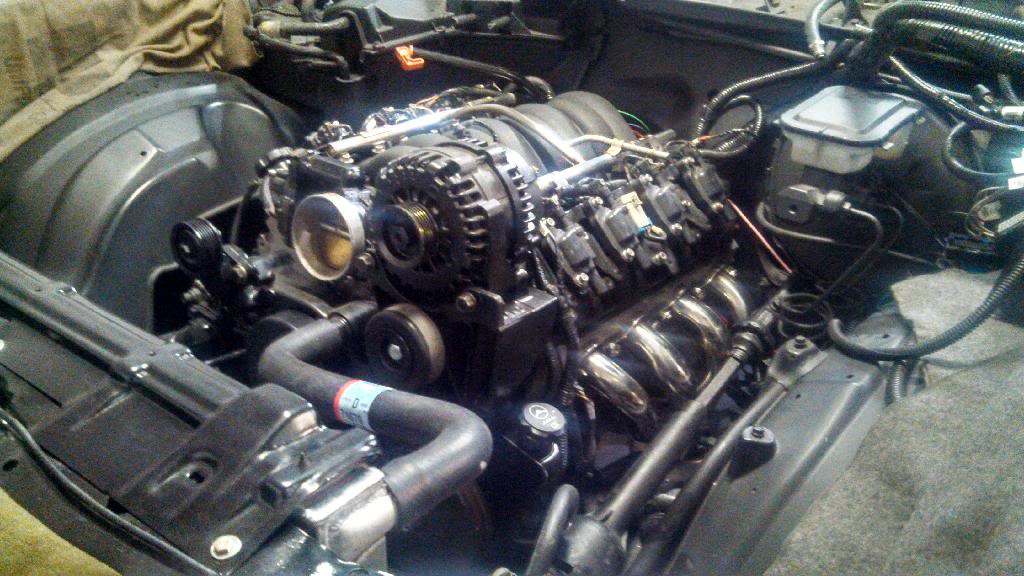
Headers are now fully bolted down after I mistakenly had the gaskets in wrong not allowing all the bolts to thread into the head. So now they are bolted in with the locking header bolts. Next order of business was the PS pump, even with the set back plates, we ran into a small clearance issue, the return hardline was rubbing the steering boot area of the shaft, so we had to gentle bend that up and now she fits. As for the lines, we have the return line already made up with the fitting and rubber hose, just waiting on time to mount it and cut hose down to size. As for the pressure line, luckily GM was nice enough to have the same thread type for a 80s G Body and a 08 Caddy. Stock MCSS pressure line bolted right in, little long but doable.
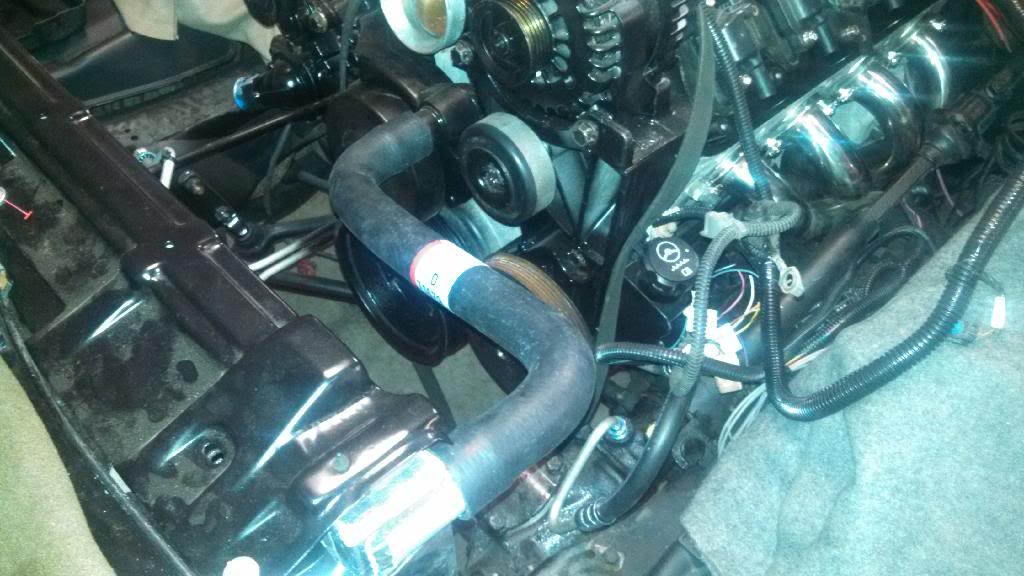
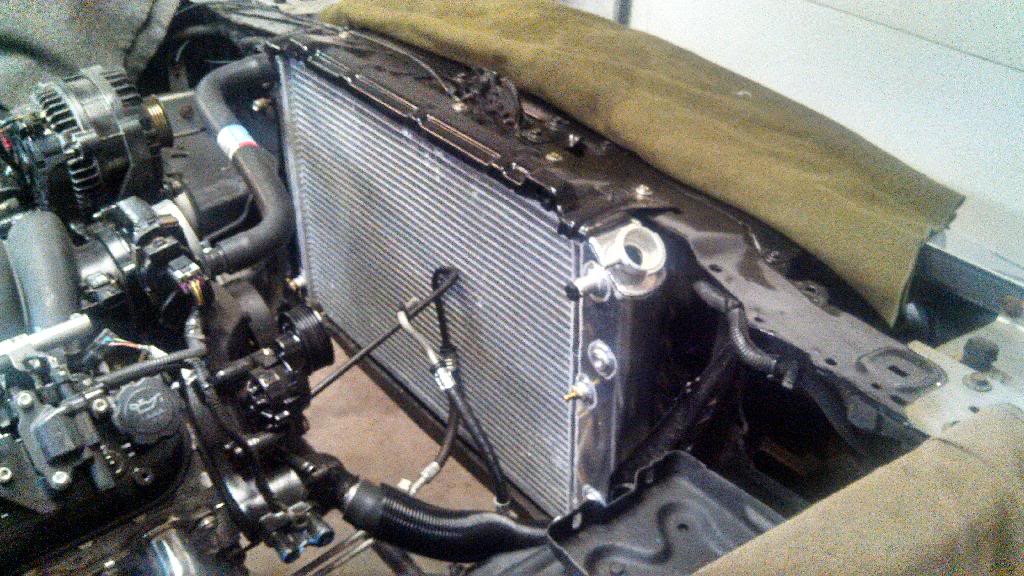
Moving on from there, I got the Cutlass radiator support bolted down and new aluminium radiator mounted. Went to the Autozone and bought a 03 Tahoe lower hose and trimmed to fit. I knew this would work since my fullsize runs the same hose. Only issue, is it sits on the frame but with the plastic cover, it should not have any issues. The upper hose with the Camaro water pump, well that was a "look at the wall of hundred of hoses and find it" type of adventure. But I got one that fits PERFECT. No stress, kinks or anything. Slips on with a little lube and its fitment couldnt be better. I have the part number if anyone needs it, I just do not know what it came from unless I get bored one day and plug away at makes and models til I find that number, haha.
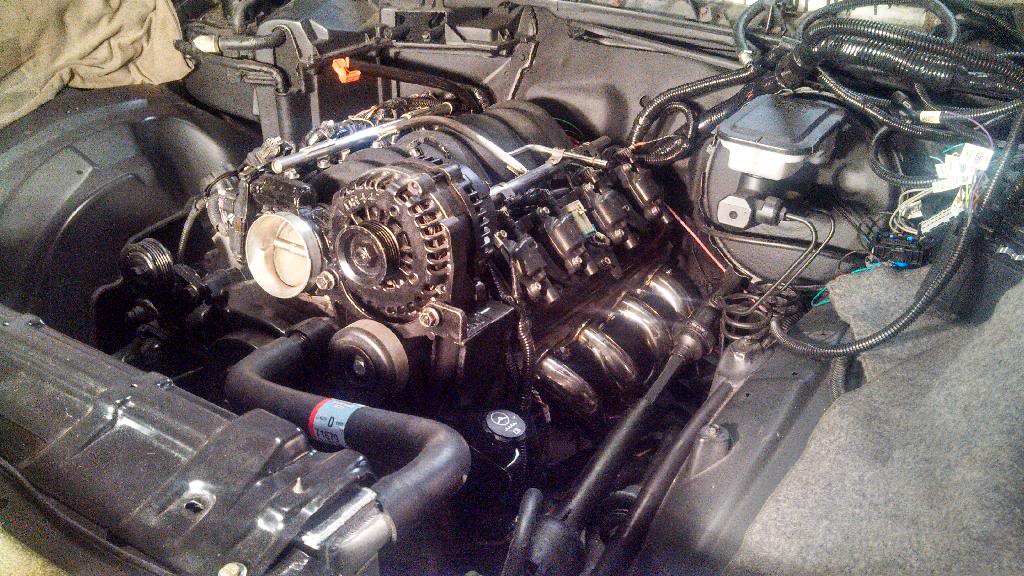
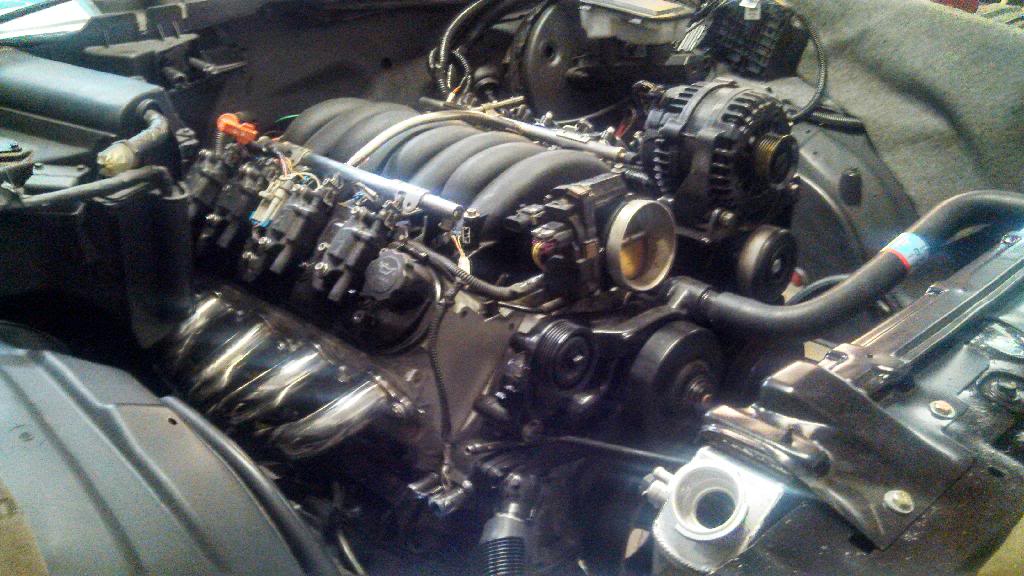
So now that the cooling system and the PS is taken care of, on to the wiring! Started laying out the wires just to see how things ran and from the looks of it, wire tucking should go over pretty well. The place that did the harness, well they did not extend the MAP sensor connection like they should have since these newer intakes have them on the front, but other than that just a few tweaks and all is good. As for the harness, I have about 75-80 percent run and hooked up minus the Knock sensors, Crank Position sensor, a few grounds all the wire splicing into the car, the pedal and trans. So things are looking pretty good.
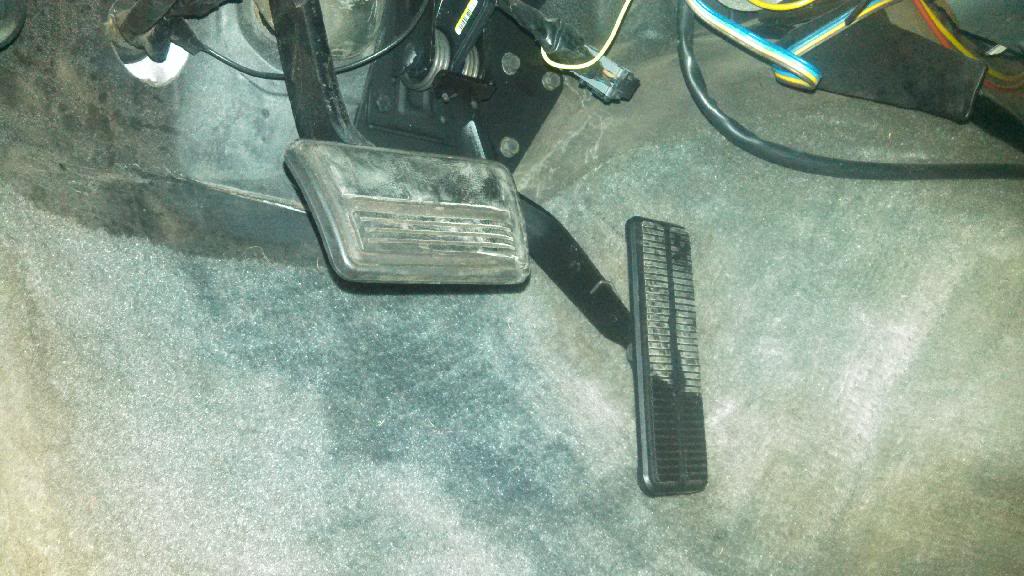
Lastly, the gas pedal has been completed. Most seem to cut the pedal itself and fab it, but my guy wanted to go with a adapter plate like the setback motor mounts and sure enough, it worked out pretty good. Might have to tweak the depth a bit since I think the pedal his the floor just barely enough where WOT might be 95% WOT. Other than that, it is good to go!
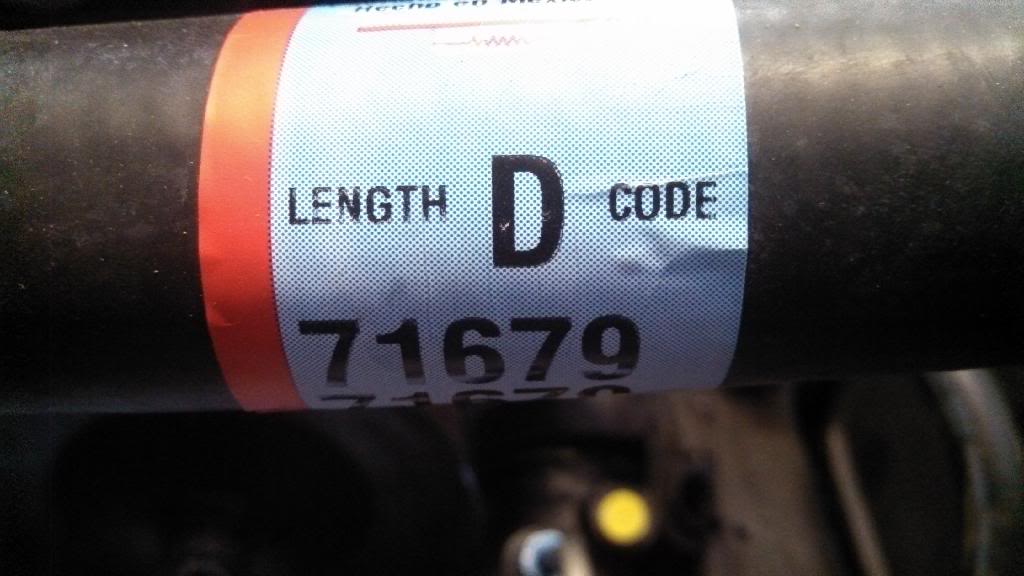
Only thing we are stuck on is the shifter. Ran the stock replacement 200r4 and it was ok length wise, could be a few more inches longer but it worked. So it was all hooked up and we tried to engage the trans. Shifter shifted into gears, but the linkage was not engaging the trans itself, if that makes any sense. So further inspection, the shift linkage broke from the plastic boot on the shifter connection side of the linkage exposing the wire. So we think the stock line is just not strong enough for this HD trans.
So does anyone have a idea/know what we can do?
Other than that here are the pictures!
Wire tucking looking good I think!
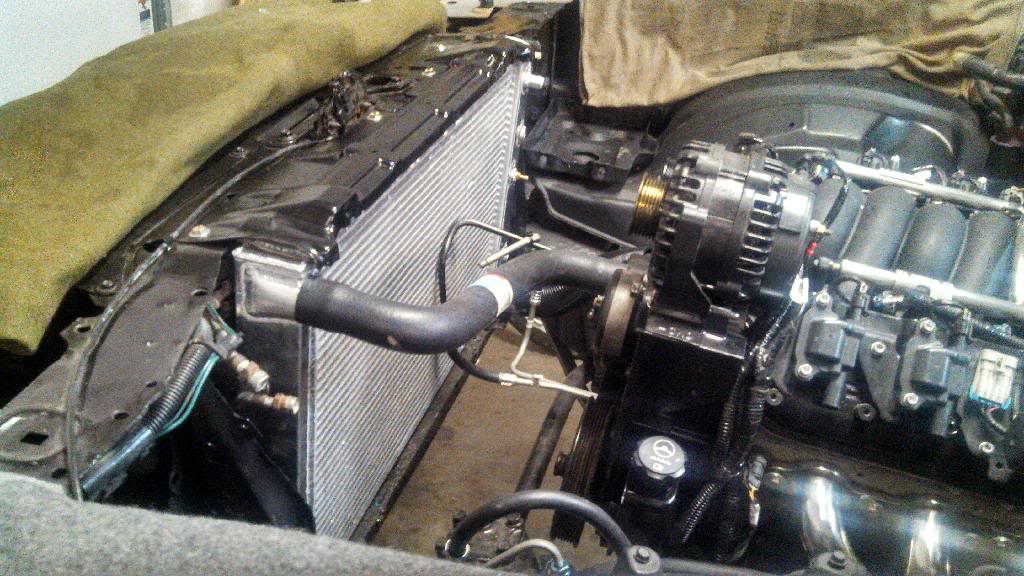
Headers are now fully bolted down after I mistakenly had the gaskets in wrong not allowing all the bolts to thread into the head. So now they are bolted in with the locking header bolts. Next order of business was the PS pump, even with the set back plates, we ran into a small clearance issue, the return hardline was rubbing the steering boot area of the shaft, so we had to gentle bend that up and now she fits. As for the lines, we have the return line already made up with the fitting and rubber hose, just waiting on time to mount it and cut hose down to size. As for the pressure line, luckily GM was nice enough to have the same thread type for a 80s G Body and a 08 Caddy. Stock MCSS pressure line bolted right in, little long but doable.
Moving on from there, I got the Cutlass radiator support bolted down and new aluminium radiator mounted. Went to the Autozone and bought a 03 Tahoe lower hose and trimmed to fit. I knew this would work since my fullsize runs the same hose. Only issue, is it sits on the frame but with the plastic cover, it should not have any issues. The upper hose with the Camaro water pump, well that was a "look at the wall of hundred of hoses and find it" type of adventure. But I got one that fits PERFECT. No stress, kinks or anything. Slips on with a little lube and its fitment couldnt be better. I have the part number if anyone needs it, I just do not know what it came from unless I get bored one day and plug away at makes and models til I find that number, haha.
So now that the cooling system and the PS is taken care of, on to the wiring! Started laying out the wires just to see how things ran and from the looks of it, wire tucking should go over pretty well. The place that did the harness, well they did not extend the MAP sensor connection like they should have since these newer intakes have them on the front, but other than that just a few tweaks and all is good. As for the harness, I have about 75-80 percent run and hooked up minus the Knock sensors, Crank Position sensor, a few grounds all the wire splicing into the car, the pedal and trans. So things are looking pretty good.
Lastly, the gas pedal has been completed. Most seem to cut the pedal itself and fab it, but my guy wanted to go with a adapter plate like the setback motor mounts and sure enough, it worked out pretty good. Might have to tweak the depth a bit since I think the pedal his the floor just barely enough where WOT might be 95% WOT. Other than that, it is good to go!
Only thing we are stuck on is the shifter. Ran the stock replacement 200r4 and it was ok length wise, could be a few more inches longer but it worked. So it was all hooked up and we tried to engage the trans. Shifter shifted into gears, but the linkage was not engaging the trans itself, if that makes any sense. So further inspection, the shift linkage broke from the plastic boot on the shifter connection side of the linkage exposing the wire. So we think the stock line is just not strong enough for this HD trans.
So does anyone have a idea/know what we can do?
Other than that here are the pictures!


Wire tucking looking good I think!


 03-22-2014, 04:43 PM
#148
TECH Enthusiast
Thread Starter
iTrader: (5)
Join Date: Aug 2008
Location: Middletown, DE
Posts: 696
Likes: 0
Received 0 Likes
on
0 Posts
Sorry for the delay....didnt get a chance to get down there when I thought I was going to. But anyways, the part number is
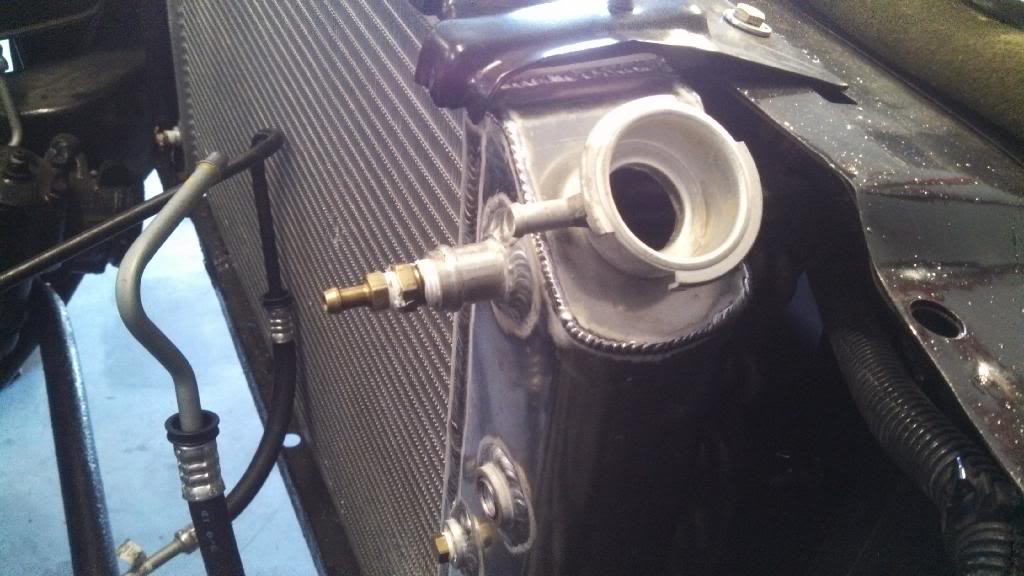
As for the car, got some stuff done, not to the point I wanted to but to make up for progress I went ahead and ordered some parts. I did change the location of the steam port location on the radiator to a higher port.
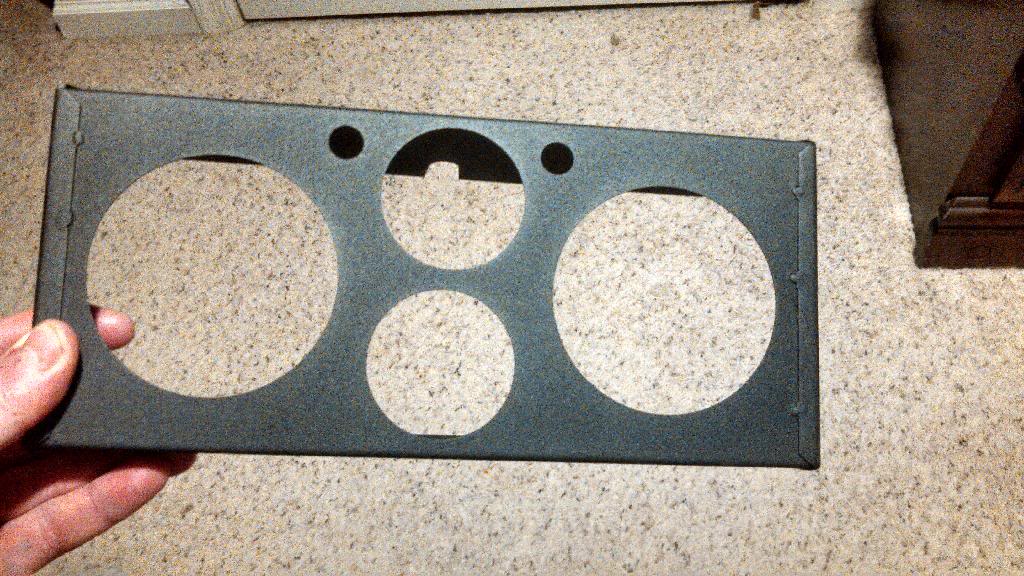
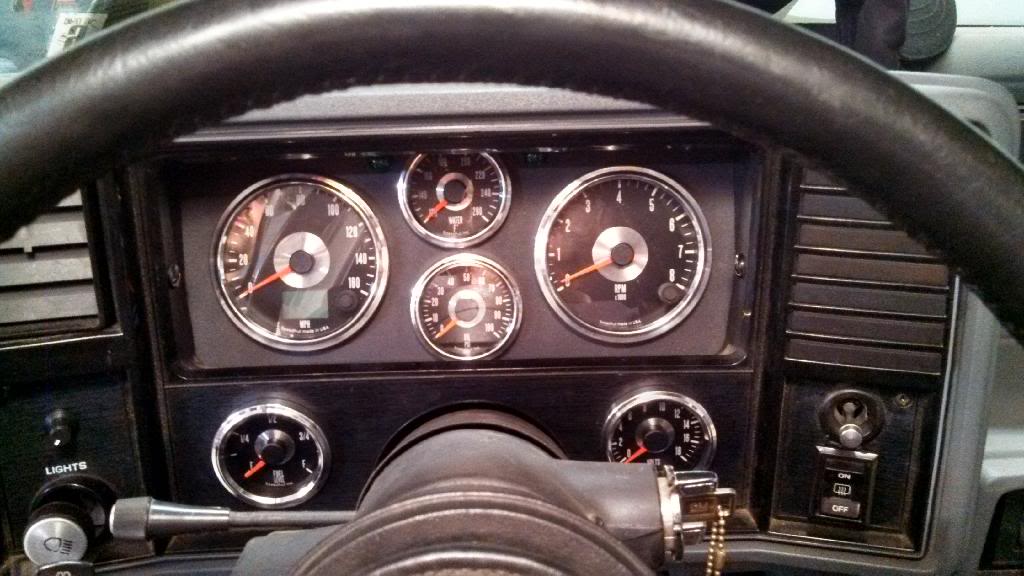
Went ahead and ordered some Speed hut gauges, and did them with a little custom look. I think it will look pretty good with a nice throw back for a old school muscle car look. They will take 10-14 business days to get them, so I am hoping to have them wired up mid April. Additionally to the gauges I ordered the Mikes Montes shadow box
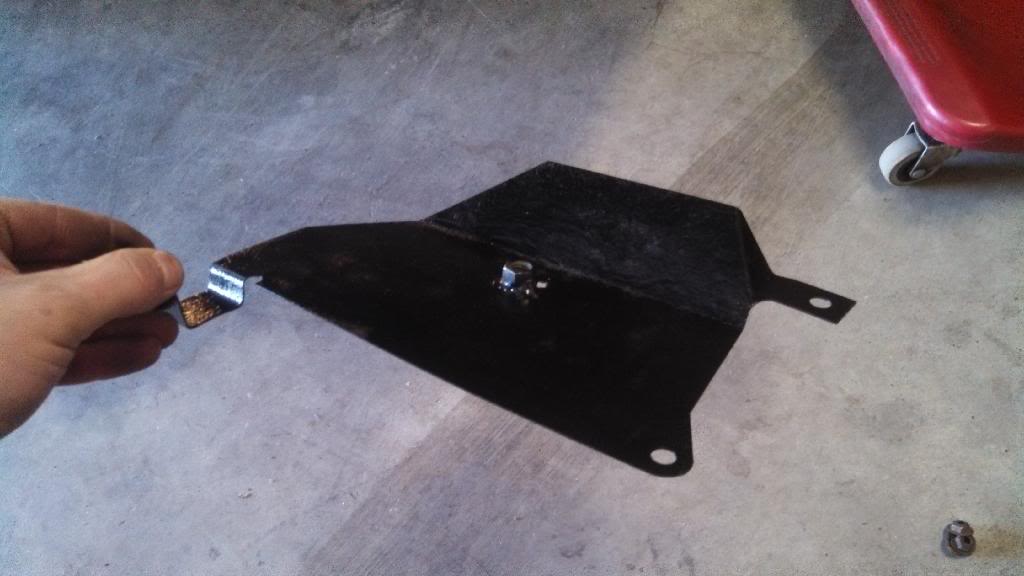
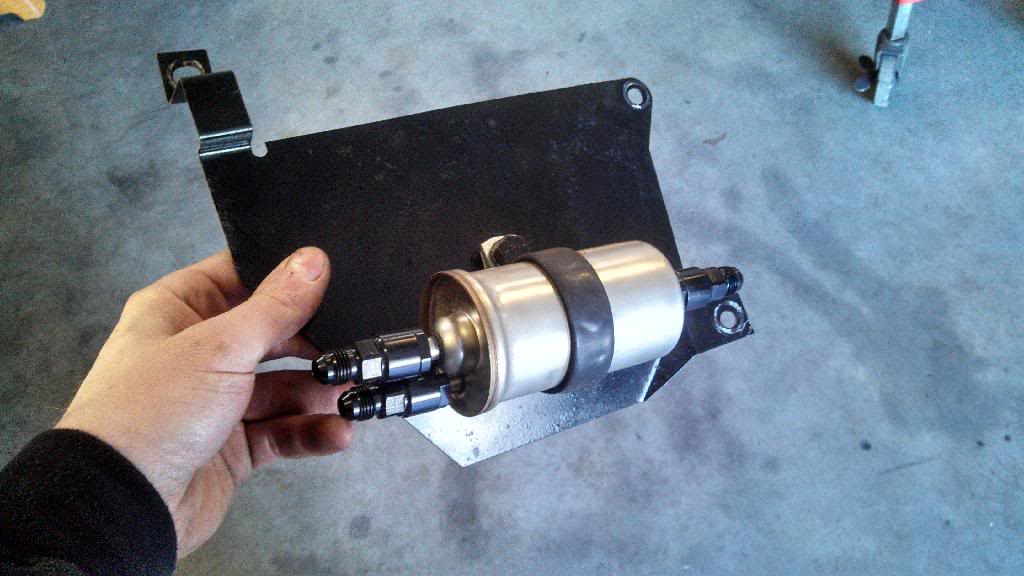
Lastly, we started laying out the fuel lines and the plan is to go down the back of the intake to the passenger side and mount to the stock locations. We also started to run the hot wire kit as well. Kinda utilized the stock heat shield for the old fuel lines as the mounting point for the FPR/filter

As for the car, got some stuff done, not to the point I wanted to but to make up for progress I went ahead and ordered some parts. I did change the location of the steam port location on the radiator to a higher port.

Went ahead and ordered some Speed hut gauges, and did them with a little custom look. I think it will look pretty good with a nice throw back for a old school muscle car look. They will take 10-14 business days to get them, so I am hoping to have them wired up mid April. Additionally to the gauges I ordered the Mikes Montes shadow box

Lastly, we started laying out the fuel lines and the plan is to go down the back of the intake to the passenger side and mount to the stock locations. We also started to run the hot wire kit as well. Kinda utilized the stock heat shield for the old fuel lines as the mounting point for the FPR/filter

 03-27-2014, 02:54 PM
#149
Registered User

Join Date: Mar 2014
Posts: 4
Likes: 0
Received 0 Likes
on
0 Posts
Well this swap will be a very slow process but I figure I'd first start this now since some things are being done now, parts have been purchased and just to start it nice and early to give me enough feedback from others to get the right part, the FIRST time!
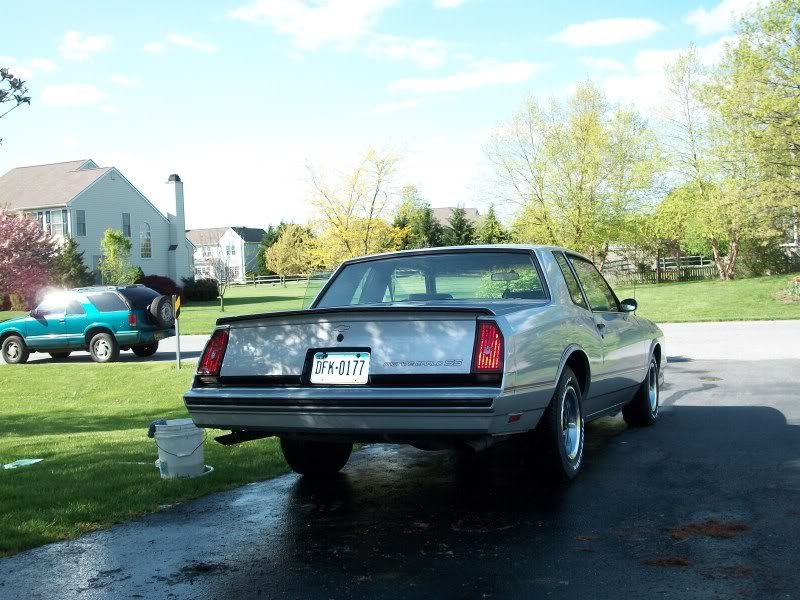
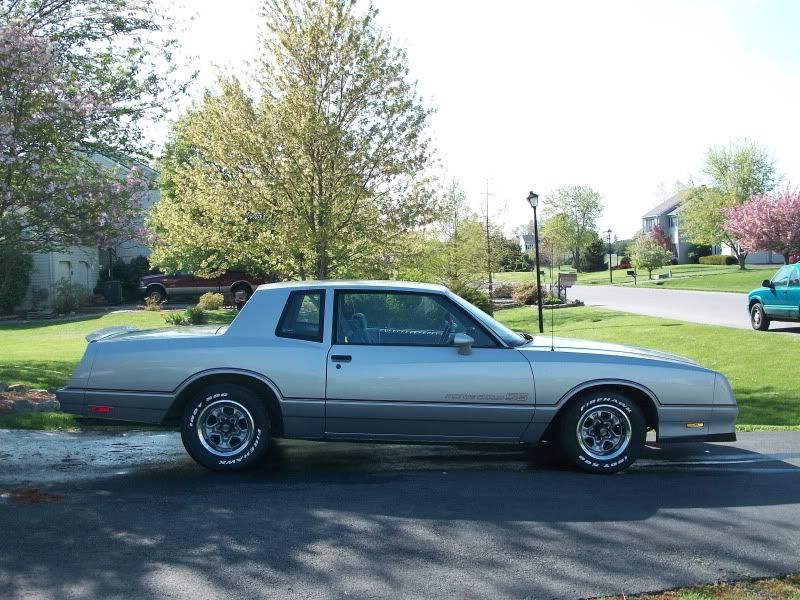
Background on the car is that its a 1985 Monte Carlo SS, bought by my Mom and Dad back in 1986 and has been in the family ever since. It was a daily from 86-early 90's than was parked when my sister was born in 1991. It than was resurrected from its long lay-off back in the early 2000's when my brother got it for his first car. It had a new paint job put on it in 2002 and was only on the road for a few months before my brother got into some trouble with the police and he had to give up the car. So from 2002 to about a few weeks ago, it had another long lay-off from being a driven vehicle.
Well unfortunately, my s10 {swapped in a lt1/t56 frame off resto was totaled} had an accident, I had a opportunity to finally work on the Monte. So as of right now its going to be the small parts to get it road worthy again. After its road worthy, I will drive it for a few months before Winter than the savings begin for the big mofro of a drivetrain to be swapped in.
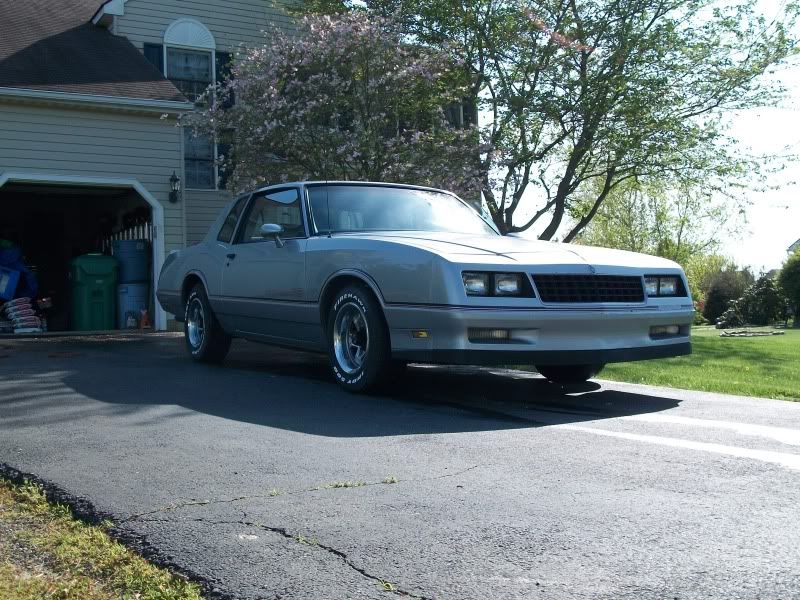
Here's a few pictures of the car before we started to do some work....
Now the reason the car is in the body shop...
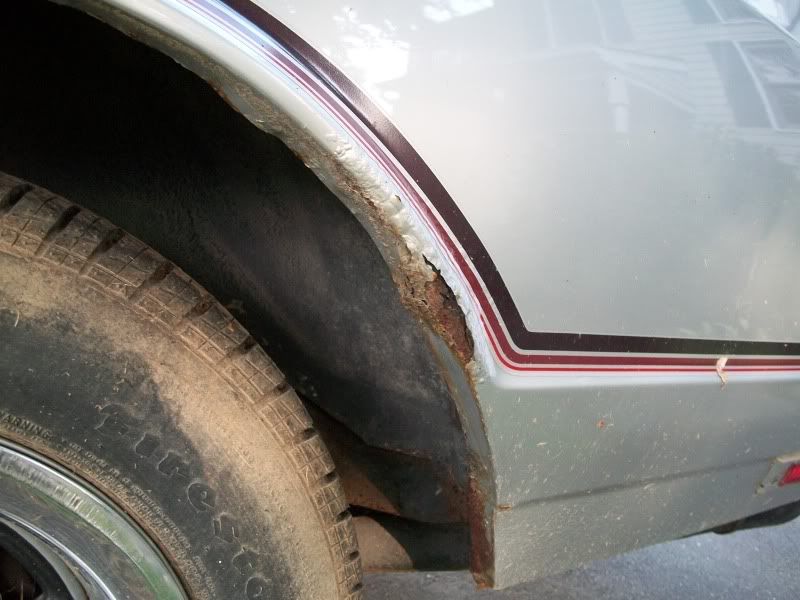
So as of right now, the car has the complete brake job done. New drums,hoses, calipers, rotors, and stainless steel hard-lines all around. It is in the shop getting the front bumper repainted, the rear wheel well patched, rear bumper fixed and the other rear wheel well touched up. All the cosmetic problems were stemming from the s10 accident when the lady hit my s10 into the Monte.
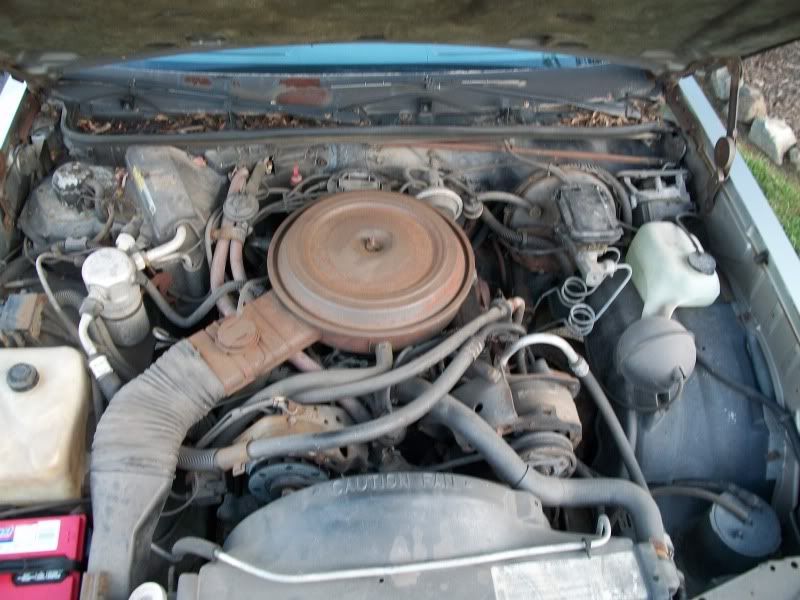
So other than the body being fixed, here's my plan for the lsx swap of the car...
6.2l engine:
-swap out the l92 intake for a ls3 intake top-end
-swap in a cam {depending on if I keep VVT or not} with springs
-swap in a oilpan that will fit damn good without too much hanging under k-member
-mod the front accessories to fit the car intake...I have some ideas from others doing it on the s10 forum that should work with no problem.
-L92 heads staying stock besides springs for cam
-DBW TB will be used
-swapping in a 06+ vette gas pedal to accommodate the DBW
4l80e:
-keep it stock
-upgrade to a aftermarket torque converter...Suggestions?
Rear:
-QP drop in 9 inch
I am trying to make this a stout 6.2l/4l80 swap with just a cam upgrade and intake. Not looking to make it a weekend warrior or a 10 second car with tons of $$ dropped into it. But I would like it to be a turn key start, idle, run like a raped ape and still retain A/C ect. Its more of a cruiser, that will haul xxxx and see the strip every once in a while.
So as of right now, the questions are,
-Seems like the headman long tube headers work well with a certain motor mount, which mounts would I need for that?
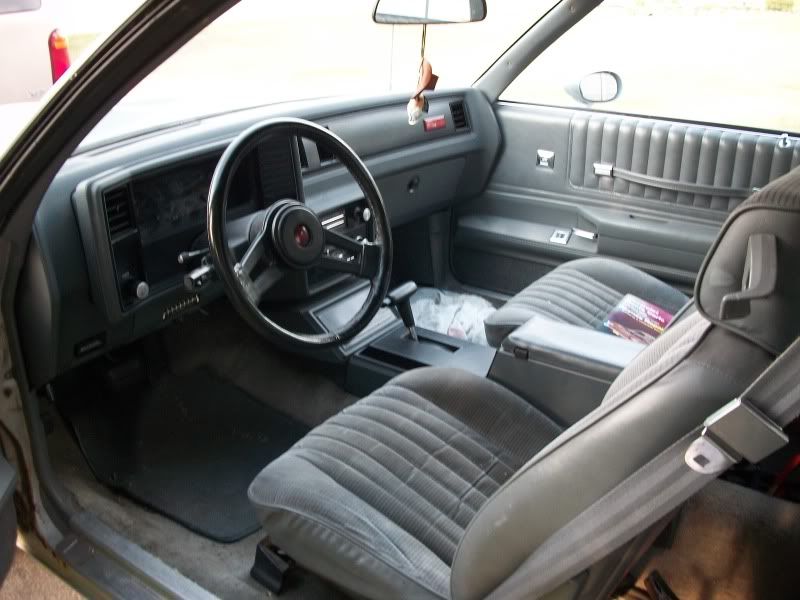
-Current Performance wiring will be modifing the stock harness as a stand alone harness, anything needed for the stock gauges to work? I eventually want to have it with autometers, but for now the stockers have to work.
Anyways thats enough of a post for now....the next post or two will be the upgrades I have as of right now...enjoy and PLEASE make suggestions, I am not one that shy's away from others opinions to make it alot easier of a swap!
Thanks, Justin.
Background on the car is that its a 1985 Monte Carlo SS, bought by my Mom and Dad back in 1986 and has been in the family ever since. It was a daily from 86-early 90's than was parked when my sister was born in 1991. It than was resurrected from its long lay-off back in the early 2000's when my brother got it for his first car. It had a new paint job put on it in 2002 and was only on the road for a few months before my brother got into some trouble with the police and he had to give up the car. So from 2002 to about a few weeks ago, it had another long lay-off from being a driven vehicle.
Well unfortunately, my s10 {swapped in a lt1/t56 frame off resto was totaled} had an accident, I had a opportunity to finally work on the Monte. So as of right now its going to be the small parts to get it road worthy again. After its road worthy, I will drive it for a few months before Winter than the savings begin for the big mofro of a drivetrain to be swapped in.
Here's a few pictures of the car before we started to do some work....
Now the reason the car is in the body shop...
So as of right now, the car has the complete brake job done. New drums,hoses, calipers, rotors, and stainless steel hard-lines all around. It is in the shop getting the front bumper repainted, the rear wheel well patched, rear bumper fixed and the other rear wheel well touched up. All the cosmetic problems were stemming from the s10 accident when the lady hit my s10 into the Monte.
So other than the body being fixed, here's my plan for the lsx swap of the car...
6.2l engine:
-swap out the l92 intake for a ls3 intake top-end
-swap in a cam {depending on if I keep VVT or not} with springs
-swap in a oilpan that will fit damn good without too much hanging under k-member
-mod the front accessories to fit the car intake...I have some ideas from others doing it on the s10 forum that should work with no problem.
-L92 heads staying stock besides springs for cam
-DBW TB will be used
-swapping in a 06+ vette gas pedal to accommodate the DBW
4l80e:
-keep it stock
-upgrade to a aftermarket torque converter...Suggestions?
Rear:
-QP drop in 9 inch
I am trying to make this a stout 6.2l/4l80 swap with just a cam upgrade and intake. Not looking to make it a weekend warrior or a 10 second car with tons of $$ dropped into it. But I would like it to be a turn key start, idle, run like a raped ape and still retain A/C ect. Its more of a cruiser, that will haul xxxx and see the strip every once in a while.
So as of right now, the questions are,
-Seems like the headman long tube headers work well with a certain motor mount, which mounts would I need for that?
-Current Performance wiring will be modifing the stock harness as a stand alone harness, anything needed for the stock gauges to work? I eventually want to have it with autometers, but for now the stockers have to work.
Anyways thats enough of a post for now....the next post or two will be the upgrades I have as of right now...enjoy and PLEASE make suggestions, I am not one that shy's away from others opinions to make it alot easier of a swap!
Thanks, Justin.
Do you have any advice for me for this swap? Thinking about doing the same in my 85 ss
03-27-2014, 09:47 PM
#150
TECH Enthusiast
Thread Starter
iTrader: (5)
Join Date: Aug 2008
Location: Middletown, DE
Posts: 696
Likes: 0
Received 0 Likes
on
0 Posts
Other than that, go with a quality part rather than a cheaper one to save some cash, research your *** off, and take your time. I hate how long this is taking but its giving me time to do things right the first time and that saves you $$ in the long run. Taking your time now will make the swap a lot better looking and more than likely will run better since you are not just throwing it together.
03-28-2014, 12:07 AM
#151
Registered User
Join Date: Mar 2014
Posts: 4
Likes: 0
Received 0 Likes
on
0 Posts
It's said in every thread made asking about the costs, but be prepared to pay for a lot of stuff you didnt think about and as well as paying double of what you think it will cost.
Other than that, go with a quality part rather than a cheaper one to save some cash, research your *** off, and take your time. I hate how long this is taking but its giving me time to do things right the first time and that saves you $$ in the long run. Taking your time now will make the swap a lot better looking and more than likely will run better since you are not just throwing it together.
Other than that, go with a quality part rather than a cheaper one to save some cash, research your *** off, and take your time. I hate how long this is taking but its giving me time to do things right the first time and that saves you $$ in the long run. Taking your time now will make the swap a lot better looking and more than likely will run better since you are not just throwing it together.
03-28-2014, 06:10 AM
#152
TECH Enthusiast
Thread Starter
iTrader: (5)
Join Date: Aug 2008
Location: Middletown, DE
Posts: 696
Likes: 0
Received 0 Likes
on
0 Posts
It was a stock harness that was modded for the application.... almost. Few things needed change thanks to a few guys on here helped me out but you can go with a off the shelf one but they won't lay as nice as ones you do yourself. Unless you want to pull wires back and reroute the positioning of the off the shelf ones.
04-05-2014, 03:40 PM
#153
TECH Enthusiast
Thread Starter
iTrader: (5)
Join Date: Aug 2008
Location: Middletown, DE
Posts: 696
Likes: 0
Received 0 Likes
on
0 Posts
Well, last night had two buddy's come over and get some work done on the car. Mike (spacemanspif) did some more work with the engine wiring with the help of our buddy Gunnar. Most of the harness is hooked up and wired just need a little more work and the engine harness should be good to go. We did get the old gauge cluster all out and ready for the new SpeedHut's which should be in by Weds. So Weds and Thurs we plan to get the gauges hopefully done, if not as close as possible.
As for today, we got he rest of the fuel lines done so there is another item off the list! This coming week we plan to get the Gauges ran, new rear poly bushings for the GN rear and maybe start the tranny cooler hook up.
Besides that stuff, the D/S will be ordered early this week and installed hopefully Friday. Than the shifter needs to be bolted down for good, and mount the ls1 fans. Once that happens, run a few hoses and I think its ready for test fire. I can not wait!!

 04-17-2014, 11:47 AM
#155
TECH Enthusiast
Thread Starter
iTrader: (5)
Join Date: Aug 2008
Location: Middletown, DE
Posts: 696
Likes: 0
Received 0 Likes
on
0 Posts
Well last night Mike (Spacemanspif) and I logged a long night last night to finish the gauges. Must say, Mike did a great job on them and I am please with the end result. Everything looks like how its supposed to and looks almost factory!
Besides the gauges, the D/S is made, just the U-joints were the wrong ones so I am heading to the place now to hopefully get the D/S correct by early next week. Besides the shaft and gauges, the shifter has been reinstalled and works for the most part. The bracket we made to hold the shifter in place rubs the cable a hair so it just needs to be tweaked and finished when the car is running to tweak why it doesn't ''Click'' into all gears. It shifts down to 1 but all gears do not click into place.
Lastly, I got the o2 sensors that neither the auto parts stores or the place I got the wiring from to work since they couldnt tell me the ''direct fit'' application. So we made a little modding and they work now.
So to back track this is what's been completed since the last update:
-shifter (3/4 done)
-o2 sensors
-PS lines
-Dipstick mod
-Gauges
-Fuel system is complete besides the power, ground and fuel level wires
-D/S
This week we have gotten half of what I wanted to get done and Saturday, I would like to get the trans cooler mounted, cooler lines cut to fit, and possibly install the cooling fans. If thats the case, we are looking to be in good shape to test fire soon.
04-19-2014, 05:41 PM
#156
TECH Enthusiast
Thread Starter
iTrader: (5)
Join Date: Aug 2008
Location: Middletown, DE
Posts: 696
Likes: 0
Received 0 Likes
on
0 Posts
Well got a little more done today and I am glad this list is starting to dwindle down. Cruise week is coming fast, May 15th, so I need it done by beginning of May to get a tune on it and some mileage on the car. Anyways, today we got some more done and now on top of the gauges being done we got the trans cooler mounted and the stock 4l80e trans cooler lines cut and modded. So now the tranny cooler and lines are off the list. Here is whats left to do to get it up and running
-Run battery wires to the trunk for trunk mounting
-Mount cooling fans
-Splice in the fuel sending unit wires (one ground one fuel gauge and one for the Comp)
-Install the belt
-Run heater hoses
-Run vacuum lines
-Install the D/S
Once that is all done it should be good to fire up. Once its running we just need to:
-Mount TCM/ECM/fuse box
-cut and splice temporarily engine to body harness
-Install rear end bushings
-Make decision whether to just run the stock drums or do the disc brake conversion.
Once thats all done, off to dirty Jersey to get the exhaust done and see what this thing will put down! MAY 15th is coming FAST!!
04-22-2014, 06:58 PM
#157
I just finished reading this whole thread. Im glad its about ready to be fired up and good luck. You've come a long way and im sure you will be pleased and relieved when it comes to life for the first time. Its good to see another G Body in good hands.
 04-23-2014, 09:58 PM
#159
TECH Enthusiast
Thread Starter
iTrader: (5)
Join Date: Aug 2008
Location: Middletown, DE
Posts: 696
Likes: 0
Received 0 Likes
on
0 Posts
As for progress, D/S installed, cooling fans installed, and one vacuum line ran. Ran the driver side on the rear of the valve cover to the passenger side intake below the MAP sensor. We plugged the one below the alternator but am stumped where and what to do with the front passenger side valve cover vacuum line. Any ideas?
And we installed the battery and grounded it to see if the gauges would turn on. The gauges did not turn on, and when the left turn signal was engaged the ''fasten seatbelt'' light flashed. So we have to recheck the pin out since the one we used somehow mixed up the wires.
Tomorrow we are going to go back into it and see whats going on. Hopefully my buddy can find a connector off the sending unit from racetronix so we do not have to hard wire the wires to the fuel gauge, ground and ECM wire.
So to recap, still need to figure out the one vacuum on passenger side, run brake vacuum, splice fans wires in, run heater/coolant hoses, figure out the sending unit wires and add a few grounds and see if she will fire. .....Times a ticking.