
93 Z28 Lt1/700r4 to Lq4/T-56
 06-14-2014, 10:52 PM
#1
TECH Apprentice
Thread Starter
iTrader: (1)

Join Date: May 2014
Location: Lexington, S.C.
Posts: 351
Likes: 0
Received 0 Likes
on
0 Posts
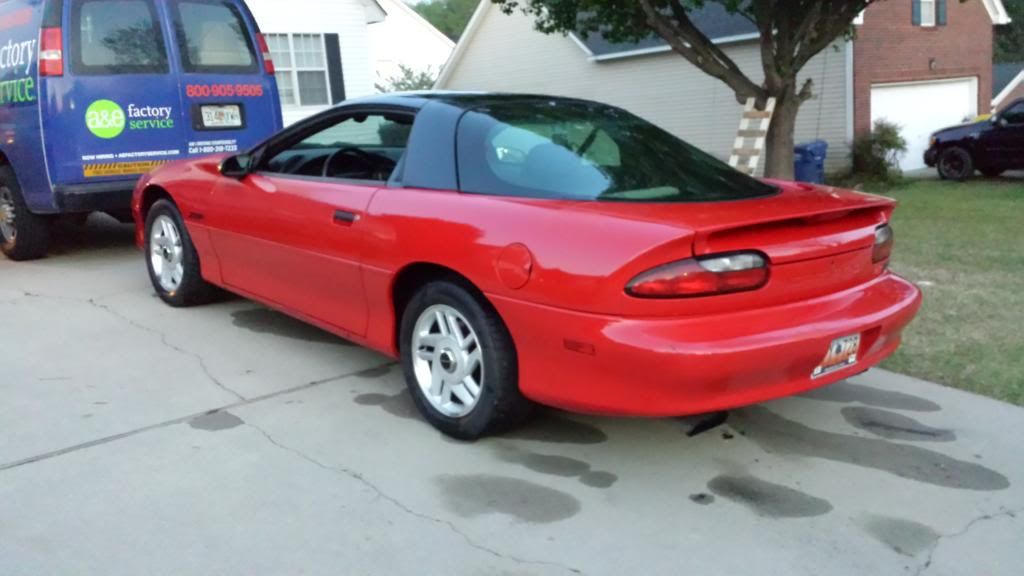
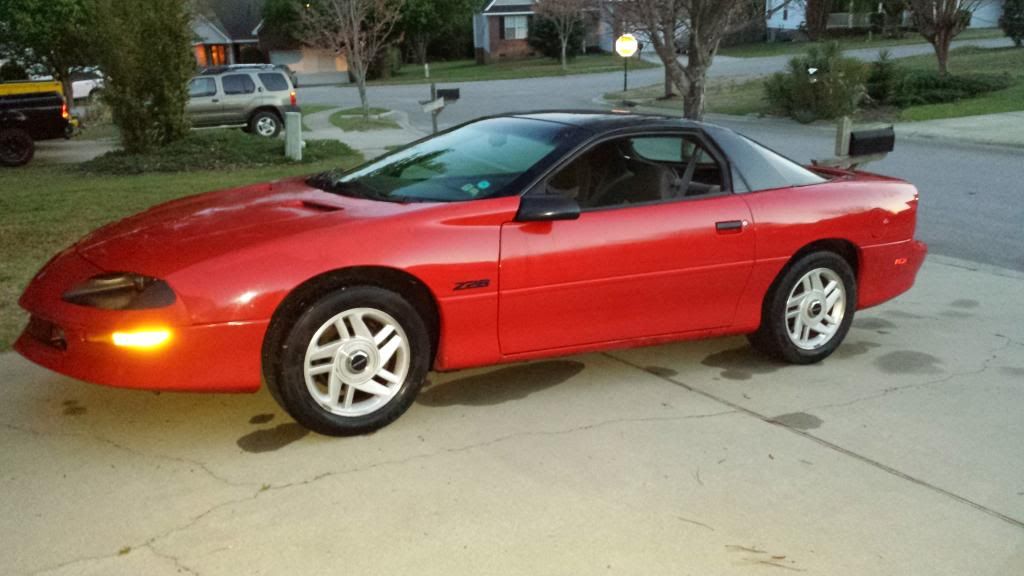
Hey guys! I am currently in the middle of building up parts for a Lq4/T-56 swap into a 93 Camaro. The car has a family history. My parents bought this car brand new when it first came out. I was 13 years old at the time and I fell in love with the car. A few years later and my parents would sometimes let me drive it to high school.
Now a few years ago they gave it to my youngest brother. He did a few things such as install a K&N cold air intake and shock tower brace. The car hit 222,000 miles and he started having reliability issues so he ended up parking it. He ended up purchasing a 01 Ws6 shortly after. The car just sat in my parents yard for several years until my brother just recently gave it to me.
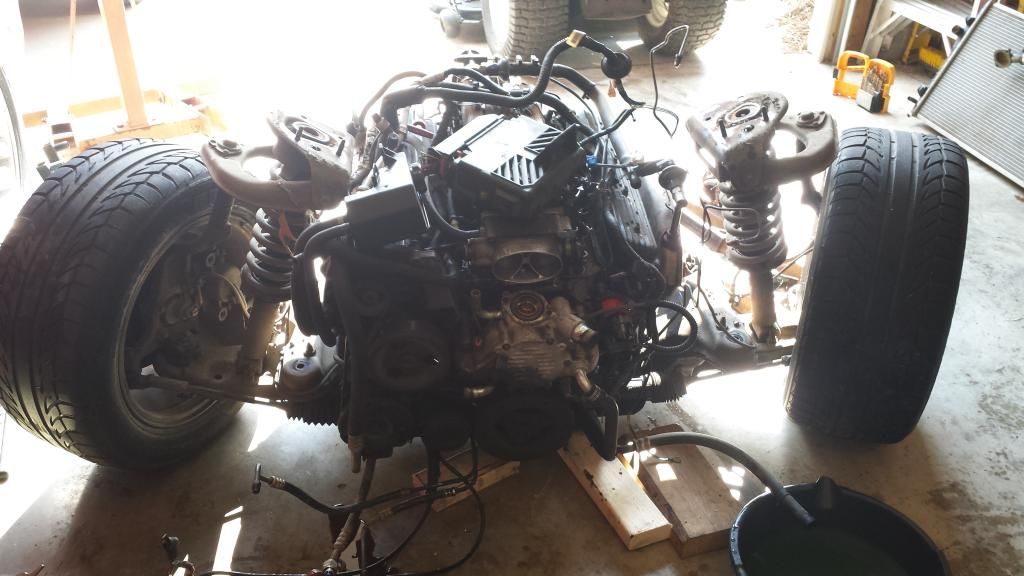
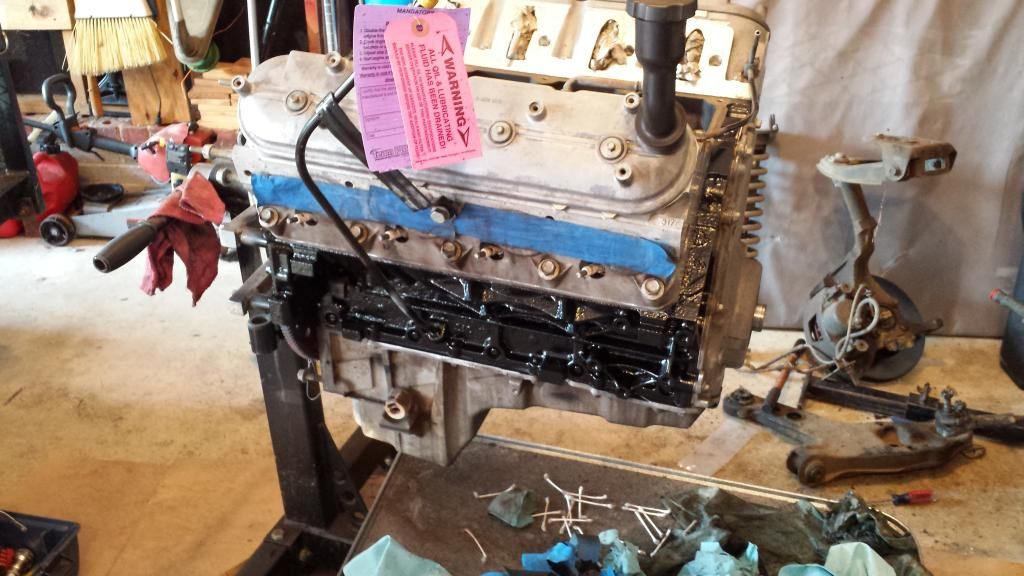
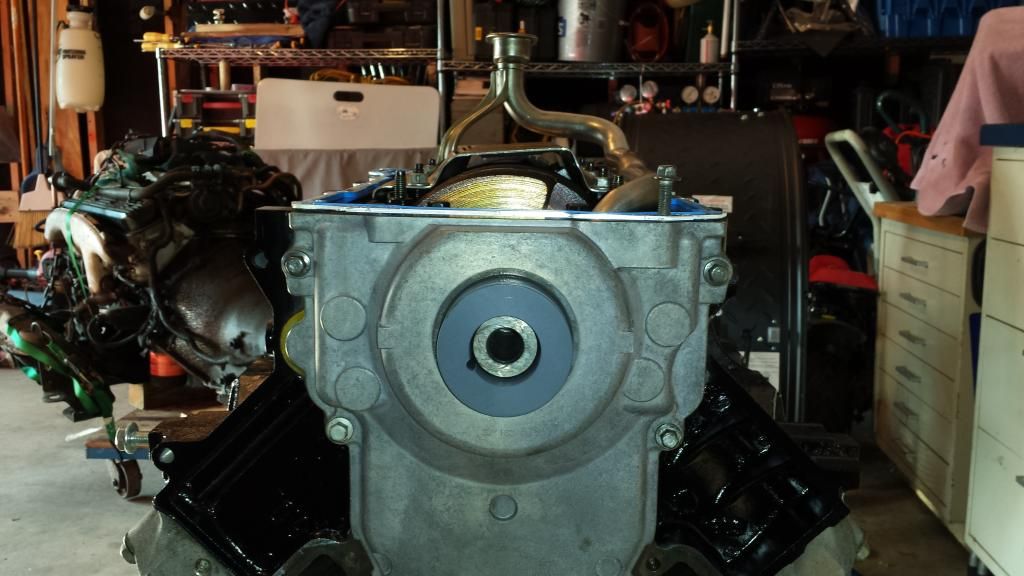
I got it running, but their are a ton of issues with oil leaks, opti spark problems, and high idle issues. I was looking at a full rebuild. I decided if I am going to go that far I might as well upgrade to a Ls based setup and that is where the Lq4 T-56 combo came in. Here are a few pictures of the car and the parts I have gathered so far.
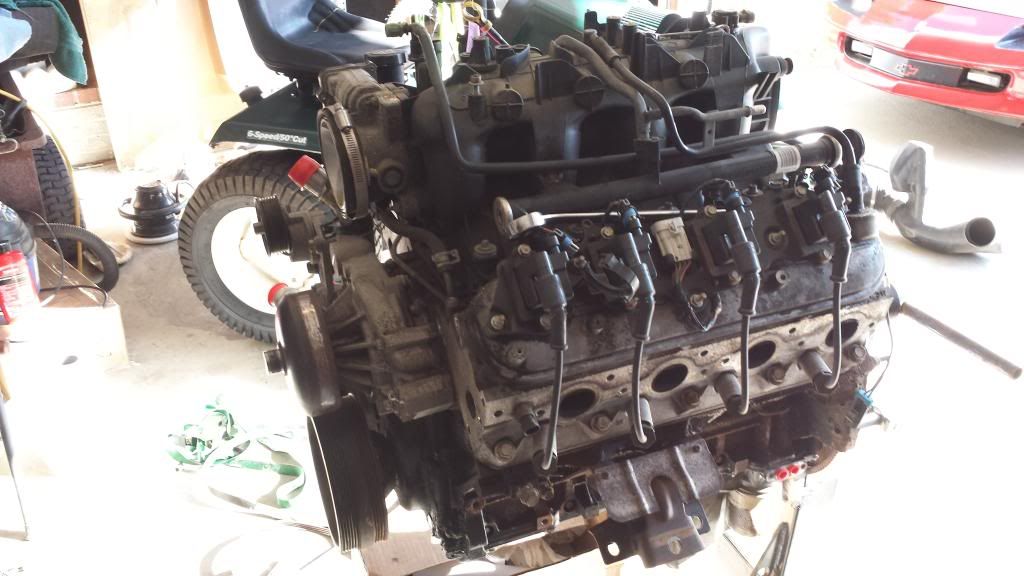
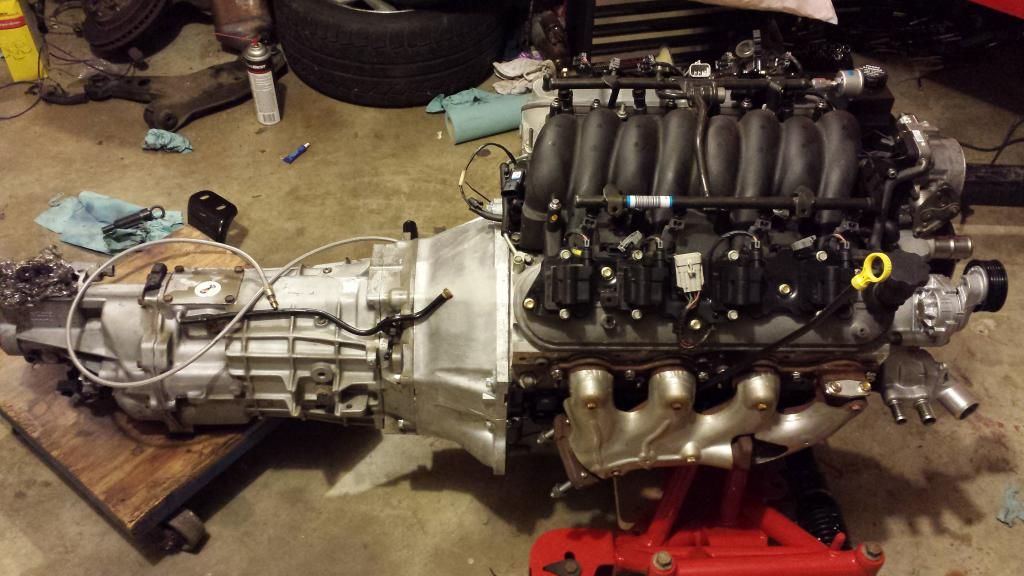
Picked up a Lq4 out of a 2005 Silverado 2500
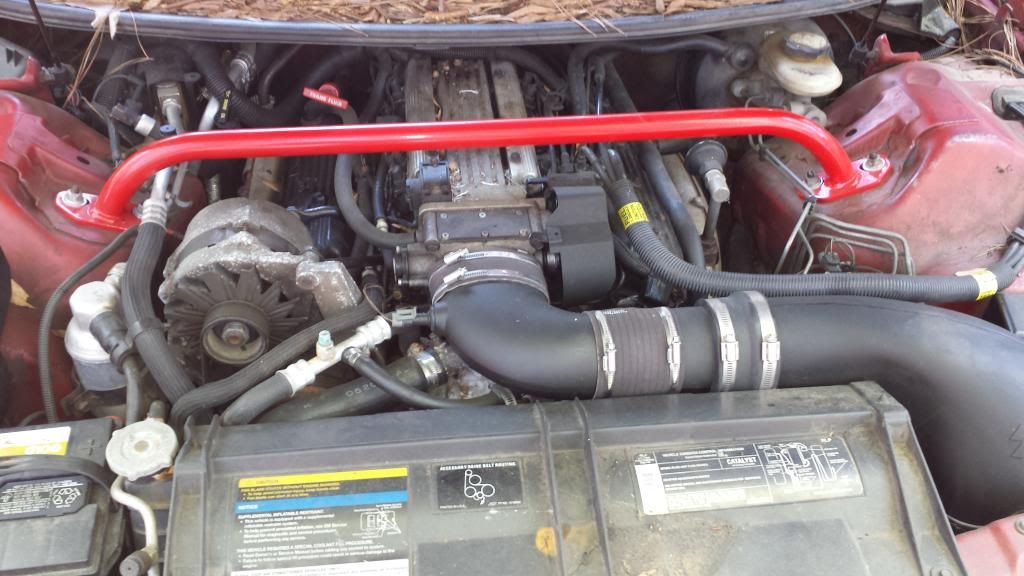
Threw my Ls6 intake on with ported throttle body.
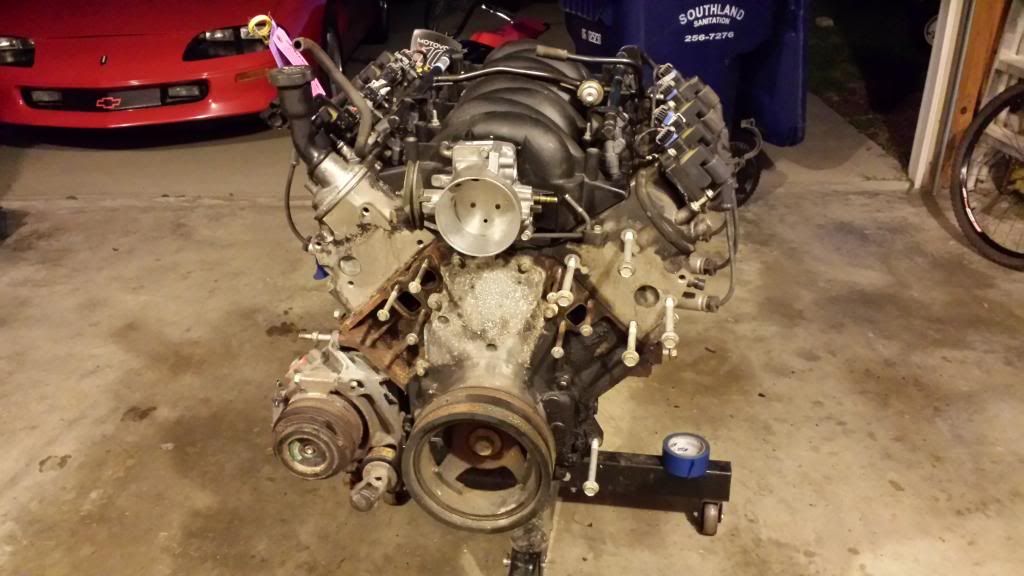
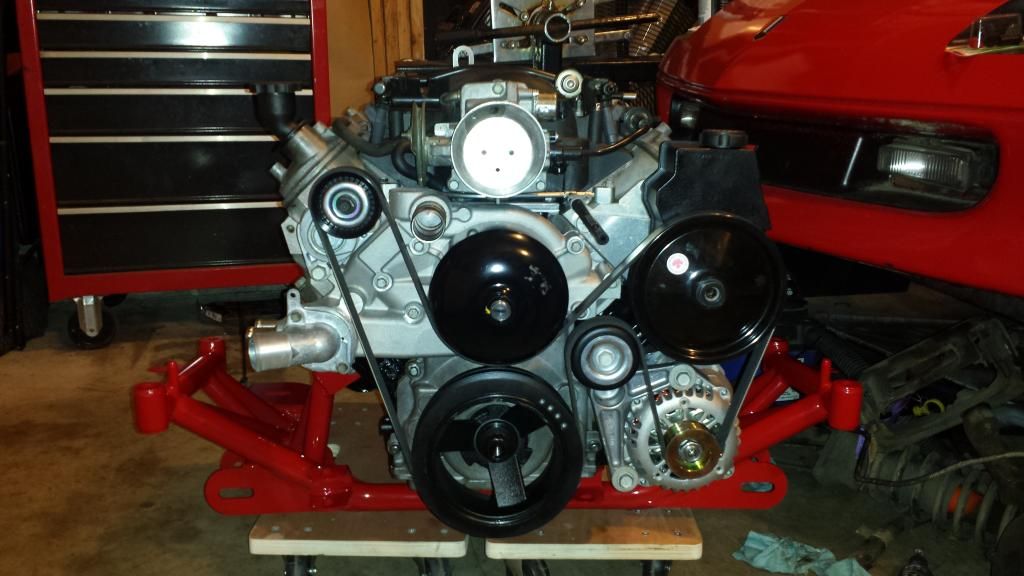
Received some parts. Ls1 water pump, Lt1 t56 crossmember, alternator, dipstick, Ls1 manual pedals, Ls6 oil pump, Ls6 front steam vent tube, and other misc. items.

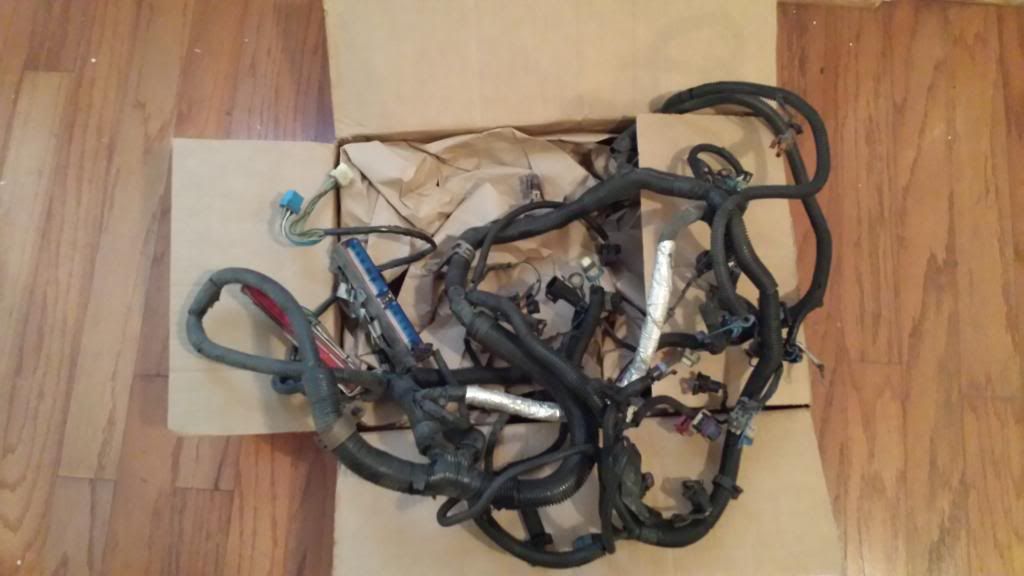
99-02 Ls1 wiring harness
Tick Performance adjustable master cylinder, ls1 throttle cable, throttle cable bracket, Arp flywheel and pressure plate bolts.

I have a Stage 2 Monster clutch kit on the way also and couple other items not pictured.
Now a few years ago they gave it to my youngest brother. He did a few things such as install a K&N cold air intake and shock tower brace. The car hit 222,000 miles and he started having reliability issues so he ended up parking it. He ended up purchasing a 01 Ws6 shortly after. The car just sat in my parents yard for several years until my brother just recently gave it to me.
I got it running, but their are a ton of issues with oil leaks, opti spark problems, and high idle issues. I was looking at a full rebuild. I decided if I am going to go that far I might as well upgrade to a Ls based setup and that is where the Lq4 T-56 combo came in. Here are a few pictures of the car and the parts I have gathered so far.


Picked up a Lq4 out of a 2005 Silverado 2500

Threw my Ls6 intake on with ported throttle body.


Received some parts. Ls1 water pump, Lt1 t56 crossmember, alternator, dipstick, Ls1 manual pedals, Ls6 oil pump, Ls6 front steam vent tube, and other misc. items.

99-02 Ls1 wiring harness

Tick Performance adjustable master cylinder, ls1 throttle cable, throttle cable bracket, Arp flywheel and pressure plate bolts.

I have a Stage 2 Monster clutch kit on the way also and couple other items not pictured.
Last edited by sierravmax; 06-15-2014 at 09:24 AM.


 06-15-2014, 07:02 AM
#3
Good jump on parts. When you grab up a ls1 k member get the brakes with it. They are much bigger. Most of the time you can grab those for little to nothing more.
Thats a super clean 93. Esp. For that kind of mileage.
Bill
Thats a super clean 93. Esp. For that kind of mileage.
Bill
__________________

Standalone LS Swap Harnesses IN STOCK!
LSX, LTX Stand alone swap harnesses. S10 LSX conversion PLUG AND PLAY harnesses, 24x conversion PLUG AND PLAY harnesses. LT1 to LSX PLUG AND PLAY Harnesses.
sales@bp-automotive.com
www.bp-automotive.com
1-888-467-4491
Standalone LS Swap Harnesses IN STOCK!
LSX, LTX Stand alone swap harnesses. S10 LSX conversion PLUG AND PLAY harnesses, 24x conversion PLUG AND PLAY harnesses. LT1 to LSX PLUG AND PLAY Harnesses.
sales@bp-automotive.com
www.bp-automotive.com
1-888-467-4491
 06-15-2014, 10:09 AM
#5
TECH Apprentice
Thread Starter
iTrader: (1)
Join Date: May 2014
Location: Lexington, S.C.
Posts: 351
Likes: 0
Received 0 Likes
on
0 Posts
About to put a order in and have some questions. Does anyone have the correct AC delco part #'s for these parts? I am on Rockauto.com and they list a couple different Ac delco part #'s.
Throttle position sensor =
Idle air control =
Mapp sensor =
Oil pressure sender =
I am also upgrading to the 04 Ls6 valley cover to eliminate the need to purchase the pcv valve and all the tubing.
Throttle position sensor =
Idle air control =
Mapp sensor =
Oil pressure sender =
I am also upgrading to the 04 Ls6 valley cover to eliminate the need to purchase the pcv valve and all the tubing.
08-09-2014, 07:13 PM
#6
TECH Apprentice
Thread Starter
iTrader: (1)
Join Date: May 2014
Location: Lexington, S.C.
Posts: 351
Likes: 0
Received 0 Likes
on
0 Posts
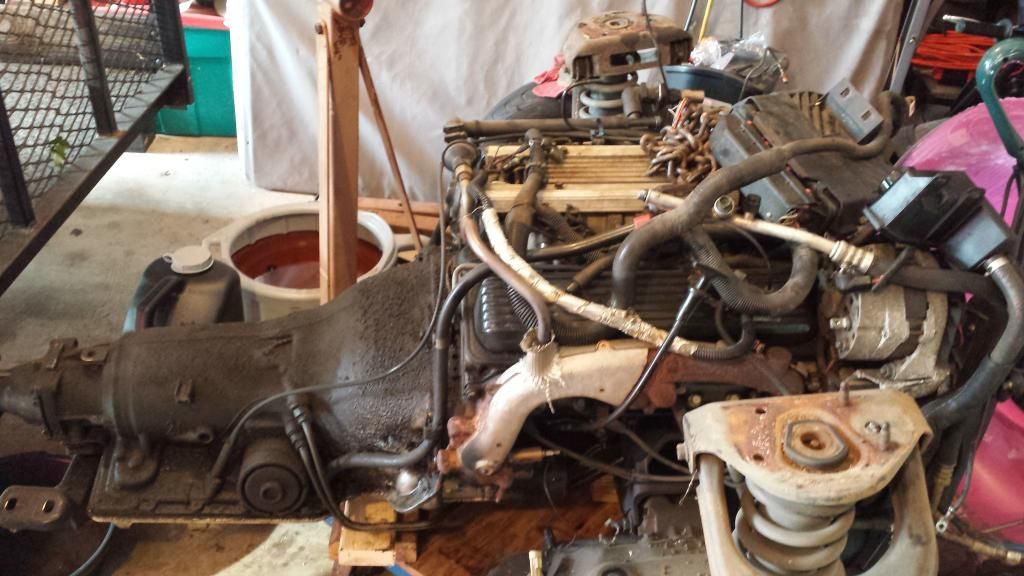
Well I finally have enough parts to start on this project. Still don't have a T56, but I have a bunch of things up for sale so hopefully that will change soon. Here are a couple of pictures to show some progress.
Video of it last running before pulling it out.
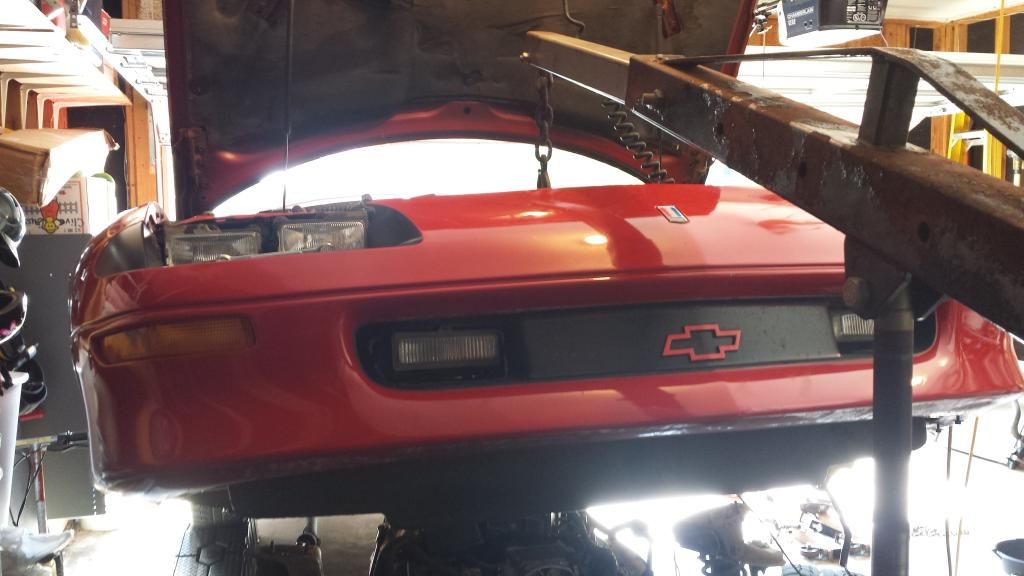
I put the rear of the car on ramps. Then I hooked the engine hoist up to the sway bar mounts. They seemed plenty strong to lift the front of the body up with no motor. Then just lifted away. Only thing I missed was the ABS wheel sensors, but I caught it in time.
Hello there!
Where did you go?
Oh there you are!

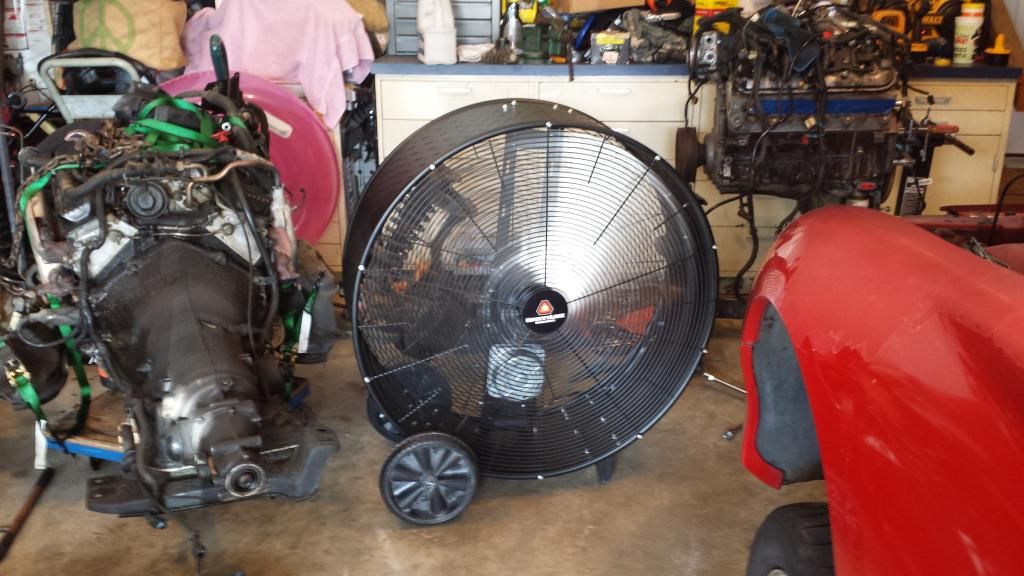
Bought a fan to keep it cool in here!
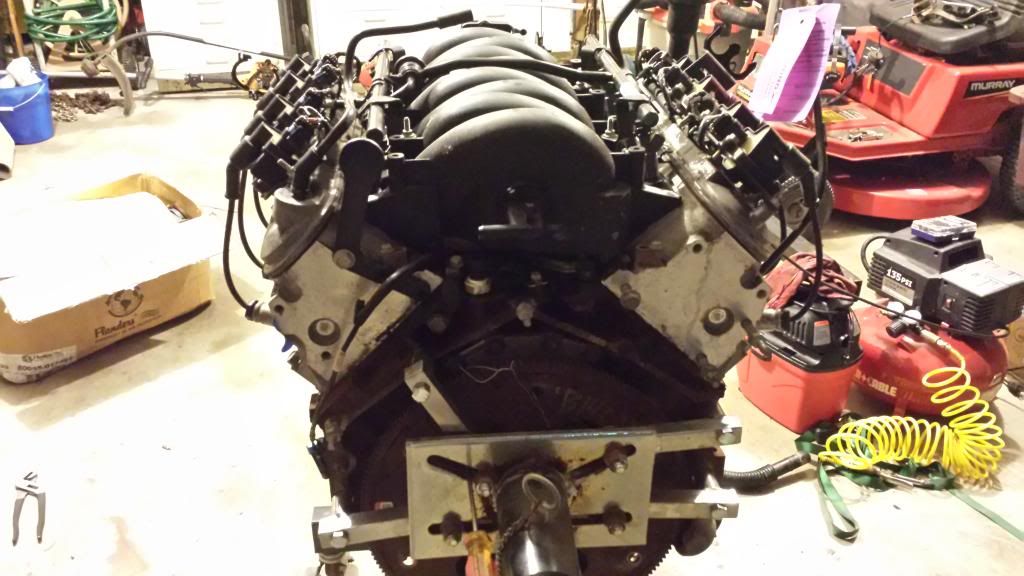
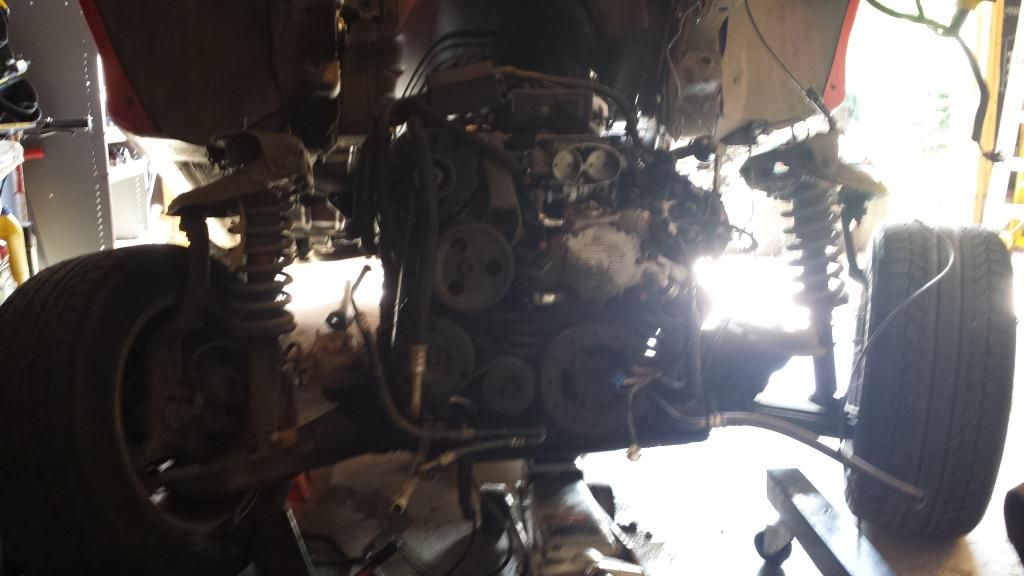
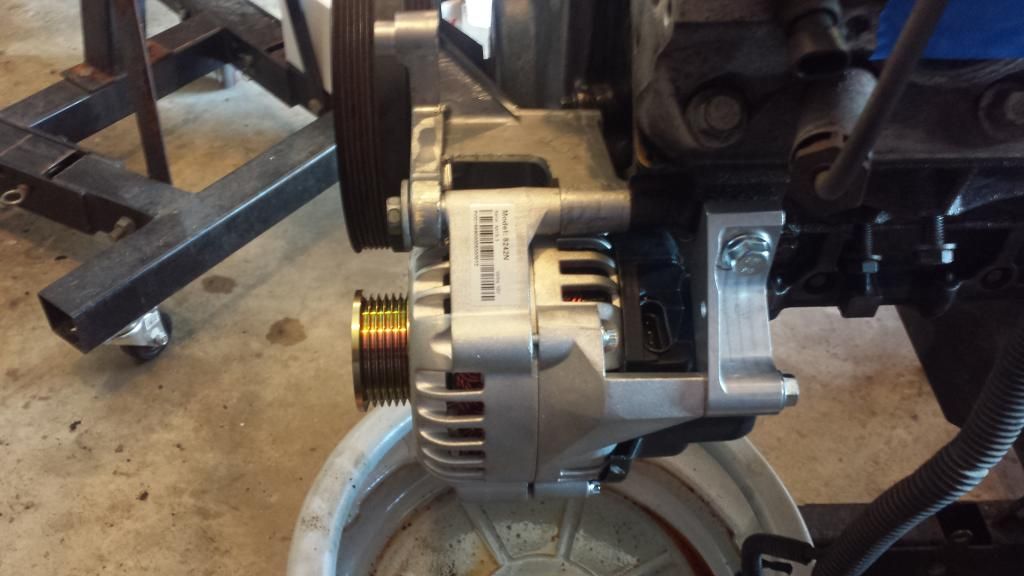
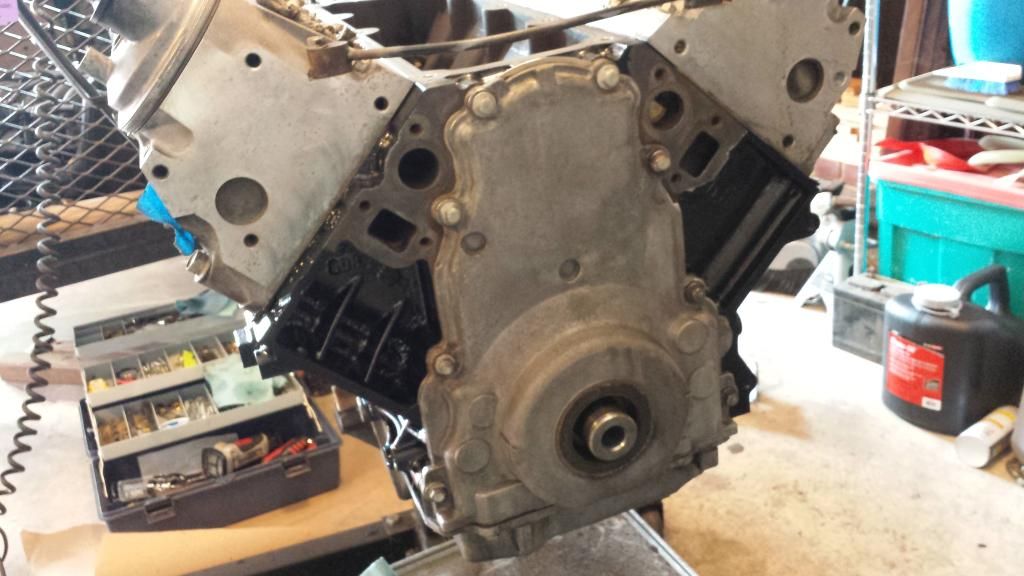
Drilled the hole in the block and tapped to mount the Ls1 alternator. Was way easier then I thought it was going to be. The R sized drill bit cut through it like butter. Hardest part was keeping it straight. I used the alternator bracket as a guide until then had to take it off to finish drilling.

Block all cleaned up and painted with removed crank pulley.
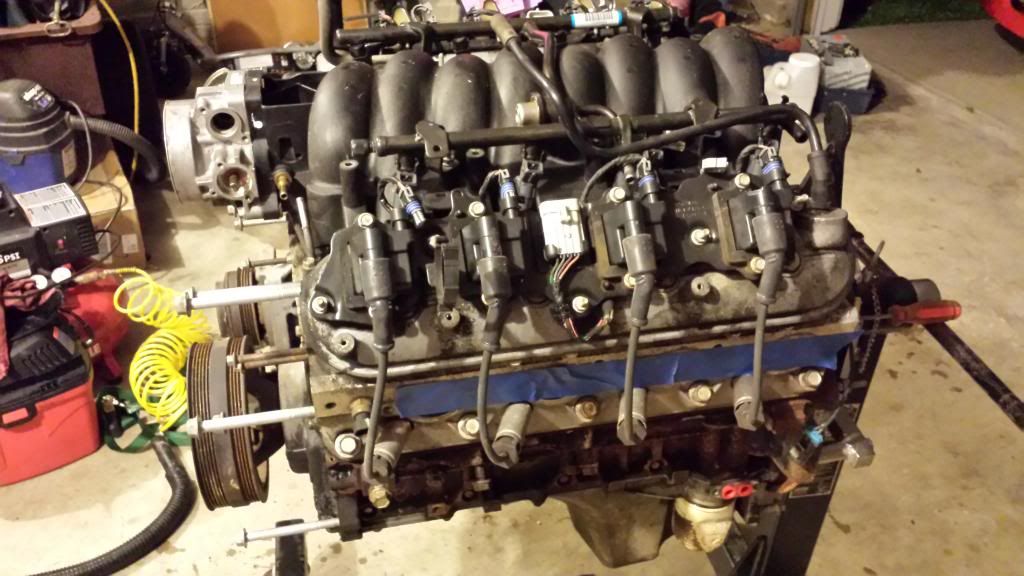
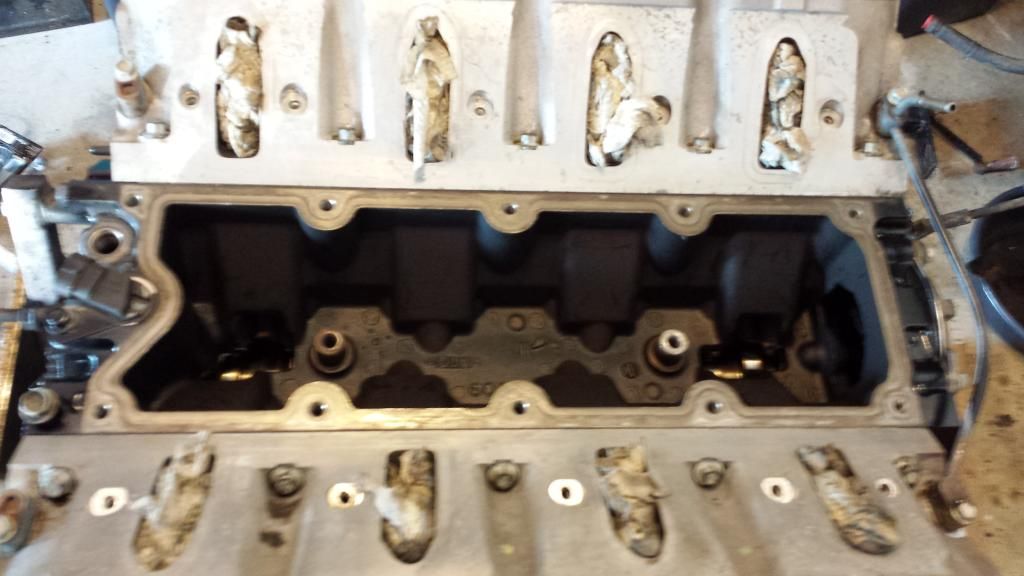
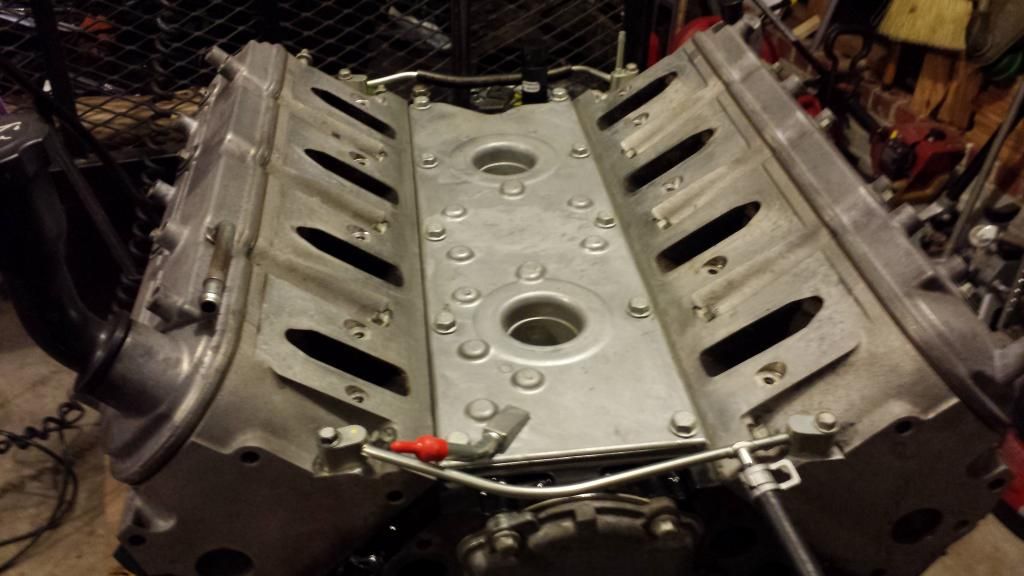
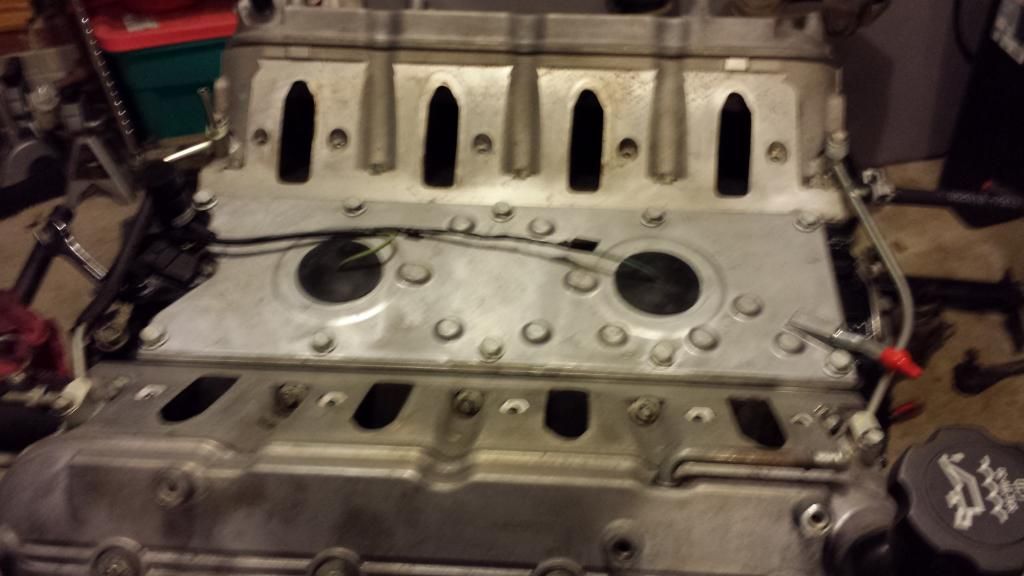
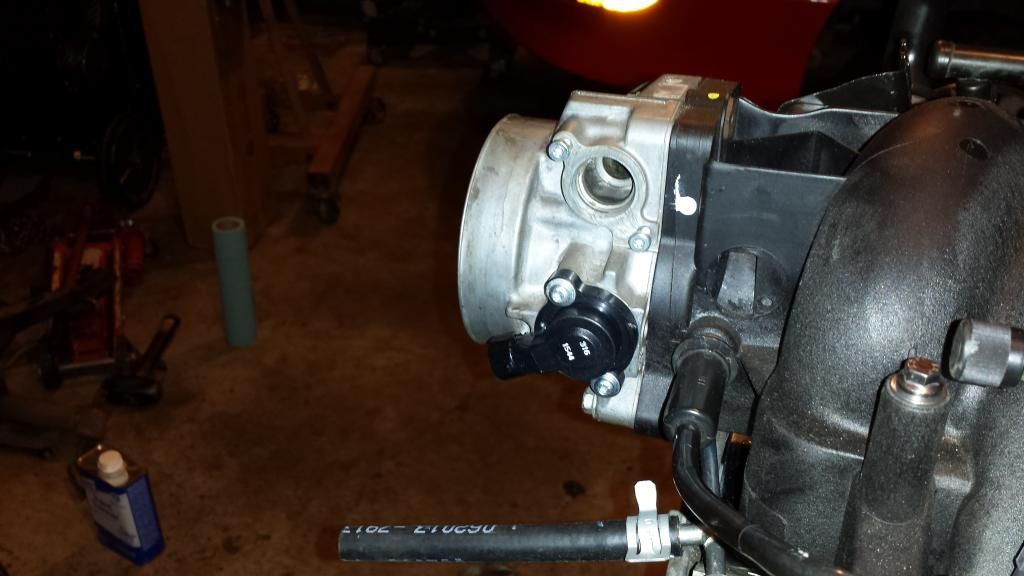
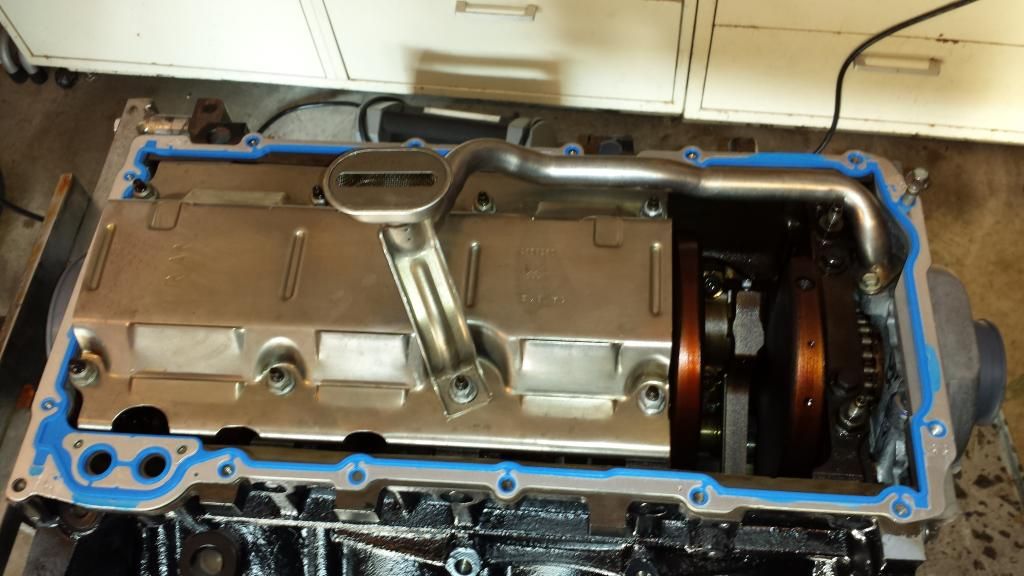
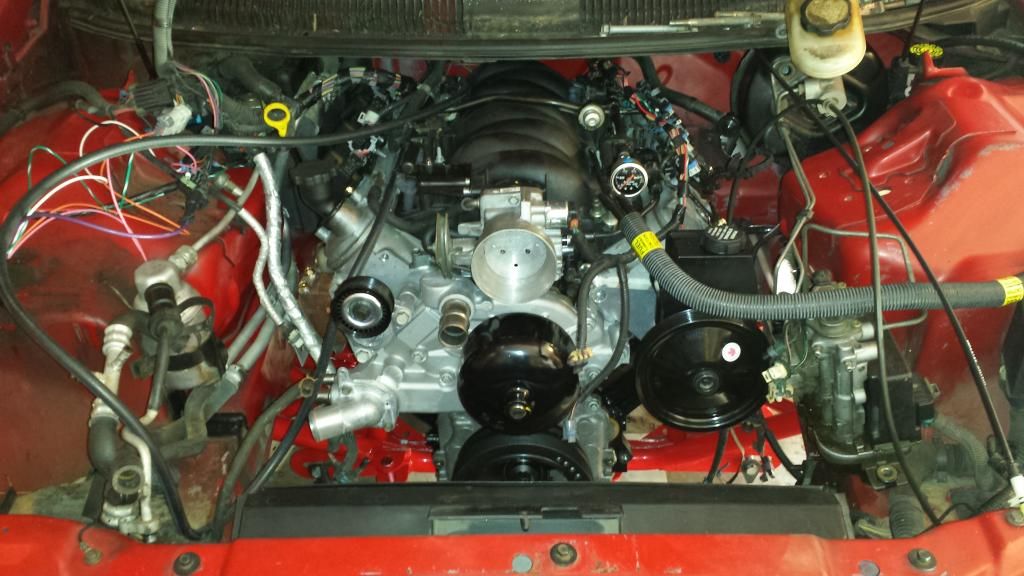
Removed the valley cover for the 04 Ls6 upgraded cover.
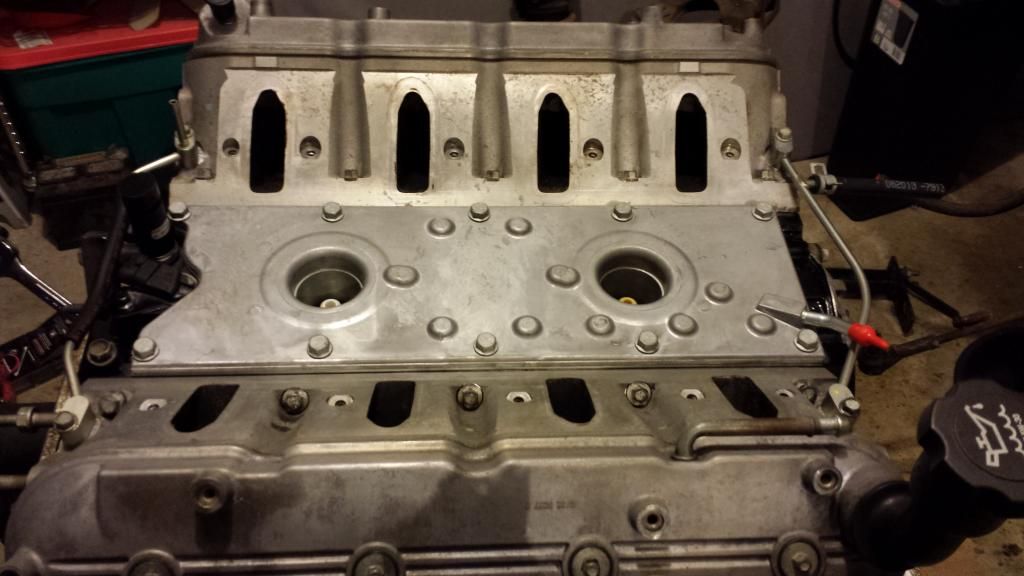
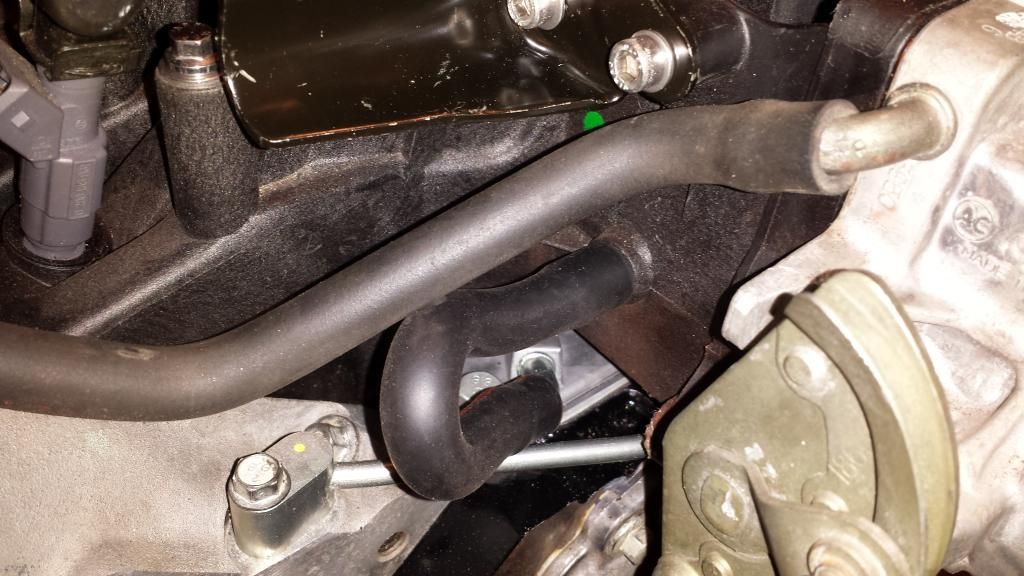
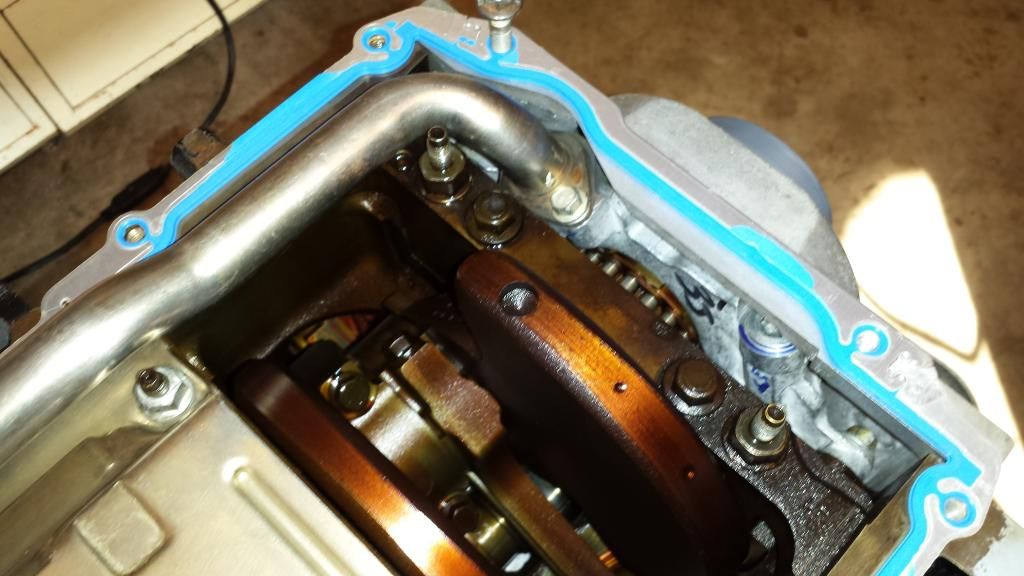
Ls6 cover installed, Ls6 front steam vent, and then ctsv rear steam vent.
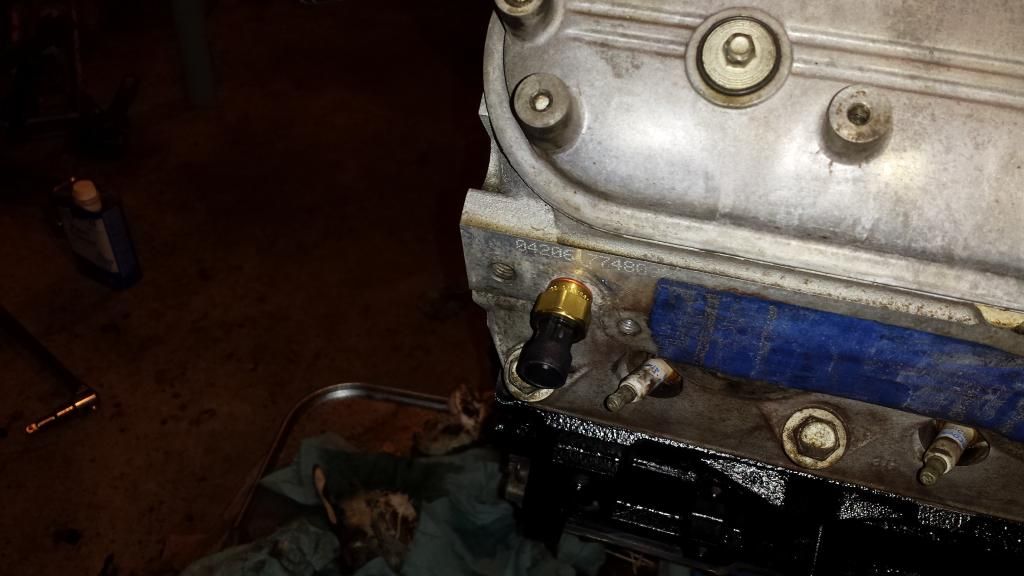
Replaced rear knock sensor. It was nasty. Kept front sensor as it still looked great. Cleaned up and installed knock sensor harness.
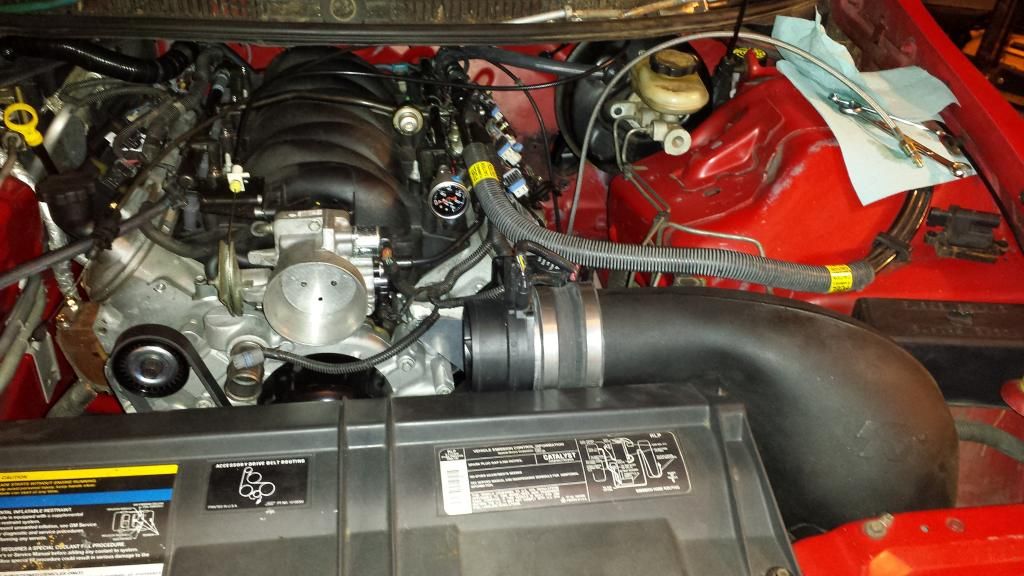
Torqued down intake with Stainless ARP fasteners. Looking good!

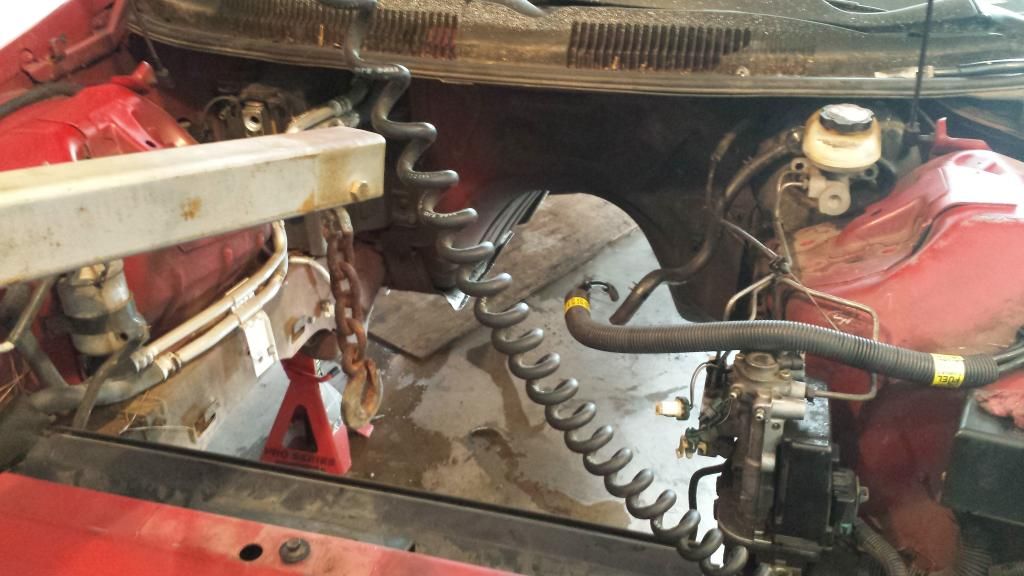
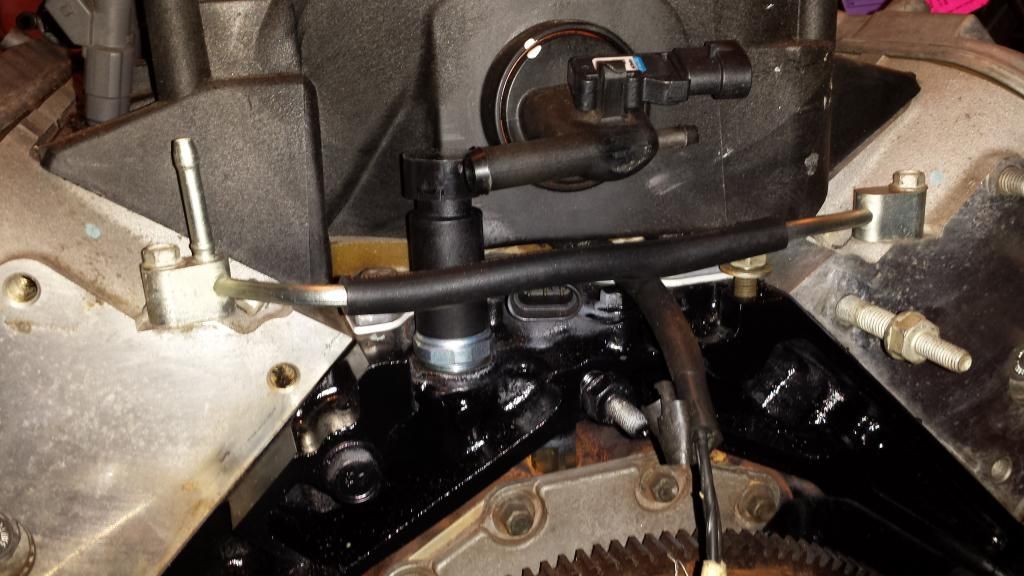
Got to love this new pcv setup. Hardly any hoses!
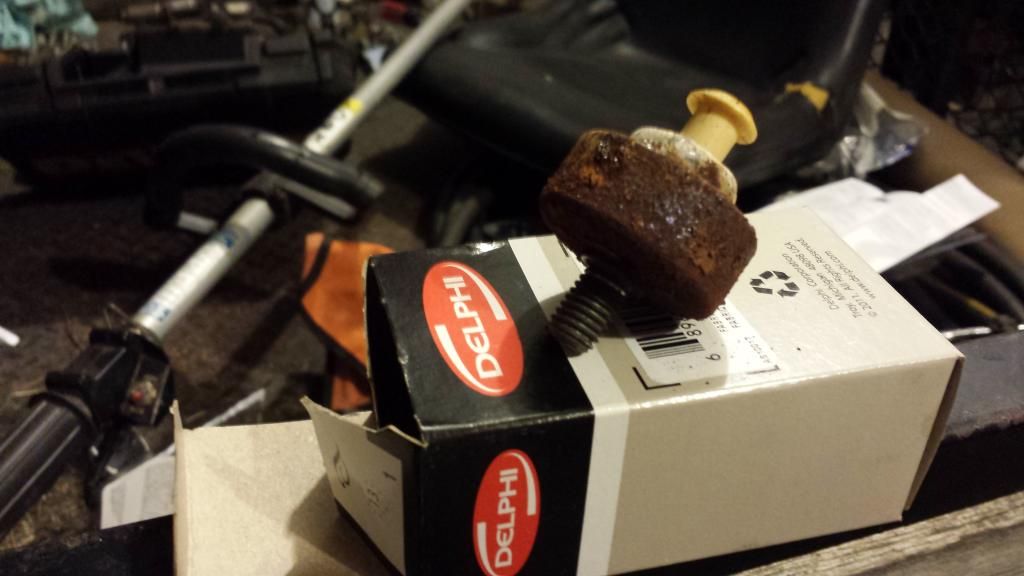
New 98 Ls1 water temp sending unit.
New AC delco tps sensor. IAC is on the way.
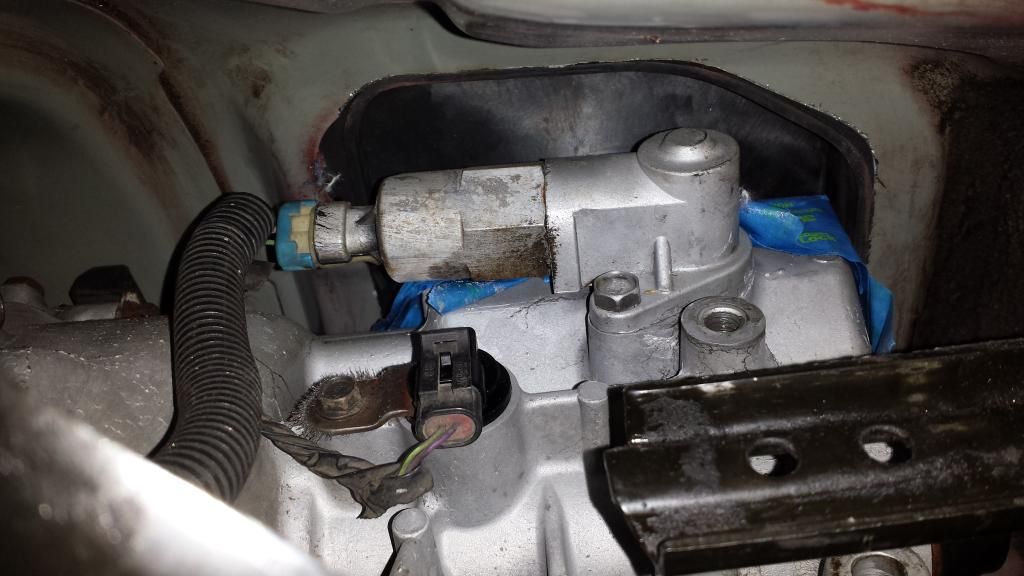
Replaced truck 3 wire oil sending unit with LS1 1 wire sending unit. Luckily I found a socket at Autozone that is made just to replace this. Also installed new map sensor. Also you can see the Ctsv rear steam vent better in this picture. I had to bend it up slightly to clear the cam sensor.
Video of it last running before pulling it out.
I put the rear of the car on ramps. Then I hooked the engine hoist up to the sway bar mounts. They seemed plenty strong to lift the front of the body up with no motor. Then just lifted away. Only thing I missed was the ABS wheel sensors, but I caught it in time.

Hello there!

Where did you go?


Oh there you are!


Bought a fan to keep it cool in here!

Drilled the hole in the block and tapped to mount the Ls1 alternator. Was way easier then I thought it was going to be. The R sized drill bit cut through it like butter. Hardest part was keeping it straight. I used the alternator bracket as a guide until then had to take it off to finish drilling.


Block all cleaned up and painted with removed crank pulley.


Removed the valley cover for the 04 Ls6 upgraded cover.

Ls6 cover installed, Ls6 front steam vent, and then ctsv rear steam vent.


Replaced rear knock sensor. It was nasty. Kept front sensor as it still looked great. Cleaned up and installed knock sensor harness.


Torqued down intake with Stainless ARP fasteners. Looking good!

Got to love this new pcv setup. Hardly any hoses!

New 98 Ls1 water temp sending unit.

New AC delco tps sensor. IAC is on the way.

Replaced truck 3 wire oil sending unit with LS1 1 wire sending unit. Luckily I found a socket at Autozone that is made just to replace this. Also installed new map sensor. Also you can see the Ctsv rear steam vent better in this picture. I had to bend it up slightly to clear the cam sensor.
 08-17-2014, 02:00 PM
#7
Staging Lane
Join Date: Aug 2014
Location: Tulsa, OK
Posts: 77
Likes: 0
Received 0 Likes
on
0 Posts
Great info!!!
I'm watching closely and I'm probably gonna be asking a lot of questions when I start my swap.... Pretty much had the same thing in mind. I found a lq4 and a 4l60e for mine...
Interested to see how you do the fuel delivery and wiring
Keep it up
I'm watching closely and I'm probably gonna be asking a lot of questions when I start my swap.... Pretty much had the same thing in mind. I found a lq4 and a 4l60e for mine...
Interested to see how you do the fuel delivery and wiring
Keep it up
Trending Topics
09-28-2014, 09:58 AM
#9
TECH Apprentice
Thread Starter
iTrader: (1)
Join Date: May 2014
Location: Lexington, S.C.
Posts: 351
Likes: 0
Received 0 Likes
on
0 Posts
Thanks guys! I am slowly making progress on it. I have another small update.
Removed the oil pan, rear cover, and front cover and installed new oil pump. I am going to keep the stock chain for now as I am planning to pull this motor back out down the road and build it.
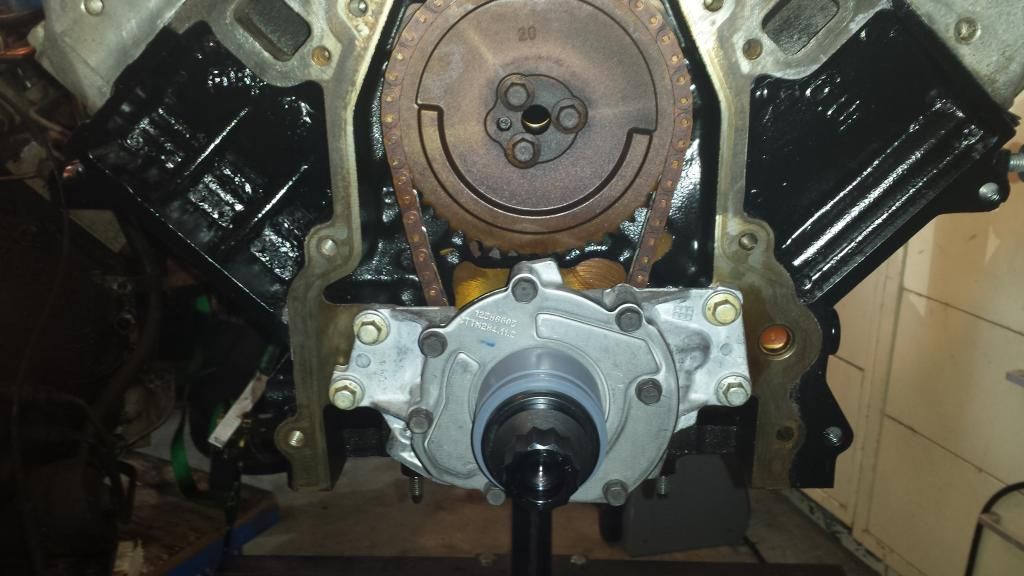
Cleaned up and installed front cover with new gasket. These installer tools from SacCity Corvette really help out. I also used the oil pump tool to align it.
Installed Ls1 windage tray and pickup tube. I used the blue o-ring from the dealership.
Installed rear cover.
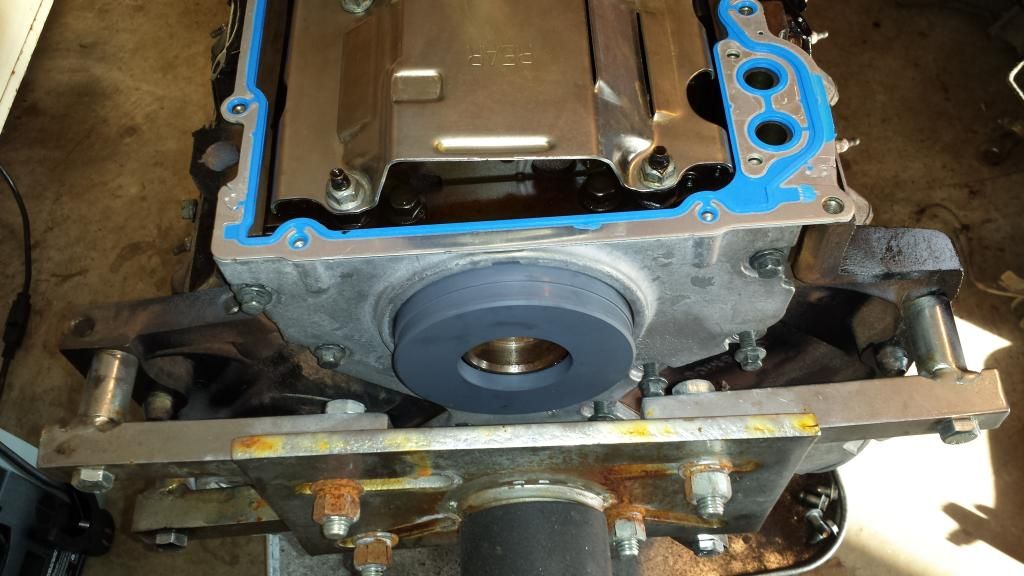
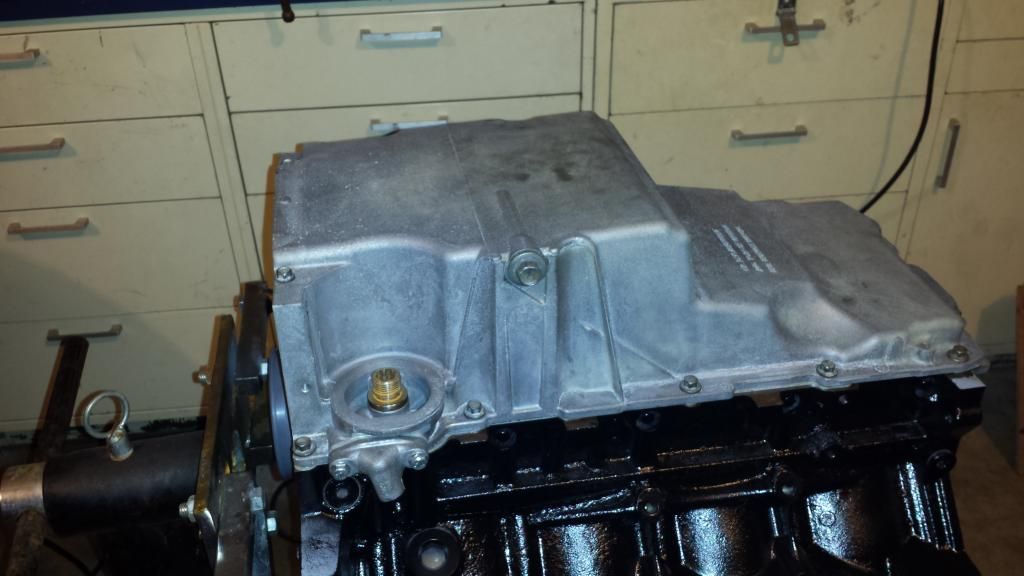
Installed oil pan using SacCity tutorial video so I could torque down everything properly and evenly. I also added some extra sealant at four corners of the oil pan where the front covers meet the block. I hope to have no oil leaks. I can't stand oil leaks!
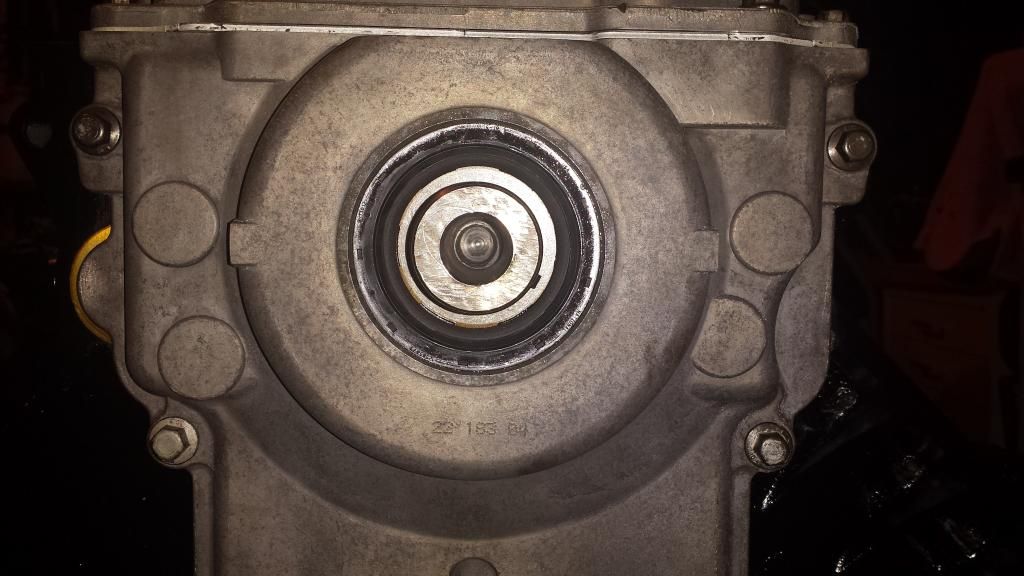
Front seal installed. Looks pretty straight to me.
I have some more pictures. Will update later today.
Removed the oil pan, rear cover, and front cover and installed new oil pump. I am going to keep the stock chain for now as I am planning to pull this motor back out down the road and build it.

Cleaned up and installed front cover with new gasket. These installer tools from SacCity Corvette really help out. I also used the oil pump tool to align it.

Installed Ls1 windage tray and pickup tube. I used the blue o-ring from the dealership.


Installed rear cover.

Installed oil pan using SacCity tutorial video so I could torque down everything properly and evenly. I also added some extra sealant at four corners of the oil pan where the front covers meet the block. I hope to have no oil leaks. I can't stand oil leaks!

Front seal installed. Looks pretty straight to me.

I have some more pictures. Will update later today.
09-28-2014, 11:00 AM
#10
TECH Apprentice
Thread Starter
iTrader: (1)
Join Date: May 2014
Location: Lexington, S.C.
Posts: 351
Likes: 0
Received 0 Likes
on
0 Posts
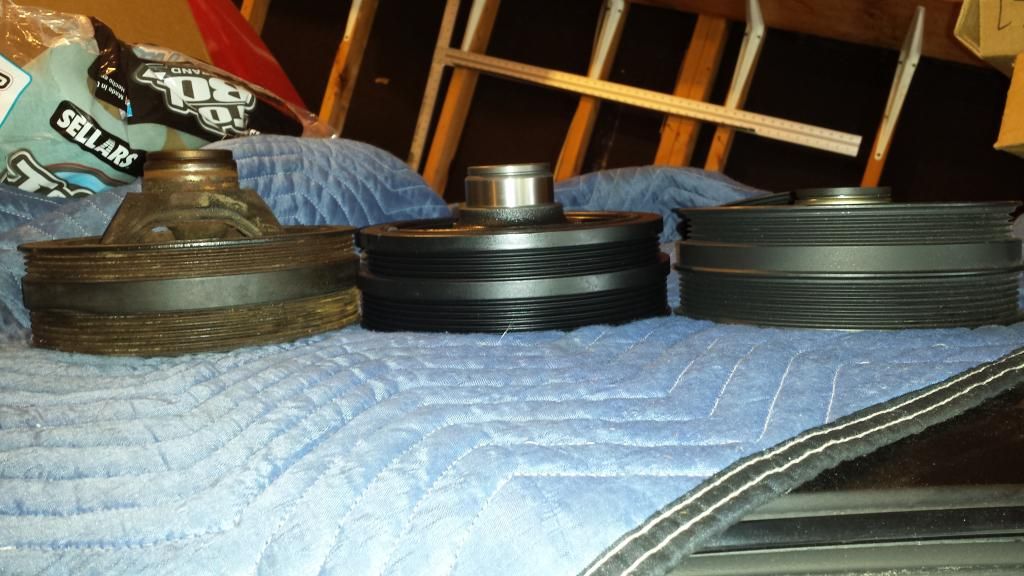
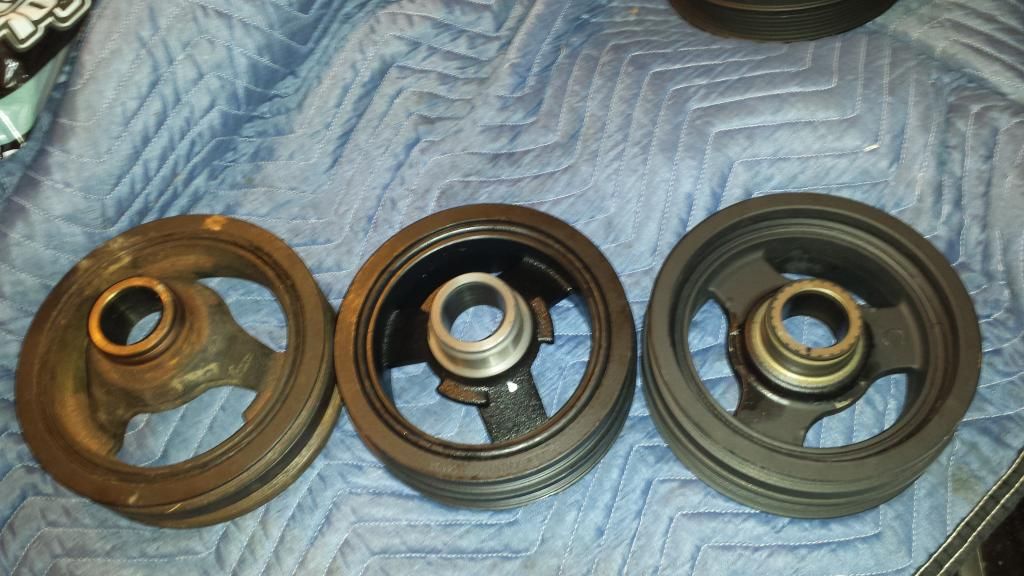
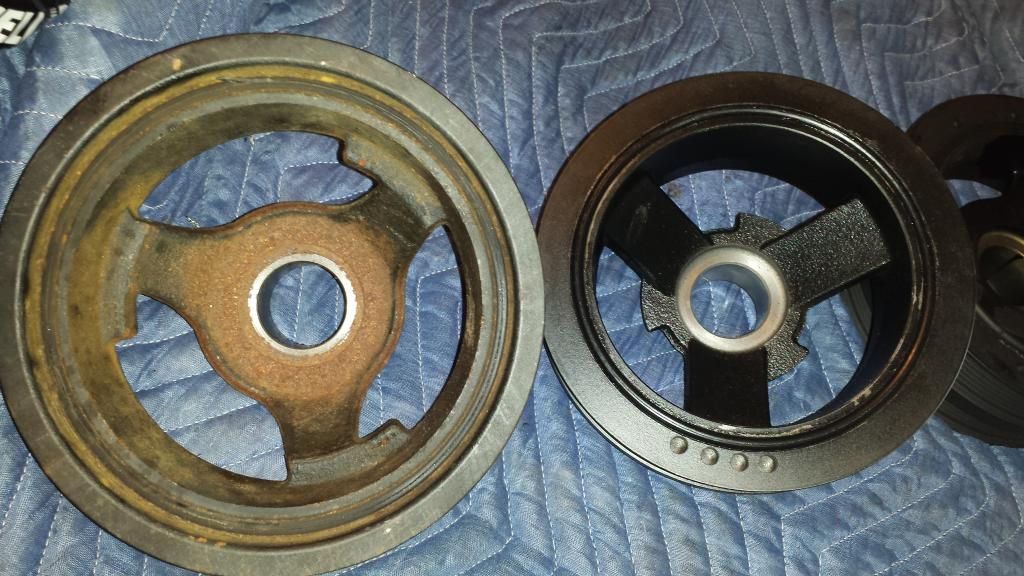
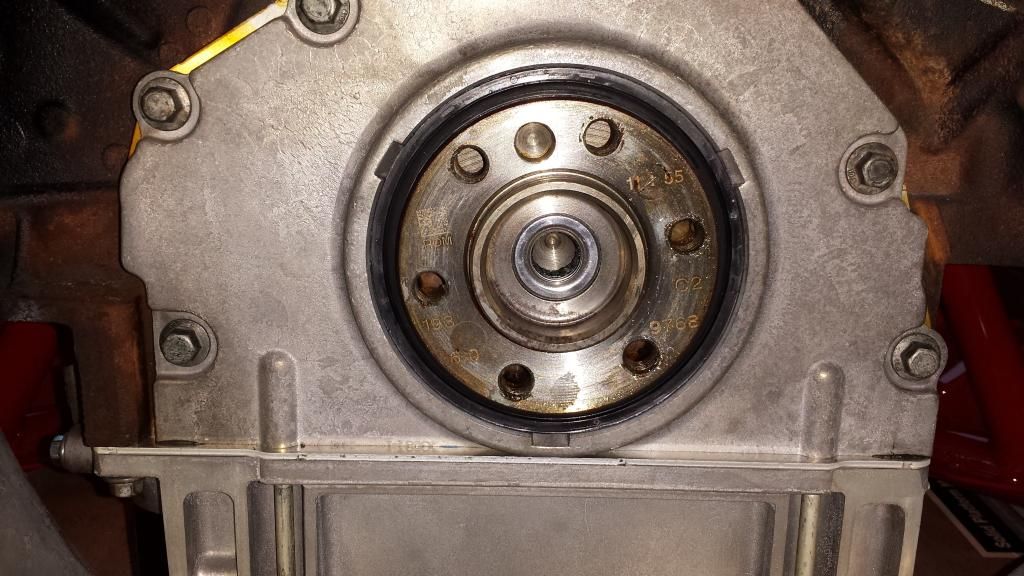
Started installing front end accessories and ran into a major problem. I found out that the AC delco harmonic balancer I bought 5 months ago isn't right. It does not align up at all. I checked the part number on the box and it was correct. Turns out that AC delco packaged a Corvette balancer in the Camaro box instead. So I bought another from a different supplier and same thing. This turned out to be a major headache and I do not have the money to buy a ATI Super damper.

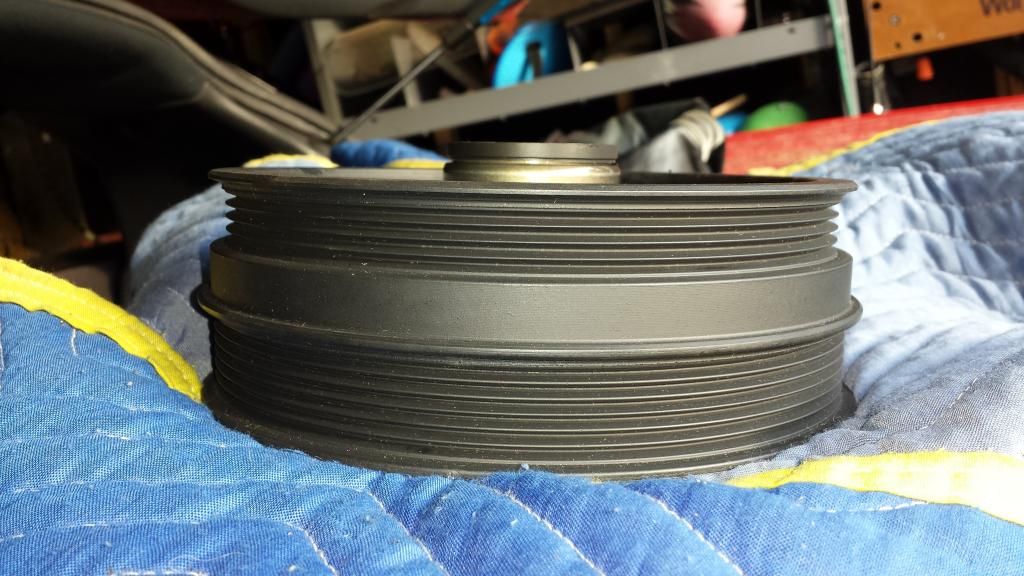
So I ended up buying a Dorman balancer for a LS1 Camaro and it came in correct. Here are the differences between a truck balancer, Camaro balancer and Corvette. If anyone needs a new Corvette balancer let me know. I have two brand new ones. lol
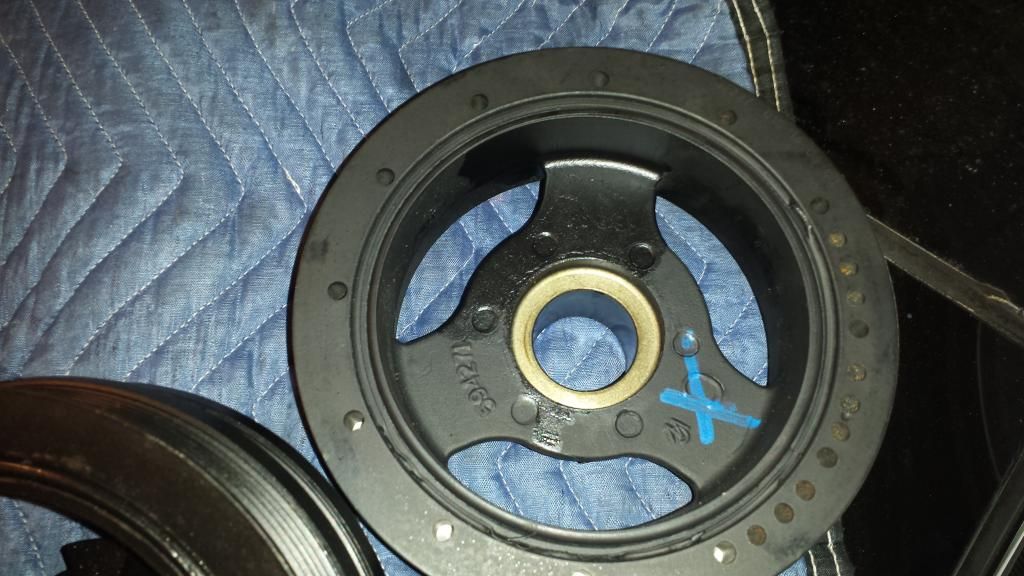
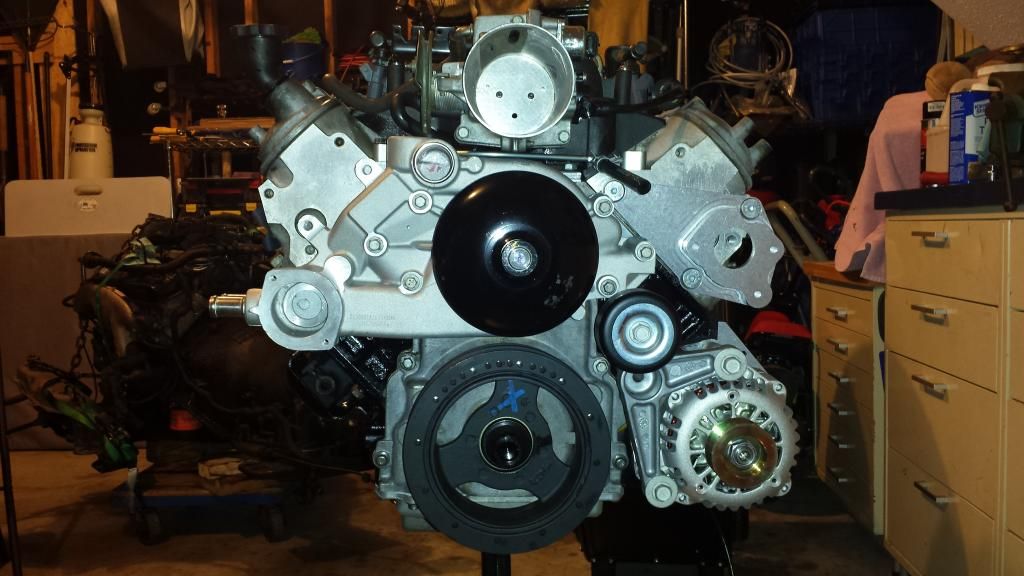
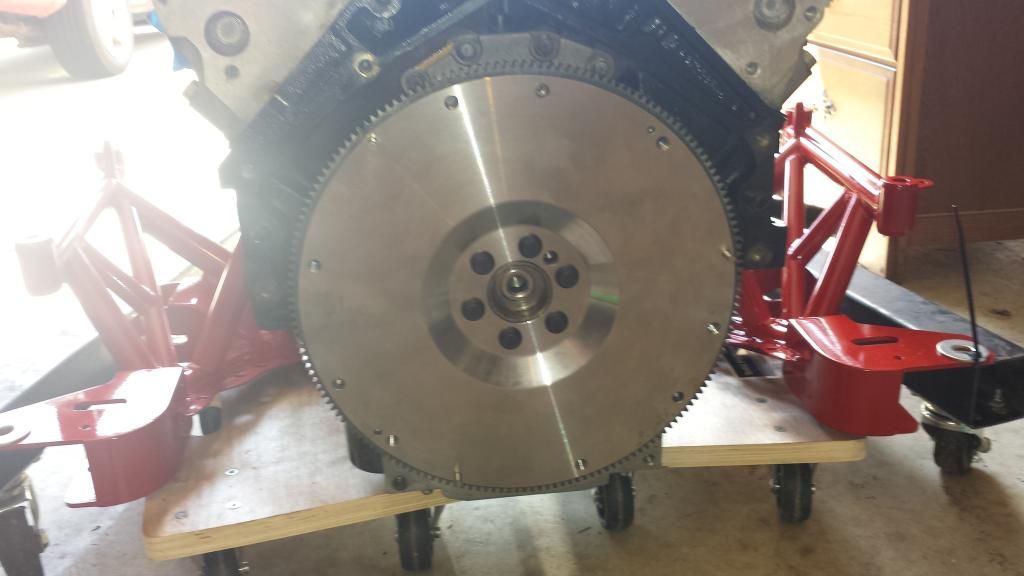
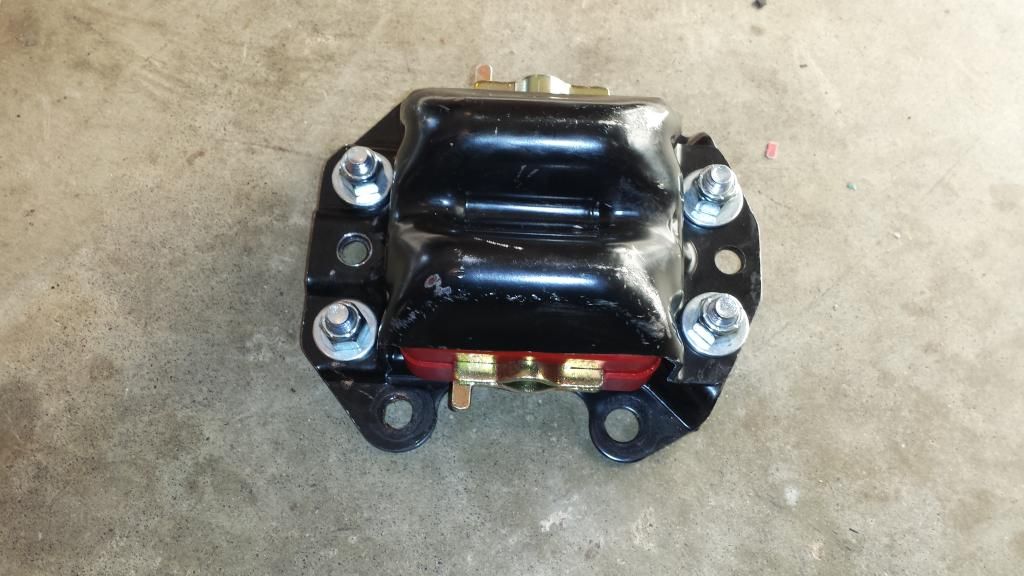
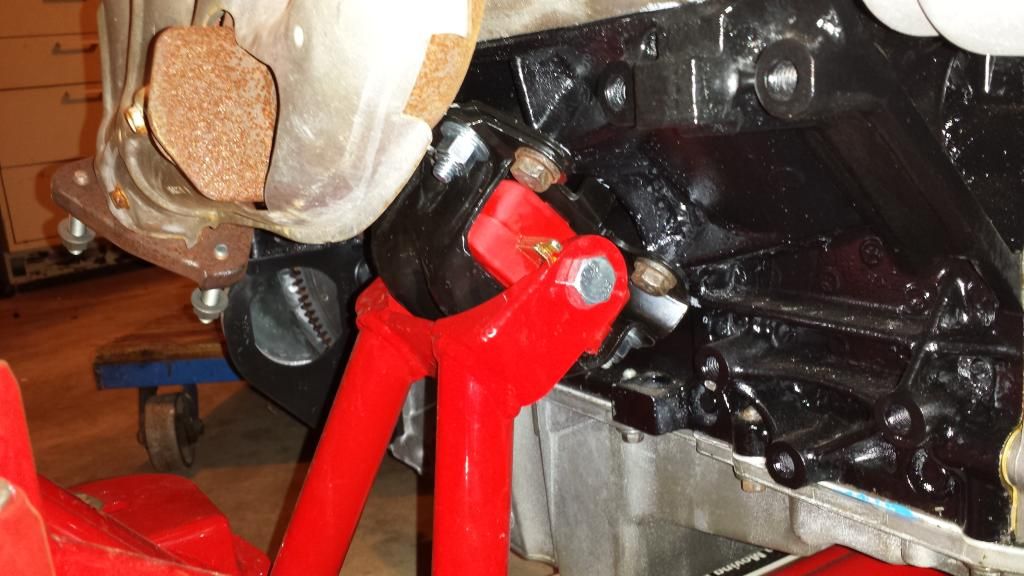
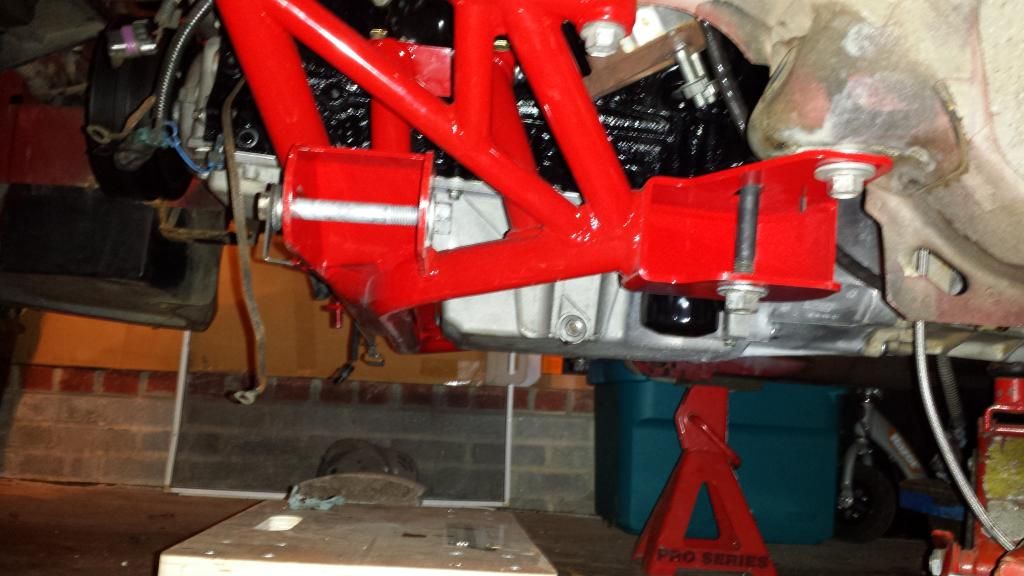
Finally got the balancer on and the belt on. Waited so long for this! Also you can notice that I went ahead and bolted it in to the UMI K member.
Here I installed the rear main seal. I also tapped in the the pilot bearing.
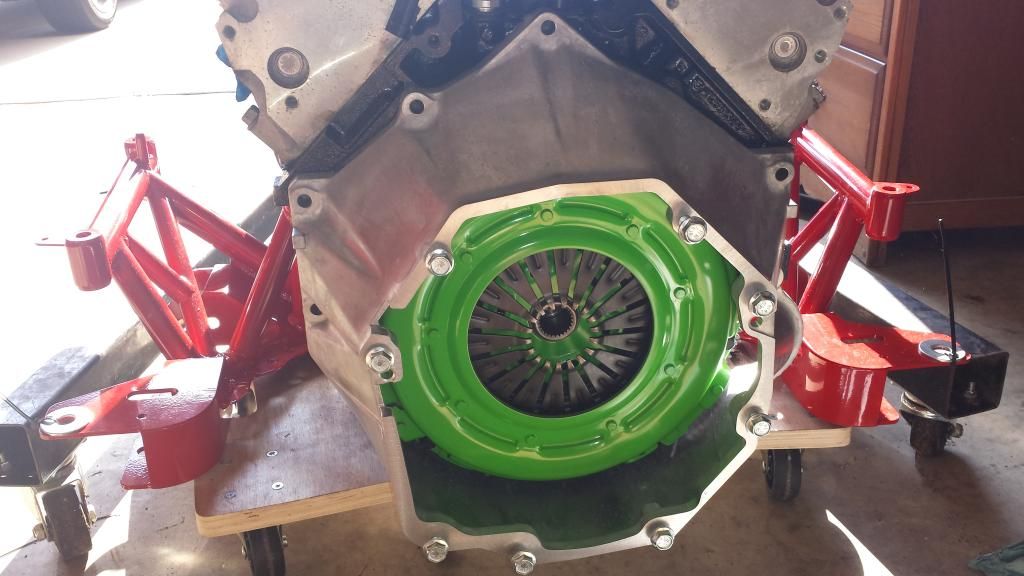
Tapped the alignment dowels in by laying the flywheel on a 2x4 and using a brass bolt and big hammer. Installed the flywheel and torqued the Arp bolts with thread locker.
Installed the clutch using the alignment tool and torqued down with ARP bolts.
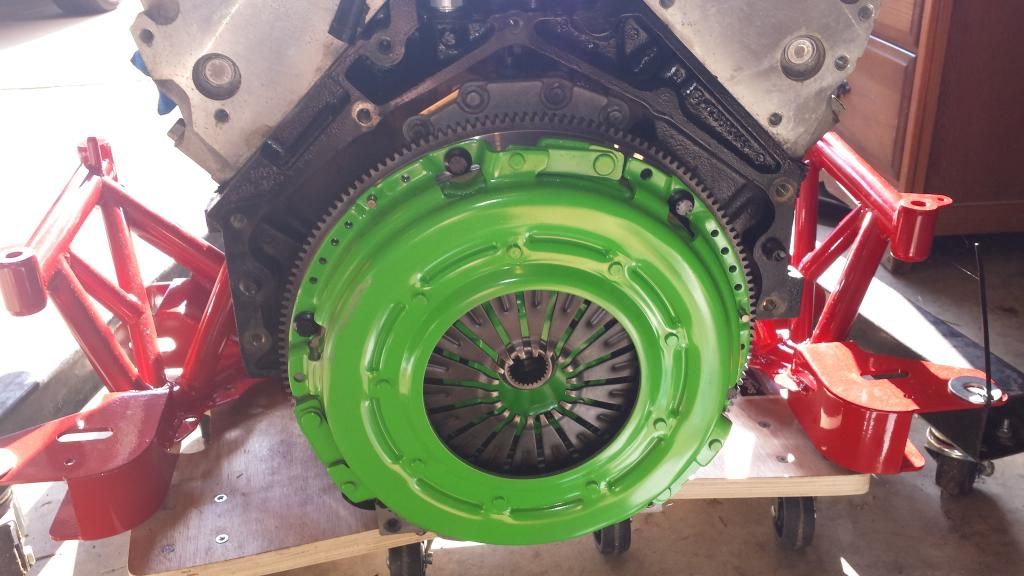
Slapped the bellhousing on to see how it fits. Waiting for bellhousing bolts and I ran into another headache. Ebay supplier ships me the wrong sized bolts. Then tries to correct it and then find that the new bolts blew out of the envelope on the way here. Now he is going to ship some more this Monday.


So I ended up buying a Dorman balancer for a LS1 Camaro and it came in correct. Here are the differences between a truck balancer, Camaro balancer and Corvette. If anyone needs a new Corvette balancer let me know. I have two brand new ones. lol


Finally got the balancer on and the belt on. Waited so long for this! Also you can notice that I went ahead and bolted it in to the UMI K member.

Here I installed the rear main seal. I also tapped in the the pilot bearing.

Tapped the alignment dowels in by laying the flywheel on a 2x4 and using a brass bolt and big hammer. Installed the flywheel and torqued the Arp bolts with thread locker.

Installed the clutch using the alignment tool and torqued down with ARP bolts.

Slapped the bellhousing on to see how it fits. Waiting for bellhousing bolts and I ran into another headache. Ebay supplier ships me the wrong sized bolts. Then tries to correct it and then find that the new bolts blew out of the envelope on the way here. Now he is going to ship some more this Monday.

Last edited by sierravmax; 09-28-2014 at 11:08 AM.
11-19-2014, 09:08 PM
#11
TECH Apprentice
Thread Starter
iTrader: (1)
Join Date: May 2014
Location: Lexington, S.C.
Posts: 351
Likes: 0
Received 0 Likes
on
0 Posts
Sorry for no updates. Been real busy lately. Here are a couple pictures.
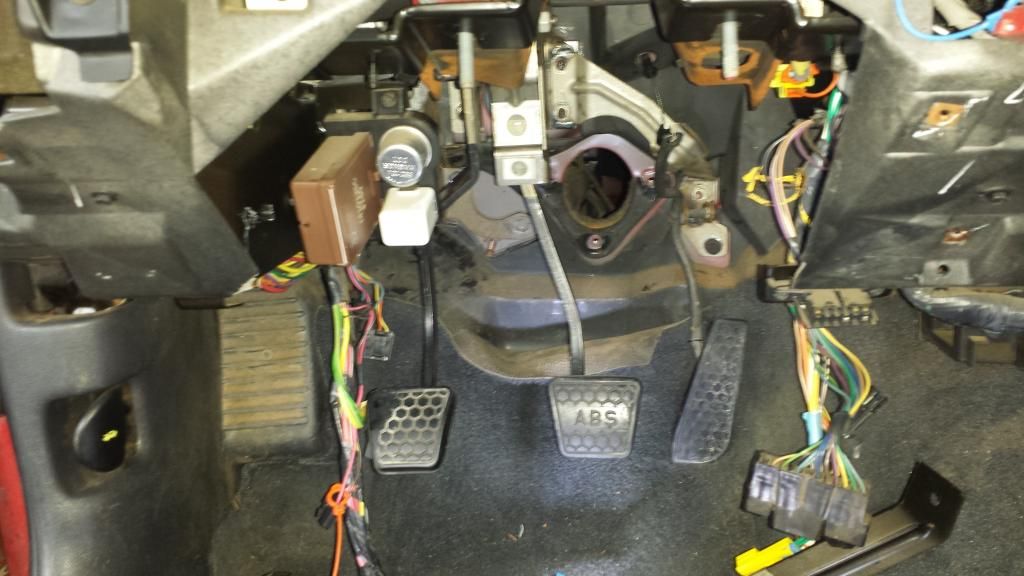
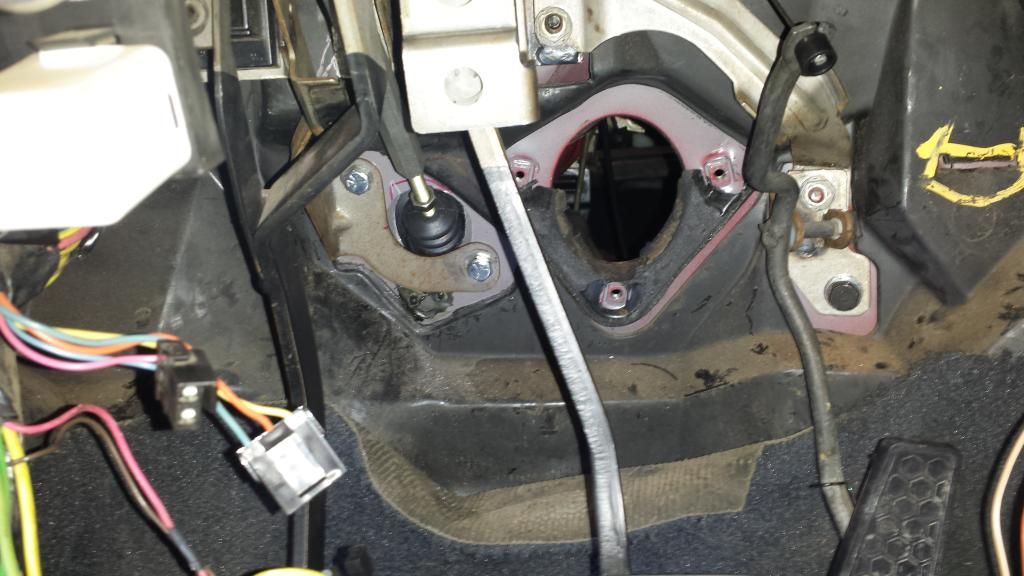
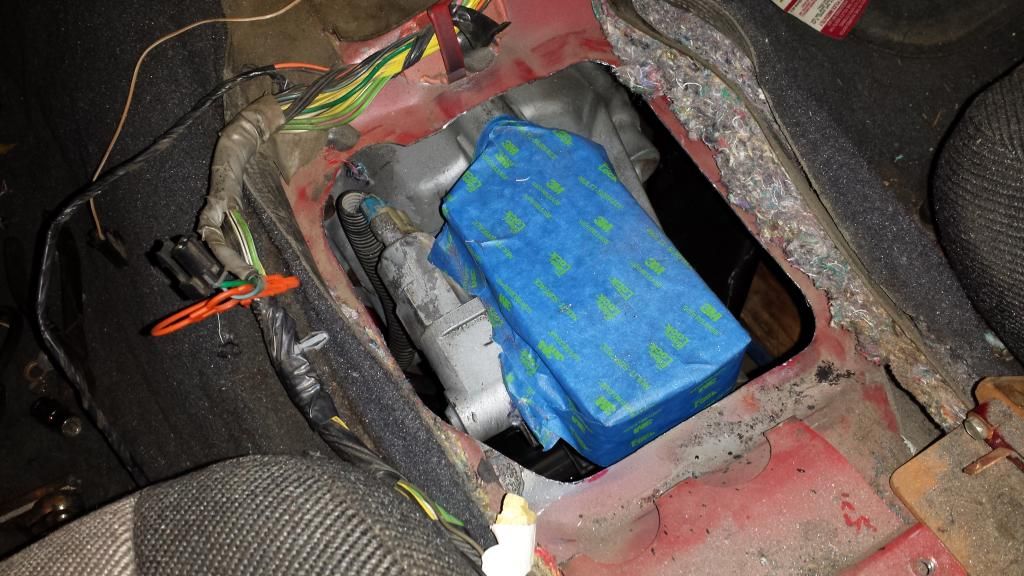
Mounted pedals
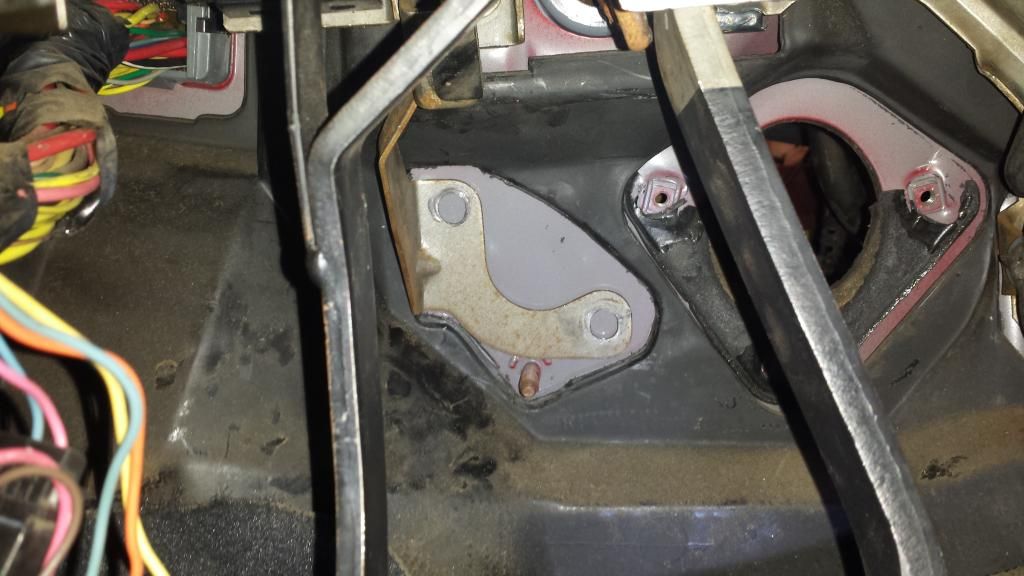
Marked holes
Hole cut
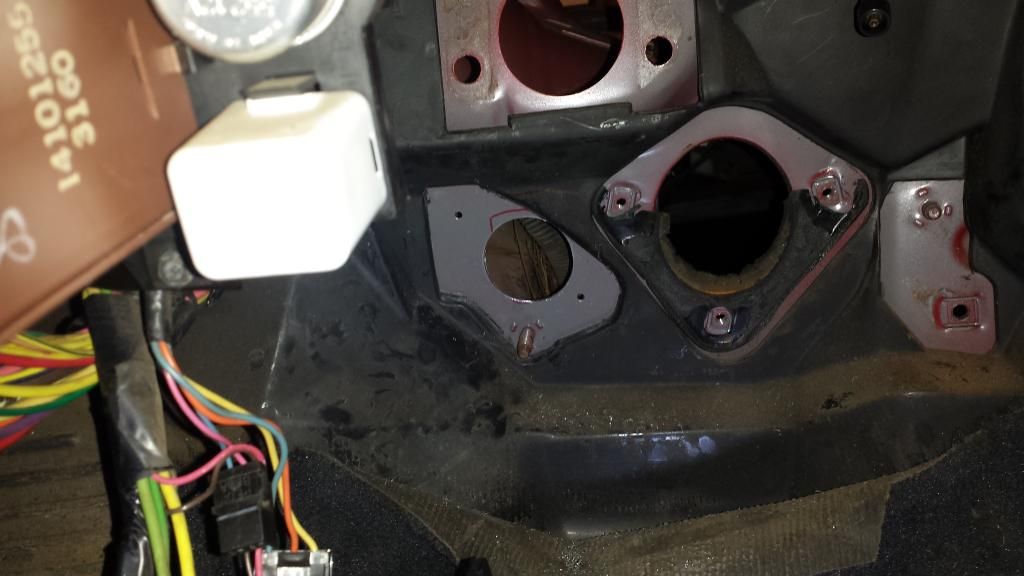
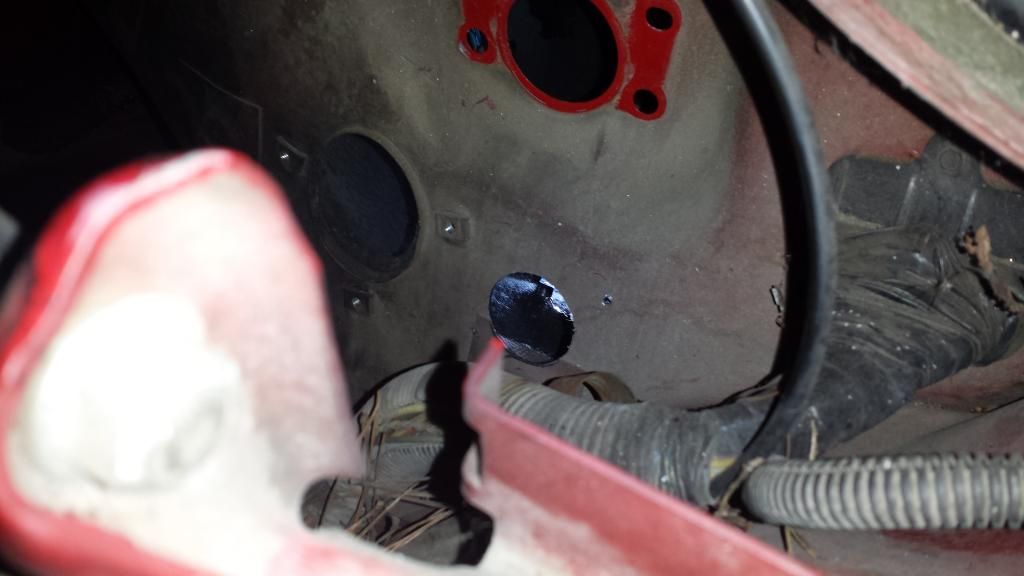
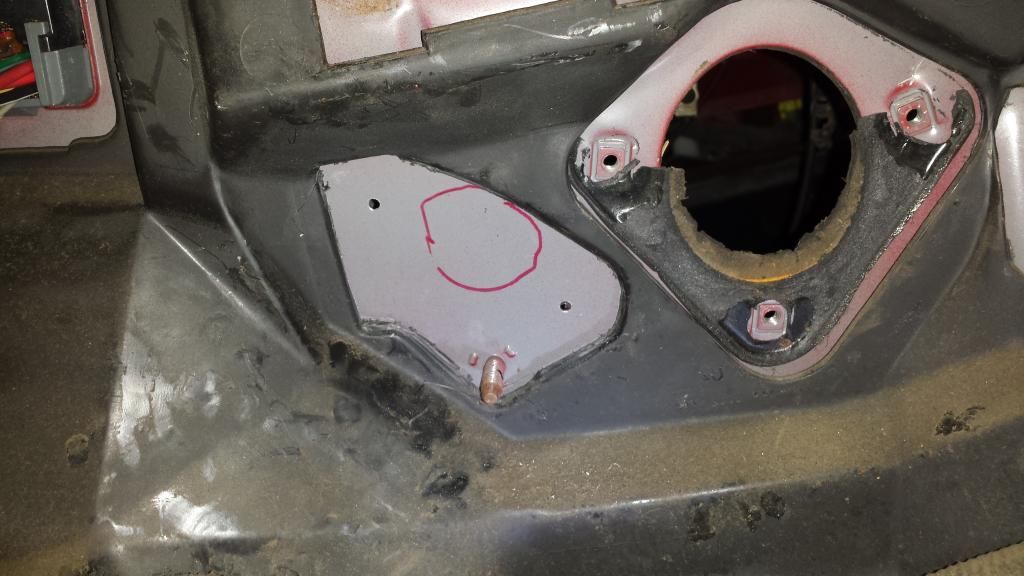
Cleaned firewall
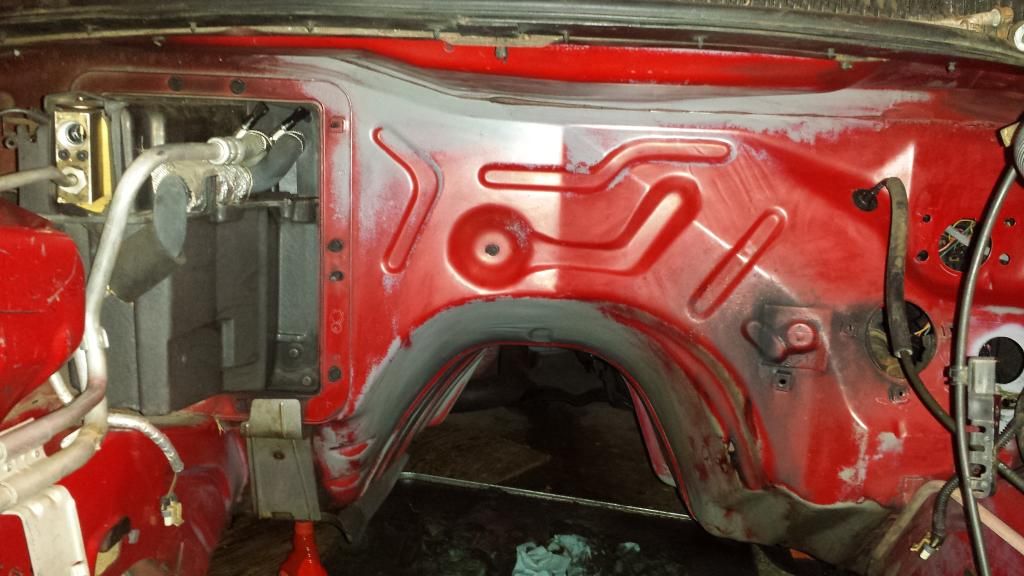
Tick master cylinder and pedals installed
Mounted pedals


Marked holes

Hole cut


Cleaned firewall

Tick master cylinder and pedals installed

Last edited by sierravmax; 11-19-2014 at 09:26 PM.
11-19-2014, 11:05 PM
#12
TECH Apprentice
Thread Starter
iTrader: (1)
Join Date: May 2014
Location: Lexington, S.C.
Posts: 351
Likes: 0
Received 0 Likes
on
0 Posts
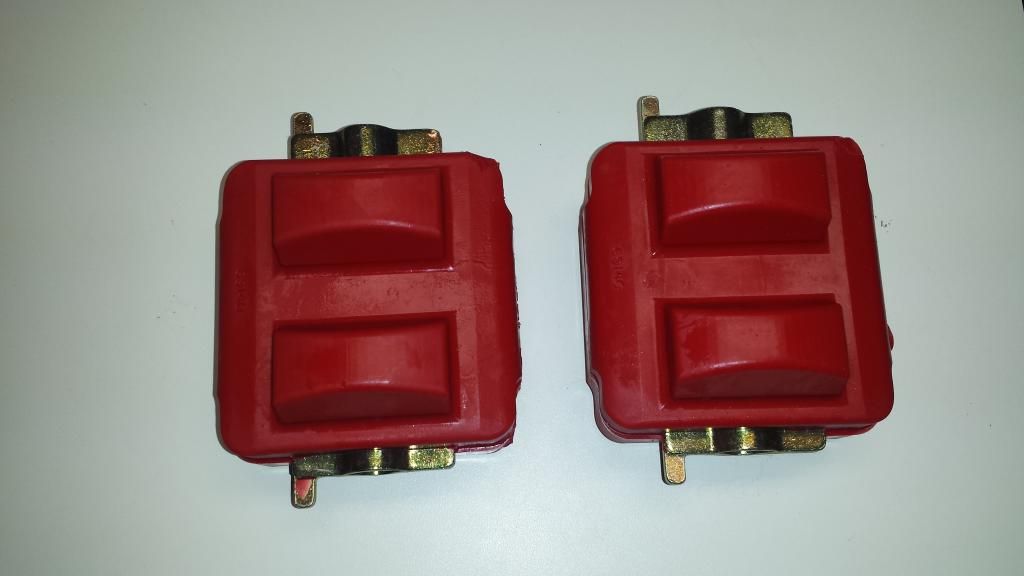
Decided to upgrade to Prothane inserts. Didn't care for how the stock ones sagged.
Drilled the rivets out and bolted back together.

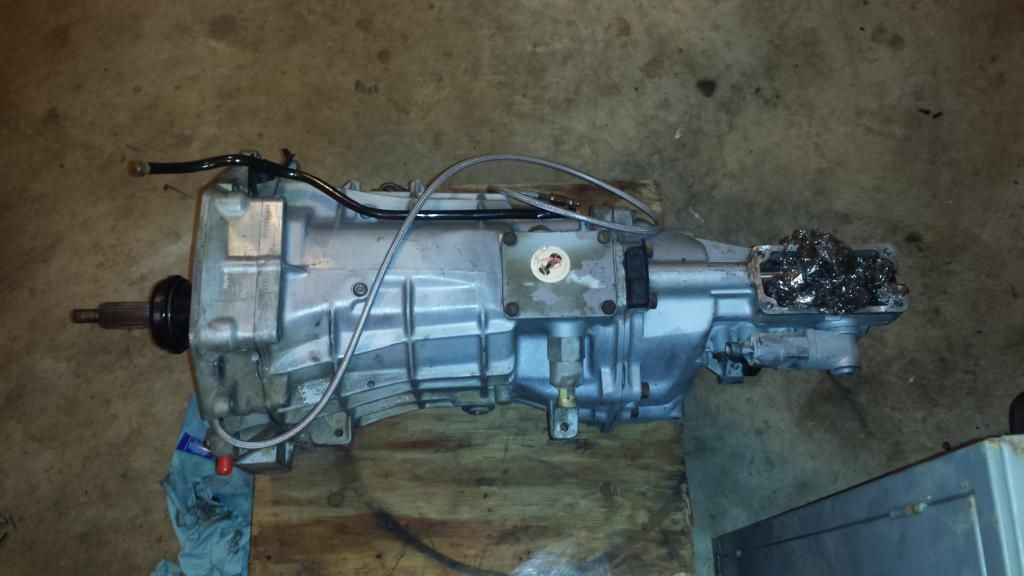
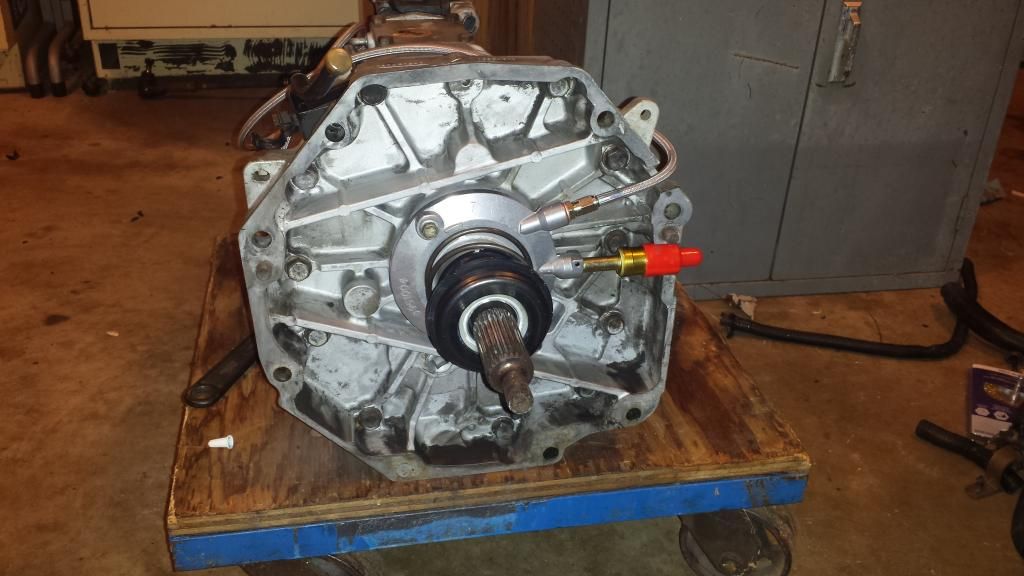
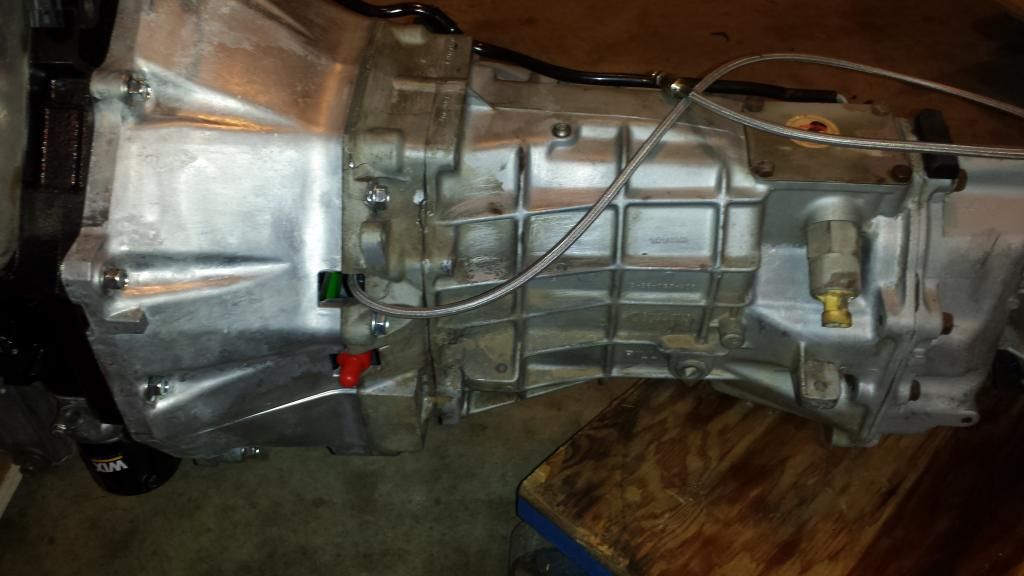
Received my T56 and installed slave cylinder and remote bleeder.
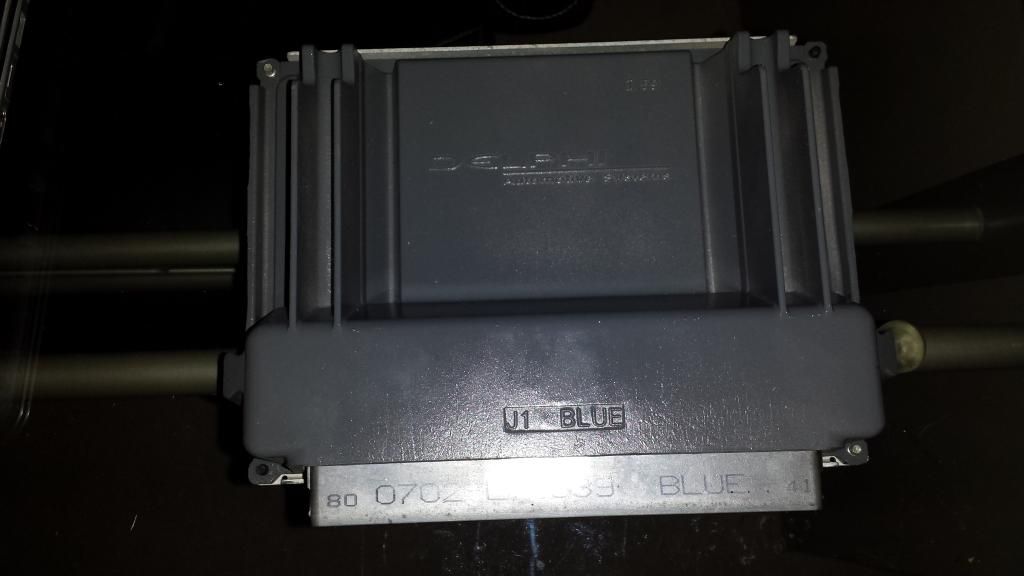
Got my computer in. It is all setup for the swap.

Drilled the rivets out and bolted back together.


Received my T56 and installed slave cylinder and remote bleeder.


Got my computer in. It is all setup for the swap.
 11-19-2014, 11:33 PM
#13
TECH Apprentice
Thread Starter
iTrader: (1)
Join Date: May 2014
Location: Lexington, S.C.
Posts: 351
Likes: 0
Received 0 Likes
on
0 Posts
Going in!

Finally in!
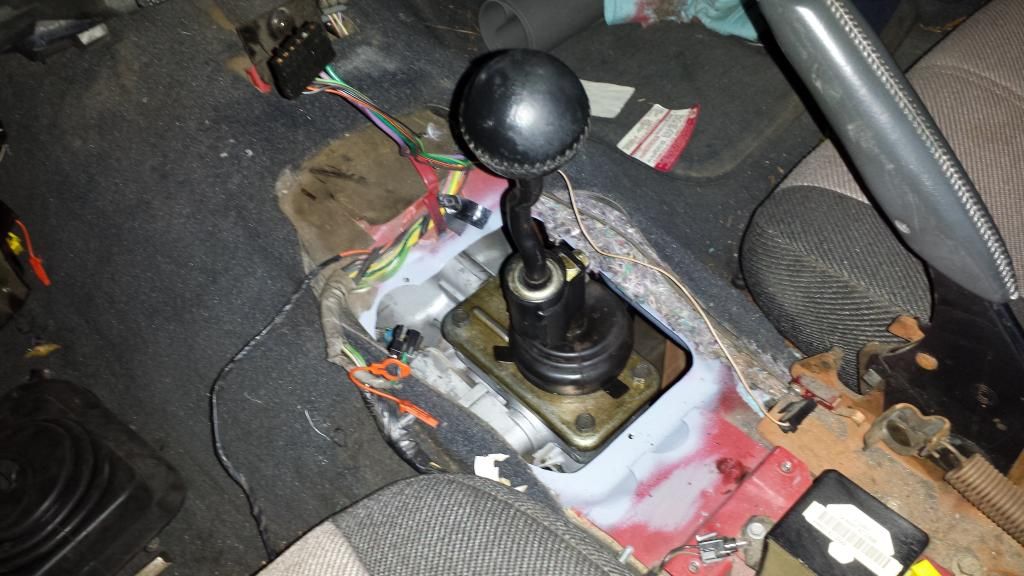
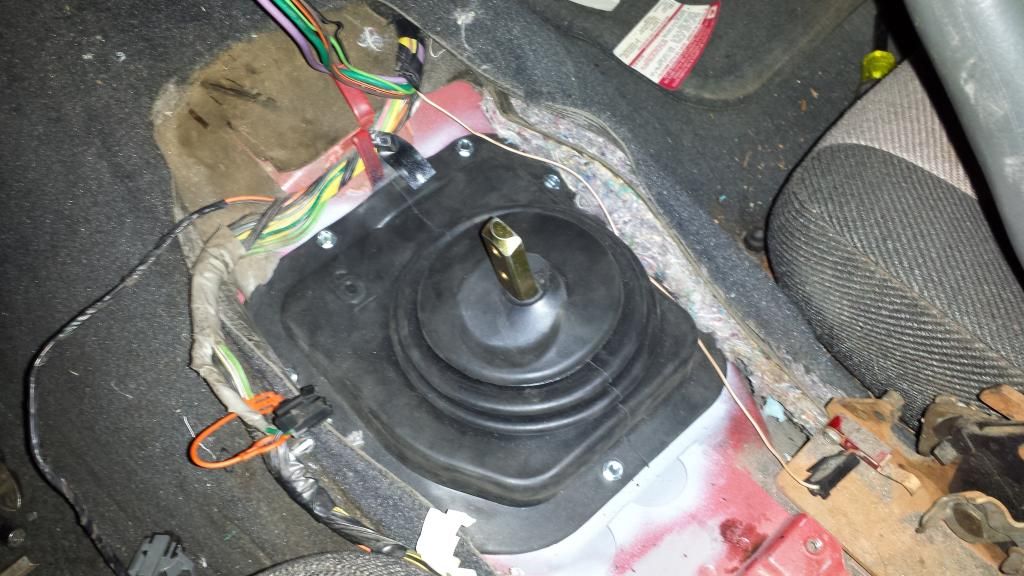
Cut hole for shifter. Made a cardboard template off bottom of shifter boot.
Test fitting boot.

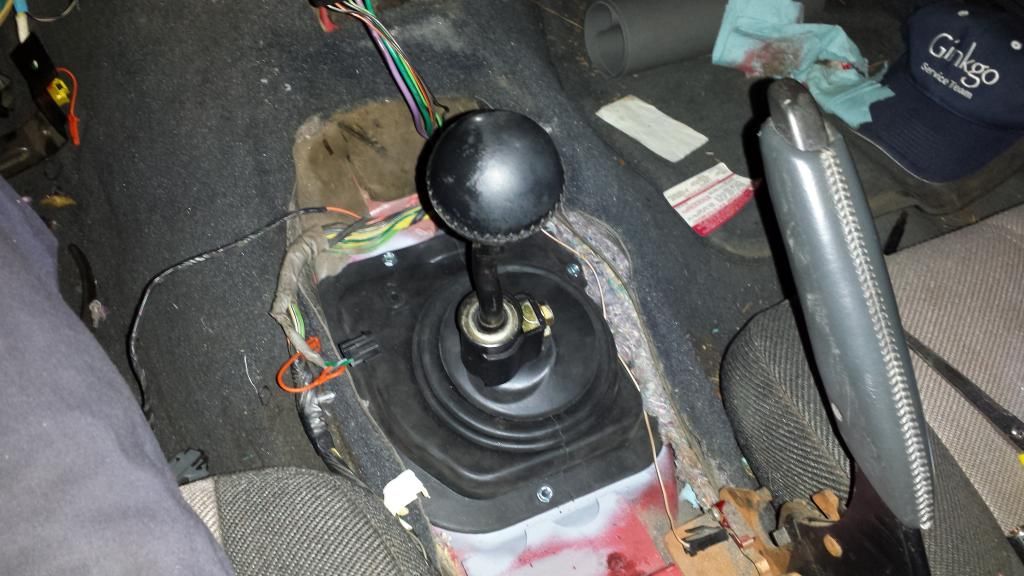
Stock shifter installed. Hope to upgrade to a MGW sometime.
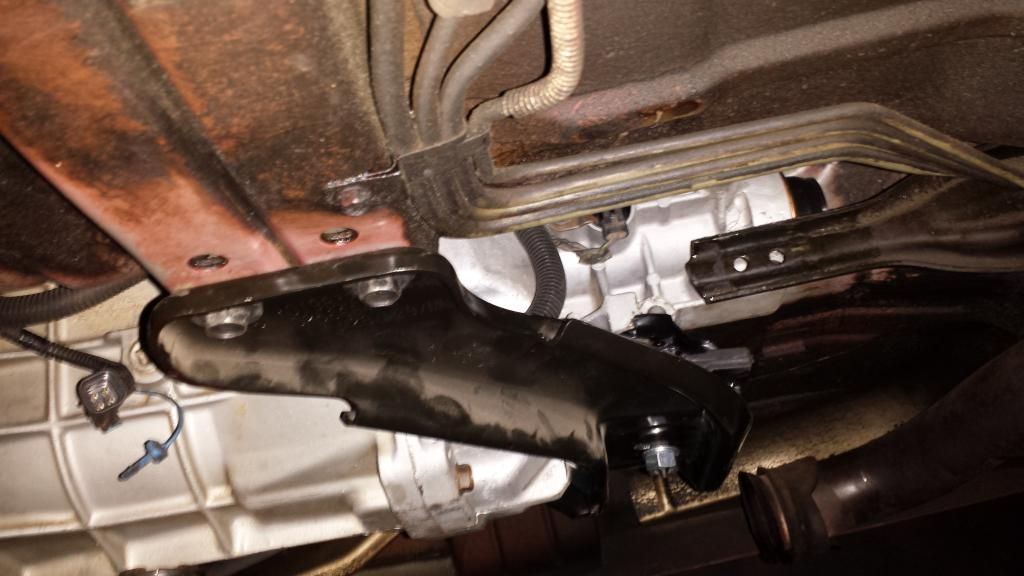
Ls1 rack installed.
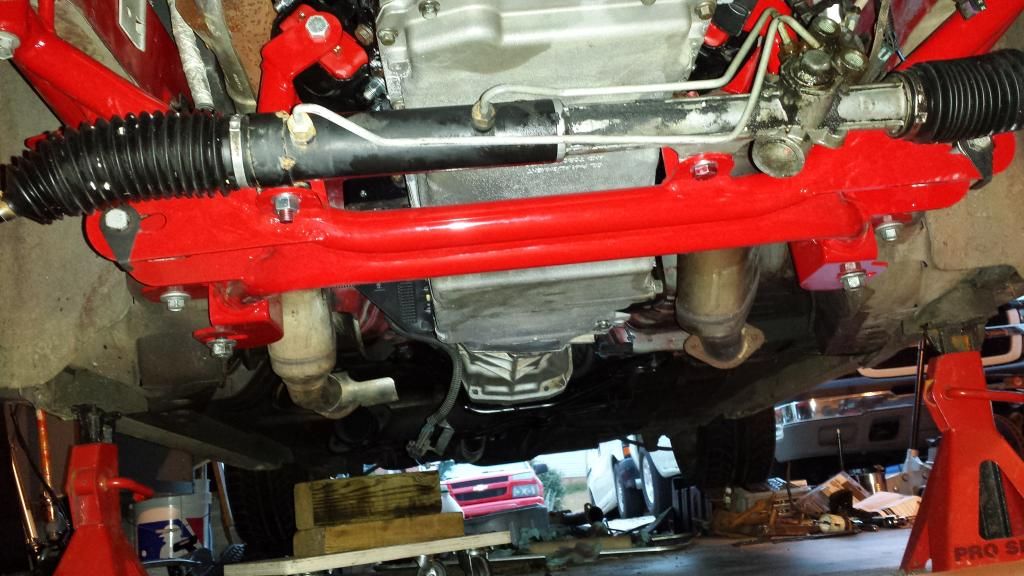
This fitting went to the Lt1 engine oil cooler. Will not be used with Ls1 so I capped it off.
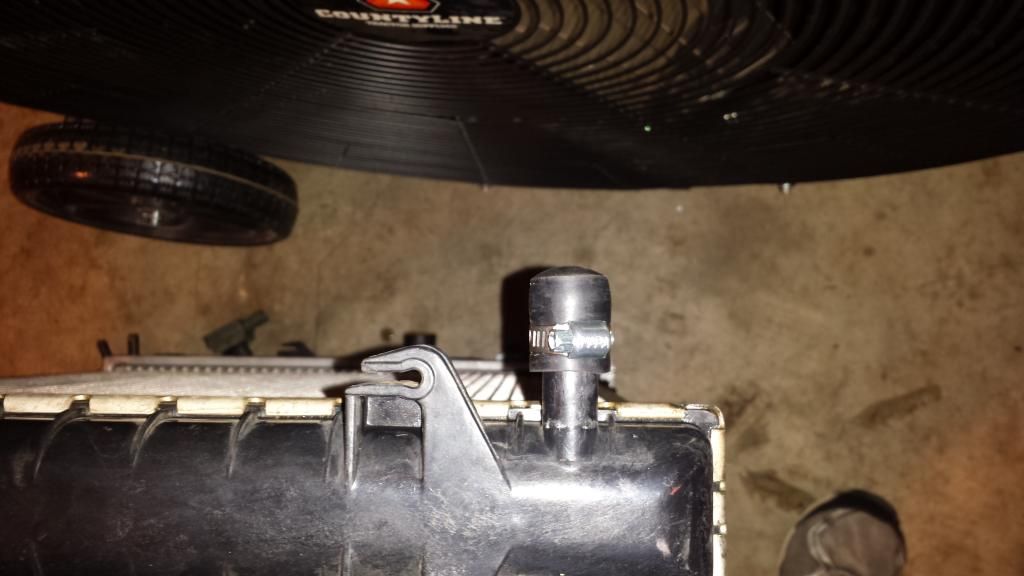
Test fitting radiator. Also can see part of my modded harness.
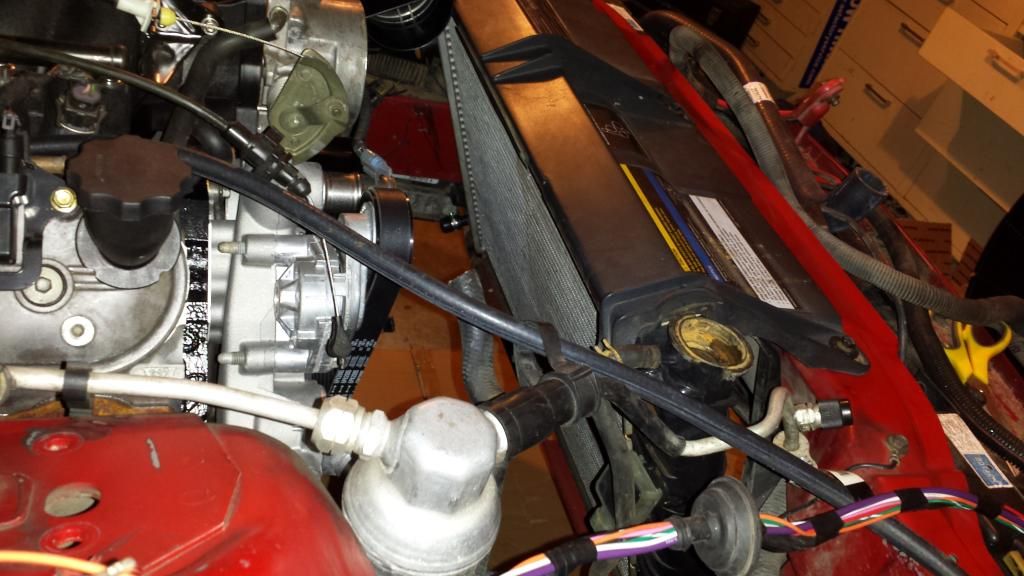
Test fitting K&N intake and figuring out which fittings I needed to adapt to make it work.

Finally in!


Cut hole for shifter. Made a cardboard template off bottom of shifter boot.

Test fitting boot.


Stock shifter installed. Hope to upgrade to a MGW sometime.


Ls1 rack installed.

This fitting went to the Lt1 engine oil cooler. Will not be used with Ls1 so I capped it off.

Test fitting radiator. Also can see part of my modded harness.

Test fitting K&N intake and figuring out which fittings I needed to adapt to make it work.

 But I suppose it's things like that that will end up slowing a build way down.
11-20-2014, 08:59 PM
But I suppose it's things like that that will end up slowing a build way down.
11-20-2014, 08:59 PM
#15
TECH Apprentice
Thread Starter
iTrader: (1)
Join Date: May 2014
Location: Lexington, S.C.
Posts: 351
Likes: 0
Received 0 Likes
on
0 Posts
Yeah I could of painted it. Maybe one day in the future. I may put a turbo on it or stroke it out to a 408 with some better heads and a cam.
