

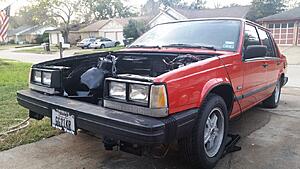
1987 Volvo 740 w/ 5.3 LM7 Turbo - Build Thread
 11-15-2014, 11:50 PM
#1
Hey Fellas.
I didn't have my first build of this car posted here, it was posted here at The Car Lounge.
If you're interested in the history of the car before now, please see the previous thread on TCL. This thread will contain the LS build, which I guess is appropriate, eh?
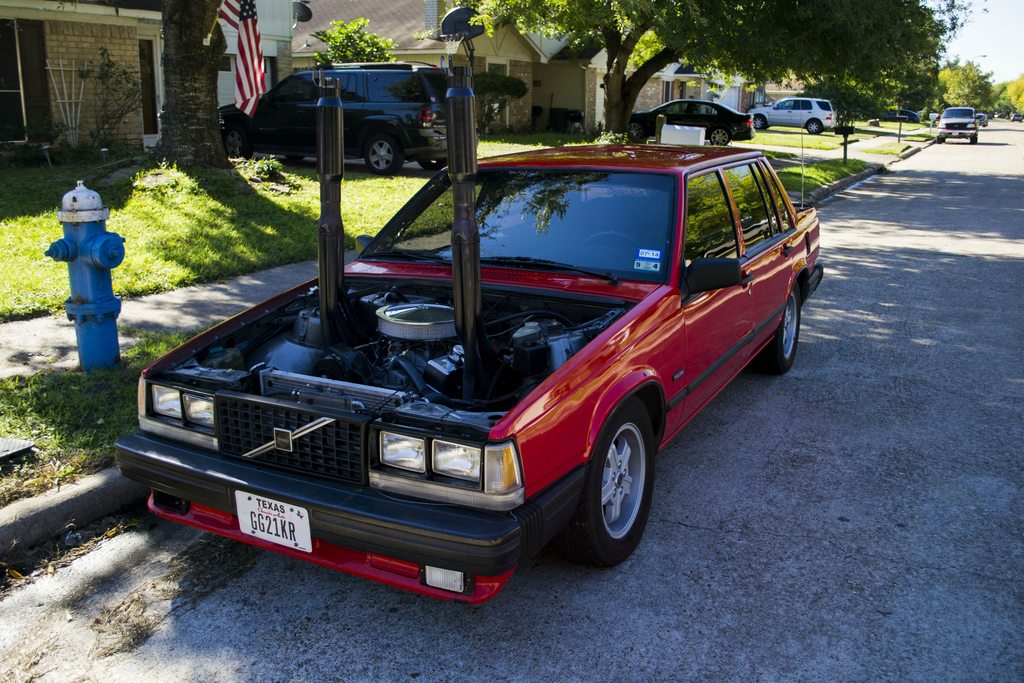
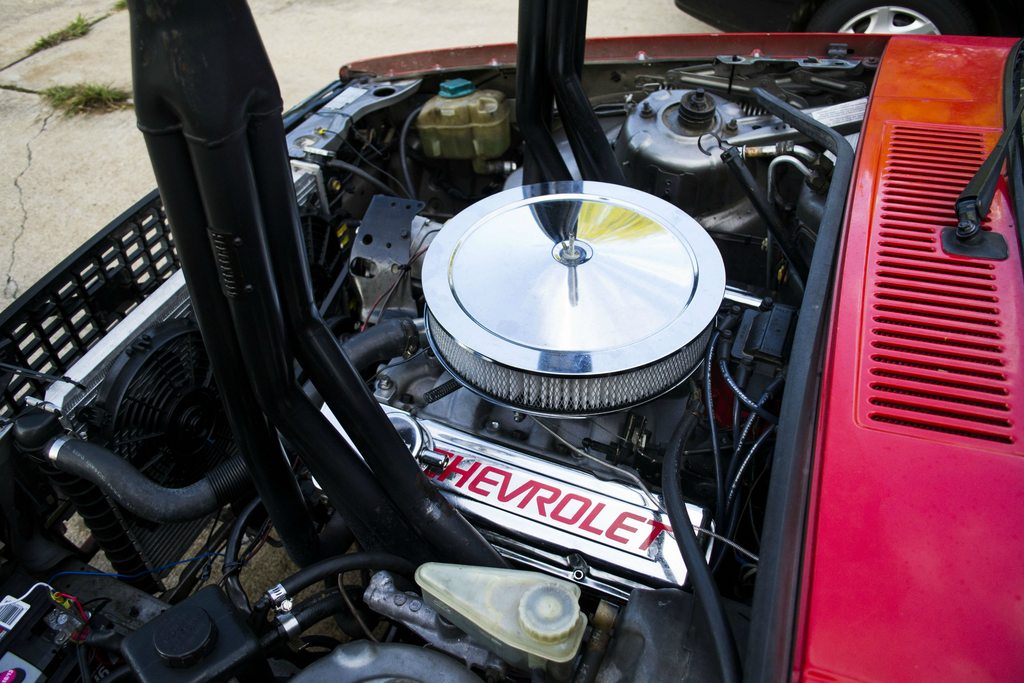
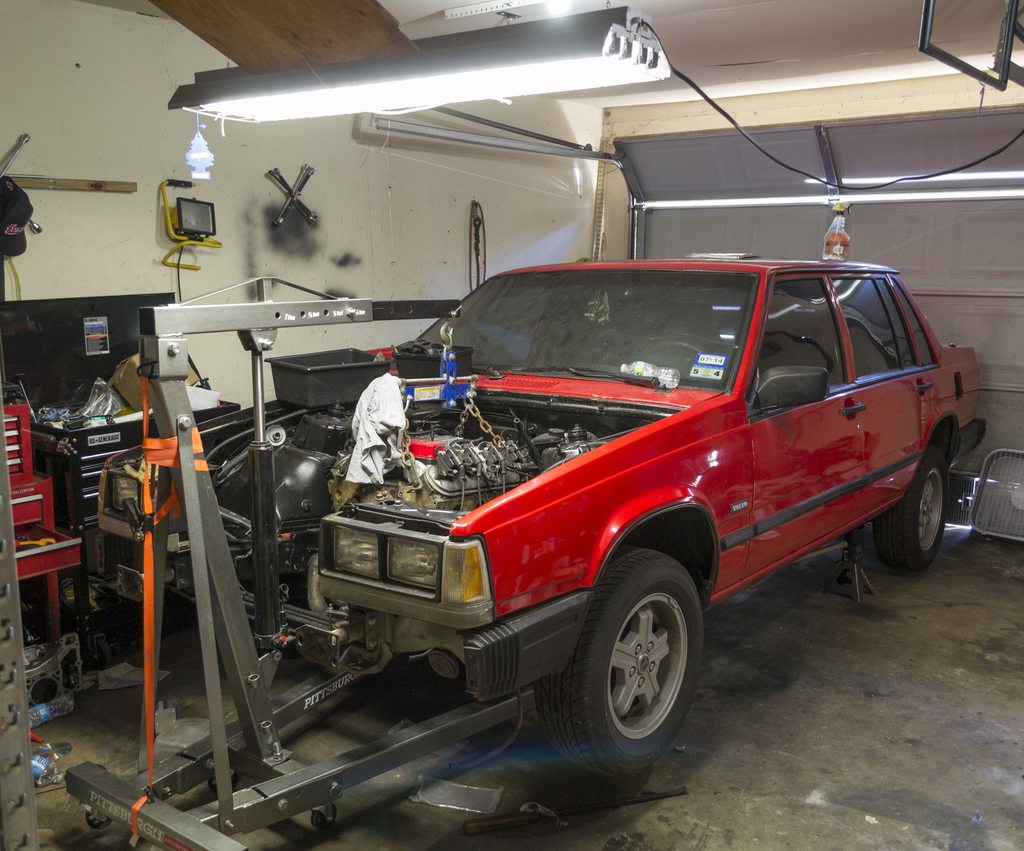
Here's some pictures of the car from the peak of the previous build:

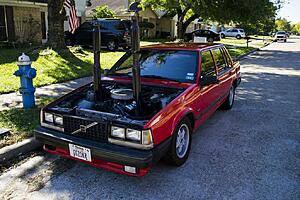

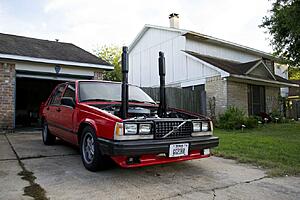

Back in May/June I was about to start a new SBC build. I decided to hold off, saved some money, sold one of my daily-able drivers and am now ready to take on the first stage of this build.
Just had a pow-wow with my partner on this build who'll be doing just as much labor as I'll be doing. He has experience with standalone ECUs, but we'll get into that later...
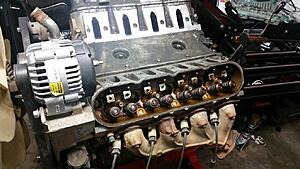
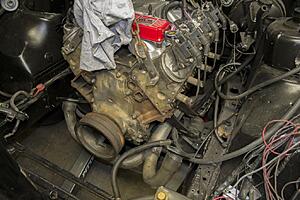
First of all, the old 350 is gone. I am trading it for labor costs to get this bad-boy running in my car: two months ago I picked up a full LM7 drop-out from a 2004 Silverado with 146k on it.
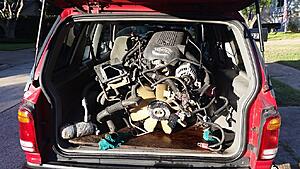
This unit came complete, minus pedal assembly (DBW throttle body). The engine will be remaining mostly stock with the exception of a valve spring upgrade. Transmission is a 4L60E.
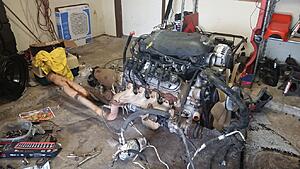
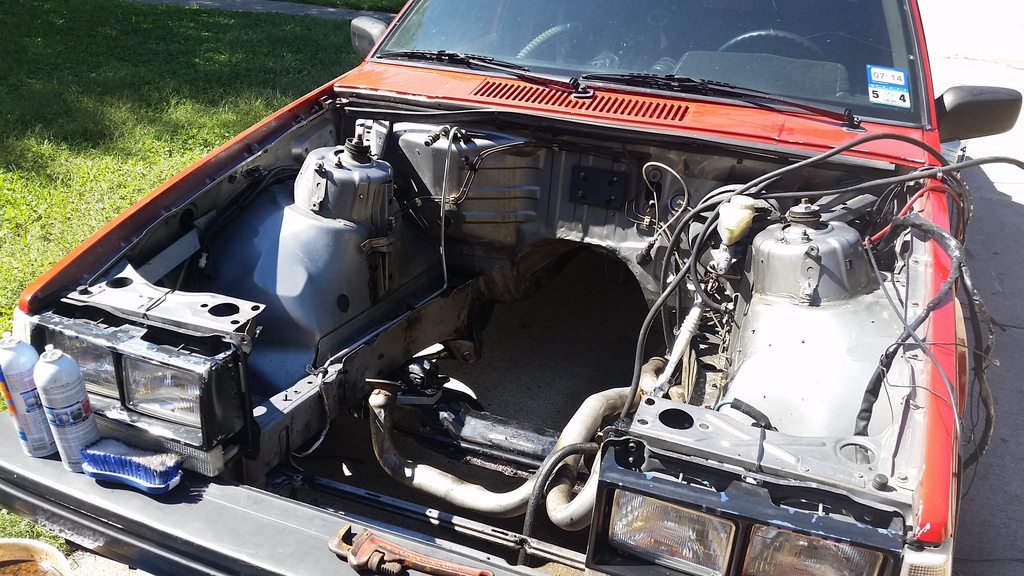
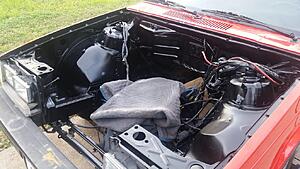
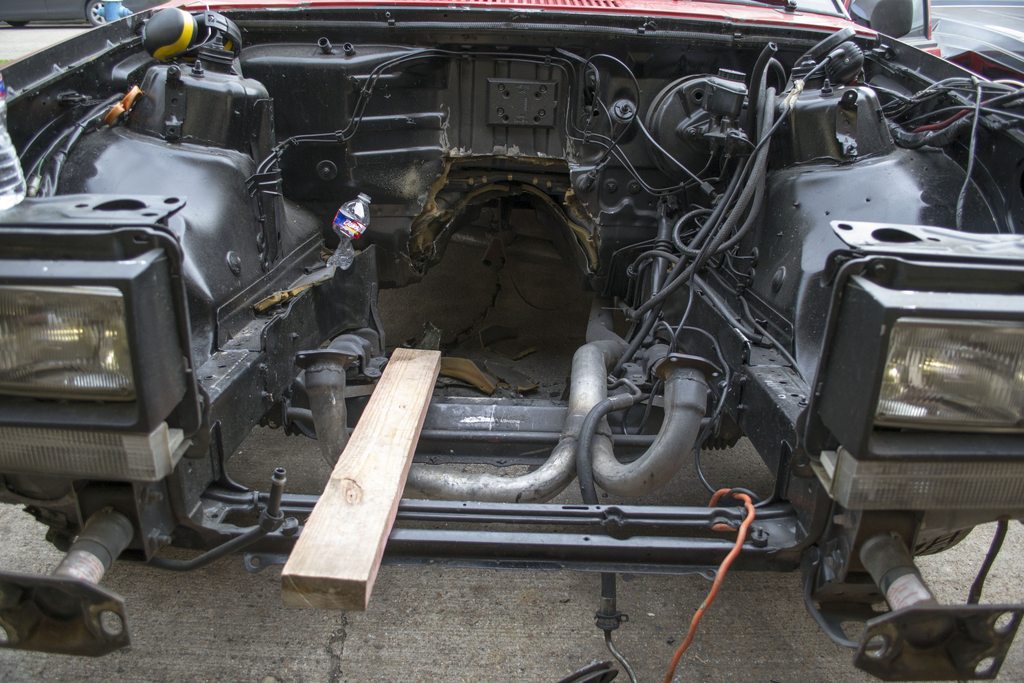
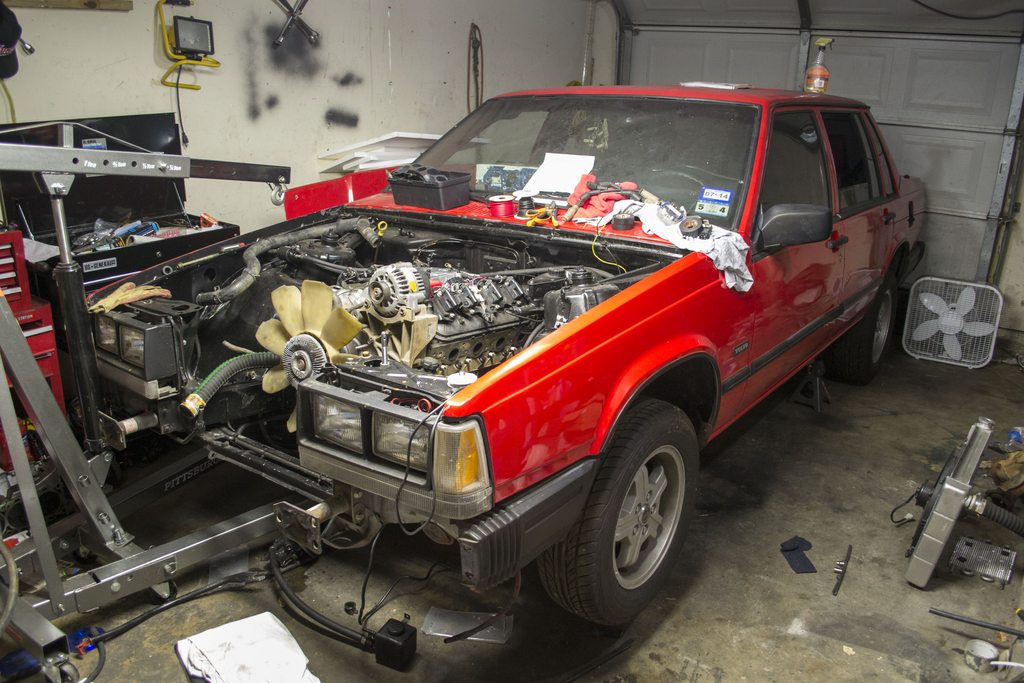
Took a day to Gunk(tm) the living hell out of the engine bay, which had promising results. A lot of bunk wiring was cut out, still have some left over but will do over-all cleanup after engine install:

We just put together our first shopping list, containing the major bulk of the hardware needed to pull this off. At the moment, we are getting the car going N/A with making all the necessary prerequisites to add a turbo in a few months after other areas of the car are addressed (brakes, suspension, interior, etc).
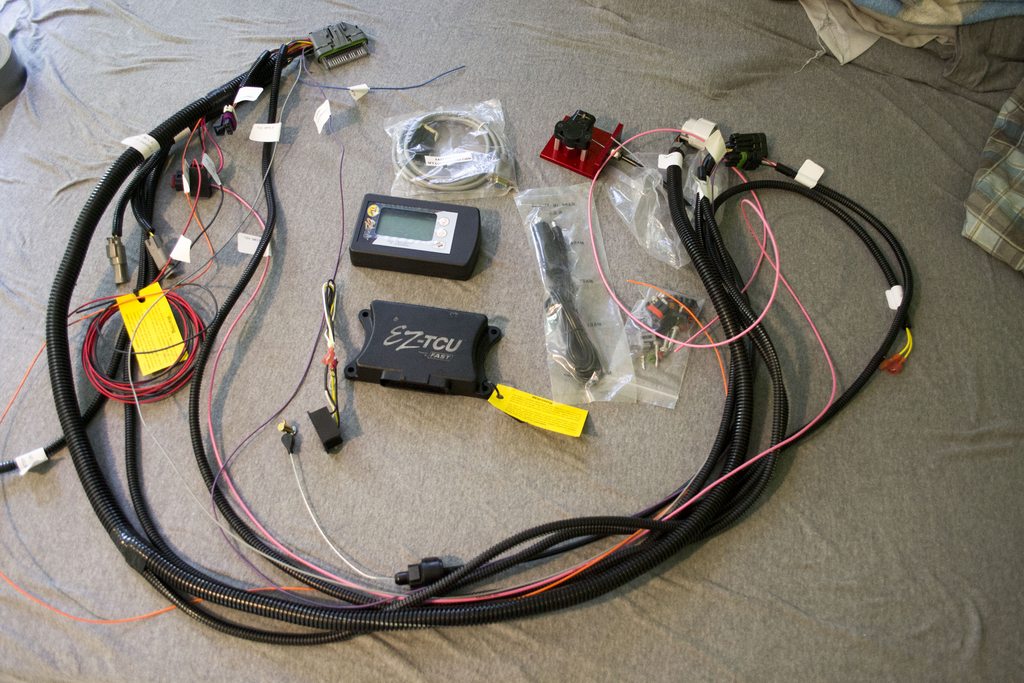
MicroSquirt v3 LSX PnP w/ harness: this is the big boy, the big-ticket item on this shopping list. We're opting to go with the MicroSquirt as they now have a package where, for $795, you get a pre-made, ready-to-run, plug-n-play harness and an ECU that's already been modified & programmed to work on an LS-based engine. The advantages this route has over using the factory ECU are overwhelming, where we can fine-tune the car and especially tackling turbo-tuning later on. BYOSensors, which thankfully I have most of already. I need to get a pair of widebands, but this thing is going to make this car really shine.
EZ-TCU: The only disadvantage for going with MicroSquirt over using the factory ECU is that it can't control the transmission as part of it's duties. Enter the EZ-TCU, where with a handheld device you can control every aspect of the transmission. Firm/soft shifts, RPM/load shift point changes, etc etc. And it's all electronic. A little pricey, but at this point it's still cost-effective compared to beefing up my 700R4 to handle my power goals.
Texas Speed Torquer V3: After days of researching 5.3 builds and LS builds in general, I've decided on this grind. Great Naturally-aspirated, and great under boost. Great idle, etc. A very good all-around cam in my opinion.
Gold Dual Valve Springs: The stock truck 5.3 springs are pretty wimpy. In order to be able to handle my selected cam I've picked out a ProMaxx Performance 8401 dual valve spring kit. Should handle my power goal (400+ without turbo, 600+ with) with a generous rev-limit.
Modified 75mm DBC throttle body: Replacing the stock DBW throttle body with a ported 75mm DBC one. I'll also need to purchase a throttle position sensor (cheap) for the ECU as well.
Motor mount adapters: Pretty self-explanatory. Adapters to drop the LS onto the already-installed SBC motor mounts.
Walbro External Fuel Pump: We'll be needing to make new runs to the fuel tank, with an in-line high-pressure fuel pump.
Siemens 60lb injectors: Should be a great upgrade. With the MicroSquirt and an ethanol sensor on the fuel rail I can easily adapt to E85 fuel and get more power.
2800-3200 stall w/ lockup: Will be a very fun streetable car with this kind of stall, and with great lockup control from the EZ-TCU it should be relatively good on gas, at least compared to the old SBC which netted around 8-10mpg on average (!!).
I'll also be replacing the intake manifold gasket, rear main, and oil pan gaskets before the engine goes in the car. Just for good measure.
I am going on vacation a week from this coming Monday; going home to NY for the holidays for two weeks. The mass-order will be placed a few days before I head back to Houston so that by the time I get back, parts will already be starting to arrive. From there, the car, engine, engine stand, and engine hoist will be loaded onto the back of a buddy's pickup and hauled over to another buddy's place where the majority of the work will be done to it.
From there, we do the engine upgrades thanks to the engine already being on a stand, throw in the new torque converter, bolt the trans back to the engine and drop her in the car. The driveshaft should bolt right up thanks to using the 700R4 previously. Motor will have a degree or two more of height because of the mount adapters but should be negligible.
Afterwards comes the wiring. Should be pretty straight forward thanks to the plug-n-play MicroSquirt combo. Interior gets ripped out, ECU gets mounted and we hook everything up. Fuel plumbing is tackled and the car should run. Cooling system should be easy enough to figure out (mechanical fan to be replaced with electric), and away we go.
December is going to be a great month :thumbup:. Hopefully by February we'll have brakes and suspension worked out and we can spend the Spring taking her to the track.
I didn't have my first build of this car posted here, it was posted here at The Car Lounge.
If you're interested in the history of the car before now, please see the previous thread on TCL. This thread will contain the LS build, which I guess is appropriate, eh?
Here's some pictures of the car from the peak of the previous build:


Back in May/June I was about to start a new SBC build. I decided to hold off, saved some money, sold one of my daily-able drivers and am now ready to take on the first stage of this build.
Just had a pow-wow with my partner on this build who'll be doing just as much labor as I'll be doing. He has experience with standalone ECUs, but we'll get into that later...
First of all, the old 350 is gone. I am trading it for labor costs to get this bad-boy running in my car: two months ago I picked up a full LM7 drop-out from a 2004 Silverado with 146k on it.

This unit came complete, minus pedal assembly (DBW throttle body). The engine will be remaining mostly stock with the exception of a valve spring upgrade. Transmission is a 4L60E.

Took a day to Gunk(tm) the living hell out of the engine bay, which had promising results. A lot of bunk wiring was cut out, still have some left over but will do over-all cleanup after engine install:
We just put together our first shopping list, containing the major bulk of the hardware needed to pull this off. At the moment, we are getting the car going N/A with making all the necessary prerequisites to add a turbo in a few months after other areas of the car are addressed (brakes, suspension, interior, etc).
MicroSquirt v3 LSX PnP w/ harness: this is the big boy, the big-ticket item on this shopping list. We're opting to go with the MicroSquirt as they now have a package where, for $795, you get a pre-made, ready-to-run, plug-n-play harness and an ECU that's already been modified & programmed to work on an LS-based engine. The advantages this route has over using the factory ECU are overwhelming, where we can fine-tune the car and especially tackling turbo-tuning later on. BYOSensors, which thankfully I have most of already. I need to get a pair of widebands, but this thing is going to make this car really shine.
EZ-TCU: The only disadvantage for going with MicroSquirt over using the factory ECU is that it can't control the transmission as part of it's duties. Enter the EZ-TCU, where with a handheld device you can control every aspect of the transmission. Firm/soft shifts, RPM/load shift point changes, etc etc. And it's all electronic. A little pricey, but at this point it's still cost-effective compared to beefing up my 700R4 to handle my power goals.
Texas Speed Torquer V3: After days of researching 5.3 builds and LS builds in general, I've decided on this grind. Great Naturally-aspirated, and great under boost. Great idle, etc. A very good all-around cam in my opinion.
Gold Dual Valve Springs: The stock truck 5.3 springs are pretty wimpy. In order to be able to handle my selected cam I've picked out a ProMaxx Performance 8401 dual valve spring kit. Should handle my power goal (400+ without turbo, 600+ with) with a generous rev-limit.
Modified 75mm DBC throttle body: Replacing the stock DBW throttle body with a ported 75mm DBC one. I'll also need to purchase a throttle position sensor (cheap) for the ECU as well.
Motor mount adapters: Pretty self-explanatory. Adapters to drop the LS onto the already-installed SBC motor mounts.
Walbro External Fuel Pump: We'll be needing to make new runs to the fuel tank, with an in-line high-pressure fuel pump.
Siemens 60lb injectors: Should be a great upgrade. With the MicroSquirt and an ethanol sensor on the fuel rail I can easily adapt to E85 fuel and get more power.
2800-3200 stall w/ lockup: Will be a very fun streetable car with this kind of stall, and with great lockup control from the EZ-TCU it should be relatively good on gas, at least compared to the old SBC which netted around 8-10mpg on average (!!).
I'll also be replacing the intake manifold gasket, rear main, and oil pan gaskets before the engine goes in the car. Just for good measure.
I am going on vacation a week from this coming Monday; going home to NY for the holidays for two weeks. The mass-order will be placed a few days before I head back to Houston so that by the time I get back, parts will already be starting to arrive. From there, the car, engine, engine stand, and engine hoist will be loaded onto the back of a buddy's pickup and hauled over to another buddy's place where the majority of the work will be done to it.
From there, we do the engine upgrades thanks to the engine already being on a stand, throw in the new torque converter, bolt the trans back to the engine and drop her in the car. The driveshaft should bolt right up thanks to using the 700R4 previously. Motor will have a degree or two more of height because of the mount adapters but should be negligible.
Afterwards comes the wiring. Should be pretty straight forward thanks to the plug-n-play MicroSquirt combo. Interior gets ripped out, ECU gets mounted and we hook everything up. Fuel plumbing is tackled and the car should run. Cooling system should be easy enough to figure out (mechanical fan to be replaced with electric), and away we go.
December is going to be a great month :thumbup:. Hopefully by February we'll have brakes and suspension worked out and we can spend the Spring taking her to the track.

The following users liked this post:
Homer_Simpson (02-24-2024)
01-24-2015, 10:52 PM
#2
Painted the engine bay.


Then I coated the headlight bezels with a fresh matte black.
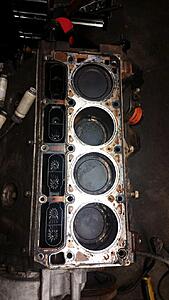
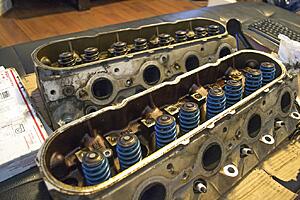
Taught a buddy how to take an engine head off.

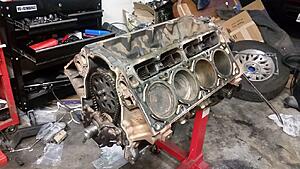
Engine looks great. Still has factory cross-hatching (not pictured).


So now I'm pumped up and ready to get this project on the road before it gets too hot. I am in the process of starting the process of (see what I did there?) moving to Southern Colorado, so before that happens this car must be 100% complete. Lots of motivation . So I placed the first-of-many mass orders to get this show on the road...
-- Fel-Pro Intake Manifold Gaskets
-- SBC --> LS Conversion Billet Motor Mounts
-- 12625003 Valve Springs
-- Fresh Grind GM LS6 Camshaft
-- NGK TR6 Spark Plugs
-- Fel-Pro Steel Core Laminate Head Gaskets, stock thickness
-- ARP Cylinder Head Bolts
I also picked up some tools as well; things that I've been wanting to add to my garage.
-- 20 gallon parts washer. This will come in handy so I can wash up the engine components and prep them for a fresh coat of paint.
-- 3-ton heavy duty floor jack
All parts are here already. This week I am going to be going through my garage and getting it all cleaned up. This way, when I get back in town (going up to visit CO next weekend), I can start re-assembly. I want to have the motor back together by Mid-February, in the car by the end of February, and running with the harness & ECU by Mid-March. By the end of April I want the car to be running to the point where I could take it out of spins every other weekend or so. I think I can pull it off if I discipline myself to working on it at least 2-3 weeknights per week and at least one weekend day. :thumbup:

Then I coated the headlight bezels with a fresh matte black.

Taught a buddy how to take an engine head off.
Engine looks great. Still has factory cross-hatching (not pictured).


So now I'm pumped up and ready to get this project on the road before it gets too hot. I am in the process of starting the process of (see what I did there?) moving to Southern Colorado, so before that happens this car must be 100% complete. Lots of motivation
. So I placed the first-of-many mass orders to get this show on the road...-- Fel-Pro Intake Manifold Gaskets
-- SBC --> LS Conversion Billet Motor Mounts
-- 12625003 Valve Springs
-- Fresh Grind GM LS6 Camshaft
-- NGK TR6 Spark Plugs
-- Fel-Pro Steel Core Laminate Head Gaskets, stock thickness
-- ARP Cylinder Head Bolts
I also picked up some tools as well; things that I've been wanting to add to my garage.
-- 20 gallon parts washer. This will come in handy so I can wash up the engine components and prep them for a fresh coat of paint.
-- 3-ton heavy duty floor jack
All parts are here already. This week I am going to be going through my garage and getting it all cleaned up. This way, when I get back in town (going up to visit CO next weekend), I can start re-assembly. I want to have the motor back together by Mid-February, in the car by the end of February, and running with the harness & ECU by Mid-March. By the end of April I want the car to be running to the point where I could take it out of spins every other weekend or so. I think I can pull it off if I discipline myself to working on it at least 2-3 weeknights per week and at least one weekend day. :thumbup:
03-07-2015, 10:49 PM
#3
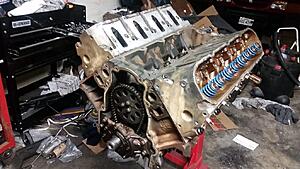
Installed the LS6 beehive valve springs tonight.
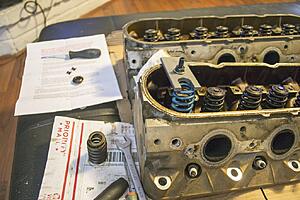
Made the last big purchase yesterday to gather the remaining parts needed to get the engine back together and in ready-to-run condition. Stay tuned, looking to have engine together and running by the end of next week.


Made the last big purchase yesterday to gather the remaining parts needed to get the engine back together and in ready-to-run condition. Stay tuned, looking to have engine together and running by the end of next week.
Last edited by metallicamaster3; 03-07-2015 at 11:11 PM.

 04-05-2015, 01:10 PM
#7
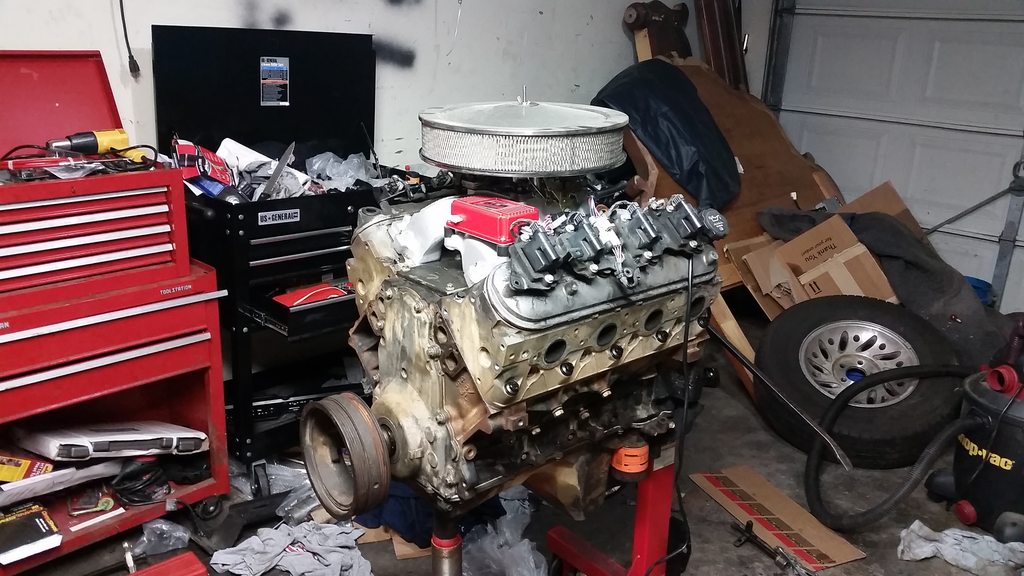
Made some progress last night.
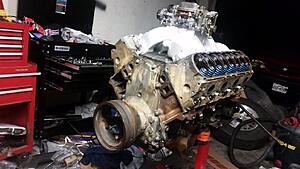
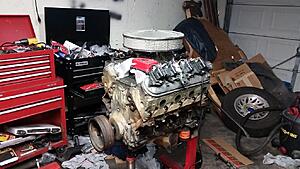
Moving the engine over to the cradle once I find a hardware store that happens to be open on Easter. Want to get a set of Grade 8 bolts to hold the engine to the cradle, y'know, to be safe and stuff.
Once the engine is on the cradle I'll need to hook up a battery (preferably with a charger), fuel pump, and she should run.
Dana 30, I believe. Similar to what you'd find in a Jeep. Car came with a 3.73 open diff. Ideally, I'd like 3.55s with a locker.
Trending Topics
04-28-2015, 11:58 PM
#8
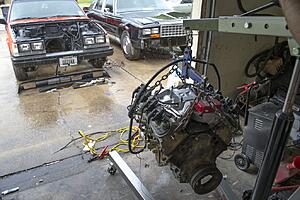
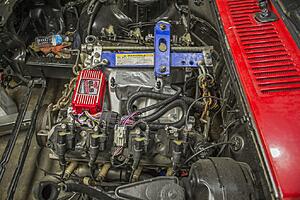
She ran today.
Massive vacuum leak meant it didn't want to idle (missing MAP sensor, big ol' hole on the intake manifold) and the base tune will definitely need adjustment -- but she ran!
Will try to get the engine in the car throughout the week, and the transmission within the next few weeks. By months end, hopefully the car will move under its own power.
...for the first time in over a year.
05-05-2015, 10:00 PM
#9
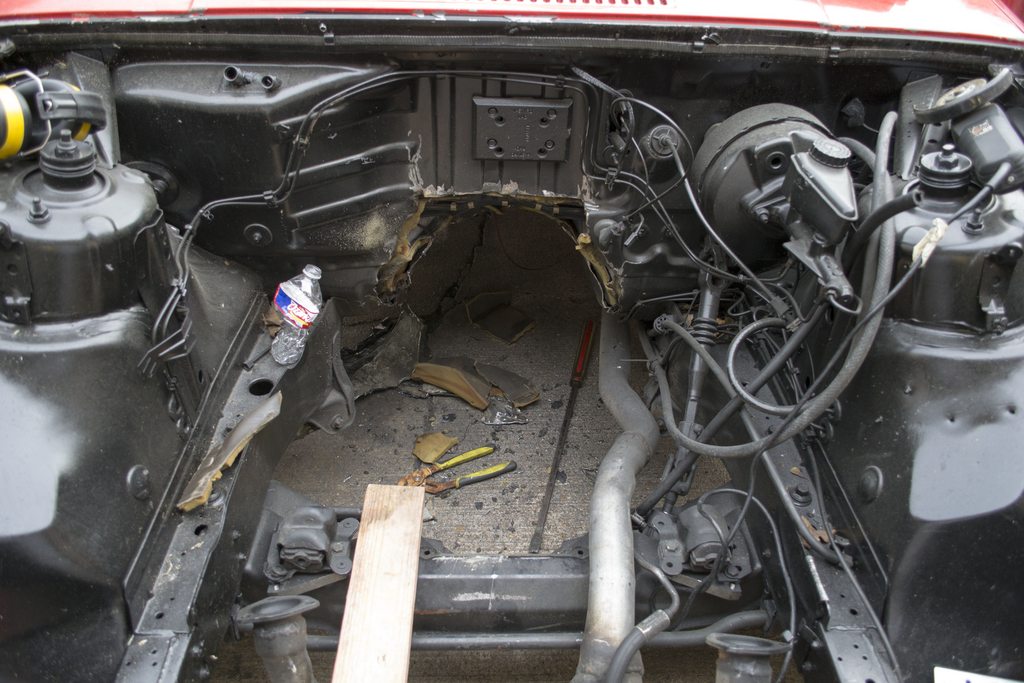
Got some headway today. The transmission tunnel was already hammered in quite a bit from fitting the 700R4 in there, and the 4L60E's bellhousing is slightly bulkier. That combined with the stock oil pan meant the transmission tunnel had to go -- something I had already planned on doing anyway, as this car will not have an interior much longer and I want a cutaway access door to the transmission so that I can remove all bellhousing bolts from the transmission while leaving the engine in the car.


 05-10-2015, 04:35 PM
#13
Cheers!
Transmission tunnel cut was successful. The remainder of it will be removed when I get the rest of the interior out. For now, the engine and trans sit very comfortably in the engine bay.

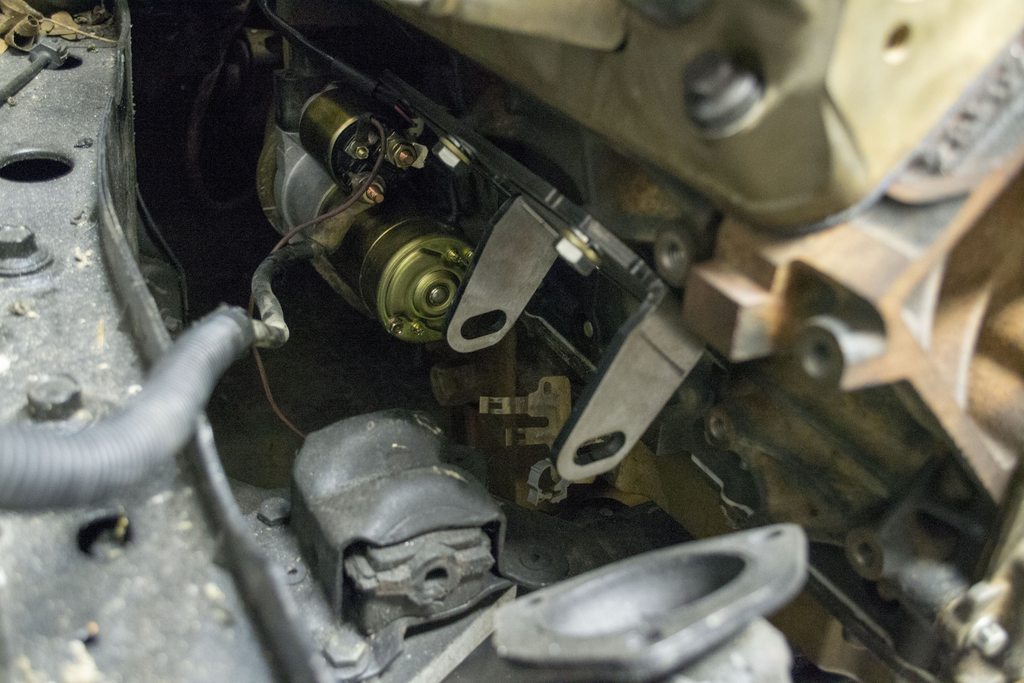
I ended up getting the wrong engine mounts, however. Buddy of mine offered to make up an adapter, so we'll see how that goes. May end up trying to get in touch with Dirty Dingo to see if I can exchange the mounts I have for the correct ones.


You can see how the old SBC-style mount has significantly longer brackets. I assume that I needed the "truck style" LS adapters, and I ordered the "car" style (F-body?)

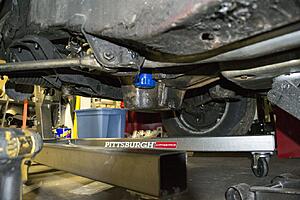
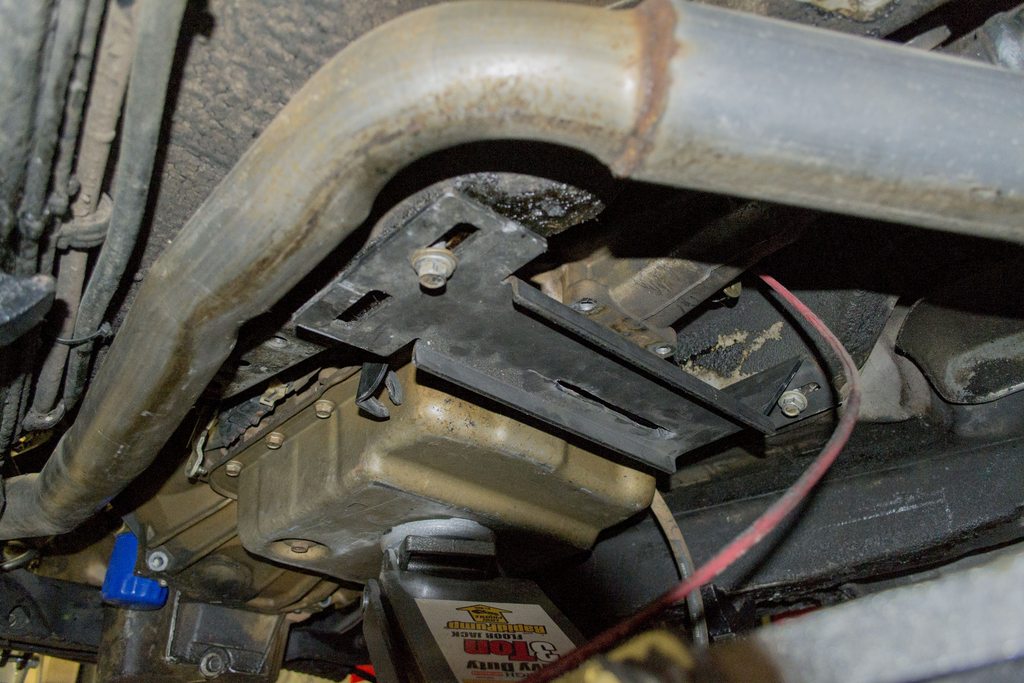
Not all that thrilled with the oil pan clearance considering the car's ride height, but the ~1/2-3/4" rise it will have from sitting on engine mounts instead of the subframe should be enough to where I'm not worried about potholes all that much. A slimmer oil pan very well may be on my "upgrade list" for the future.
Transmission tunnel cut was successful. The remainder of it will be removed when I get the rest of the interior out. For now, the engine and trans sit very comfortably in the engine bay.


I ended up getting the wrong engine mounts, however. Buddy of mine offered to make up an adapter, so we'll see how that goes. May end up trying to get in touch with Dirty Dingo to see if I can exchange the mounts I have for the correct ones.

You can see how the old SBC-style mount has significantly longer brackets. I assume that I needed the "truck style" LS adapters, and I ordered the "car" style (F-body?)

Not all that thrilled with the oil pan clearance considering the car's ride height, but the ~1/2-3/4" rise it will have from sitting on engine mounts instead of the subframe should be enough to where I'm not worried about potholes all that much. A slimmer oil pan very well may be on my "upgrade list" for the future.
 06-01-2015, 06:57 PM
#14
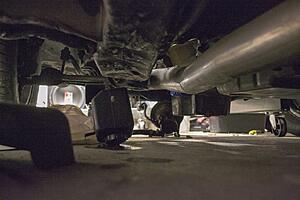
Got the car up on stands. Lots of room underneath now. Got the engine and transmission leveled, ran across another mild roadblock. Need taller body-side engine mounts and a new transmission mount (old one was trashed).
To do:
Hook up shifter cable
Wire up the odd & end electronics
Mount belt accessories & radiator
Remount carb, plug in TPS & TCU
Smokey burnouts.


To do:
Hook up shifter cable
Wire up the odd & end electronics
Mount belt accessories & radiator
Remount carb, plug in TPS & TCU
Smokey burnouts.


 06-09-2015, 04:10 AM
#15
Made some more progress. Got all the essential electronics wired up, and the car cranks. My 3/8" engine risers should arrive later today (6/9/15) which will allow me to finally anchor the engine & trans to the car (it's currently resting on a jack & subframe).
I need to source a shorter serpentine belt to accommodate for the lack of an A/C compressor. The power steering lines bolted right up to the new pump, which is pretty awesome. Clearly, however, without relocation brackets, front-facing headers are out of the question as well as a hood due to the location of the power steering pump and alternator. I also need to convert the current 2-wire alternator setup over to the newer 4-wire. Hopefully will tackle radiator and hoses tomorrow. And finally, need to look into a makeshift PCV system.


If this wasn't Roadkill enough for you, I'm hoping to have the car roadworthy by next Wednesday, so I can drive it 1700 miles from Houston TX to New York, NY. Wish me luck.
 06-11-2015, 03:21 PM
#17

Mechanical fan is staying for the time being.
Doing the 4L60E wiring tonight.
 06-12-2015, 09:05 PM
#19
It's an optional part included in the JagsThatRun SBC kits, and since I'm using a SBC --> LS adapter plate system, I need that optional spacer to raise the engine high enough to clear the crossmember.
07-06-2015, 08:03 PM
#20
Well, clearly that pipedream of taking this thing cross-country never happened, lol.
I've been away for the last two and a half weeks, so obviously nothing was done to the car in my absence. Today was the first day I've gotten the chance to do anything and I didn't get very far.
Over the course of the next 2-3 weeks I'm hoping to have the following accomplished:
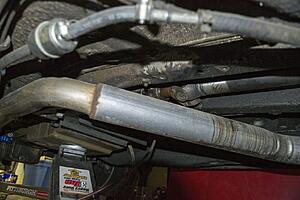
- Grind ear/lip from subframe to clear oil pan: Since I'm currently stuck using the stock 5.3 truck oil pan, the incline towards the bottom of the pan/sump is interfering with the crossmember/subframe. I can gain approximately 3/4 of an inch by grinding off the unnecessary lip. This will allow me to move the engine forward that amount in order to assist the slip yoke's available distance of travel, as well as exhaust clearances.
- Install second layer of engine mount spacers: Apparently the car already had a set of engine mount spacers installed, whereas I had originally suspected that they were not due to the fact that the engine would not clear the crossmember, even at the lowest parts of the oil pan. So, now the car will have two sets of spacers installed, and thus require a specifically-longer set of bolts as well. Once installed, however, the additional 3/8" of engine clearance helps driveshaft angle, exhaust clearance, and engine mount clearance. The engine will no longer ever fit under a stock hood; especially with the stock truck accessory drive. A slick cowled hood is in future plans.
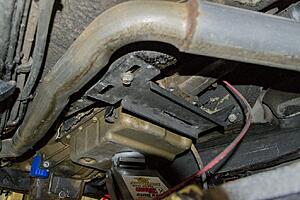
- Install transmission mount & crossmember: Missing two out of four bolts to mount the crossmember to the body, so will need to get that straightened out first. The crossmember is slotted and allows for about 2.5" of adjustment, so assuming that gives me 1.25" of additional clearance for the transmission mount to to be able to line up, since the engine/trans assembly as a whole will all be moving forward.
Finally, with the engine and transmission bolted into the chassis once and for all, the rest will fall into place.
WP gaskets, idler pulley and serp belt, shifter cable, reinstall carb, wire efan, mount radiator, trans cooler.
May take a trip this week over to the local LKQ(s) to get some OEM nuts/bolts as well.
So stay tuned, I suppose.
I've been away for the last two and a half weeks, so obviously nothing was done to the car in my absence. Today was the first day I've gotten the chance to do anything and I didn't get very far.
Over the course of the next 2-3 weeks I'm hoping to have the following accomplished:
- Grind ear/lip from subframe to clear oil pan: Since I'm currently stuck using the stock 5.3 truck oil pan, the incline towards the bottom of the pan/sump is interfering with the crossmember/subframe. I can gain approximately 3/4 of an inch by grinding off the unnecessary lip. This will allow me to move the engine forward that amount in order to assist the slip yoke's available distance of travel, as well as exhaust clearances.
- Install second layer of engine mount spacers: Apparently the car already had a set of engine mount spacers installed, whereas I had originally suspected that they were not due to the fact that the engine would not clear the crossmember, even at the lowest parts of the oil pan. So, now the car will have two sets of spacers installed, and thus require a specifically-longer set of bolts as well. Once installed, however, the additional 3/8" of engine clearance helps driveshaft angle, exhaust clearance, and engine mount clearance. The engine will no longer ever fit under a stock hood; especially with the stock truck accessory drive. A slick cowled hood is in future plans.
- Install transmission mount & crossmember: Missing two out of four bolts to mount the crossmember to the body, so will need to get that straightened out first. The crossmember is slotted and allows for about 2.5" of adjustment, so assuming that gives me 1.25" of additional clearance for the transmission mount to to be able to line up, since the engine/trans assembly as a whole will all be moving forward.
Finally, with the engine and transmission bolted into the chassis once and for all, the rest will fall into place.
WP gaskets, idler pulley and serp belt, shifter cable, reinstall carb, wire efan, mount radiator, trans cooler.
May take a trip this week over to the local LKQ(s) to get some OEM nuts/bolts as well.
So stay tuned, I suppose.