
1937 Ford Sedan


 11-20-2015, 09:59 PM
#222
TECH Regular
Thread Starter

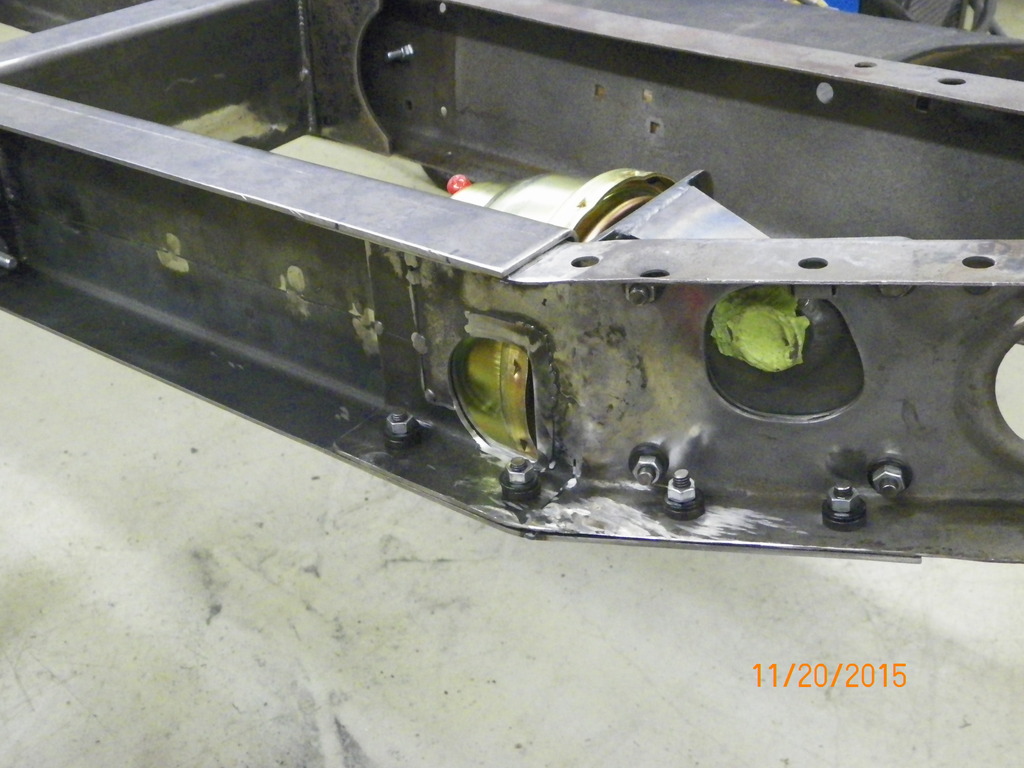
Moved the driver side brace as far outboard as possible to allow transmission clearance knowing it would get into the brake booster a little bit. Cut a "D" shaped clearance hole so the booster can be changed easily if ever needed. The brace runs all the way behind the booster mounting bracket and also has a piece underneath the existing frame to give it more strength.

Last edited by Kharp; 11-20-2015 at 10:20 PM.
11-20-2015, 10:19 PM
#223
TECH Regular
Thread Starter
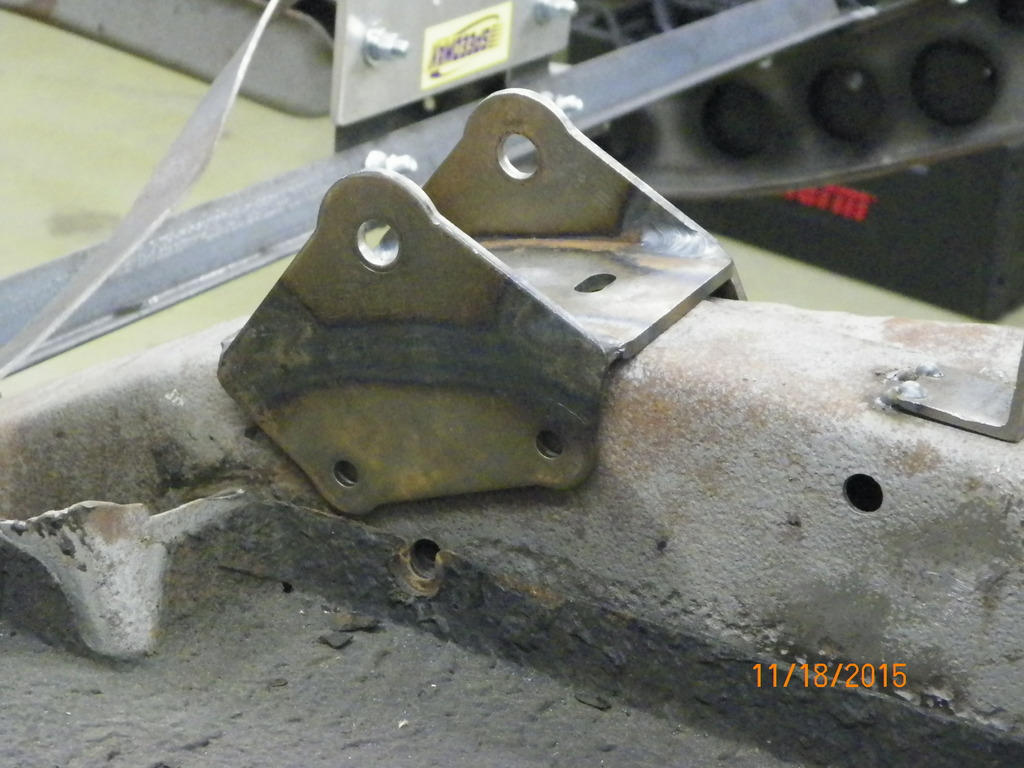
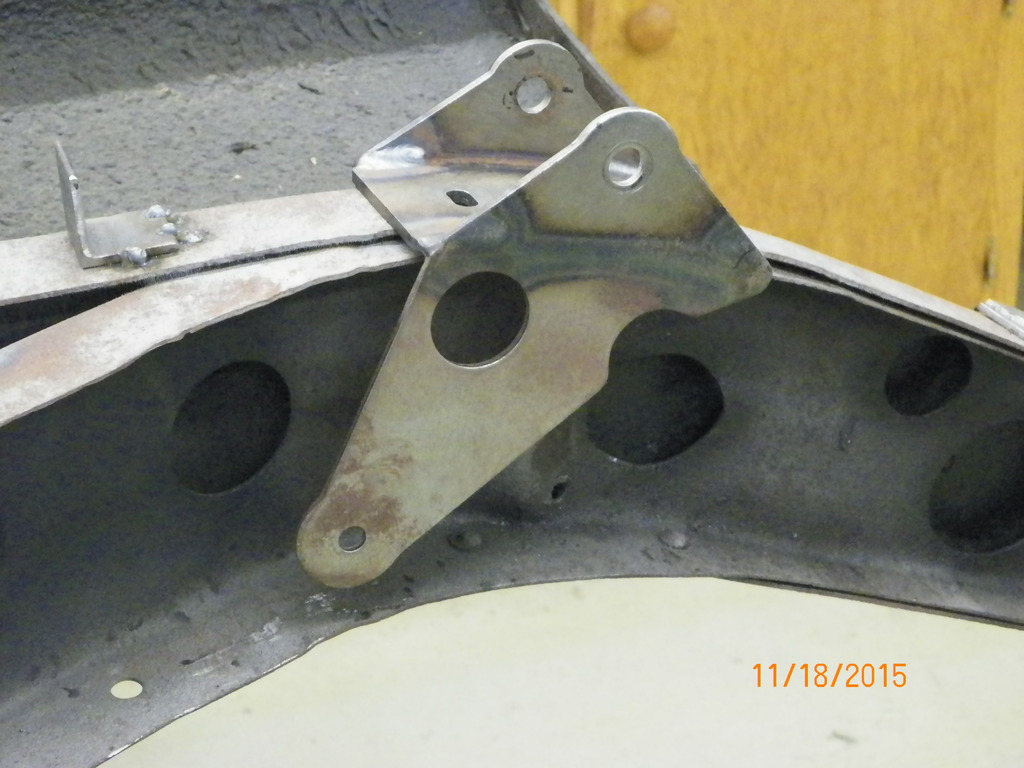
In process

Still needs holes added for exhaust and a center piece that ties it together, but its getting there.


Still needs holes added for exhaust and a center piece that ties it together, but its getting there.

Last edited by Kharp; 11-24-2015 at 02:42 PM.
11-27-2015, 01:29 PM
#224
TECH Resident
Is that a 7" booster?...looks like it.
I had to eventually switch to an 8" dual diaphragm booster on my '35 sedan. The 7" unit I originally built the car with just wouldn't stop the car with the four wheel disc setup.
I had to eventually switch to an 8" dual diaphragm booster on my '35 sedan. The 7" unit I originally built the car with just wouldn't stop the car with the four wheel disc setup.
11-27-2015, 03:11 PM
#225

Don't do what I did. While building my frame I used a friend's booster/Master cylinder to mock up the position and "K" member. When it came time to transfer mine from the old frame to the new it would not fit because mine is duel diaphragm and his was a single. Nothing that a Sawzall can't fix!
11-27-2015, 08:02 PM
#226
I put a 7" dual diaphragm booster on my '33 when I built it, and it just plain sucked! I got used to it for a while, but one day got in a panic stop situation and didn't think I was going to get her hauled down in time, actually didn't, I swerved at the last second. About pulled the steering wheel off that day trying to stop! After that I switched out the booster to a hydroboost, night and day difference! Also had a buddy who had the same booster and his didn't work too well either. Not sure what it is about those things, but I suspect they just aren't big enough to supply the required amount of assist.
11-28-2015, 12:44 AM
#227
TECH Resident
With an 8" booster I was surprised how it made a day & night difference in assist. I drove the car 20,000 miles before I actually fixed the brakes with that 8 incher.
11-30-2015, 12:28 PM
#228
TECH Regular
Thread Starter
Thanks for your comments on the brake system. It is indeed a 7" dual diaphragm. You have already been there so help me decide which way to go here. What sort of issues would I run into by installing an 8" booster? Does it run up into the floorboard or hang down too far? I have enough room for more length toward the rear of the car, but I would have to enlarge my clearance "D" shaped hole shown in a previous post which may require some more stiffening since I will get down past the radius of that channel. Also it would make my exhaust a little closer to the booster than it already is, but I was planning on making a heat shield for that anyway. While I would like to have 4 wheel disc brakes I'm not locked into that. I know someone with a street rod that has a 7" dual booster with disc/drum setup and his will lock the brakes up. On the other hand, I've talked to a few people and got really mixed reviews on the 7" booster so I'm glad to hear the questions and comments NOW instead of later. I would rather not go to a hydro boost system at this point for various reasons. Really appreciate your insights...... Where to go from here????
Last edited by Kharp; 11-30-2015 at 03:42 PM.
11-30-2015, 06:04 PM
#229
An 8" booster will only be 1/2" higher, lower and side to side, so it looks like you have plenty of room for that. I would try and fit the biggest booster you can fit in there, definitely wont hurt to have more assist. When I swapped mine, the hydroboost was the only thing I could get to fit, I made all the brackets fit tight against the 7" booster with just enough room to remove it if ever necessary. Live and learn I guess!
11-30-2015, 06:35 PM
#230
TECH Resident

+1 on the Hydroboost suggestion.
I LOVE the hydroboost unit I installed in my pickup. It provides much more boost than previous vacuum - based systems in a clean, compact package.
Having an under-cab mounted master cylinder gave me an opportunity to experiment with boosters, master cylinders, etc, but with space constraints. Given the master cylinder hangs from the frame rail, I only had limited room (in terms of diameter). Initially, I couldn't even lock up my brakes with a long-travel master and a 7" booster.
I now run an oversized master cylinder (1 1/4" bore, which gives avery short throw on the brake pedal) and with plenty of boost to lock up the brakes, but also a nice firm pedal for good modulation.
I assembled the boost setup for about $350 ($150 was high pressure, assemble-it-yourself Eaton hoses) and including a new AC Delco booster bought from Amazon and a new master cylinder.
You can also do, as you know, sequential vacuum boosters with multiple diaphragms for more boost / assist. Only issue with those is they are expensive. It is that reason that I chose to go with a HB unit.
With your fabrication skills you could easily do same. The unit mounting plate and input pushrod required fabrication in my case.
11-30-2015, 06:37 PM
#231
TECH Resident
BTW - I know you'll end up with a great solution. It is clear you'll end up with a killer finished product.
I look forward to the ongoing updates.
If you were down the street, I'd have you drive my truck to see the braking feel for yourself.
Doug
I look forward to the ongoing updates.
If you were down the street, I'd have you drive my truck to see the braking feel for yourself.
Doug
11-30-2015, 07:31 PM
#232
TECH Resident
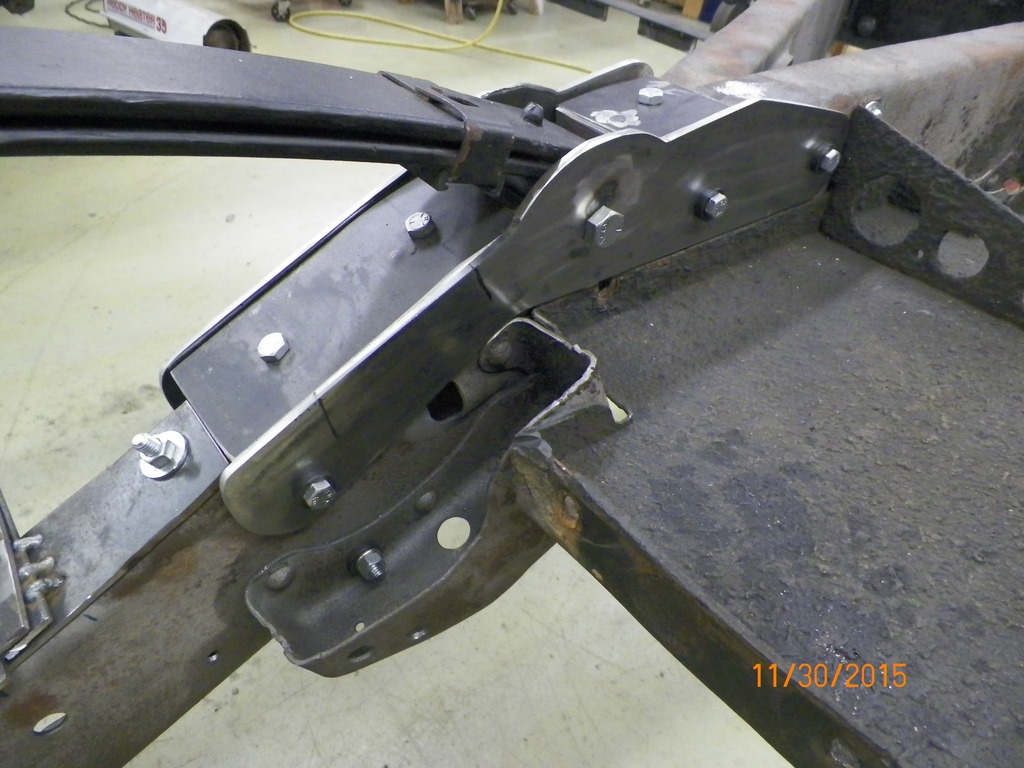
I had to modify the bracket assembly a bit to provide the additional clearance for the 8 inch booster, a little harder to do with the car assembled but you shouldn't have a problem. I wish I had done it in 2003 when I was doing the bare chassis but I listened to the wrong people when I bought that 7 inch booster..."oh sure it'll be ok, your car isn't very heavy". Famous last words.
The car really stops nice now.
The car really stops nice now.
12-01-2015, 08:07 AM
#234
TECH Regular
Thread Starter
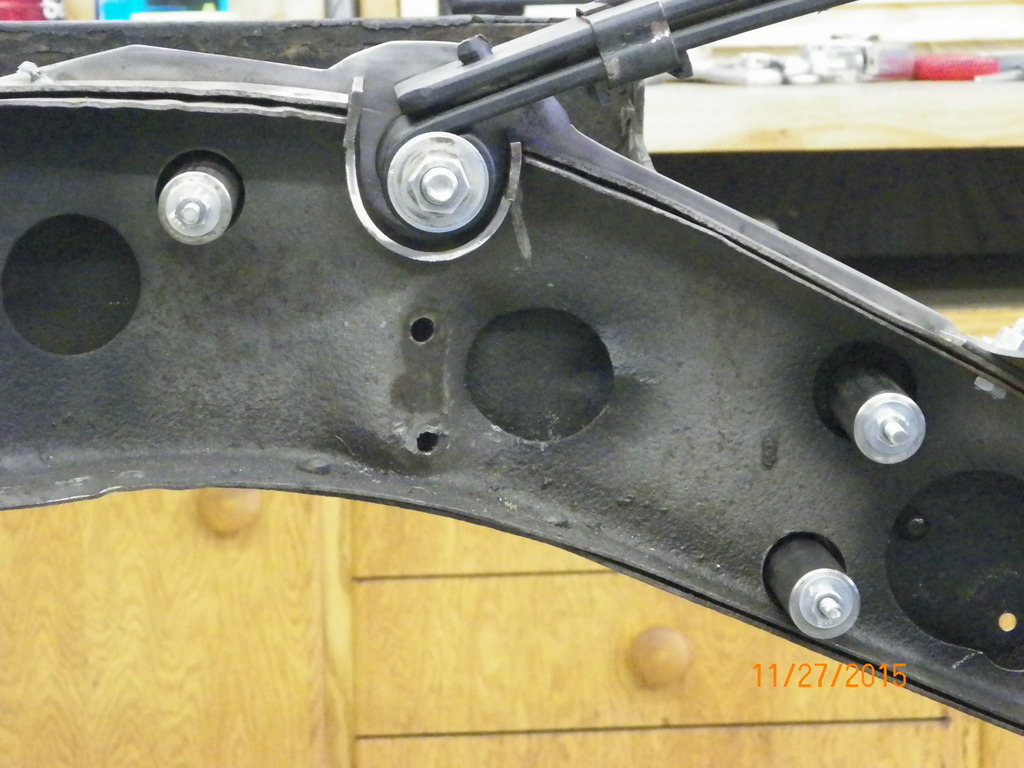
I started another fab project last weekend. I'm notching the frame for the rear end brackets on the front of the leaf spring. How the front comes out will determine if I do anything with the rear. Here is the baseline. Note all pictures will be upside down like this view...


Last edited by Kharp; 12-01-2015 at 09:19 AM.
12-01-2015, 08:10 AM
#235
TECH Regular
Thread Starter
Here is the original mount. Seemed a little flimsy so we set out to make some stronger ones. Will also raise the rear end in the car while we're at it by notching the frame.


Last edited by Kharp; 12-01-2015 at 08:01 PM.
 12-01-2015, 08:22 AM
#237
TECH Regular
Thread Starter
Made a gauge to attach to the rear and swing by the front spring eye hole to make a large radius to mark the cut and "sink" the spring in the frame. Dropped it 2 1/4" in the front and that translated to a 1" gain in the middle where the spring pad will be.
Ken my lowering blocks are getting shorter

Ken my lowering blocks are getting shorter

Last edited by Kharp; 12-01-2015 at 08:44 AM.
12-01-2015, 08:32 AM
#238
TECH Regular
Thread Starter
So here it is roughed out. I have to do some more measuring before the bracket is welded together, but this is a general idea of how it will be put together. The top profile of the brackets are not to final shape just yet.

Last edited by Kharp; 12-01-2015 at 09:48 AM.
12-01-2015, 08:39 AM
#239
TECH Regular
Thread Starter
Here is a cross section showing the spacers and the pipe in the frame notch. The pipe is not to final fit yet.
The fab director thinks the bracket below looks like the shape of a dog so I'm sure the bracket will get some attention before I weld on it ! More soon.......


The fab director thinks the bracket below looks like the shape of a dog so I'm sure the bracket will get some attention before I weld on it !
More soon.......
Last edited by Kharp; 12-01-2015 at 09:26 AM.
