
1993 Mustang Coupe LS1 Tremec 3550
 06-02-2017, 03:41 PM
#121
Got some more work done on the AC.
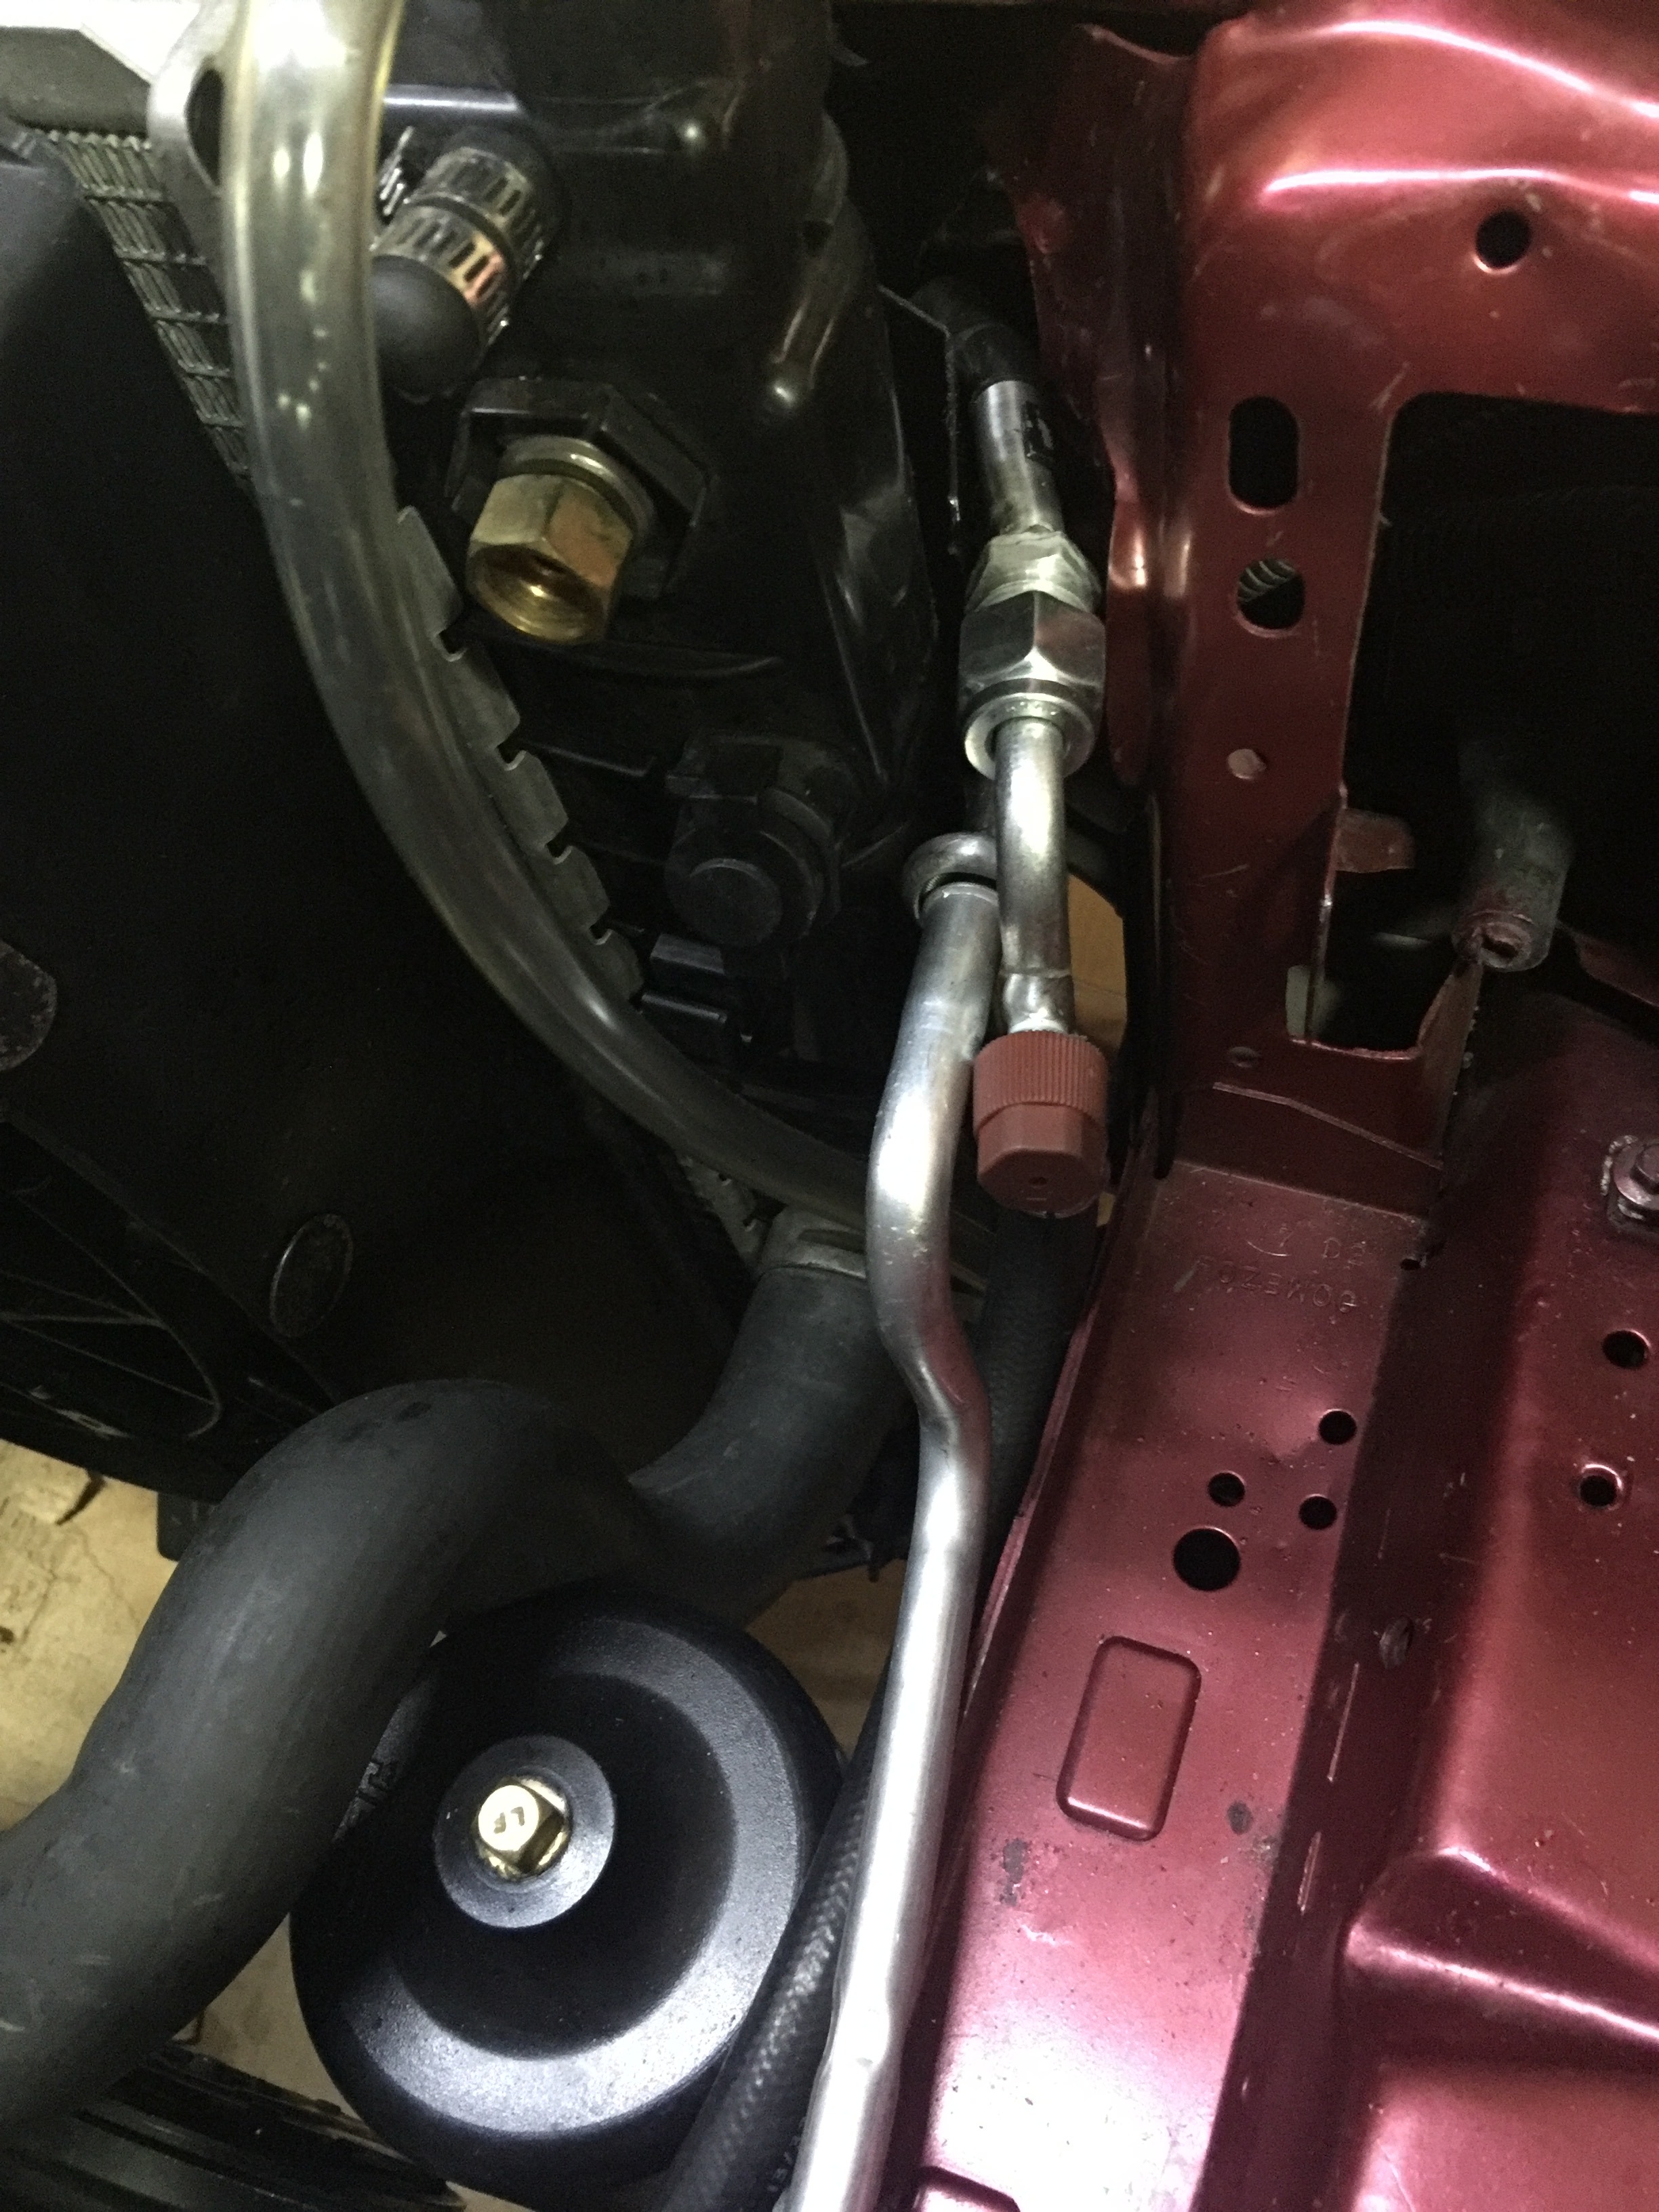
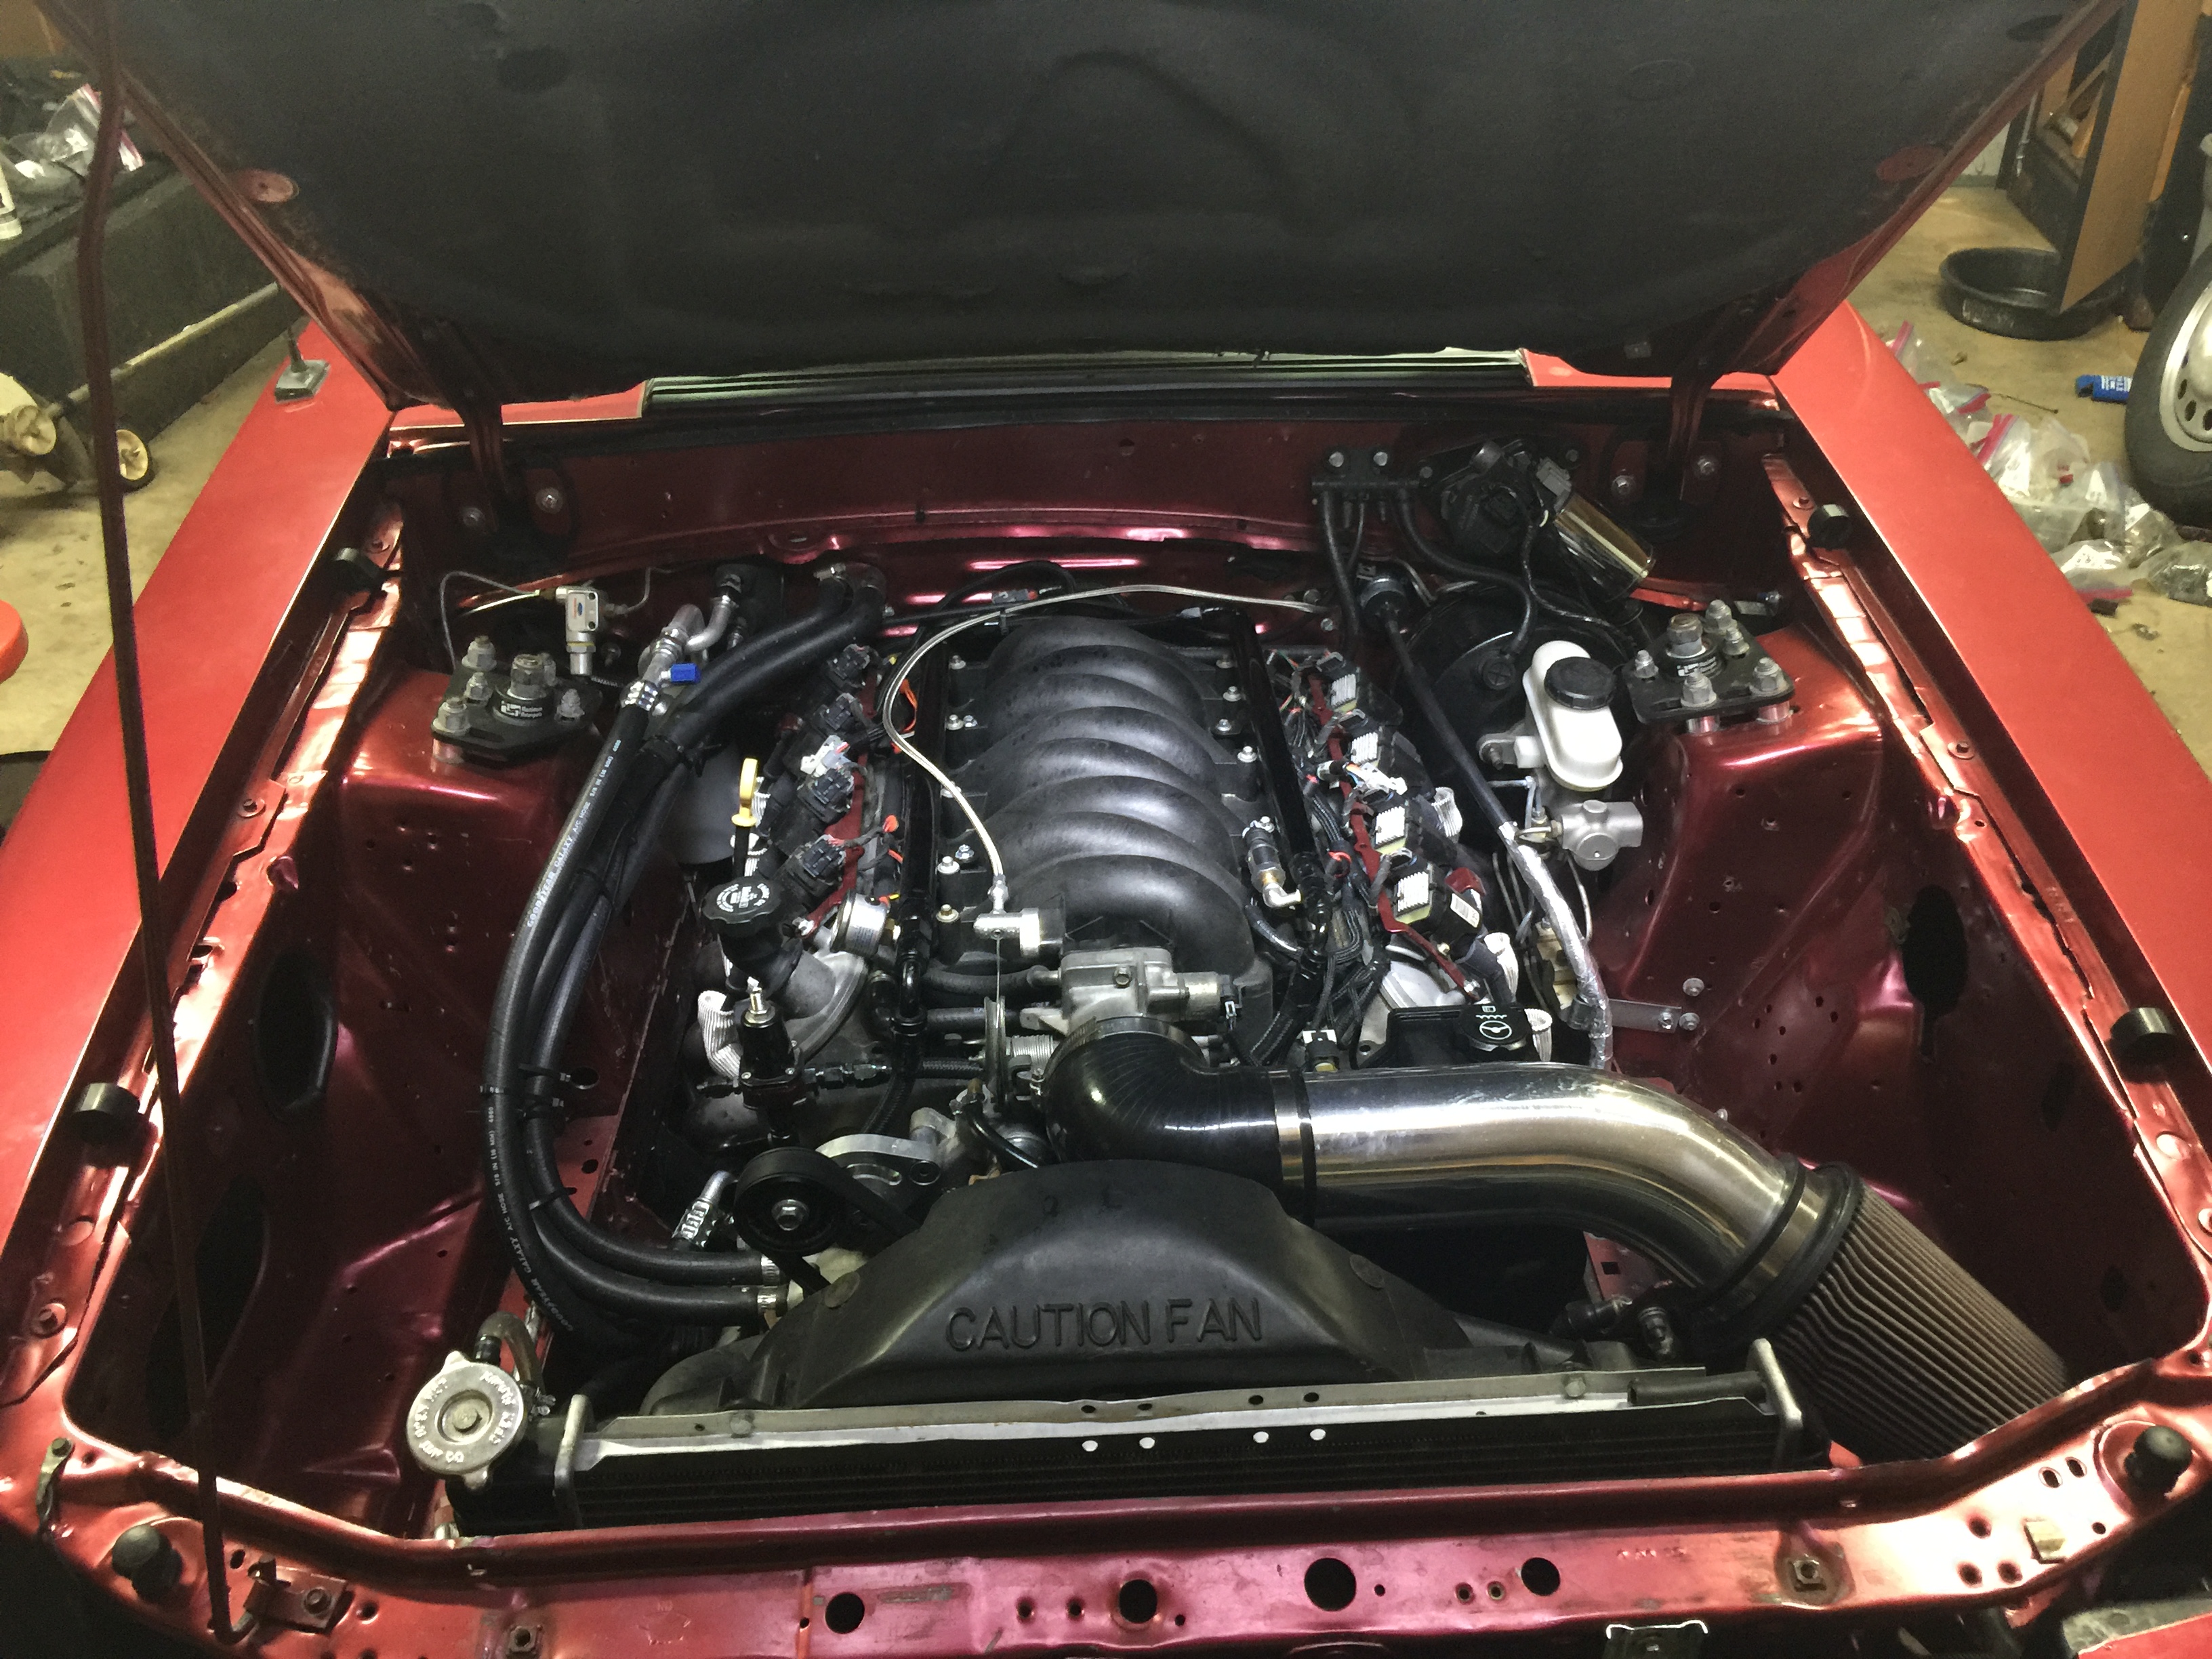
I finished making up the lines lines. I also picked up the condenser and accumulator from having the fittings tig welded on. Got everything mounted up and I'm very happy with how it turned out. Doesn't take up much space at all. I have a little wiring to take care of and then it should be ready to pull a vacuum on it and charge it up! I do need to make some spacers for my sway bar too. It is hitting the compressor.
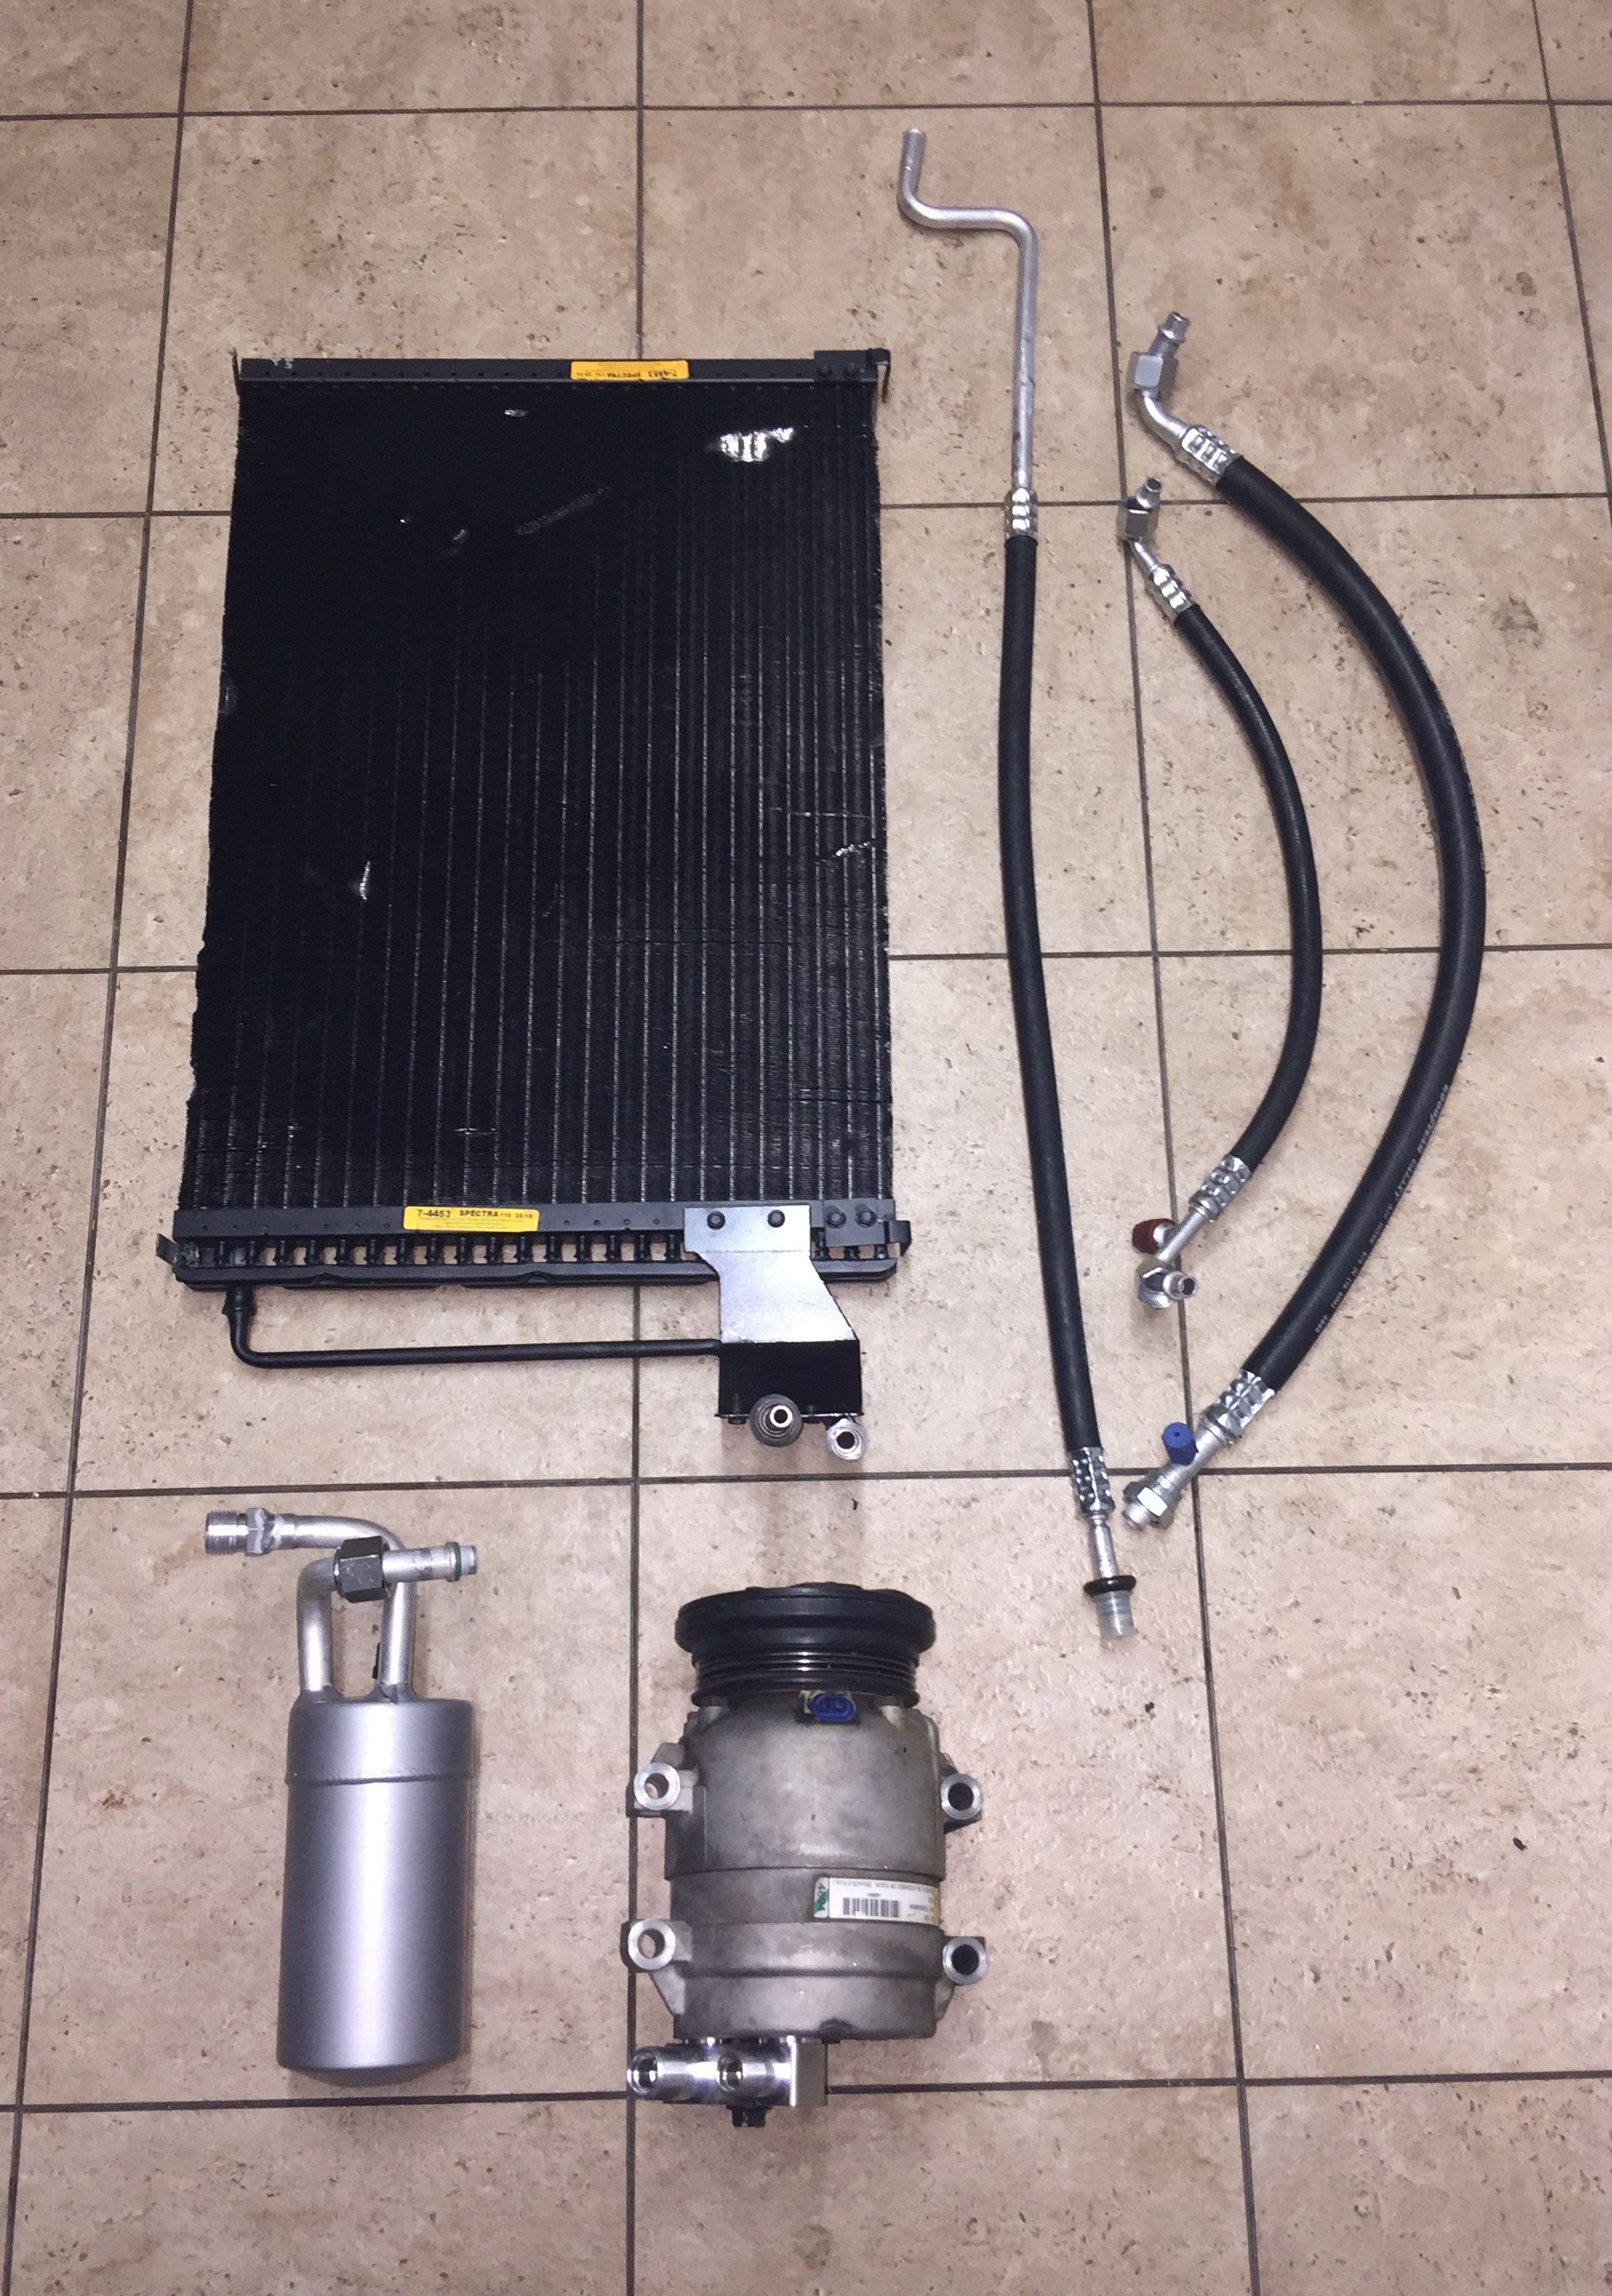
Here are the parts ready to go in
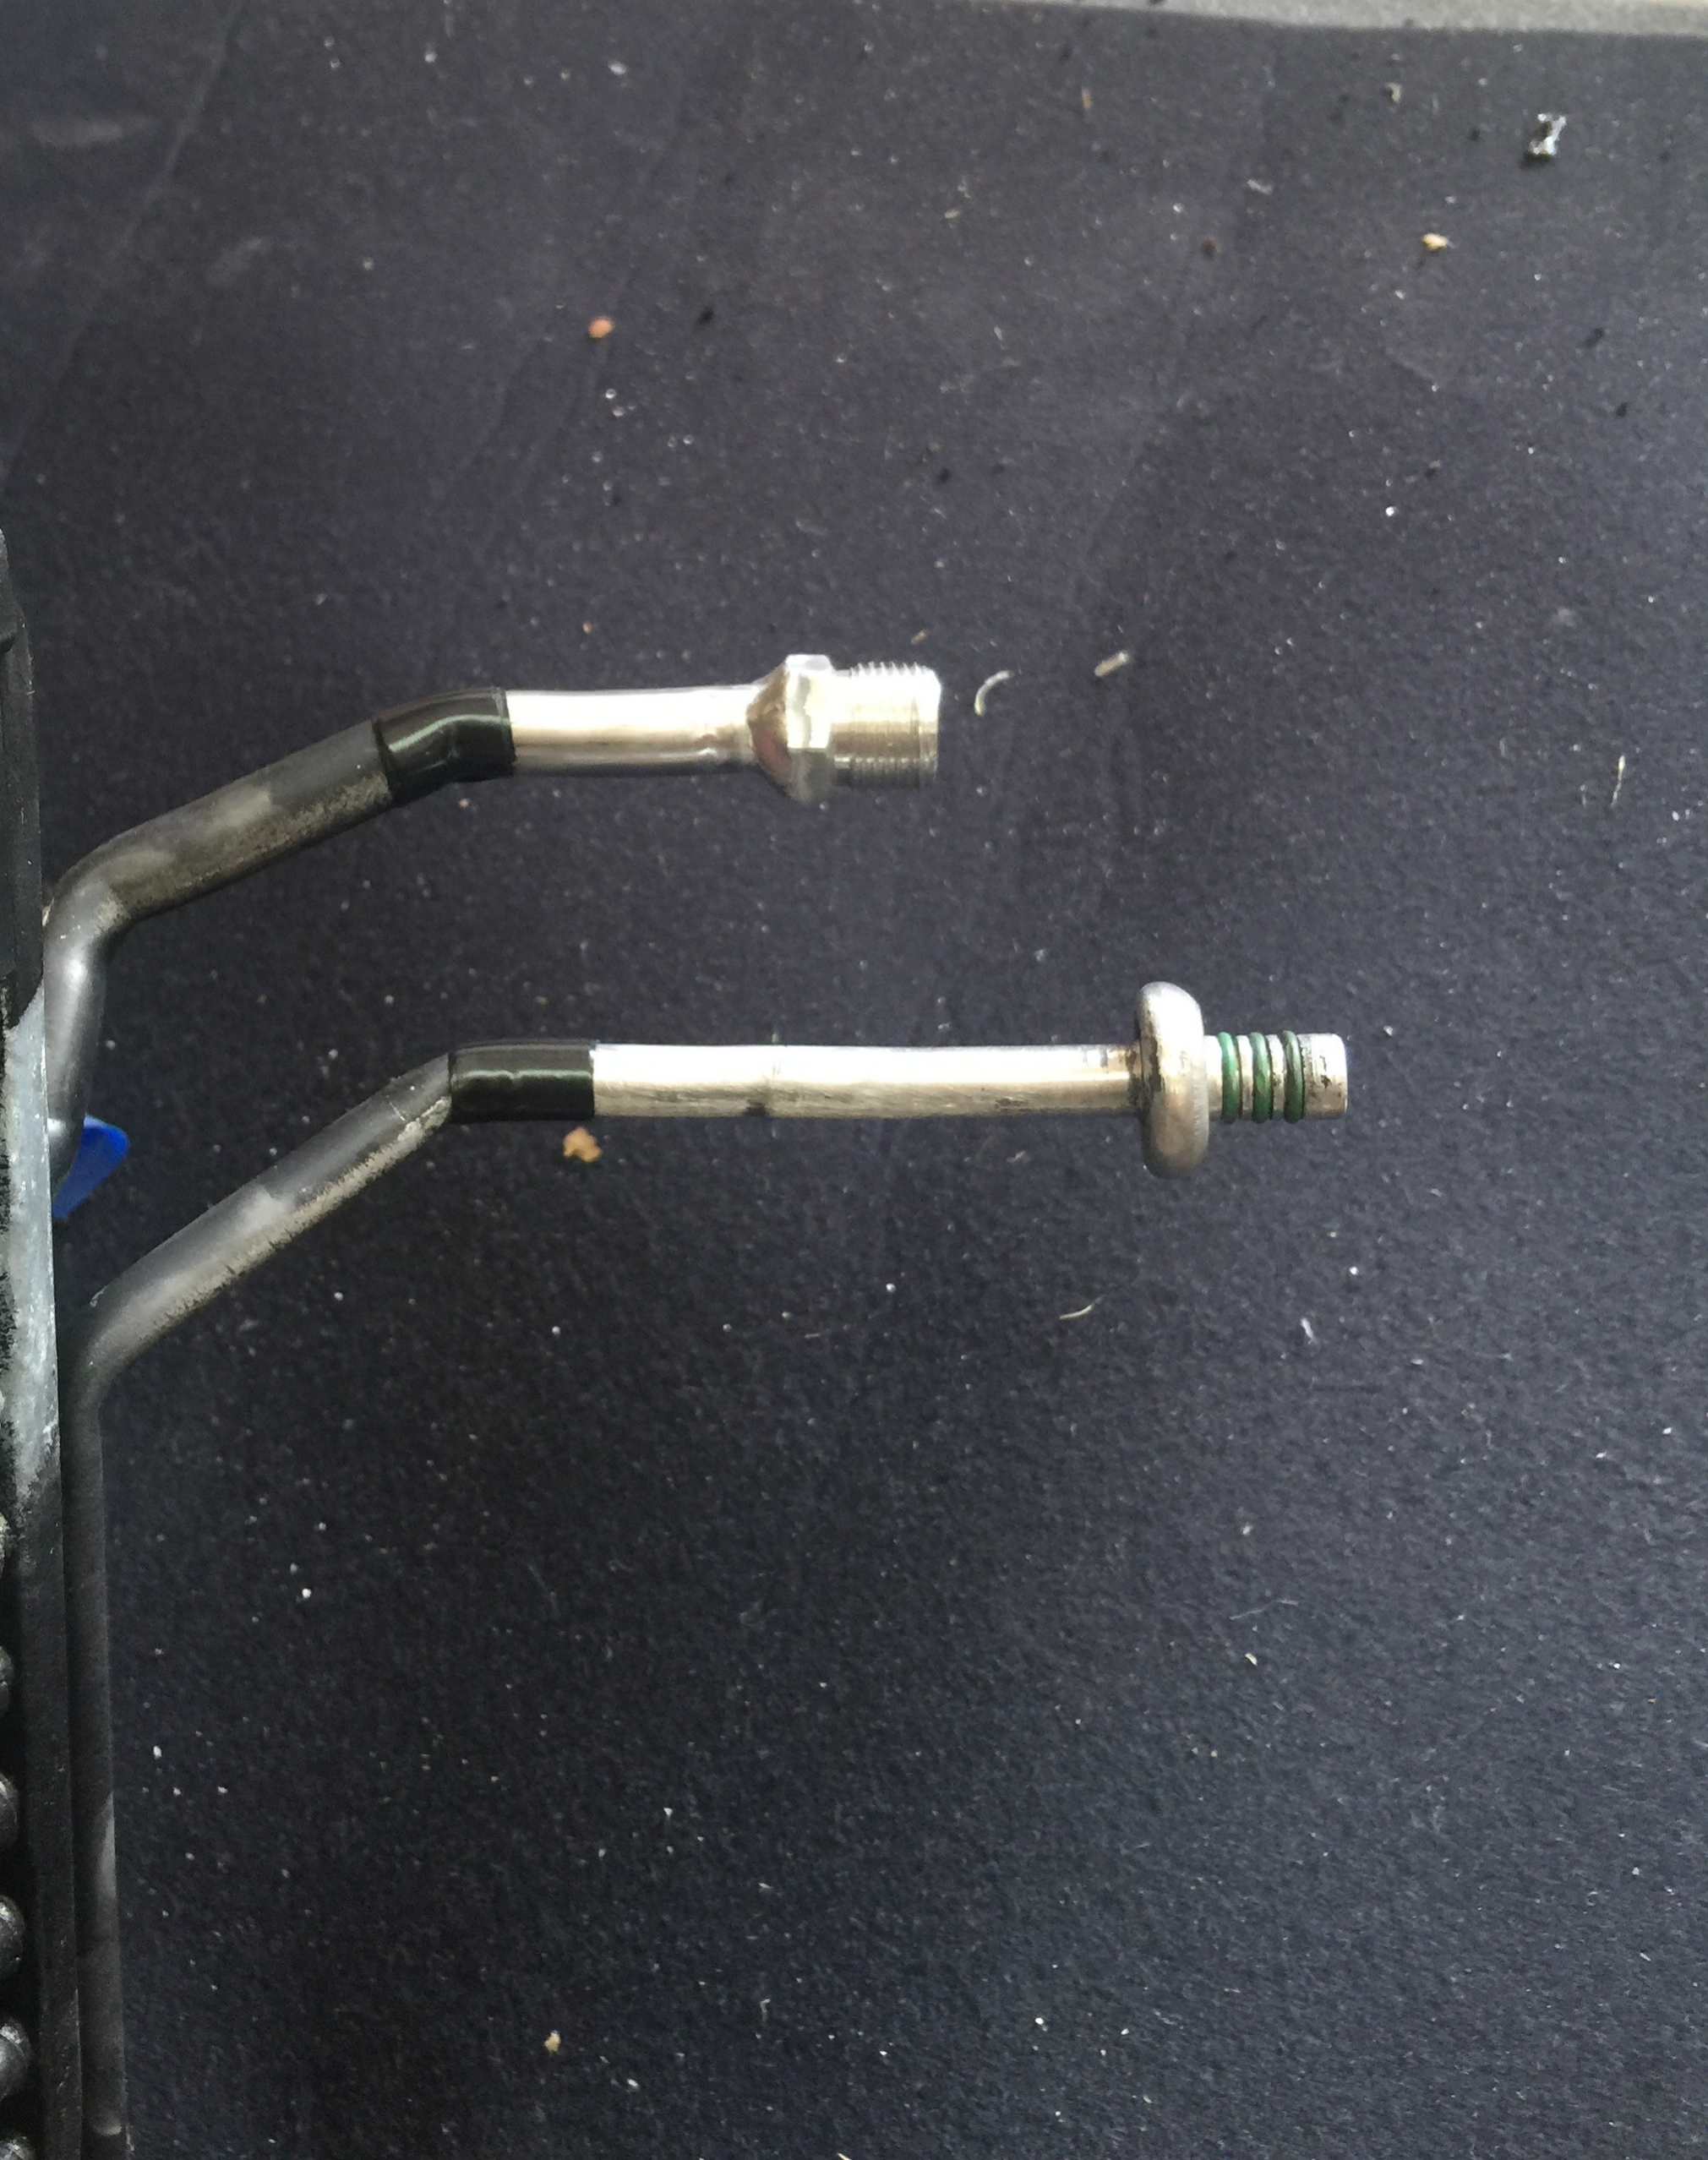
This is the male o-ring fitting I had tig welded onto the condenser. Thats for the line coming from the compressor. I left the springlock fitting on the other tube because thats where the stock liquid line hooks up.
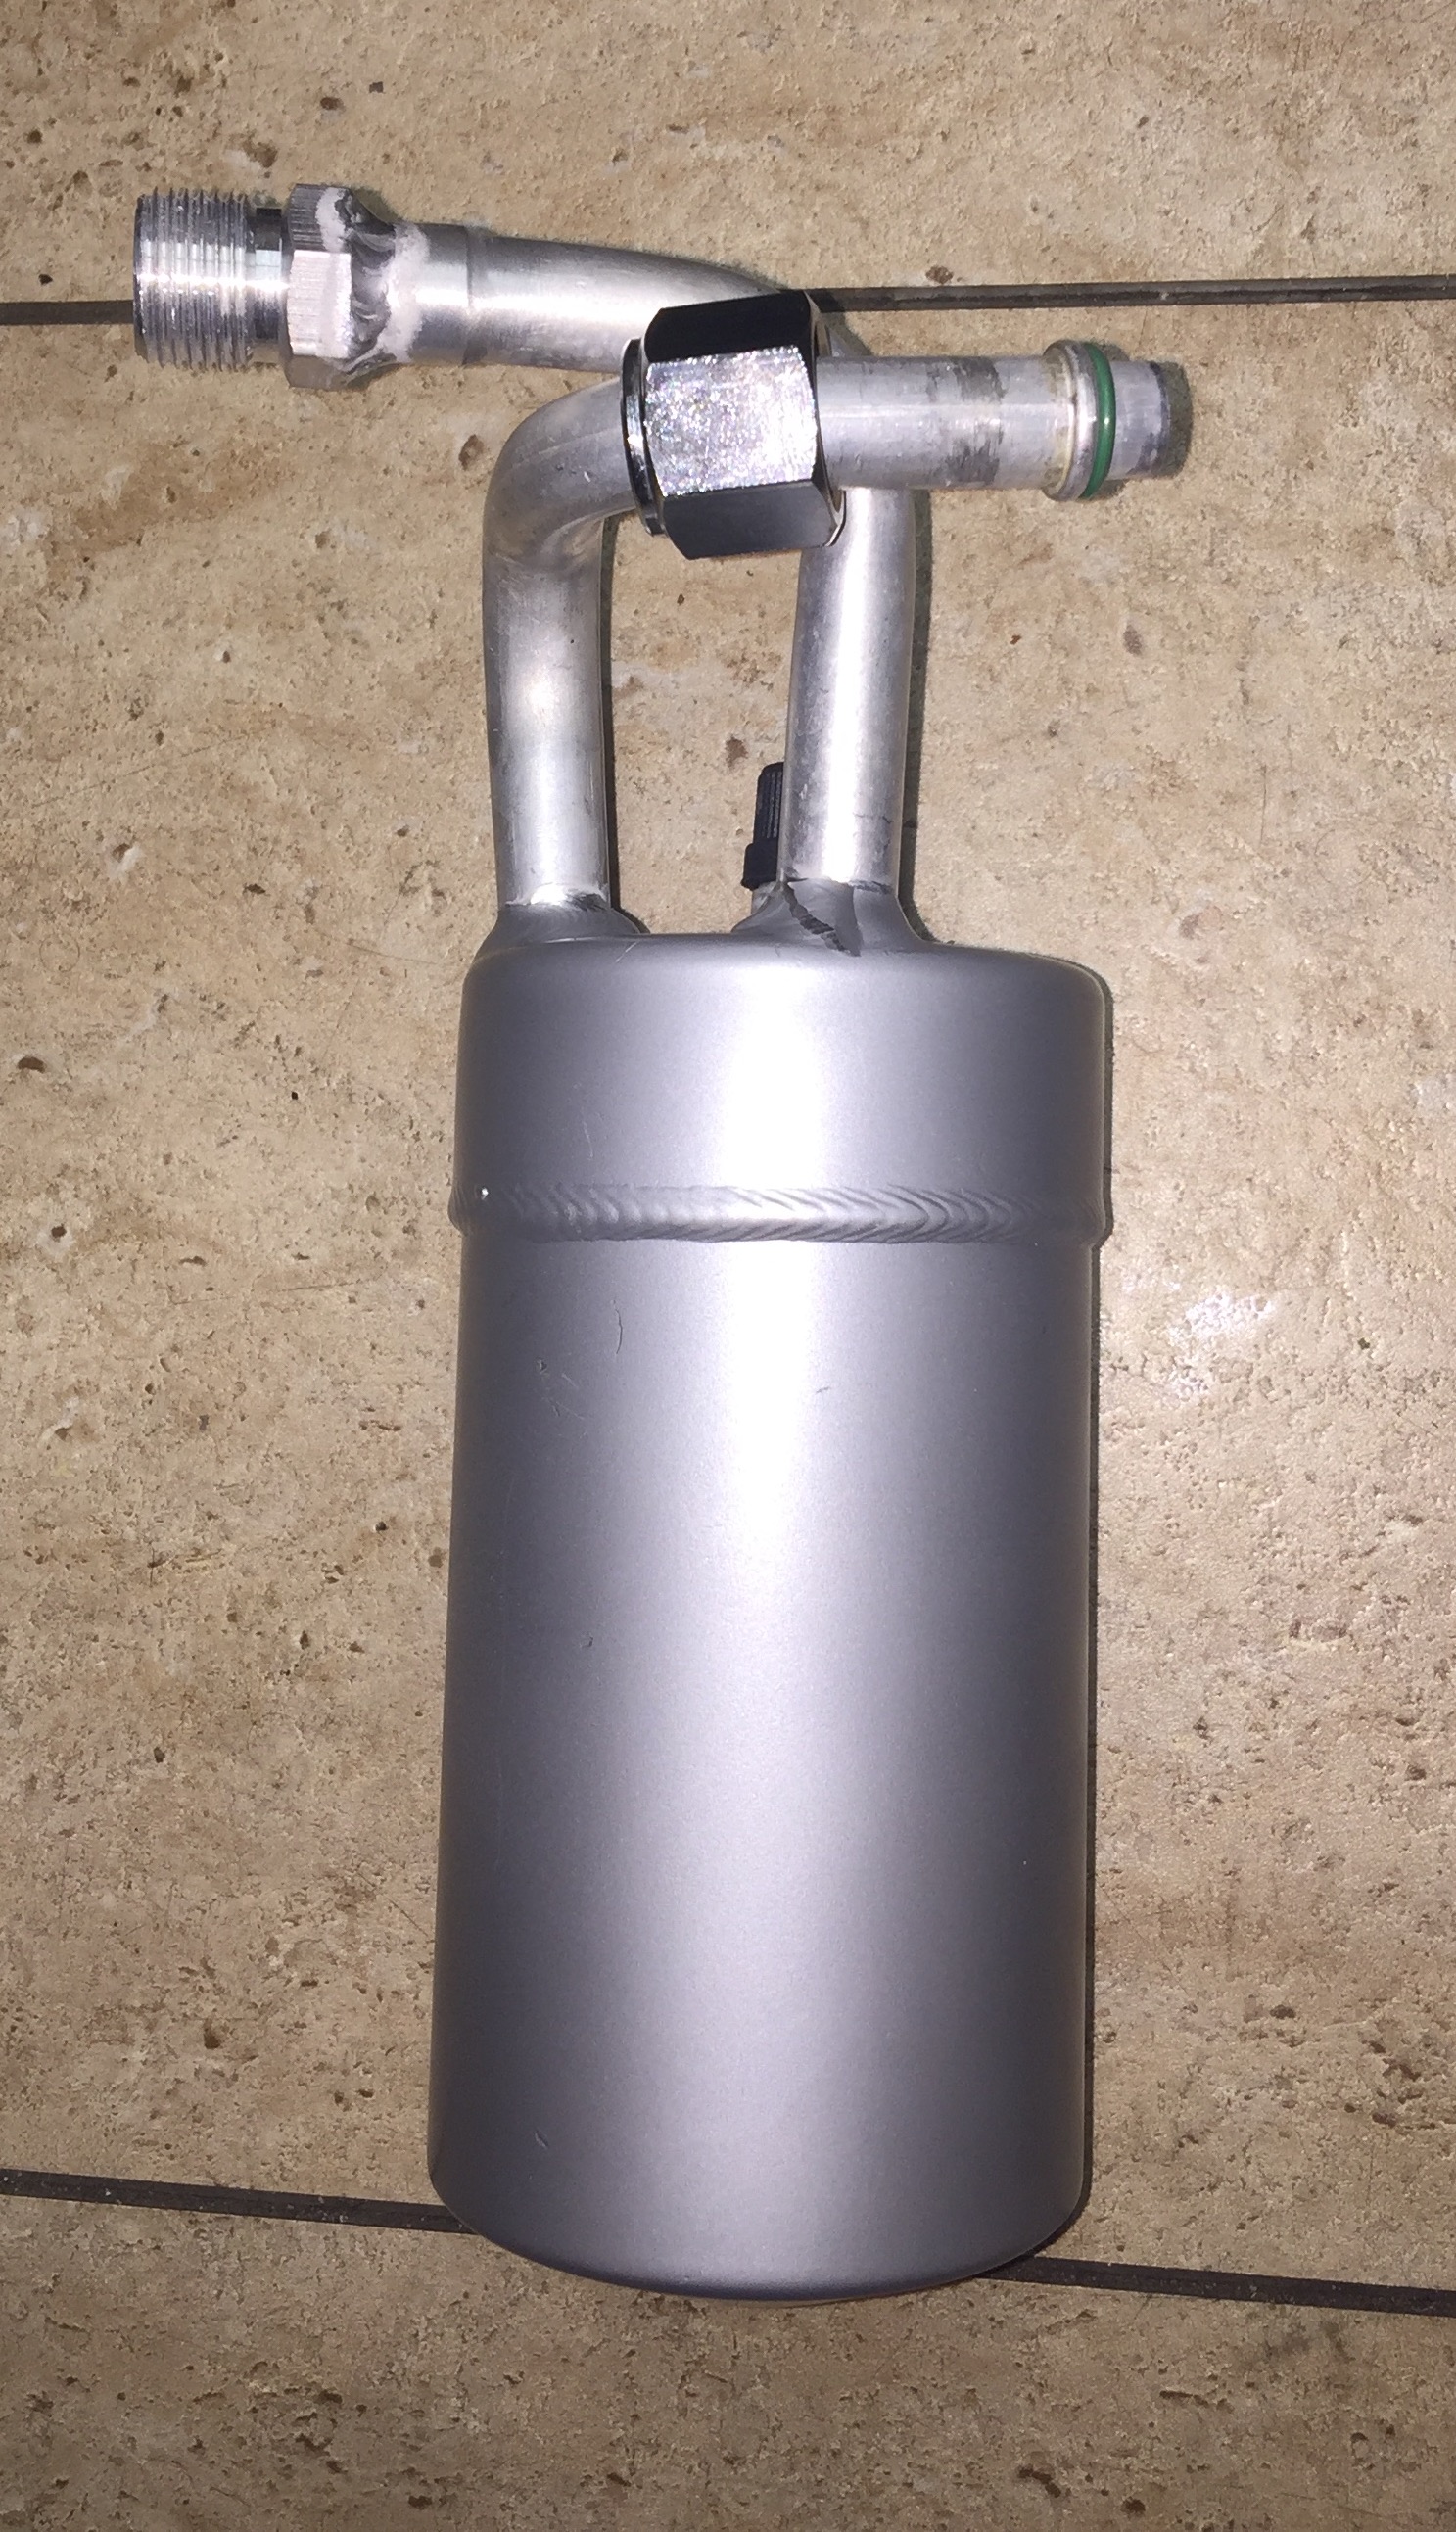
Also had the male o-ring fitting welded onto the accumulator
The Hawk Motorsports LS swap adapter mounted on the compressor

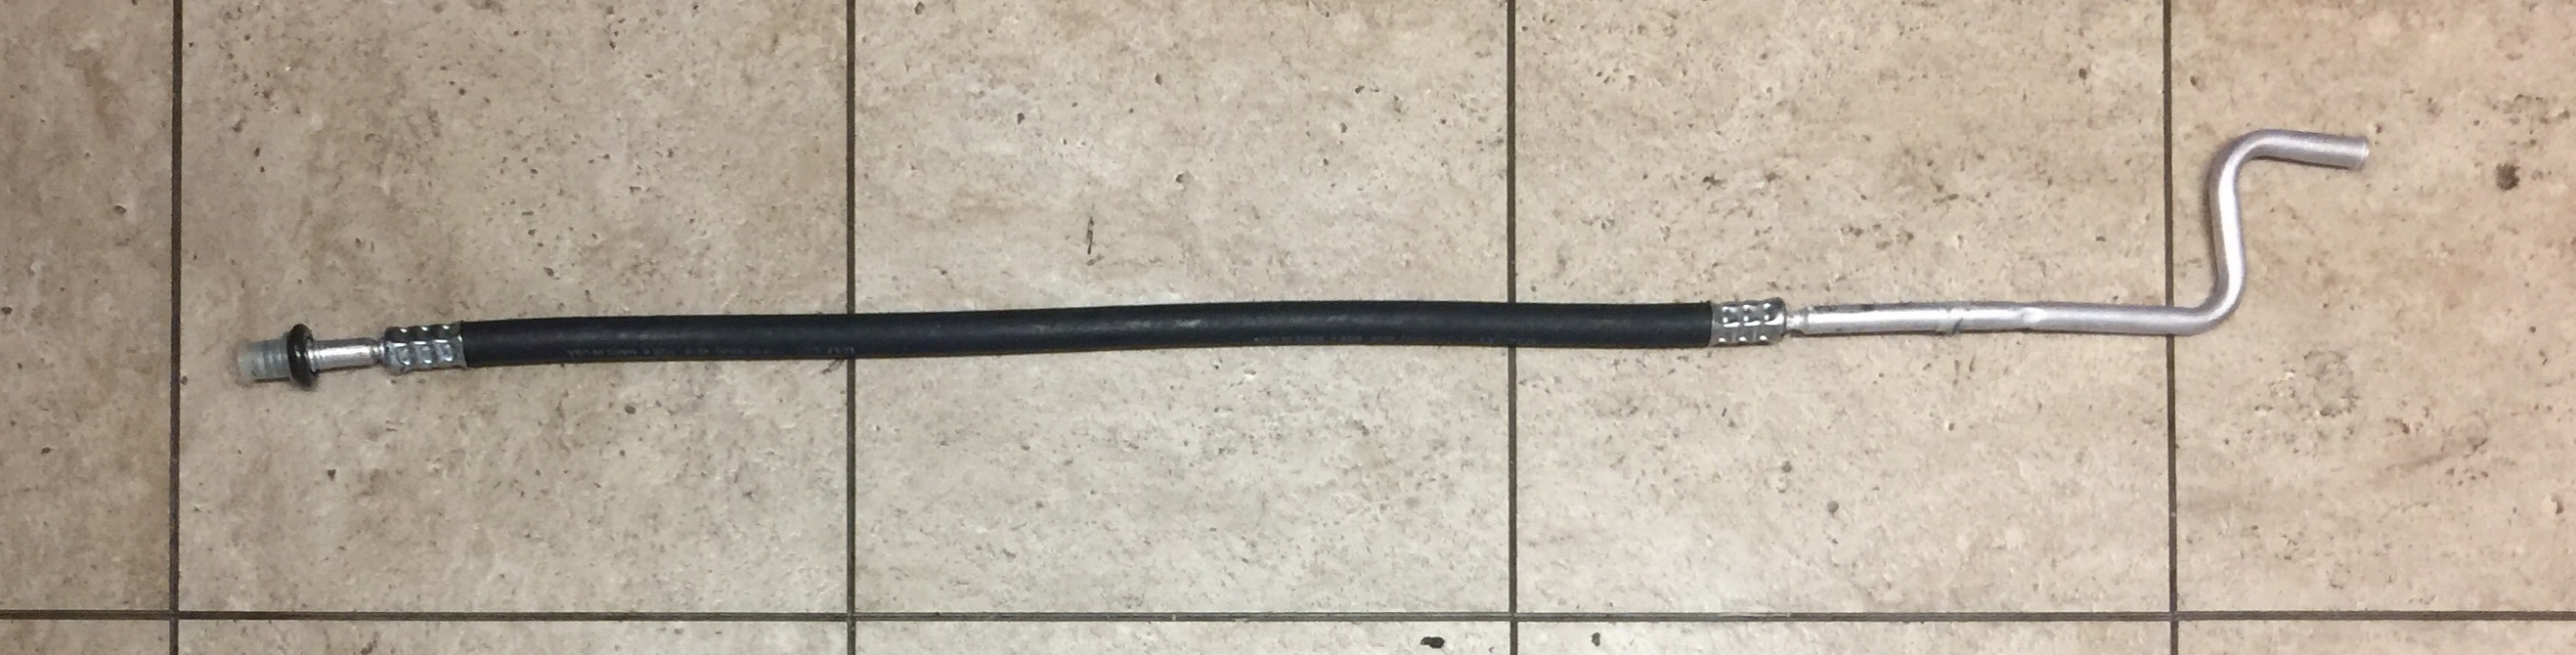
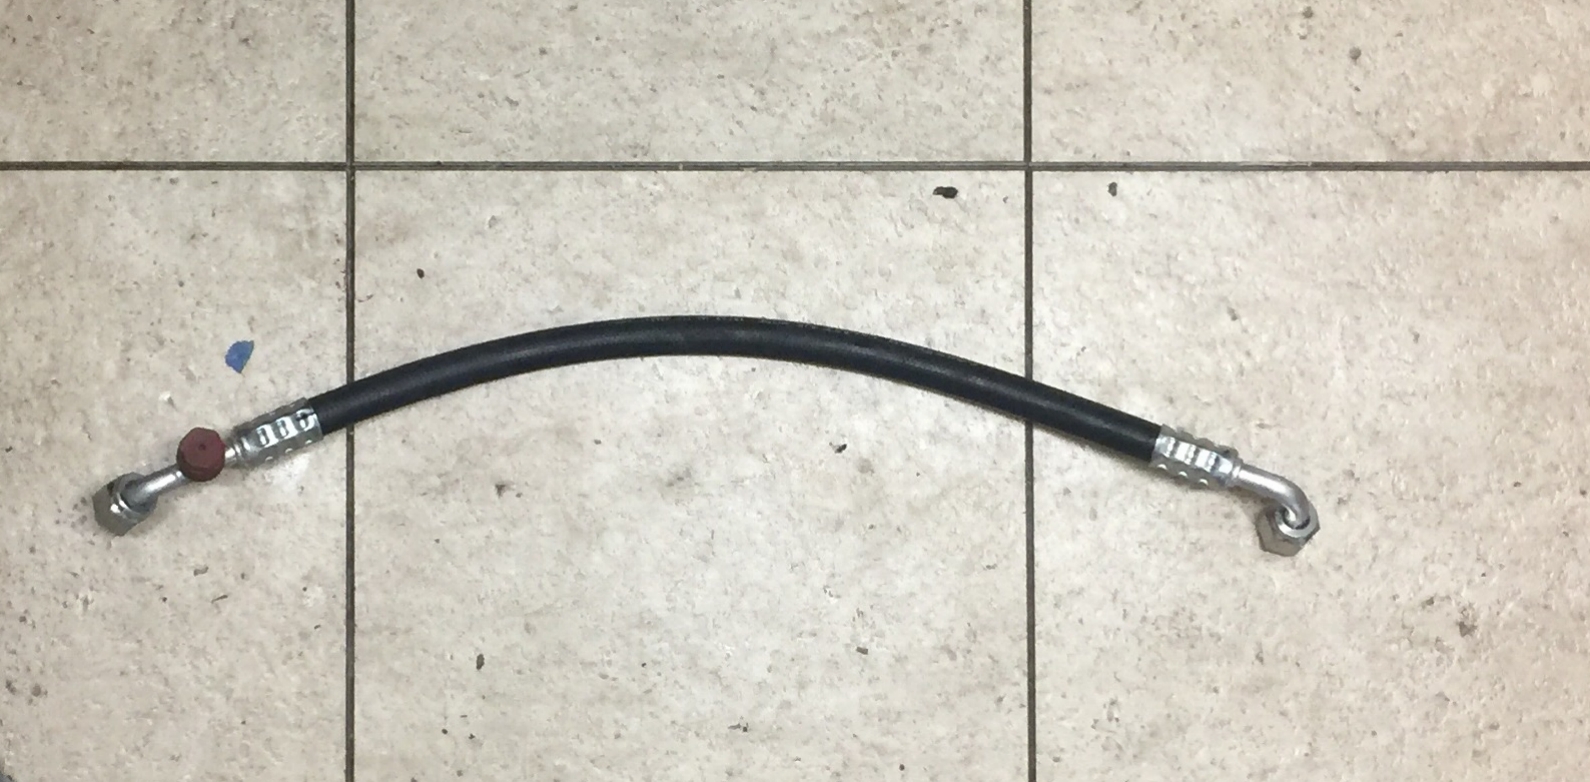
This is the liquid line that runs from the condenser to the evaporator. With the fittings on the condenser and evaporator still stock, I could have just used a stock liquid line. But I've never liked how the liquid line runs right by the header on a Fox Mustang. So I ordered a Springlock fitting for the firewall end (far left in the picture), and then I cut the ferrule off of the hose where it attaches to the metal line on the other end (right in the picture) and reused that metal section, and crimped with a new ferrule. The orifice tube is located in that section, otherwise I would have just ran straight hose all the way.
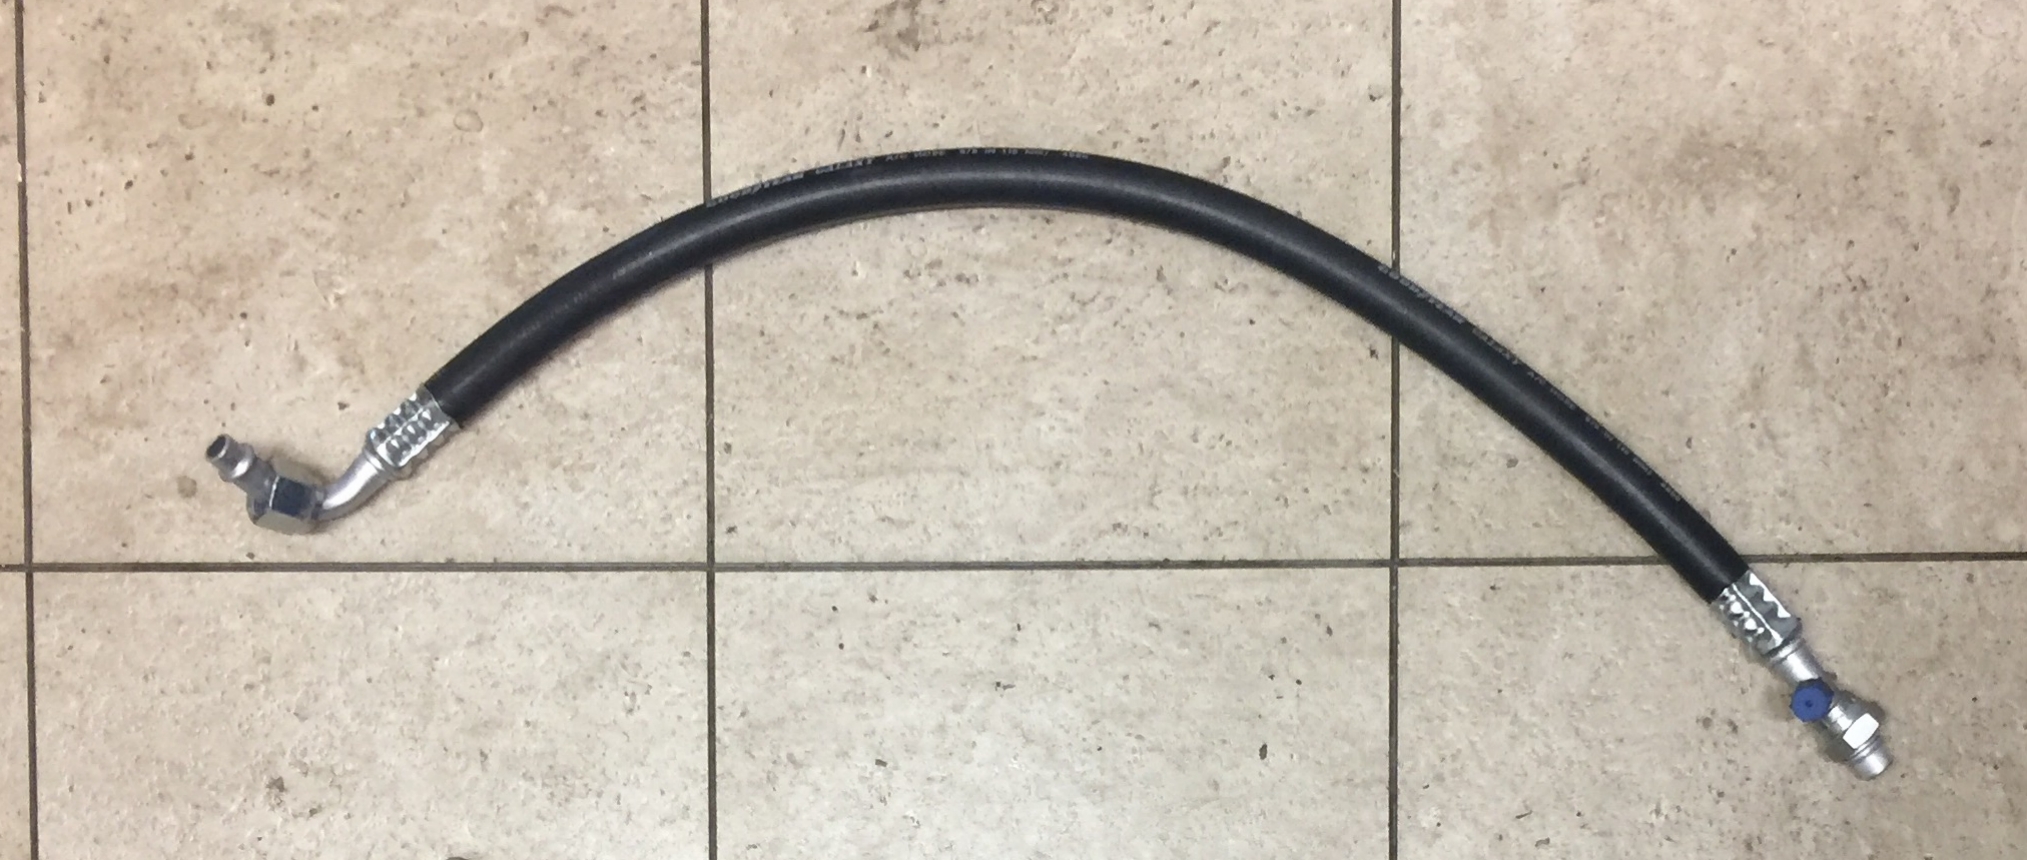
Discharge line from compressor to the condenser. 90 degree 0-ring fitting with service port on the condenser end (connects to new fitting on condenser). 90 degree 0-ring fitting where it attaches to the adapter on the compressor.
Hose running from compressor to the new fitting on the accumulator. 90 degree o-ring fitting on the compressor end. Straight o-ring fitting with service port on the accumulator end.
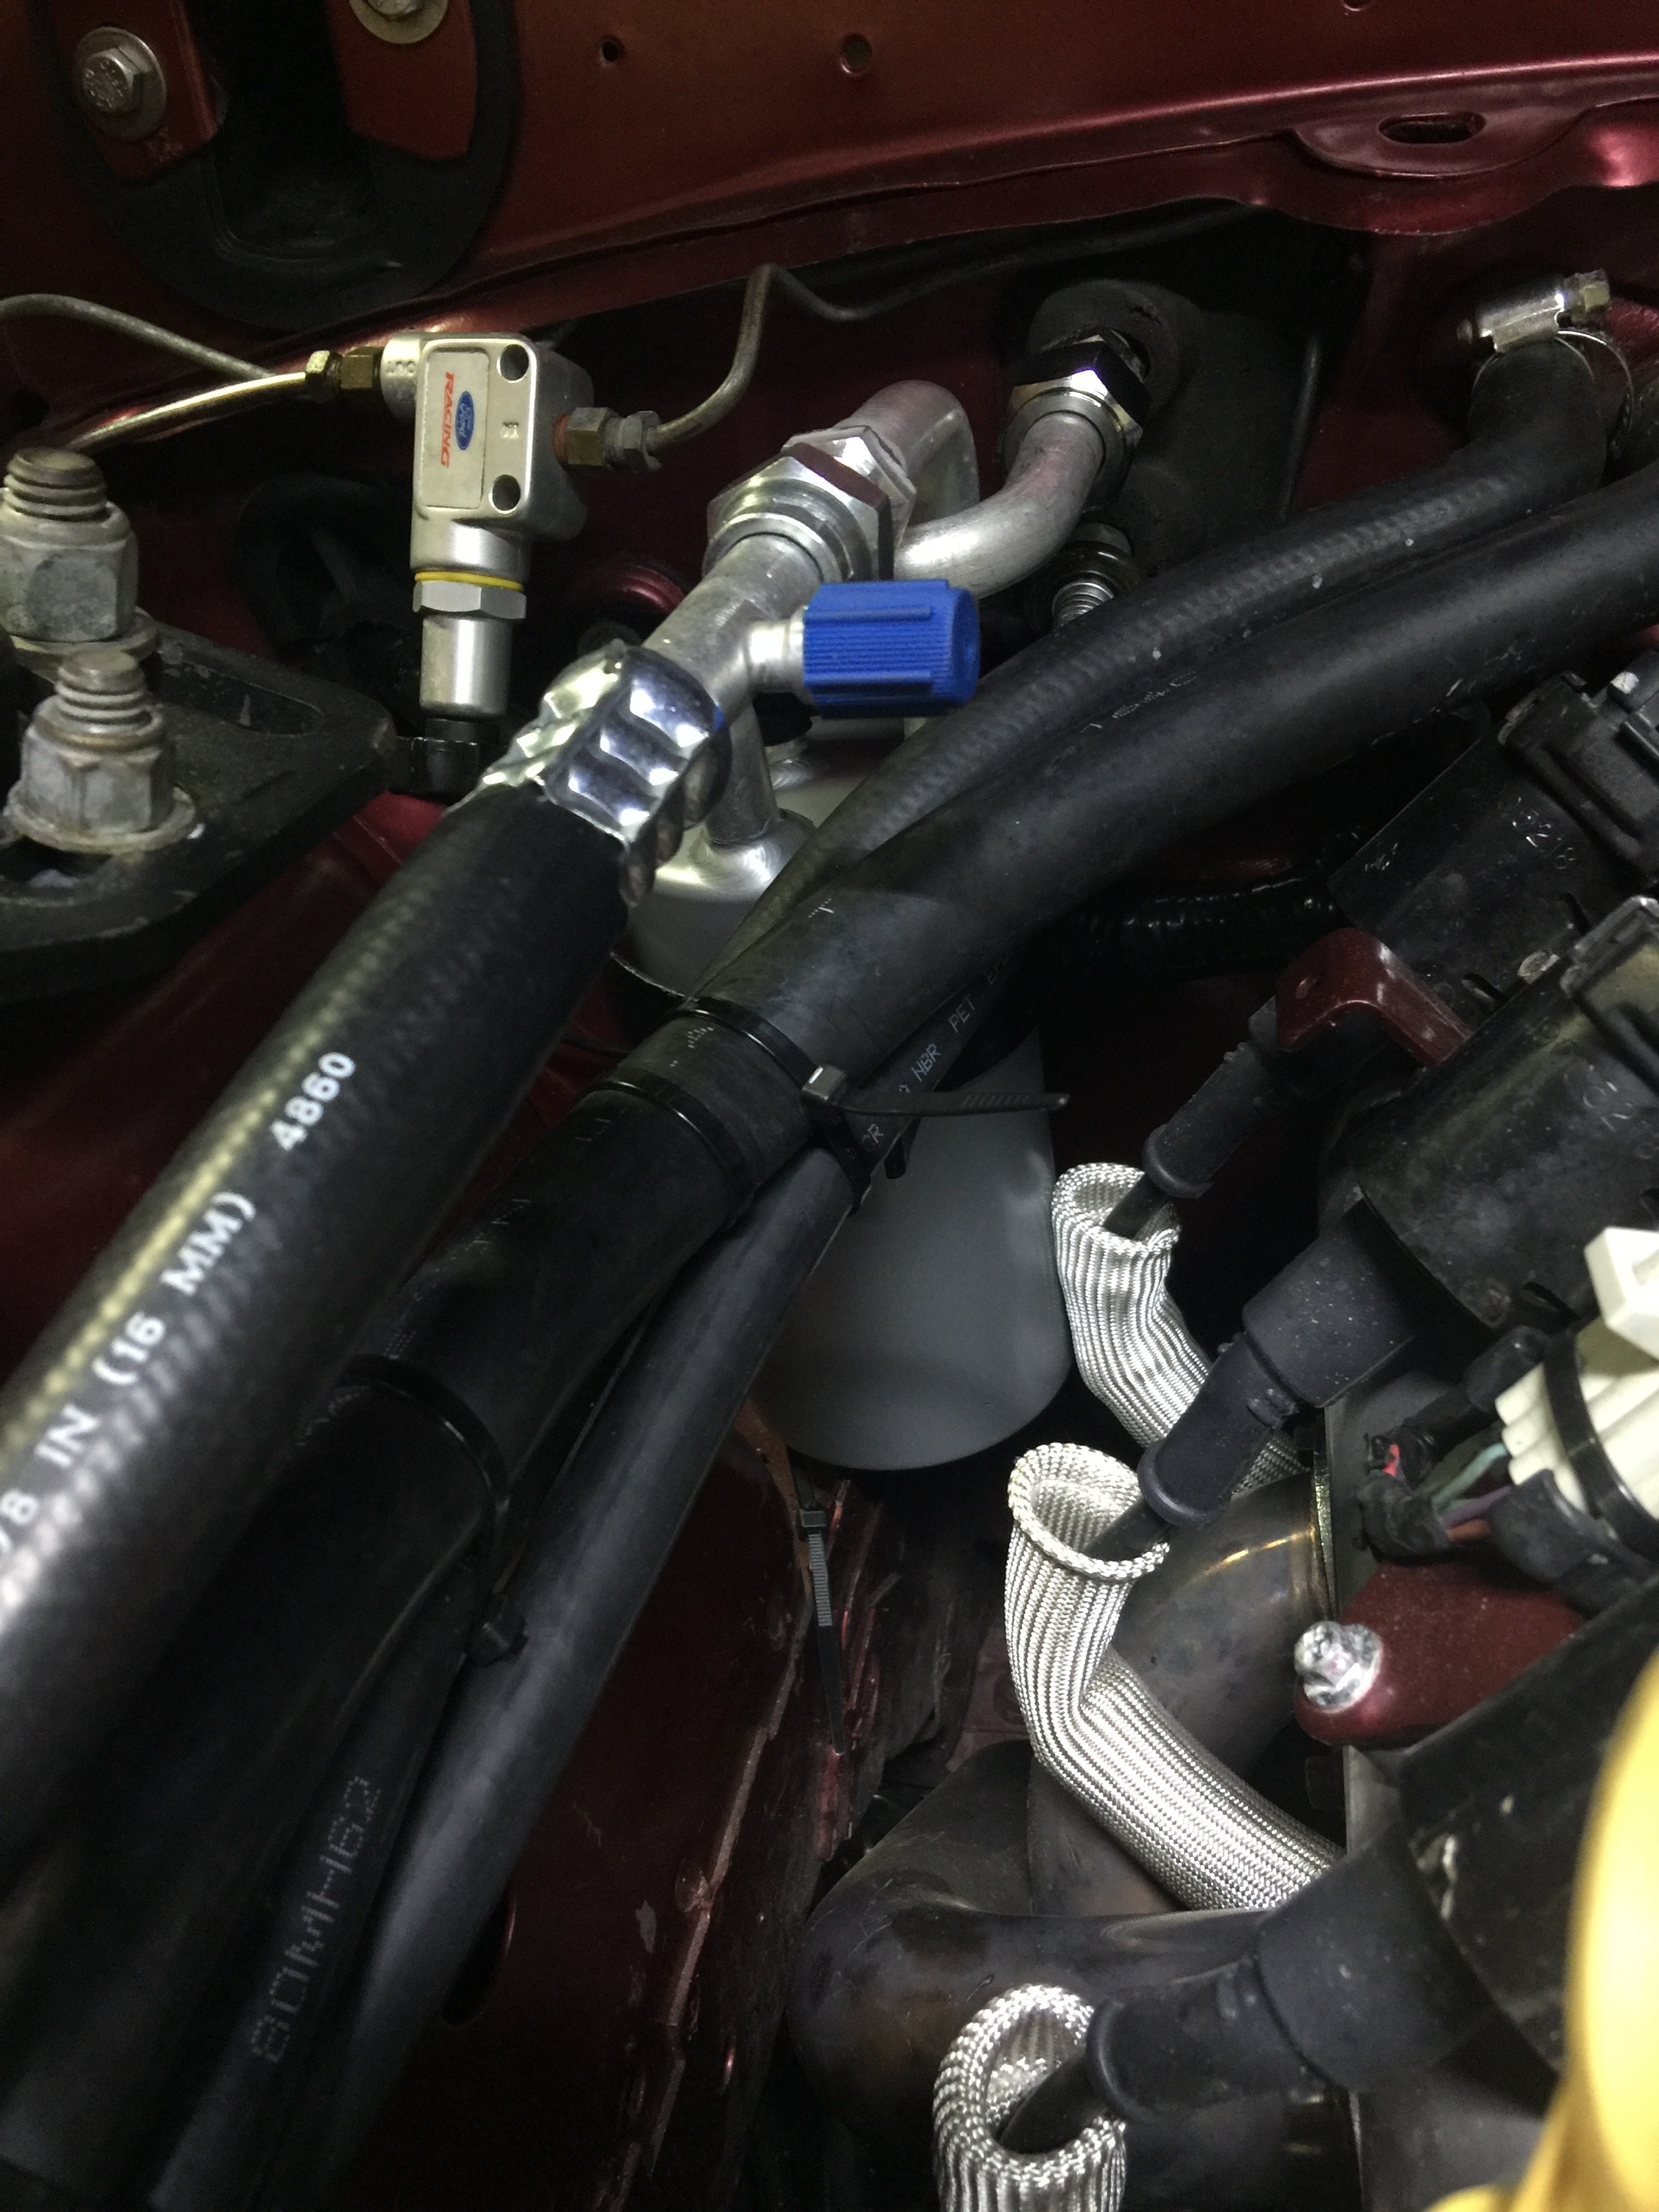
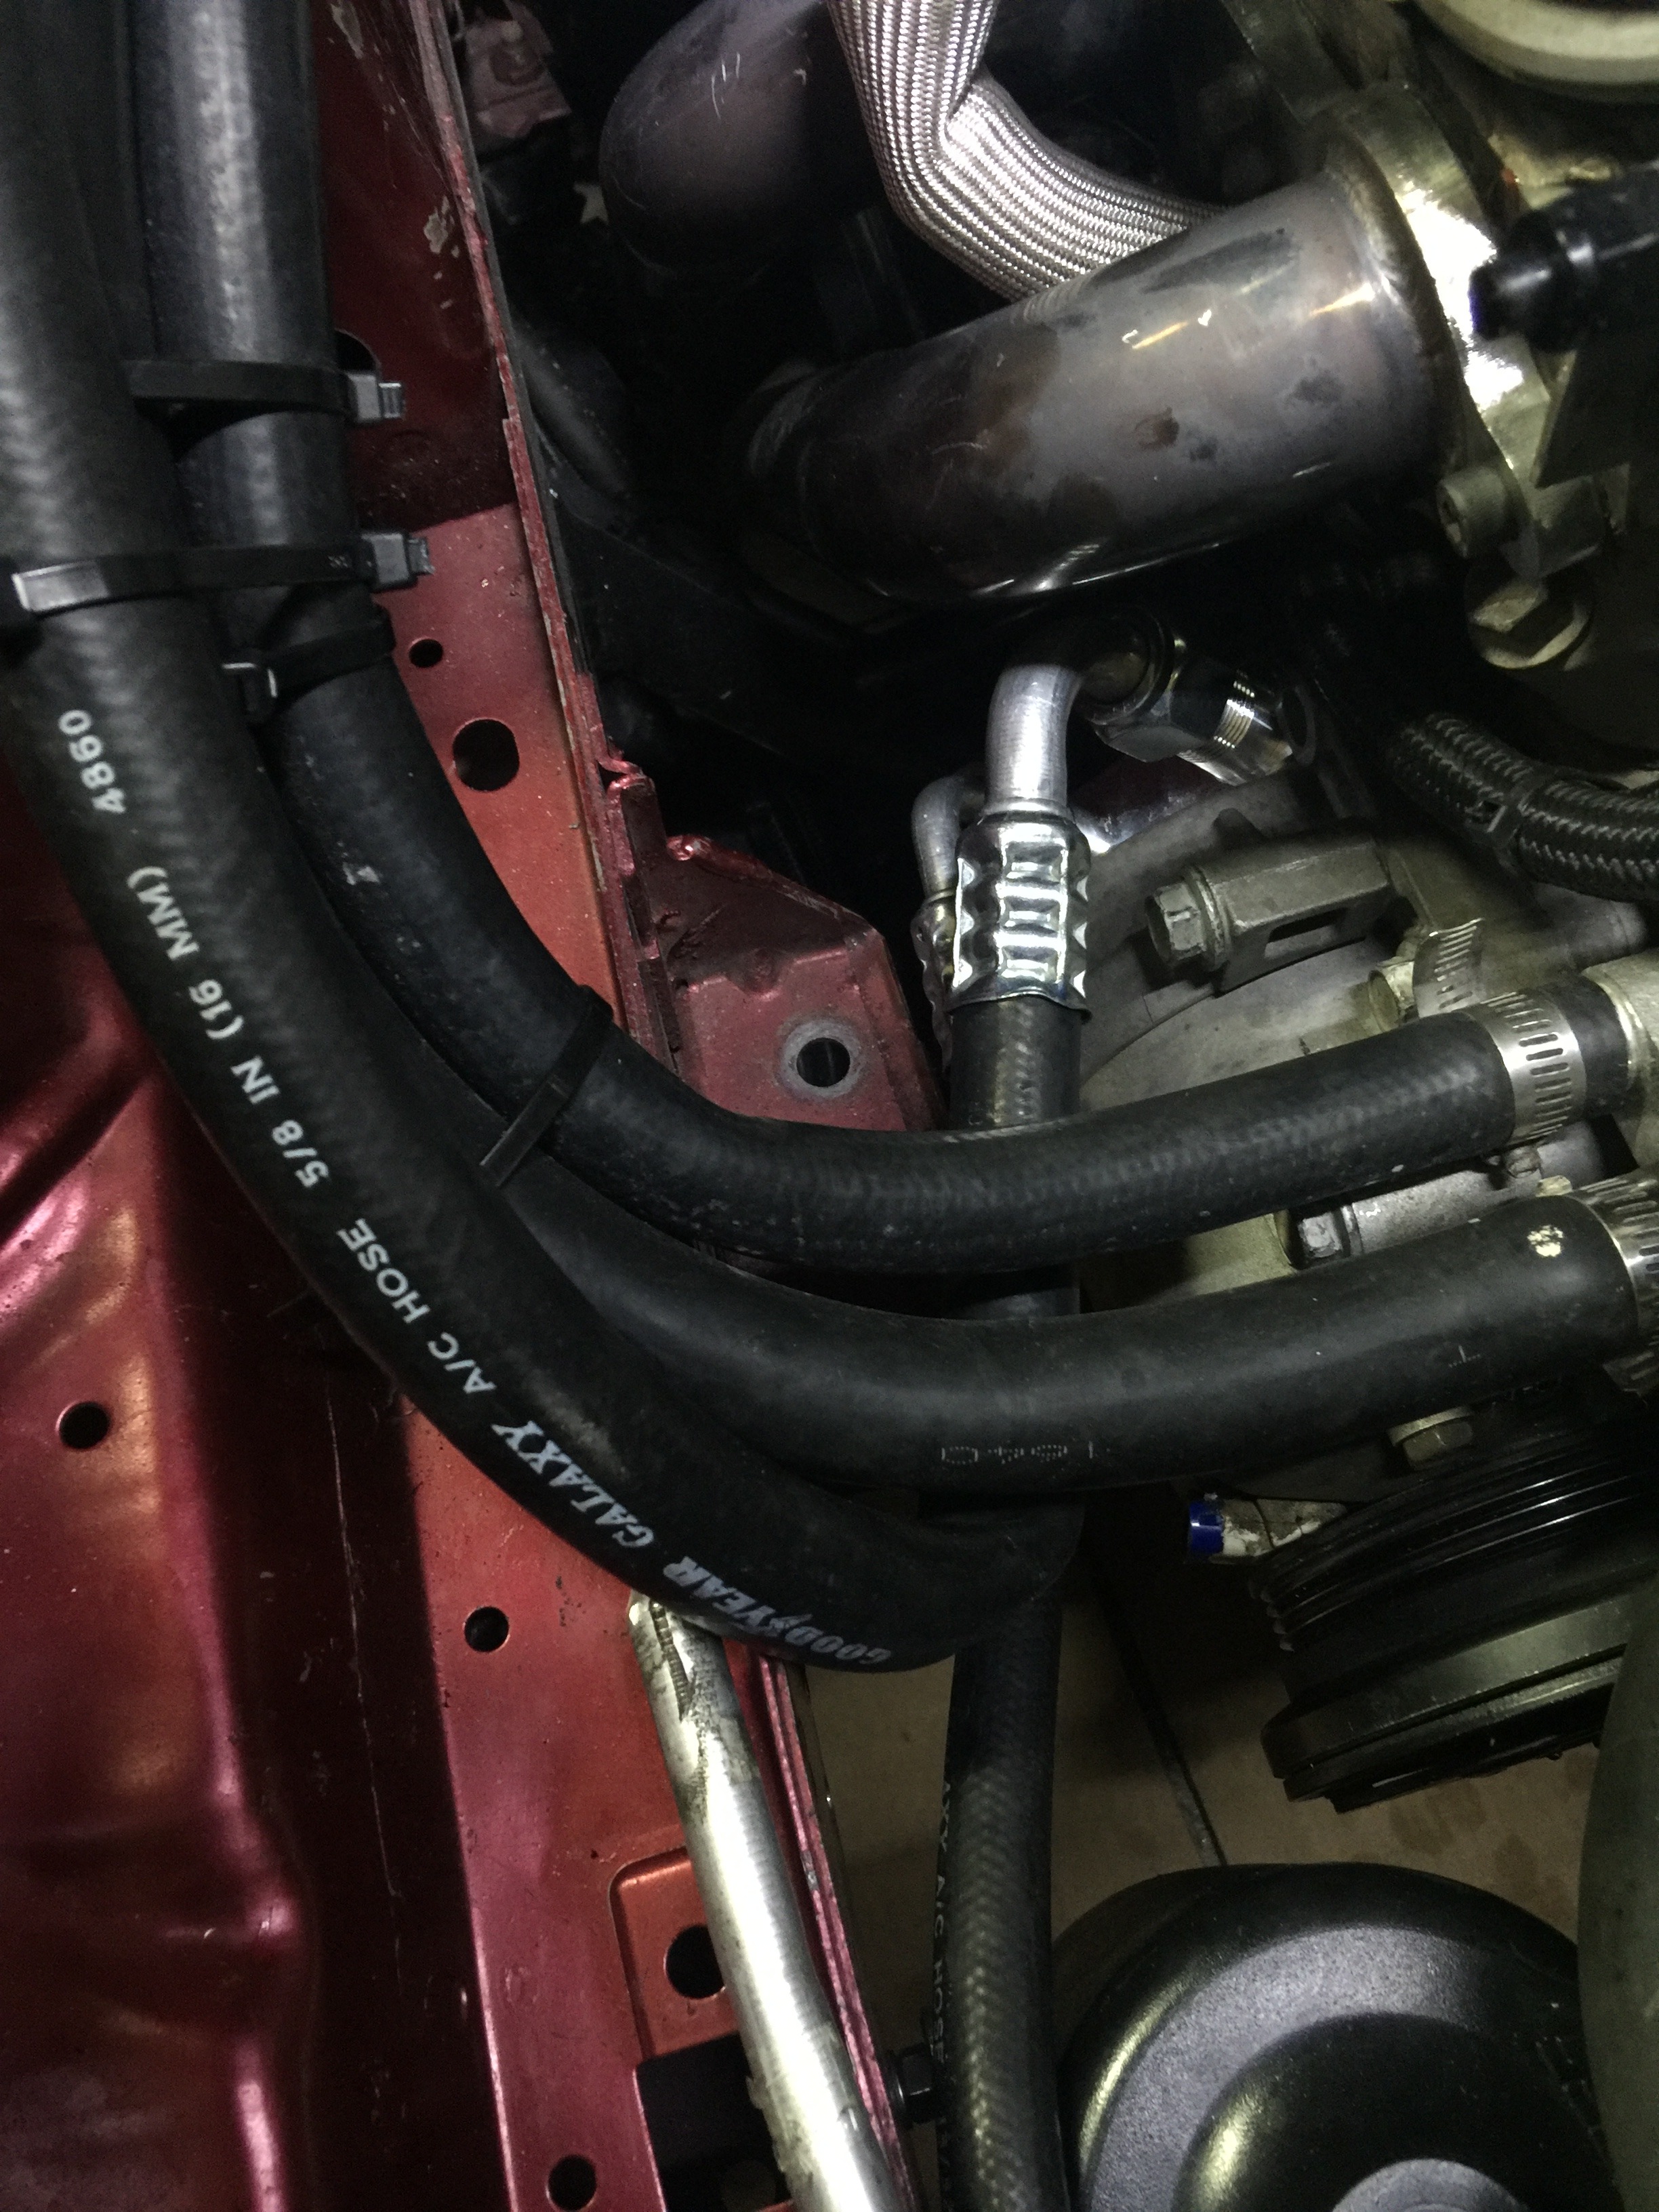
Like I said, I'm pretty happy with how it turned out. I'll do something a little more final than the zipties, just had them in there to see how everything would sit lol.

I finished making up the lines lines. I also picked up the condenser and accumulator from having the fittings tig welded on. Got everything mounted up and I'm very happy with how it turned out. Doesn't take up much space at all. I have a little wiring to take care of and then it should be ready to pull a vacuum on it and charge it up! I do need to make some spacers for my sway bar too. It is hitting the compressor.
Here are the parts ready to go in
This is the male o-ring fitting I had tig welded onto the condenser. Thats for the line coming from the compressor. I left the springlock fitting on the other tube because thats where the stock liquid line hooks up.
Also had the male o-ring fitting welded onto the accumulator
The Hawk Motorsports LS swap adapter mounted on the compressor
This is the liquid line that runs from the condenser to the evaporator. With the fittings on the condenser and evaporator still stock, I could have just used a stock liquid line. But I've never liked how the liquid line runs right by the header on a Fox Mustang. So I ordered a Springlock fitting for the firewall end (far left in the picture), and then I cut the ferrule off of the hose where it attaches to the metal line on the other end (right in the picture) and reused that metal section, and crimped with a new ferrule. The orifice tube is located in that section, otherwise I would have just ran straight hose all the way.
Discharge line from compressor to the condenser. 90 degree 0-ring fitting with service port on the condenser end (connects to new fitting on condenser). 90 degree 0-ring fitting where it attaches to the adapter on the compressor.
Hose running from compressor to the new fitting on the accumulator. 90 degree o-ring fitting on the compressor end. Straight o-ring fitting with service port on the accumulator end.
Like I said, I'm pretty happy with how it turned out. I'll do something a little more final than the zipties, just had them in there to see how everything would sit lol.
Last edited by TxFireman1972; 06-02-2017 at 03:46 PM.

 06-04-2017, 01:51 PM
#124
Teching In
iTrader: (2)
Join Date: Jul 2005
Location: CALIFORNIA
Posts: 15
Likes: 0
Received 0 Likes
on
0 Posts

Did you have any issues installing all 4 bolts in the engine using the aje mounts? Was about to order my aje k member and motor mounts, read that some were not able to put all 4 bolts in the engine.


 06-06-2017, 07:01 PM
#133
9 Second Club
iTrader: (9)

Join Date: Apr 2011
Location: Indian Rocks Beach Fl
Posts: 1,059
Likes: 0
Received 0 Likes
on
0 Posts
yep, I have 4 relays on a board next to my battery in the trunk, 2 for the pumps, on their own relay with my ON3 hat and cobra tank. the 2 other relays are for my 2 bottle heaters. It gets cold in Florida.
 06-08-2017, 09:29 PM
#137
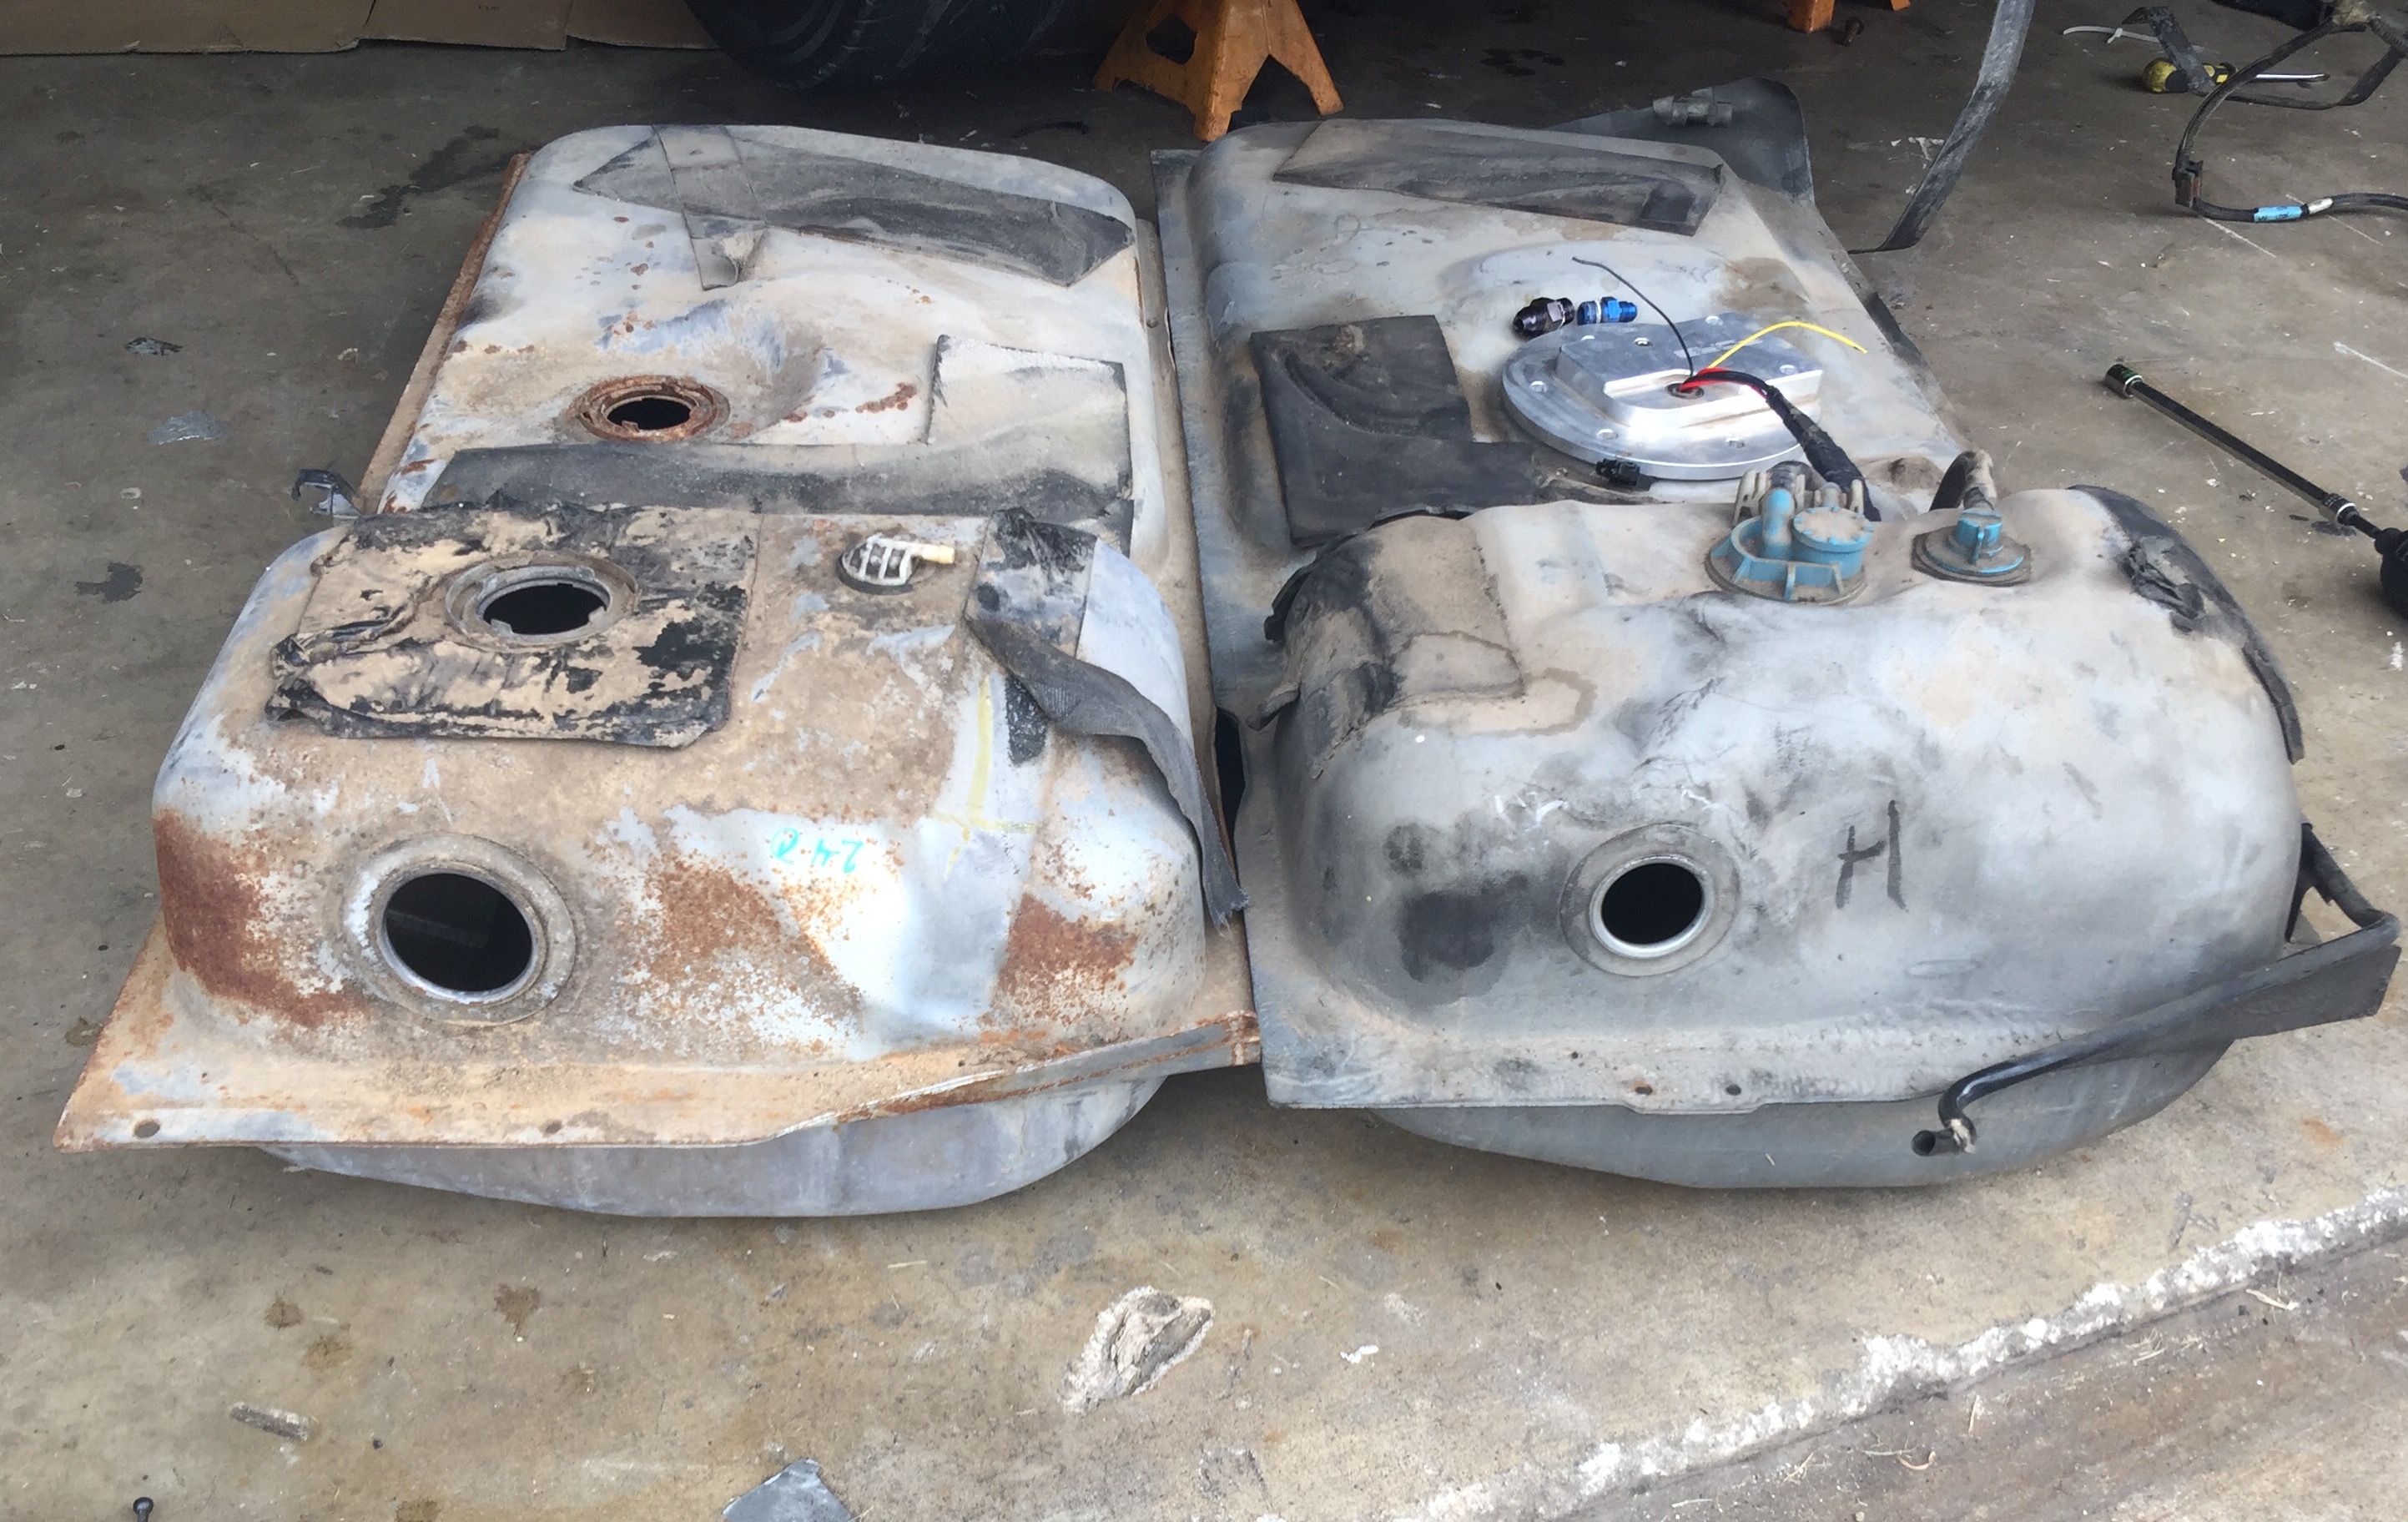
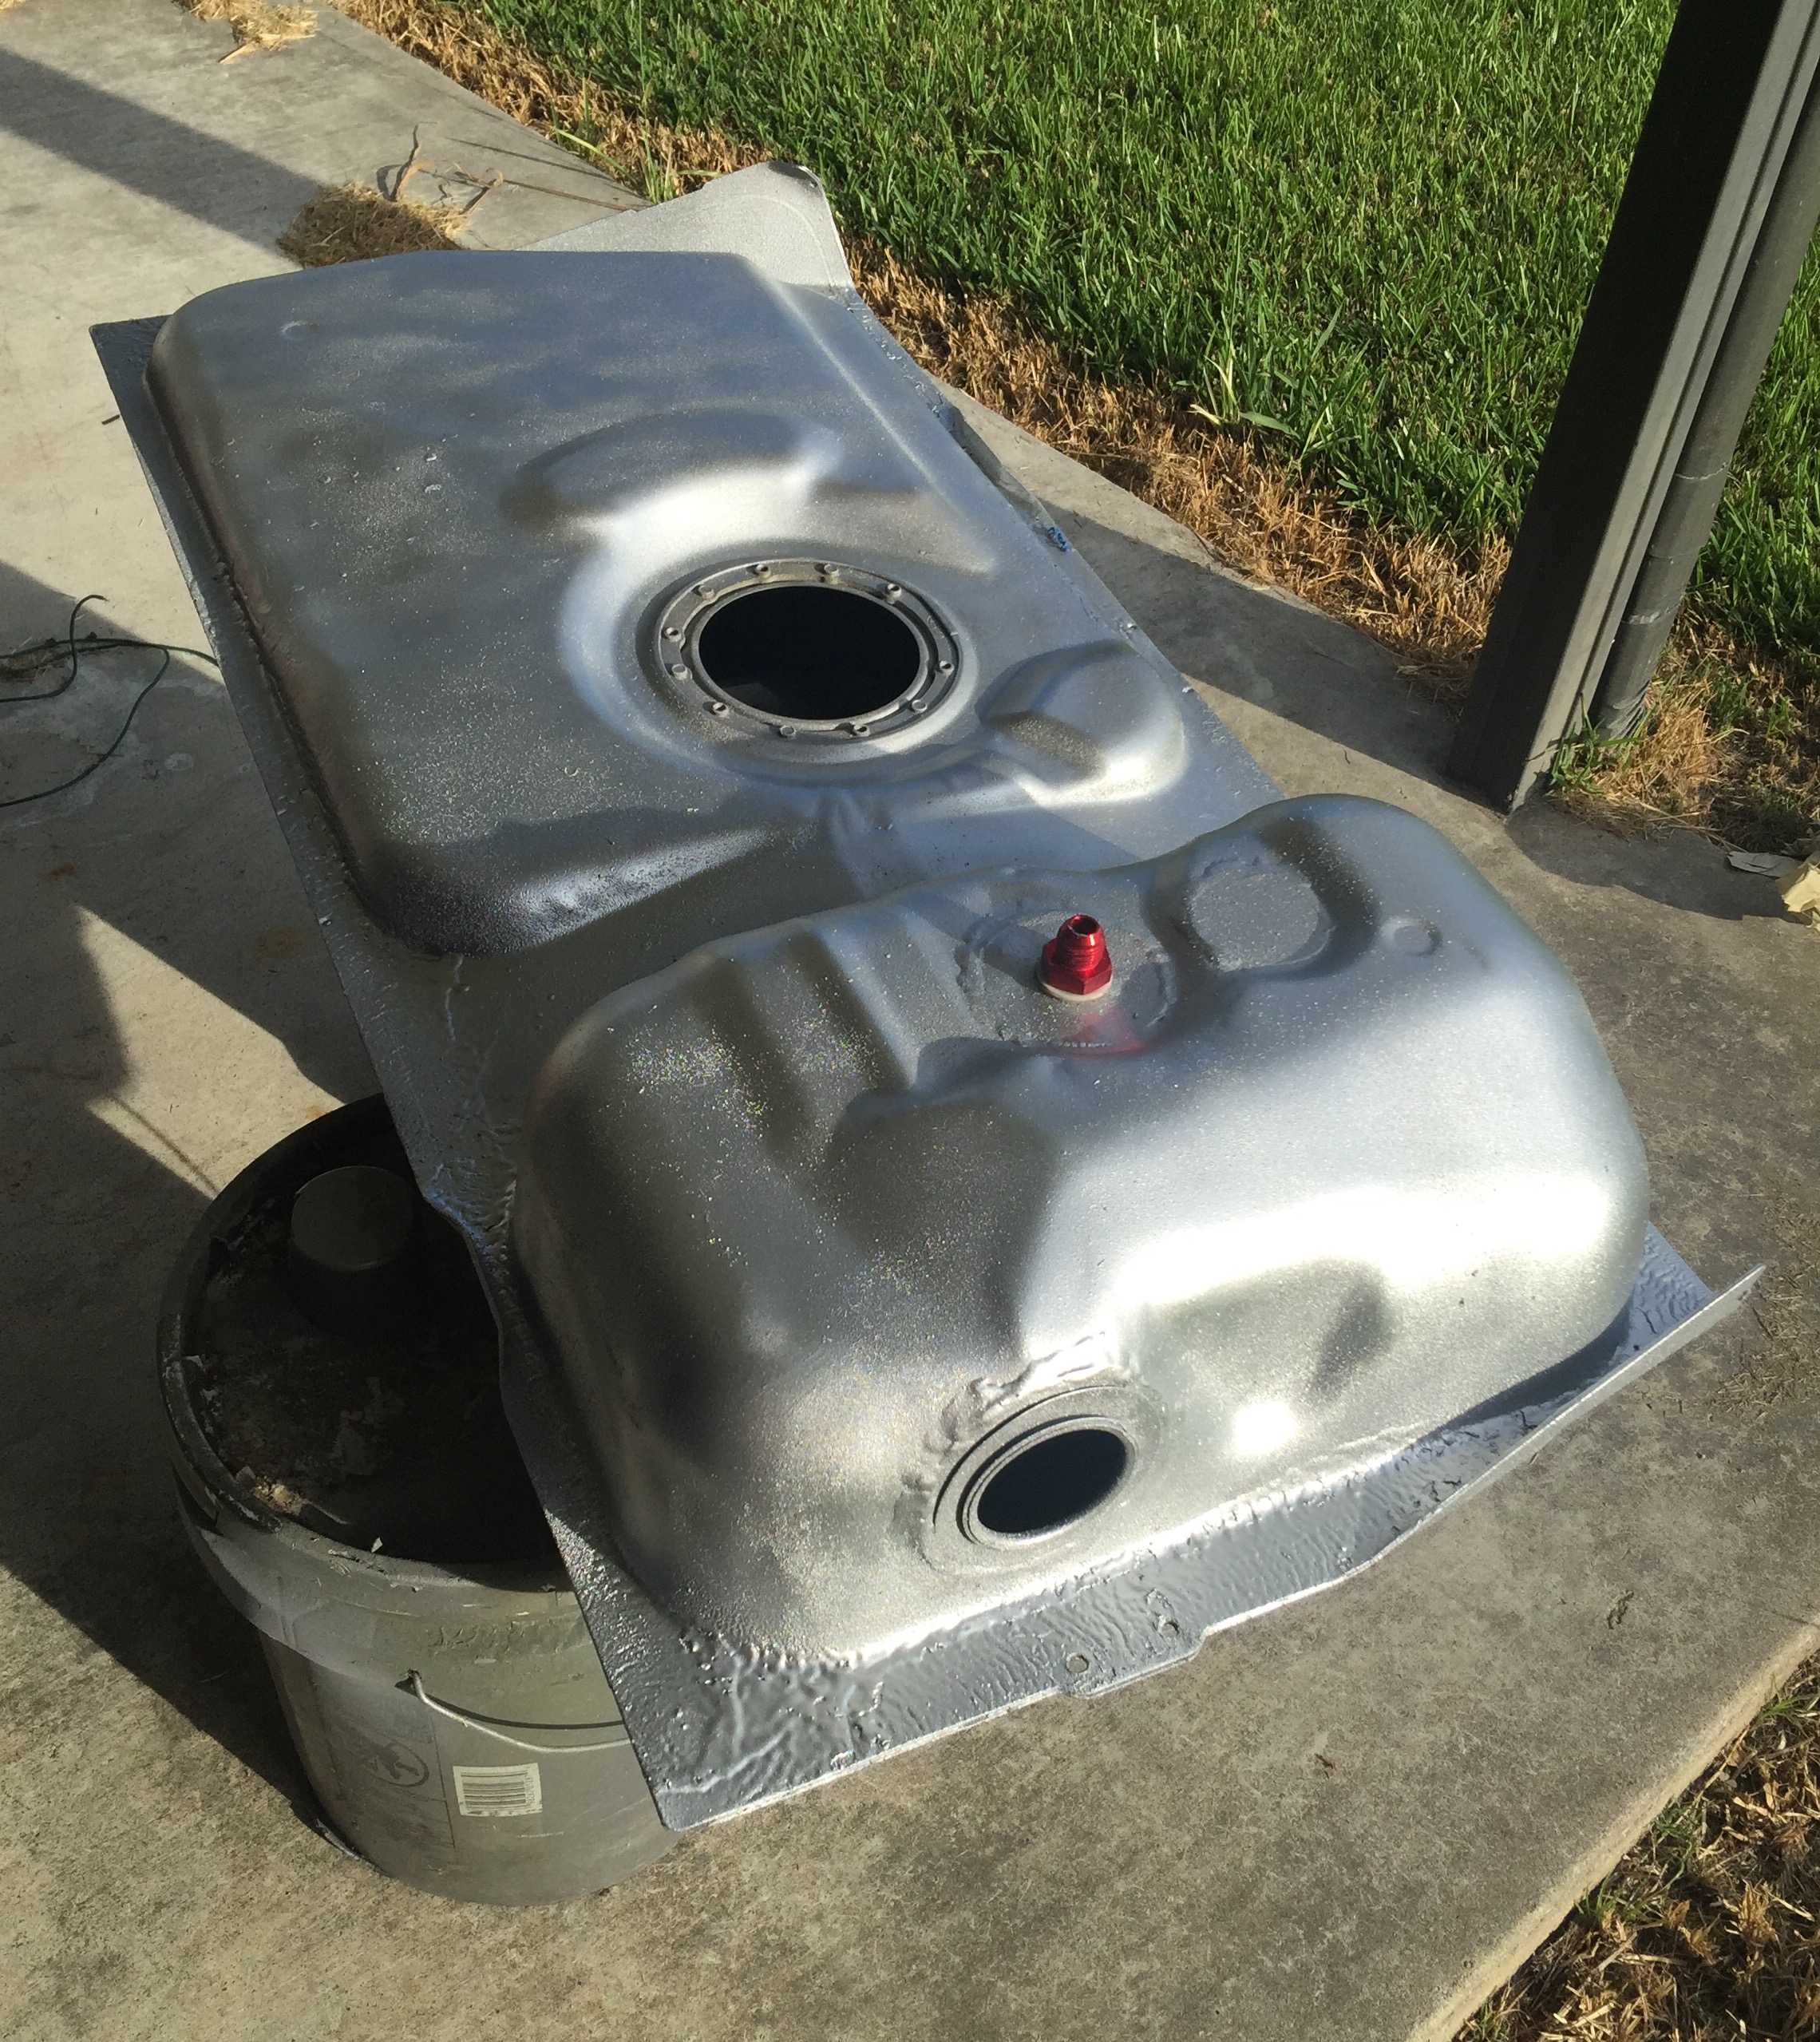
It will bolt in place of the Fox tank. I don't like the filler tube setup on the Cobra tank. Its a lot smaller line and most people just rig it up to get to work, not my style lol.
Naturally because of the smaller filler tube, the hole in the side of the tank is smaller on the Cobra tank. Cobra tank on the right, old stock Fox tank on the left:
I cut the section out of the Fox tank that has the flange for the filler tube gasket. Then I trimmed it down to a small section. Opened up the hole on the Cobra tank. Here is the section from the Fox tank sitting on the Cobra tank:
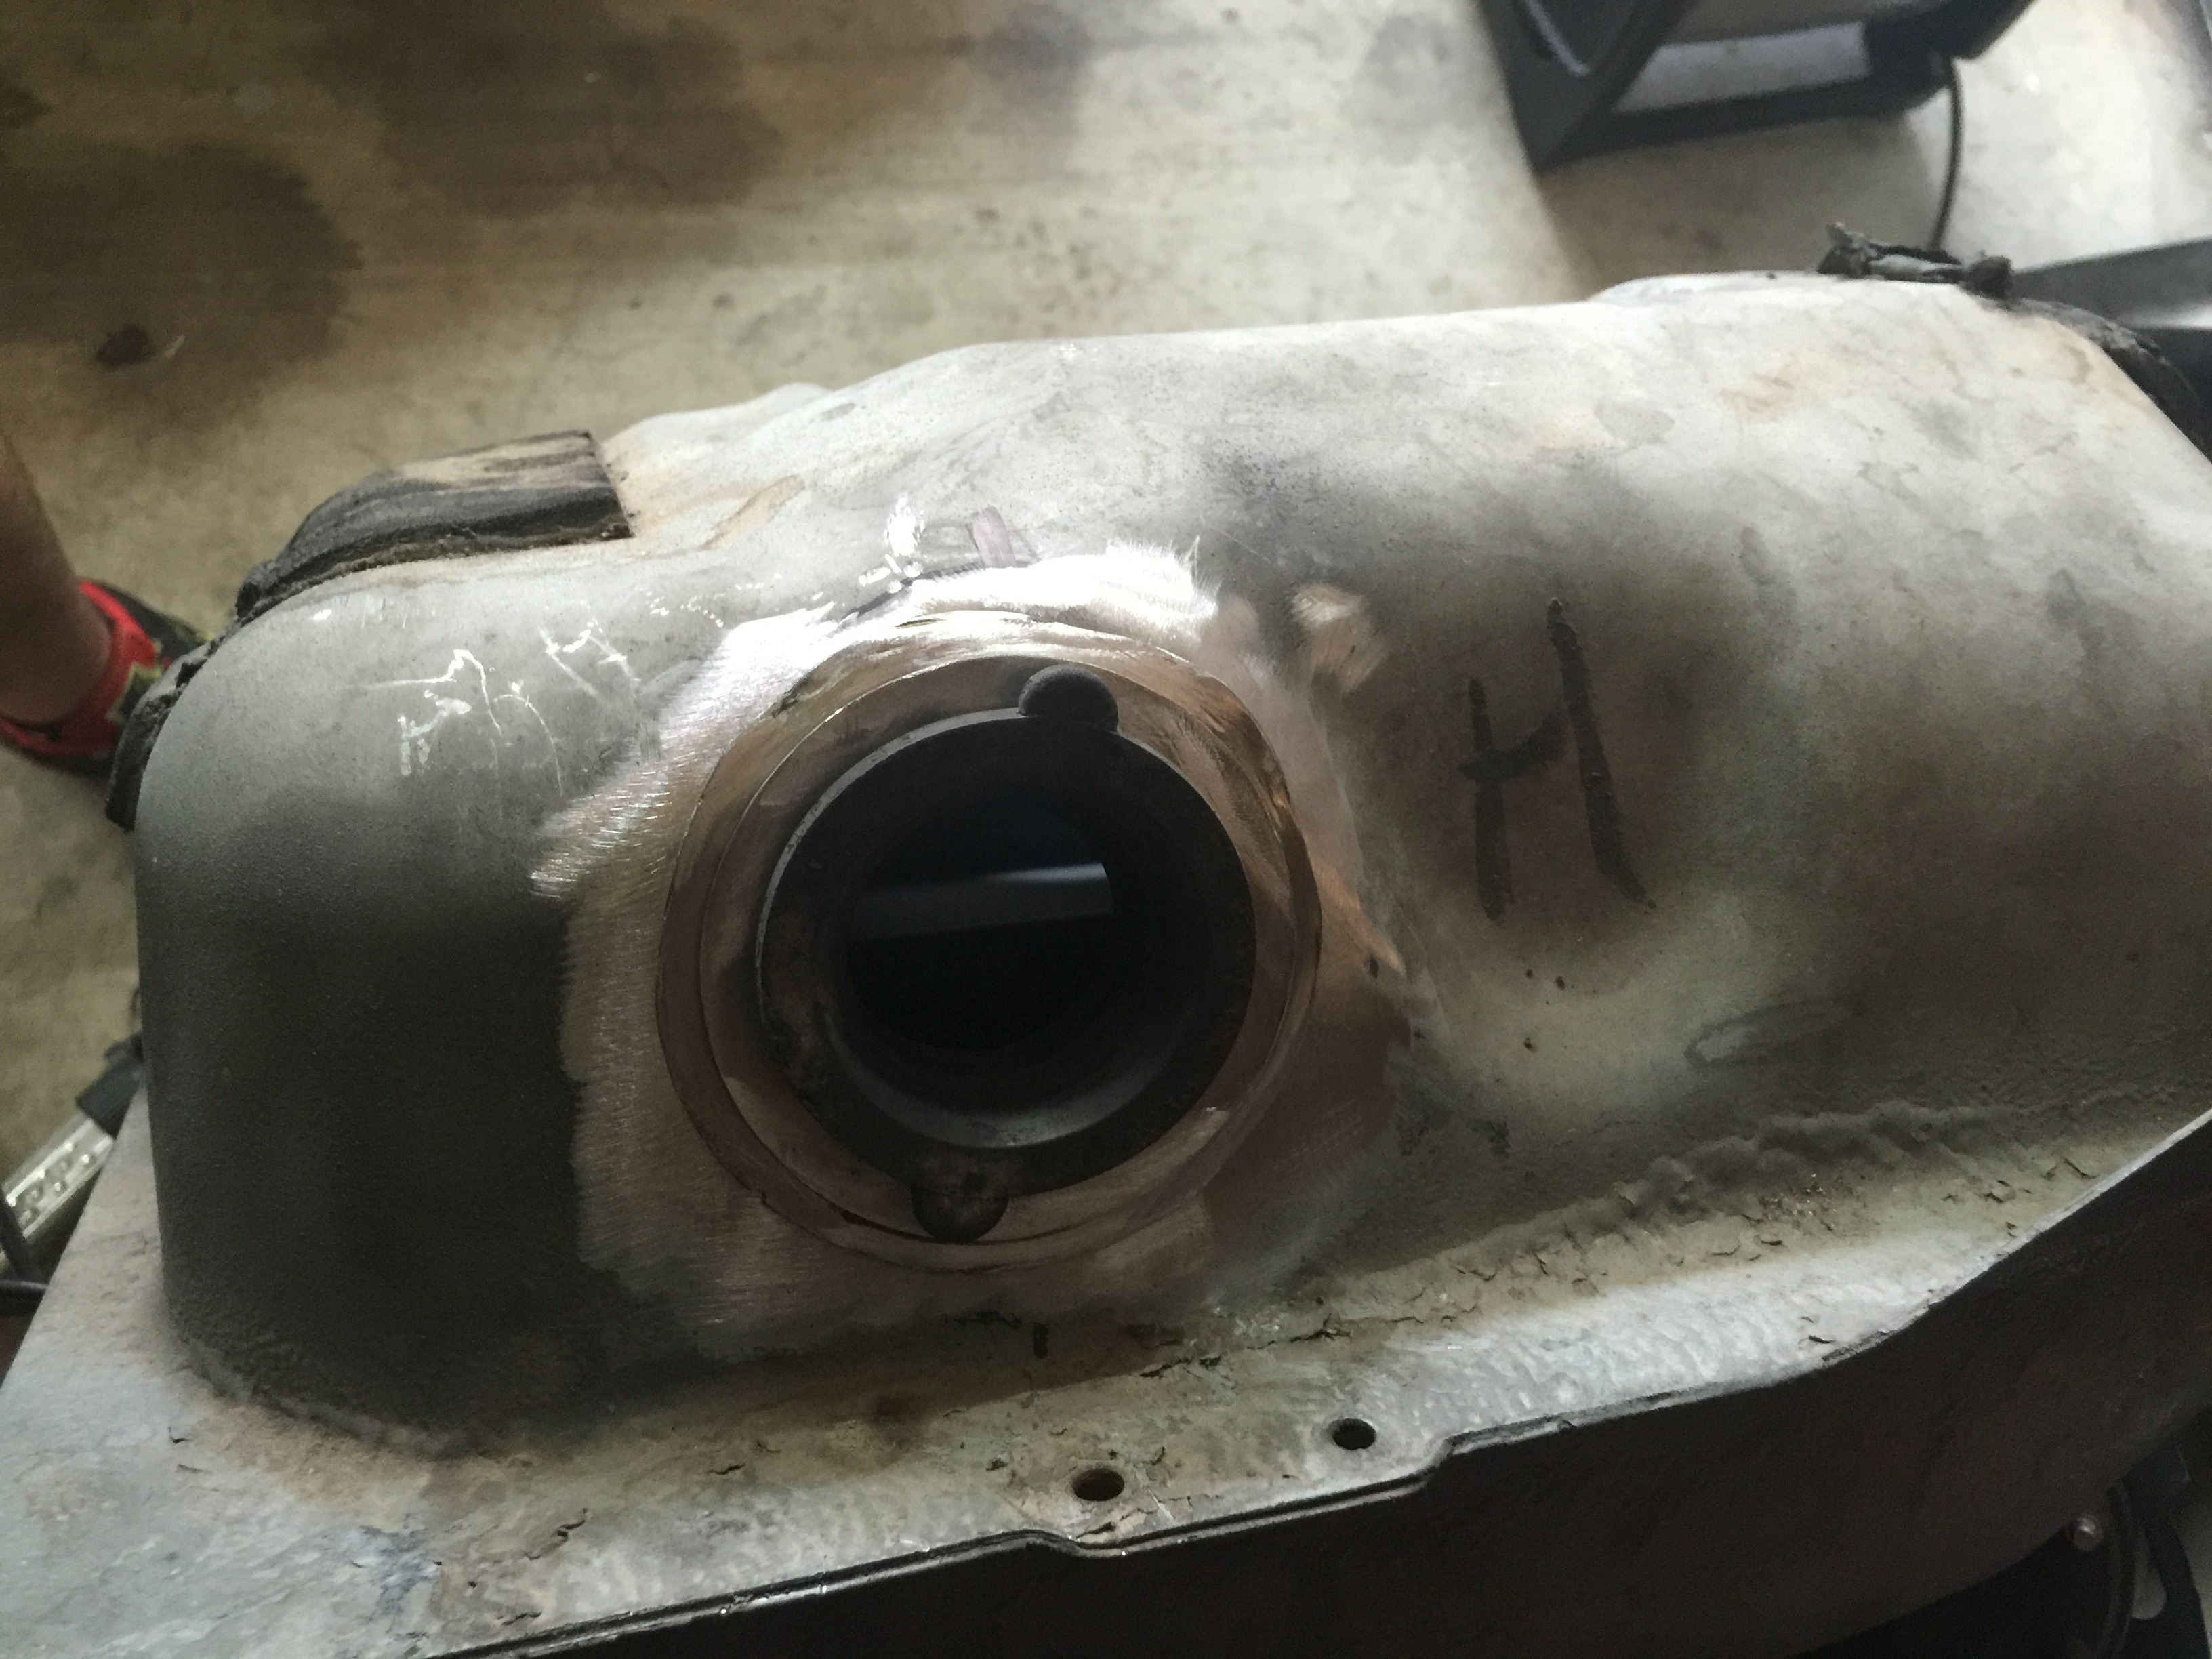
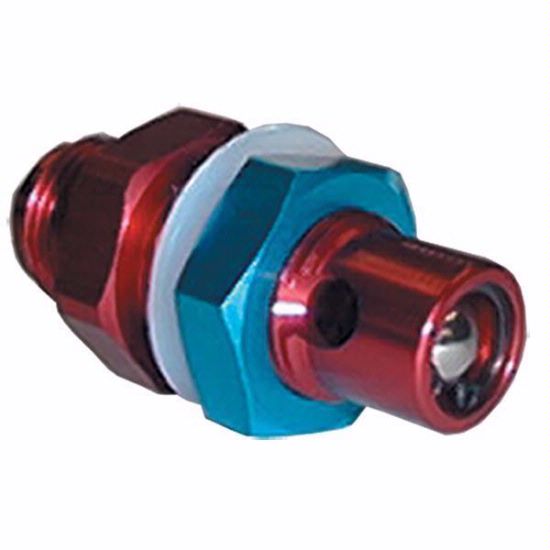
I also cut out plates to cover a couple of the unneeded holes on the Cobra tank. On one of them I mounted a 8an rollover valve/vent valve mounted on it. An item that is often over looked, but recommended when doing fuel system upgrades.
Had a friend of mine weld it all up and leak test it, then put a coat of paint.
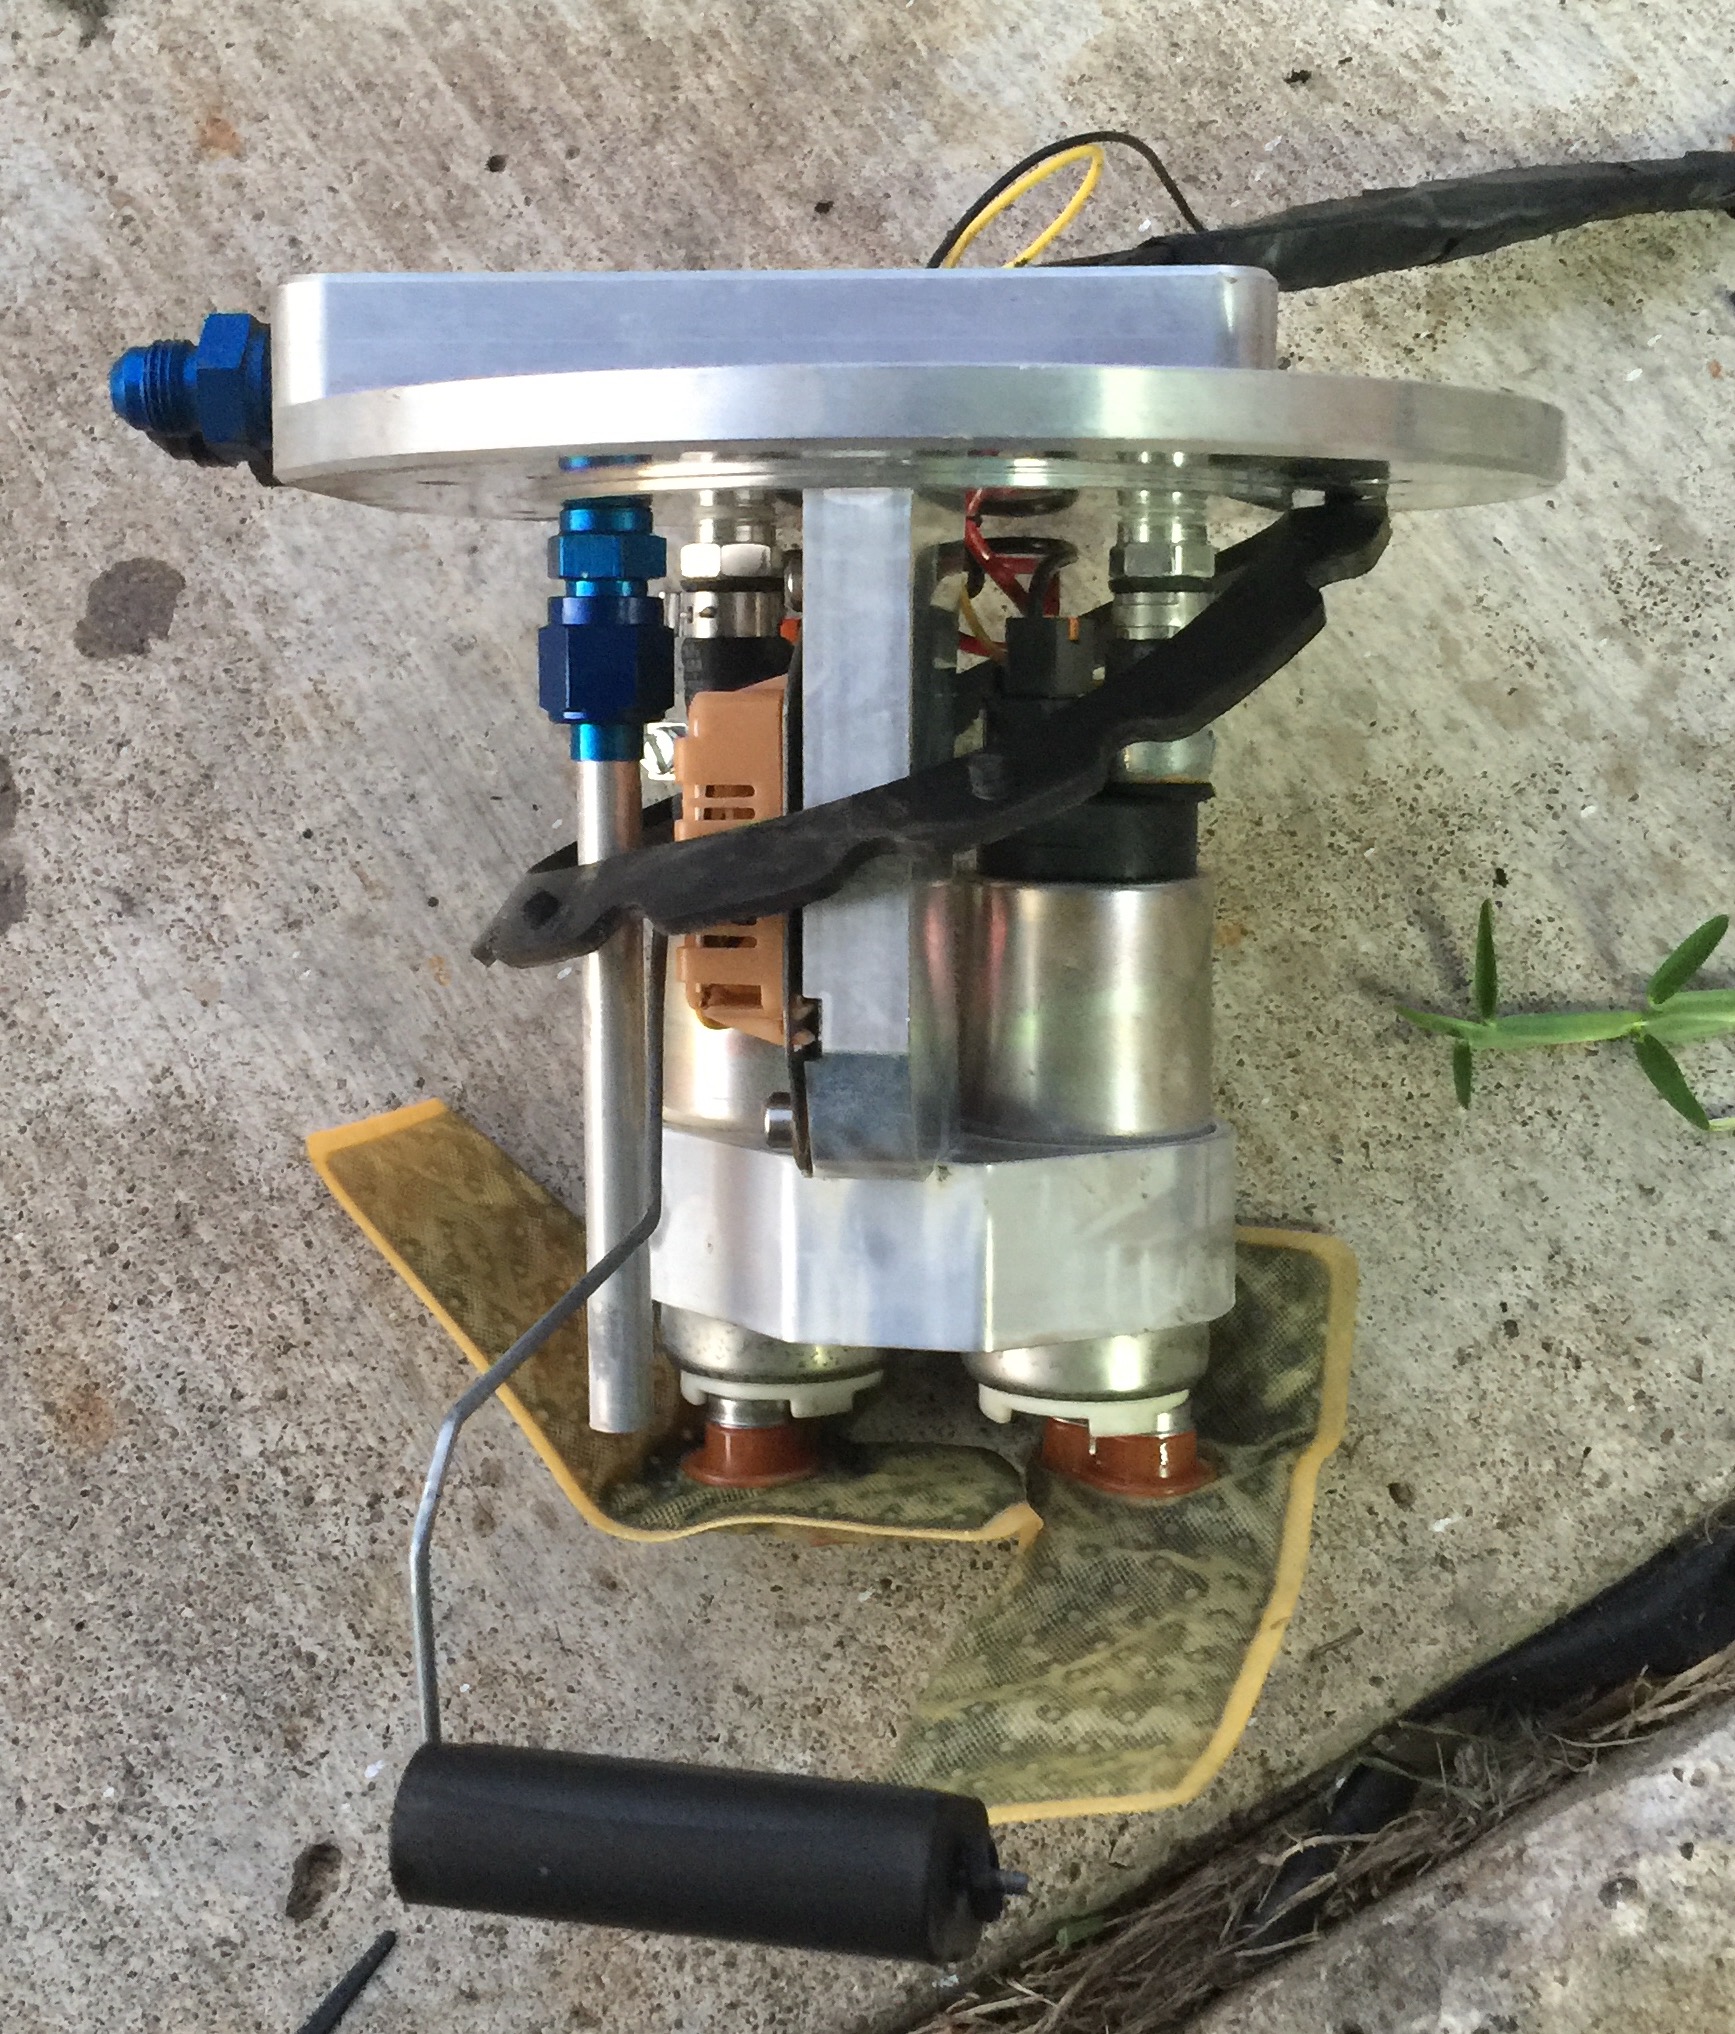
Running a Fore billet fuel hat with twin Walbro 255's and a stock style sending unit
Naturally because of the smaller filler tube, the hole in the side of the tank is smaller on the Cobra tank. Cobra tank on the right, old stock Fox tank on the left:

I cut the section out of the Fox tank that has the flange for the filler tube gasket. Then I trimmed it down to a small section. Opened up the hole on the Cobra tank. Here is the section from the Fox tank sitting on the Cobra tank:

I also cut out plates to cover a couple of the unneeded holes on the Cobra tank. On one of them I mounted a 8an rollover valve/vent valve mounted on it. An item that is often over looked, but recommended when doing fuel system upgrades.

Had a friend of mine weld it all up and leak test it, then put a coat of paint.

Running a Fore billet fuel hat with twin Walbro 255's and a stock style sending unit
 06-08-2017, 11:28 PM
#138
Did you basically center the piece you cut from the fox body tank over the hole in the cobra tank and cut it out
Last edited by AFTER HOURS MOTORSP; 06-08-2017 at 11:49 PM.
06-09-2017, 10:05 AM
#140
9 Second Club
iTrader: (9)
Join Date: Apr 2011
Location: Indian Rocks Beach Fl
Posts: 1,059
Likes: 0
Received 0 Likes
on
0 Posts
I was lucky on my Cobra tank, it used the Fox filler tube dia. We have the same hat, ON3 was buying them from Fore, right close to me. I did use spacers on the gas tank straps to give me clearance on the top hat.