
1970 GTO Version 3.0


The following users liked this post:
Project GatTagO (04-27-2021)
 04-27-2021, 10:42 AM
#202
TECH Senior Member
Thread Starter
iTrader: (7)

Andrew, I thought this whole time you were doing a GenV swap here, and I just now realized you were keeping the LS. I missed a couple weeks I guess. Anyhoo, sounds like solid upgrades to the LS and looking forward to seeing how you like the changes. Love your car sir!
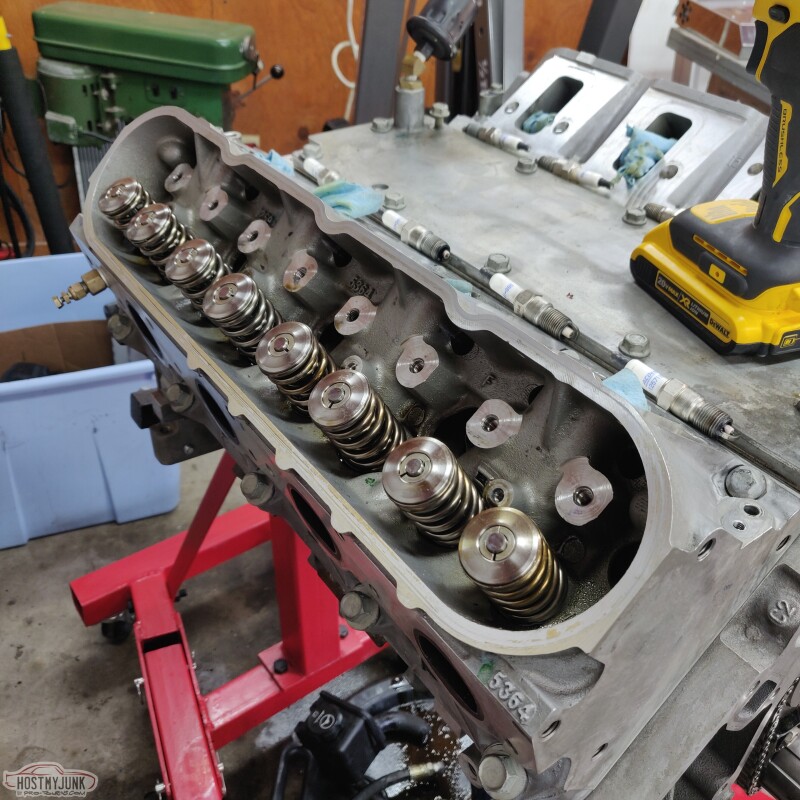
Pulled the rockers, push rods and spark plugs in order to proceed with the cam swap.
I also dropped the oil pan so that when I rotate the engine upside down, whatever oil was in the pan didn't start dripping out all over the place.

Rotated the crank so that #1 cylinder was at TDC on the compression stroke.
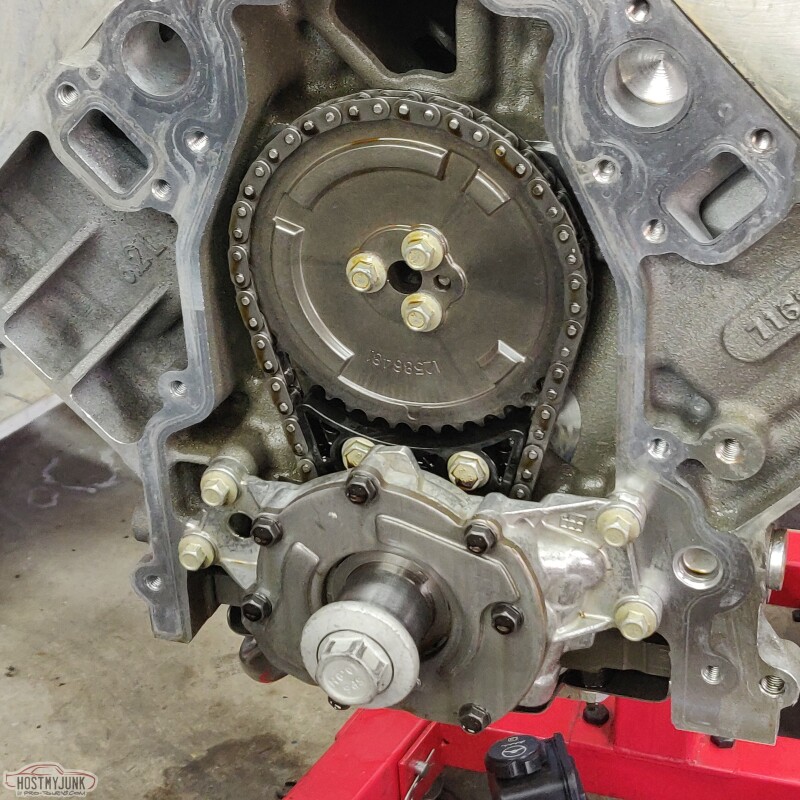
The crank and cam gears are dot to dot and the dowel pin is at 3 o'clock.
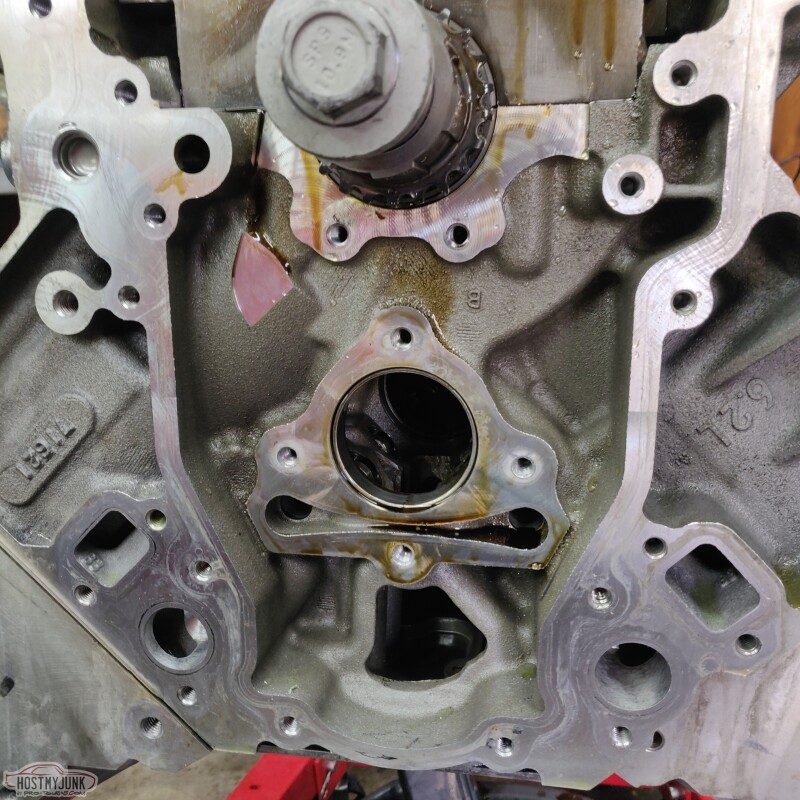
Pulled the oil pump off and the cam gear. Used a long water pump bolt to help pull the cam.
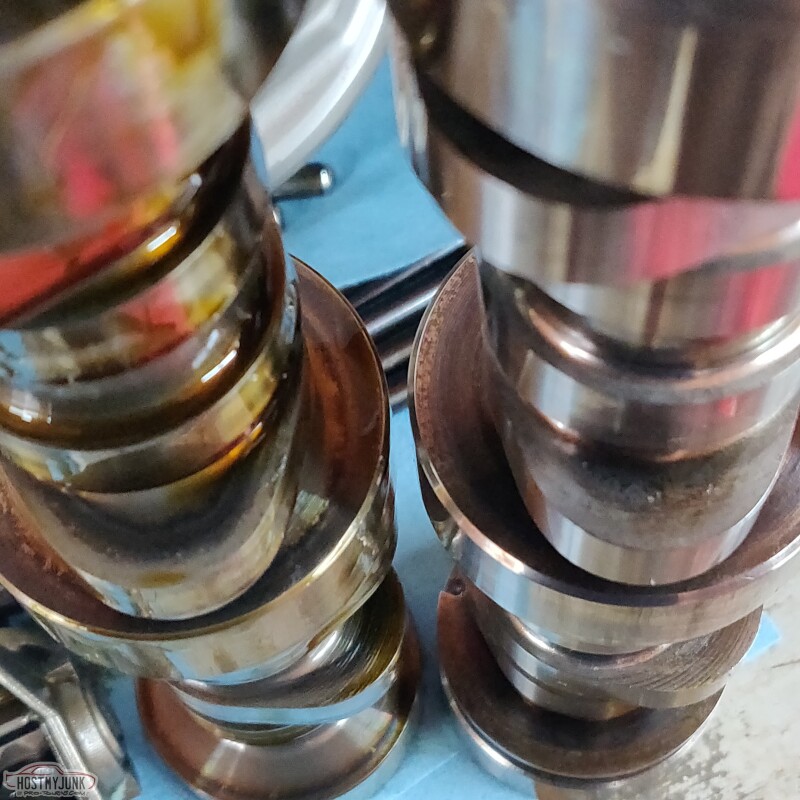
LS7 cam on the left, Summit "ghost" cam on the right.
Having the engine upside down prevents the lifters from dropping down. Also checked the cam bearings and they looked good.
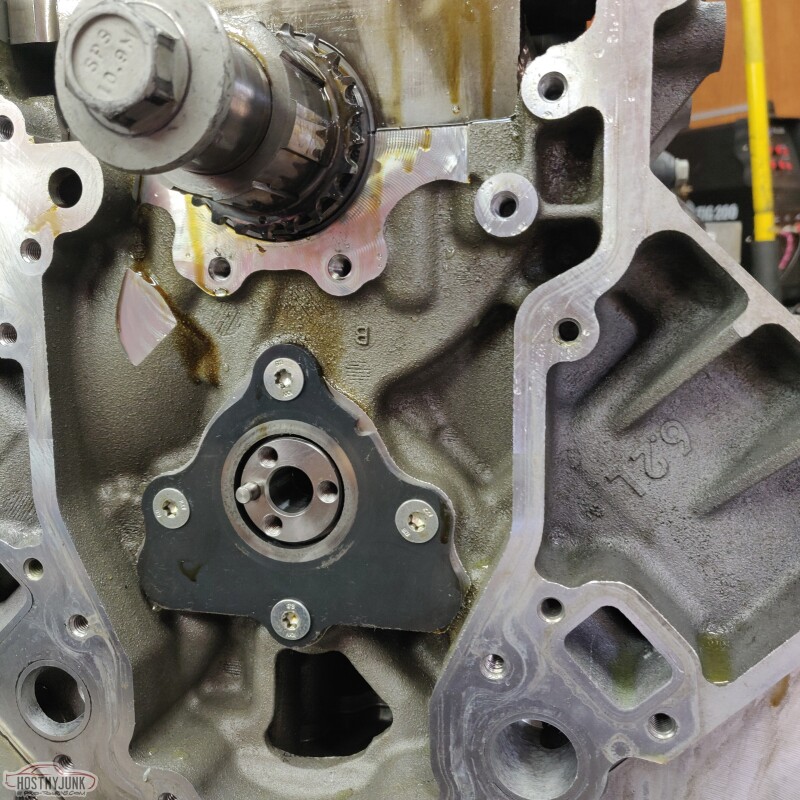
Before installing the new cam, I wiped it down with acetone and then lubed it up with motor oil.
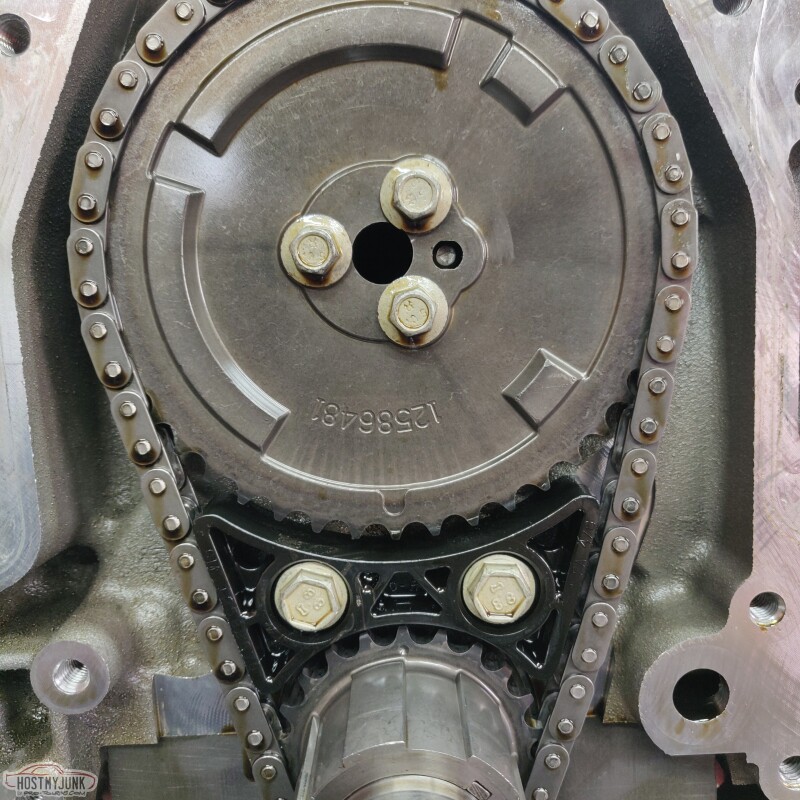
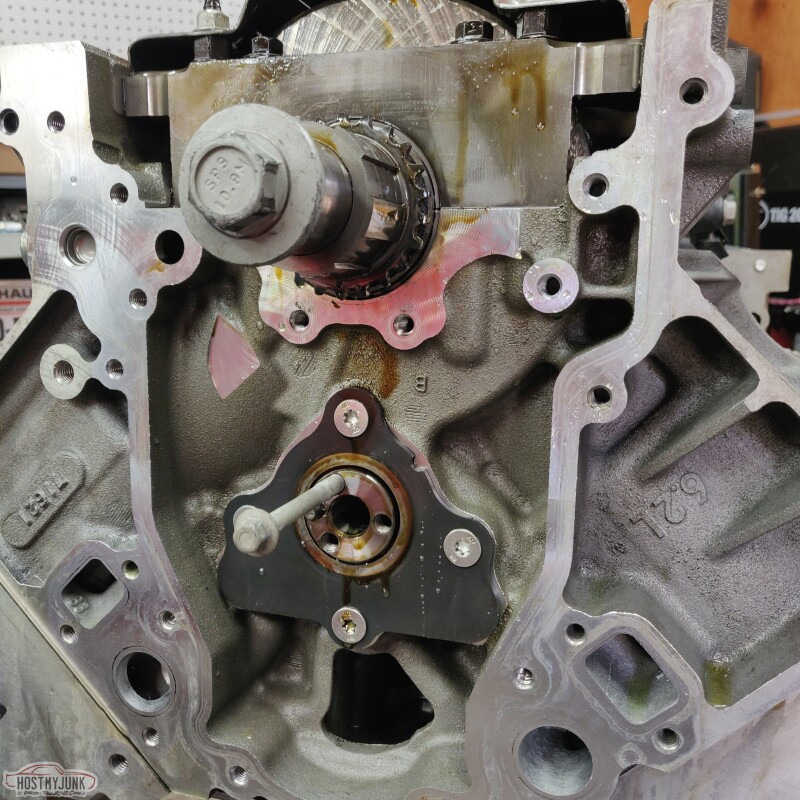
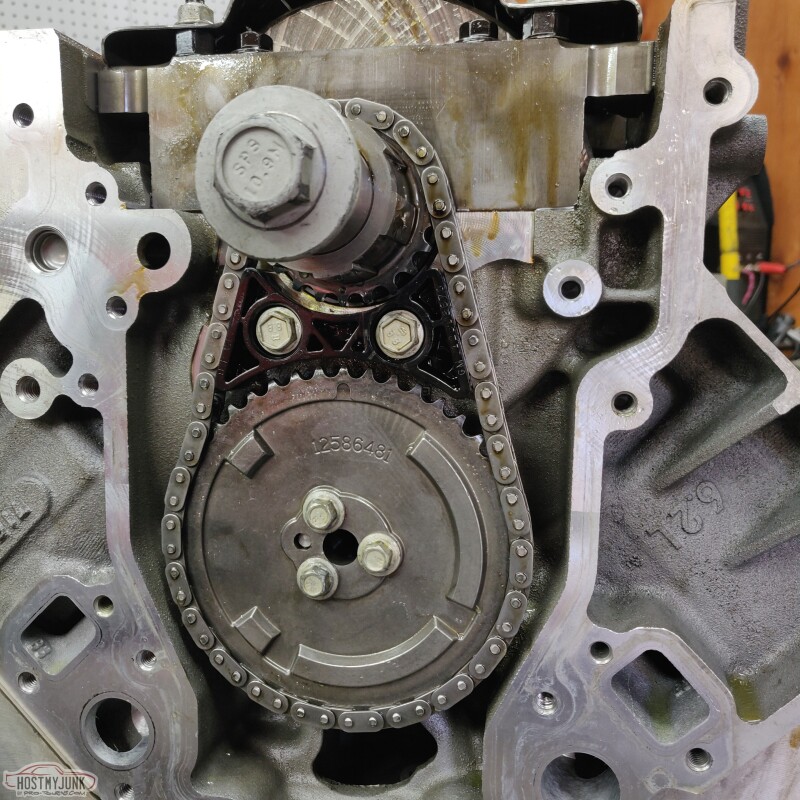
Cam gear, timing chain, and chain guide installed. With the engine upside down, the dowel is at the 9 o'clock position.
Next up is the oil pan installation.
Andrew
04-27-2021, 01:24 PM
#203
LS1Tech Sponsor
Join Date: Jan 2008
Location: Ohio, Georgia, Nevada, Texas
Posts: 2,010
Received 1,202 Likes
on
652 Posts

Summit- How much leeway is there with pushrod length when using say, LS7 lifters ?
Down the road when my LM7 needs work, I plan on over hauling the heads with a GOOD valve job, bowl blend, and milling about .020" to lose 3 cc's from the chambers. All with .040 head gaskets to arrive at a a hair less than 10:1 compression.
With stock pushrods at 7.400", and taking off .031 (.020 milled, .011 thinner HG, for a new theoretical length of 7.369), would I go down to the next available length pushrod (7.375") or even shorter?
No more hijacking Andrew's thread. Sorry!
Regarding pushrod length leeway and LS7 lifters. That would be in the previously mentioned variances and lifter pre-load. With our LS7 spec lifters we recommend .050"-.075" pre-load. That gives you a .025" window to play with. As long as you can get within that window and the valvetrain geometry is in check then you'll be in good shape.
We'll use the Ghost cam and a stock LM7 as an example. With un-milled heads and .051" gaskets, a 7.425" pushrod is a good target. If you took .020" off the heads and used a .040" head gasket a 7.400" pushrod would be a good target to shoot for. Not to sound like a preacher, but we recommend getting a pushrod length checker and a set of dial calipers. It makes good engine building practice and those are useful tools for future projects.

Last edited by Summitracing; 04-30-2021 at 08:23 AM.
The following 2 users liked this post by Summitracing:
Project GatTagO (04-27-2021), Rick Dorion (01-29-2023)
04-27-2021, 02:16 PM
#204
TECH Senior Member

Great question G! We like your plan of attack for the heads and head gaskets.
Regarding pushrod length leeway and LS7 lifters. That would be in the previously mentioned variances and lifter pre-load. With our LS7 spec lifters we recommend .050"-.075" pre-load. That gives you a .025" window to play with. As long as you can get within that window and the valvetrain geometry is in check then you'll be in good shape.
We'll use the Ghost cam and a stock LM7 as an example. With un-milled heads and .051" gaskets, a 7.425" pushrod is a good target. If you took .020" off the heads and used a .040" head gasket a 7.400" pushrod would be a good target to shoot for. Not to sound like a preacher, but we recommend getting a pushrod length checker and a set of dial calipers. It makes good engine building practice and those are useful tools for future projects.

The following 2 users liked this post by G Atsma:
Rick Dorion (01-29-2023), Summitracing (04-27-2021)
04-27-2021, 05:04 PM
#205
TECH Senior Member
Thread Starter
iTrader: (7)
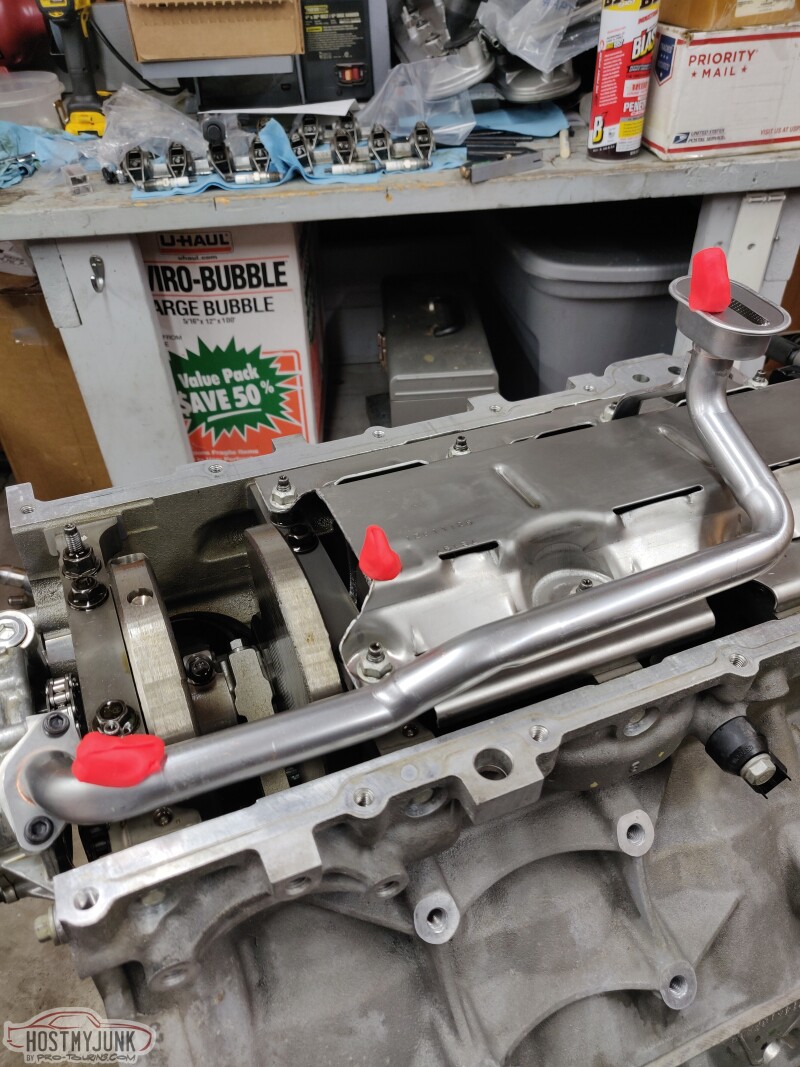
I have been taking a ton of pictures along the way, and hopefully y'all won't mind the details.
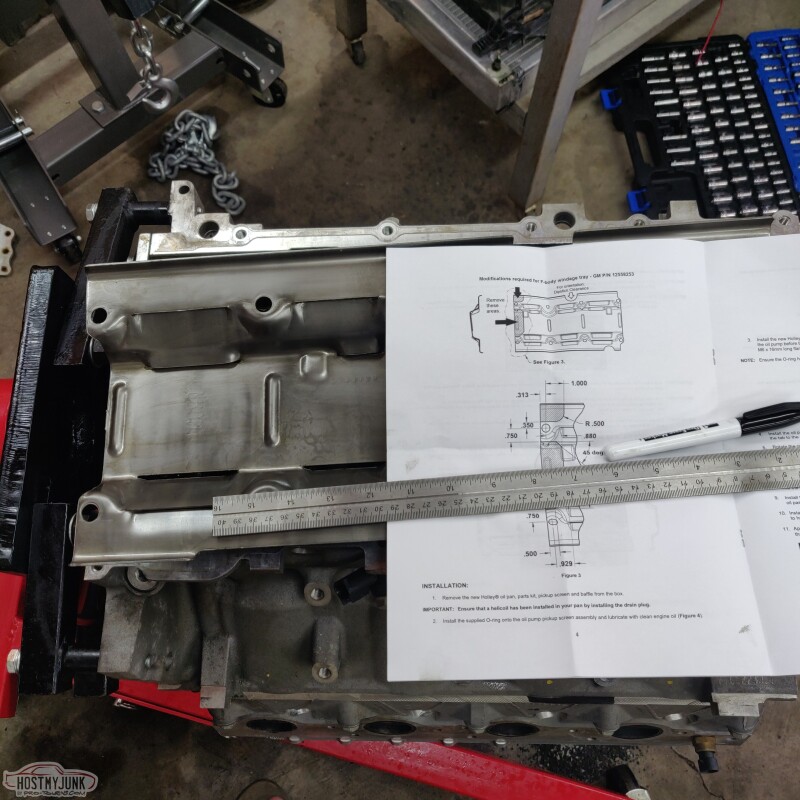
With the AutoKraft pan, I was able to use a full length (truck style) windage tray. You can see in this picture how the windage tray interferes with the new Holley pickup tube.
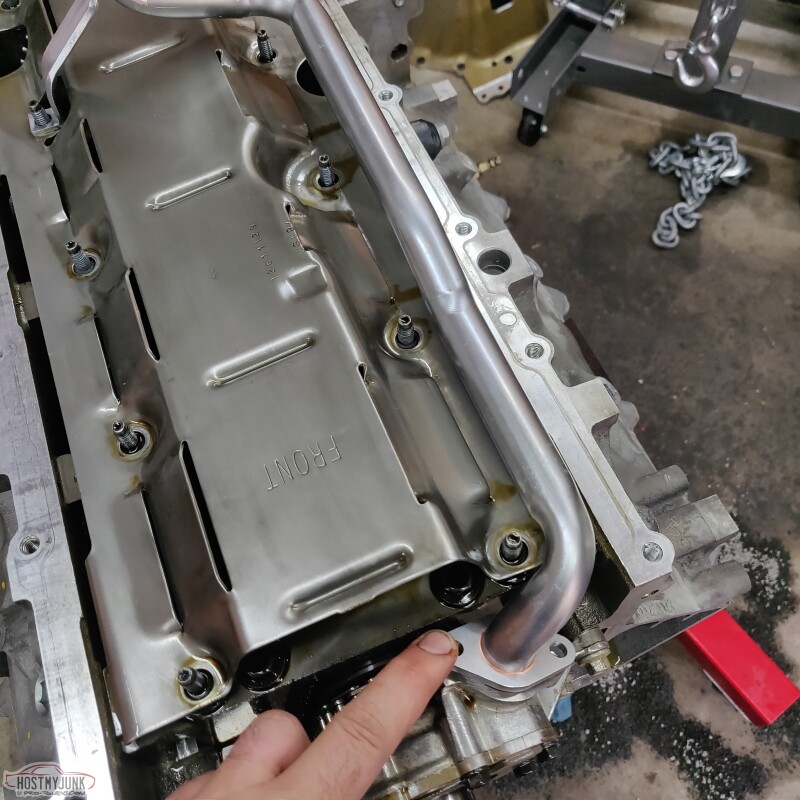
I took it off for modifications. (more on this later)
I also picked up the 302-12 road race baffle kit. Not that I plan to do a lot of racing with this car, but it is always good to have a pan with good oil control.

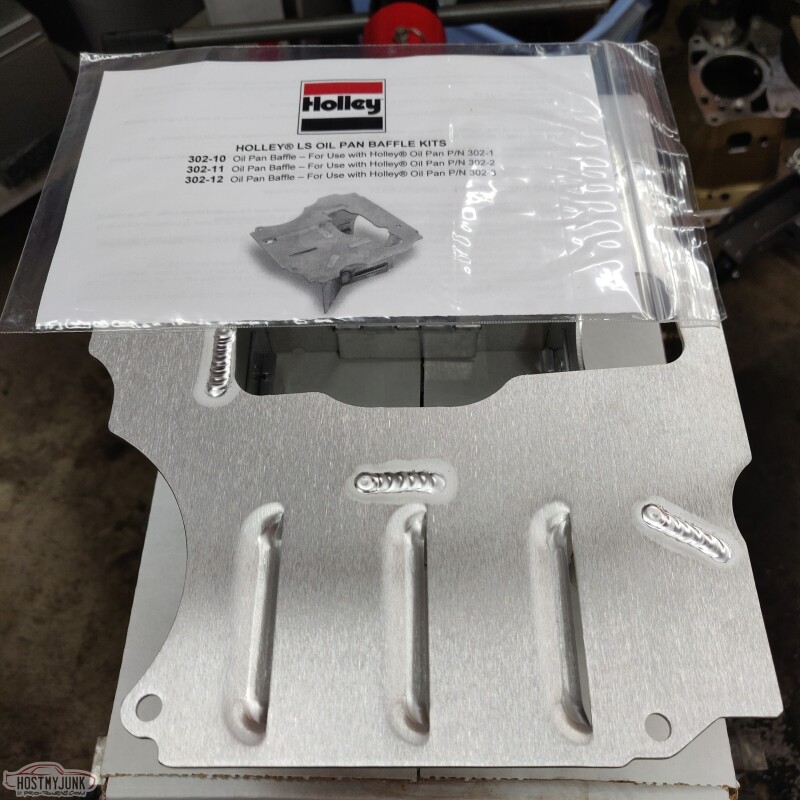
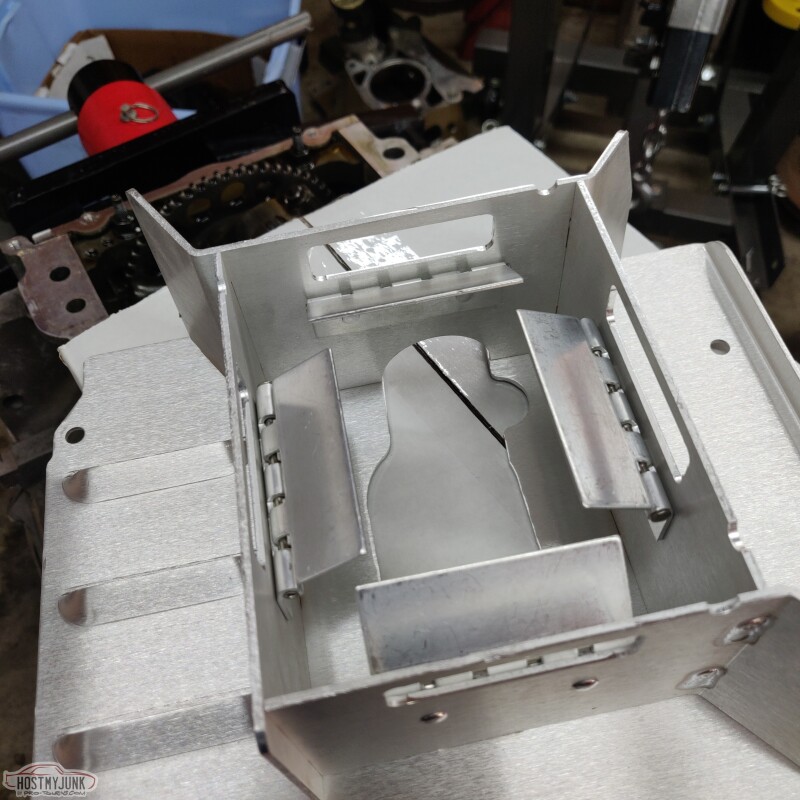
It's a very nice piece with thoughtfully designed trap doors do keep the pickup tube covered with oil as much as possible.
Andrew
With the AutoKraft pan, I was able to use a full length (truck style) windage tray. You can see in this picture how the windage tray interferes with the new Holley pickup tube.
I took it off for modifications. (more on this later)
I also picked up the 302-12 road race baffle kit. Not that I plan to do a lot of racing with this car, but it is always good to have a pan with good oil control.
It's a very nice piece with thoughtfully designed trap doors do keep the pickup tube covered with oil as much as possible.
Andrew
04-27-2021, 05:38 PM
#206
TECH Senior Member
Thread Starter
iTrader: (7)
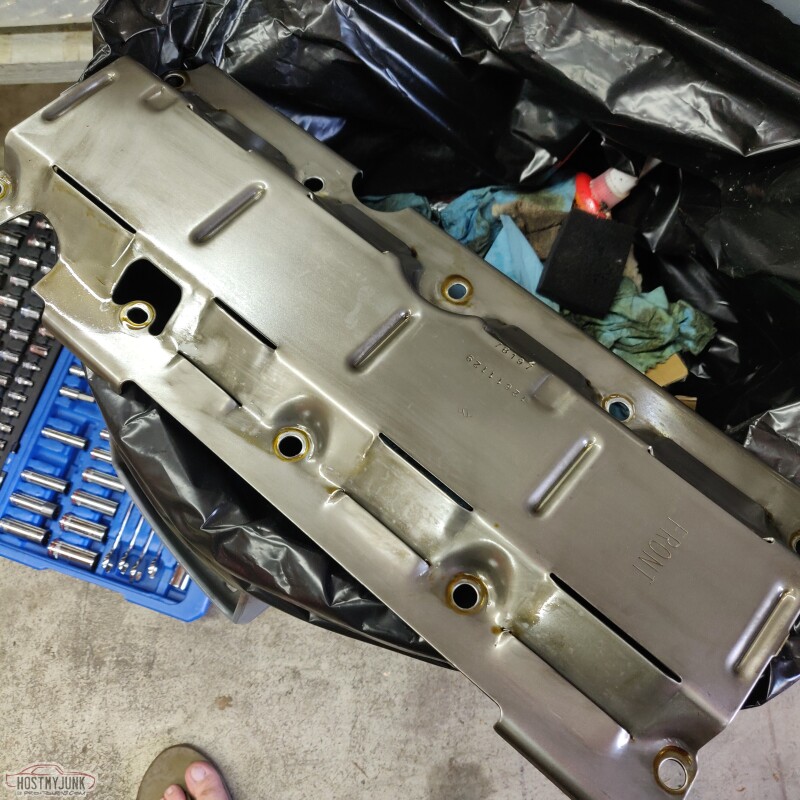
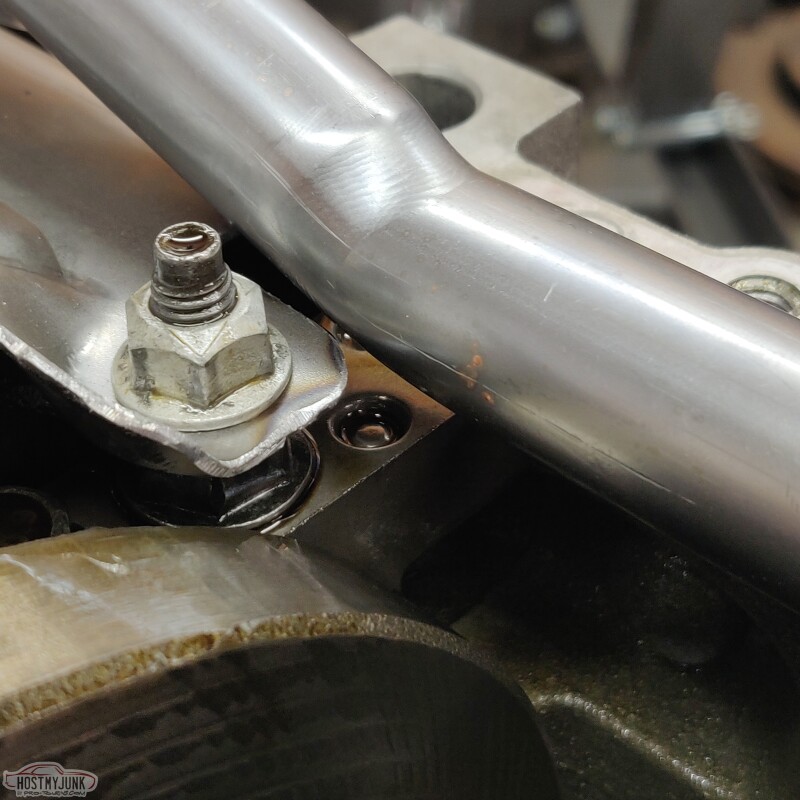
Holley provided an instruction sheet with the 302-3 oil pan, including a dimensional drawing as to how the windage tray trimming was to be done.
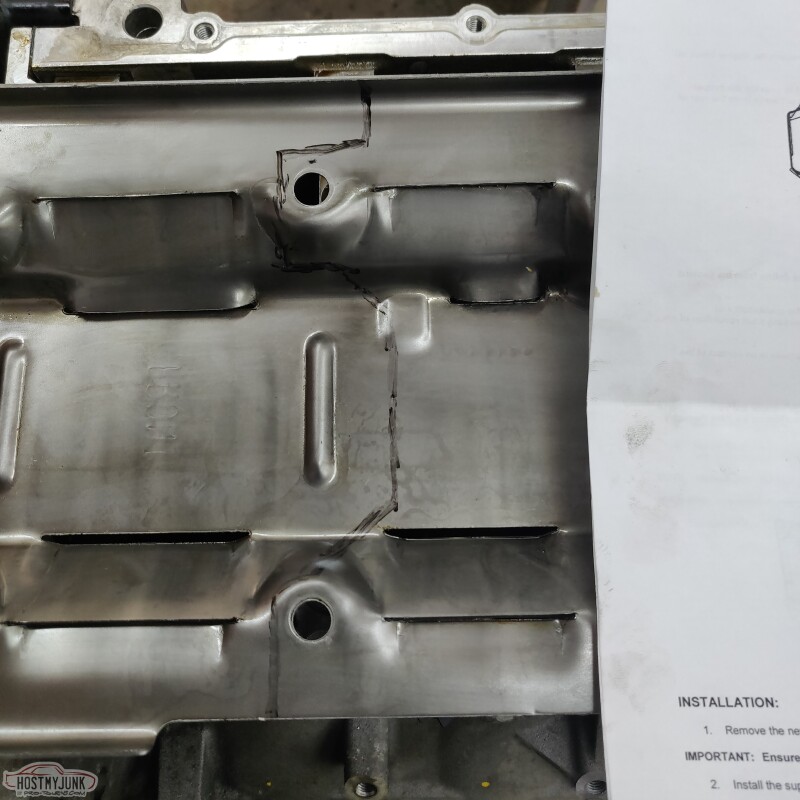
After some quality time with the whizzwheelofdeath, the windage tray was chopped.
Here you can see how the pickup tube fits snugly in the space created and the flange sits flush against the oil pump.
Andrew
After some quality time with the whizzwheelofdeath, the windage tray was chopped.
Here you can see how the pickup tube fits snugly in the space created and the flange sits flush against the oil pump.
Andrew
04-27-2021, 05:52 PM
#207
TECH Senior Member
Thread Starter
iTrader: (7)
Last post of the day, which brings us to the end of the day, yesterday...
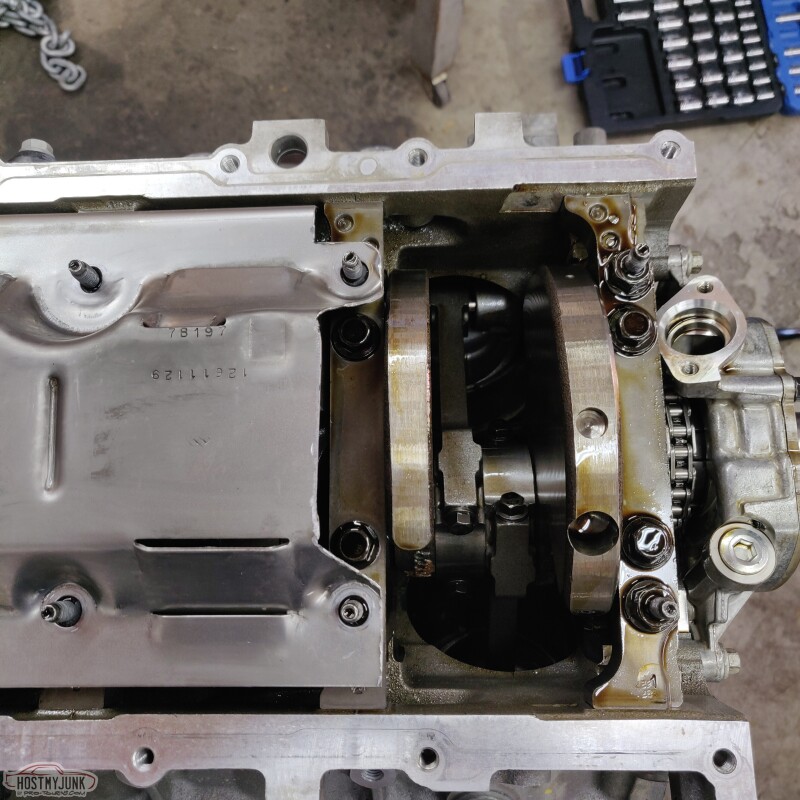
With much enthusiasm, I popped the oil pan into place, only to find it was hanging up on something. There is no gasket, obviously, but the gasket is only about 1/8".

Nothing was jumping out at me, so instead of beating my head against the wall, I went inside the house and had a few bourbons...
Andrew
With much enthusiasm, I popped the oil pan into place, only to find it was hanging up on something. There is no gasket, obviously, but the gasket is only about 1/8".
Nothing was jumping out at me, so instead of beating my head against the wall, I went inside the house and had a few bourbons...
Andrew
The following 3 users liked this post by Project GatTagO:
04-28-2021, 03:20 AM
#208

Is the interference the pickup tube as it goes to 45*. The last pic I believe
04-28-2021, 01:25 PM
#210
I am really glad to see the Holley pan has a "road race" trap door system. That type of oil control system was the main reason I went for the Autokraft/Champ steel pan on my build years ago. If a cast pan was available at the time with this feature I probably would have sprung for it.
The following 2 users liked this post by -TheBandit-:
2ToeRacing (07-15-2023), G Atsma (04-28-2021)
04-28-2021, 02:01 PM
#211
TECH Senior Member
Thread Starter
iTrader: (7)
Nope...It will be fine...
I actually did figure it out and I will be posting an update shortly.
The road race baffle is an extra cost option for the Holley pan, but I feel it is a worthwhile investment. It is very similar in construction to the AutoKraft pan that I removed. The Holley pan just has superior fitment when installed into GM A-bodies. The AutoKraft pan is too thick in the front and my inner tie rods hit the corners of the pan in extreme parking lot turns.
Andrew
This is sometimes the best course of action, especially if you're tired at the end of the day! No point in making mistakes or rushing things. I'm sure you'll figure this out quickly. Might have something to do with those long main studs.
I am really glad to see the Holley pan has a "road race" trap door system. That type of oil control system was the main reason I went for the Autokraft/Champ steel pan on my build years ago. If a cast pan was available at the time with this feature I probably would have sprung for it.
I am really glad to see the Holley pan has a "road race" trap door system. That type of oil control system was the main reason I went for the Autokraft/Champ steel pan on my build years ago. If a cast pan was available at the time with this feature I probably would have sprung for it.
The road race baffle is an extra cost option for the Holley pan, but I feel it is a worthwhile investment. It is very similar in construction to the AutoKraft pan that I removed. The Holley pan just has superior fitment when installed into GM A-bodies. The AutoKraft pan is too thick in the front and my inner tie rods hit the corners of the pan in extreme parking lot turns.
Andrew
The following 3 users liked this post by Project GatTagO:
04-28-2021, 04:16 PM
#212
TECH Senior Member
Thread Starter
iTrader: (7)
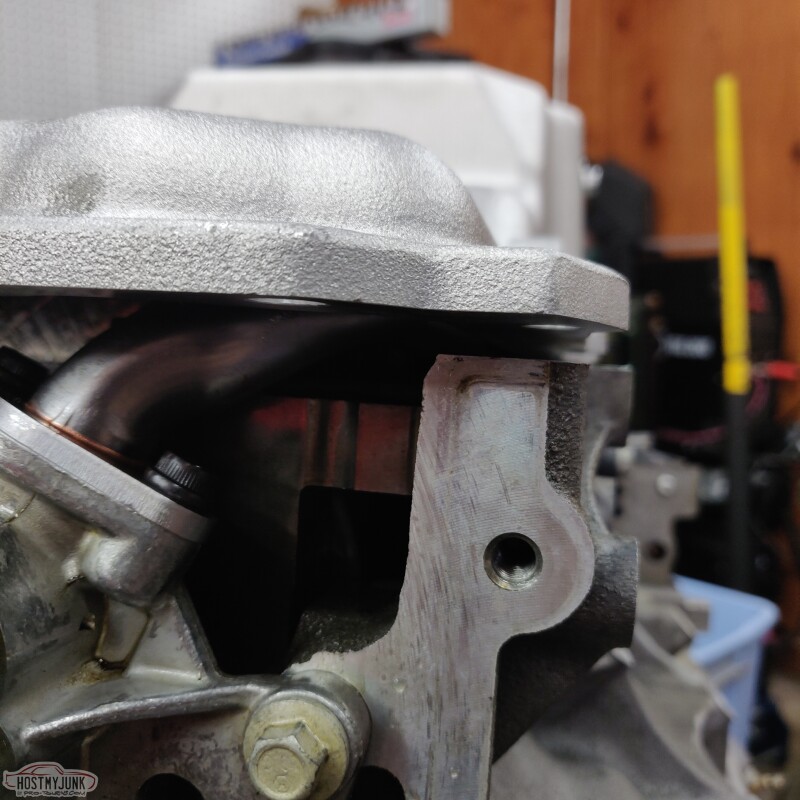
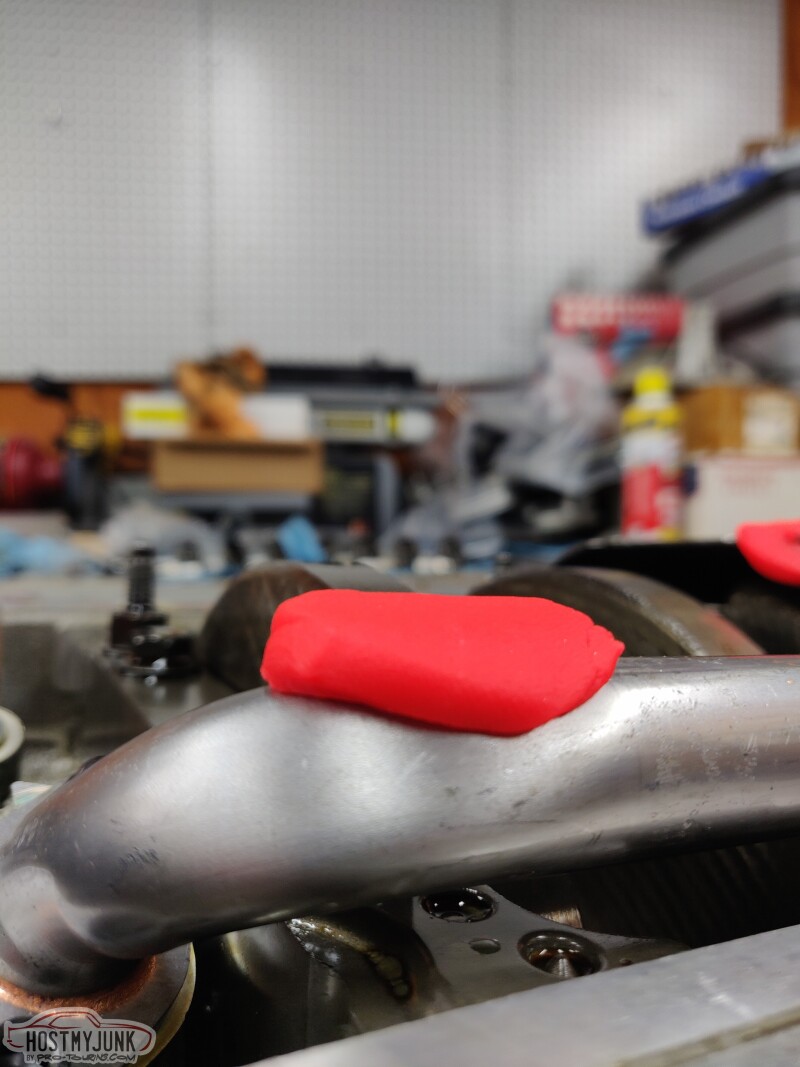
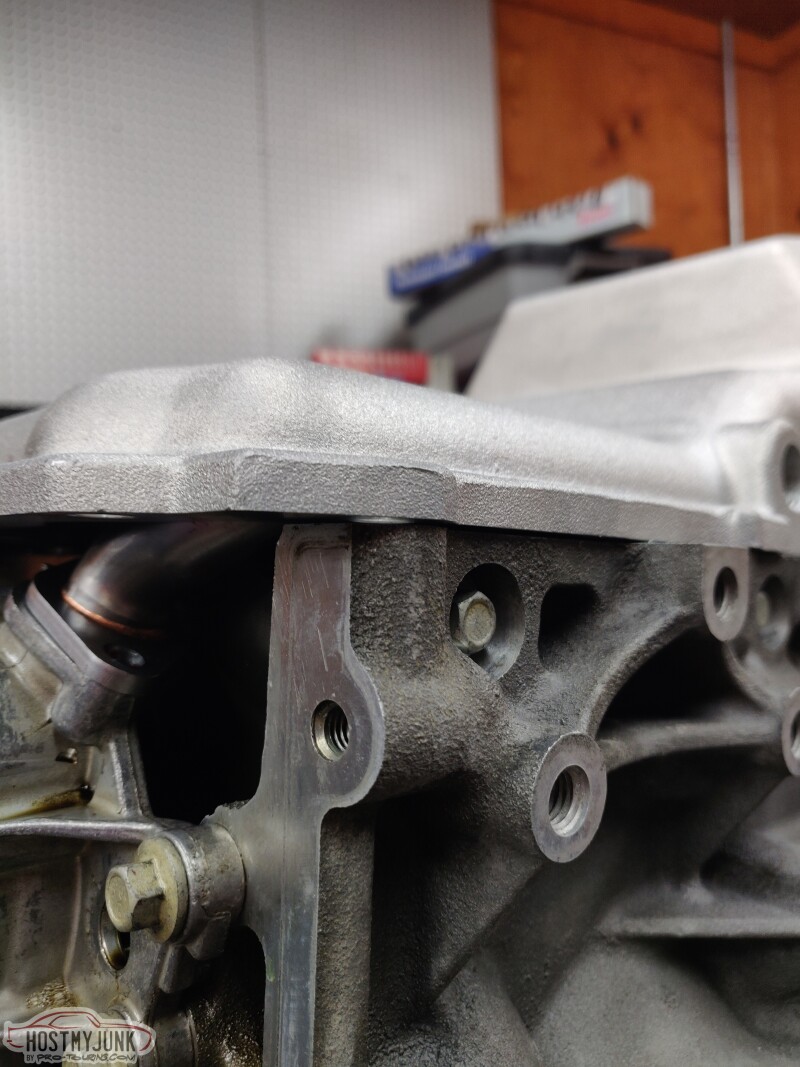
Yesterday morning I tackled the oil pan issue with renewed enthusiasm. I got the big guns out to figure out where exactly the interference was. I stuck some play doh on the 3 likely places and placed the pan on the engine.
The pick-up tube clearance looks good.
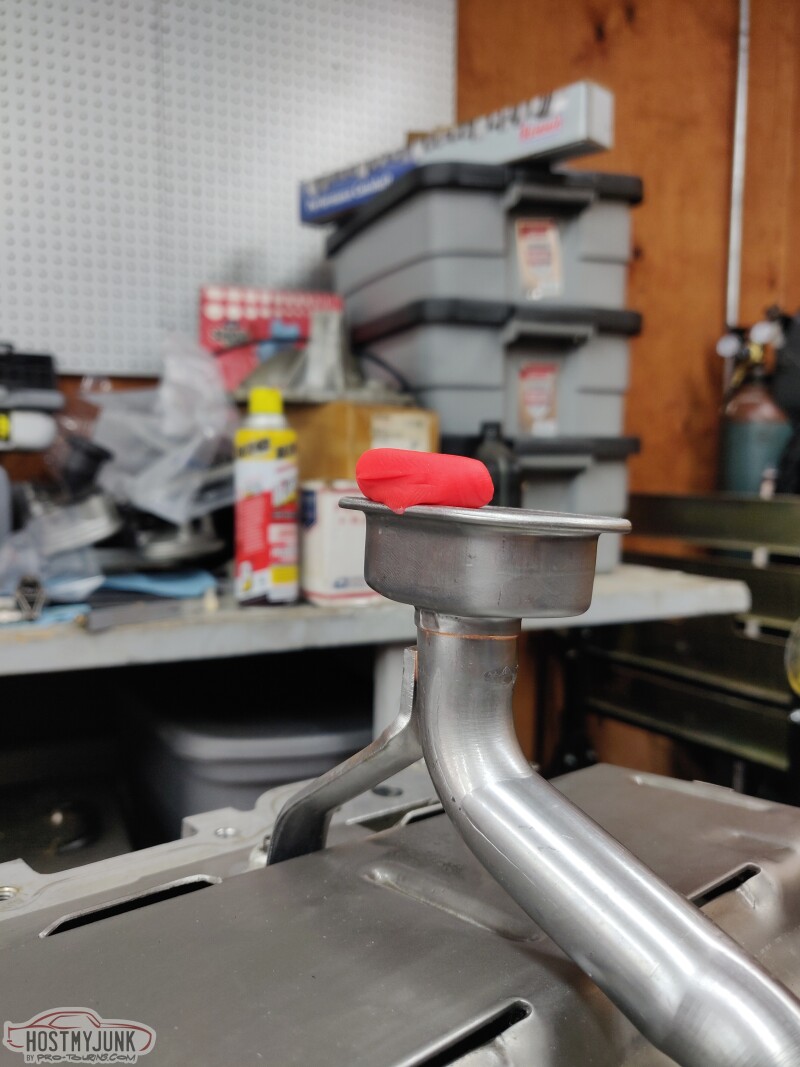
The front of the pick-up tube also looks good.
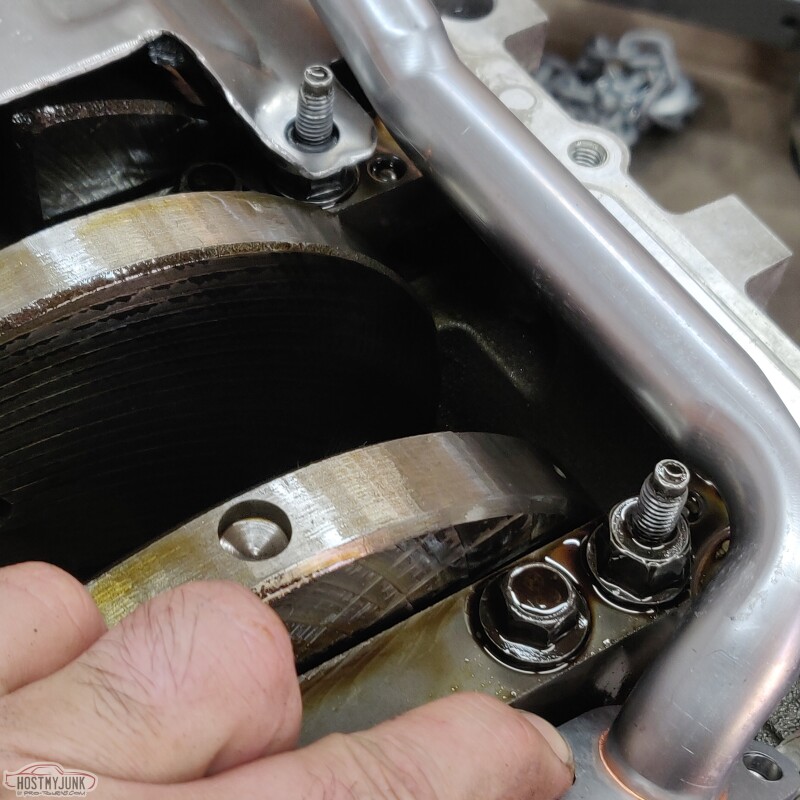
Houston, we have a problem.
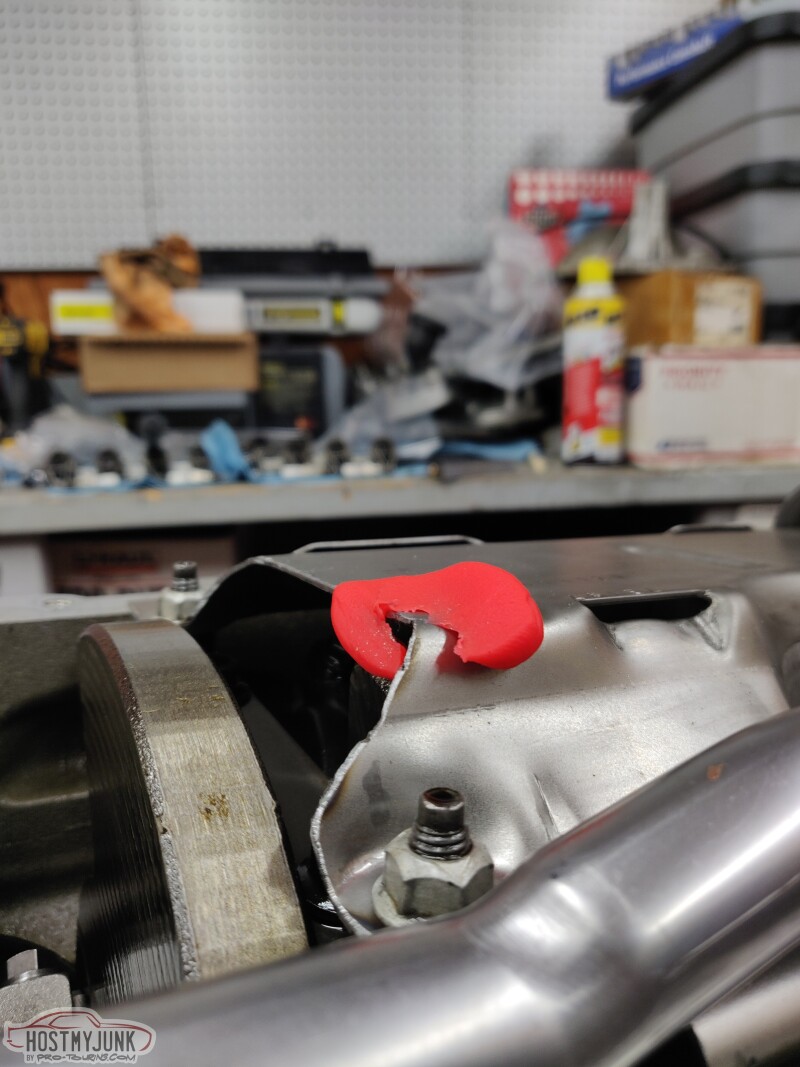
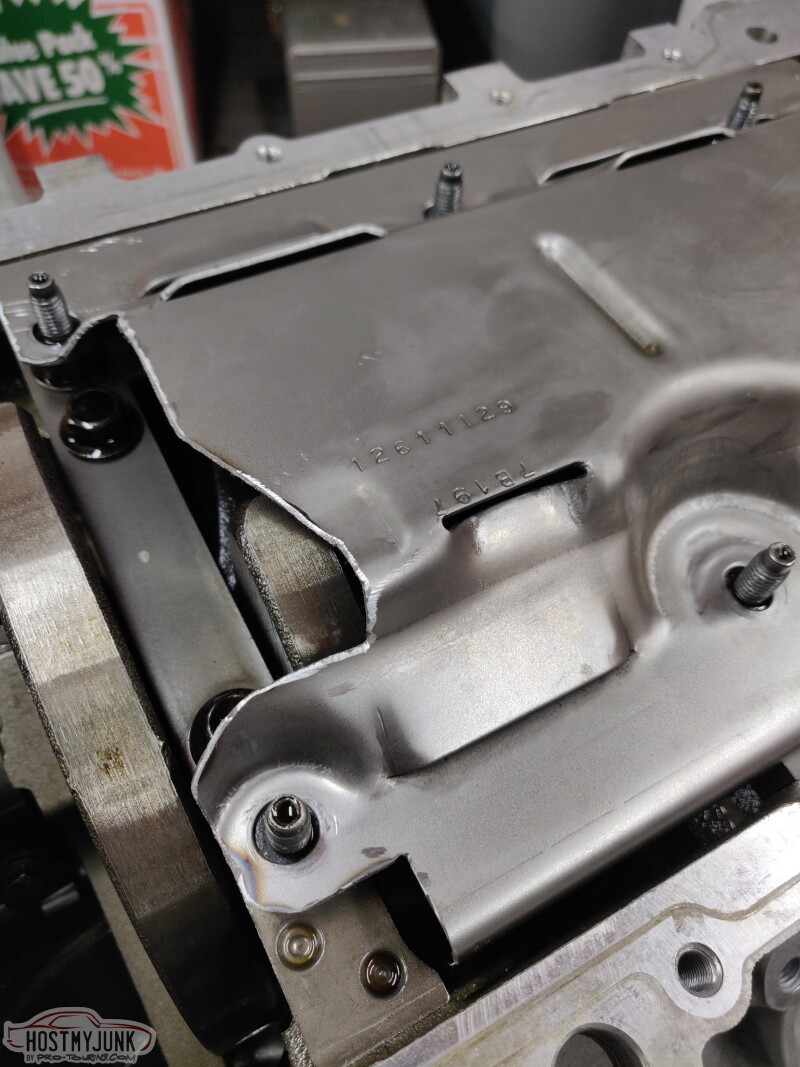
Turn out it was #usererror. I didn't trim back the windage tray far enough in this area. So after a few minutes of quality time with the whizzwheelofdeath, I had enough clearance that the pan sat flat against the engine block, even without a oil pan gasket.
Andrew
The pick-up tube clearance looks good.
The front of the pick-up tube also looks good.
Houston, we have a problem.
Turn out it was #usererror. I didn't trim back the windage tray far enough in this area. So after a few minutes of quality time with the whizzwheelofdeath, I had enough clearance that the pan sat flat against the engine block, even without a oil pan gasket.
Andrew
The following 2 users liked this post by -TheBandit-:
2ToeRacing (07-15-2023), Project GatTagO (04-28-2021)

The following users liked this post:
Project GatTagO (04-28-2021)
04-28-2021, 08:54 PM
#215
TECH Senior Member
Thread Starter
iTrader: (7)
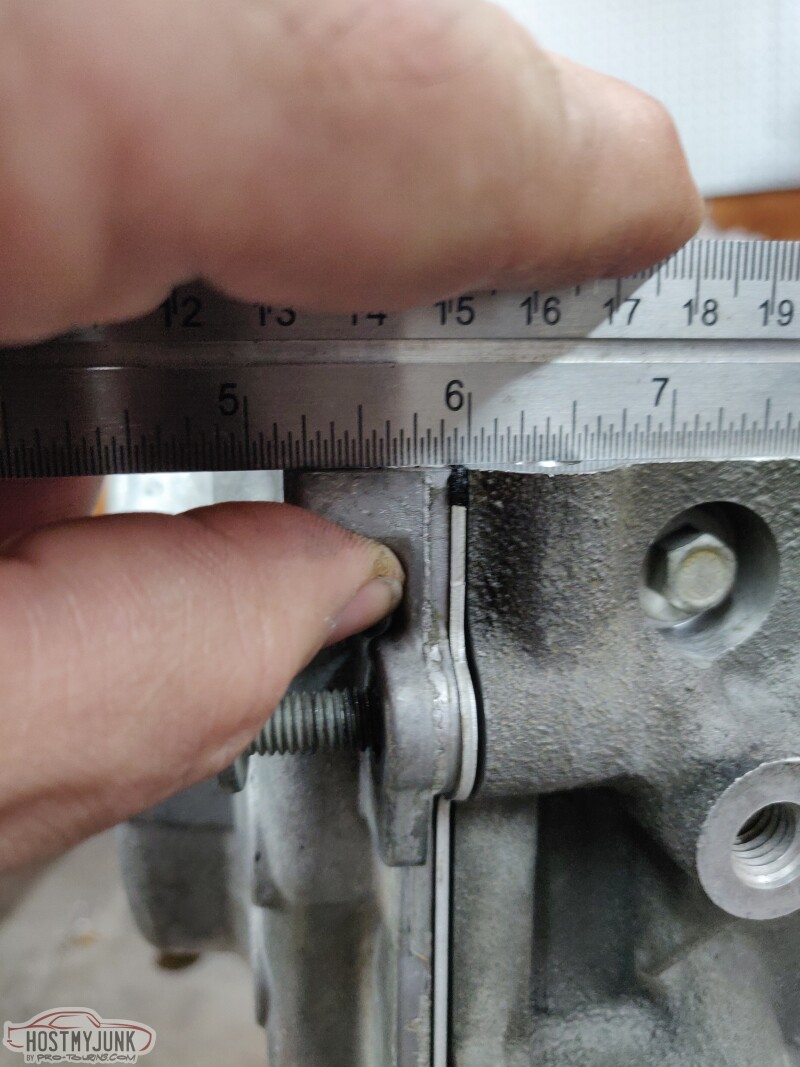
With the windage tray properly trimmed, the oilpan now sat flat against the block. The addition of the gasket raised it up a little higher, so I was confident that nothing was touching.
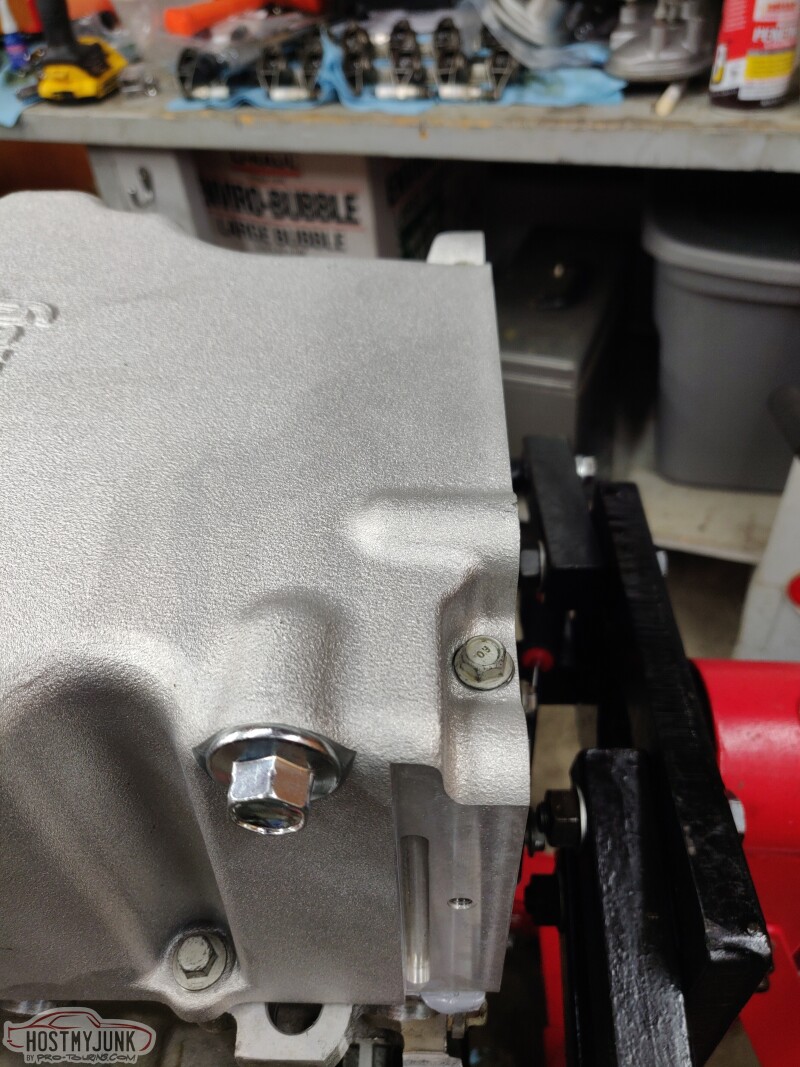
Then it was time to focus on the front cover. I purchased some nifty alignment tools when I built the Cougar, which I didn't think I would use again, but they sure came in handy here. I popped the old seal out of the cover and used the alignment tool to center the front cover on the crank.
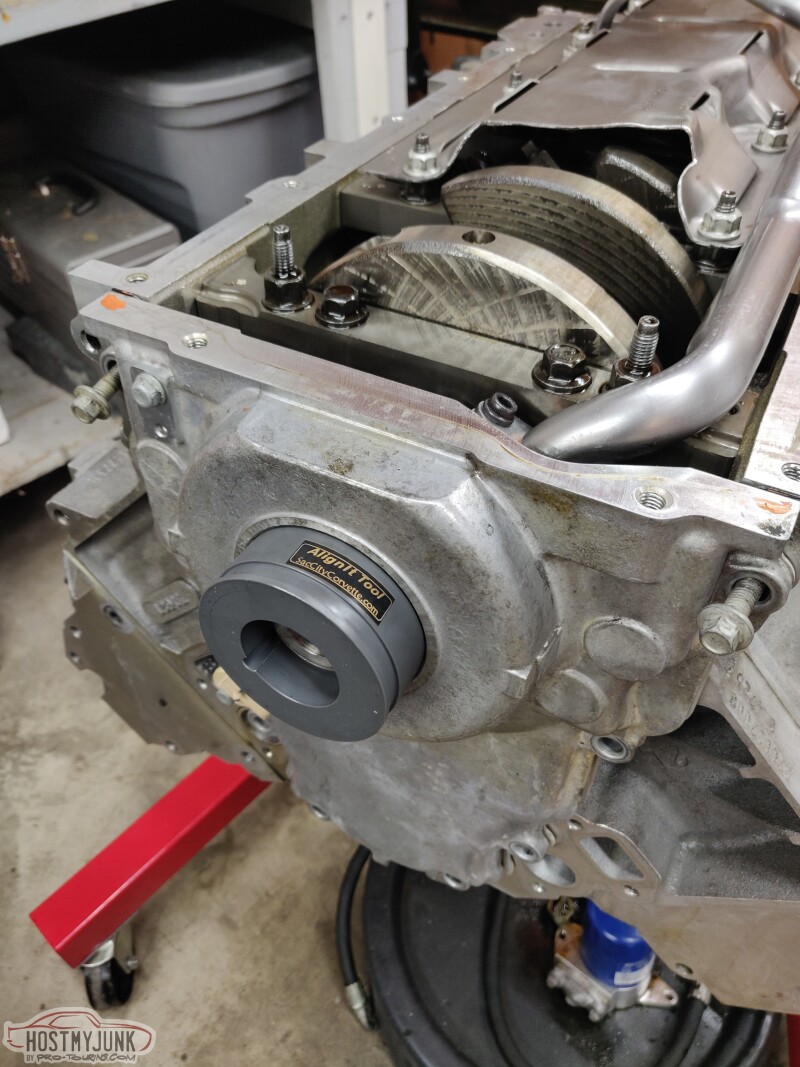
With the front cover centered, I used a straight edge to align the cover with the block and snugged up the bolts.
Now that the front cover was tightened down against the block, I loosely installed a new front seal.
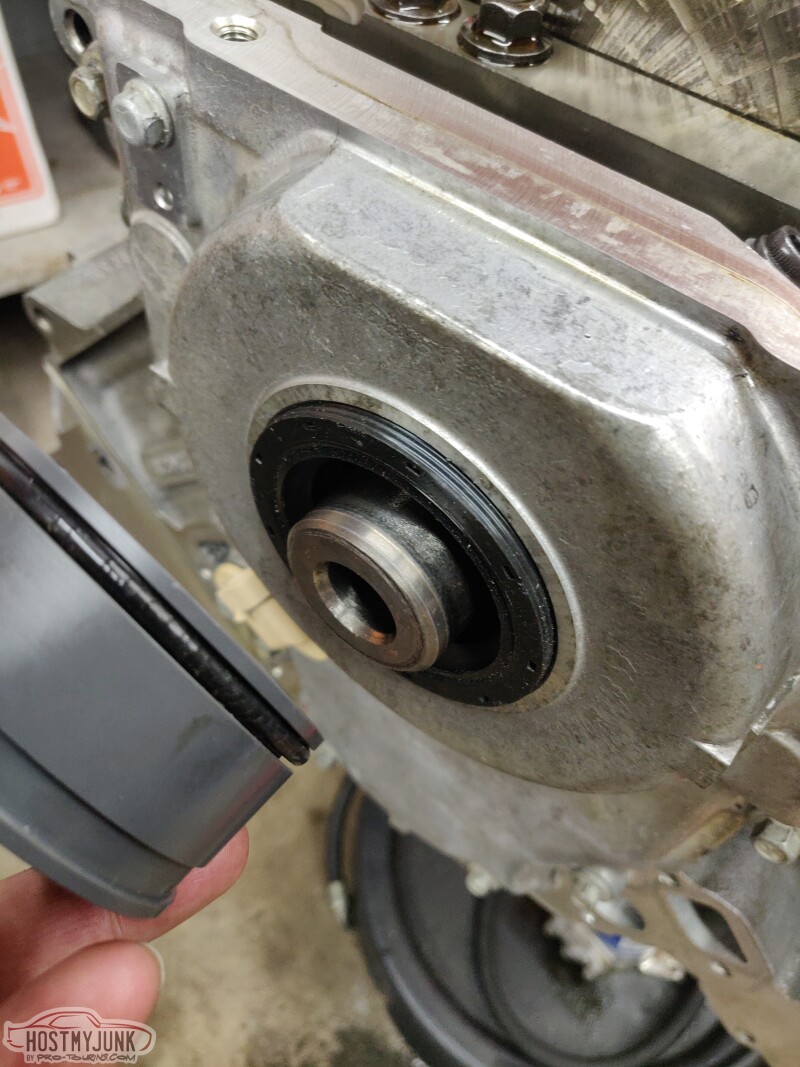
The alignment tool also serves as the perfect installation tool for the front seal. Using a dead blow hammer, I tapped it in all the way.
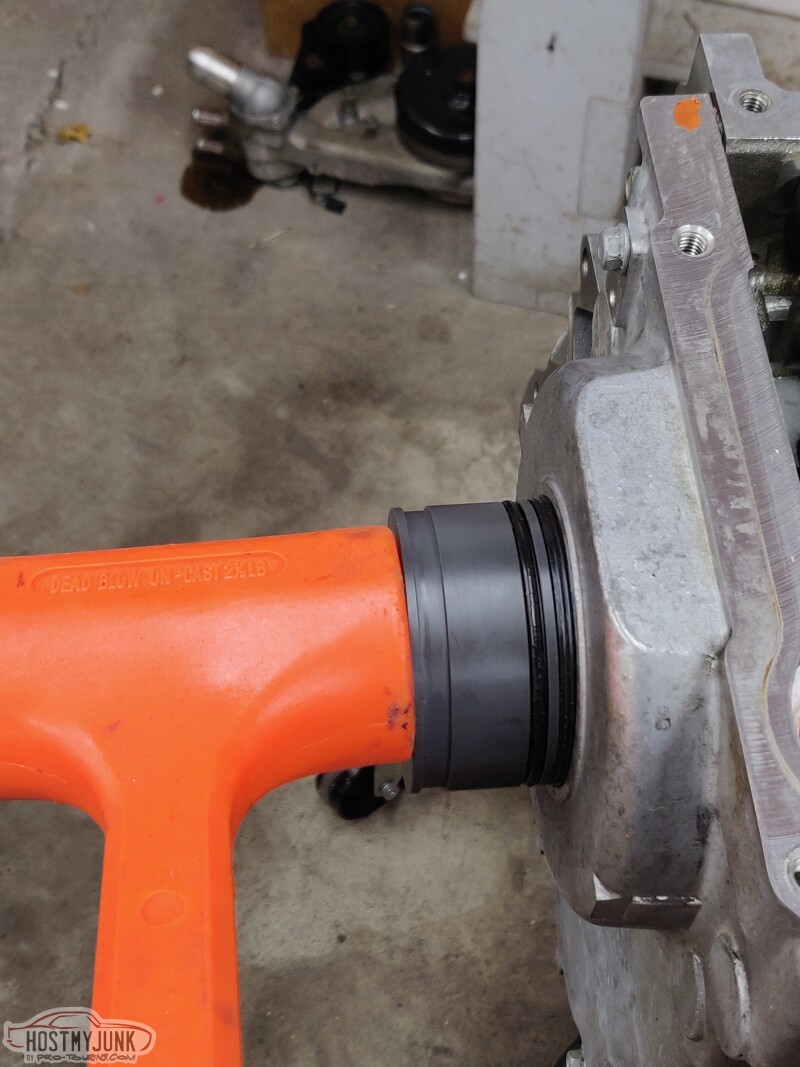
Sorted....
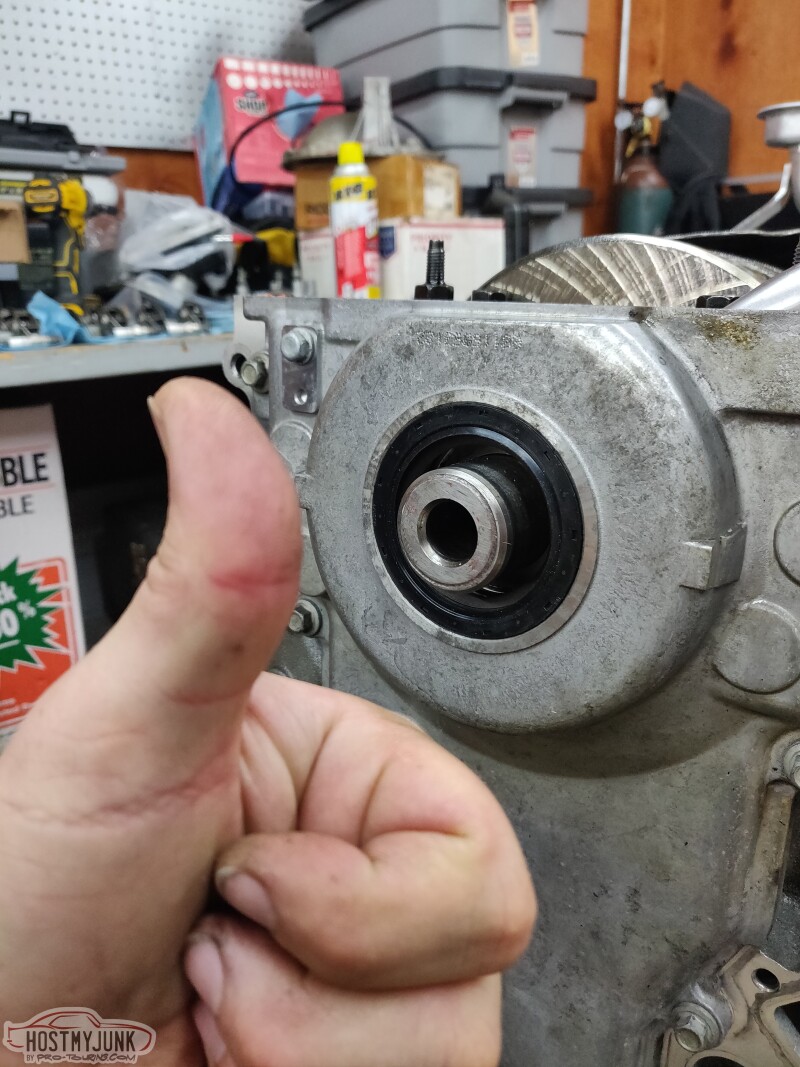
Andrew
Then it was time to focus on the front cover. I purchased some nifty alignment tools when I built the Cougar, which I didn't think I would use again, but they sure came in handy here. I popped the old seal out of the cover and used the alignment tool to center the front cover on the crank.
With the front cover centered, I used a straight edge to align the cover with the block and snugged up the bolts.
Now that the front cover was tightened down against the block, I loosely installed a new front seal.
The alignment tool also serves as the perfect installation tool for the front seal. Using a dead blow hammer, I tapped it in all the way.
Sorted....
Andrew
The following 2 users liked this post by Project GatTagO:
2ToeRacing (07-15-2023), G Atsma (04-28-2021)
04-28-2021, 09:00 PM
#216
TECH Senior Member
It's looking.... MUCH better now!
The following users liked this post:
Project GatTagO (04-28-2021)
04-28-2021, 10:45 PM
#217
I am on the fence for the baffle for c10. Don�t feel I�ll get rowdy enough in it to justify it.
For peace of mind did you rotate the crank to ensure clearance. I�m sure all fine but that�s how I found I didn�t read the small print on the 302-2 tried to use on my 427. 🤦♂️
What�s rental rate on the seal installation tool for a good friend? Included with the price of a tune? 😂
For peace of mind did you rotate the crank to ensure clearance. I�m sure all fine but that�s how I found I didn�t read the small print on the 302-2 tried to use on my 427. 🤦♂️
What�s rental rate on the seal installation tool for a good friend? Included with the price of a tune? 😂
The following users liked this post:
will69camaro (04-28-2021)
04-28-2021, 10:51 PM
#219
TECH Senior Member
Thread Starter
iTrader: (7)
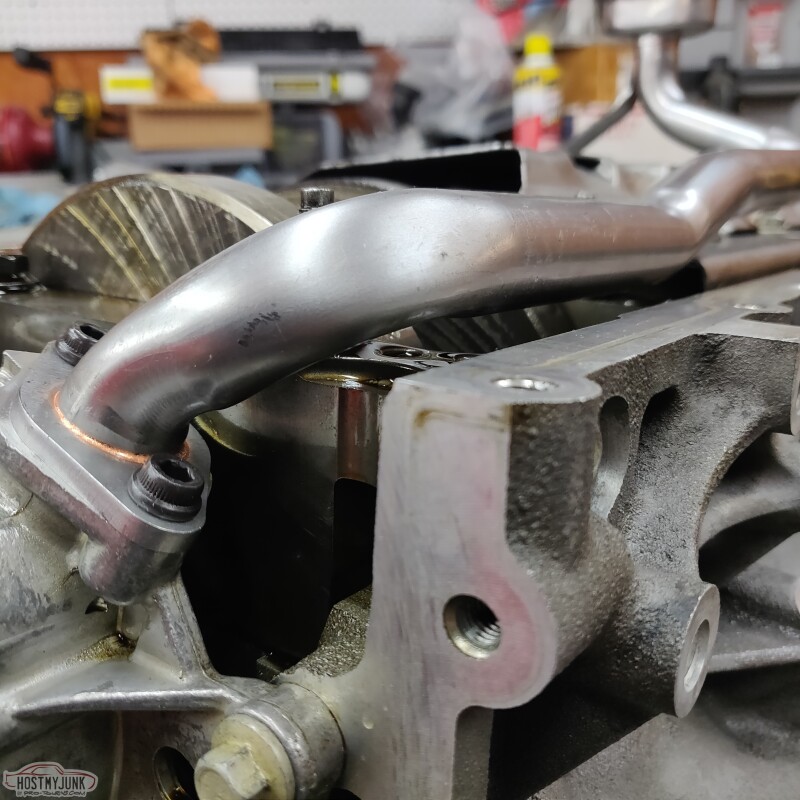
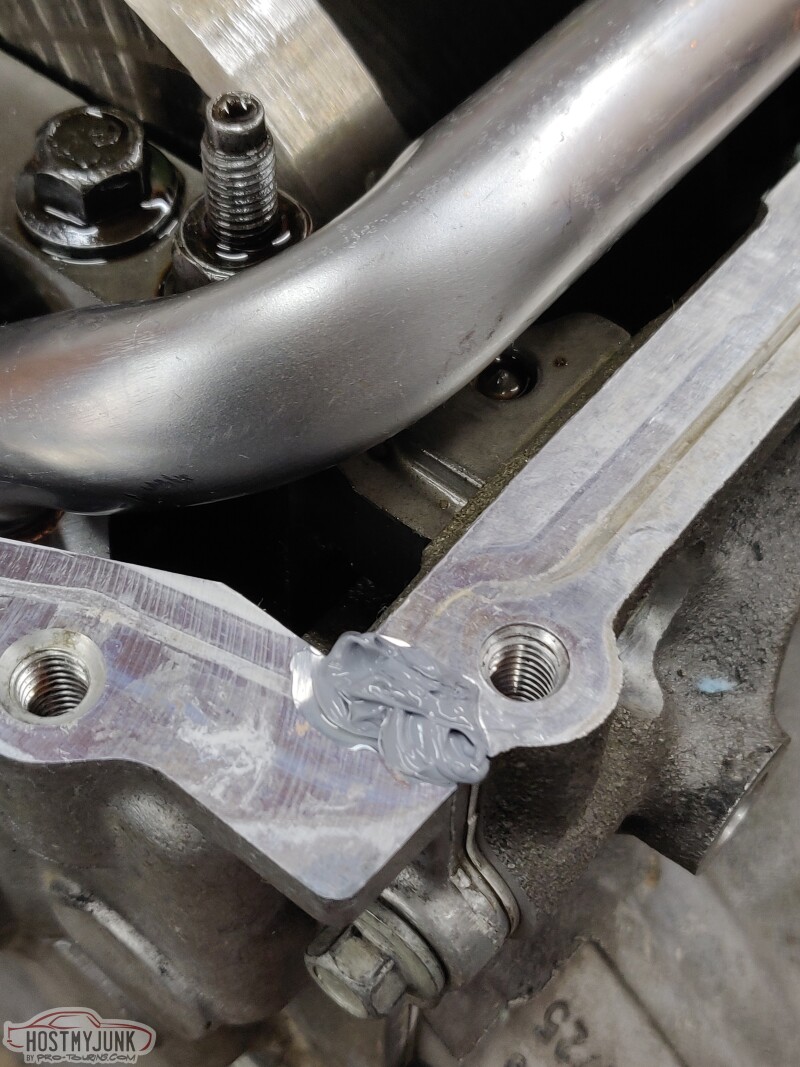
I used some Permatex Gray to seal the corners of the pan.
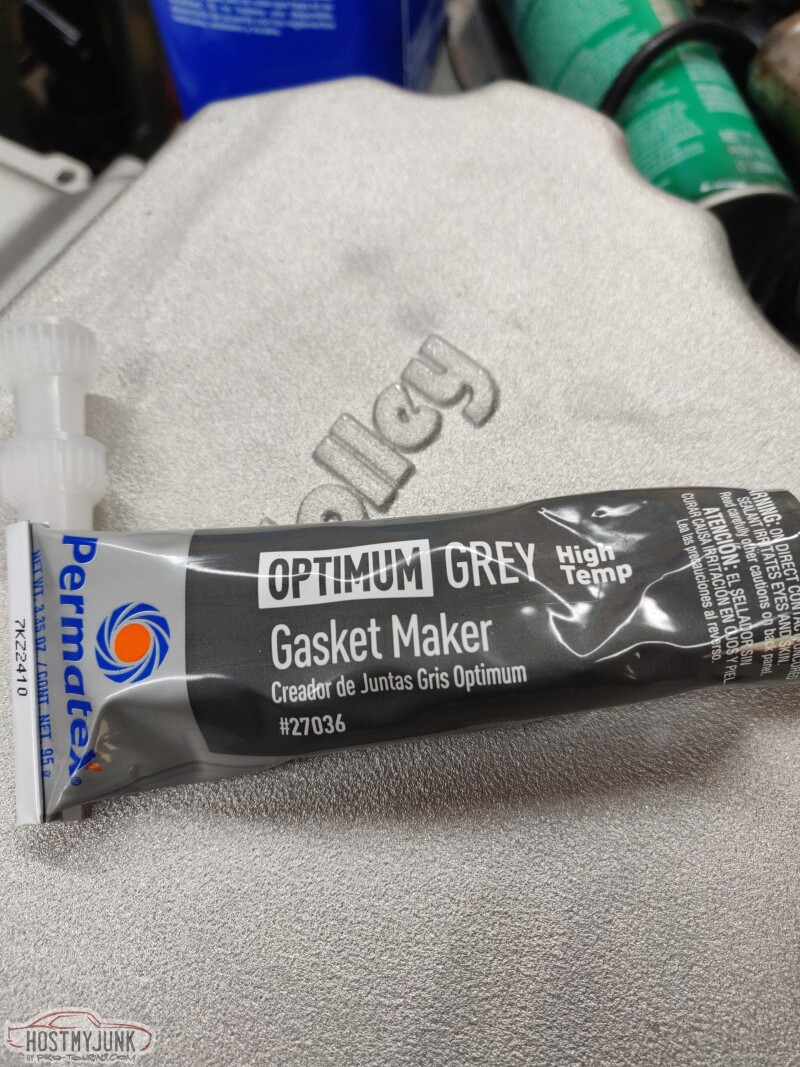
Just a little dab on the corners where the front and rear covers meet the block and the oil pan. With a new Fel-pro oil pan gasket.
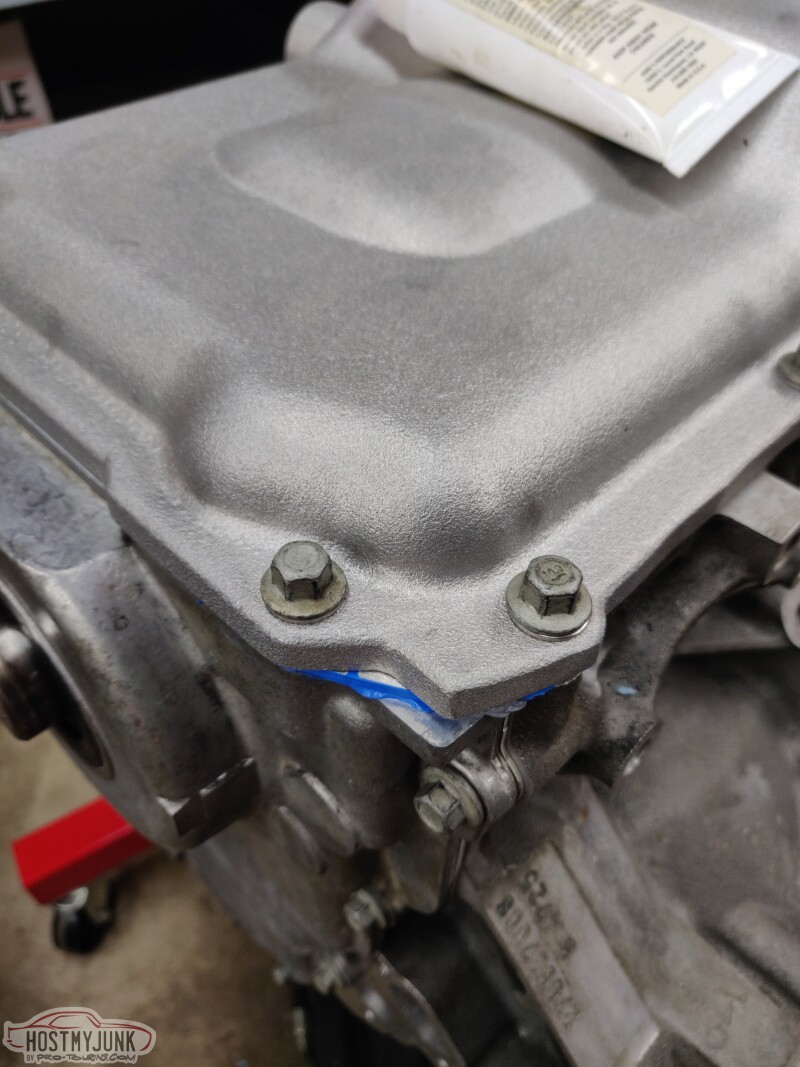
Lastly, the turbo oil drain ports were sealed off with the supplied plugs and some Earl's thread sealer.

That brings us up to date and wraps up the bottom of the engine. Next time I am out in the garage I plan to flip it over and check which push rods give me the best preload. Then it is time to clean up the intake manifold and start mocking up the engine harness.
Andrew
Just a little dab on the corners where the front and rear covers meet the block and the oil pan. With a new Fel-pro oil pan gasket.
Lastly, the turbo oil drain ports were sealed off with the supplied plugs and some Earl's thread sealer.
That brings us up to date and wraps up the bottom of the engine. Next time I am out in the garage I plan to flip it over and check which push rods give me the best preload. Then it is time to clean up the intake manifold and start mocking up the engine harness.
Andrew
The following 3 users liked this post by Project GatTagO:
04-29-2021, 03:20 AM
#220
Andrew,
During your lifter preload session, would you mind giving a detailed explanation of what and why you�re doing it w/ pics?
If I keep my LY6, I foresee myself having to do a cam swap( shortly after it�s road worthy). Plus I�m sure it will help out a lot of people.
I�m sure I missed it somewhere, but what lifters are you going to run?thanks,
jim
Last edited by Jimbo1367; 04-29-2021 at 04:22 AM.
The following 2 users liked this post by Jimbo1367:
2ToeRacing (07-15-2023), Project GatTagO (04-29-2021)