

Some swap updates! 4th gen A/C, air intake, brake setup, exhaust issues...Big pics
 09-20-2006, 07:50 AM
#1

Hey everyone! I just thought Ide throw some pics of my swap progress up. Its so close to be done...
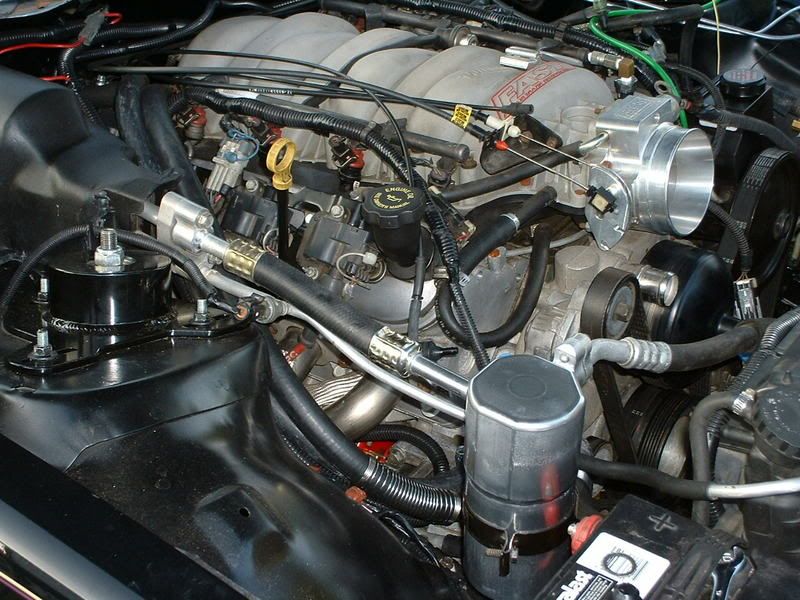
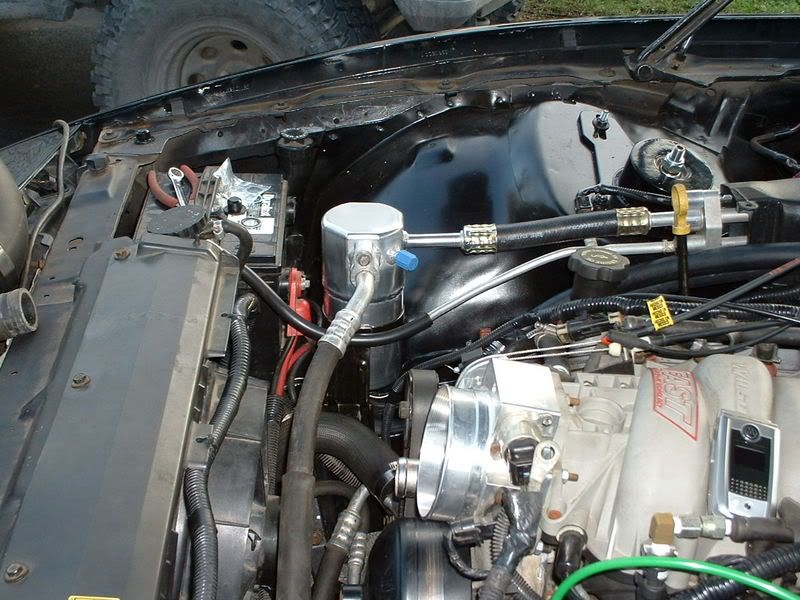
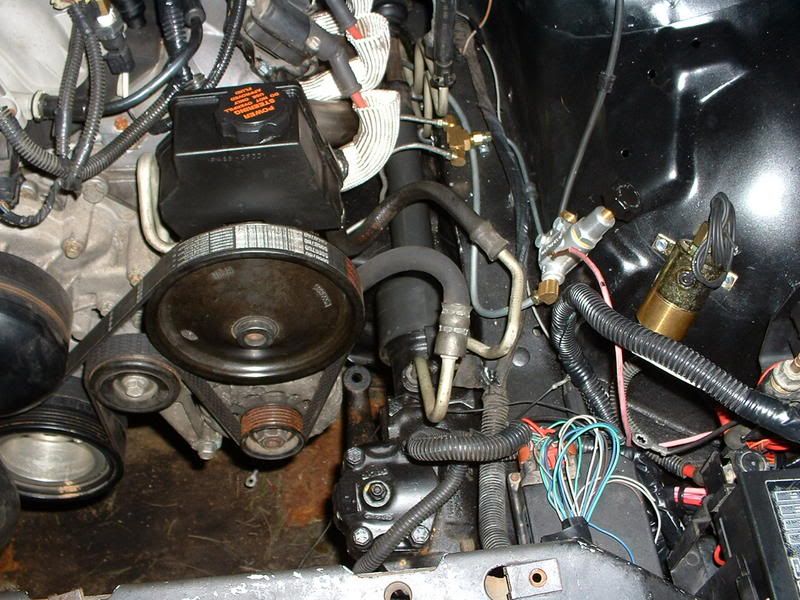
First up is my A/C. Its 100% 4th gen A/C. Everything. Got a new drier, and new seals to install too.
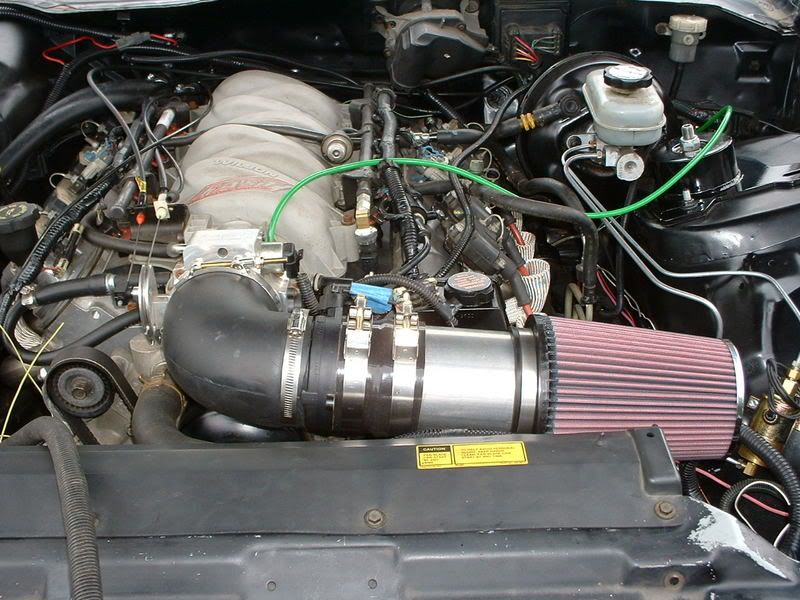
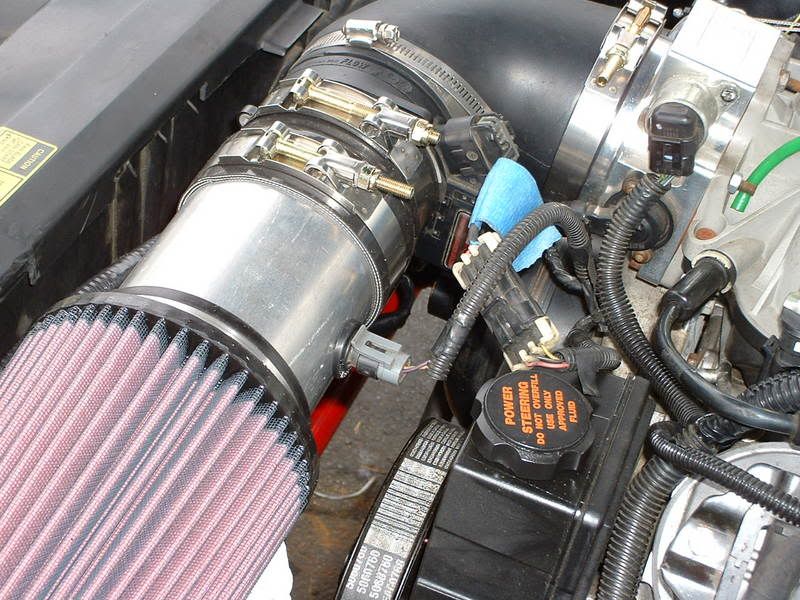
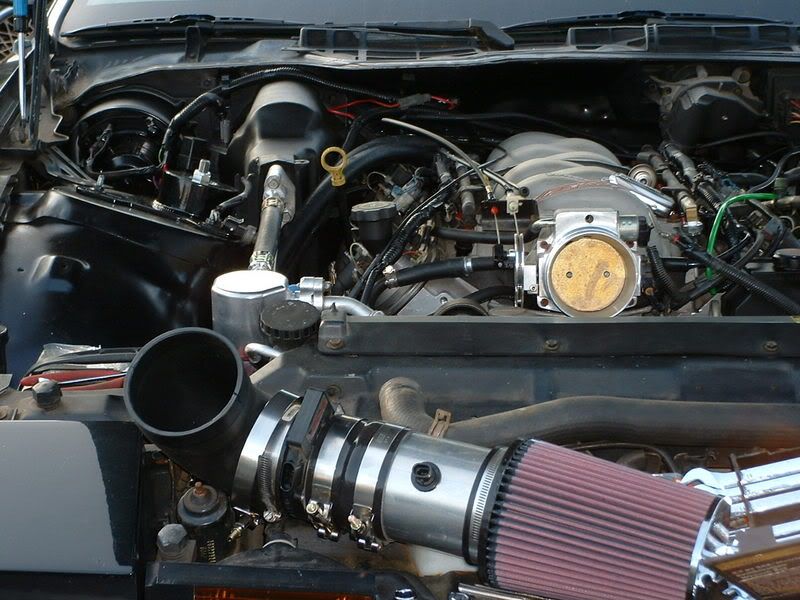
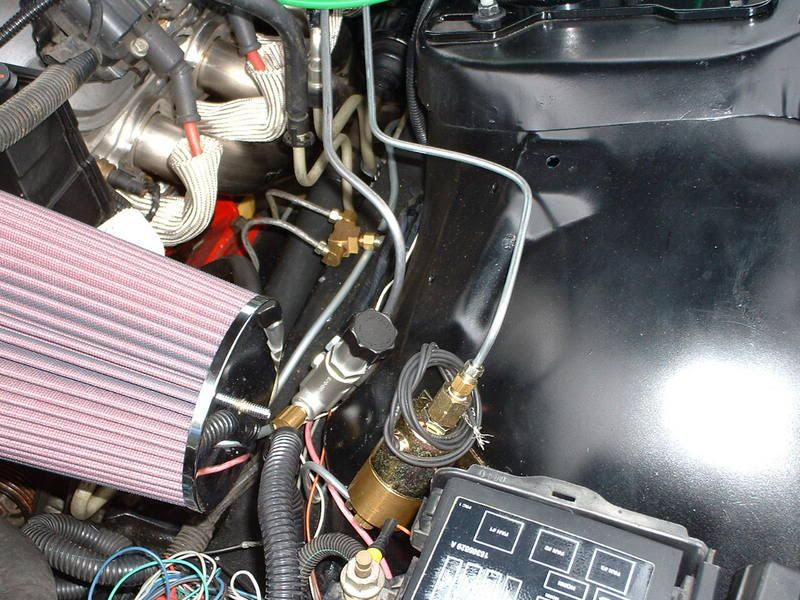
Here is my intake. I got a nice grommet for a Nissan for the IAT. Fits great.
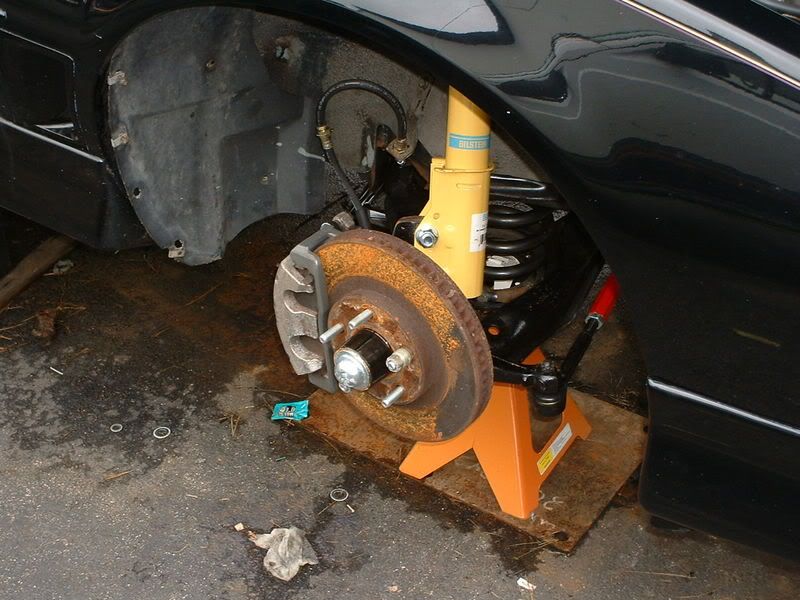
Brakes... All LS1 brakes as well as an SJM ABS delete kit with line lock...also for an LS1 car. These are the old rotors and pads and all. The new stuff will go on during final install in a few days.
The engine bay is much cleaner than in these pics. I have most of the wires out of sight..a.nd only a few more to hook up and loom.
Ive got the gauges hooked up, the warning lights working, brake lights and reverse lights working. A few more connections inside and Ill be able to fire the car again.
Justin
First up is my A/C. Its 100% 4th gen A/C. Everything. Got a new drier, and new seals to install too.
Here is my intake. I got a nice grommet for a Nissan for the IAT. Fits great.
Brakes... All LS1 brakes as well as an SJM ABS delete kit with line lock...also for an LS1 car. These are the old rotors and pads and all. The new stuff will go on during final install in a few days.
The engine bay is much cleaner than in these pics. I have most of the wires out of sight..a.nd only a few more to hook up and loom.
Ive got the gauges hooked up, the warning lights working, brake lights and reverse lights working. A few more connections inside and Ill be able to fire the car again.
Justin
 09-20-2006, 07:53 AM
#2
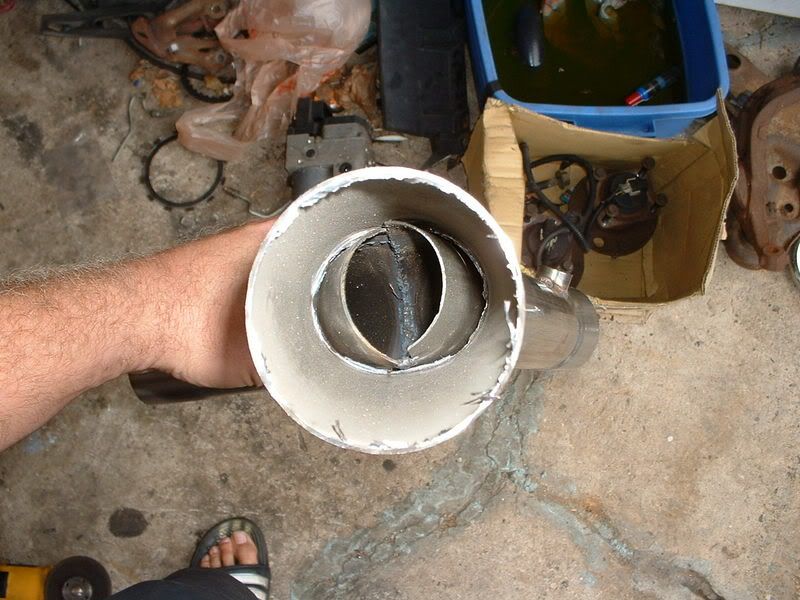
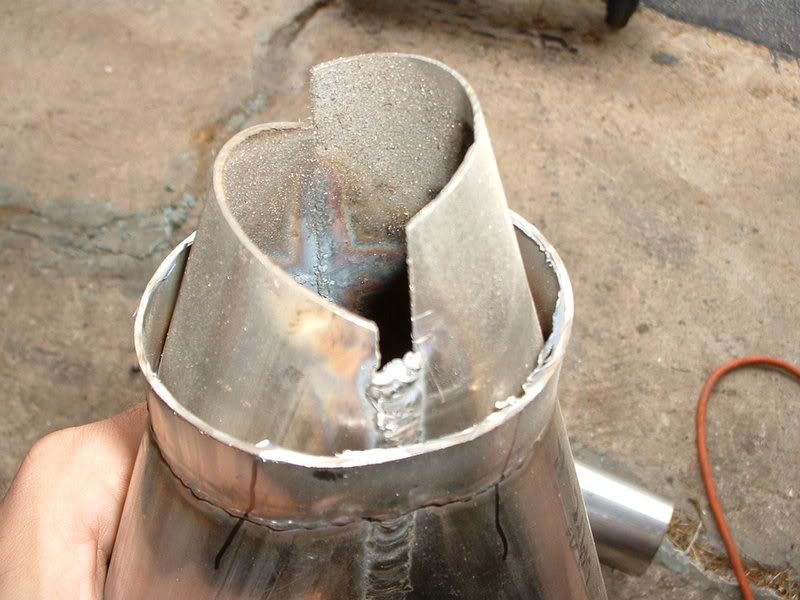
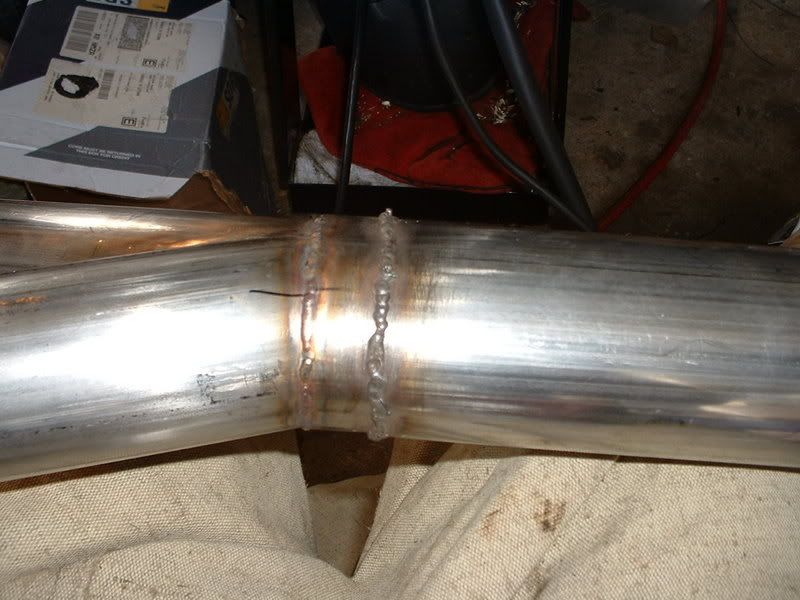
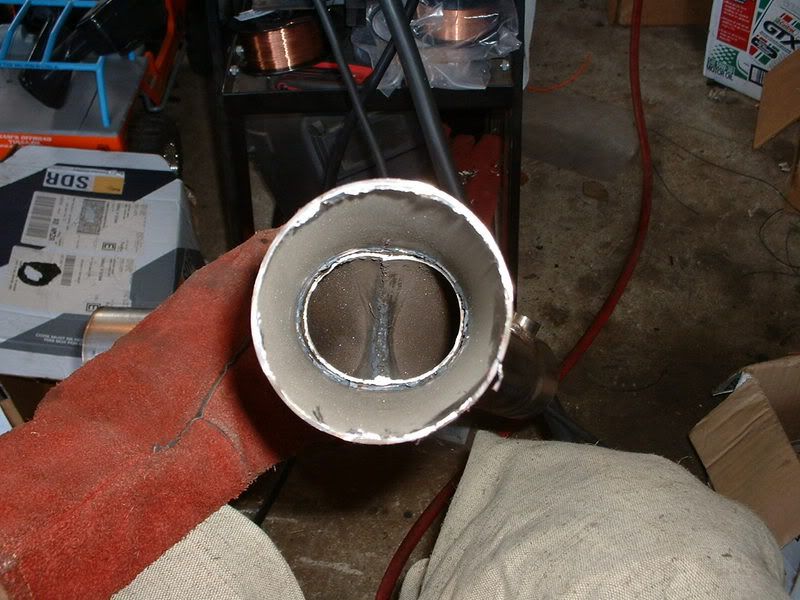
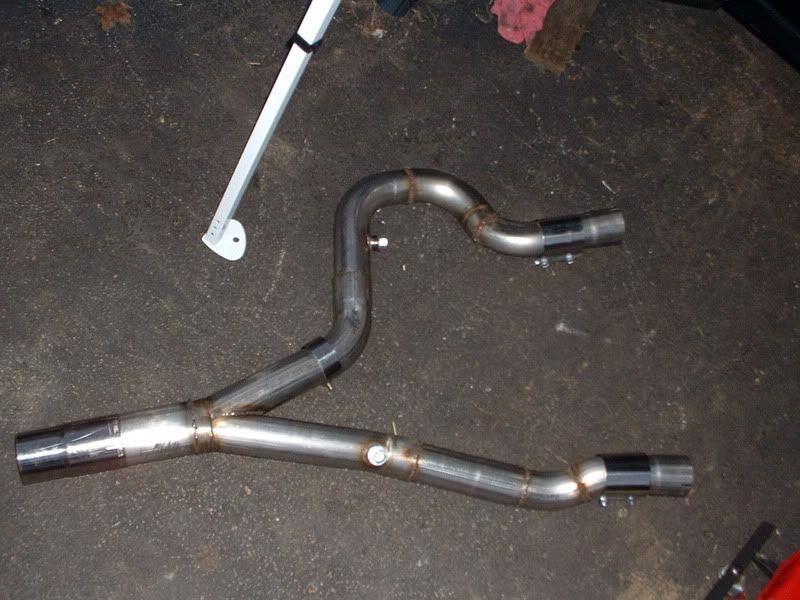
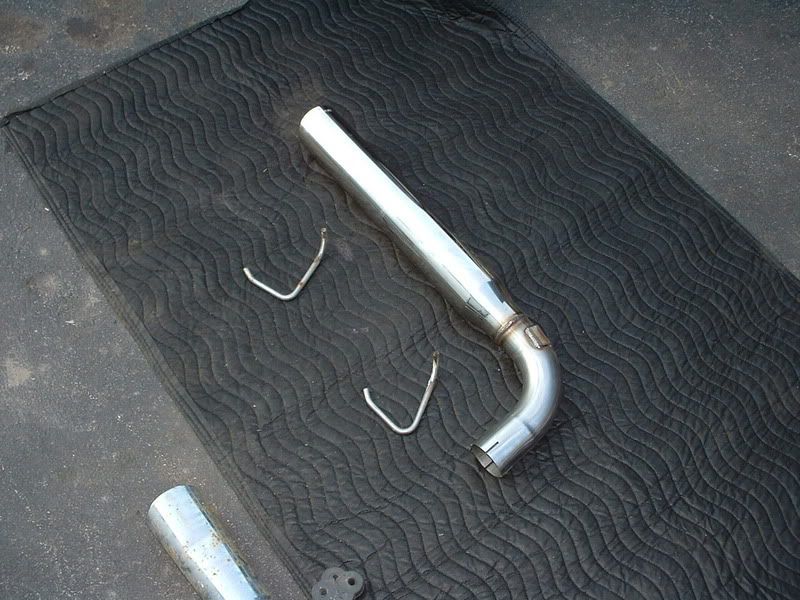
Oh I said exhaust too... Well... I got the hawks LTs with the ORY. LTs are awsome. Y-pipe not so much. Im not going to get into all the details...but Ill post some pics. I had to modify the actual y-pipe part due to a restriction...see pics.
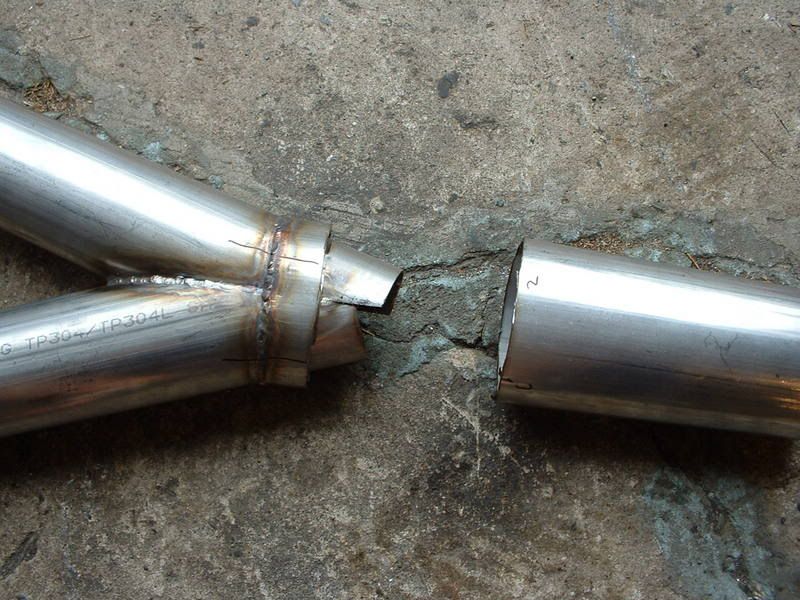

Then the rest of the y-pipe... Doesnt fit so good. I have to do some cutting and tweaking and re-welding. Ill post some finished pics of that when its actually finshed.
Hope no one minds all the pictures. Im just getting excited to be done. Hopefully Ill have the whole month of October and some of November to enjoy the car before the weather gets crappy. I wish I would have started this project two months earlier!!!
Justin
 09-20-2006, 10:26 AM
#5
Yup...thats how she came. You guys done even want to see the rest of the y-pipe... Maybe after I get it to fit Ill post some pics of those mods. Its going to be fun thats for sure. Another thing that bugged me...however its a really small thing.. Is that there was a ton of junk inside the y-pipe. Like when it was cut with a saw, the coolant from the saw mixed with the little shavings. The insides were covered in a thick layer of that. I know it probably cant hurt anything. But still...I paid alot for it. and I paid alot for the magnaflow cat back. I dont really want that stuff blowing through it.
But anyway thanks for the compliments!!!
Justin
But anyway thanks for the compliments!!!
Justin
09-20-2006, 11:38 AM
#6
Staging Lane

Join Date: Nov 2005
Location: Latrobe PA
Posts: 63
Likes: 0
Received 0 Likes
on
0 Posts
Originally Posted by ghettocruiser
Yup...thats how she came. You guys done even want to see the rest of the y-pipe... Maybe after I get it to fit Ill post some pics of those mods. Its going to be fun thats for sure. Another thing that bugged me...however its a really small thing.. Is that there was a ton of junk inside the y-pipe. Like when it was cut with a saw, the coolant from the saw mixed with the little shavings. The insides were covered in a thick layer of that. I know it probably cant hurt anything. But still...I paid alot for it. and I paid alot for the magnaflow cat back. I dont really want that stuff blowing through it.
But anyway thanks for the compliments!!!
Justin
But anyway thanks for the compliments!!!
Justin
Andy

Trending Topics
09-20-2006, 05:15 PM
#8
Staging Lane
Join Date: Nov 2005
Location: Latrobe PA
Posts: 63
Likes: 0
Received 0 Likes
on
0 Posts
Originally Posted by ls1chevy2
I can not believe some would build a Y pipe like that and then sell it.
I'll try to remeber to avoid Hawks.
I'll try to remeber to avoid Hawks.
Andy
09-20-2006, 07:26 PM
#9
Andy has it right... Hawks did not make the headers or the y... In fact...I think it gets shipped right from stainless works. Even if they are shipped to Hawks first...I doubt he opens everything and mocks it up and looks it over. So he wouldnt be aware of any fitment issues until the customer actually tries to use it.
Im not even going to try to go to stainless works. Ive heard too many people say that their customer service isnt too great. So rather than get all excited dealing with them...I simply wrote Bruce at Hawks an email, sent him some pics, and told him that I was only telling him to make him aware that there might be some QC issues at stainless works. I didnt write it to sound like I was complaining or bashing him...more of an informational email.
Bruce is a stand up guy. I highly doubt he would let y-pipes go out with such a large restriction in it. Or let the other pieces leave when they dont fit at all. Hell...if Bruce was making them in house, Im sure he would atleast spray some cleaner inside the pipes and get rid of all the crud! Jeez... such a simple thing and stainless works just lets it roll out looking like crap.
ANYWAY... I started cutting and re-welding the pipes tonight. Got it close. Ill wrap it up tomorrow. I also started her back up tonight. But I dont think my battery is charging. I think I might have a ground strap missing... The one over by the altenator. So Im going to charge the batt., hook up that strap, and see what I have. Sounded so awsome... And there was coolant in it this time Oil Press. was 50, temp got to 160...fans kicked on and thermostat opened up, fuel level gauge isnt working though... Might have to call autometer on this. Since I sent it back to them to have work done. Tach works...I think. I think it was showing an idle alittle lower than I think it was...
Keep the comments coming! Any questions on the A/C hook up??? Ide do it this way again given the chance. Just looks much cleaner. Plus it was cheaper than custom lines. Took some work...but the whole swap takes work. So whats alittle more?
Justin
Im not even going to try to go to stainless works. Ive heard too many people say that their customer service isnt too great. So rather than get all excited dealing with them...I simply wrote Bruce at Hawks an email, sent him some pics, and told him that I was only telling him to make him aware that there might be some QC issues at stainless works. I didnt write it to sound like I was complaining or bashing him...more of an informational email.
Bruce is a stand up guy. I highly doubt he would let y-pipes go out with such a large restriction in it. Or let the other pieces leave when they dont fit at all. Hell...if Bruce was making them in house, Im sure he would atleast spray some cleaner inside the pipes and get rid of all the crud! Jeez... such a simple thing and stainless works just lets it roll out looking like crap.
ANYWAY... I started cutting and re-welding the pipes tonight. Got it close. Ill wrap it up tomorrow. I also started her back up tonight. But I dont think my battery is charging. I think I might have a ground strap missing... The one over by the altenator. So Im going to charge the batt., hook up that strap, and see what I have. Sounded so awsome... And there was coolant in it this time
Oil Press. was 50, temp got to 160...fans kicked on and thermostat opened up, fuel level gauge isnt working though... Might have to call autometer on this. Since I sent it back to them to have work done. Tach works...I think. I think it was showing an idle alittle lower than I think it was... Keep the comments coming! Any questions on the A/C hook up??? Ide do it this way again given the chance. Just looks much cleaner. Plus it was cheaper than custom lines. Took some work...but the whole swap takes work. So whats alittle more?
Justin
09-26-2006, 09:56 AM
#10
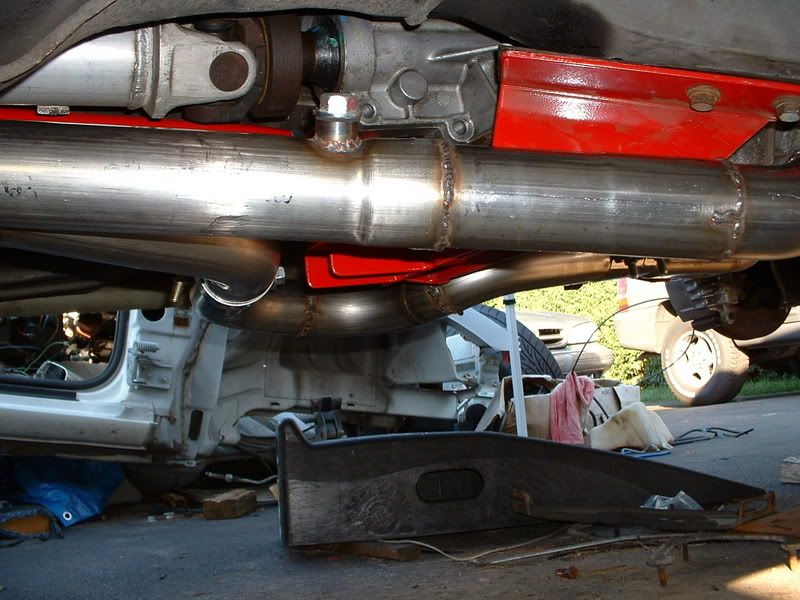
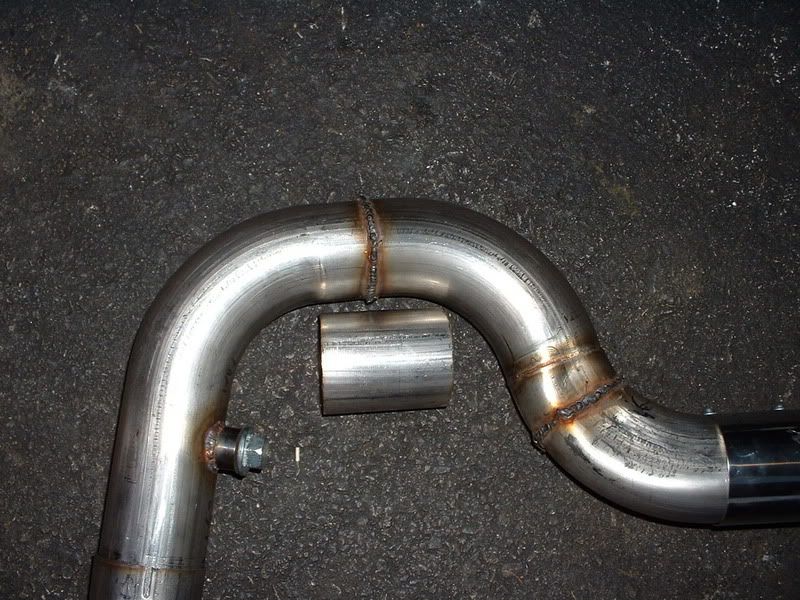
Some updates on my y-pipe fix. Its just about finished. I started installing the magnaflow catback...but am having some hanger issues. Here are a few pics of the y-pipe. I lost some pics due to my camera getting destroyed, but I show how much material I actually cut out. Feel free to ask any questions.
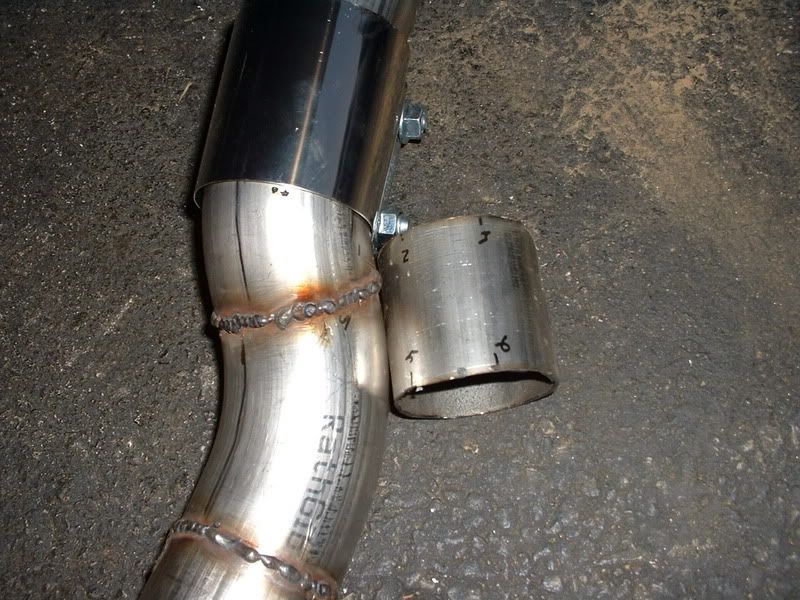
Justin
Justin
09-26-2006, 06:15 PM
#11
Staging Lane
Join Date: Nov 2005
Location: Latrobe PA
Posts: 63
Likes: 0
Received 0 Likes
on
0 Posts
That last pic cracks me up. I had to torch and crimp my pipe in the exact same place to avoid hitting the trans member bolts. At leats I'm not the only one. Car looks so close to being done, any ideas on when you'll be driving it?
Andy.
Andy.
09-26-2006, 07:37 PM
#12

Looking good bud! I just got my motor this weekend....  I am ready to get this project underway!
BTW...I got the Hawks y-pipe also (used) and it doesn't have that big restriction yours did. Maybe they fixed it on thier end.
I noticed you have been mig welding that stainless....are you using 75/25 gas or triple mix?
I am ready to get this project underway!BTW...I got the Hawks y-pipe also (used) and it doesn't have that big restriction yours did. Maybe they fixed it on thier end.
I noticed you have been mig welding that stainless....are you using 75/25 gas or triple mix?
09-27-2006, 07:26 AM
#13
Andy,
Ide like to be driving it by next weekish... But then again Ive been saying that every week...so we'll see. If I put it on the ground and put tires on it...I could drive it right now. But Im trying to FINISH everything lol.
Basicaly...The thing that is really holding me up right now is exhaust. I got the y-pipe good to go... now the magnaflow catback is giving me fits. I just can NOT get those tail pipes to line up where I need them. Like not even close. The damn drivers side is always in too far and up too far. And teh passenger side is sticking out too far and down too far. Doesnt seem like I can straighten them out. IN fact...when its on the ground..it seems like the tail pipes are shifted a bit when installed into the muffler. Not sure if they are all like that or what. Ide expect magnaflow has pretty strict quality control...so Im going to try to make it work. If I dont figure it out today...Im going to clamp it all together crooked as hell and call it done. haha. Then Ill take it to my exhaust shop and let them work it out.
LS1-IROC: Nice!! What are the specs on your motor? All stock? T56 or auto?? Stainless works could have fixed the problem...but it could also be that hawks didnt know about it...then found out about it...and made a few calls. Yup...Ive been mig welding everything. I would love to have tigged it...but I dont have a TIG. The mig is working ok. I found that i have to spot weld instead of running a bead. Even with my welder turned all the way down it was too much of a pain to run a bead. It would either glob up or burn through. Im using a mix of argon co2... 75/25. And 304 stainless wire. Its working good. Of course the y-pipe is probably only temporary until I can make something better. But for now it will work.
Now if I can only get the darn magnaflow on.. By the way...last night we clamped it together crooked because I wanted to hear it with the exhaust. What a difference. SOooo much more quiet than when I started it with just the intermediate pipe only 20 minutes before. Pretty quiet at idle...but sounds bad *** just off idle and only gets better the more you rev. Ill defnietly be installing a cutout though....
Justin
09-27-2006, 04:40 PM
#14
Justin,
I actually found a brand new LS1 crate motor. It's 1999 vintage some guy bought and never used...it's been sitting all sealed up since. I got a smoking deal on it too
I still need to find a T56 and a wireharness though....
I'm gonna try the stainless wire in my mig too....glad to know it's working well for you.
09-27-2006, 09:22 PM
#15
Wow dude! Nice score! You should be able to snag a trans fairly cheap. Try to get a "swap package". There are usually some people that either switched to auto, or are parting out their cars... and they will sell the trans, pedals, hydraulics, driveshaft, wiring, etc all as one package. As for the harness... Just make sure you dont get a 98... get a 99+. Or...get a painless or speartech harness. Probably the easiest thing to do...but alittle pricey. Yeah give the stainless a try. I would like to switch my gas to 100% argon...but since Im doing a limited amount of stainless welding, I didnt think it was worth it.
Speaking of my stainless crap... I think Ive come up with a better solution for installing magnaflow. I ordered the kit for the 93-97 cars. I was told it fits...and the mounts seemed close enough. Well...I fought and fought and fought with it to no avail. So I got to thinkin about the 99 camaro I have sittin there in a pile. If you order the kit for the 98-02 cars, you get little brackets with it that bolt on towards the back of the car. And the system hangs by three pin type hangers, and the one normal one on the pass side.
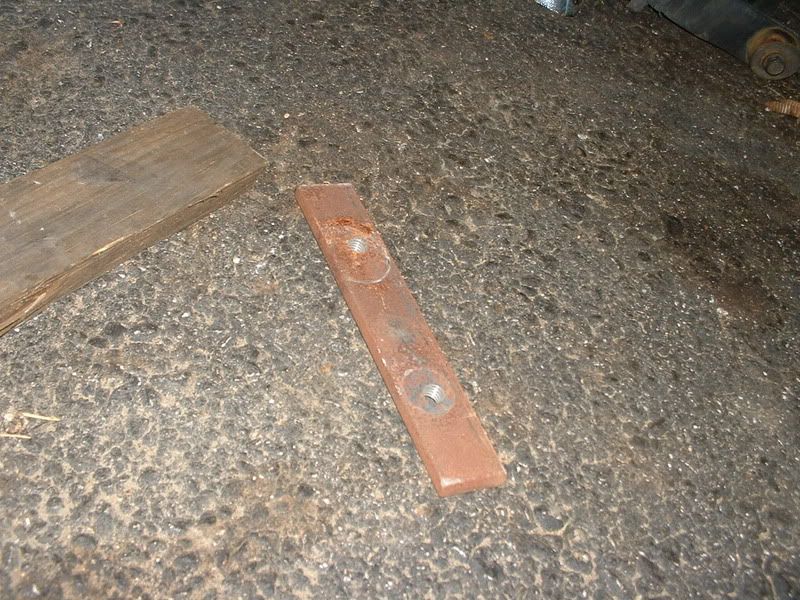
So...here is what I did. I took off the rearward hangers on the 99. They look like this...

Not sure if thats factory...or if the previous owner put them on from a kit.
Anyway, they are held on by a metal bar that is slipped into the "frame rail" and has tapped holes. These..
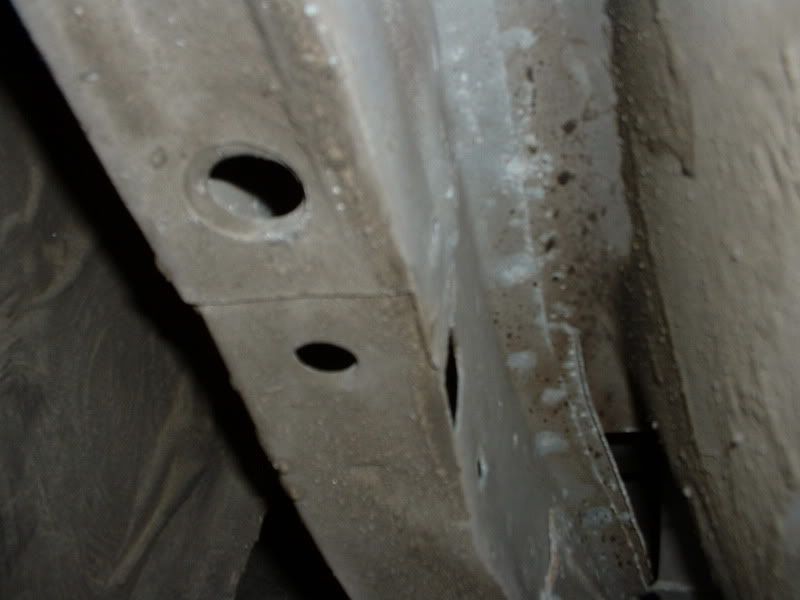
On to the thirdgen... What do you know. Two holes in the "frame rail" just like the 99. The similarities never cease to amaze me.
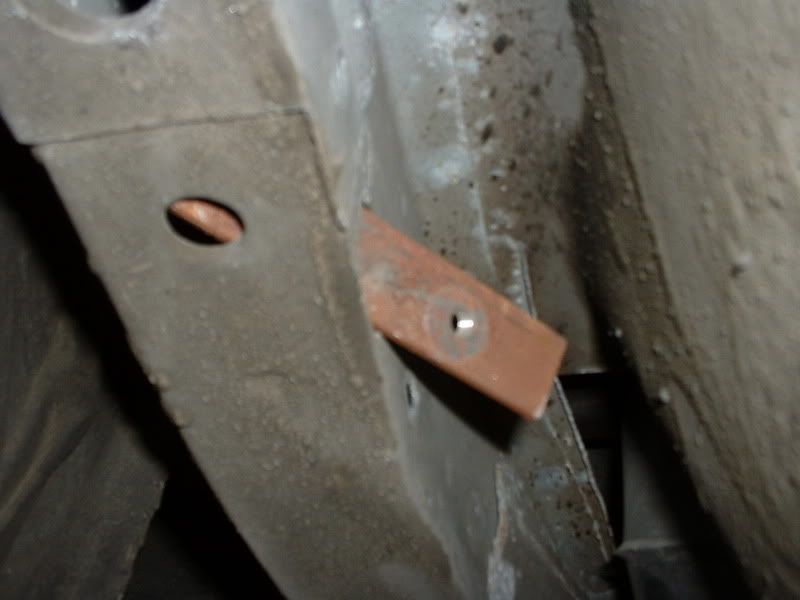
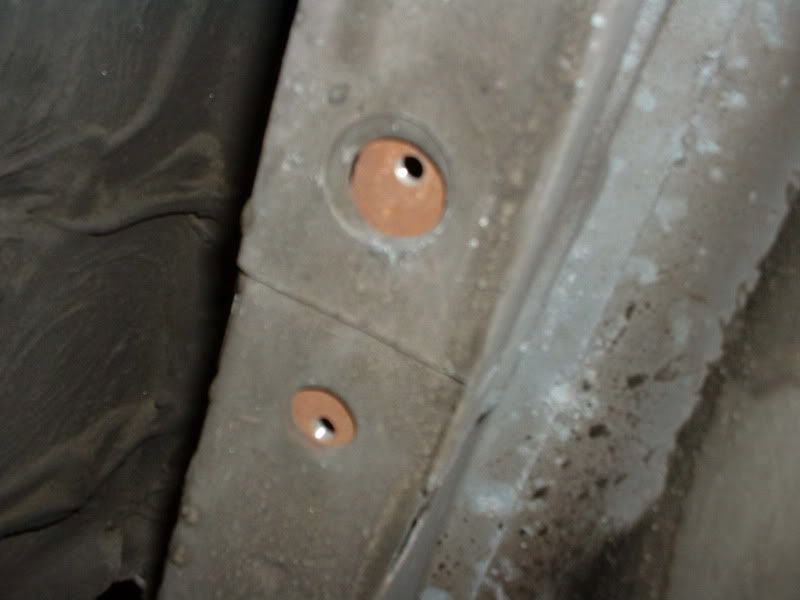
This is how it goes together..

Now since I have the 93-97 kit...I didnt have these bar type hangers. So this was my solution. I used the hangars from the 99 cat back. It was trash anyway.

Ok this is getting long...but bare with me. I dont have pics of it installed...but it was SO much easier to get the tips lined up and looking good using this install method. Because the tips are held in two places instead of just at the rear. I basically used jack stands to get the tail pipes where i wanted them, hung the hangers that I cut off in the rubber isolators, and tacked them in place. Worked beautifully.
Now...my thinking is. Wouldnt it be easier to just order the LS1 magnaflow catback??? Im going to take some measurements tomorrow on the 99 to see if the hole spacing is the same...but judging from where I had to weld the hangers, it looks pretty darn close... Seems like it would just bolt right in then. All you would need is the driver's side front hanger. You can use the passenger side front 3rd gen hanger with no issues.
Ok...Thats enough from me for the night. Gotta pull the exhaust completely apart again tomorrow for last minute tweaking, and fitting...then its back together for good. Ill snap pics then. Thanks for reading along!
Justin
Speaking of my stainless crap... I think Ive come up with a better solution for installing magnaflow. I ordered the kit for the 93-97 cars. I was told it fits...and the mounts seemed close enough. Well...I fought and fought and fought with it to no avail. So I got to thinkin about the 99 camaro I have sittin there in a pile. If you order the kit for the 98-02 cars, you get little brackets with it that bolt on towards the back of the car. And the system hangs by three pin type hangers, and the one normal one on the pass side.
So...here is what I did. I took off the rearward hangers on the 99. They look like this...
Not sure if thats factory...or if the previous owner put them on from a kit.
Anyway, they are held on by a metal bar that is slipped into the "frame rail" and has tapped holes. These..
On to the thirdgen... What do you know. Two holes in the "frame rail" just like the 99. The similarities never cease to amaze me.
This is how it goes together..
Now since I have the 93-97 kit...I didnt have these bar type hangers. So this was my solution. I used the hangars from the 99 cat back. It was trash anyway.
Ok this is getting long...but bare with me. I dont have pics of it installed...but it was SO much easier to get the tips lined up and looking good using this install method. Because the tips are held in two places instead of just at the rear. I basically used jack stands to get the tail pipes where i wanted them, hung the hangers that I cut off in the rubber isolators, and tacked them in place. Worked beautifully.
Now...my thinking is. Wouldnt it be easier to just order the LS1 magnaflow catback??? Im going to take some measurements tomorrow on the 99 to see if the hole spacing is the same...but judging from where I had to weld the hangers, it looks pretty darn close... Seems like it would just bolt right in then. All you would need is the driver's side front hanger. You can use the passenger side front 3rd gen hanger with no issues.
Ok...Thats enough from me for the night. Gotta pull the exhaust completely apart again tomorrow for last minute tweaking, and fitting...then its back together for good. Ill snap pics then. Thanks for reading along!
Justin
09-27-2006, 09:56 PM
#16
On The Tree
iTrader: (28)
Join Date: Aug 2005
Location: Hattiesburg, MS
Posts: 137
Likes: 0
Received 0 Likes
on
0 Posts

That hanger is stock on my 92. Might only be certain year third-gen's.. But you are correct, the muffler/tips off of my 2000 Z28 parts car bolted right up.
Kevin D.
Kevin D.
10-01-2006, 08:15 PM
#17
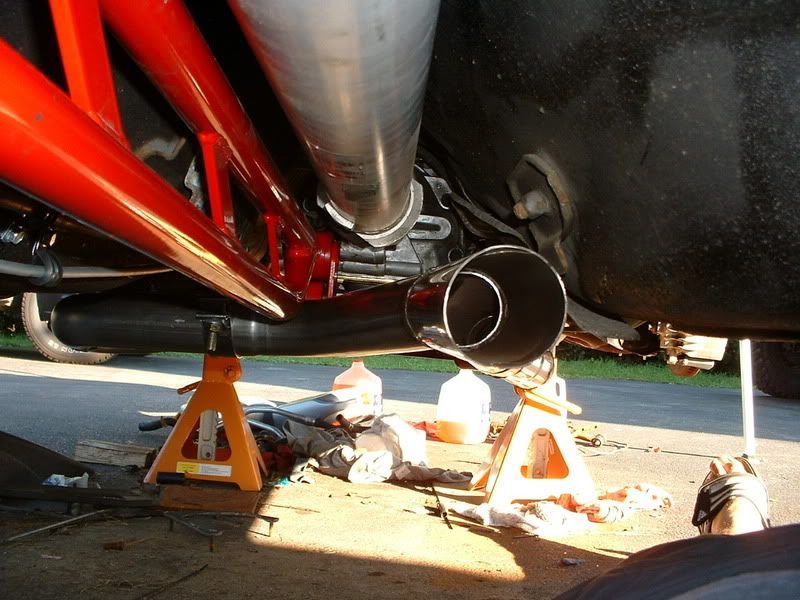
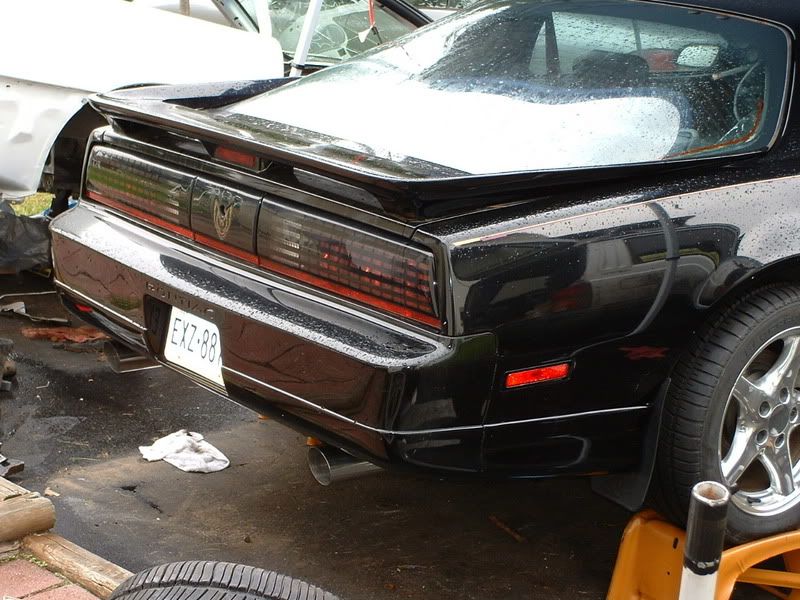
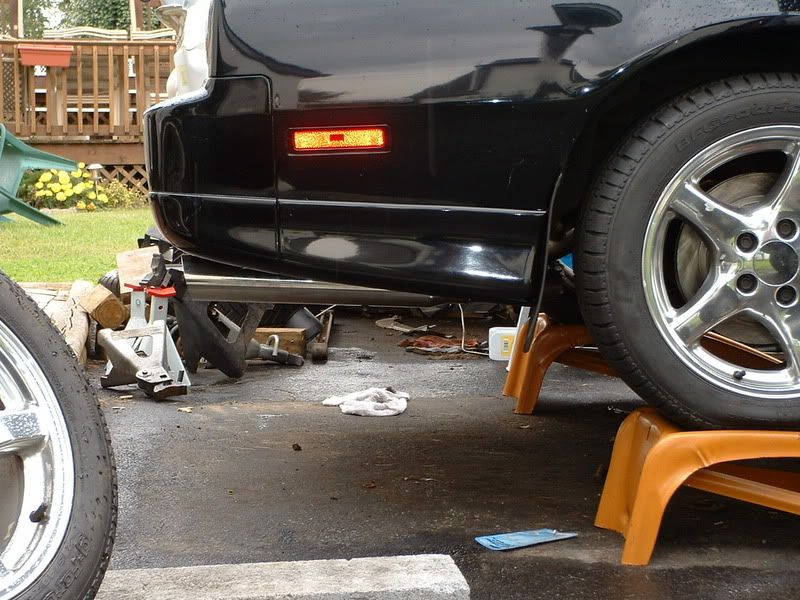
Hey everyone. I got some more work done on the TA over the past few days. I have some pics of the finished exhaust. The tips are a tad crooked...but I doubt anyone that isnt looking for them to be crooked will even notice. Plus some other things I got done as well. Hope you all dont mind some more pictures
Some pics of the tips...
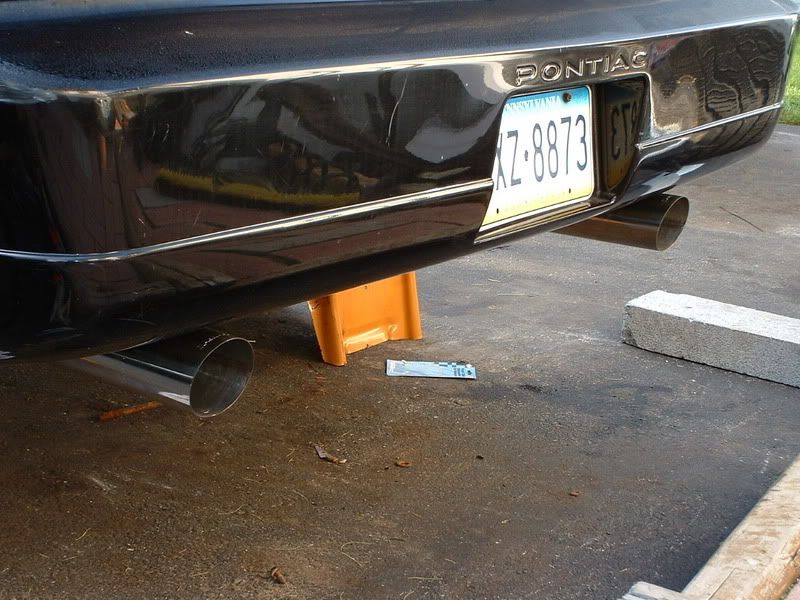
Wheel and tip pic.
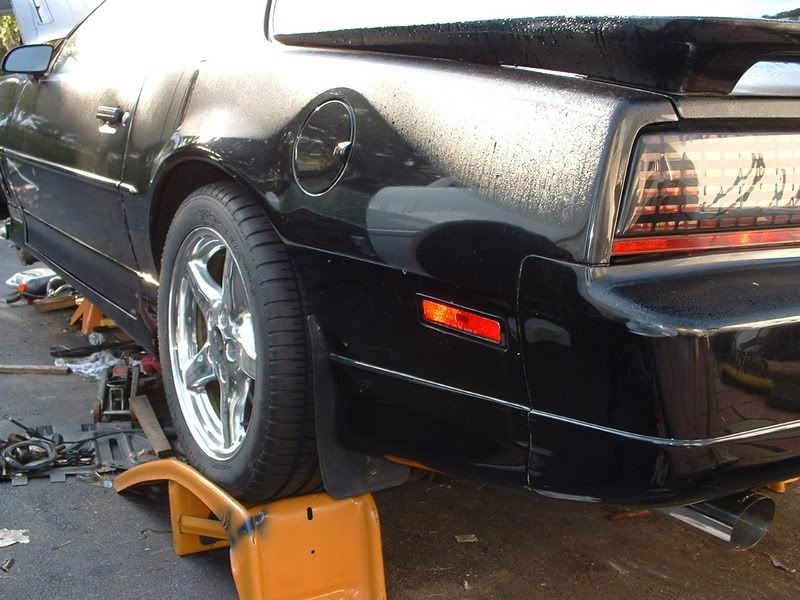
Side view of the tip...
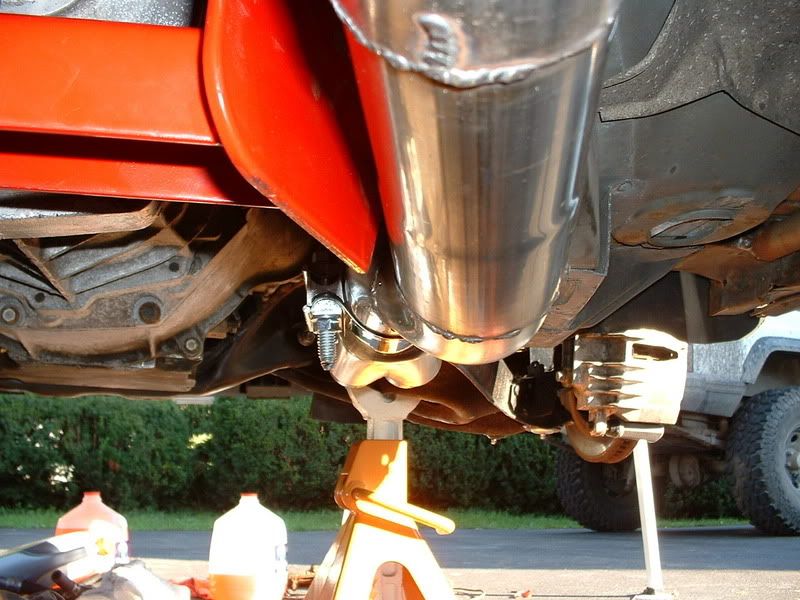
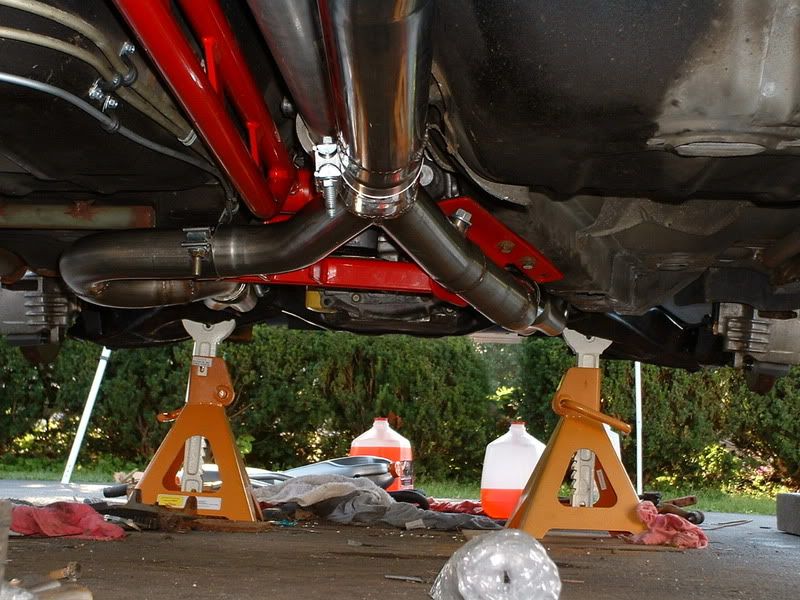
Under car shot of the pipes...
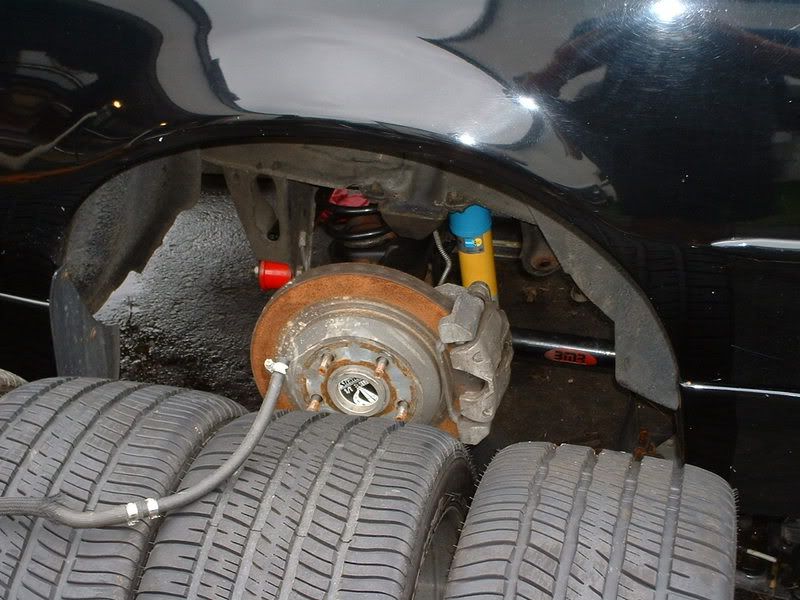
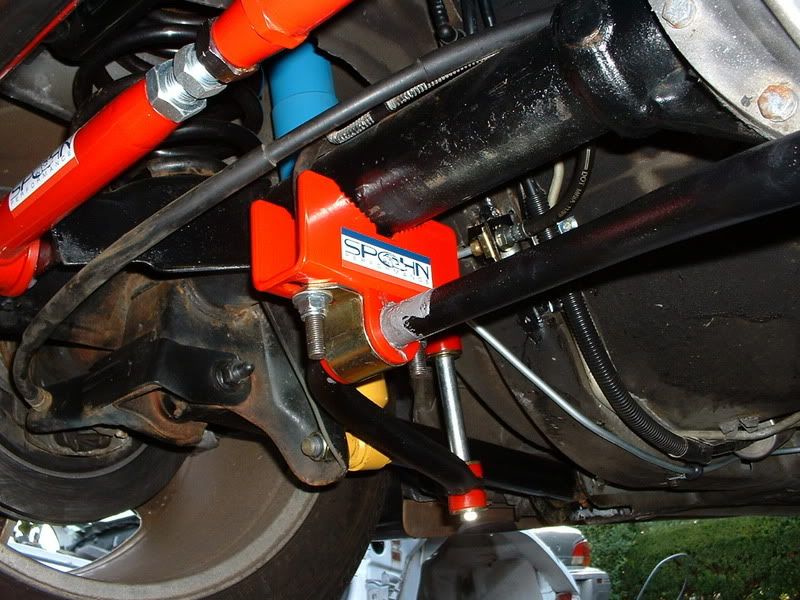
Random pic of the rear sway bar and spohn sway bar drops..
The hangers worked out great. If anyone wants to see pics of them...Ill throw them on here too.
IM ALMOST DONE!! I por15'ed the sub frame connectors and a few other spots under the car. Got the wiring almost finished. All I have left is some more cleaning up of the wiring, a few odds and ends under the hood...then it will be time to take her for a spin!!!
Speaking of driving her...does anyone have any tips on getting my alignment close enough to drive around alittle? I measured the old tie rods and all...but they are alittle different than the ones I have on the car now. Any way to get it dialed in alittle better so I can atleast run it around alittle before taking it to the alignment shop. Thanks for lookin!
Justin
Some pics of the tips...
Wheel and tip pic.
Side view of the tip...
Under car shot of the pipes...
Random pic of the rear sway bar and spohn sway bar drops..
The hangers worked out great. If anyone wants to see pics of them...Ill throw them on here too.
IM ALMOST DONE!! I por15'ed the sub frame connectors and a few other spots under the car. Got the wiring almost finished. All I have left is some more cleaning up of the wiring, a few odds and ends under the hood...then it will be time to take her for a spin!!!
Speaking of driving her...does anyone have any tips on getting my alignment close enough to drive around alittle? I measured the old tie rods and all...but they are alittle different than the ones I have on the car now. Any way to get it dialed in alittle better so I can atleast run it around alittle before taking it to the alignment shop. Thanks for lookin!
Justin
10-02-2006, 08:48 AM
#18
Staging Lane
Join Date: Nov 2005
Location: Latrobe PA
Posts: 63
Likes: 0
Received 0 Likes
on
0 Posts
You can eyeball an alignment and at least keep from scrubbing the tires off for a little while
There are three basic measurments you can adjust
Caster, how far forward or back the spindle tilt is. Adjust by moving the top of the strut back or forward. Try to just get then both the same for now using the strut plate and bolts as a guide, basically just center them.
Camber, the tilt of the tire toward the inside or outside. You want from 0 degrees to 1 degree negative (top of tire tilts in toward the car) I would just use a level and get it plumb or straight up and down for now
Toe, the direction the front tires roll, tow in is pointing the fronts toward each other out is away from each other. you want just a tad of in, almost not noticeable. to adjust just set the car on the ground and center the steering wheel. snap a few chalk lines beside your tire to about 20 feet past the front of the car. tou will use that as a sight line. adjust your tie rods until they are just on the inside of straight.
That will get you by for now but until you hit an alignment shop keep a close eye on the front tires, toe will wear them out quicker than anything
good luck
Andy
10-02-2006, 09:36 AM
#19
Andy... Thanks for the post man!!! I basically positioned the new strut mounts in the old locations. I think my car was in a wreck at one point in its lift...so they strut mounts were always in different spots from each other. My main concern is basically the toe. Now on my jeep, I never get it aligned. the only adjustment on that thing is the toe...and I get it dead on myself. But with the type of steering the TA has...its alittle intimidating.
The toe procedure sounds pretty easy. Basically Im just giving myself some reference lines that are straight, and Im eyeballing the tires/wheels until they are mostly straight. That about the jist of it??
My main reason for wanting to drive it a bit, is I want to see how the suspension settles out. Im afraid I might have to cut some spring out of the eibachs up front. Ide rather do that before I take it for alignment. So I want to be able to hit some back roads and get some bumps in to make sure everything is seated...then proceed from there.
Thanks again!
Justin
10-03-2006, 06:31 PM
#20
Staging Lane
Join Date: Nov 2005
Location: Latrobe PA
Posts: 63
Likes: 0
Received 0 Likes
on
0 Posts
Originally Posted by ghettocruiser
Andy... Thanks for the post man!!! I basically positioned the new strut mounts in the old locations. I think my car was in a wreck at one point in its lift...so they strut mounts were always in different spots from each other. My main concern is basically the toe. Now on my jeep, I never get it aligned. the only adjustment on that thing is the toe...and I get it dead on myself. But with the type of steering the TA has...its alittle intimidating.
The toe procedure sounds pretty easy. Basically Im just giving myself some reference lines that are straight, and Im eyeballing the tires/wheels until they are mostly straight. That about the jist of it??
My main reason for wanting to drive it a bit, is I want to see how the suspension settles out. Im afraid I might have to cut some spring out of the eibachs up front. Ide rather do that before I take it for alignment. So I want to be able to hit some back roads and get some bumps in to make sure everything is seated...then proceed from there.
Thanks again!
Justin
The toe procedure sounds pretty easy. Basically Im just giving myself some reference lines that are straight, and Im eyeballing the tires/wheels until they are mostly straight. That about the jist of it??
My main reason for wanting to drive it a bit, is I want to see how the suspension settles out. Im afraid I might have to cut some spring out of the eibachs up front. Ide rather do that before I take it for alignment. So I want to be able to hit some back roads and get some bumps in to make sure everything is seated...then proceed from there.
Thanks again!
Justin
Andy
http://www.4x4xplor.com/alignment.html