
The G-Body Swap Thread
 04-30-2012, 11:04 AM
#801
On The Tree

Join Date: Jul 2003
Location: Illinois
Posts: 100
Likes: 0
Received 0 Likes
on
0 Posts

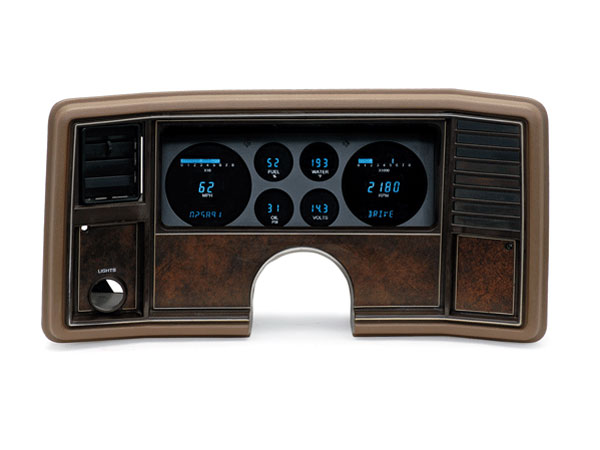
I have this p-coated black w/ some LED's for the turn signals. I currently have some autometer gauges installed for my old setup (speedo, suel, and tach) so I will need to replace the speedo and tach to match my LY6 swap. I got the plate off someone at montecarloss.com. I have no idea if he is selling these anymore?
I also have the t-top and pillar gauge pods for air/fuel, trans temp, volts, etc. I'll try and get some pics when I can.

found another vendor while looking for the original....
http://custommontessparts.com/gaugesshadow_box_156-167
I also have the t-top and pillar gauge pods for air/fuel, trans temp, volts, etc. I'll try and get some pics when I can.
found another vendor while looking for the original....
http://custommontessparts.com/gaugesshadow_box_156-167
 04-30-2012, 11:06 AM
#802

Why do you have to use something on the Tach? I have not heard that.
As for the speedo, if you are clever you can use the electronic head from an 80s firebirt/trans am, on the Monte faceplate & either have it recalibrated, or make a new face decal for it. It can be a PITA, but will work.
As for the speedo, if you are clever you can use the electronic head from an 80s firebirt/trans am, on the Monte faceplate & either have it recalibrated, or make a new face decal for it. It can be a PITA, but will work.
04-30-2012, 11:32 AM
#803
Registered User

Join Date: Apr 2012
Location: Alamogordo,NM
Posts: 2
Likes: 0
Received 0 Likes
on
0 Posts
I went through this whole thread again, so I missed it or there isn't much talk about gauges.
To run factory speed/Rpm gauge you need some B.S. that cost like $400 correct?
Then depending on which Auto Meter guages your taste buds quench for that's $400-$700 for all the main gauges you need- Fuel/Volts/Temp/Oil/Speed/RPM. Which should all be the electric gauges.
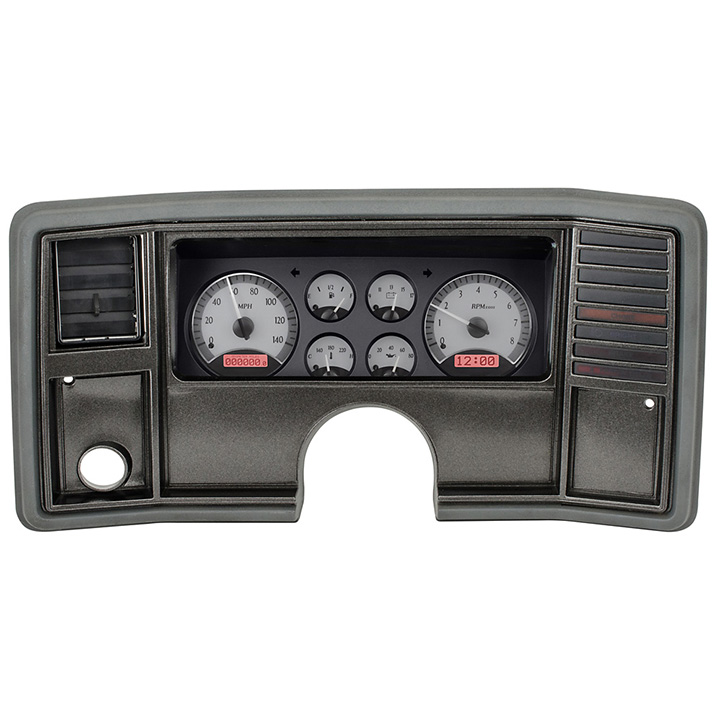
Then you got Dakota Digital. Right now they have two options for Gbody.
There first gauge cluster.
Now they also offer this one.
What is everyone doing? Can you post up pics if possible.
If I go with Auto Meter I'm trying to work up some nice ideas to incorporate turn signals, high beam, gear shift indicator to make it look somewhat custom/still factory looking then the normal slapped in gauges with two light in there for turn signal. Ya know that somewhat street car/track car look.
To run factory speed/Rpm gauge you need some B.S. that cost like $400 correct?
Then depending on which Auto Meter guages your taste buds quench for that's $400-$700 for all the main gauges you need- Fuel/Volts/Temp/Oil/Speed/RPM. Which should all be the electric gauges.
Then you got Dakota Digital. Right now they have two options for Gbody.
There first gauge cluster.
Now they also offer this one.
What is everyone doing? Can you post up pics if possible.
If I go with Auto Meter I'm trying to work up some nice ideas to incorporate turn signals, high beam, gear shift indicator to make it look somewhat custom/still factory looking then the normal slapped in gauges with two light in there for turn signal. Ya know that somewhat street car/track car look.
Dirte
05-02-2012, 08:08 AM
#804
Teching In

Join Date: Mar 2012
Location: VA
Posts: 32
Likes: 0
Received 0 Likes
on
0 Posts
Hey fellas, I've read through quite a bit of this thread all ready but not all of it. What are yall using for traction bars or similar. Also on this gauge deal is there no way to just wire up stock and use it even though it looks like complete a$$ in my opinion. I was thinking of just buying the aftermarket gauges and running them after making a plate to fit in the dash to hold them. Thanks
 05-14-2012, 09:37 PM
#806
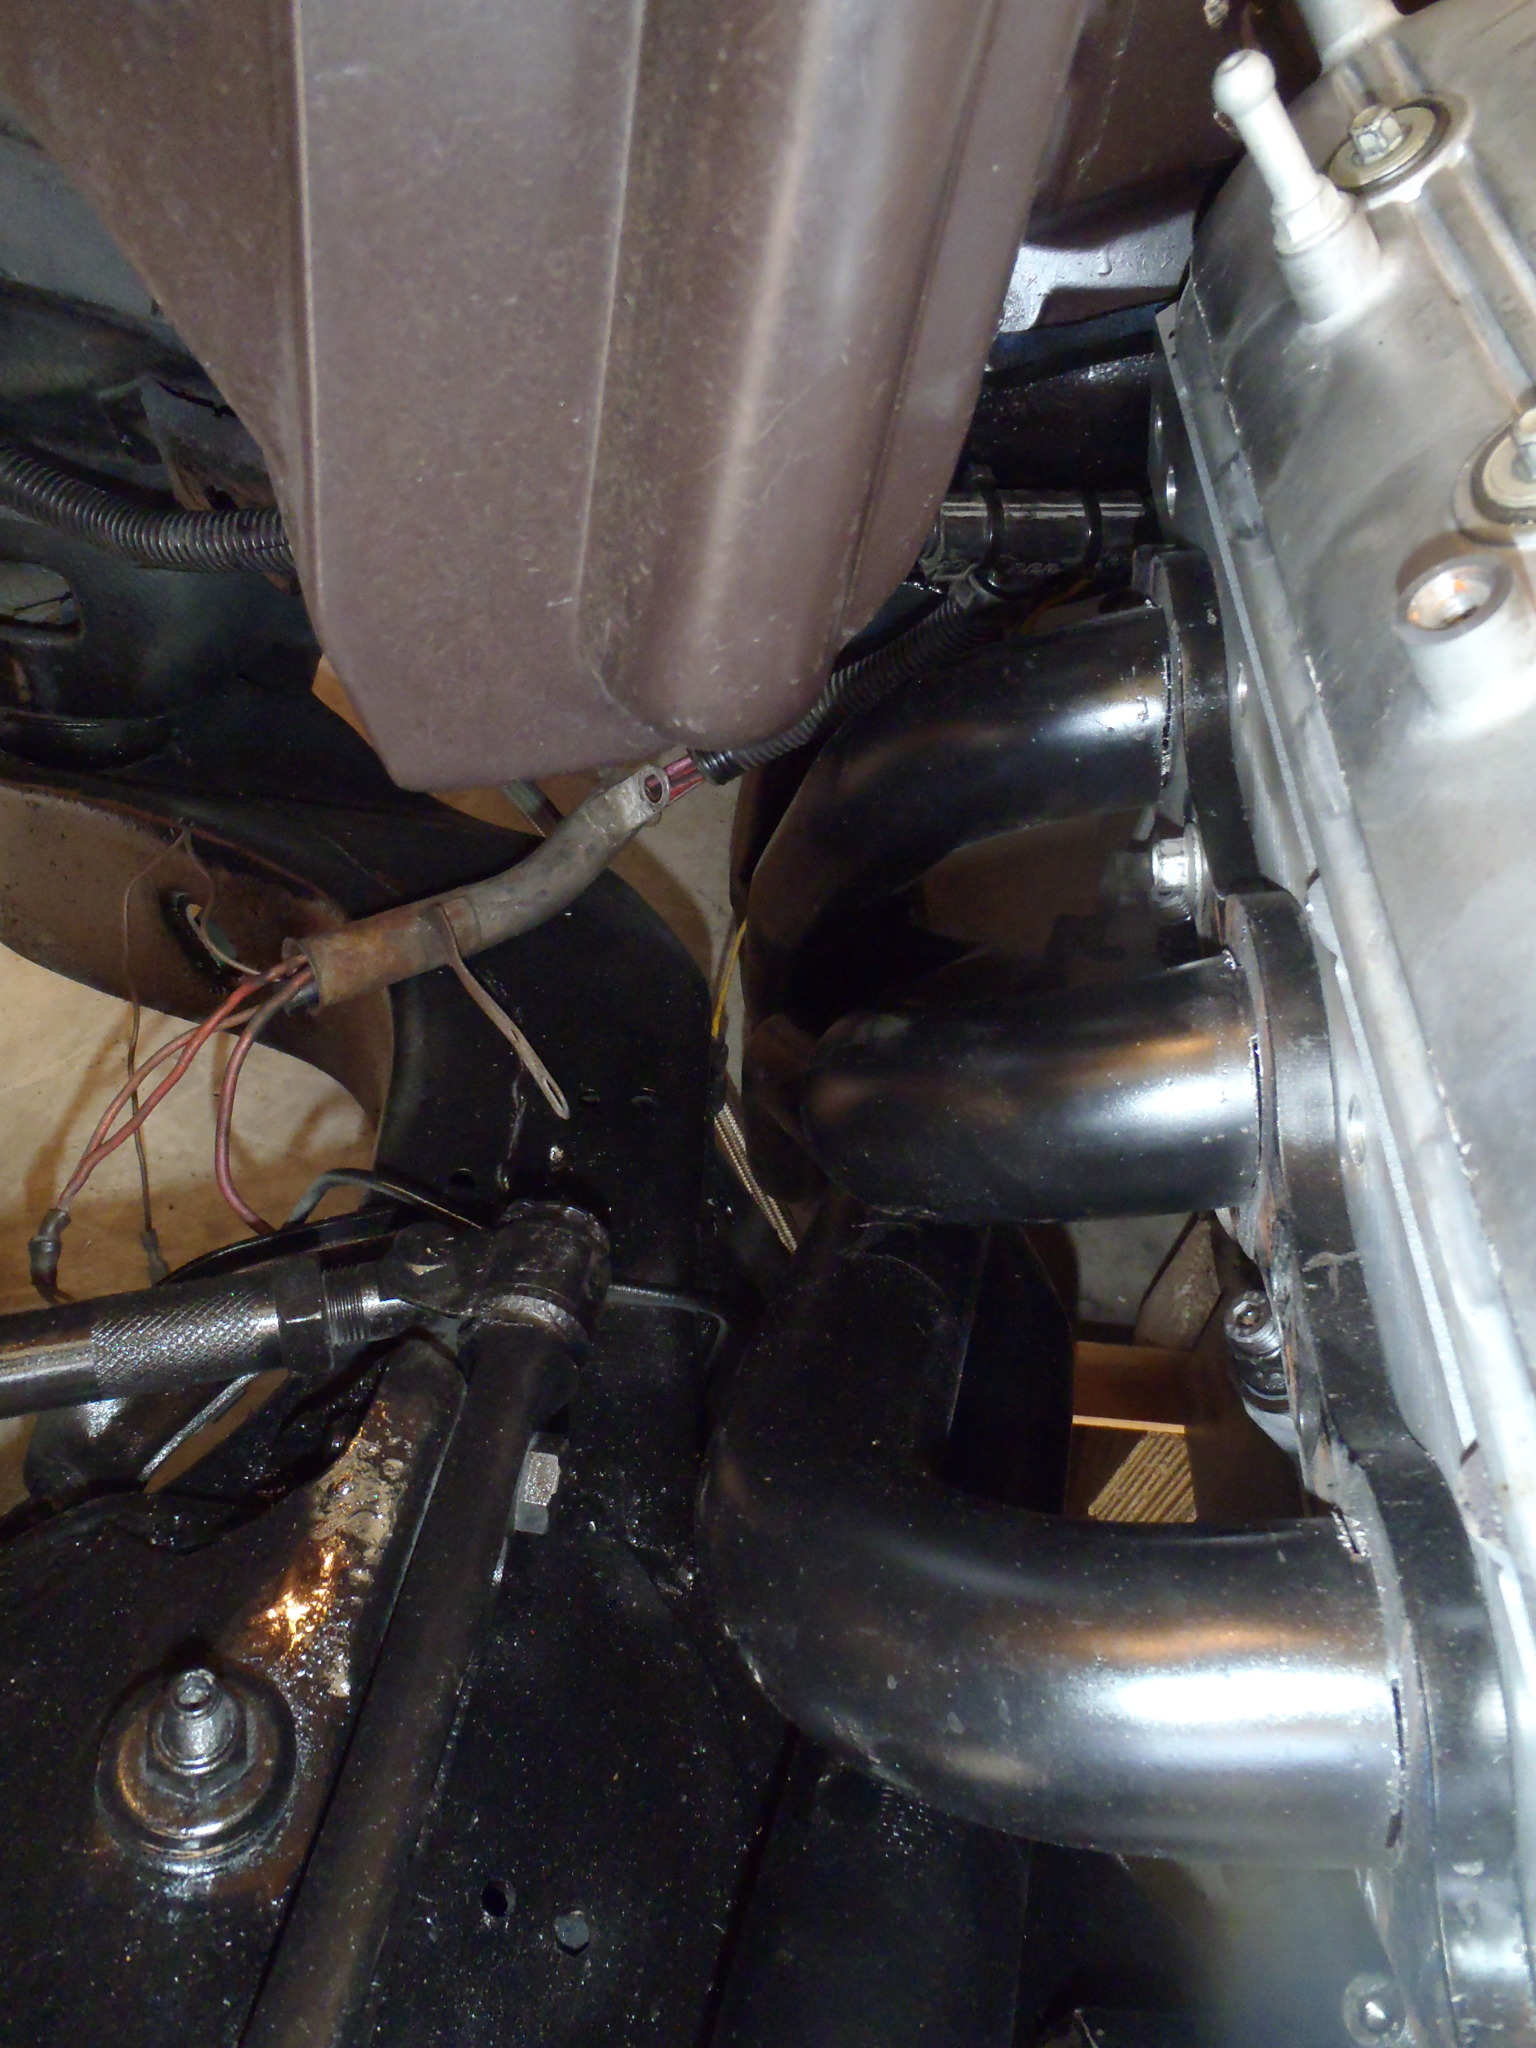
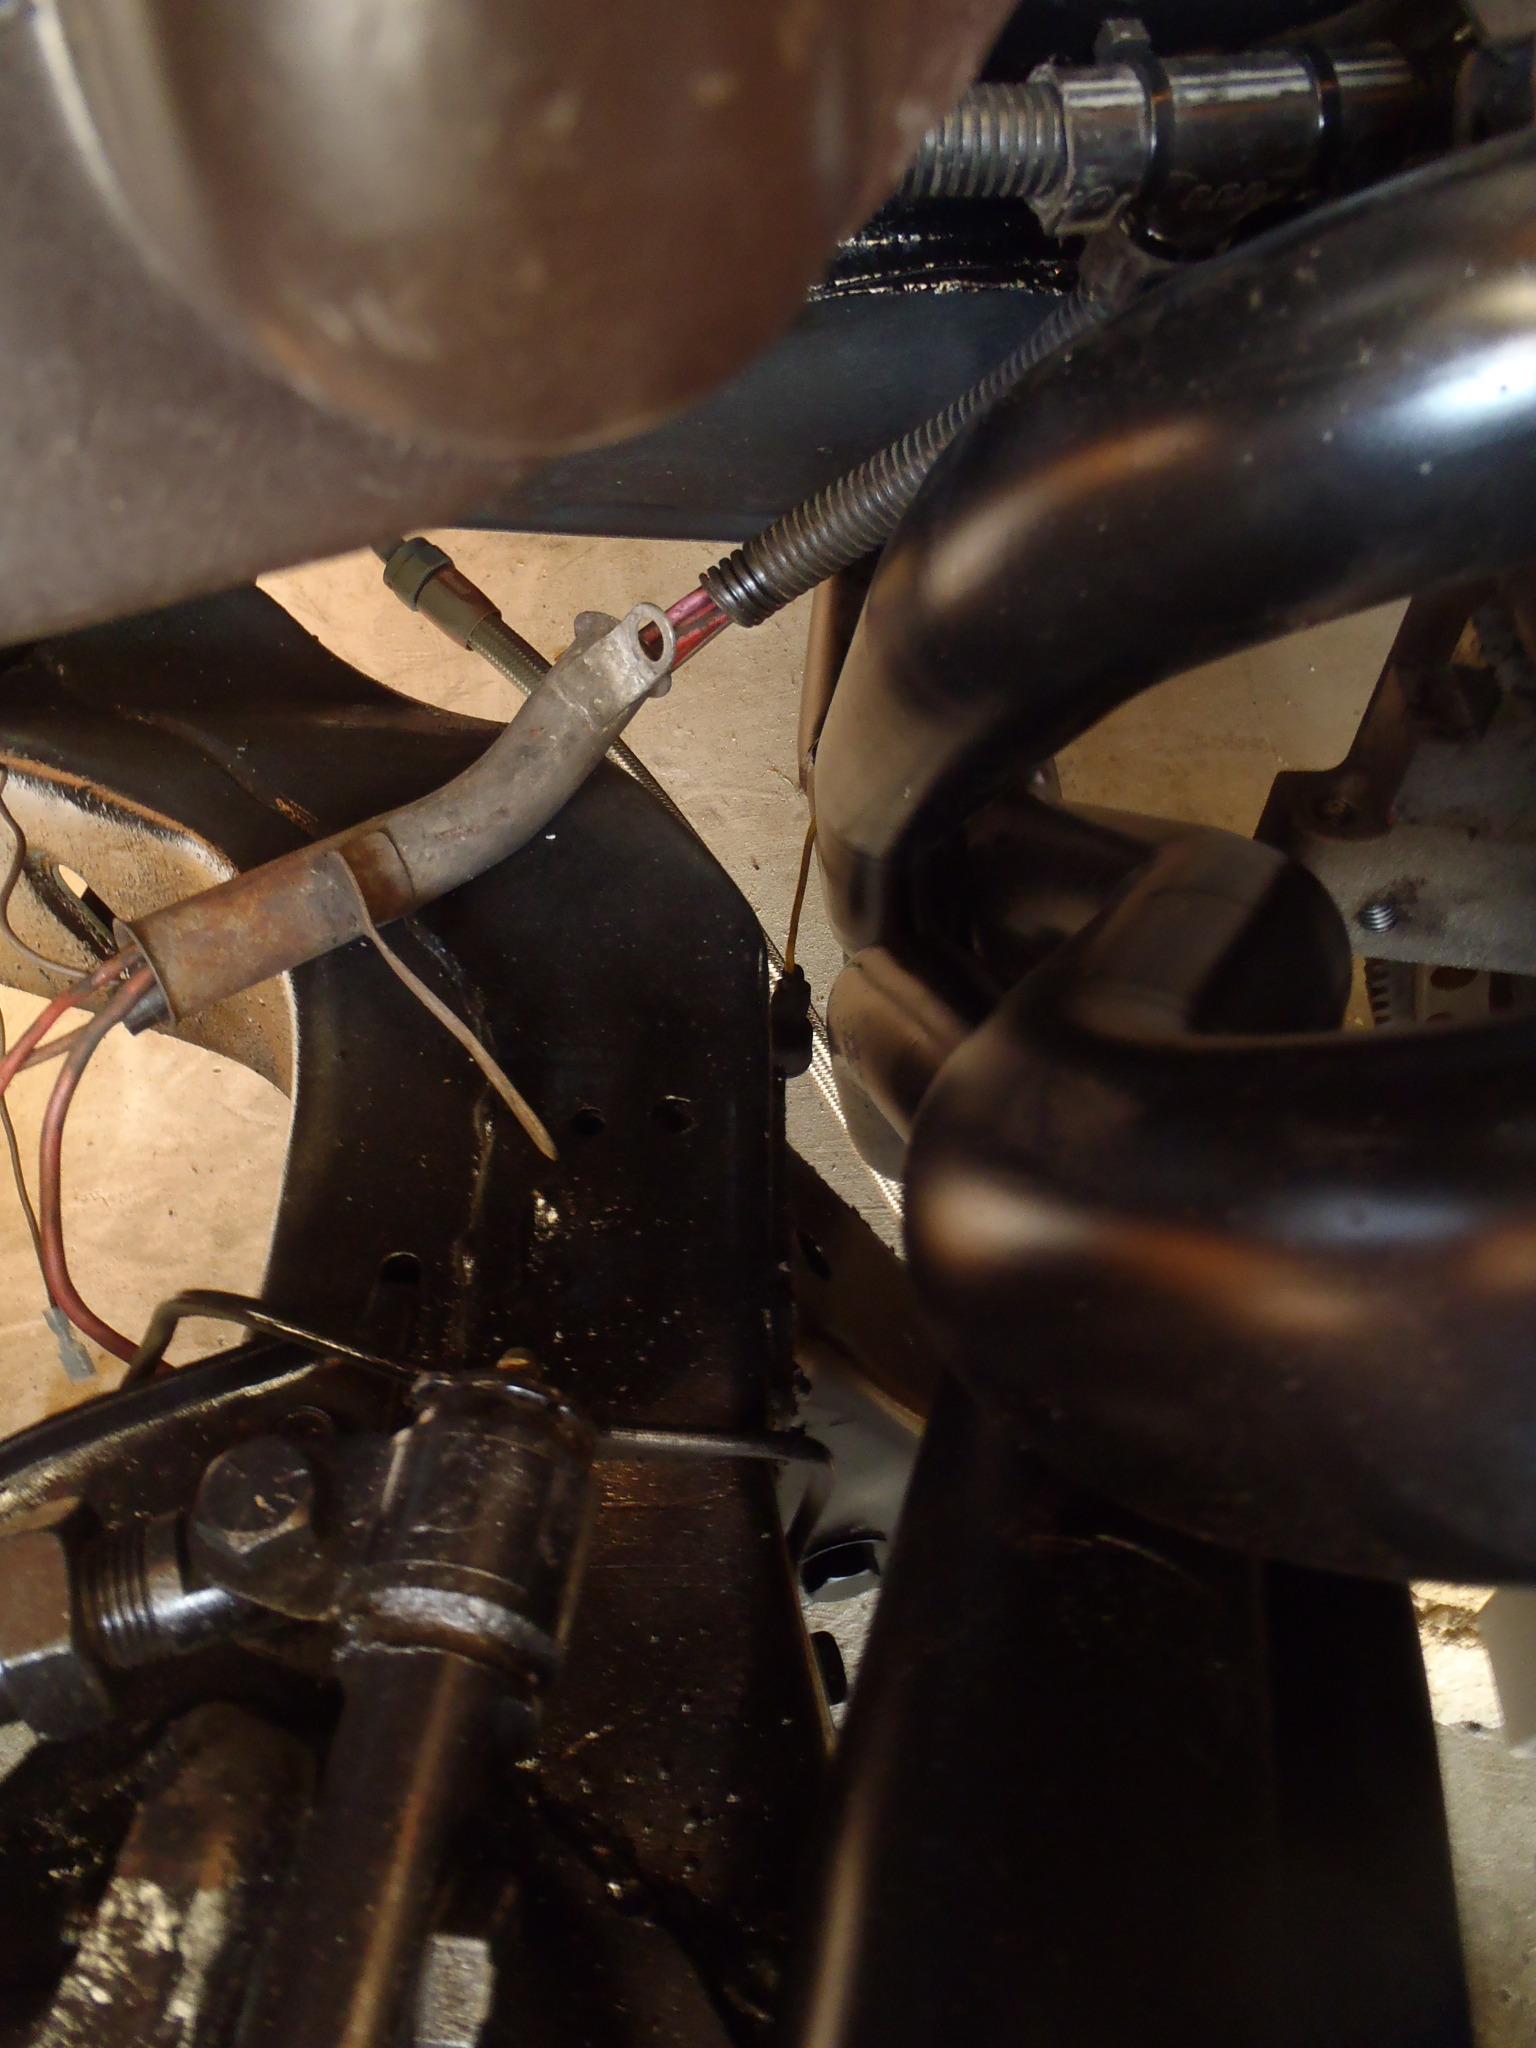
So tonight & put the Paceheader headers on to see how they fit. The driver's side fit without interference with anything, I'm not a fan of the kickout bend of the header, and I cannot get my finger between the oil filter & the header. Everybody have that issue on the driver's side? I have the Mast oil pan.
Passenger side hits the frame, so gotta do some modifications there. Either notch the frame, or modify the header itself. Thinking I may cut the tubes off the flange and weld back on at a small angle to pull the tube away from the frame.
Passenger side hits the frame, so gotta do some modifications there. Either notch the frame, or modify the header itself. Thinking I may cut the tubes off the flange and weld back on at a small angle to pull the tube away from the frame.
05-14-2012, 09:44 PM
#807
Post pics with whatever you do. I might modify the headers cause I dont want to bang on them.
I'm not feeling the kickout bend as well with mine.
Will be using Carshop 1in setback with mine.
I'm not feeling the kickout bend as well with mine.
Will be using Carshop 1in setback with mine.
05-14-2012, 09:48 PM
#808

So tonight & put the Paceheader headers on to see how they fit. The driver's side fit without interference with anything, I'm not a fan of the kickout bend of the header, and I cannot get my finger between the oil filter & the header. Everybody have that issue on the driver's side? I have the Mast oil pan.
Passenger side hits the frame, so gotta do some modifications there. Either notch the frame, or modify the header itself. Thinking I may cut the tubes off the flange and weld back on at a small angle to pull the tube away from the frame.
Passenger side hits the frame, so gotta do some modifications there. Either notch the frame, or modify the header itself. Thinking I may cut the tubes off the flange and weld back on at a small angle to pull the tube away from the frame.
05-25-2012, 01:56 PM
#810
OK so the passenger side header, I cut 80% through the tubes from the underside, right where it meets the flange, then push it down to get it some clearance between the tube & the frame. Worked good, haven't welded back together yet.
Anyone on here using the GMPP LSx controller kit/harness? Where/how did you mount the fuse block & computer?
Anyone on here using the GMPP LSx controller kit/harness? Where/how did you mount the fuse block & computer?
05-26-2012, 01:48 PM
#812
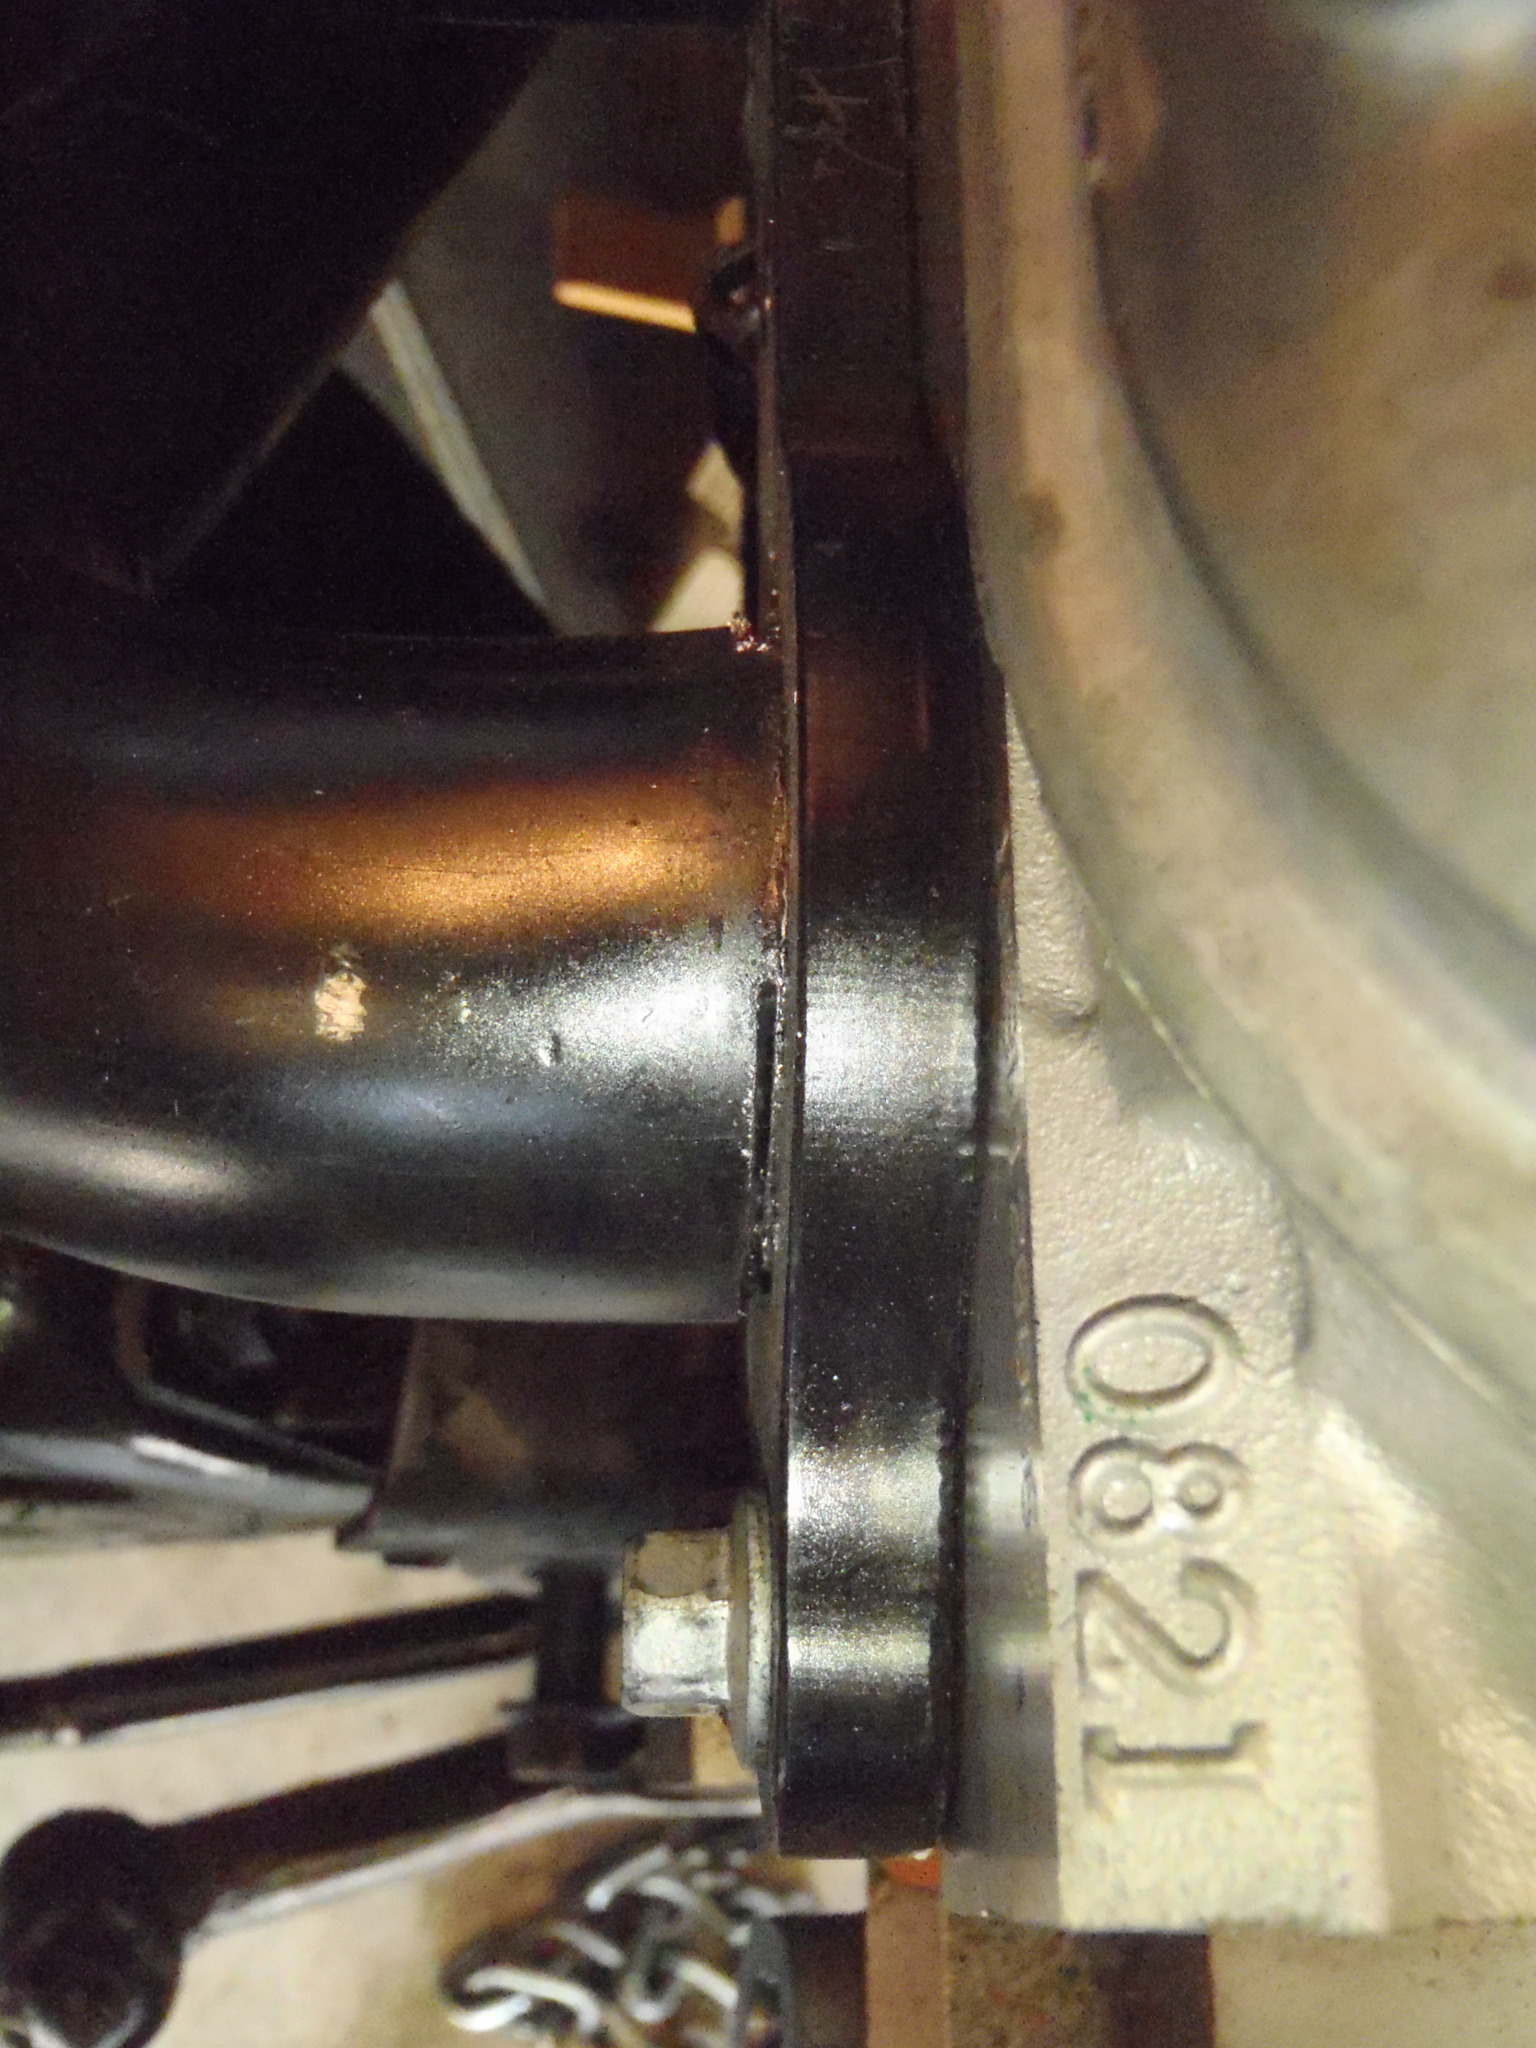
Just remembered, so here is tome quick pics. This is not a definite final spot of the motor, I still doesn't have the trans in, so not sure the angle of the engine. But it is close & definitely have clearance between the frame & headers.
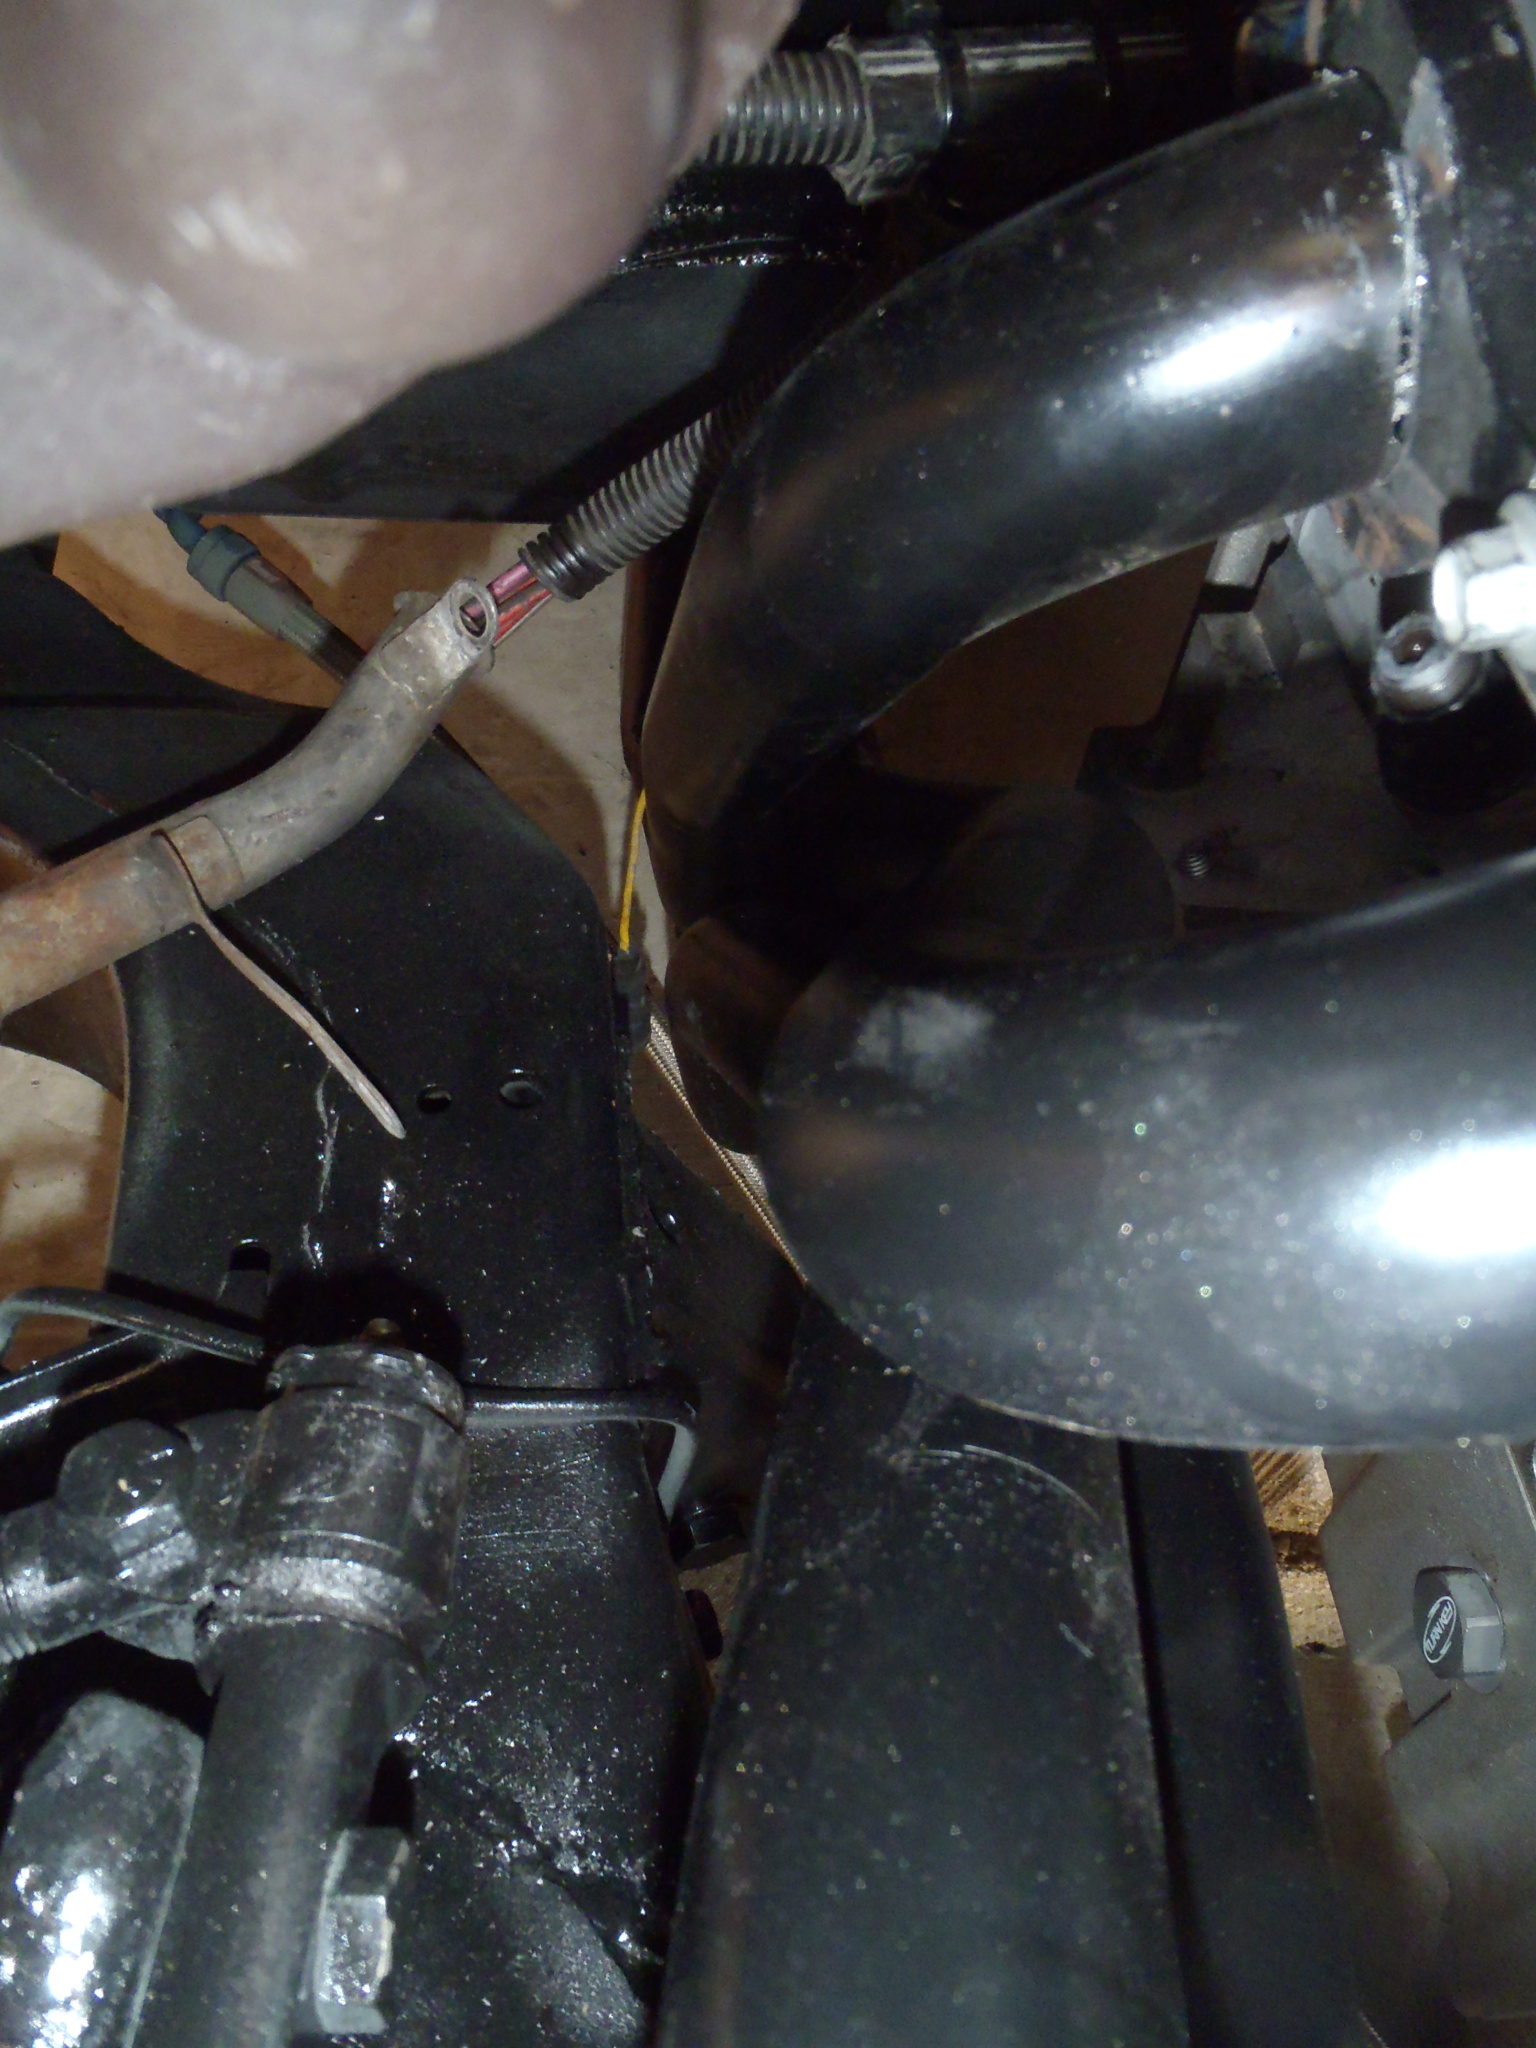
Cut the bottom of the headers like this, on the bottom side of the tube, it is cut about double the width of the cutting wheel, less than 1/8".
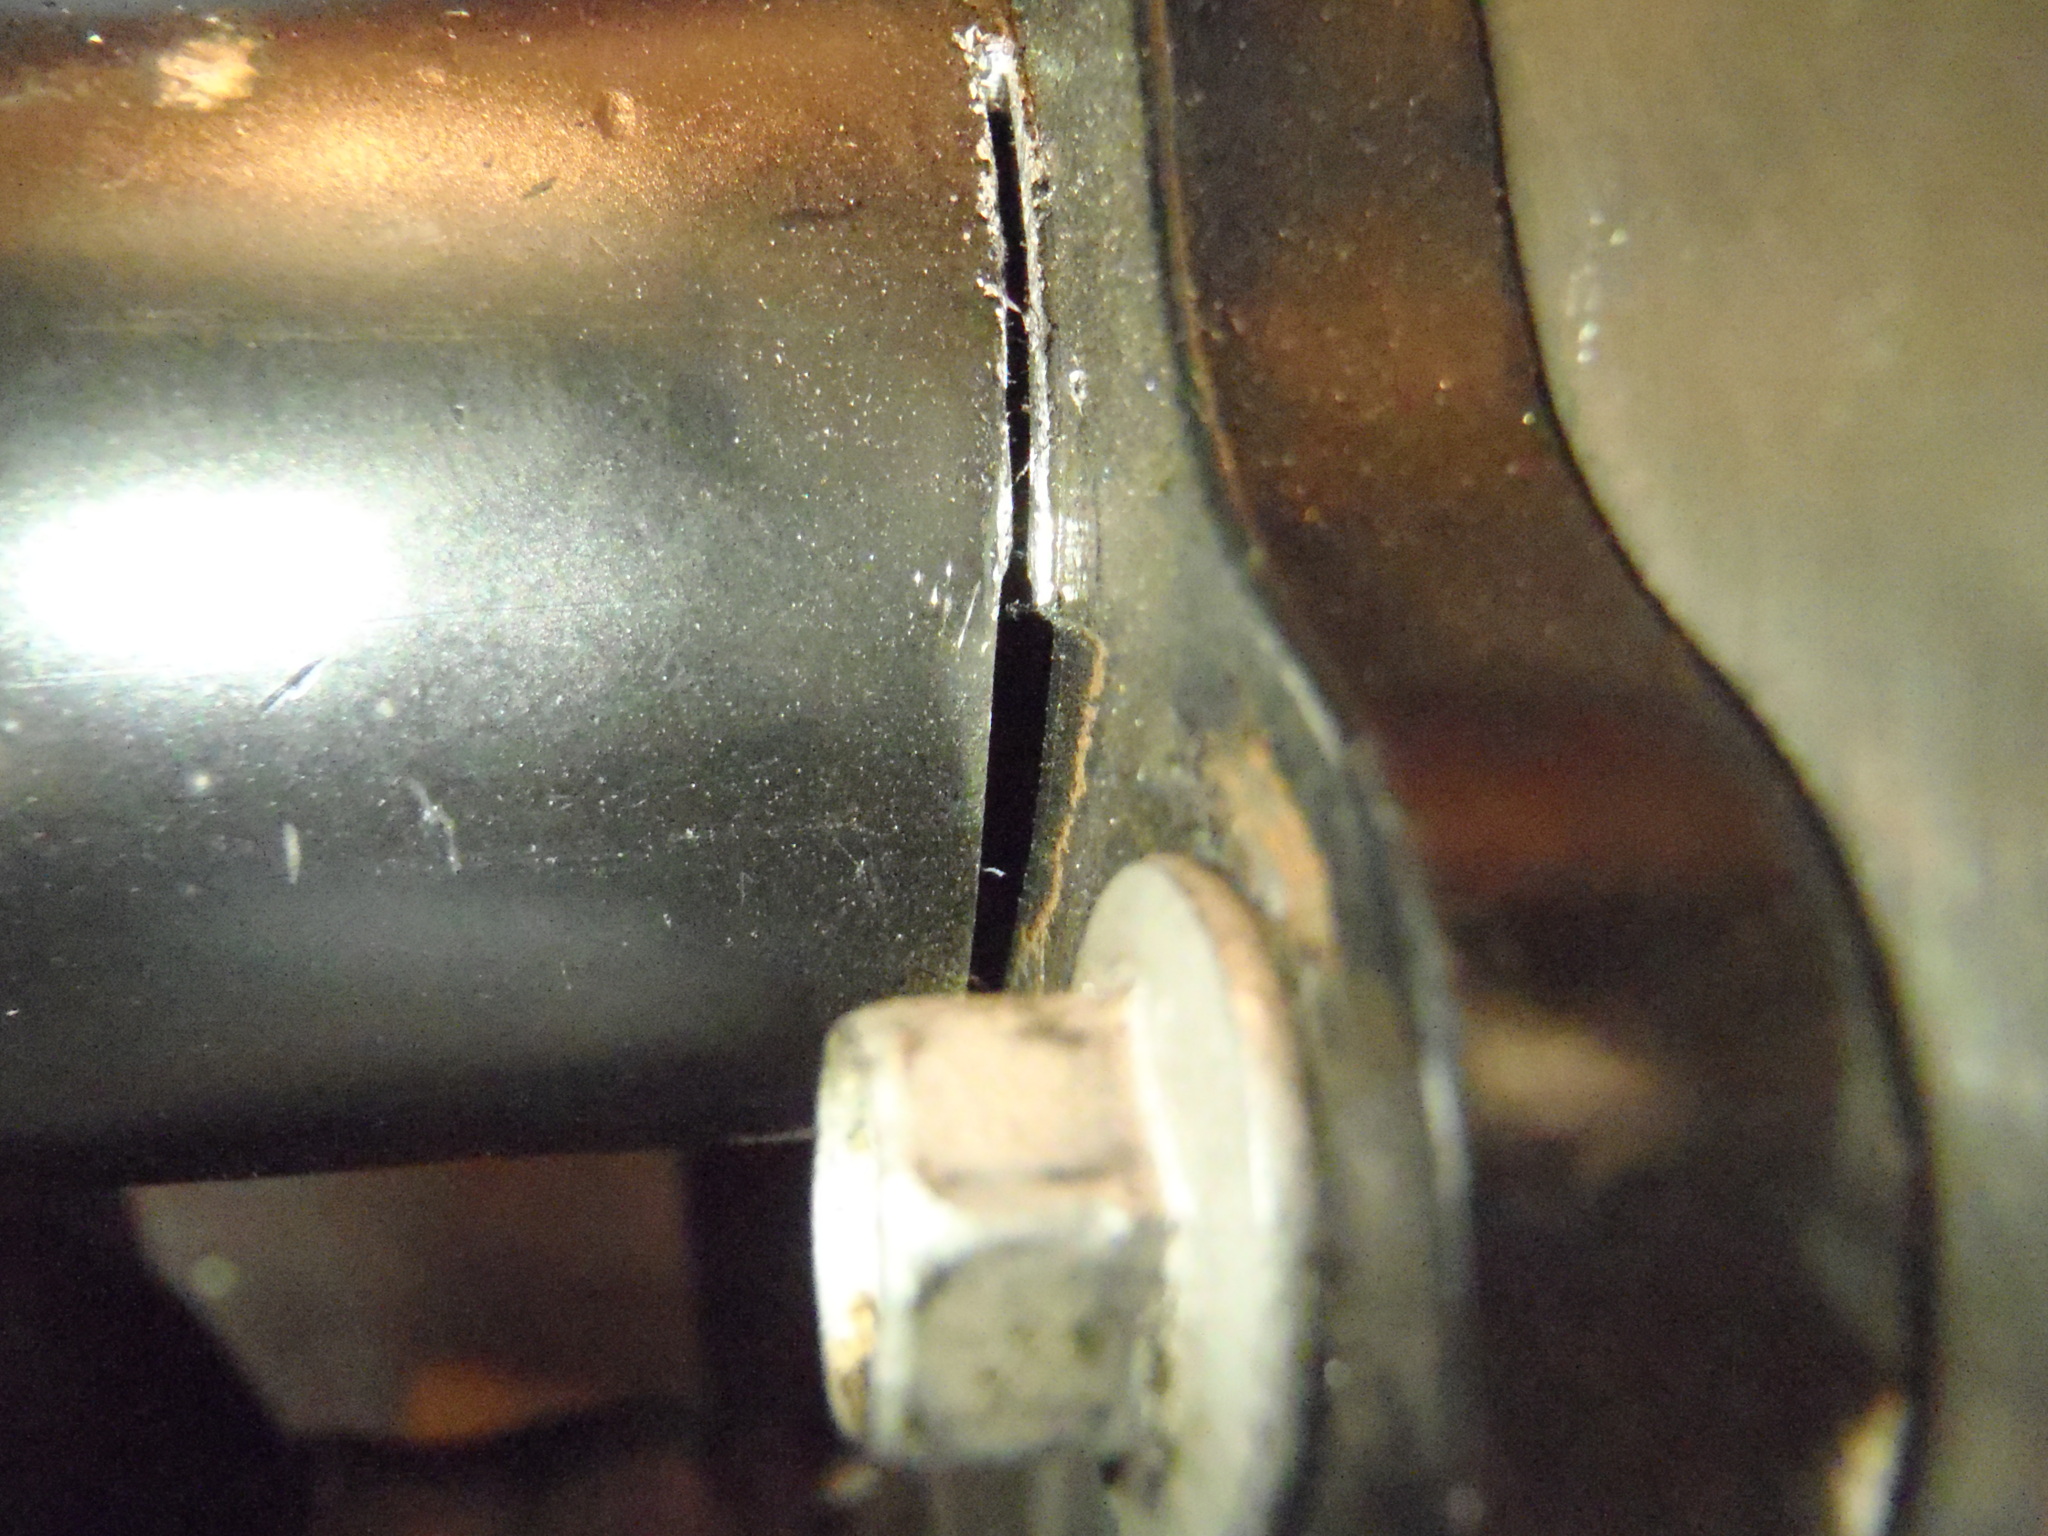
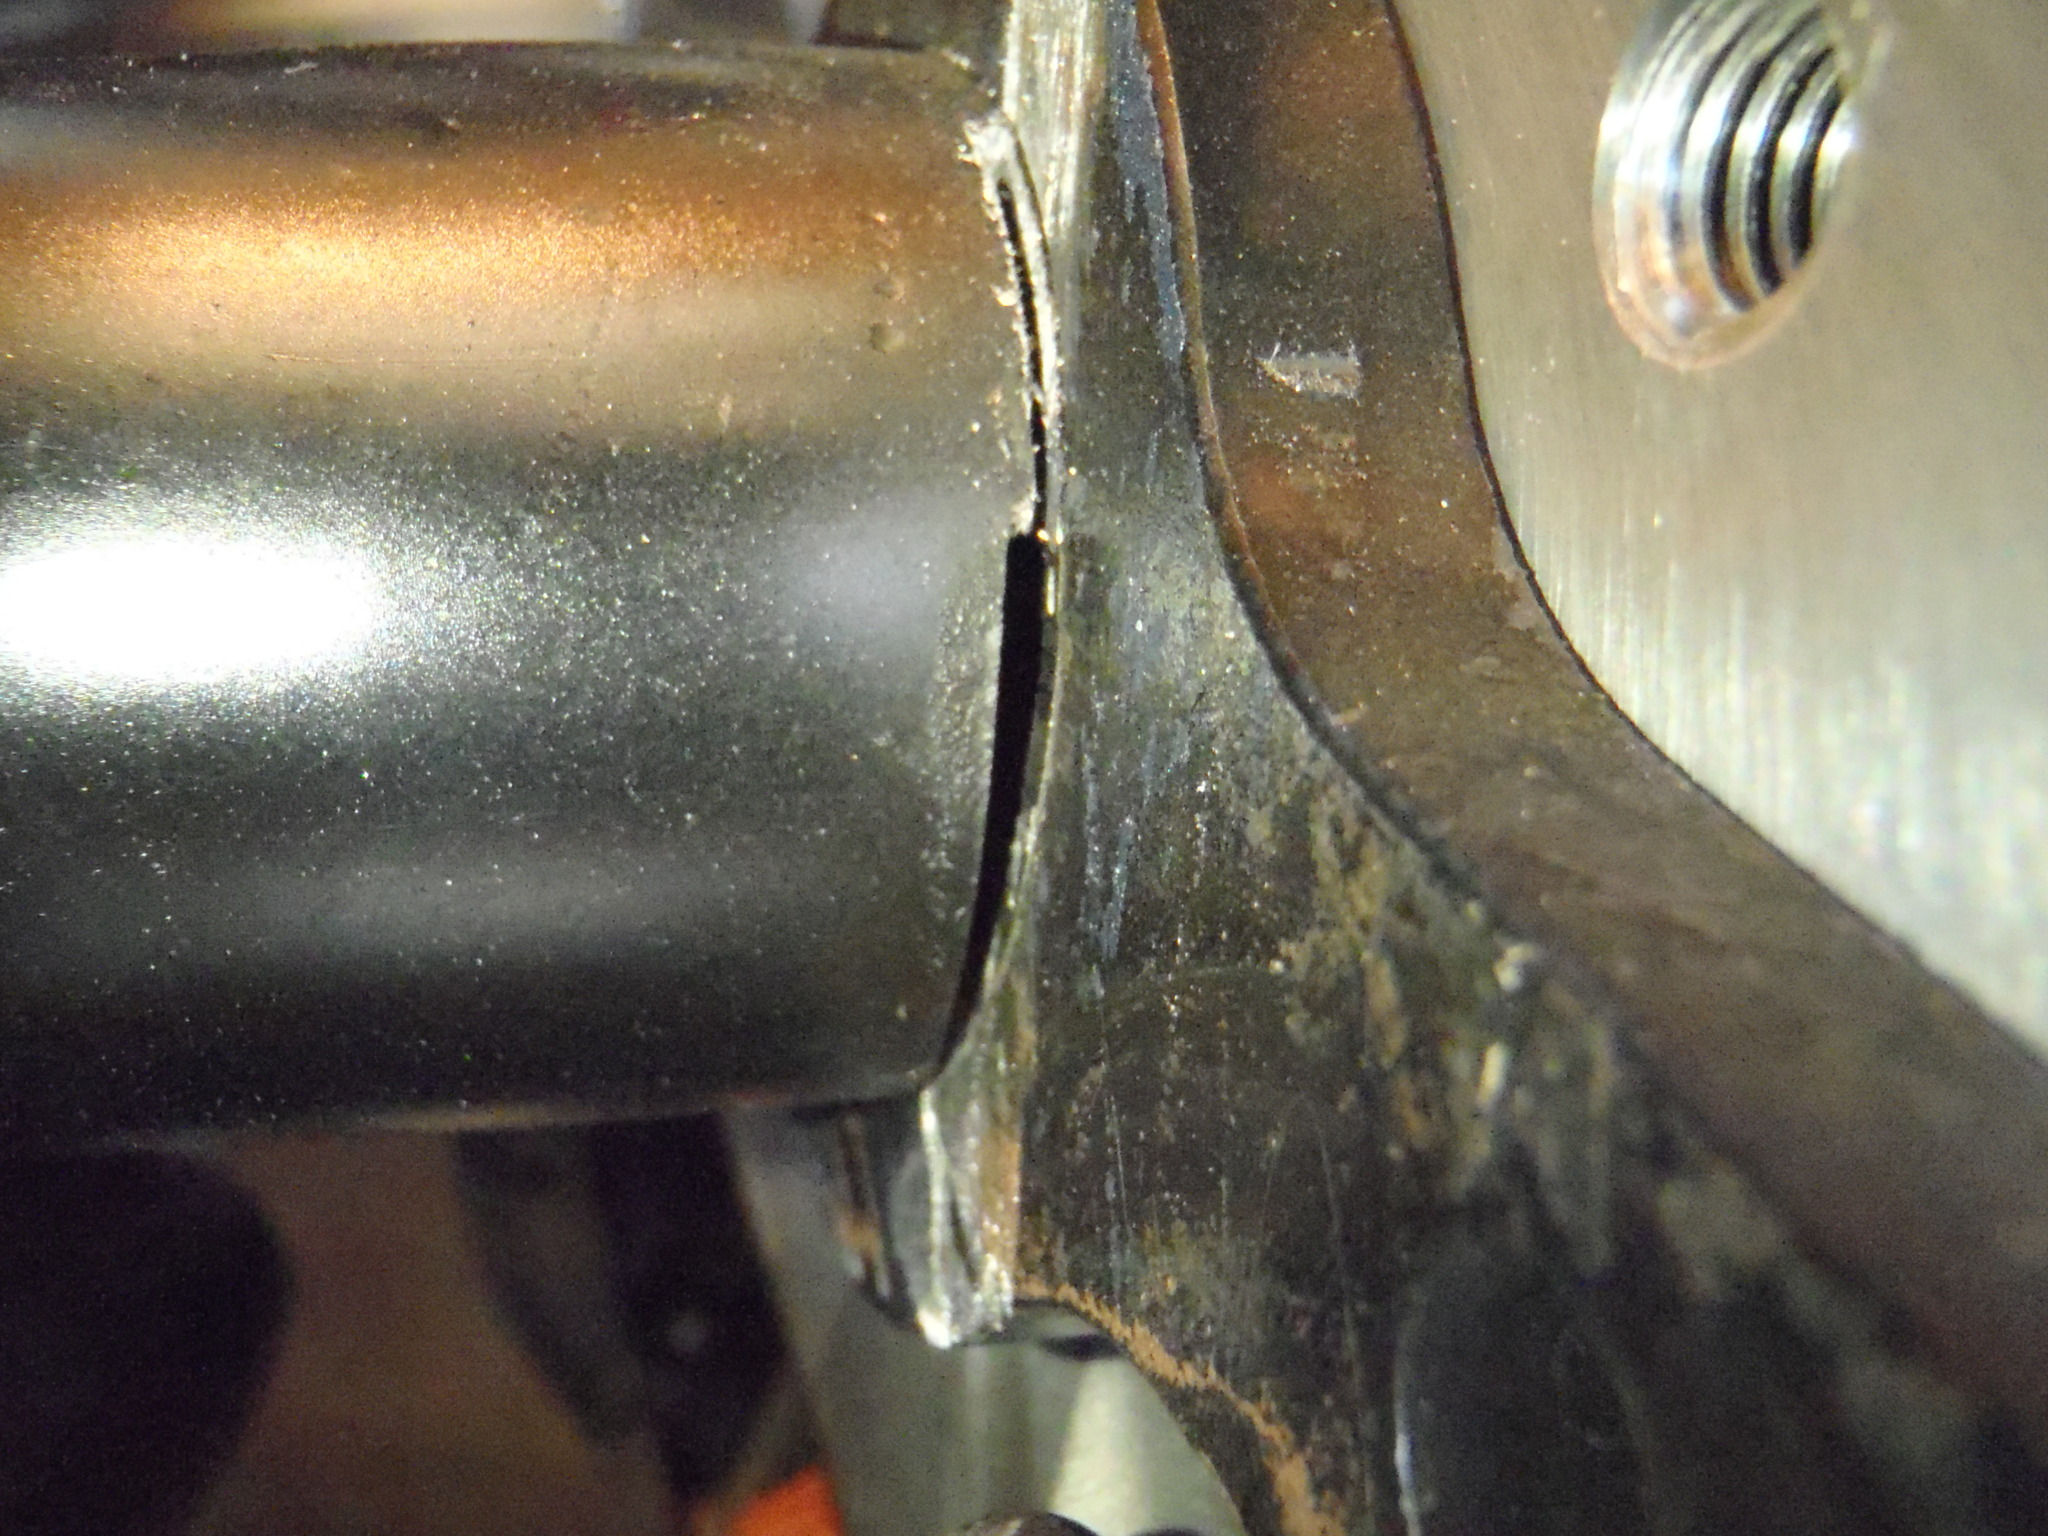
Cut the bottom of the headers like this, on the bottom side of the tube, it is cut about double the width of the cutting wheel, less than 1/8".
05-26-2012, 02:30 PM
#813
Great pics thanks.
So once you cut through the tubes there just grab them from the bottom side and pull away from the frame?
Think this would work with the driver side with the way they flare out to the side a bit?
So once you cut through the tubes there just grab them from the bottom side and pull away from the frame?
Think this would work with the driver side with the way they flare out to the side a bit?
05-27-2012, 09:05 PM
#815
Teching In
iTrader: (1)

Join Date: Dec 2009
Location: new castle delaware
Posts: 37
Likes: 0
Received 0 Likes
on
0 Posts
has anybody had to take their cars through emissions testing with the lsx swaps or does everybody have their car tagged classic? i was just debating on doing a cam with mine after i get it tagged and i wanted to know how these engine do with exhaust emissions tests
05-28-2012, 02:32 PM
#816
Teching In
Join Date: Jan 2012
Posts: 8
Likes: 0
Received 0 Likes
on
0 Posts
Just a couple pictures of the finished product. also want to give a special thanks to "Shop Customs" and the amount of time and hard work put into getting the job done right.
let me know what you guys think

let me know what you guys think
05-28-2012, 10:21 PM
#817
Just spent hours carefully removing all the wires listed on lt1swap.com from the BLUE connector. I carefully removed all of them and labeled them to what they went to and what pin# for whatever "just in case" situations.
Went onto the RED connector and there were quite a few wires listed to remove that had to do with A/C stuff.
Pin# 17 (A/C Request Signal)
Pin# 33 (HVAC Recirculation Door Control "Keep pin here for fan relay control")
Pin# 43 (A/C Clutch Relay Control)
Pin# 55 (A/C Low Pressure Switch Signal)
I plan on keeping A/C, do I still remove any of these? Or will the trucks original A/C compressor even work with my car? I plan to notch the frame and keep A/C down low if possible. Not sure though as I haven't test fit the motor yet.
I'm using orginal SBC mounts with 1in setback plates and all truck brackets.
 05-30-2012, 03:23 AM
#820

 There is a youtube video that has a guy who did it in smog **** state Cali...
 Colorado seems to just follow their "rules"...
  here is the link and i am pretty much trying to duplicate his build Good job BTW..http://www.youtube.com/watch?v=SWZDfGQRMWY