

69 Chevelle with LS3
maybe i misunderstood andrew, but dont set your driveline angle until you have that thing at ride height in the rear!!! it will totally change you ds angle which will change your working angles. if you dont want to change the springs, go buy a bunch of plaster sand at home depot and load it up. this little bit could be the difference btwn having to raise the rear of the tranny up another inch or leaving it as is.
Thread Starter
On The Tree
Joined: Aug 2007
Posts: 110
Likes: 0
From: So Cal
maybe i misunderstood andrew, but dont set your driveline angle until you have that thing at ride height in the rear!!! it will totally change you ds angle which will change your working angles. if you dont want to change the springs, go buy a bunch of plaster sand at home depot and load it up. this little bit could be the difference btwn having to raise the rear of the tranny up another inch or leaving it as is.
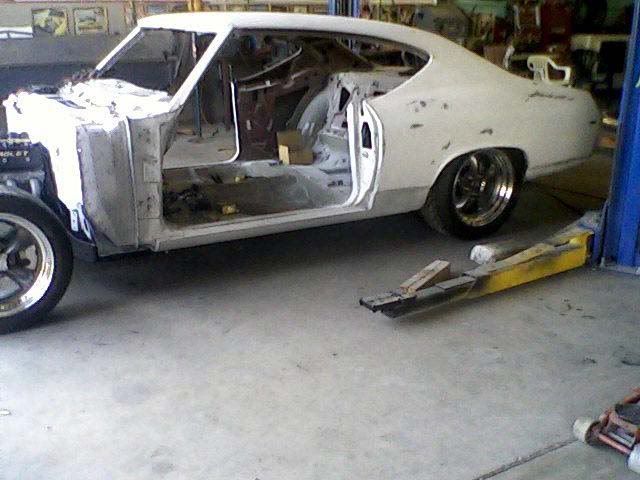
I am not really worried about driveline angle anymore because I am doing a similar tunnel mod that Troy did. I think you might be confused about the spring height as I was just kinda surprised at how high it still was. Yes plaster is good but when your gonna toss the springs anyway......just cut them

Sorry crappy cell picture.
you're right, just cut them. also, i guess i was concerned that you were going to set them at this ride height. as long as you drop it first youre good to go.
have fun cutting. ive got the tranny tunnel out so far and the tranny sits really high. im going to see how the pan clearance is now that i got my lee box, and if the height of the motor doesnt help, ill drop it back down.
Tim
have fun cutting. ive got the tranny tunnel out so far and the tranny sits really high. im going to see how the pan clearance is now that i got my lee box, and if the height of the motor doesnt help, ill drop it back down.
Tim
Tim,
I am not really worried about driveline angle anymore because I am doing a similar tunnel mod that Troy did. I think you might be confused about the spring height as I was just kinda surprised at how high it still was. Yes plaster is good but when your gonna toss the springs anyway......just cut them
Sorry crappy cell picture.
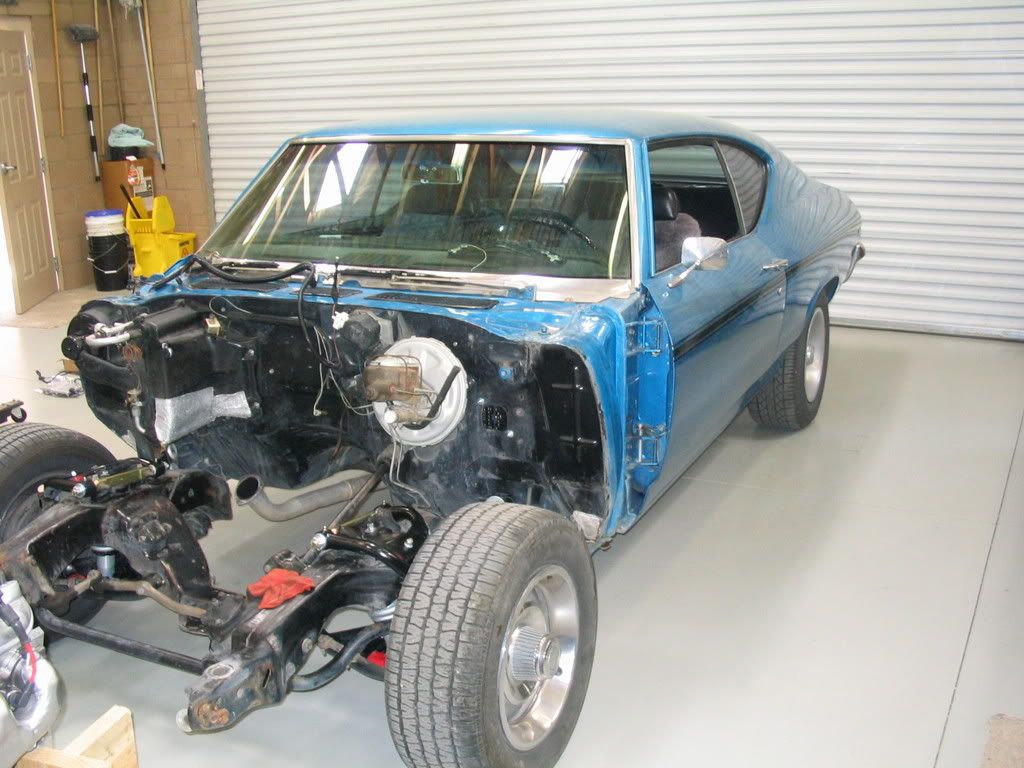
That stance looks killer, but I bet your frame is on the axle bumpstops.
Andrew
Thread Starter
On The Tree
Joined: Aug 2007
Posts: 110
Likes: 0
From: So Cal
Andrew,
I am pretty sure you are correct. These cars do look better lowered but even it did work like that (which it won't) it's a little low for me. I like what you did on yours with the adjusters on the back. Since it's just a roller currently thought it would look better sitting in the shop.
Tom
I am pretty sure you are correct. These cars do look better lowered but even it did work like that (which it won't) it's a little low for me. I like what you did on yours with the adjusters on the back. Since it's just a roller currently thought it would look better sitting in the shop.
Tom
Thread Starter
On The Tree
Joined: Aug 2007
Posts: 110
Likes: 0
From: So Cal
LS2 Chevelle that's a nice car you have.
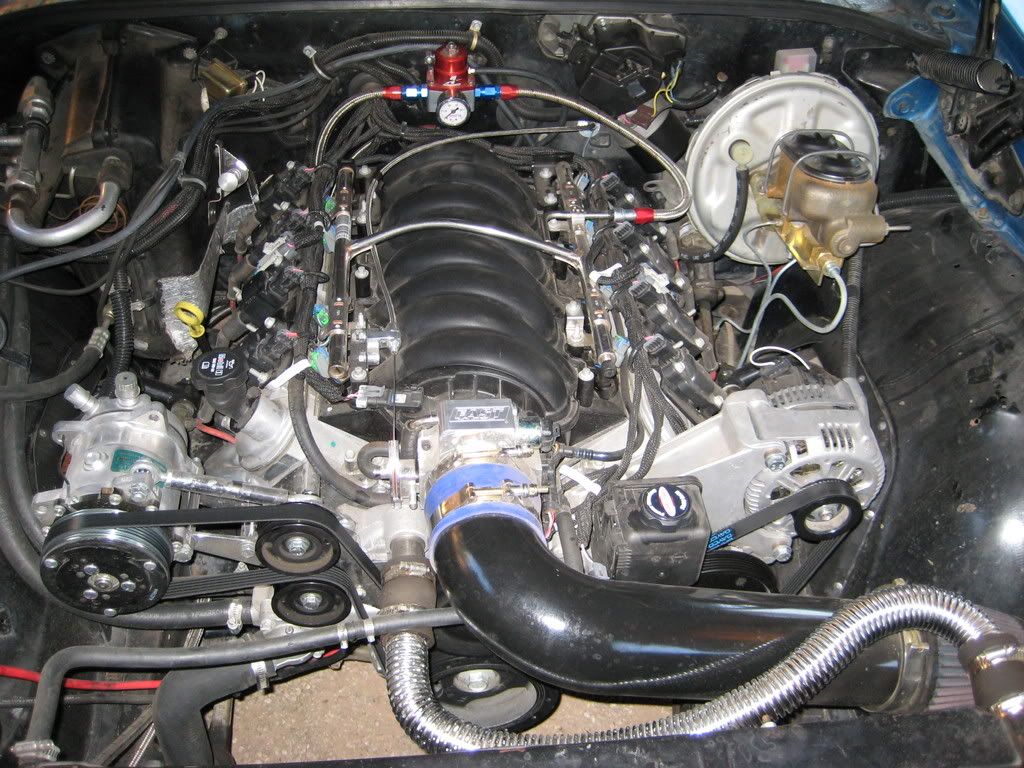
Got the tunnel mod almost finished. We ended making the complete tunnel out of sheet metal and a break. To reinforce the trans tunnel it is flanged on the bottom and along the edges it has a 3/16" plate that ties the sheet metal tunnel to the original floor board. Going to wait on the drive line hoop till after we see where the drive-line will land. I really don't think it will need any additional bracing....I am about 225 lbs and I bent over and stood on the tunnel and it's nice and firm. If any A-body guy's that are considering doing Troy's idea and want to see more angles let me know. I have more just don't want to bore anybody.
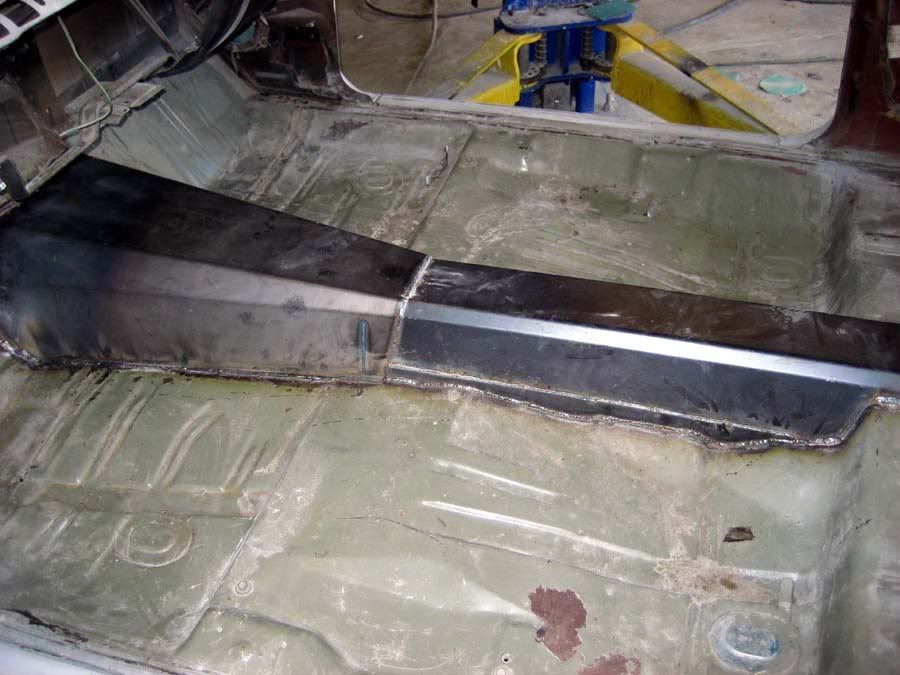
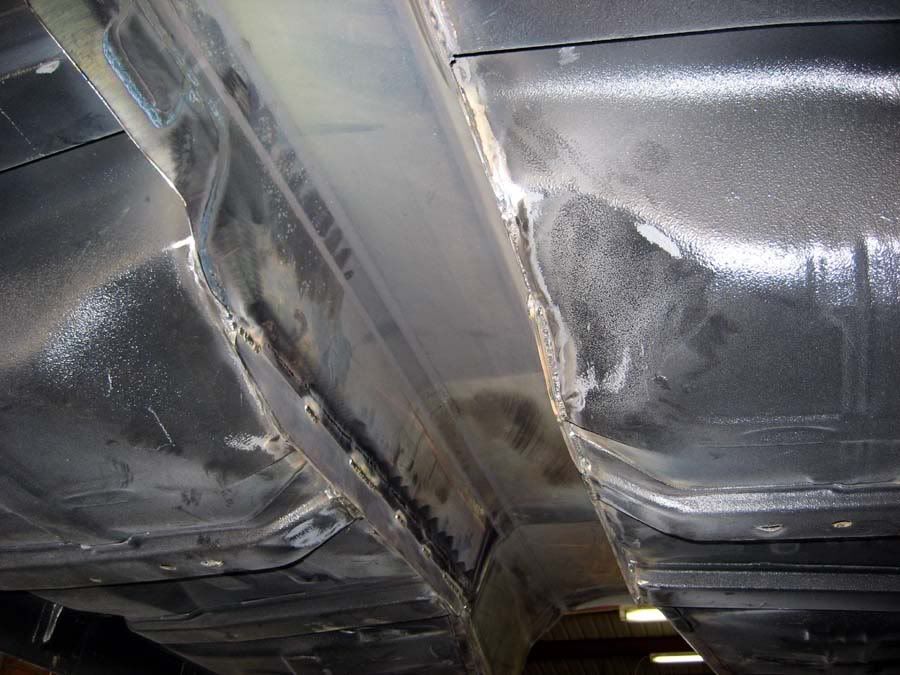
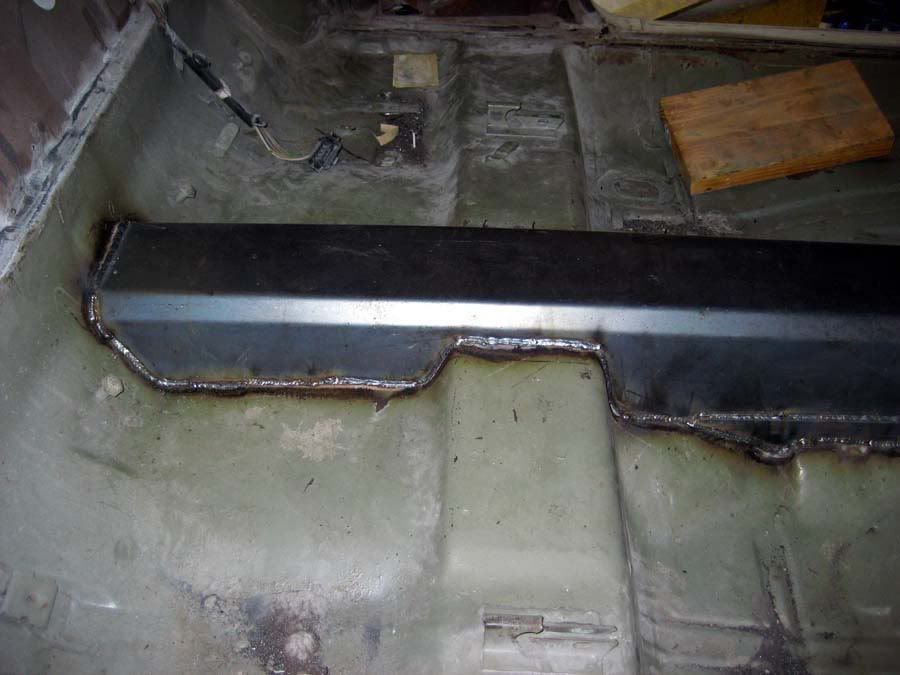
Got the tunnel mod almost finished. We ended making the complete tunnel out of sheet metal and a break. To reinforce the trans tunnel it is flanged on the bottom and along the edges it has a 3/16" plate that ties the sheet metal tunnel to the original floor board. Going to wait on the drive line hoop till after we see where the drive-line will land. I really don't think it will need any additional bracing....I am about 225 lbs and I bent over and stood on the tunnel and it's nice and firm. If any A-body guy's that are considering doing Troy's idea and want to see more angles let me know. I have more just don't want to bore anybody.
LS1 Tech Stories
The Best V8 Stories One Small Block at Time

6 Common C5 Corvette Failures and What's Involved In Repairing Them
Pouria Savadkouei
Retro Modern Bandit Pontiac Trans AM Comes With Burt Reynolds' Autograph
Verdad Gallardo
Top 10 Greatest Cadillac V Series Performance Models Ever, Ranked
Pouria Savadkouei
Top 10 Most Powerful Chevy Trucks Ever Made!

Hennessey's New Supercharged Silverado ZR2 Has 700 HP
Verdad Gallardo
Coachbuilt N2A Anteros Is an LS2-Powered C6 Corvette In Italian Clothes
Verdad Gallardo
Awesome K5 Blazer Restomod Comes With C7 Corvette Power
Verdad Gallardo
10 Camaros You Should Never Buy

10 LS Engine Myths That Refuse to Die
Verdad Gallardo Thread Starter
On The Tree
Joined: Aug 2007
Posts: 110
Likes: 0
From: So Cal
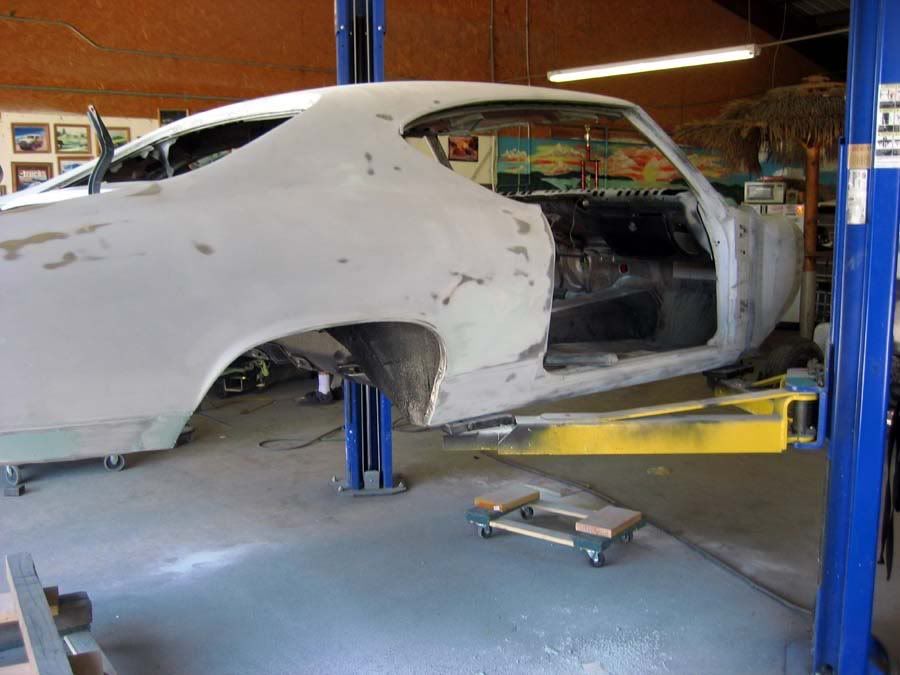
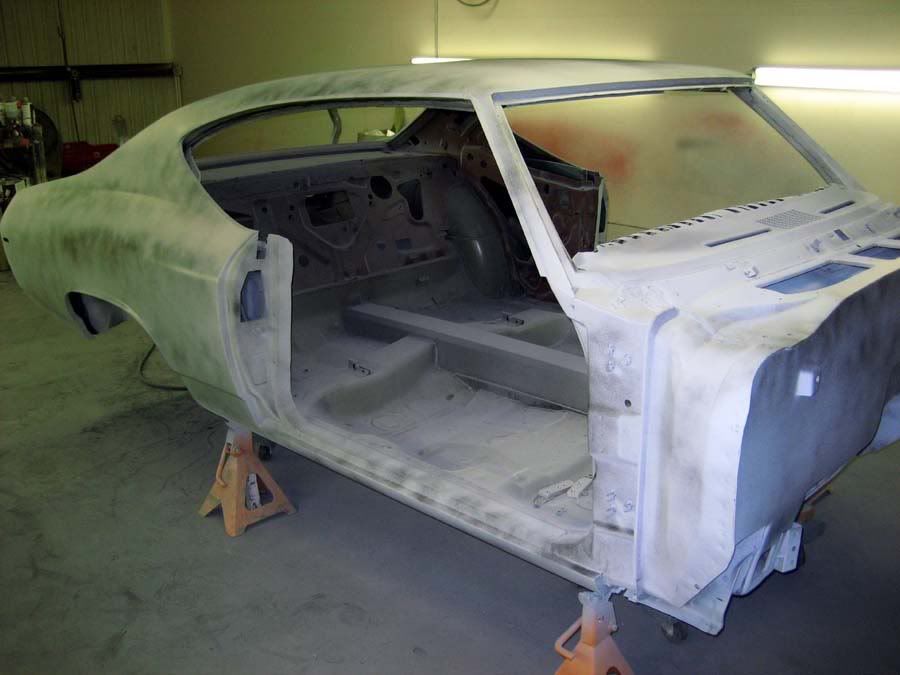
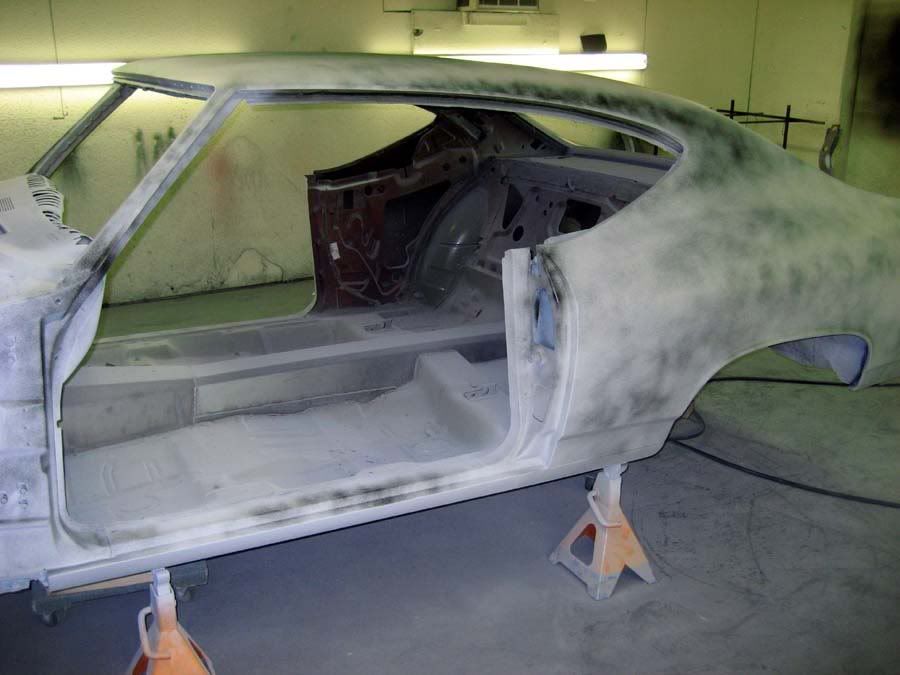
Today we worked on the body again. I really am gonna owe my brother as he is doing most of the body work. I did not get the same talent he has. It's taking longer because what body guy wants to help his brother by doing body work on his day off LOL. It's no wonder why Paint and body cost so much $$$. It is just plain tedious. Sand primer, sand primer, sand primer and so on. Keep in mind that I have chosen for the time being to go with a satin paint job with a better down the road....in doing this I keep on telling him let's just squirt the darn thing, but even after begging he says it's still not ready for that....so we ended the day with another primer and guide coat. More blocking to come. Also it may be a little delayed as I have chosen to add a roll cage...hopefully and update on that in the future.


 Great project! I am about the same place you are right now with my 67. Keep us posted.


been trying to follow along, esp the trans portion-i finished mine earlier this year, went with the hooker setup and cts pan, lq4 w/vette dr
since i started with a wrecked 69 300 sedan, and would be doing 100% of the work myself(replace the bent frame, floors, 1/4's, paint, engine build, all fab) i wanted to use some stuff that i knew would work w/o a lot of fab'n
i ended up with a 6.0, added forged rods/pistons, z06 cam and stock 317 heads, edel intake, msd6010, procharger, carb, turbo 400-while it runs great, i find i need more rear gear to really bring it alive, and along with the gears comes higher rpms on the road
so the solution to that is overdrive-i have a late model 4l80e laying around, but have been leaning to a tko600 or richmond 5 sp(had a tko600 once, hated the 2-3 shift) my question is the clutch setup-i guess it needs a hyd setup, or can an ls use a mech one-not sure if the stock 69 cross shaft would clear the headers, so prob a hyd would get the nod-where would the master cyl get mounted, on the firewall? and would it use a hyd throwout bearing, or a cyl to move the clutch fork? also, what flywheel/clutch setup to work with the trans input shaft-any pics of that setup-thanks
Thread Starter
On The Tree
Joined: Aug 2007
Posts: 110
Likes: 0
From: So Cal
been trying to follow along, esp the trans portion-i finished mine earlier this year, went with the hooker setup and cts pan, lq4 w/vette dr
since i started with a wrecked 69 300 sedan, and would be doing 100% of the work myself(replace the bent frame, floors, 1/4's, paint, engine build, all fab) i wanted to use some stuff that i knew would work w/o a lot of fab'n
i ended up with a 6.0, added forged rods/pistons, z06 cam and stock 317 heads, edel intake, msd6010, procharger, carb, turbo 400-while it runs great, i find i need more rear gear to really bring it alive, and along with the gears comes higher rpms on the road
so the solution to that is overdrive-i have a late model 4l80e laying around, but have been leaning to a tko600 or richmond 5 sp(had a tko600 once, hated the 2-3 shift) my question is the clutch setup-i guess it needs a hyd setup, or can an ls use a mech one-not sure if the stock 69 cross shaft would clear the headers, so prob a hyd would get the nod-where would the master cyl get mounted, on the firewall? and would it use a hyd throwout bearing, or a cyl to move the clutch fork? also, what flywheel/clutch setup to work with the trans input shaft-any pics of that setup-thanks
since i started with a wrecked 69 300 sedan, and would be doing 100% of the work myself(replace the bent frame, floors, 1/4's, paint, engine build, all fab) i wanted to use some stuff that i knew would work w/o a lot of fab'n
i ended up with a 6.0, added forged rods/pistons, z06 cam and stock 317 heads, edel intake, msd6010, procharger, carb, turbo 400-while it runs great, i find i need more rear gear to really bring it alive, and along with the gears comes higher rpms on the road
so the solution to that is overdrive-i have a late model 4l80e laying around, but have been leaning to a tko600 or richmond 5 sp(had a tko600 once, hated the 2-3 shift) my question is the clutch setup-i guess it needs a hyd setup, or can an ls use a mech one-not sure if the stock 69 cross shaft would clear the headers, so prob a hyd would get the nod-where would the master cyl get mounted, on the firewall? and would it use a hyd throwout bearing, or a cyl to move the clutch fork? also, what flywheel/clutch setup to work with the trans input shaft-any pics of that setup-thanks
So did you determine the driveline angle wouldn't work or are just doing the tunnel to avoid any possible problems?
Any plans for the tie rod issue?
Looking good. Wish I knew someone who didn't mind body work and had the space.
Any plans for the tie rod issue?
Looking good. Wish I knew someone who didn't mind body work and had the space.
Thread Starter
On The Tree
Joined: Aug 2007
Posts: 110
Likes: 0
From: So Cal
I did not really know how much of a problem I would have. I originally modified the tunnel but it was not enough (did not have the body on frame and was guessing....my bad). As for the complete trans and drive shaft piece idea came from another guy with a TKO that was at low ride height. He had problems with vibration at higher speeds. He also had issues with the DS rubbing. He posted a thread on Team Chevelle showing what he did. After being convinced by another member here I chose to copy what he did. I still don't know how much I will need but figured anything bigger would be better. As for the tie rod issue....not figured it out.

Thread Starter
On The Tree
Joined: Aug 2007
Posts: 110
Likes: 0
From: So Cal
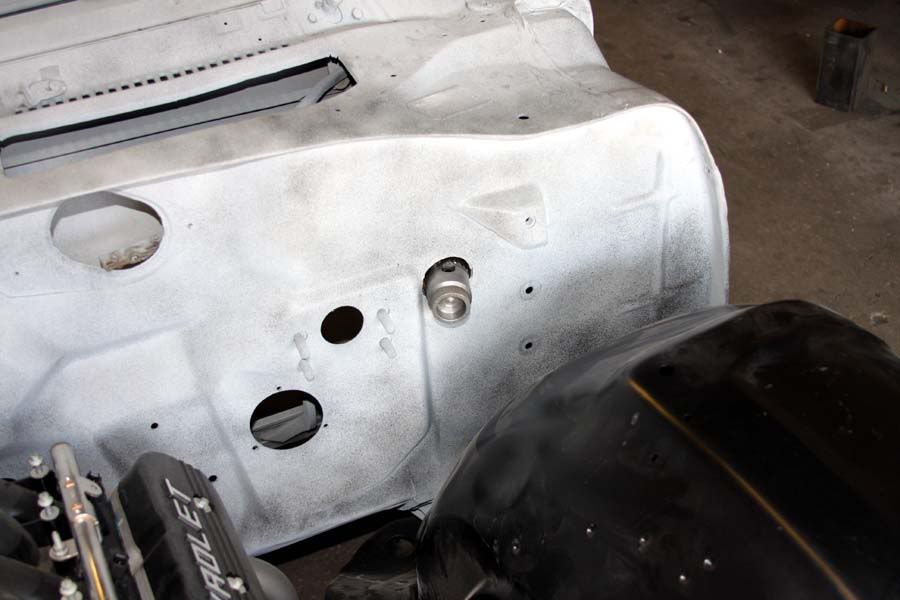
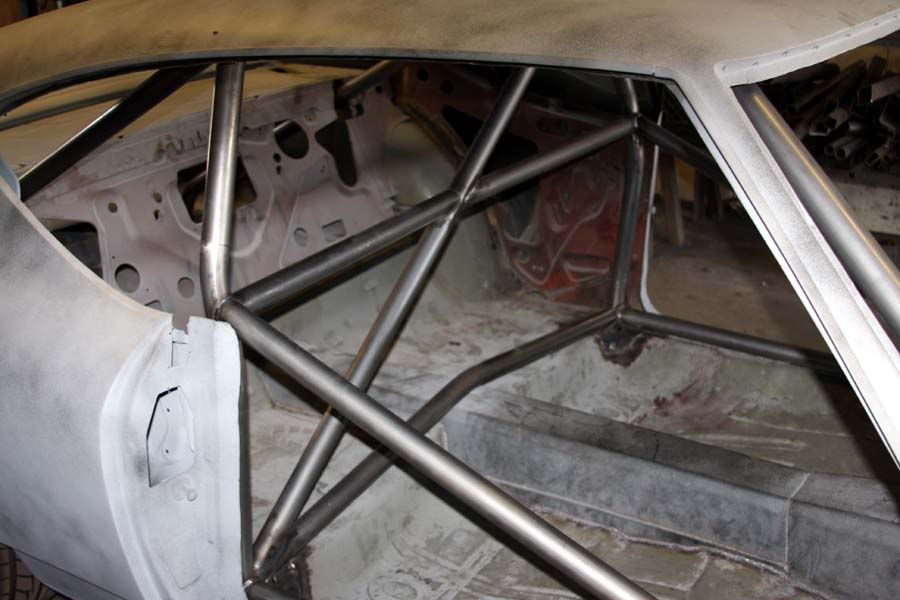
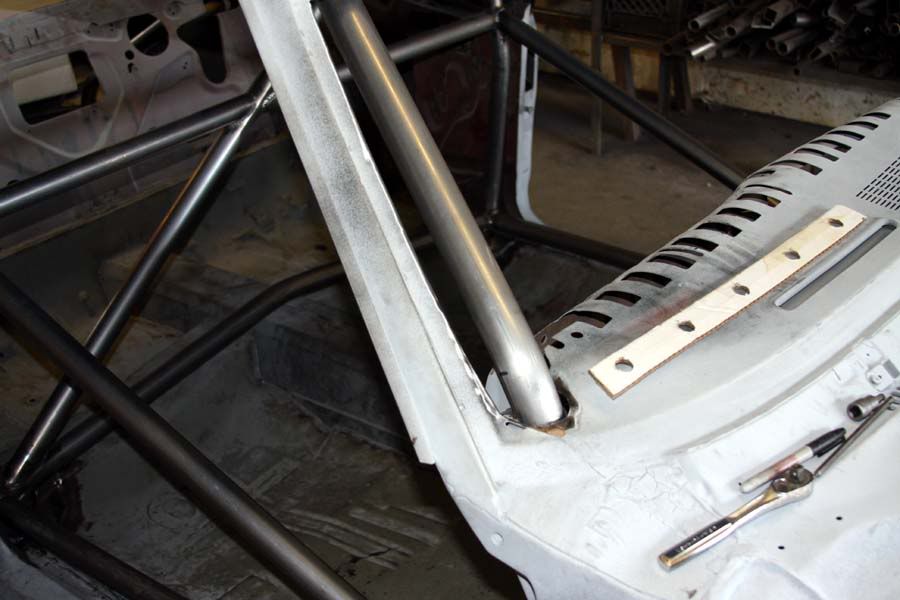
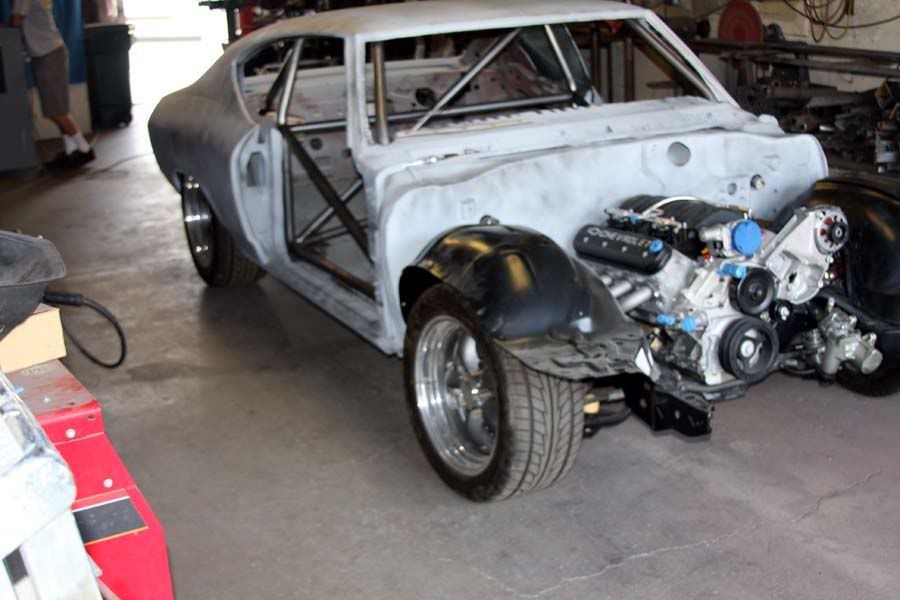
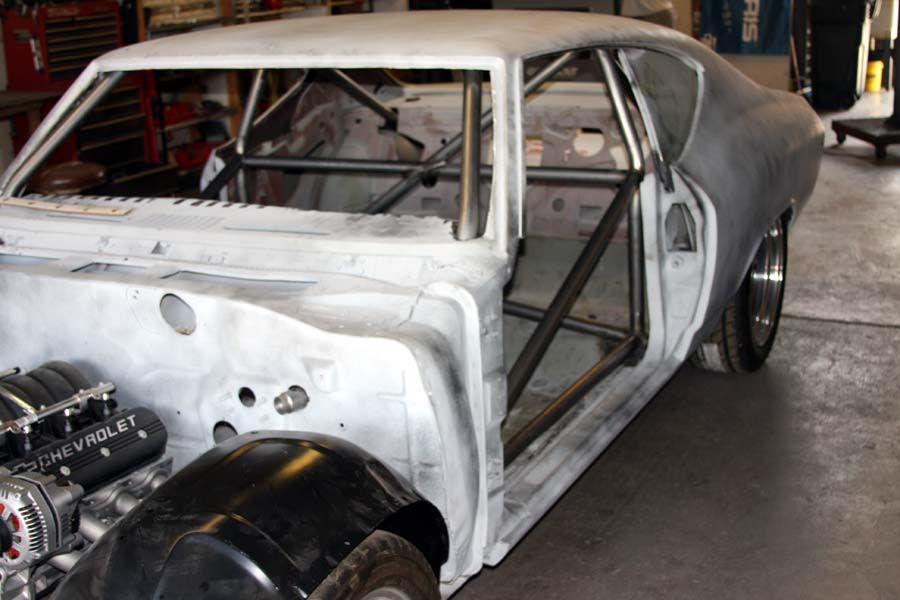
The roll cage is almost complete. I stopped by the shop and snapped a few pictures Today. I debated about material, size, roll bar or roll cage. I know this is a sticky topic of what is right or wrong etc. I tried to look at rules for something that over laps different types of events...wow there is no universal way. Rules, at least in my looking are confusing at best. So I elected to go with 1-3/4" DOM with 120 wall thickness. I also chose to weld to the frame. My frame is not boxed so we boxed/plated about a 7" section on the frame at each contact point. After talking with a few people about the floor pan I chose to leave a 5/16" gap and will later fill with seam sealer with hopes this may allow the body to flex a little.
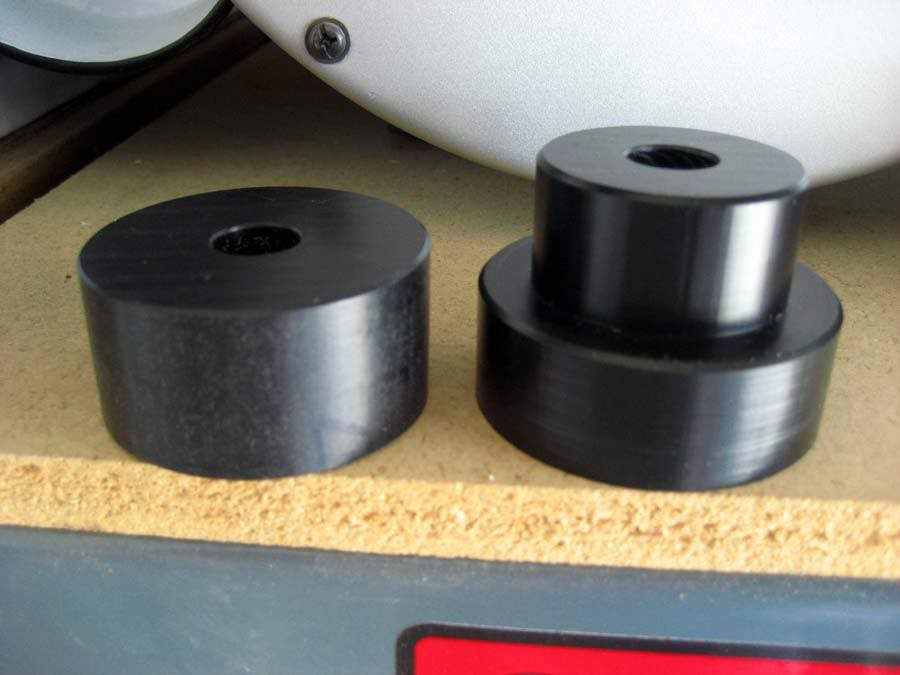
I am using Delrin body bushings that I got from a board member here a while back.
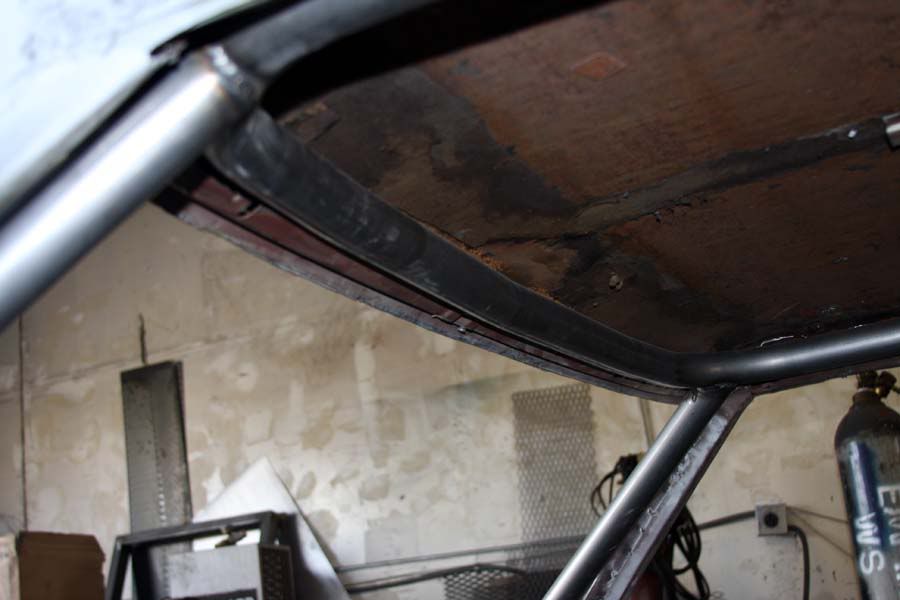
I was in a hurry Today and did not realize how bad of pictures I took but these will give idea what it looks like..
In order to get the bar tuck as tight as possible he cut parts of the inner structure to push the bar inward.
I am using Delrin body bushings that I got from a board member here a while back.
I was in a hurry Today and did not realize how bad of pictures I took but these will give idea what it looks like..
In order to get the bar tuck as tight as possible he cut parts of the inner structure to push the bar inward.