

Mark's LS1 2nd Gen Camaro build
 11-20-2009, 10:58 PM
#221
11 Second Club
Thread Starter
Join Date: Mar 2008
Location: New Westminster, B.C., Canada
Posts: 445
Likes: 0
Received 1 Like
on
1 Post

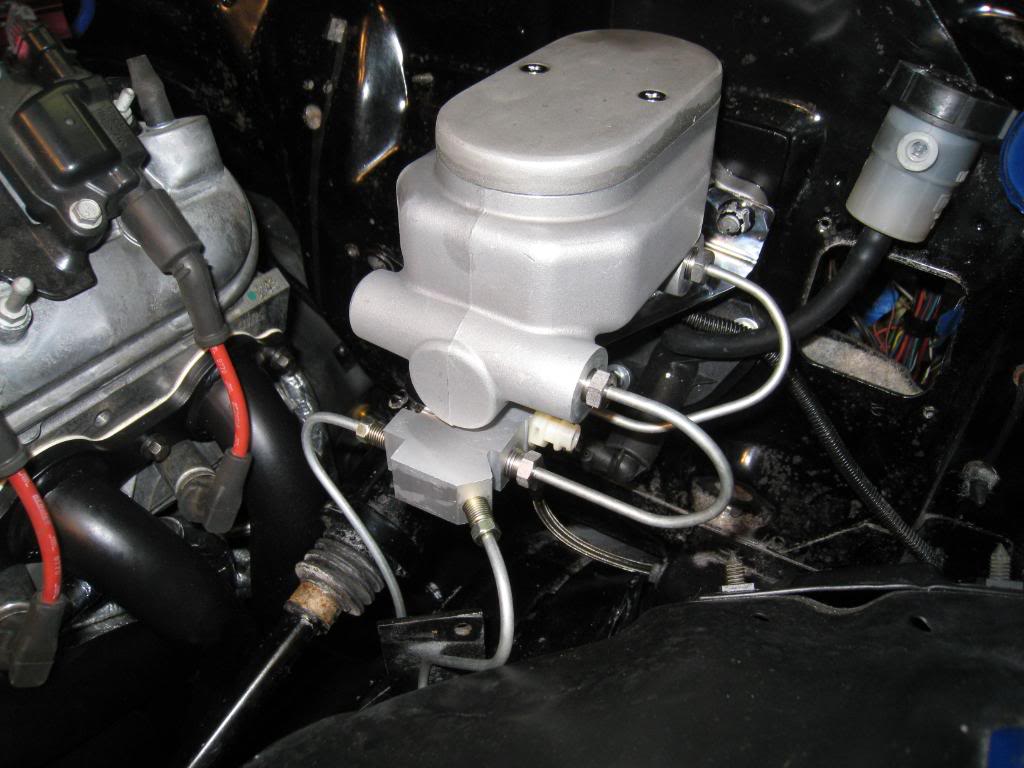
I am using a 1 1/16 bore master cylinder (manual brakes). It may be too big. I will report back on that after I drive it. It will be on the road this spring. Should be ready sooner, but the weather will make me wait...
 01-09-2010, 02:19 PM
#222
11 Second Club
Thread Starter
Join Date: Mar 2008
Location: New Westminster, B.C., Canada
Posts: 445
Likes: 0
Received 1 Like
on
1 Post
Thinking about a few of things...
Camshaft.
Injectors.
Frame connectors.
Anybody have any thoughts on what would work for my setup?
Motor's a '07 vette LS2 with a M1 Procharger, stock internals.
The frame connectors need to be very low profile for ground clearance and I'd rather not cut up my floor.
Camshaft.
Injectors.
Frame connectors.
Anybody have any thoughts on what would work for my setup?
Motor's a '07 vette LS2 with a M1 Procharger, stock internals.
The frame connectors need to be very low profile for ground clearance and I'd rather not cut up my floor.
 01-09-2010, 10:29 PM
#225
11 Second Club
Thread Starter
Join Date: Mar 2008
Location: New Westminster, B.C., Canada
Posts: 445
Likes: 0
Received 1 Like
on
1 Post
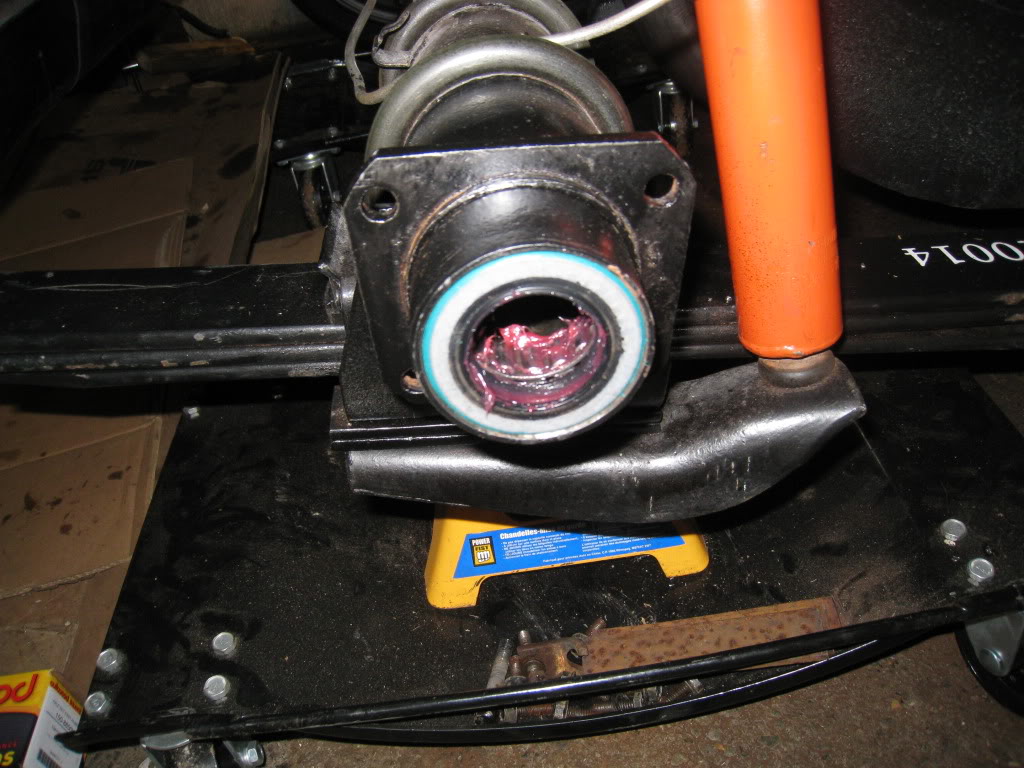
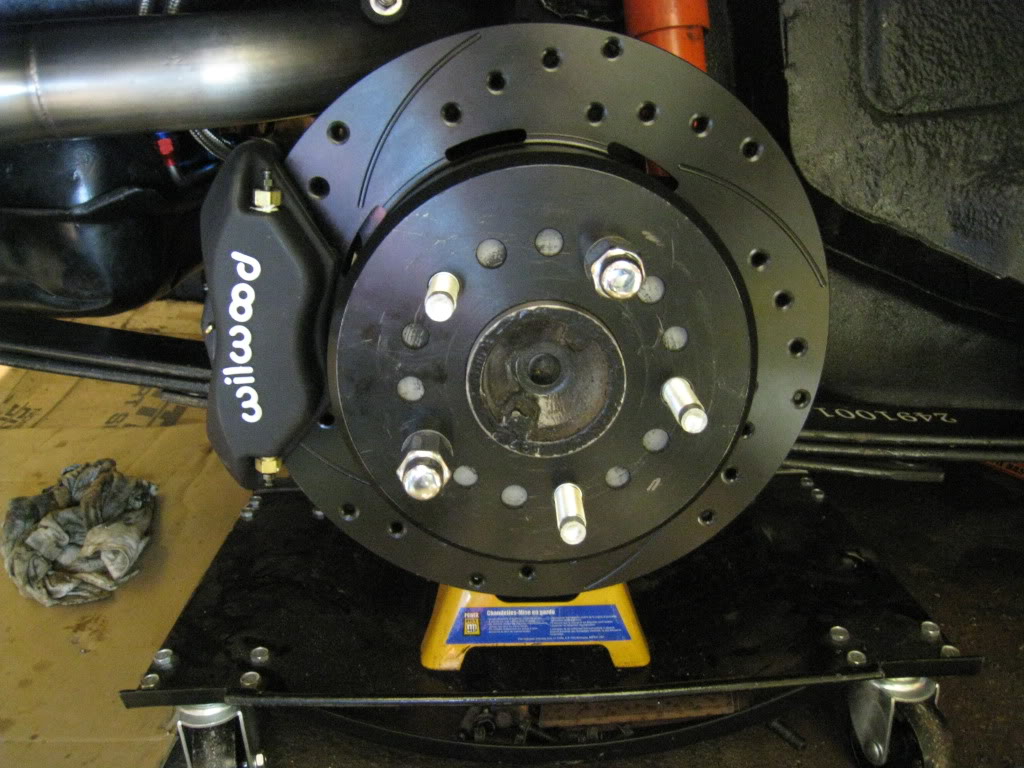
Got back into the garage today. Finished the front brakes. Pulled the rear diff cover off and pulled one side of the rear brakes apart. More on that tomorrow.
Here's a couple pic's of how it's looking now.

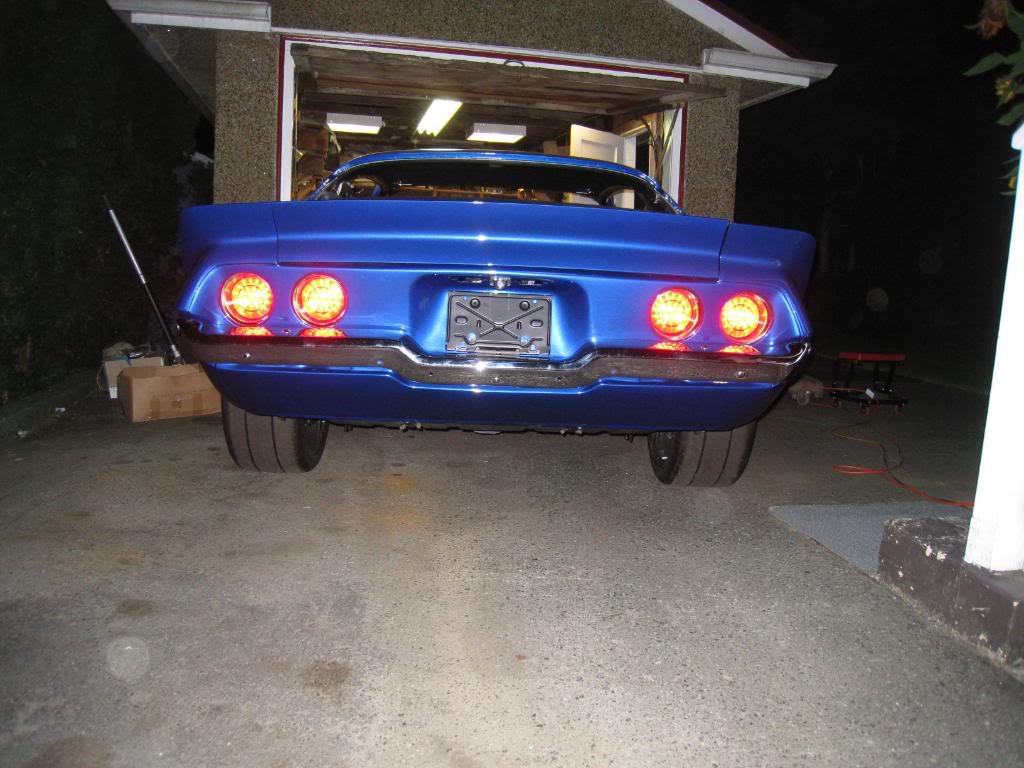
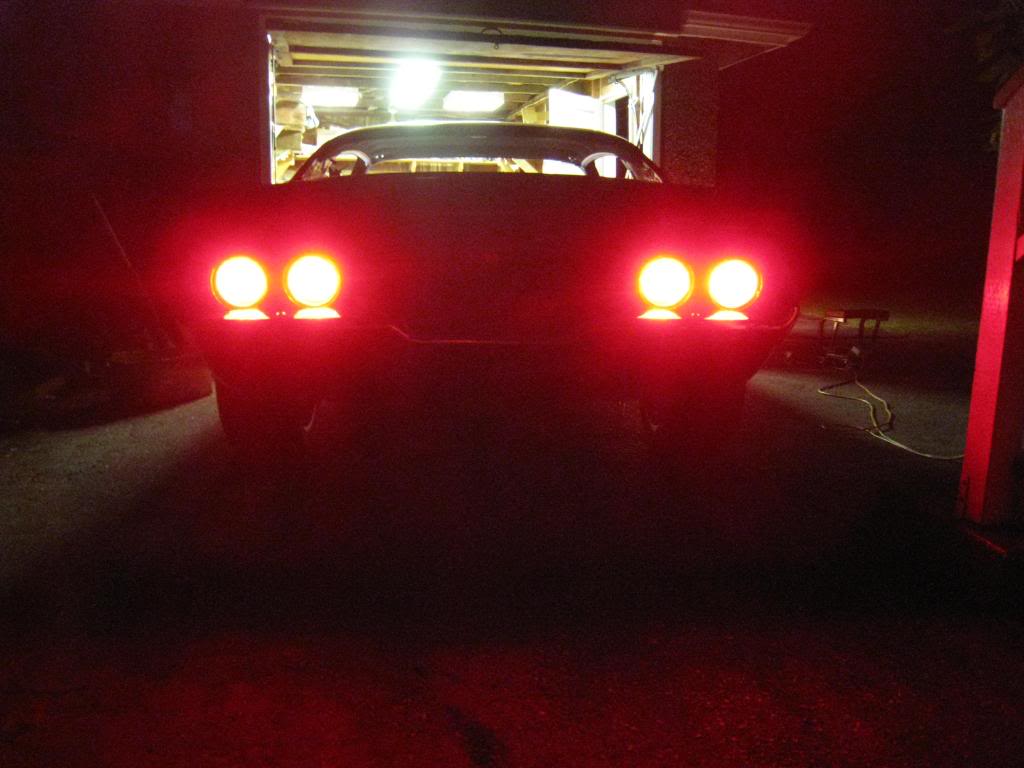
Here's a couple pic's of how it's looking now.
01-10-2010, 08:25 PM
#226
11 Second Club
Thread Starter
Join Date: Mar 2008
Location: New Westminster, B.C., Canada
Posts: 445
Likes: 0
Received 1 Like
on
1 Post
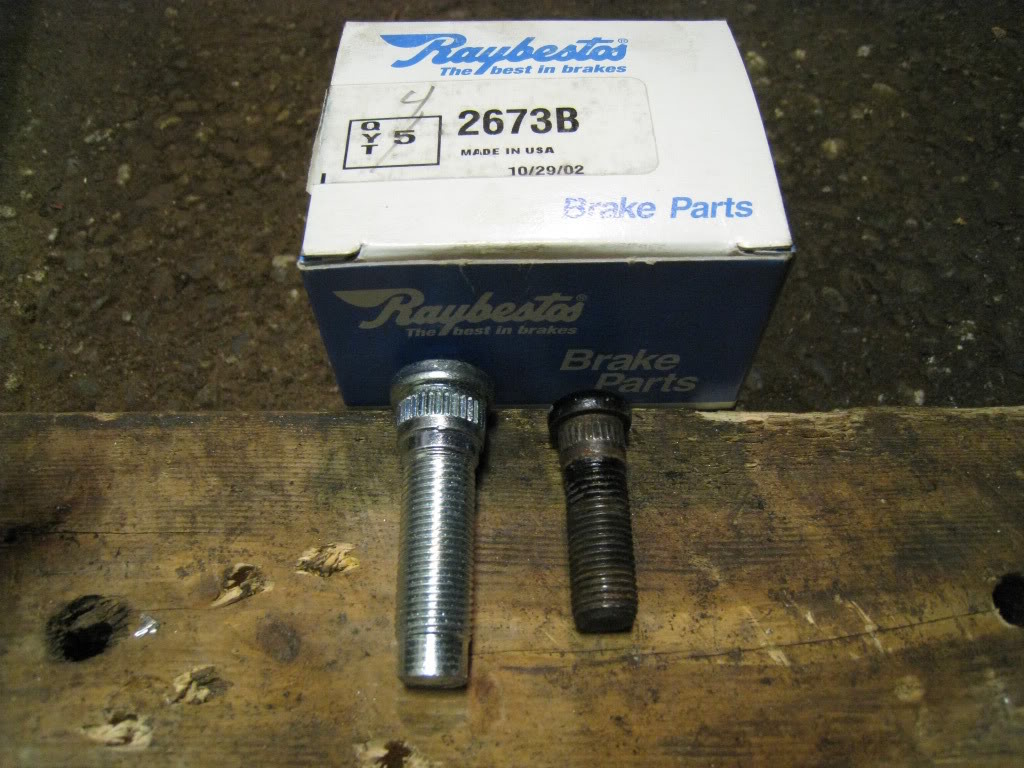
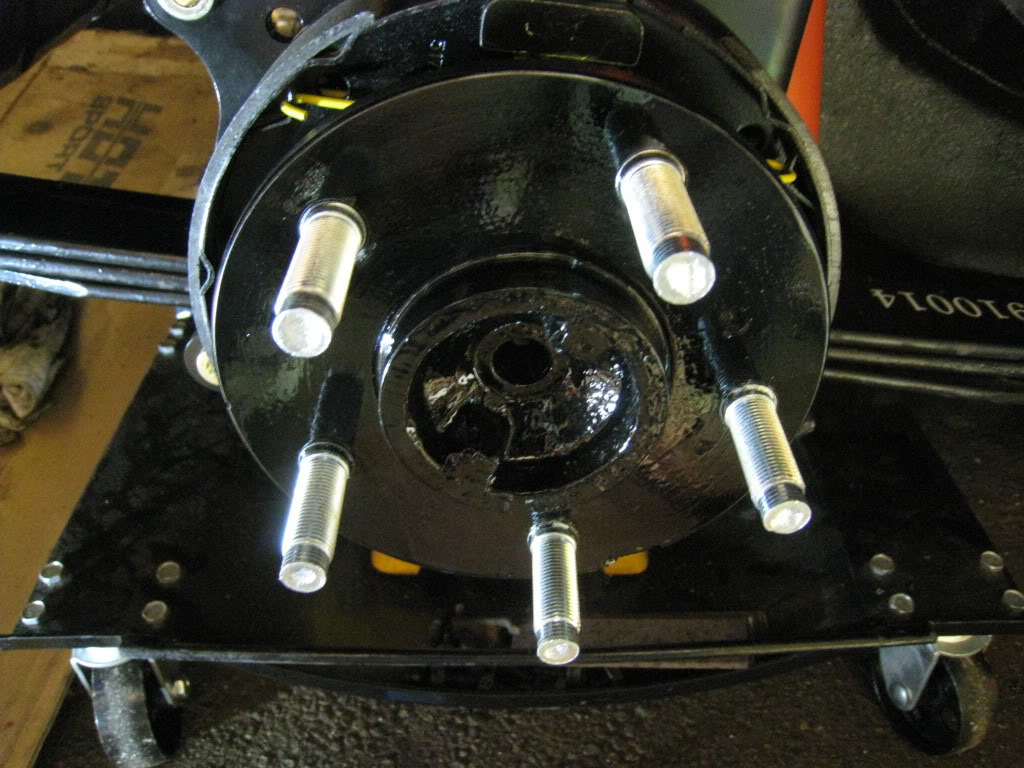
I started working on the back brakes. As usual I was met with a hurdle. I need to replace my wheel studs. I am changing them from 7/16-20x1 and a bit to 1/2-20x1 3/4.(raybestos # 2673B). So as I had to pull my axles anyway for the swap, I am going to do the seals as well. I hope this rear end holds up to the abuse I have in store for it. Worst case I swap in a 12 bolt, as these brakes bolt right onto that axle as well.
I am also lowering the rear 1/2". I got the lowering kit Hotchkis recomended but was not happy with what they supplied. It's hard to tell in the pics, but basically they send you 1/4" shims that you bolt onto the top of the leaf stack in the amount that you want to lower the car. In my case 1/2" or 2 shims. thing is, they dont supply any shims for the side of the stack. So I guess you are supposed to put the shims on top of the leaf, then tighten the U bolts to whatever tourque is recomended and hope that the lower polyeurothane isolator doesn't squish out sideways. I built my own shims, out of 1/4 flat bar, to extend the side mount of the axle tube bracket. It worked perfectly and locates the isolator. Why didn't they think of that?
old brakes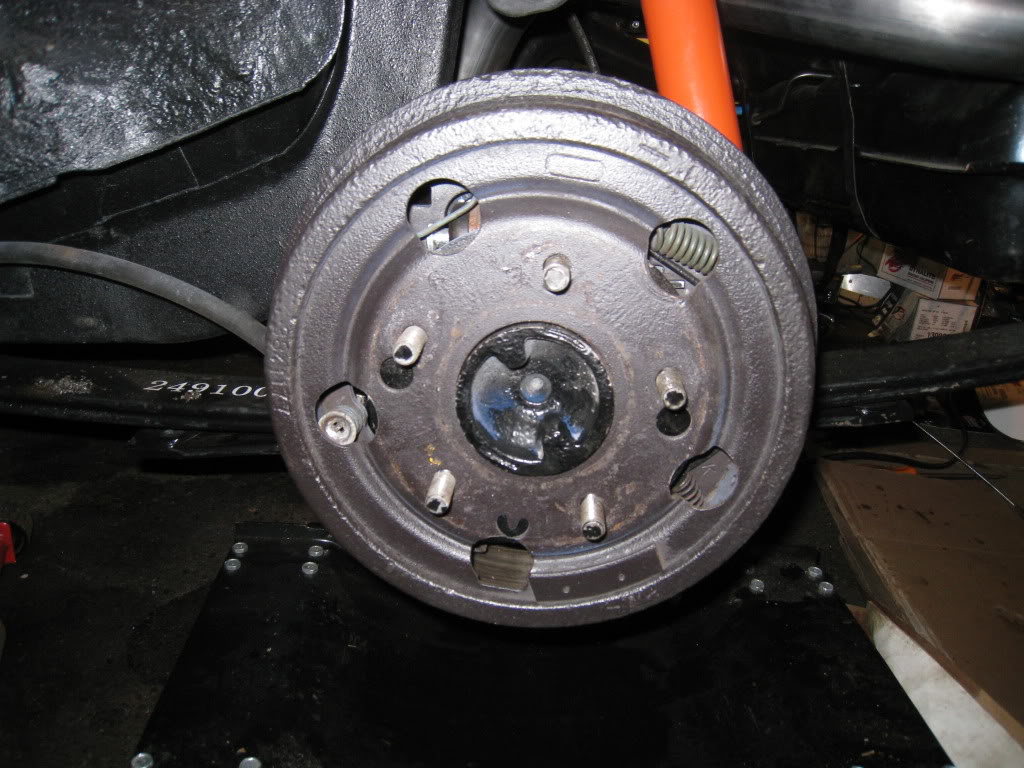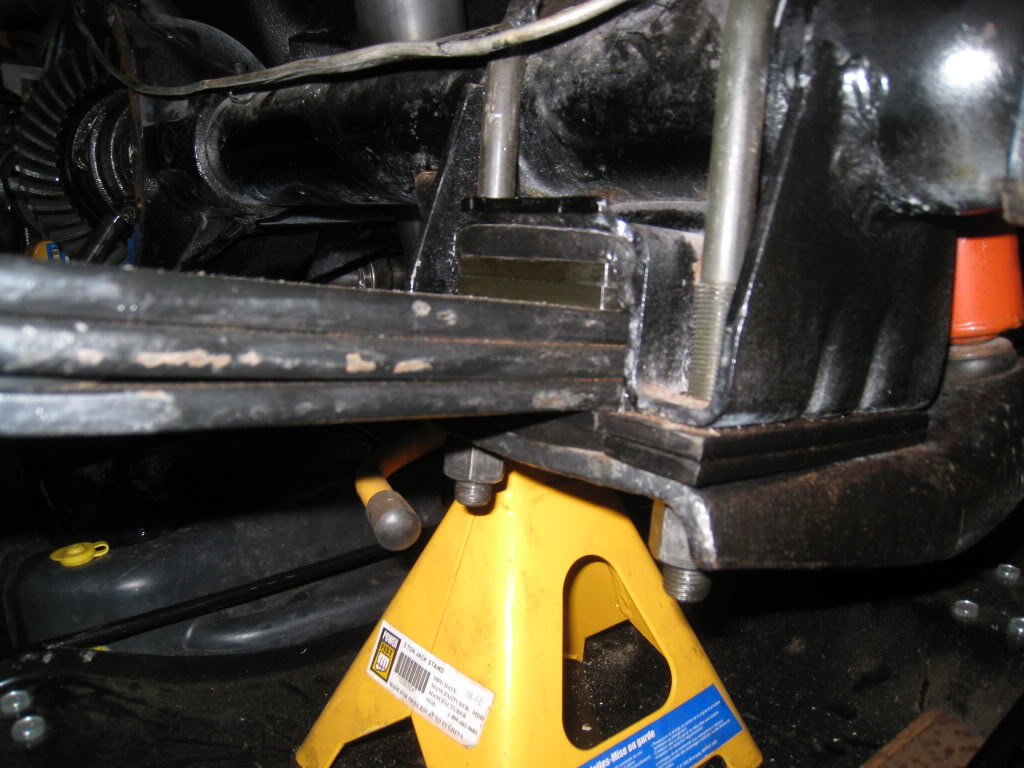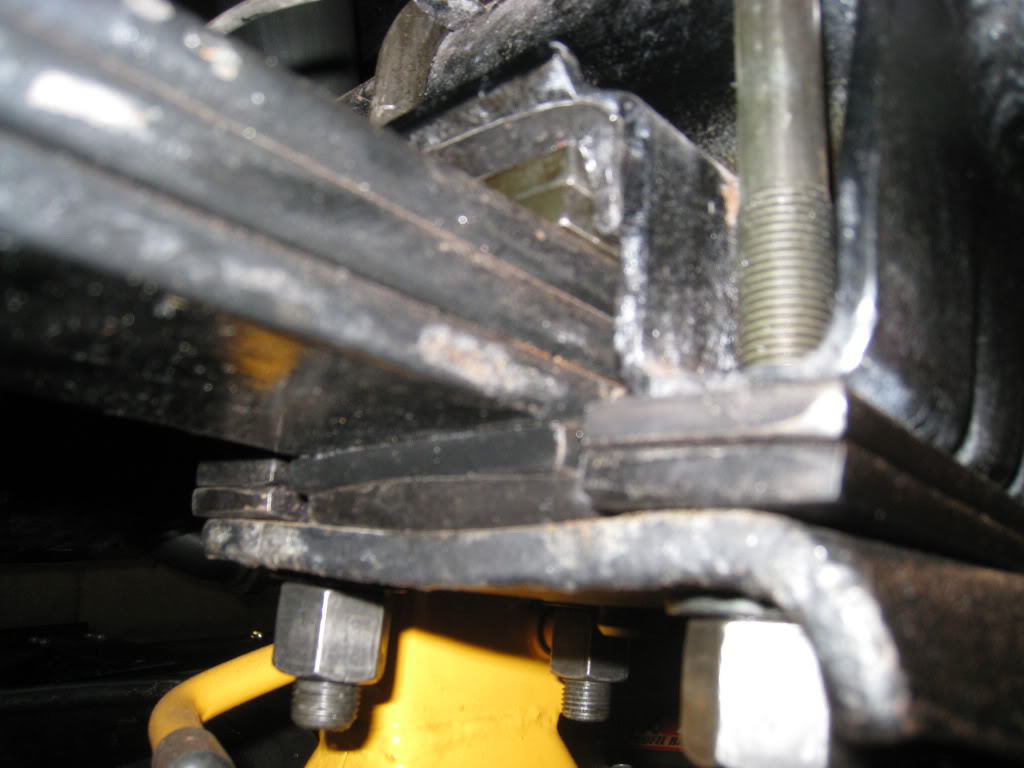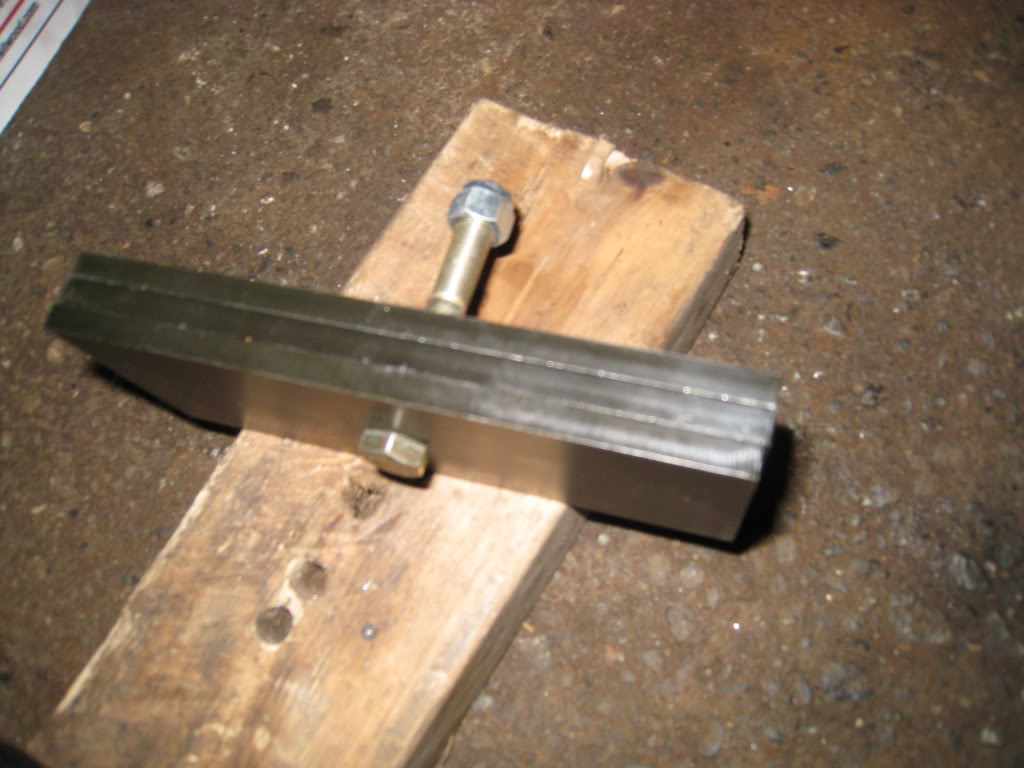
Last edited by Marktainium; 01-10-2010 at 08:33 PM.
 01-13-2010, 01:10 AM
#229
11 Second Club
Thread Starter
Join Date: Mar 2008
Location: New Westminster, B.C., Canada
Posts: 445
Likes: 0
Received 1 Like
on
1 Post
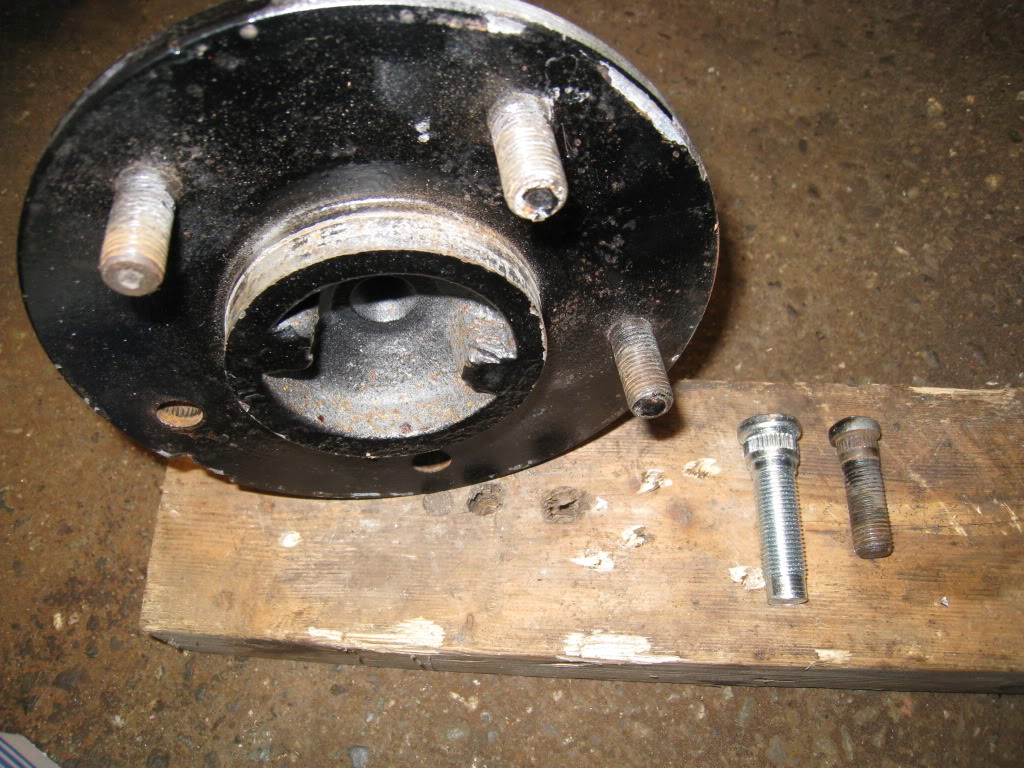
OK, more troubles... It seems even the simple jobs can take all day, or at least a good portion of them. Went to drill out the axles for the new studs and the drill bit I needed I didn't have. $28 later, for 1 bit, I get the holes done. Then the disks don't sit flush because the center of the hub has a ridge on it. Put the axle in the lathe, spun it and machined it down using a file. (didn't want to risk damaging the bearing surface of the axle with the lathe chuck, so grabbed it further down the axle and it was wobbly) OK got the disk to sit properly. Then pressed in the new studs. (Easiest part of this job) Then found the stud protrudes just slightly past the flange surface, so had to enlarge the holes in the brake disk to make em fit. Done! Yay!
Started the install.Was going well till I tried to centre the caliper over the disk. There is about .050 of axle end play... I need to figure out how to shim that down now. Can't have the disk floating left to right between the pads. It'll make for a soft pedal and unwanted drag on the brakes.
Started the install.Was going well till I tried to centre the caliper over the disk. There is about .050 of axle end play... I need to figure out how to shim that down now. Can't have the disk floating left to right between the pads. It'll make for a soft pedal and unwanted drag on the brakes.
01-13-2010, 06:37 AM
#230
TECH Resident
iTrader: (13)
Join Date: Mar 2008
Location: On the coast of somewhere
Posts: 779
Likes: 0
Received 1 Like
on
1 Post
Leave that 10 bolt where it is. Put aftermarket parts in it and you're golden. My buddy runs 9's on slicks with nitrous and transbrake, for 5 or 6 years now. It is plenty strong in stock trim for what you're doing, c-clip eliminators are a good safety upgrade. Very nice build. Good luck and keep the details coming.
01-13-2010, 09:54 AM
#231
Leave that 10 bolt where it is. Put aftermarket parts in it and you're golden. My buddy runs 9's on slicks with nitrous and transbrake, for 5 or 6 years now. It is plenty strong in stock trim for what you're doing, c-clip eliminators are a good safety upgrade. Very nice build. Good luck and keep the details coming.
01-13-2010, 09:15 PM
#233
11 Second Club
Thread Starter
Join Date: Mar 2008
Location: New Westminster, B.C., Canada
Posts: 445
Likes: 0
Received 1 Like
on
1 Post
Went to my local rear end shop and showed em what I had. Said he hadn't seen one like that in 15 years. Anyway, $1595 plus tax later... well, it was a quote, I'm not quite there yet. I'm thinking that a eaton truetrac may be the way to go, with 30 spline axles. Is this the best setup for road course and auto cross?
01-14-2010, 09:05 AM
#234
Staging Lane
iTrader: (19)
Join Date: Jun 2009
Location: Shakopee, MN
Posts: 58
Likes: 0
Received 0 Likes
on
0 Posts
Mark- Great build by the way. Amazing attention to detalil. Looks awsome.
I'd like to throw my commnets in about the True-trac to help out if I can. Personally I have one in my Trans Am, also building a road course truck with one in it. My car origionally had the clutch-type LSD. It worked, but even when new it would slip from time to time. Lockers are not a great choice for road racing, can really throw a turn off for you when you try to lay down power and the wheels lock together.
That's where the True-trac does great, it locks together seamlessly but still gives you the benefits of the clutch-type differential. I noticed a huge difference in the way my car put the power down back there. I think you would be thoroghly happy if you made that choice.
As a side note, I've seen all the work you've done there and I don't think a person with your skills would have a hard time doing a gear/diff swap by yourself. There are a lot of online articles out there (that's where I learned) and it's not all that bad really. I've got a few under my belt now just by reading what others have done. Just throwing that out there.
Good luck on the rest of the build!
01-16-2010, 07:23 PM
#235

Mark,
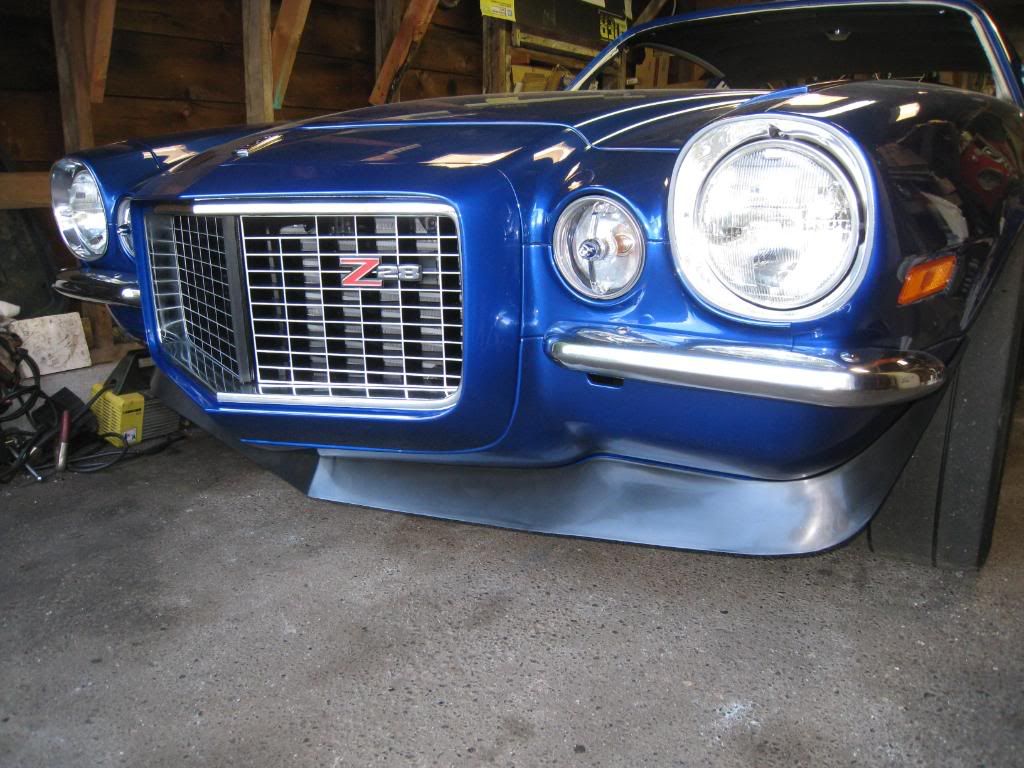
Looking good. What color (shade) blue is your car? I am thinking.... that blue with white stripes and maybe cowl hood for my camaro.
thanks,
Jim
Looking good. What color (shade) blue is your car? I am thinking.... that blue with white stripes and maybe cowl hood for my camaro.
thanks,
Jim
01-16-2010, 07:58 PM
#236
TECH Resident

 01-17-2010, 12:47 AM
#237
11 Second Club
Thread Starter
Join Date: Mar 2008
Location: New Westminster, B.C., Canada
Posts: 445
Likes: 0
Received 1 Like
on
1 Post
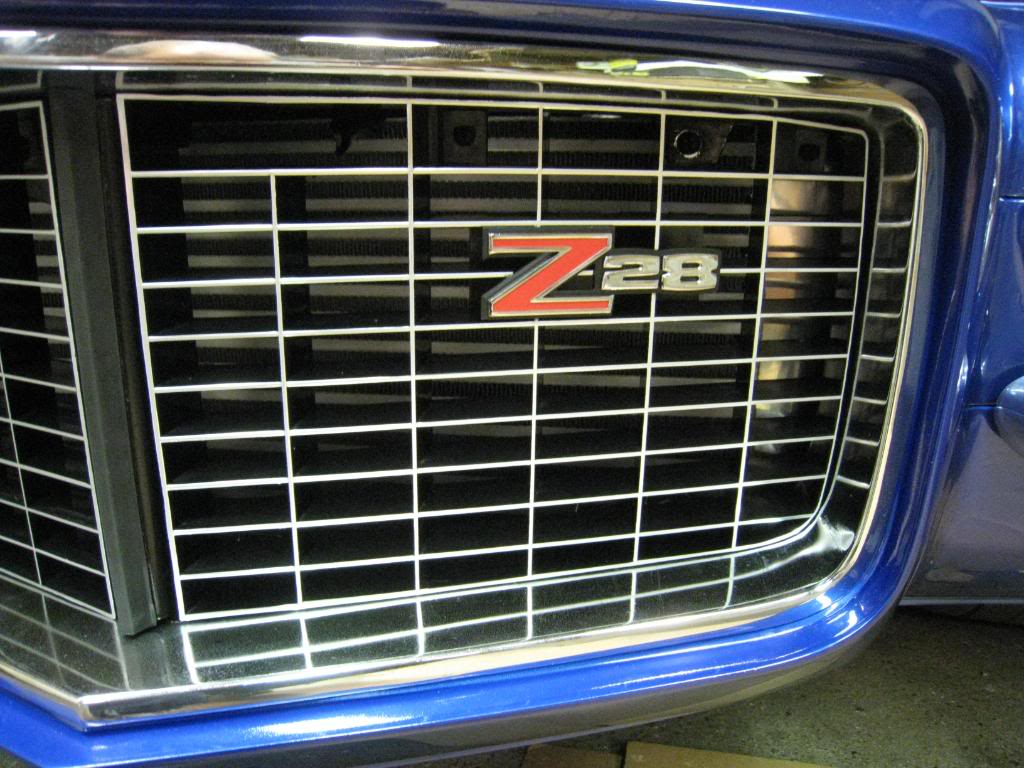
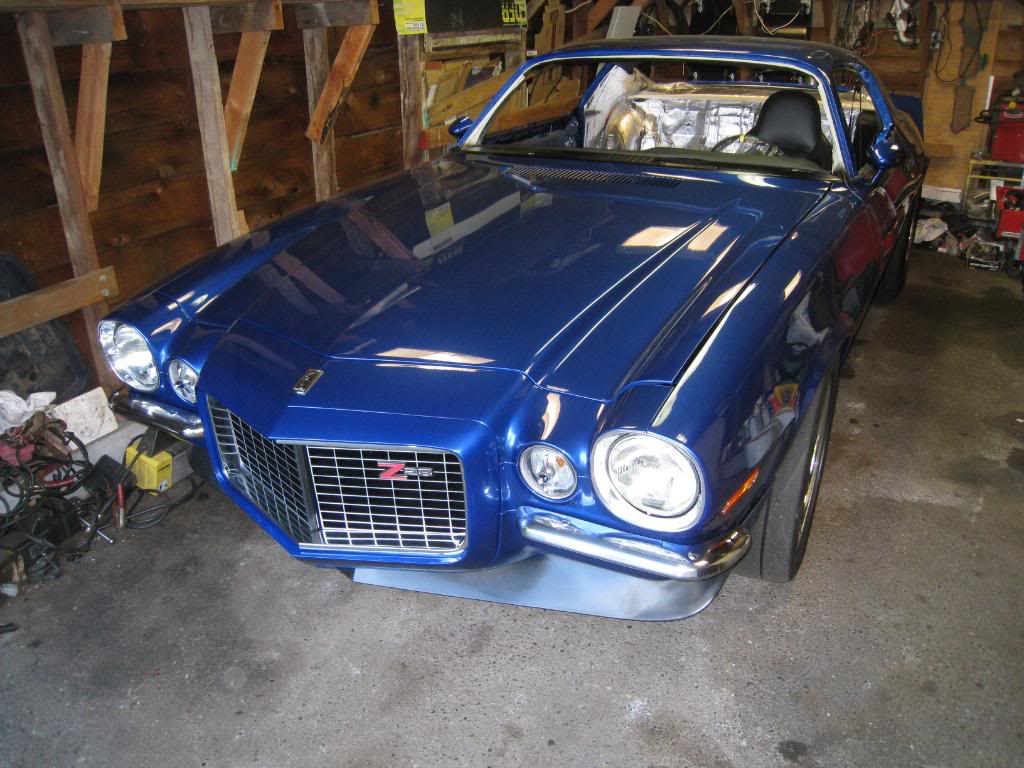
Thanks for the compliments! The color is Aston Martin Viper Blue Pearl Metalic. It took a long time to align the eurothane grill and I'm still not happy with it.
01-19-2010, 07:46 PM
#238
11 Second Club
Thread Starter
Join Date: Mar 2008
Location: New Westminster, B.C., Canada
Posts: 445
Likes: 0
Received 1 Like
on
1 Post
 I got a low mileage T56 out of an 04 gto. My 99 camaro t56 was popping out of reverse so it needed a rebuild anyway. I was doing the swap today, on my back, on jackstands in my garage by myself, holding the transmission with my hands and jacking with my leg. Sketchy... found out the bellhousing is slightly different in the starter relief area, by about 1/2". Incase anyone wanted to know, they don't interchange. I probably could have swapped the starter, but who knows. Lowered the tranny down, crawled out from under there, killed the power and inside for a drink. (some days are like this!!!)
 01-21-2010, 05:38 PM
#240
11 Second Club
Thread Starter
Join Date: Mar 2008
Location: New Westminster, B.C., Canada
Posts: 445
Likes: 0
Received 1 Like
on
1 Post
Success!! Got the MN12 transmission sorted out and installed. At the end of the day I had to swap the bell housing, hydraulic clutch bearing, shifter, and shifter ball socket thingy. (On the end of the transmission shift shaft). Used the 2 arms and 1 leg on back technique.
At the same time I installed a bulkhead insulated stud for my battery cable. It runs through the inside of the car to the trunk. I had run the cable through a grommet in the firewall but kept having visions of the whole thing going up in smoke. I've found that, with me anyway, if I think of something that could go wrong, it probably will, no matter how remote a chance. Not worth the risk.
At the same time I installed a bulkhead insulated stud for my battery cable. It runs through the inside of the car to the trunk. I had run the cable through a grommet in the firewall but kept having visions of the whole thing going up in smoke. I've found that, with me anyway, if I think of something that could go wrong, it probably will, no matter how remote a chance. Not worth the risk.