


LQ4 into a 3rd Gen/1972 Nova
Thanks... I thought of this, but wouldn't having the return ~1-2" away from the pickup introduce some aeration/bubbles and possibly cavitate the pump? I know having the return fuel exit as low in the tank as possible helps with this, but would it be good enough if it were in such an enclosed space like that sump?
Thread Starter
Joined: May 2007
Posts: 1,806
Likes: 46
From: Vancouver BC, Canada
Couple of updates:
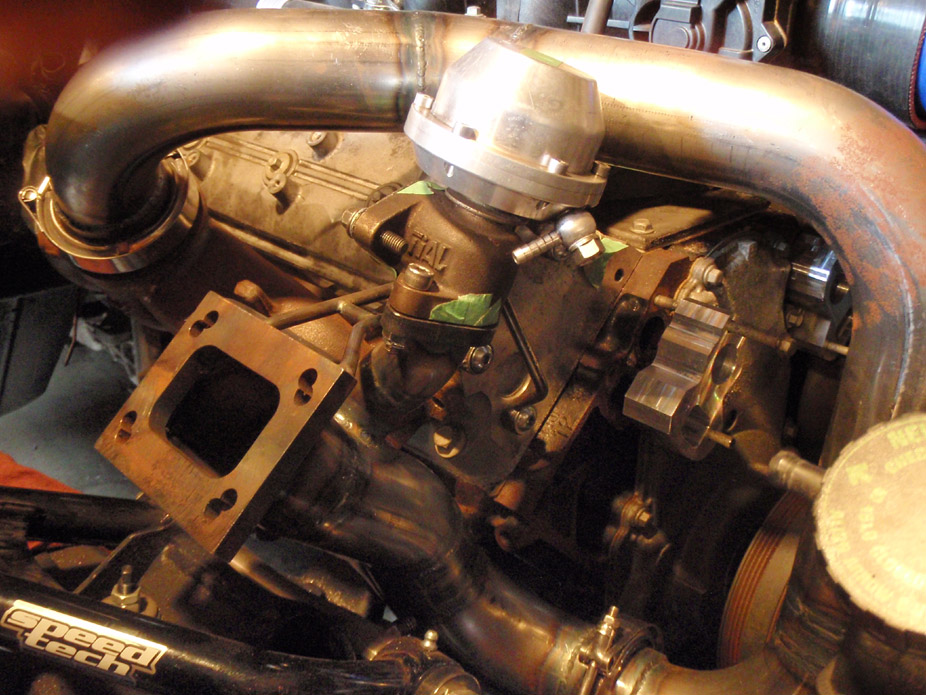
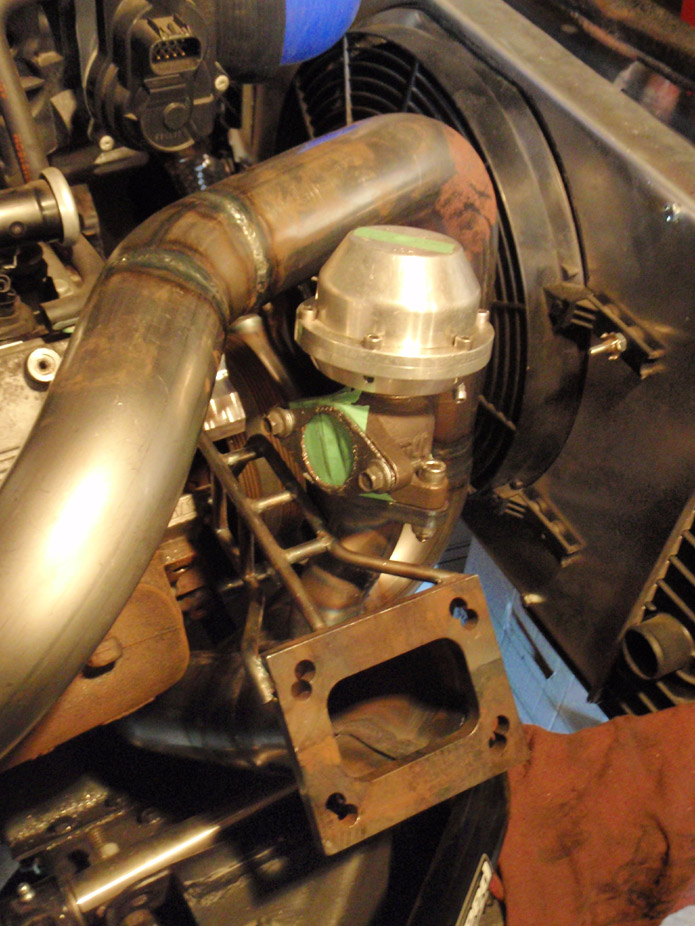
First, got the wastegate welded on, so hot side is officially finished from manifolds to turbo (except for grinding/smoothing the inner perimeter of the turbo flange and the ceramic coating). The pics are deceiving, there is a good 1.5"+ clearance between the aluminum diaphragm cover and the passenger side hot pipe...
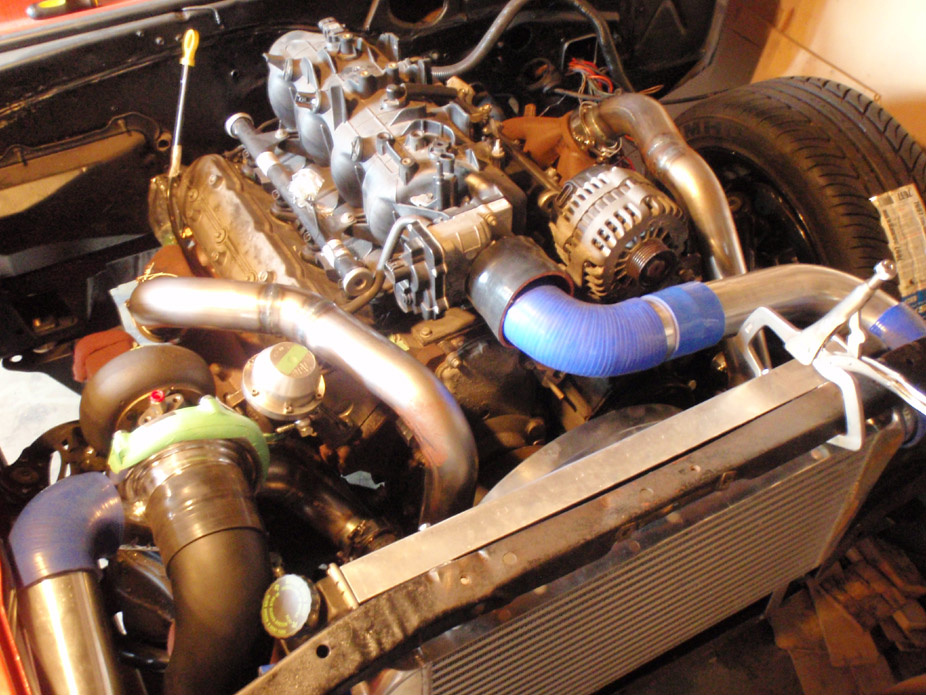
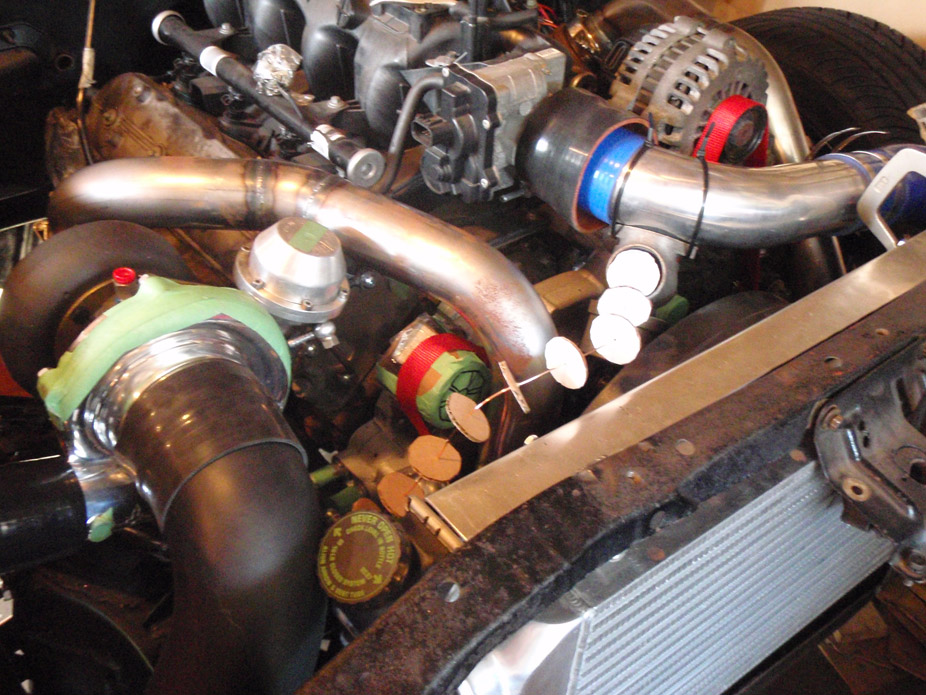
ROUGH mocking up cold side, just wanted to see overall what it'll look like. Need to finallize bends and order up some black silicon reducing sleeves and 90's...
First, got the wastegate welded on, so hot side is officially finished from manifolds to turbo (except for grinding/smoothing the inner perimeter of the turbo flange and the ceramic coating). The pics are deceiving, there is a good 1.5"+ clearance between the aluminum diaphragm cover and the passenger side hot pipe...
ROUGH mocking up cold side, just wanted to see overall what it'll look like. Need to finallize bends and order up some black silicon reducing sleeves and 90's...
Thread Starter
Joined: May 2007
Posts: 1,806
Likes: 46
From: Vancouver BC, Canada
Got some cheap Recaro knock-off seats locally. Seem to be decent enough quality and fit me really well, and the bolsters are actually solid and non-flexy, but with some cushion. Most importantly, they were half the price of the cheapest "real" buckets I could've gotten, even before shipping, which would've been Corbeau's.
And they are black with red stitching to match my steering wheel and gauges.. haha. Anyways, a little mockup just to tease myself with what the interior will look like...
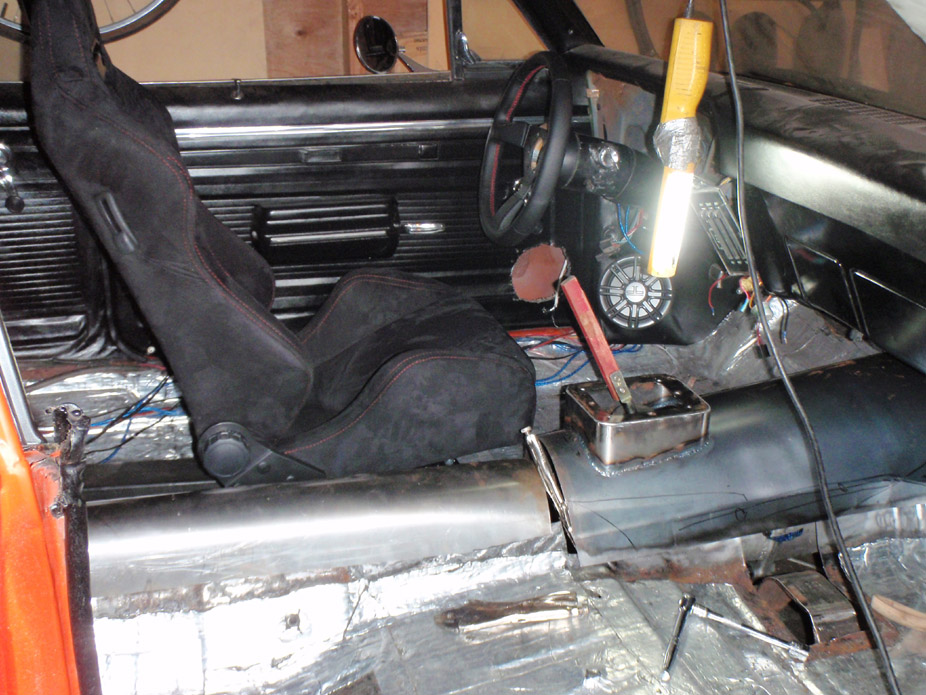


And they are black with red stitching to match my steering wheel and gauges.. haha. Anyways, a little mockup just to tease myself with what the interior will look like...
Thread Starter
Joined: May 2007
Posts: 1,806
Likes: 46
From: Vancouver BC, Canada
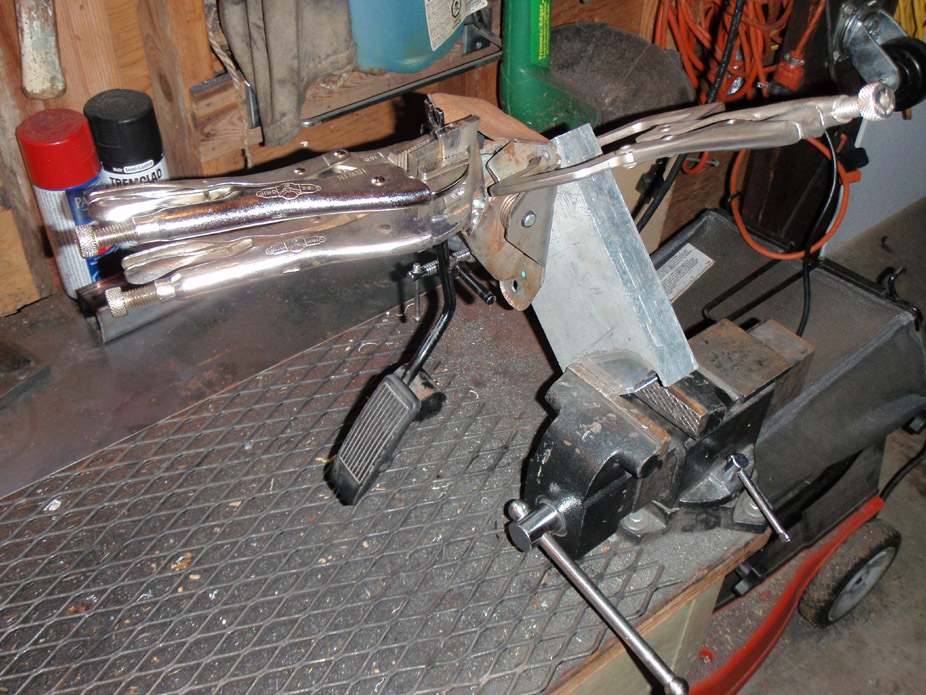
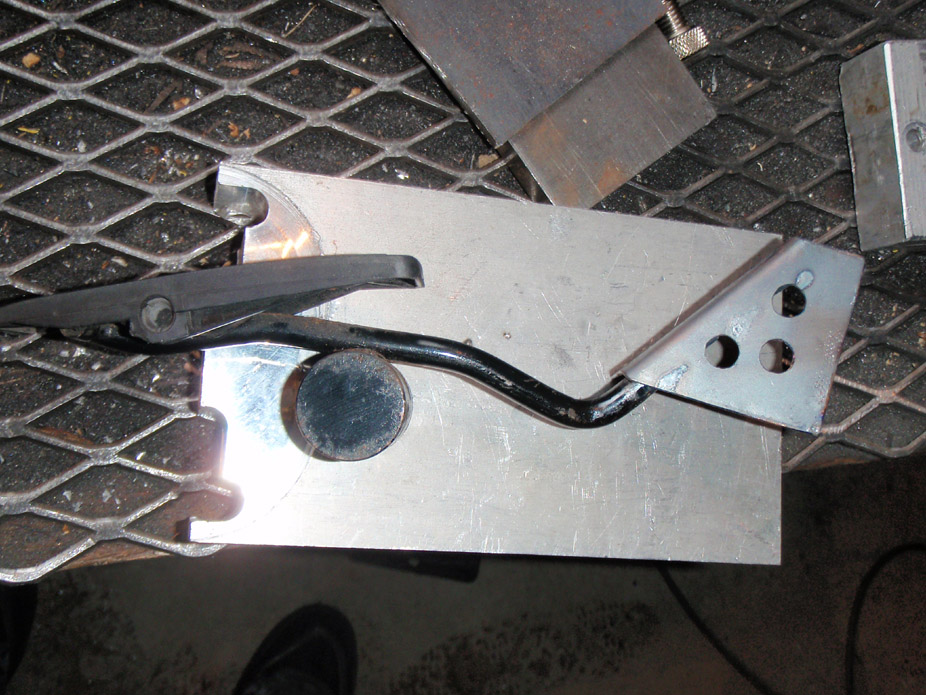
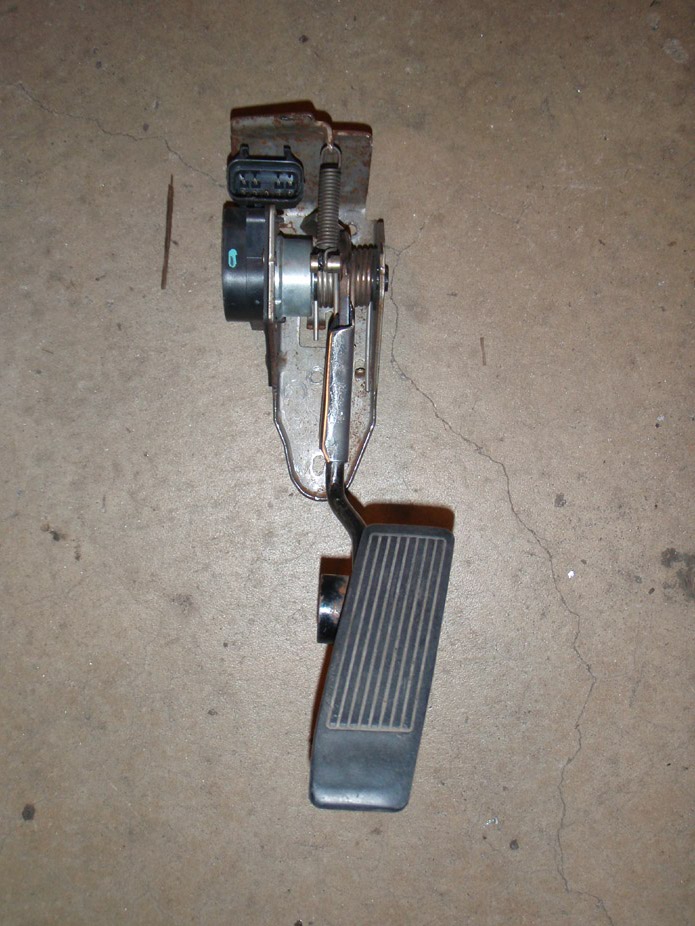
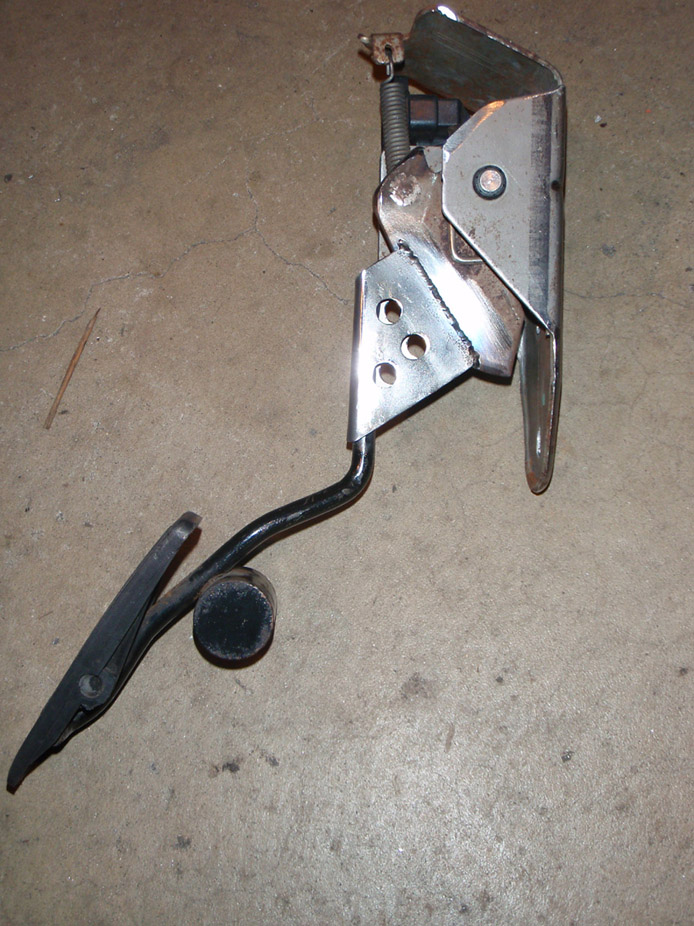
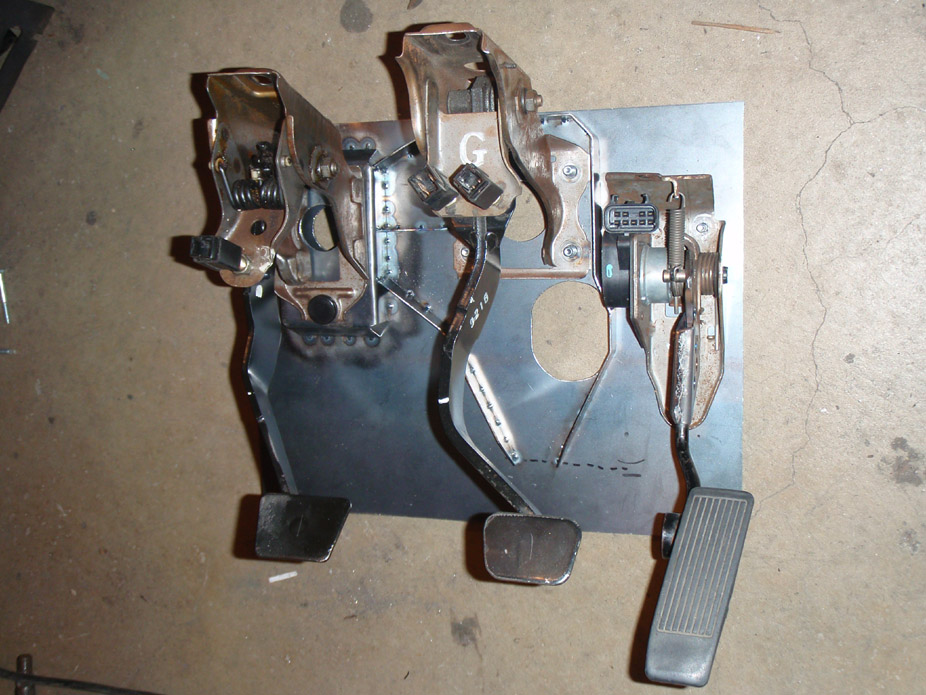
I traded a guy my old modified DBW pedal with the kick-down cable attachment because he really wanted it, and so it was time to modify another one (his one in the trade), I think I did a bit of a classier job the 2nd time 'round...
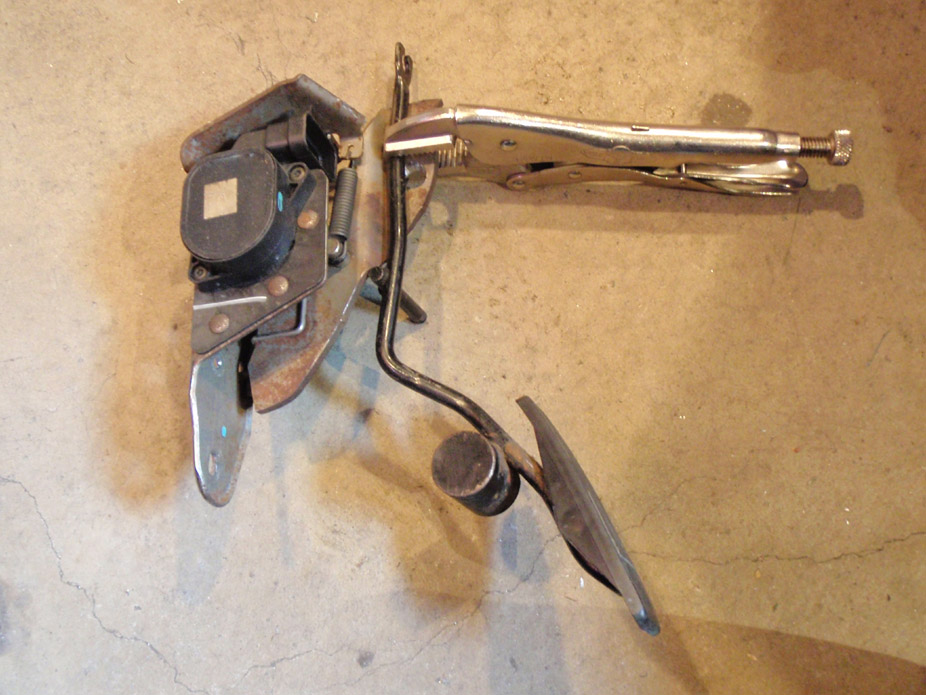
I have no idea what truck pedal he used, but the only "cut" part on it I could find (aka where the stock pedal would have been previously) extended up from the top... I have no idea how that'd work. But I compared it a shitload to pics of my old pedal and other than the pedal arm seeming upsidedown, it seemed identical...

Mocked it up on the bench and climbed up there to test the pedal arm length AKA the pedal throw/travel, from zero to WOT, felt good...


I have no idea what truck pedal he used, but the only "cut" part on it I could find (aka where the stock pedal would have been previously) extended up from the top... I have no idea how that'd work. But I compared it a shitload to pics of my old pedal and other than the pedal arm seeming upsidedown, it seemed identical...
Mocked it up on the bench and climbed up there to test the pedal arm length AKA the pedal throw/travel, from zero to WOT, felt good...
Thread Starter
Joined: May 2007
Posts: 1,806
Likes: 46
From: Vancouver BC, Canada
As I mentioned previously, I didn't have a clutch pedal lying around, and happened to have 240sx cluthc/brake pedals lying around, plus I like the 2-way assisting cammed spring thingy on the clutch pedal, so decided to use it.
First as always, break out the cardboard to template it up...
From various 240sx/s13/LS1 swap threads, it seems for the stock 240sx clutch pedal, a 3/4" bore master cylinder works best. I had originally wanted to use a stock 240sx master cylinder too for ease of fitment, but it is a 5/8".
So I decided to modify the Ram '98-'02 Camaro master cylinder I had, this included chopping off the threaded rod & clevis from an old 240sx master cylinder I had lying around, and welding it onto the Ram MC at the appropriate length, to keep the same MC rod geometry as a stock 240sx MC, which the 240sx clutch pedal is designed for...
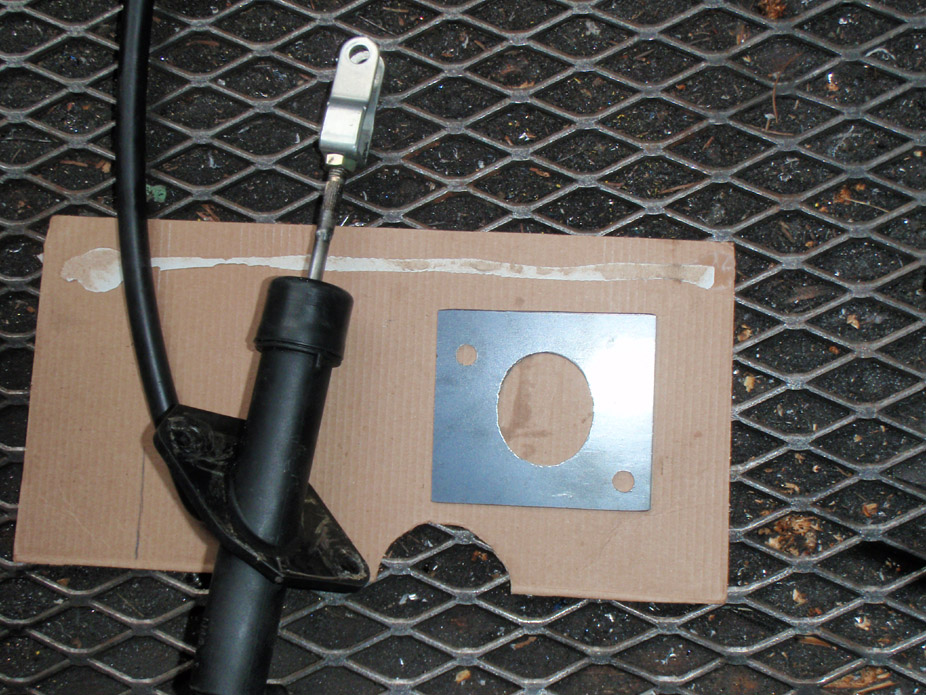
Once the proper 240sx rod length was replicated on the Ram MC, I then made a bracket to position it properly relative to the clutch pedal...
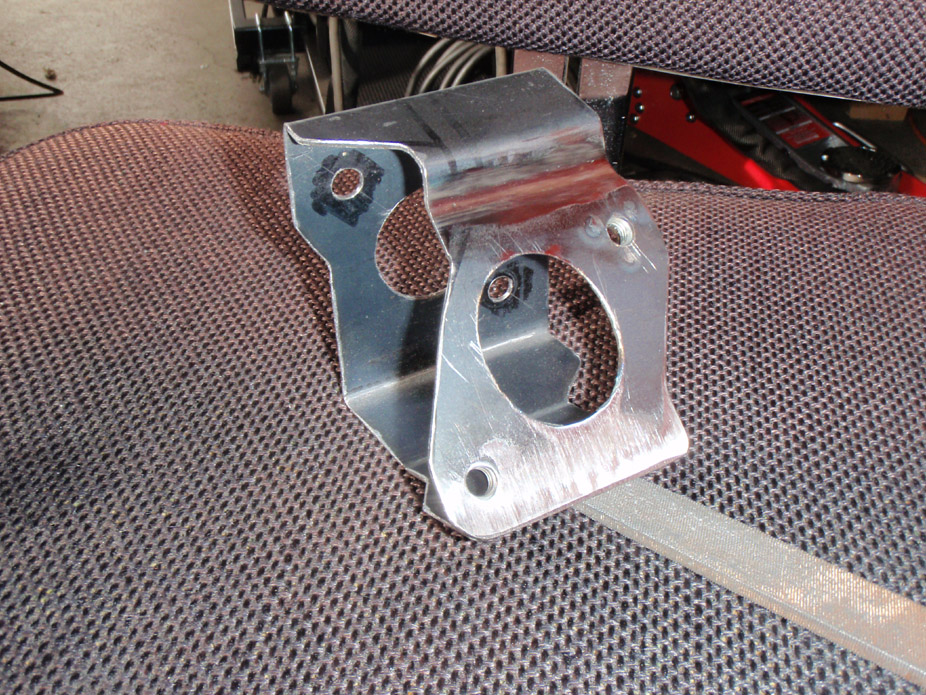

And the resulting overall "pedal plate" that just needs to be trimmed, then "cut & paste" into the Nova firewall...
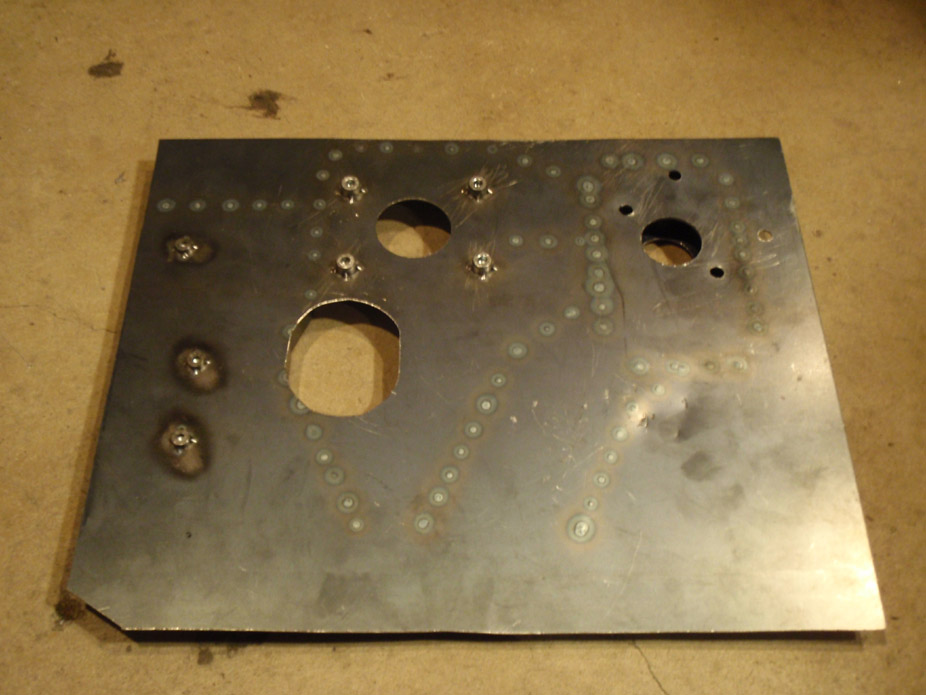


First as always, break out the cardboard to template it up...
From various 240sx/s13/LS1 swap threads, it seems for the stock 240sx clutch pedal, a 3/4" bore master cylinder works best. I had originally wanted to use a stock 240sx master cylinder too for ease of fitment, but it is a 5/8".
So I decided to modify the Ram '98-'02 Camaro master cylinder I had, this included chopping off the threaded rod & clevis from an old 240sx master cylinder I had lying around, and welding it onto the Ram MC at the appropriate length, to keep the same MC rod geometry as a stock 240sx MC, which the 240sx clutch pedal is designed for...
Once the proper 240sx rod length was replicated on the Ram MC, I then made a bracket to position it properly relative to the clutch pedal...
And the resulting overall "pedal plate" that just needs to be trimmed, then "cut & paste" into the Nova firewall...
Thread Starter
Joined: May 2007
Posts: 1,806
Likes: 46
From: Vancouver BC, Canada
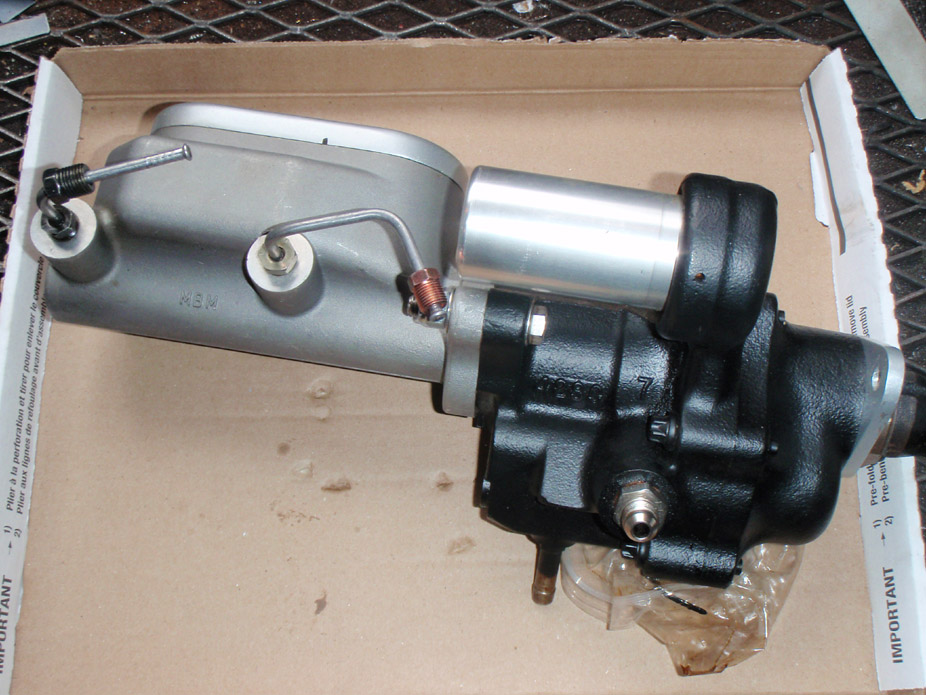
And finally, there's NO way that the hydroboost unit and the brake MC are gonna clear the driver side manifold with it flipped upside down, so, gonna go with I think a 7/8" or 1" manual setup, and this whole unit is for sale... anybody interested??

LS1 Tech Stories
The Best V8 Stories One Small Block at Time

Topdon ONE vs. Artidiag 800 BT2: Which is the Diagnostic Tablet For You?
Pouria Savadkouei
Gas Monkey Built a 6-Wheel Ferrari Testarossa With a Corvette LT4 Engine
Verdad Gallardo
7 Most Reliable High-Performance Engines GM Has Ever Built
Verdad Gallardo
Amazing '71 Camaro Restomod Is Modern Muscle Car Under the Skin
Verdad Gallardo
6 Common C5 Corvette Failures and What's Involved In Repairing Them
Pouria Savadkouei
Retro Modern Bandit Pontiac Trans AM Comes With Burt Reynolds' Autograph
Verdad Gallardo
Top 10 Greatest Cadillac V Series Performance Models Ever, Ranked
Pouria Savadkouei
Top 10 Most Powerful Chevy Trucks Ever Made!

Hennessey's New Supercharged Silverado ZR2 Has 700 HP
Verdad Gallardo

Thread Starter
Joined: May 2007
Posts: 1,806
Likes: 46
From: Vancouver BC, Canada
Mark... The shifter was a tube cut from a broken carbon fiber mountain bike, and I like the curve and uniqueness of it. It's just just placed in there for mockup but I have a half-finished aluminum adapter to bolt it to the trans which I'll epoxy into the tube, and will probably add some lead weight to it to give it good throw.
Other idea for a temporary shifter was to just cut off a hockey stick handle complete with tape & ****, but that might be a bit too Canadian haha.
bczee... The hydroboost is off of a 2005 Colorado, and the master cylinder fits it perfectly and is a 1-1/8" bore unit, all aluminum. Was thinking $100 for the hydroboost and $160 with the master cylinder, plus shipping...
kmracer... Thanks! Been a long road but I'll have 6 months straight with it this summer, but hope to have it on the road within 3-4 to enjoy some sunny cruising. I actually think it'll be doable, the list of big items to finish is slowly getting knocked down...
Thread Starter
Joined: May 2007
Posts: 1,806
Likes: 46
From: Vancouver BC, Canada
Oh, I might just check that shifter out to see how it feels, does it have the **** too or just the rod? I'll be in Ucluelet this weekend but I move back for good next wednesday so hangin out & wrenchin will happen soon after...
Thread Starter
Joined: May 2007
Posts: 1,806
Likes: 46
From: Vancouver BC, Canada
So I'm moved back to Vancouver for good... finally some serious, consistent work can be done on this damn car.
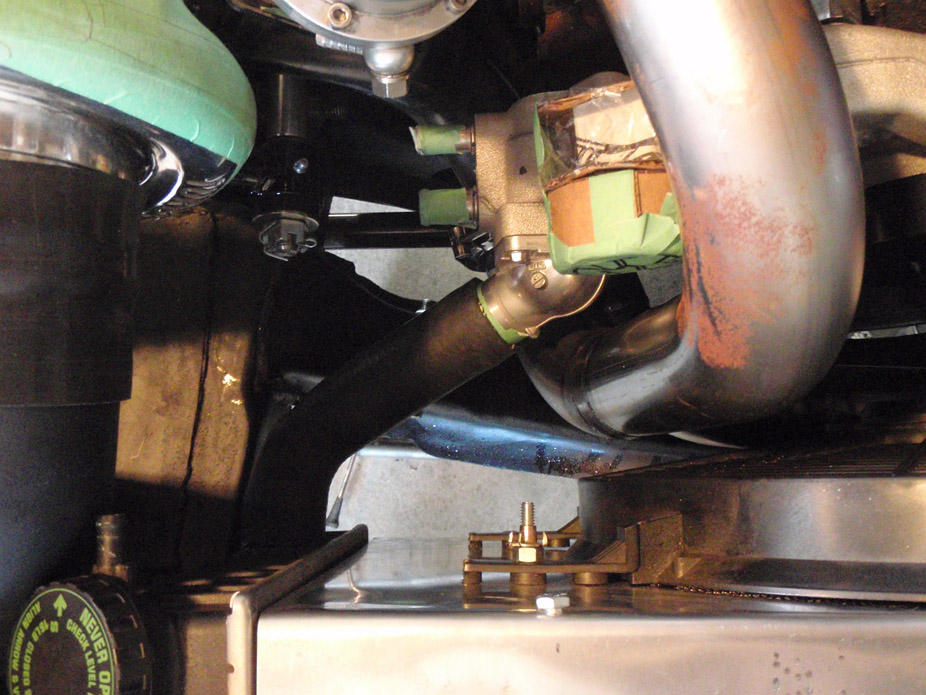
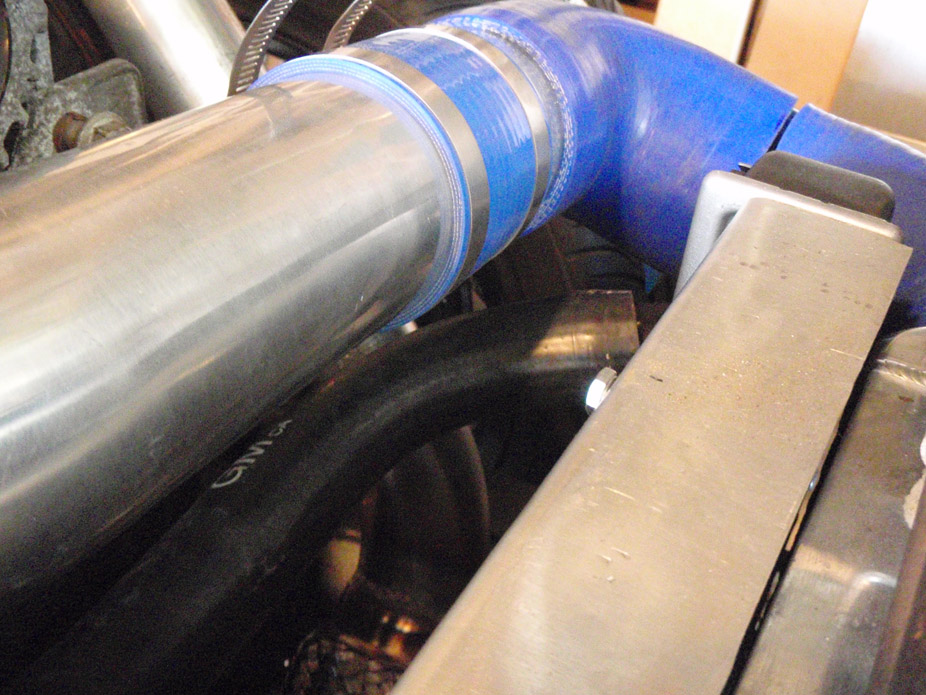
Continued turbo plumbing mockup to see what I need to order.

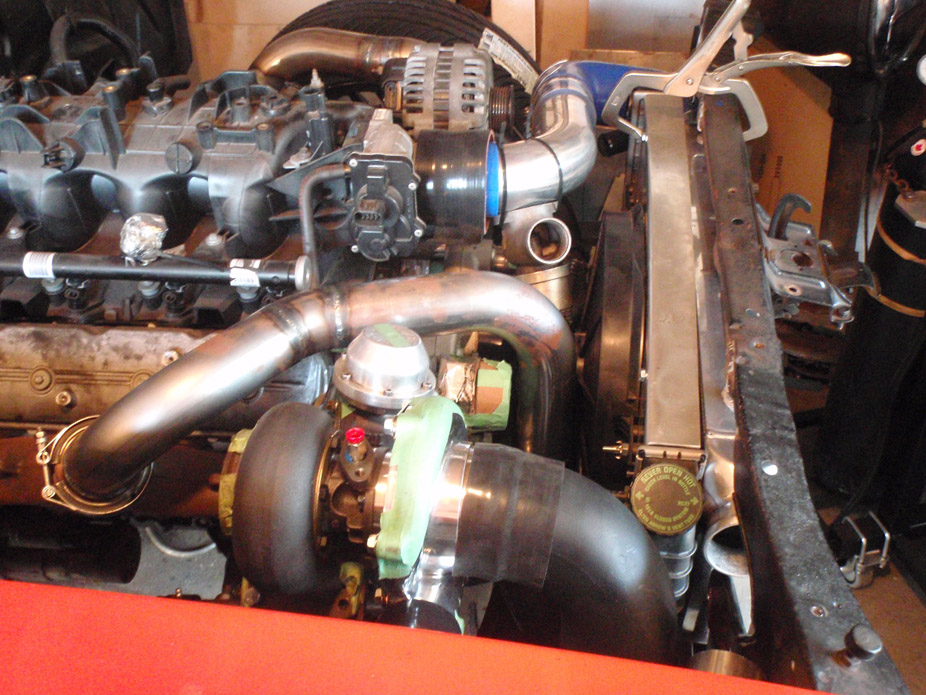
Going to have to notch the inner sheetmetal on the passenger fender so I can rotate/clock the compressor housing a little bit more up, to clear the stock inner fenderwell....

Potential BOV location. Other orientations would work but this is the only one that would allow a recirculation tube back to the intake, if I so chose to make one (still on the fence)...

Nice direct pump outlet to rad, with a trimmer stock S10 45* lower rad hose to connect...
Good amount of clearance for upper rad hose too...
Possible recirculation pipe layout for BOV...
Continued turbo plumbing mockup to see what I need to order.
Going to have to notch the inner sheetmetal on the passenger fender so I can rotate/clock the compressor housing a little bit more up, to clear the stock inner fenderwell....
Potential BOV location. Other orientations would work but this is the only one that would allow a recirculation tube back to the intake, if I so chose to make one (still on the fence)...
Nice direct pump outlet to rad, with a trimmer stock S10 45* lower rad hose to connect...
Good amount of clearance for upper rad hose too...
Possible recirculation pipe layout for BOV...
Thread Starter
Joined: May 2007
Posts: 1,806
Likes: 46
From: Vancouver BC, Canada
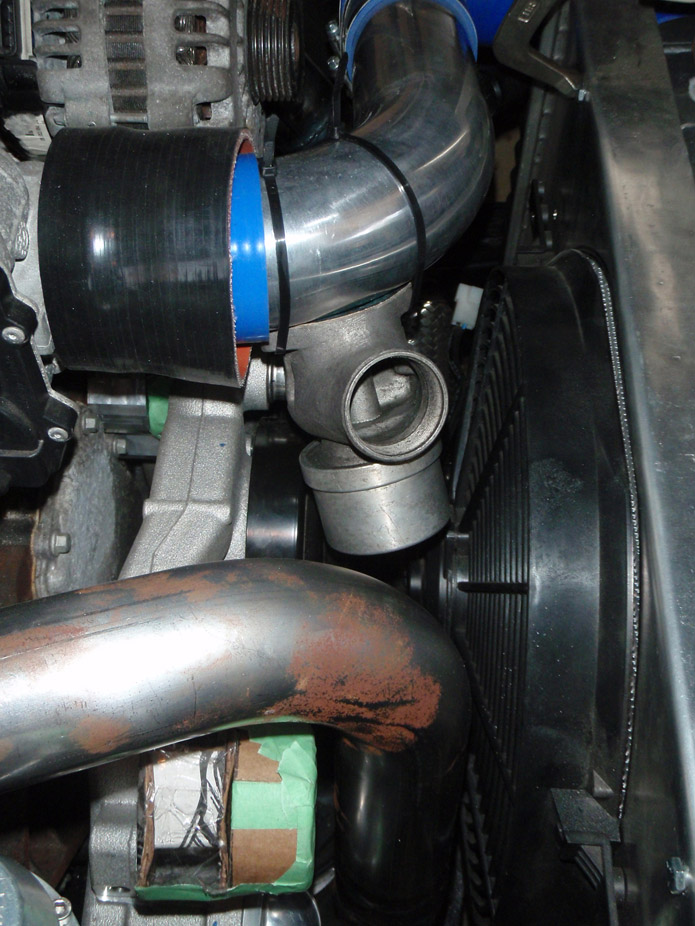
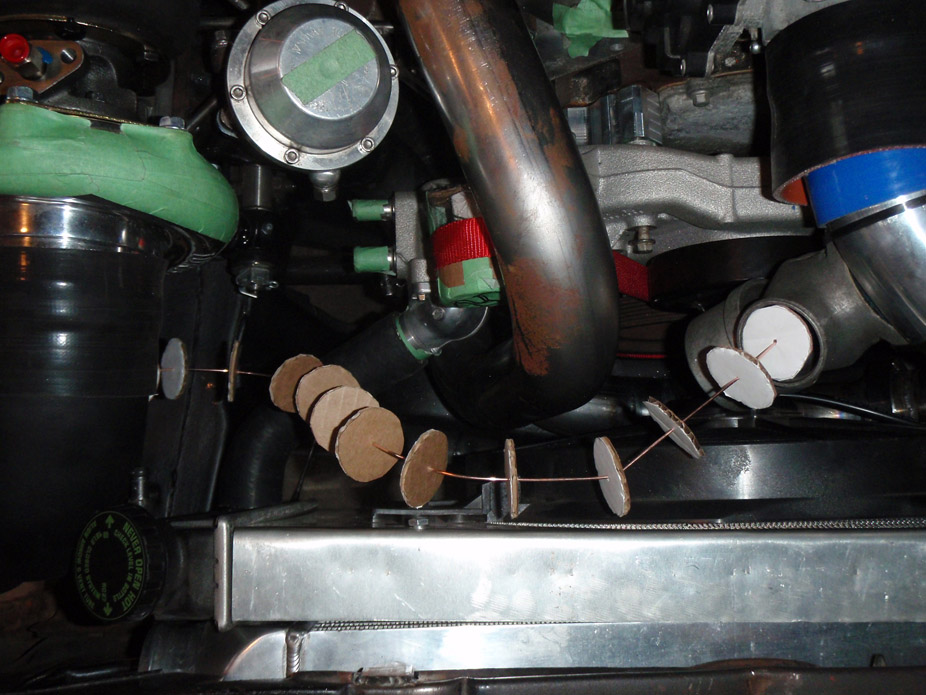
Now I need some input from you guys, I was getting worried because I really left consideration for the serpentine belt out of it when I removed the stock LQ4 idler pulley and put the passenger side hotpipe in its place, but feel relieved because looks like I have some good options.
I need some opinions on which layout is best. Most don't offer a huge amount of belt contact on the crank pulley... I don't like that. Most also place the belt fairly close to the waterpump return inlet.
Since I'm running no subframe bushings, I doubt my alternator will clear the stock hood now, so I will likely just make a new plate to mount the PS pump & alt to, keeping the pump in roughly the same place, but the alt could move down and/or outboard quite a bit and still clear the driver side hotpipe...
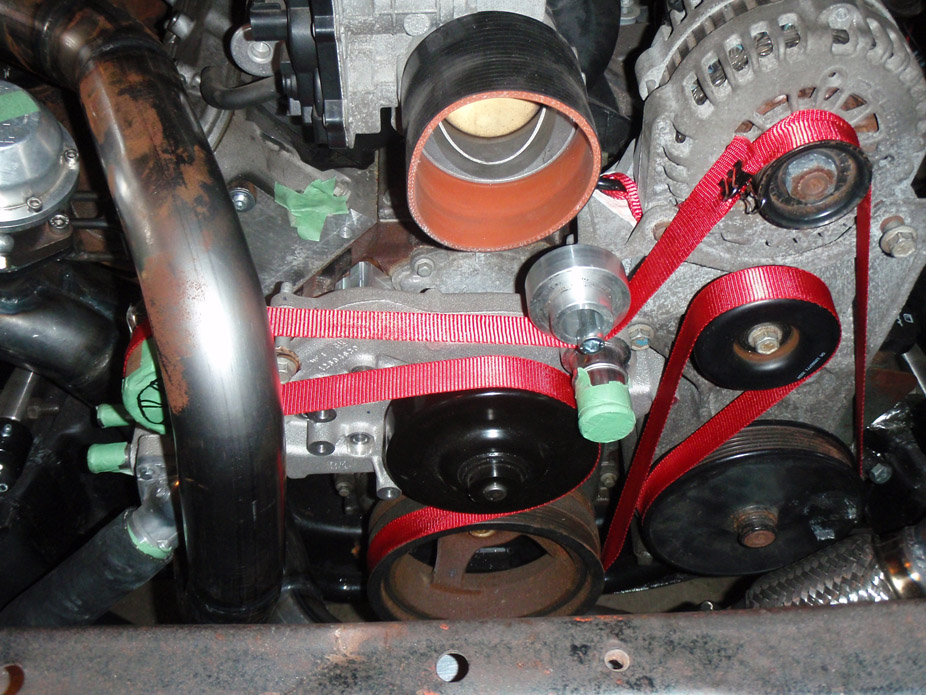
Option #1 (not good)...

Option #2 (also not good)...
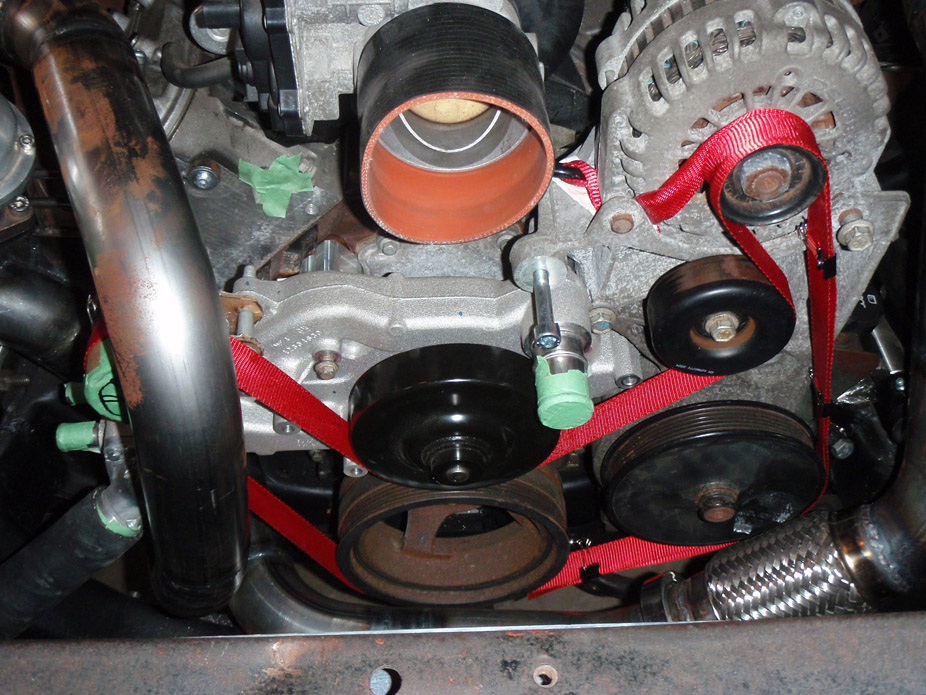
Option #3 (slightly better)...

Option #4 (pretty good looking)...
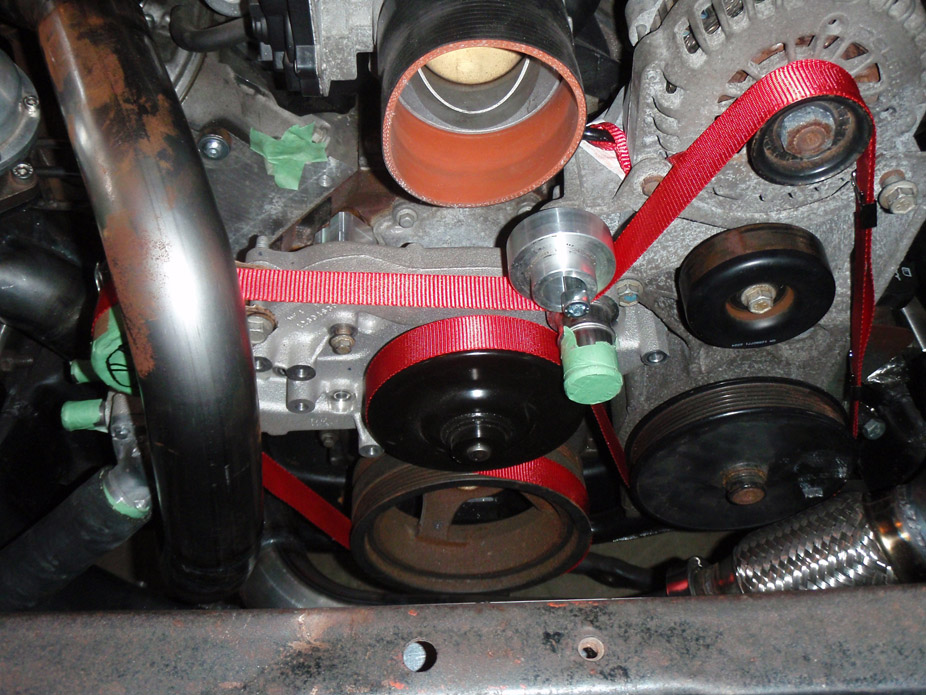
Option #5 (too crazy of a belt wrap?)...
I need some opinions on which layout is best. Most don't offer a huge amount of belt contact on the crank pulley... I don't like that. Most also place the belt fairly close to the waterpump return inlet.
Since I'm running no subframe bushings, I doubt my alternator will clear the stock hood now, so I will likely just make a new plate to mount the PS pump & alt to, keeping the pump in roughly the same place, but the alt could move down and/or outboard quite a bit and still clear the driver side hotpipe...
Option #1 (not good)...
Option #2 (also not good)...
Option #3 (slightly better)...
Option #4 (pretty good looking)...
Option #5 (too crazy of a belt wrap?)...
Option 3 looks good if the belt doesnt hit. But any of the last three options should work great. I was going to suggest you purchase an 08 Corvette alt. bracket which would eliminate the hood clearance issue but I see you have a hot side pipe wrapping around. Here is a pic just in case you are interested.
[IMG] [/IMG]
[IMG]
[/IMG] Option 4 would be prolly be the best but I would take the belt around the idler between the p/s and the alternator. Keep the same configuration just on the far right side come off of the p/s and then left around the idler off the idler to the alternator.
Last edited by tsnow678; May 3, 2011 at 03:57 PM.