


LQ4 into a 3rd Gen/1972 Nova
Thread Starter
Joined: May 2007
Posts: 1,806
Likes: 46
From: Vancouver BC, Canada
With the front brakes/engine bay more or less wrapped up, and after a very annoying subframe alignment, it was finally time for...

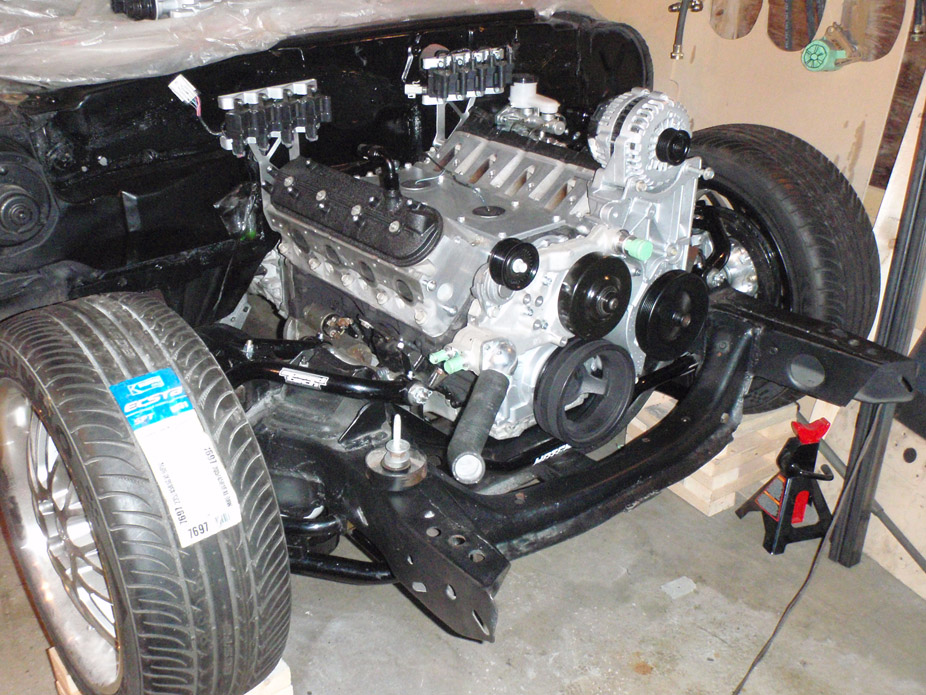
Finally coming together
Finally coming together
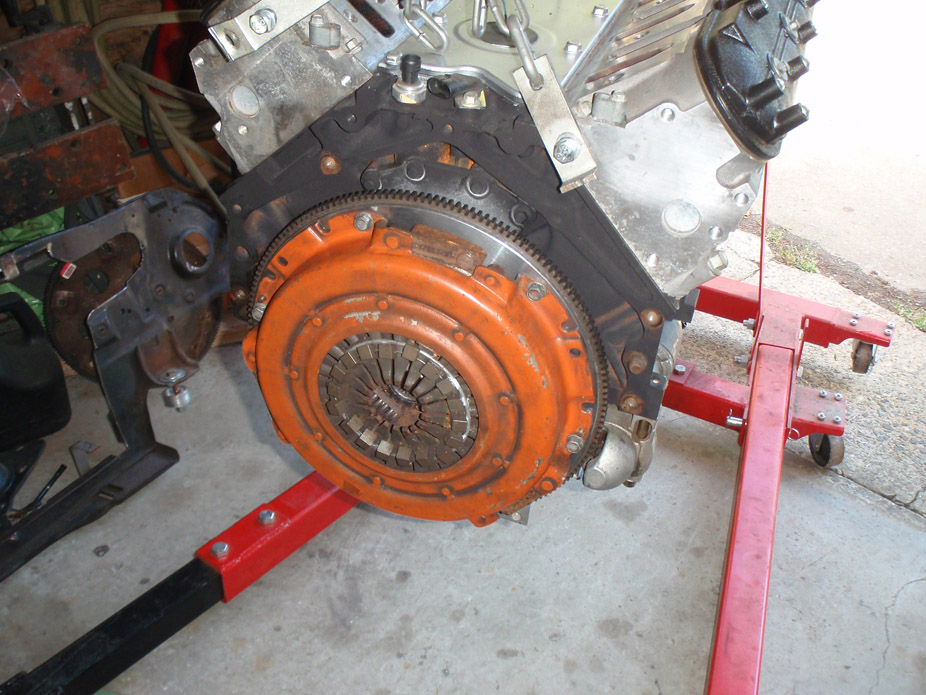
Centerforce Dual Friction or DFX? I have the Dual Friction, and TRUST me when I say it wreaked havoc. Took me forever to try and get it shifting properly. Drill mod, adjustable master, remote bleeder, etc. and come to find out, the weights on the diaphragm are the problem. You should cut them out before its all back in. TRUST ME. They are supposed to help the clutch hold better at higher RPMs, but making it VERY hard for the master to supply enough fluid to disengage it, especially in 1st and 2nd. They ended up shifting and getting caught between the diaphragm and pressure plate and cause a horrible vibration. Pulled it apart, cut them out, and it shifts so smooth its unbelievable.
Thread Starter
Joined: May 2007
Posts: 1,806
Likes: 46
From: Vancouver BC, Canada
You mean the finger weights? Can anybody think of a reason that I shouldn't remove them?
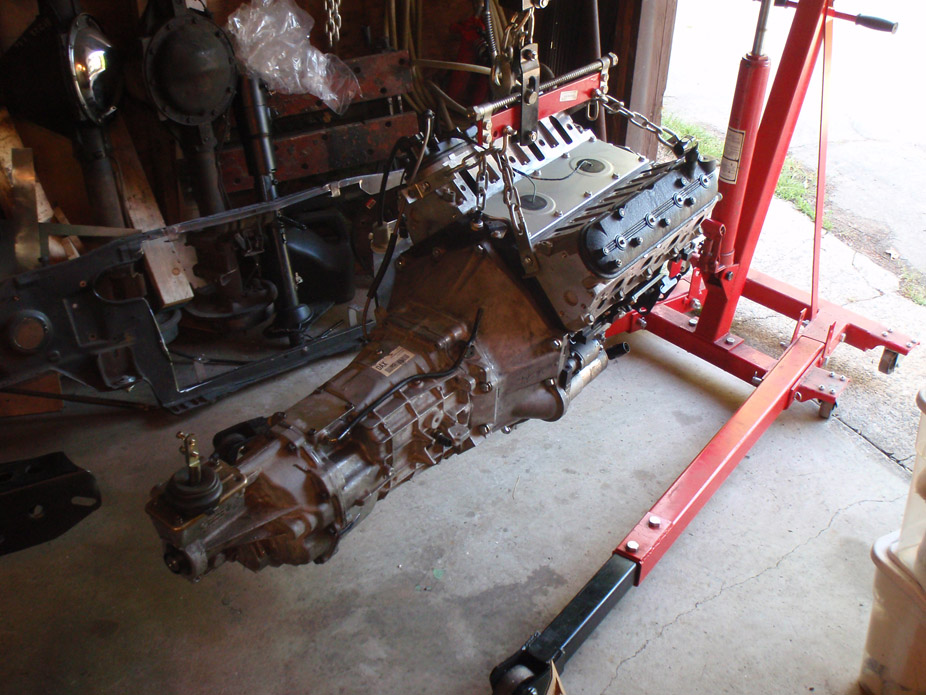
Looks like I have to take the trans off yet again to modify the clutch master/slave hydraulic line, it's about 1" too short... arrrrrg. Might as well just pull the entire engine yet again, **** I thought it was in there for good this time....
Looks like I have to take the trans off yet again to modify the clutch master/slave hydraulic line, it's about 1" too short... arrrrrg. Might as well just pull the entire engine yet again, **** I thought it was in there for good this time....
11 Second Club
Joined: Mar 2008
Posts: 445
Likes: 1
From: New Westminster, B.C., Canada
You mean the finger weights? Can anybody think of a reason that I shouldn't remove them?
Looks like I have to take the trans off yet again to modify the clutch master/slave hydraulic line, it's about 1" too short... arrrrrg. Might as well just pull the entire engine yet again, **** I thought it was in there for good this time....
Looks like I have to take the trans off yet again to modify the clutch master/slave hydraulic line, it's about 1" too short... arrrrrg. Might as well just pull the entire engine yet again, **** I thought it was in there for good this time....
 HA HA HA HA HA HA HA HA HA HA HA HA HA HA HAHAHAHAHAHAHAHAHAHAHAHAHAHAHAHAHAHAHAHAHAHAhahaha hahahahahahaha ha ha ha ha ha ..... ha ha
-and the clutch worked fine for me........

You mean the finger weights? Can anybody think of a reason that I shouldn't remove them?
Looks like I have to take the trans off yet again to modify the clutch master/slave hydraulic line, it's about 1" too short... arrrrrg. Might as well just pull the entire engine yet again, **** I thought it was in there for good this time....
Looks like I have to take the trans off yet again to modify the clutch master/slave hydraulic line, it's about 1" too short... arrrrrg. Might as well just pull the entire engine yet again, **** I thought it was in there for good this time....
I actually read of several people having the same problems, and it somehow leading to a grind in 4th occasionally from the syncro. Guess what, mine started doing it too bout the same time.

What kind of hydraulic setup did you use?
Thread Starter
Joined: May 2007
Posts: 1,806
Likes: 46
From: Vancouver BC, Canada
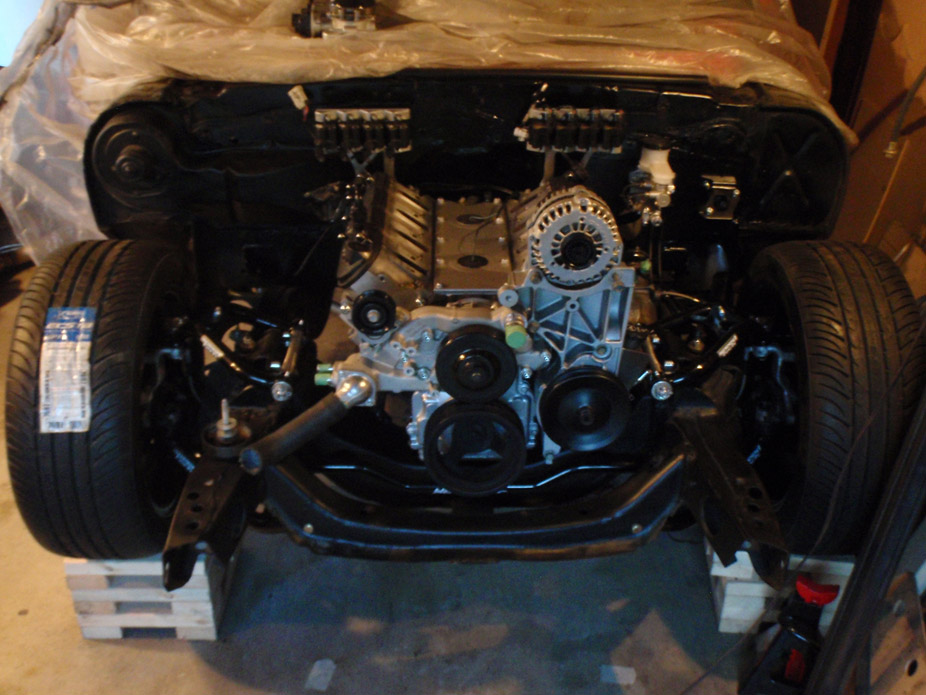
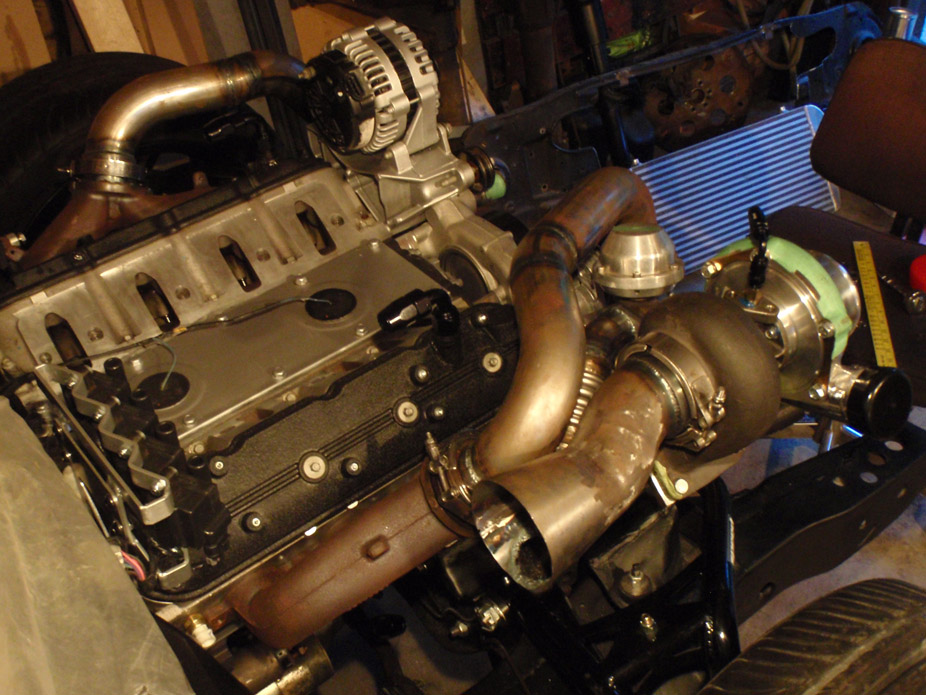
Show must go on, even tho I'll probably need to take the engine out again for clutch mod/clutch hydro line lengthen.
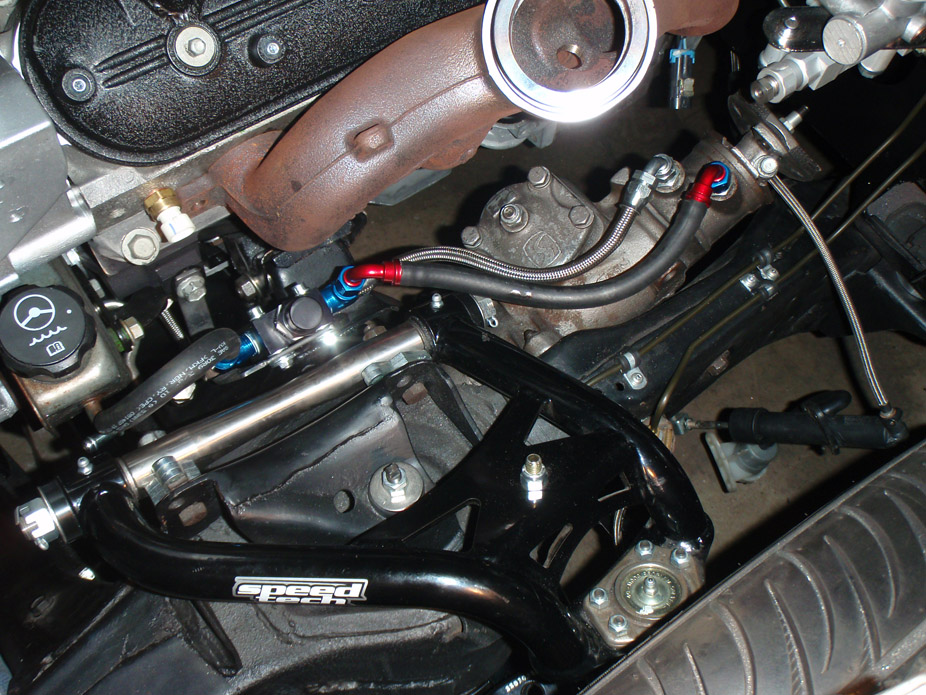
While I have the engine in for final mockup, made lines for the Heidt's power steering pressure relief valve (to adjust "feel"). Knowing how this build goes, I'll probably end up not liking it and just get a TurnOne pump and fully re-worked box later down the road, but for now I just want to drive it...
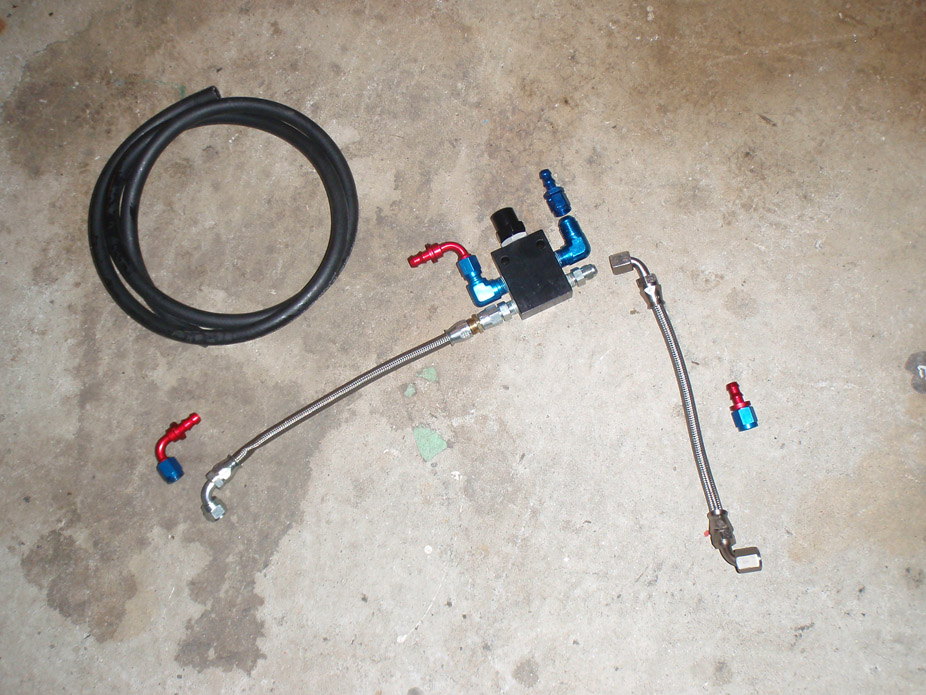
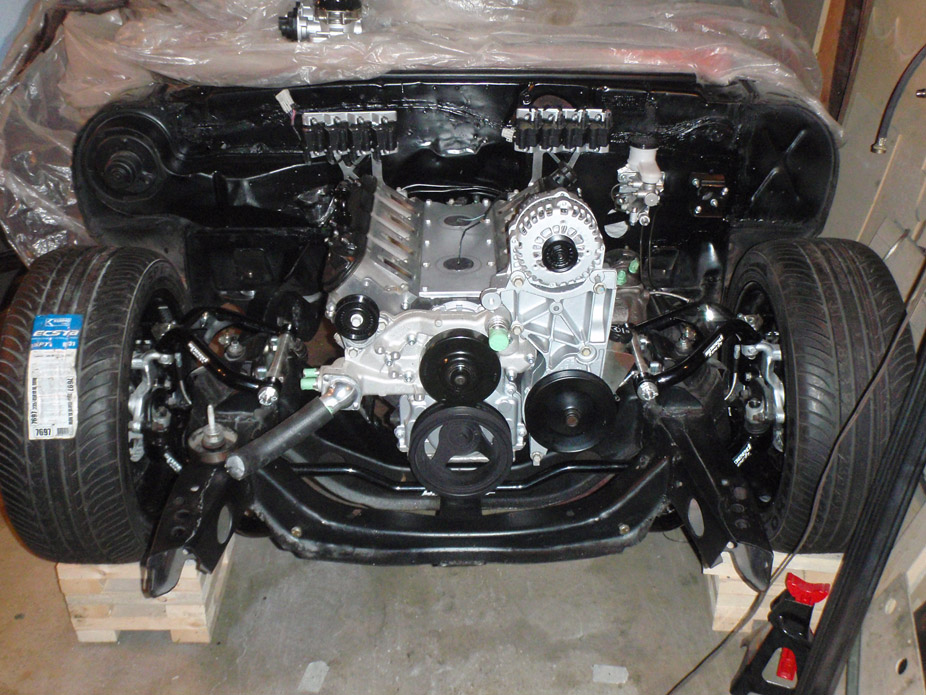
Red&blue will be sanded off and bracket I made will get painted, just mockup...


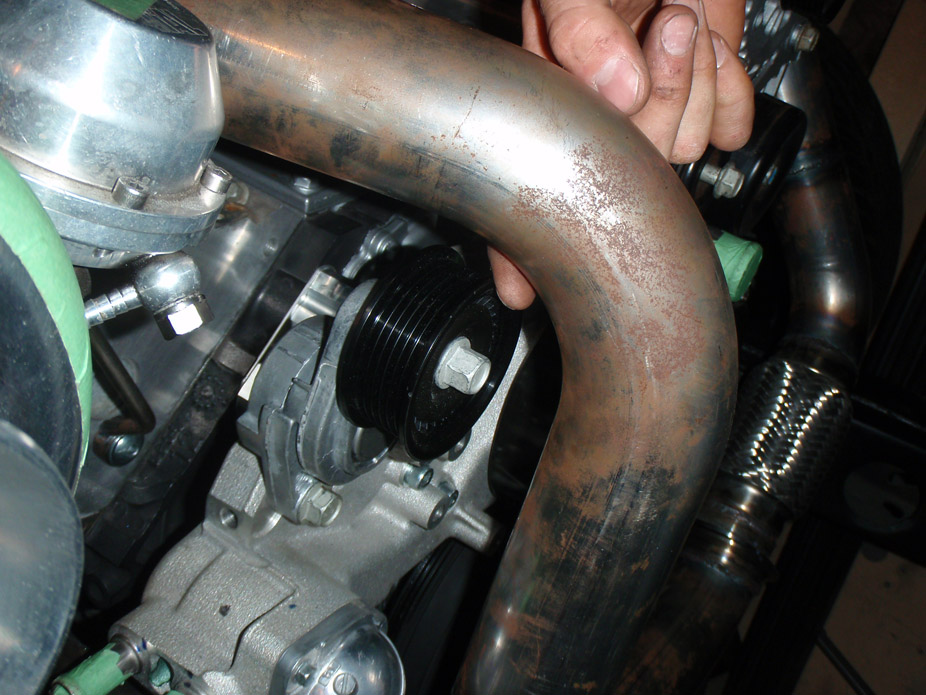
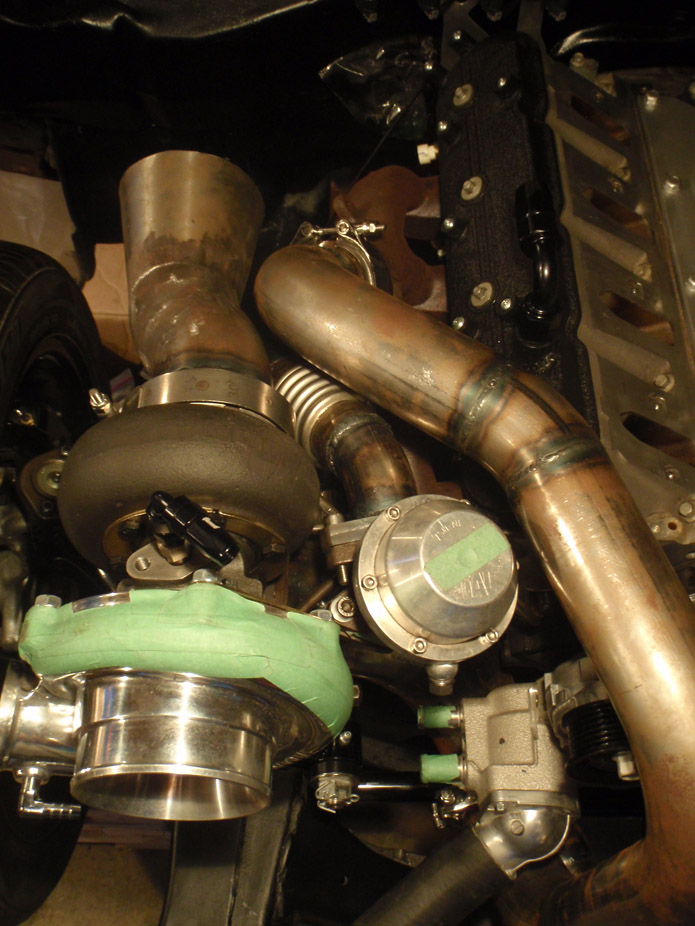
Annnnnd need to make the downpipe ASAP while the engine is in the so I can send the hotside off to get ceramic coated soon...

Good clearance seeing as I didn't have the physical idler pulley when first fabbing up the piping...
Wastegate dump pipe merging into the 3"->4" downpipe transition...

Tight but it fits with about 3/4" all round in there...
While I have the engine in for final mockup, made lines for the Heidt's power steering pressure relief valve (to adjust "feel"). Knowing how this build goes, I'll probably end up not liking it and just get a TurnOne pump and fully re-worked box later down the road, but for now I just want to drive it...
Red&blue will be sanded off and bracket I made will get painted, just mockup...
Annnnnd need to make the downpipe ASAP while the engine is in the so I can send the hotside off to get ceramic coated soon...
Good clearance seeing as I didn't have the physical idler pulley when first fabbing up the piping...
Wastegate dump pipe merging into the 3"->4" downpipe transition...
Tight but it fits with about 3/4" all round in there...
Looks great as usual!
Are you modifying your existing engine harness or are you going to buy one already done? I figure you will be doing your own but just thought I would ask.
You have taped off every hole to prevent trash from entering but your intake ports are wide open. Hope you dont have any jealous friends that might drop you a bolt or nut down the intake like we have happen at the track. Now somebody has to be at the car when it rolls off the trailer until its pushed back on. A wood screw was the culprit and it damage the piston and the head.
LS1 Tech Stories
The Best V8 Stories One Small Block at Time

Gas Monkey Built a 6-Wheel Ferrari Testarossa With a Corvette LT4 Engine
Verdad Gallardo
7 Most Reliable High-Performance Engines GM Has Ever Built
Verdad Gallardo
Amazing '71 Camaro Restomod Is Modern Muscle Car Under the Skin
Verdad Gallardo
6 Common C5 Corvette Failures and What's Involved In Repairing Them
Pouria Savadkouei
Retro Modern Bandit Pontiac Trans AM Comes With Burt Reynolds' Autograph
Verdad Gallardo
Top 10 Greatest Cadillac V Series Performance Models Ever, Ranked
Pouria Savadkouei
Top 10 Most Powerful Chevy Trucks Ever Made!

Hennessey's New Supercharged Silverado ZR2 Has 700 HP
Verdad Gallardo
Coachbuilt N2A Anteros Is an LS2-Powered C6 Corvette In Italian Clothes
Verdad Gallardo Joe,
I have read you can use lye or crystal draino to remove the anodized coating. You have to be careful about the time left in the solution & wear gloves & well ventilated area. Might be better than sanding.
I have read you can use lye or crystal draino to remove the anodized coating. You have to be careful about the time left in the solution & wear gloves & well ventilated area. Might be better than sanding.
that's a helluva setup joe... and i love the 3+ y/o 'new' wheels and tires, complete with stickers and all. you keep this up, you can be like those guys who show their cars w/ the original window stickers at shows. 
Thread Starter
Joined: May 2007
Posts: 1,806
Likes: 46
From: Vancouver BC, Canada
I've decided I will keep the finger weights on... for now. Marktainium had the clutch before me and reported zero vibration or weirdness issues, so I will try my luck at it the way it is.
Plus I also don't have to pull the trans to lengthen the clutch hydraulic line... I conveniently completely forgot that there is the quirky quick-disconnect in there... engine is still in it seems for good!
Downpipe completed up until framerails/floorpan, going to hopefully bang out a new trans x-member and y-pipe this weekend so that all exhaust things turbo related are ready to go to the ceramic coating place on Monday...


11 Second Club
Joined: Mar 2008
Posts: 445
Likes: 1
From: New Westminster, B.C., Canada
Yea, The added centrifugal forces are supposed to make the clamping power stronger while still having a stock feeling pedal, but they also make it alot harder for the master to provide enough fluid to fully disengage. At least with the F-body master.
I actually read of several people having the same problems, and it somehow leading to a grind in 4th occasionally from the syncro. Guess what, mine started doing it too bout the same time.
What kind of hydraulic setup did you use?
I actually read of several people having the same problems, and it somehow leading to a grind in 4th occasionally from the syncro. Guess what, mine started doing it too bout the same time.
What kind of hydraulic setup did you use?
Joe, down pipe is looking good, looks like an old 2 stroke expansion pipe! One thing I noticed though, where your pipe goes by the idler. I think I would put a heat shield there. I'm sure you will coat it or wrap it, but I think I would put a stand off metal heat shield there. You don't need your drive belt snapping when your pipe hits 1000*
I used the stock F-body master and road raced with it. It worked fine for me although I wasn't banging out aggressive drag race style shifts with it. The laughing was an inside joke between Joe and me. My motor has been in for the last time 3 times in the last month or so...
Joe, down pipe is looking good, looks like an old 2 stroke expansion pipe! One thing I noticed though, where your pipe goes by the idler. I think I would put a heat shield there. I'm sure you will coat it or wrap it, but I think I would put a stand off metal heat shield there. You don't need your drive belt snapping when your pipe hits 1000*
Joe, down pipe is looking good, looks like an old 2 stroke expansion pipe! One thing I noticed though, where your pipe goes by the idler. I think I would put a heat shield there. I'm sure you will coat it or wrap it, but I think I would put a stand off metal heat shield there. You don't need your drive belt snapping when your pipe hits 1000*
11 Second Club
Joined: Mar 2008
Posts: 445
Likes: 1
From: New Westminster, B.C., Canada
I'd say you were lucky then. The hydraulics are really hit or miss though. I'd also guess how much power your putting down would have an effect on it as well. My car had gobs of torque down low, so that probably didn't help disengaging the clutch I'm sure. All was fine after I removed them though...Its a little stiff for being my DD, but thats only cause I have a bad knee, so traffic isn't very fun. lmao
Thread Starter
Joined: May 2007
Posts: 1,806
Likes: 46
From: Vancouver BC, Canada
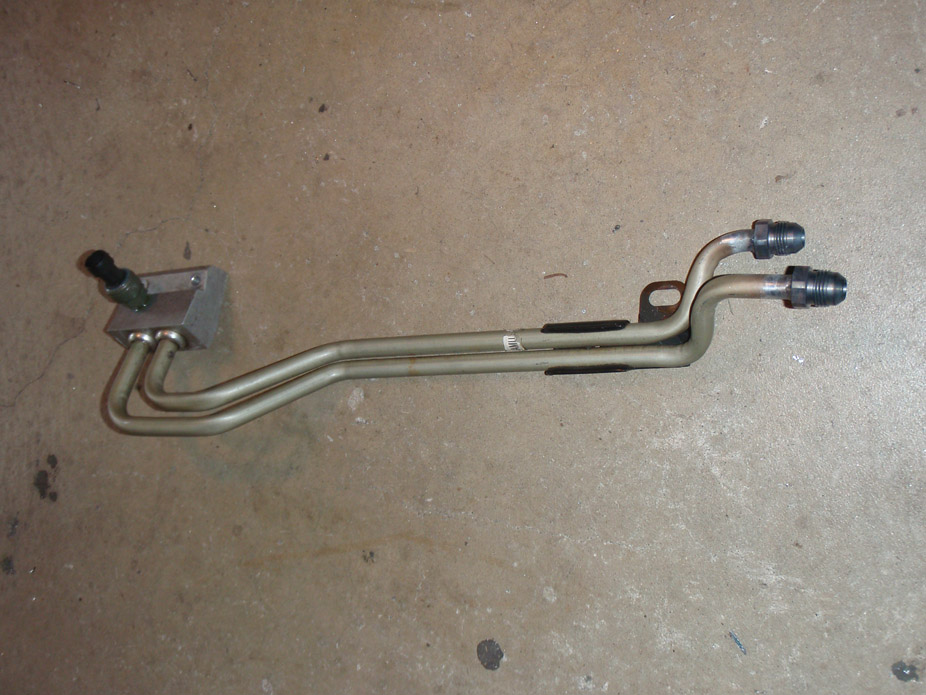
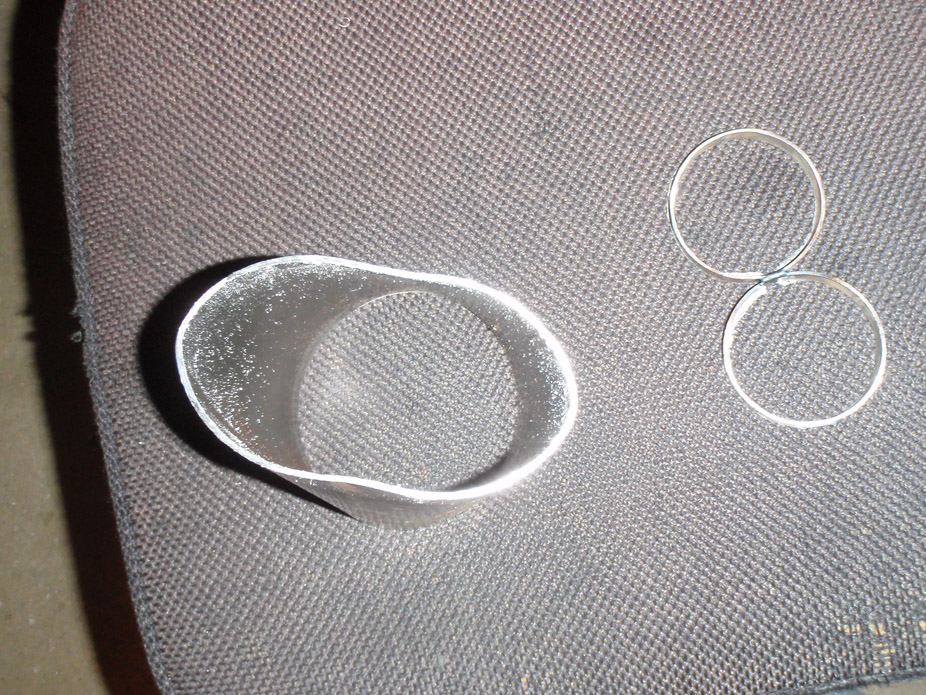
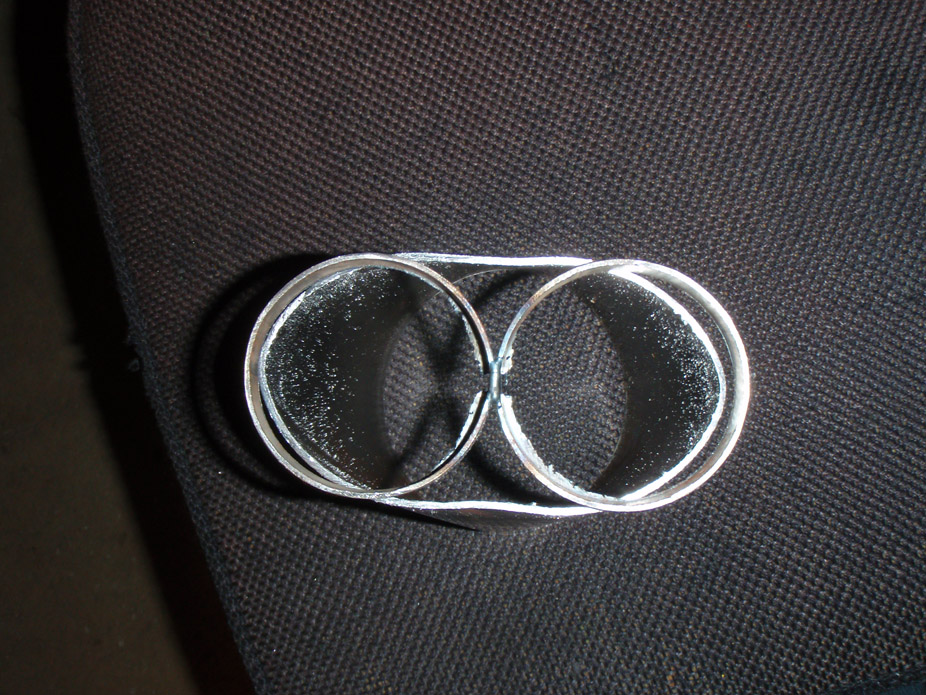
Made some oil lines & location for the oil pressure sender.
Stock...

...modified stock to all I need...
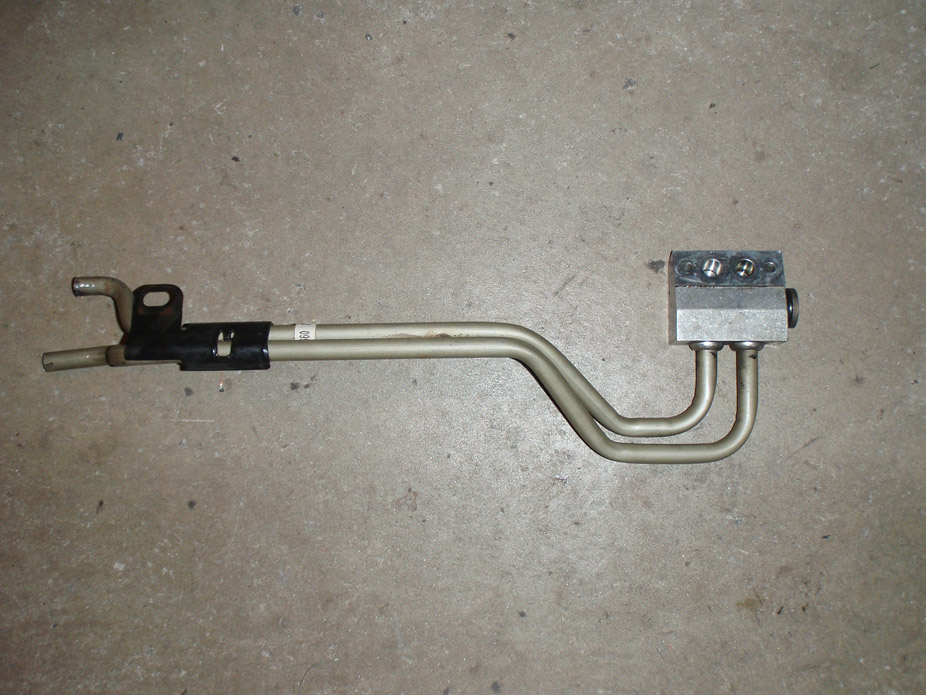
Location of pressure sender is AFTER the oil cooler, so that it reads the oil pressure that the engine block sees, and also would report pressure problems if oil cooler conks out somehow...

-8AN steel bungs welded onto lines, to have some flexy lines going to the oil cooler. Again, the TIG welder is so far the best tool I've bought by far.
Stock...
...modified stock to all I need...
Location of pressure sender is AFTER the oil cooler, so that it reads the oil pressure that the engine block sees, and also would report pressure problems if oil cooler conks out somehow...
-8AN steel bungs welded onto lines, to have some flexy lines going to the oil cooler. Again, the TIG welder is so far the best tool I've bought by far.
Last edited by frojoe; Jul 2, 2011 at 11:17 PM.
Thread Starter
Joined: May 2007
Posts: 1,806
Likes: 46
From: Vancouver BC, Canada
So.... transmission cross-member version 2.0. Not that there was anything particularly bad with the first one, but since making it I've welded the floorpan completely flat (eliminating the ~0.5" humps to clear the stock trans x-member) as well as remove the subframe bushings, so old x-member would need modding anyways.
And it was kindof flexy, but not in a dangerous way.
And it had a lot of 90 degree features that didn't look the fanciest.
And it was MIG'd so it wasn't the prettiest. Like everything on this build, the first time is a new part of the learning curve, and I wanted to redo, so I did.
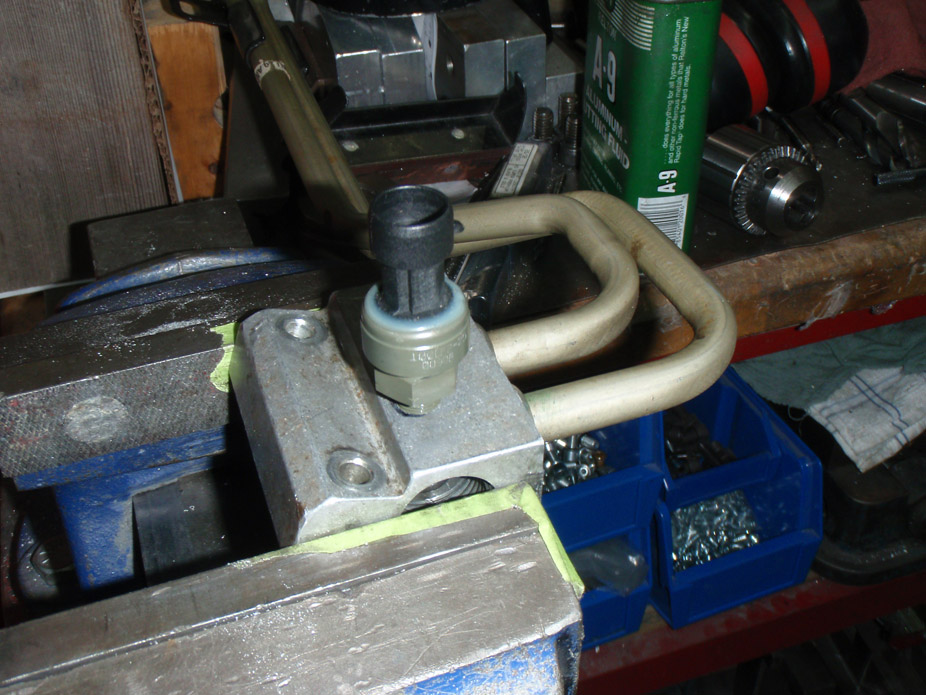
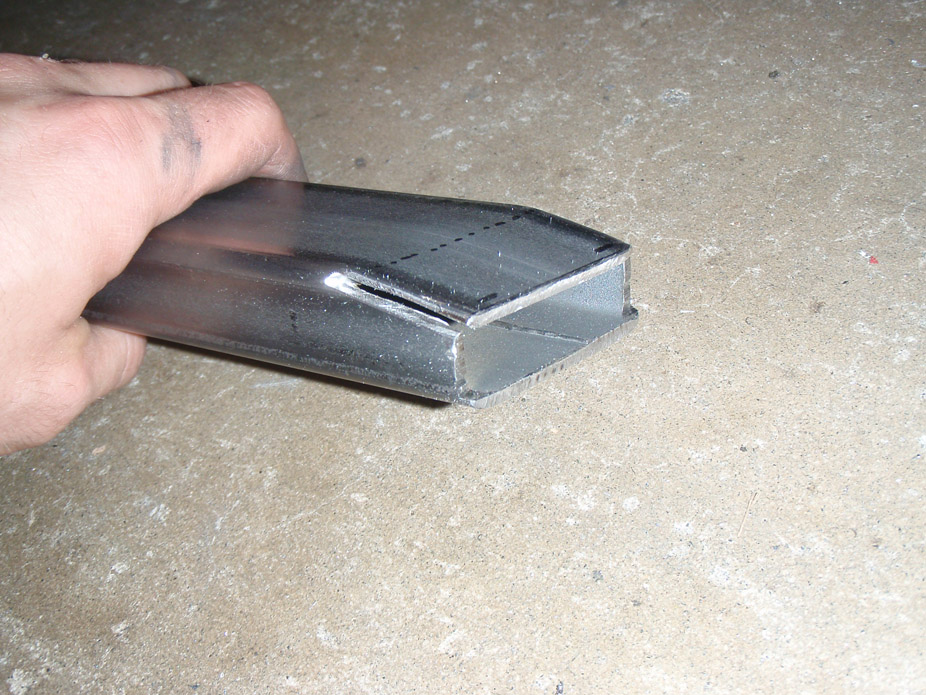
First step was to make a reference point for the lowest that anything could hang, be it x-member or exhaust pipe, which is represented by the top of the 1"x2" clamped in there...
Benchtop vice & hacksaw mitering is very classy..


Decided to make a dedicated turbo x-member this time, but still have clearance for dual 3" pipes to not hang below the subframe rails (tall order without subframe bushings)...

More fancy smancy mitering & stuff..
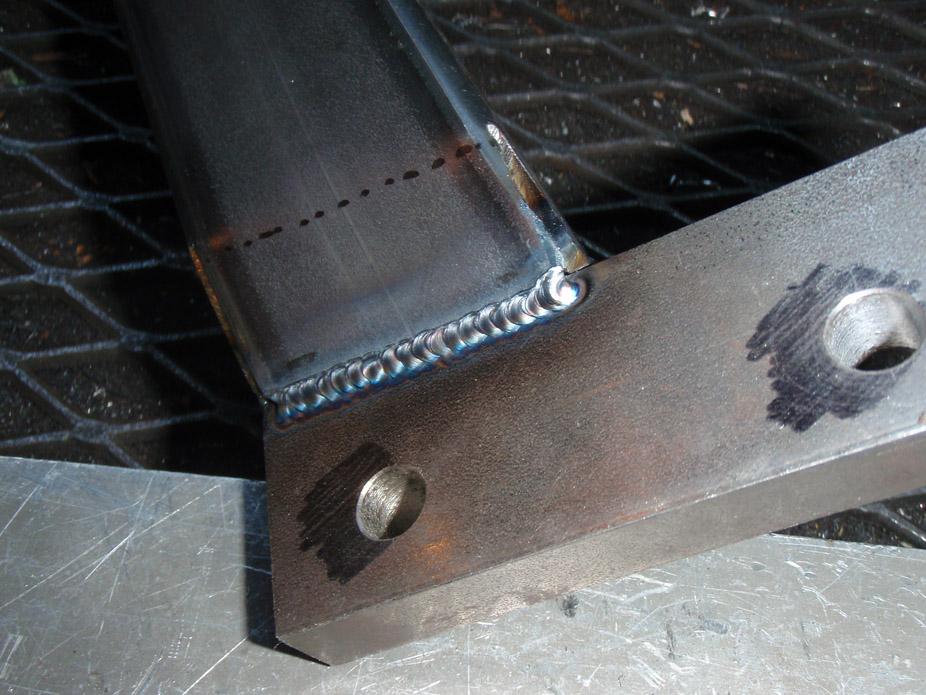

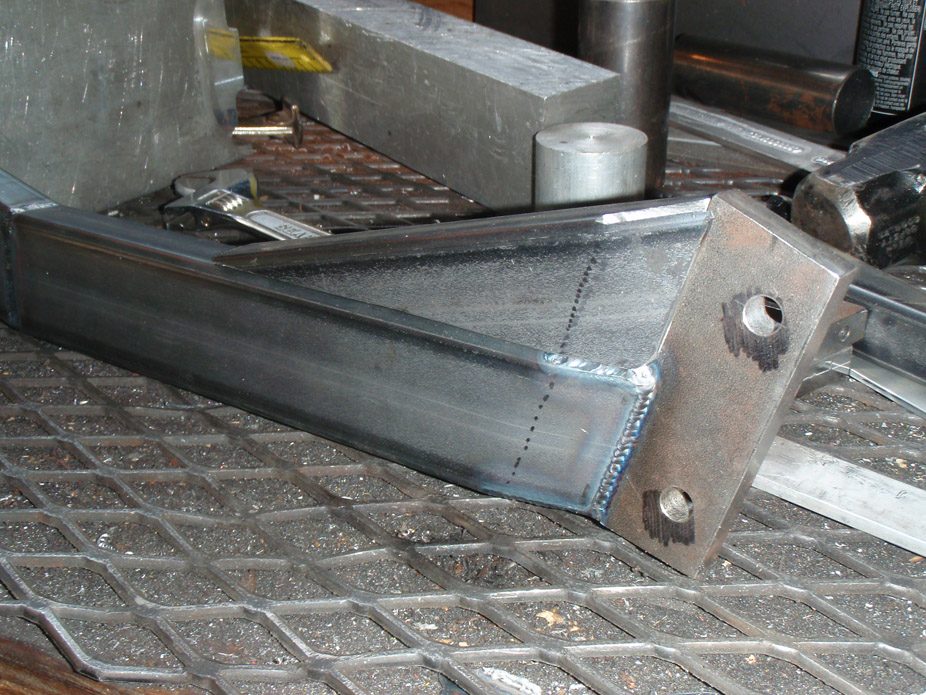
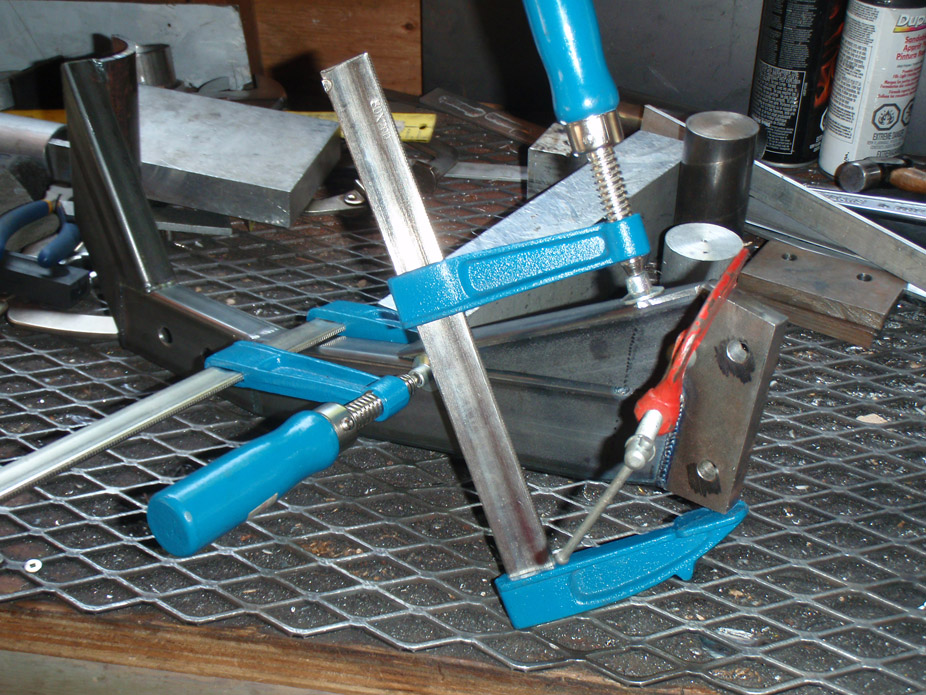
If there's ONE thing I've learned from all this car welding and machining/jigging at work, it's clamp clamp CLAMP...
And it was kindof flexy, but not in a dangerous way.
And it had a lot of 90 degree features that didn't look the fanciest.
And it was MIG'd so it wasn't the prettiest. Like everything on this build, the first time is a new part of the learning curve, and I wanted to redo, so I did.
First step was to make a reference point for the lowest that anything could hang, be it x-member or exhaust pipe, which is represented by the top of the 1"x2" clamped in there...
Benchtop vice & hacksaw mitering is very classy..
Decided to make a dedicated turbo x-member this time, but still have clearance for dual 3" pipes to not hang below the subframe rails (tall order without subframe bushings)...
More fancy smancy mitering & stuff..
If there's ONE thing I've learned from all this car welding and machining/jigging at work, it's clamp clamp CLAMP...
Thread Starter
Joined: May 2007
Posts: 1,806
Likes: 46
From: Vancouver BC, Canada
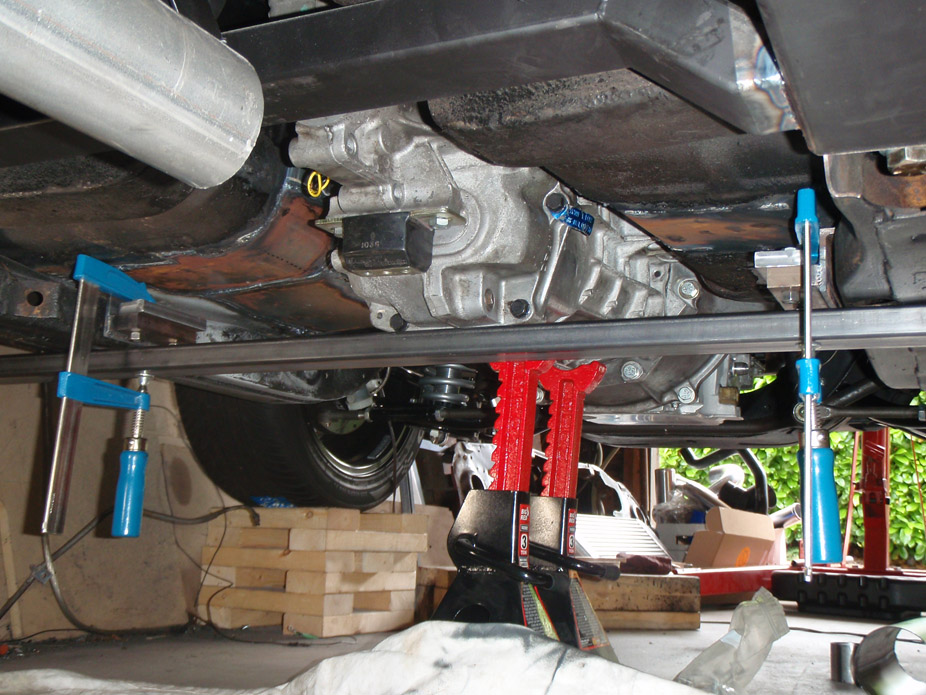
Results should be pretty self explanatory...
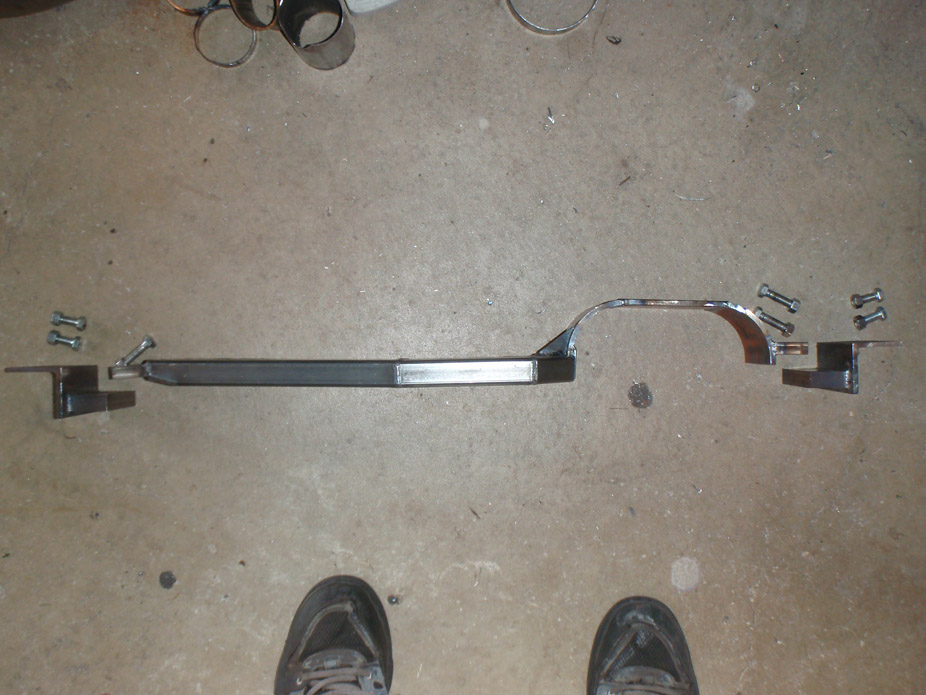


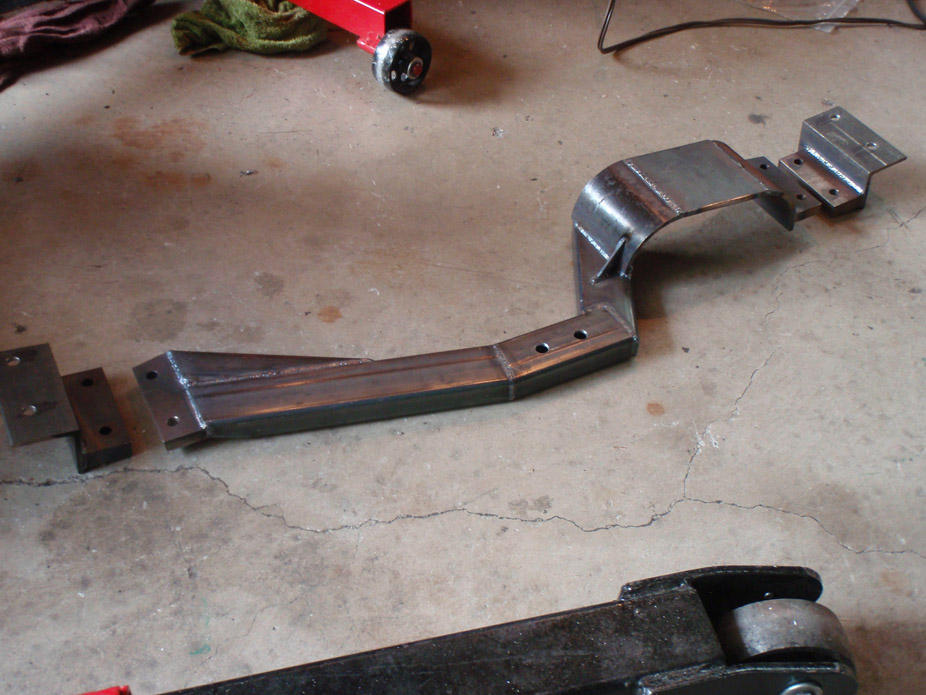
Turns out there's good ground clearance with dual 3" pipes, but a 4" single would slightly hang below the subframe rails at that location, so aim is to have the single 4" -> dual 2.5" split before the trans x-member.

Turns out there's good ground clearance with dual 3" pipes, but a 4" single would slightly hang below the subframe rails at that location, so aim is to have the single 4" -> dual 2.5" split before the trans x-member.
The X-member looks great! Welds are awesome as usual and your engineering skills are phenominal. You really need to open a shop and do custom fabbing. You are wasting your talent working for someone else.