
2000 trans am backhalf build(pics)


 08-21-2009, 12:40 AM
#124
On The Tree
iTrader: (14)
Join Date: Nov 2006
Location: Cheyenne, WY
Posts: 136
Likes: 0
Received 0 Likes
on
0 Posts
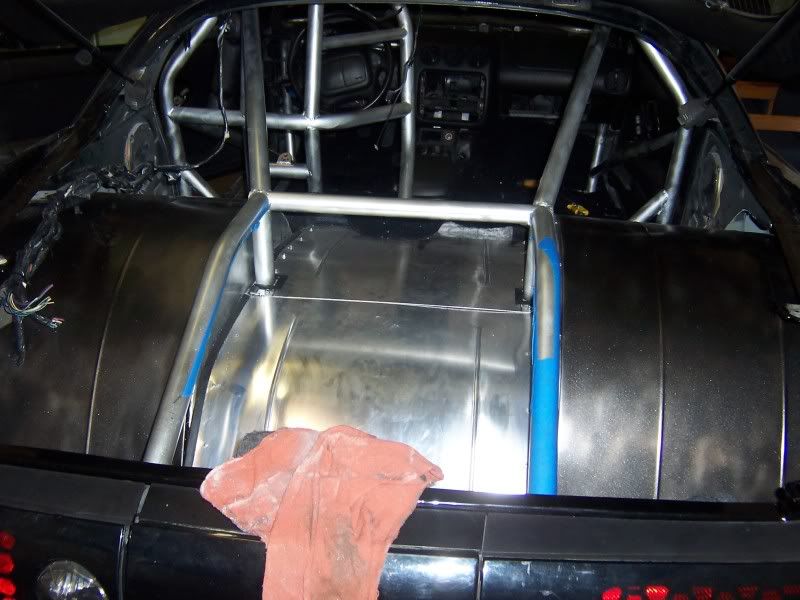
do not weld the tubs to the quarter, you will regret it. our pro car has fiber tubs and has about an 1/8" gap between the quarter and tub. but if you would like to seal it to keep smoke out, just use some silicone or a sealer than has alittle give. i've also seen people tape the gap up. just my 2 cents, cars looking very good!
08-21-2009, 01:27 AM
#125
TECH Regular
Thread Starter
iTrader: (4)
Join Date: May 2007
Location: schaumburg,il
Posts: 425
Likes: 0
Received 0 Likes
on
0 Posts

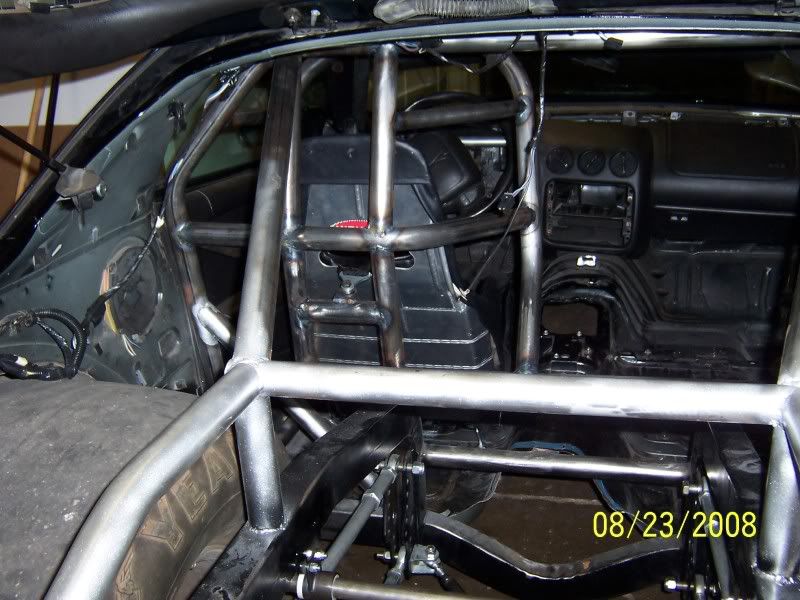
alrite guys thanks.im gonna get the cage buttoned up tomorrow or saturday then get belts mounted, start on parachute mount and anti roll this weekend and the tin work.

 08-30-2009, 12:58 PM
#127
Sweet build and you do have some skills. Your getting pretty close to a outlaw car with those big *** tires and the funny car cage. Do a front tube chassis and a little more cage and you'll have one serious car.
08-31-2009, 12:40 AM
#128
TECH Regular
Thread Starter
iTrader: (4)
Join Date: May 2007
Location: schaumburg,il
Posts: 425
Likes: 0
Received 0 Likes
on
0 Posts
thanks mel. ya eventually i plan on doing a tube front end with struts and everything but for right now ill stick with my tube k member and such up front high 8s will be good enough for me. for now.......
08-31-2009, 10:02 PM
#129
Staging Lane

Join Date: May 2008
Location: Tia Juana
Posts: 93
Likes: 0
Received 0 Likes
on
0 Posts
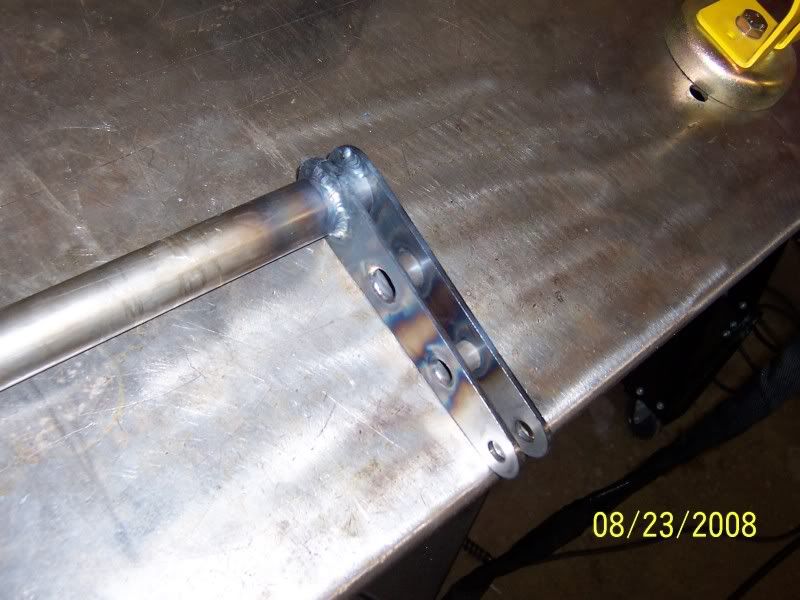
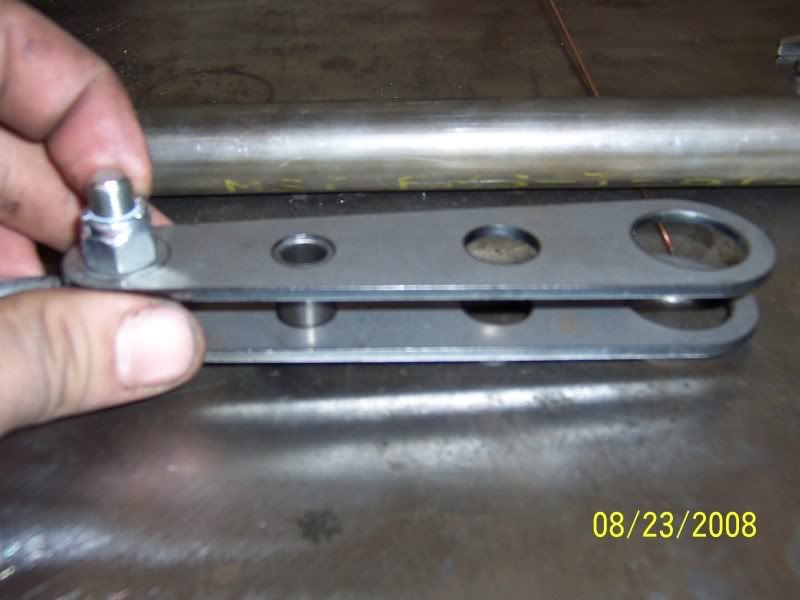
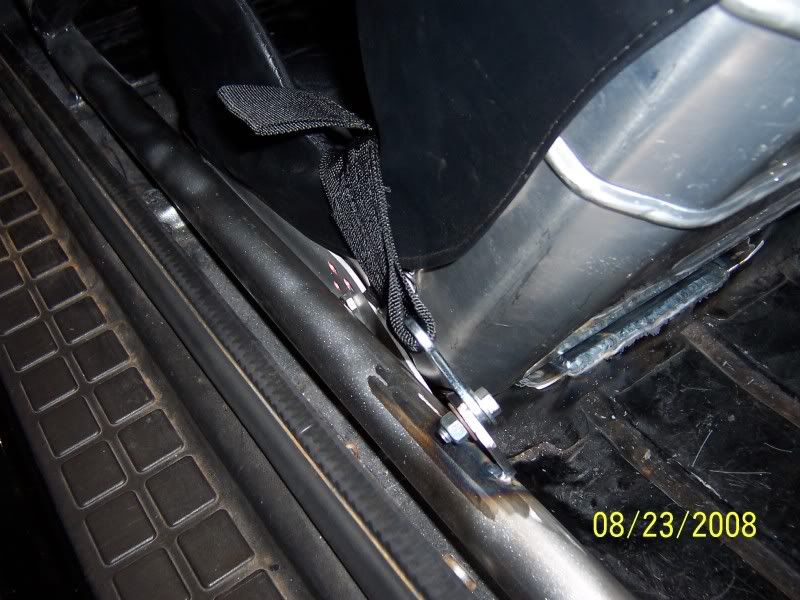
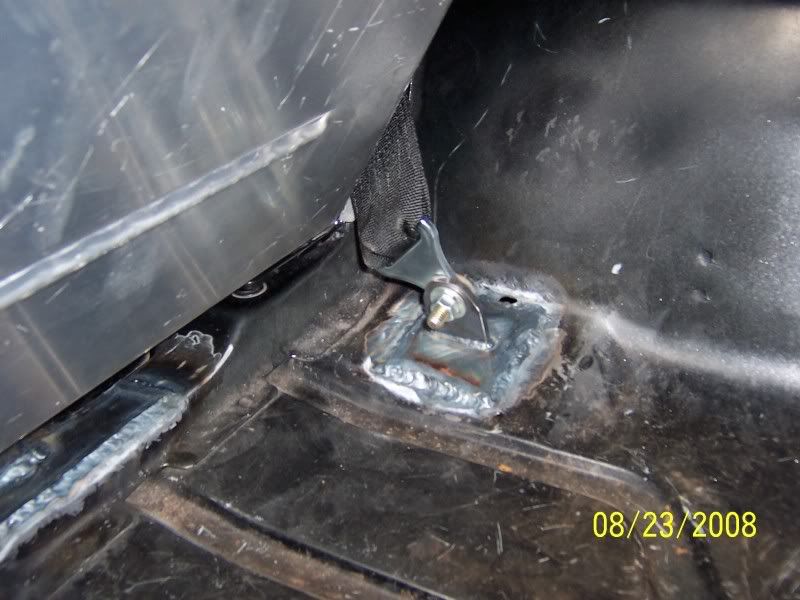
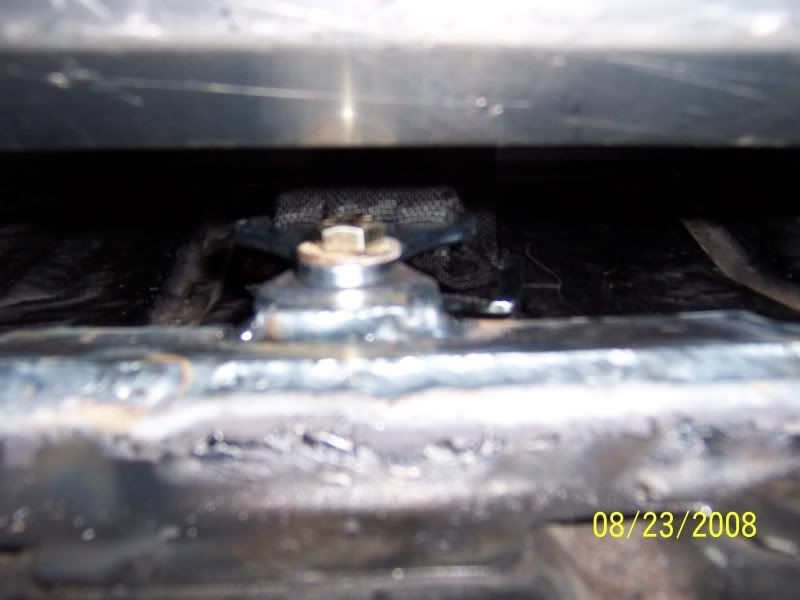
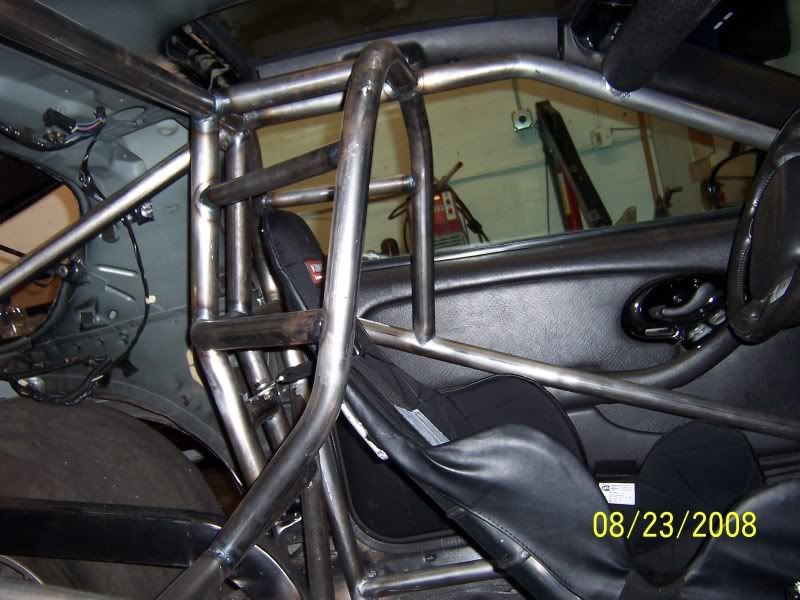
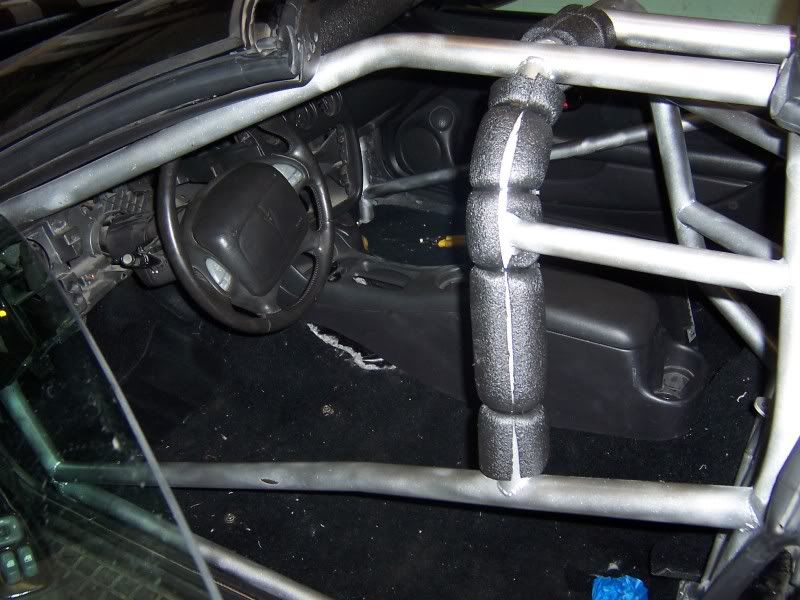
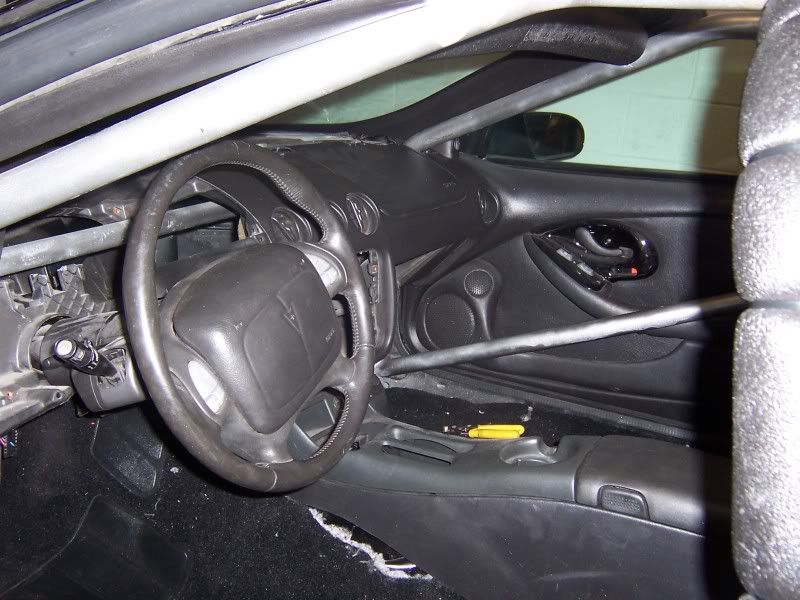
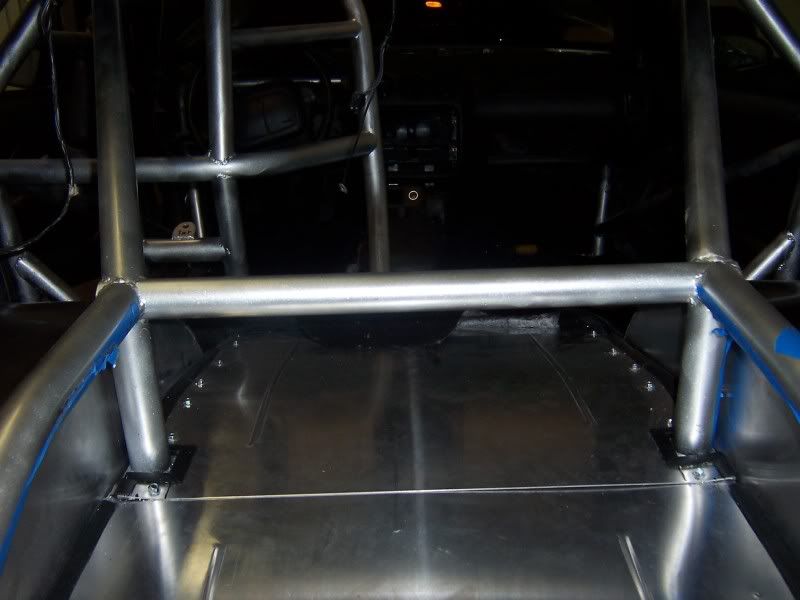
I like what you did with the lap belts, but why is the one on the rocker bar laid over like that?
Definitely better than stock, but if you are going through all the fab work, you may want to keep the mounts about at your hips width and the bolts being loaded in shear (i.e. perpendicular to the bolt).
Unless it is just the angle of the pic, it looks like it is creating a little side load.
Nice work overall though!
09-01-2009, 01:38 AM
#130
TECH Regular
Thread Starter
iTrader: (4)
Join Date: May 2007
Location: schaumburg,il
Posts: 425
Likes: 0
Received 0 Likes
on
0 Posts
its on a little bit of an angle but not enough to worry about and i put it off to the side so i had more to weld to the bar and if i went the other way it was too much of an angle and stroud says have the belts at a 45 degree angle from your waist.
09-01-2009, 08:45 AM
#131
Staging Lane
Join Date: May 2008
Location: Tia Juana
Posts: 93
Likes: 0
Received 0 Likes
on
0 Posts
By 45 degrees, they mean when you are looking from the side at the driver.
From SFI:
"Proper Installation is Important
The effectiveness of a restraint assembly is also influenced by attachment techniques. The principal precaution for installing the mounting hardware to the vehicle is to minimize bending stress in the fitting. This is achieved by making sure the belts pull from a straight angle against the hardware. The assembly should be installed so that the straps do not rub against any surface that can cause the webbing to fray. The anchoring mechanisms should also periodically be checked so that they don't become loose or weakened.
Proper installation of the restraint assembly also means achieving the correct fit to the driver. Belts should be as short as possible to reduce stretching for better control of occupant movement.
The attachment points must provide the optimum geometry to minimize movement of the belts. Lap belts perform best when they act at an angle between 45� and 55� relative to the longitudinal axis of the vehicle as illustrated in part A of the Figure. This angle permits the lap belt to react to the upward pull of the shoulder harness. A system installed with a shallow belt angle, as shown in part B of the Figure, permits the shoulder harness to pull the lap belt up off the pelvic area and into the abdominal region with the likelihood of injury to internal organs.

The end attachments of the shoulder harness must also be installed at appropriate angles. The ideal position is anywhere between 5� below and 30� above the driver's shoulder, as seen in part C of the Figure.
If the upper attachment point falls significantly below the driver's shoulder, then a spinal compression injury is likely to occur. In an accident situation, the shoulder belts pull down and back on the torso as they resist the forward motion of the driver. The resultant restraint force compresses the spinal column and will add to the stresses in the spine already caused by the force of the crash impact.
On the other hand, if the trailing ends of the harness are too far above the shoulder (greater than 30�), then two problems can occur. First, tension in the shoulder harness is increased and undue stress is applied to the harness and its structural attachments. Second, excessive angle will cause excessive motion. If the harness belts are too far above the shoulder, they will provide little resistance to forward motion of the driver's upper torso. The result is impact with the steering wheel and the possibility of neck injury. The shoulder straps should also be 3-6" apart behind the driver's neck to prevent slippage off the shoulders.
The reliability of a restraint system is greatly affected by the way it is installed. It is imperative to follow the installation instructions provided by the seat belt manufacturer. Also, the necessity of replacing or rewebbing seat belts every two years cannot be more important.
As cars become more advanced and consequently go faster, everything possible must be done to make the racing experience safe as well as fun. Failure to do so can cause serious injury, or worse. If there is anything that can be learned from the sport of racing, it's that anything is possible, and taking the attitude that "it won't happen to me" is risky, because it does happen."
From Simpson:
"Lap Belt anchors must be positioned at an angle of 60 degrees in relation to the Back Line2 and mounted to the frame rail or roll cage as close to the hip as possible."
From SFI:
"Proper Installation is Important
The effectiveness of a restraint assembly is also influenced by attachment techniques. The principal precaution for installing the mounting hardware to the vehicle is to minimize bending stress in the fitting. This is achieved by making sure the belts pull from a straight angle against the hardware. The assembly should be installed so that the straps do not rub against any surface that can cause the webbing to fray. The anchoring mechanisms should also periodically be checked so that they don't become loose or weakened.
Proper installation of the restraint assembly also means achieving the correct fit to the driver. Belts should be as short as possible to reduce stretching for better control of occupant movement.
The attachment points must provide the optimum geometry to minimize movement of the belts. Lap belts perform best when they act at an angle between 45� and 55� relative to the longitudinal axis of the vehicle as illustrated in part A of the Figure. This angle permits the lap belt to react to the upward pull of the shoulder harness. A system installed with a shallow belt angle, as shown in part B of the Figure, permits the shoulder harness to pull the lap belt up off the pelvic area and into the abdominal region with the likelihood of injury to internal organs.
The end attachments of the shoulder harness must also be installed at appropriate angles. The ideal position is anywhere between 5� below and 30� above the driver's shoulder, as seen in part C of the Figure.
If the upper attachment point falls significantly below the driver's shoulder, then a spinal compression injury is likely to occur. In an accident situation, the shoulder belts pull down and back on the torso as they resist the forward motion of the driver. The resultant restraint force compresses the spinal column and will add to the stresses in the spine already caused by the force of the crash impact.
On the other hand, if the trailing ends of the harness are too far above the shoulder (greater than 30�), then two problems can occur. First, tension in the shoulder harness is increased and undue stress is applied to the harness and its structural attachments. Second, excessive angle will cause excessive motion. If the harness belts are too far above the shoulder, they will provide little resistance to forward motion of the driver's upper torso. The result is impact with the steering wheel and the possibility of neck injury. The shoulder straps should also be 3-6" apart behind the driver's neck to prevent slippage off the shoulders.
The reliability of a restraint system is greatly affected by the way it is installed. It is imperative to follow the installation instructions provided by the seat belt manufacturer. Also, the necessity of replacing or rewebbing seat belts every two years cannot be more important.
As cars become more advanced and consequently go faster, everything possible must be done to make the racing experience safe as well as fun. Failure to do so can cause serious injury, or worse. If there is anything that can be learned from the sport of racing, it's that anything is possible, and taking the attitude that "it won't happen to me" is risky, because it does happen."
From Simpson:
"Lap Belt anchors must be positioned at an angle of 60 degrees in relation to the Back Line2 and mounted to the frame rail or roll cage as close to the hip as possible."
Last edited by Skippy SS; 09-01-2009 at 08:51 AM.

 09-19-2009, 04:06 AM
#137
^ That sucks major ***** on having to redo it all. I give you props on going for it though. My welding skills are horrible. I don't know if I would trust myself to do something of this degree. I definetly do not think you will be having issues with hooking those tires.
On the tubs I've heard of people saying they put a few tack welds on the quarters and RTV the rest.
On the tubs I've heard of people saying they put a few tack welds on the quarters and RTV the rest.