
Cam only, winter upgrades. Bitch in on a diet
 12-12-2010, 10:32 PM
#341

still working on the harness, now moving pins over to open spot in connectors to simplify them. Went form a few spots the harness would have 1-3 4-6pin connectors because there was 15-20 wires ruining there To just one full 6pin connector now, or one with on 2-4 wires in it 
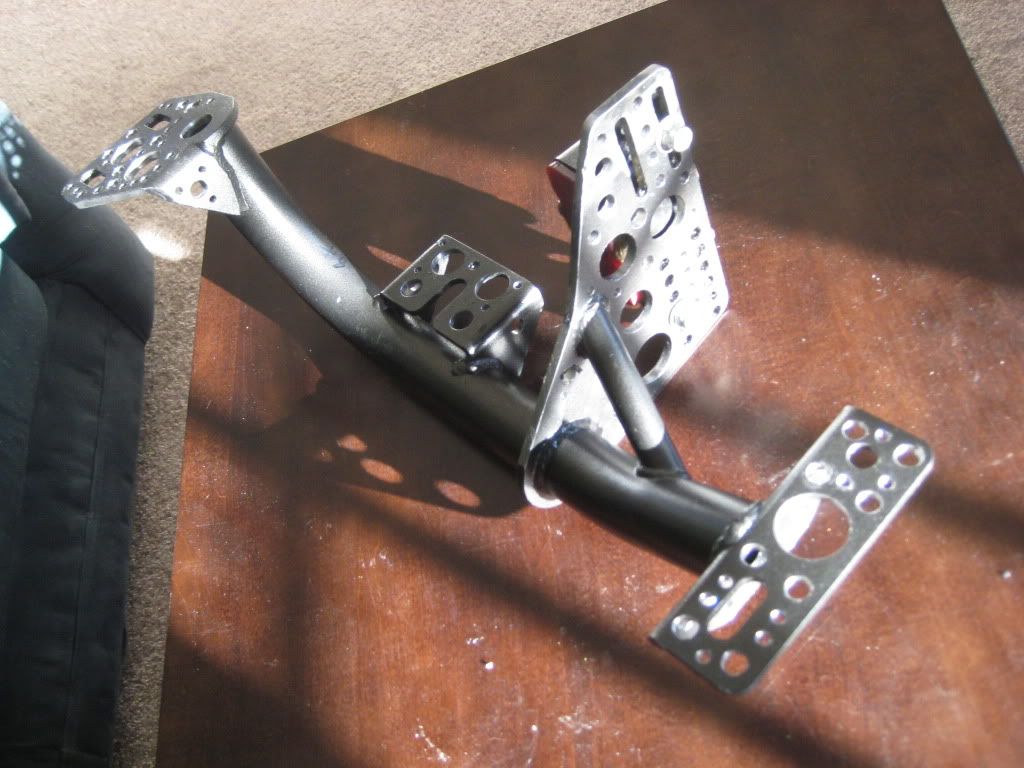
went at the BMR trans/TA mount, too a few pounds out it. did this a while ago. might be selling it for a new setup.
took out some extra metal, not a lot of weight here. But filler half a drywall bucket with the sound deadening. and while the wheel wells were loose easily hammed some more room. if I ever need it. need to get a updated pic of this. might cut out the spare tire area, and the other side.
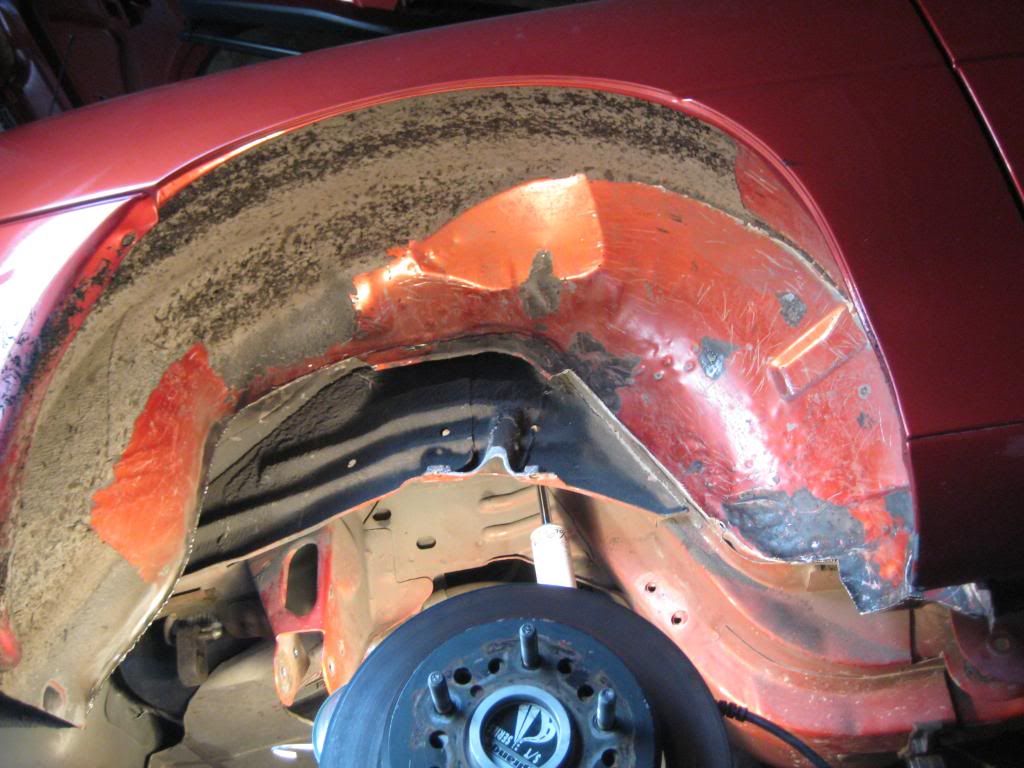
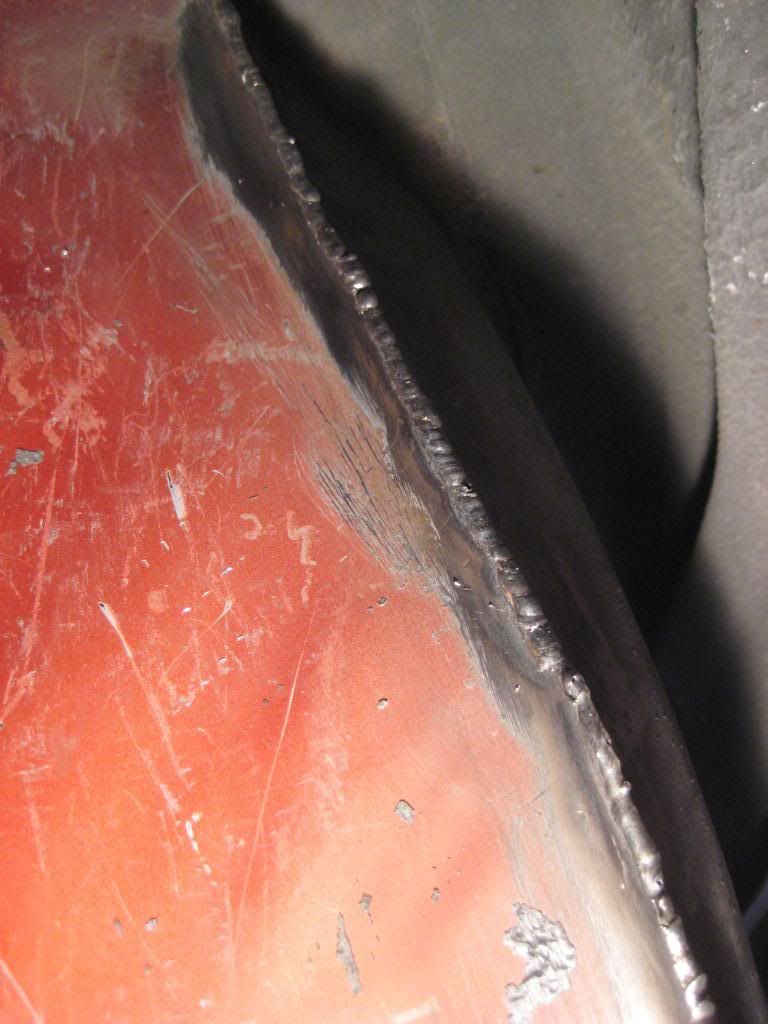
seam welding is a bitch keeping the sealer out but got it down so I dont have to mess with it on the inside.
real update is got one of these bad boys
http://www.hobartwelders.com/product...airforce250ci/
So this kinda changes things :snky:
went at the BMR trans/TA mount, too a few pounds out it. did this a while ago. might be selling it for a new setup.
took out some extra metal, not a lot of weight here. But filler half a drywall bucket with the sound deadening. and while the wheel wells were loose easily hammed some more room. if I ever need it. need to get a updated pic of this. might cut out the spare tire area, and the other side.
seam welding is a bitch keeping the sealer out but got it down so I dont have to mess with it on the inside.
real update is got one of these bad boys
http://www.hobartwelders.com/product...airforce250ci/
So this kinda changes things :snky:
Last edited by studderin; 12-12-2010 at 10:46 PM.

 12-13-2010, 09:20 AM
#343
 12-14-2010, 04:18 PM
#345
thanks, ya I would do that easy if I have my rear bars of the cage, going back to the frame rails in the hatch, and a tube off them going over the coils. But cutting that much off the "bump stop" leaves only 2 side for the frame there i dont like the idea of. with the plasma cutter I might cut some holes out. But want to at least leave the bottem lip for strenght.


 12-27-2010, 03:44 PM
#350


Cut out that spare tire area and the other side, and the t top well at the same time. That's about 50 lbs of metal out, and about 10 lbs back for the filler panels, depending on what ga. you use. All you need is a small round bar tab off the frame down to the corner of the rear bumper cover to hold it in place so it doesn't flop (where the fastner is by the bottom, near the tire) and it will be just like factory. Leave the "lip" in place that the bumper cover mounting brackets rest on and it you'd never even know it was done unless you get under the car.
Get a wire wheel out, and you can get about 18 lbs of seam sealer off the floor of the interior of the car as well... There's a total of about 58 more lbs you can get out.
When you're ready to really get to work with that welder, lemme know and I'll tell ya about 100 more lbs you can get out. it will, require finishing your cage to a 10 pt and going thru the firewall with 2 bars, but in the end will be worth the weight savings, and added safety.
Oh, swap to a coil over, relocate them to the inner part of the frame rail, up where the stock tank sits, and you can remove about 15 lbs more out of the car and only add about 5 lbs to the cage/shock mount structure.
The mini radiator I have here with the water pump on it and fan on it, including the overflow tank, is 28 lbs lighter then the stock radiator, fans and std race meziere pump. Fwiw, that's not a cheap mod, but it does make mounting the radiator alot easier as it takes up alot less real estate in the engine bay.
12-27-2010, 10:08 PM
#351
ya I might take the rear bumper off and look at that. The spare tire hump is big, I don't need it to hide a nitrous bottle or anything. The other side well too were the LT1 Evap was, But I do use them to fit tools, beer, and groceries so I don't have to drive super slow and have them flying around the car. Not gona cut the Ttop well out yet.
Weres this other weight, I got the rear panels out and gona cut some out around the speckers, and get into the mid metal, now with the plasma. But keep it so the panels fit still.
I'm gone trim the plasitc lip down in the bumper like everyne done. I've been pulling it back but its kinda a pain to do, and one side was rubbing a little. For that lower mount I'll just use some aluym bar like I did on the front bumper, and to the middle holes of the rear. That works really good for me.
Like to get a Alum DS too.
02-20-2011, 01:06 PM
#354

Cut out that spare tire area and the other side, and the t top well at the same time. That's about 50 lbs of metal out, and about 10 lbs back for the filler panels, depending on what ga. you use. All you need is a small round bar tab off the frame down to the corner of the rear bumper cover to hold it in place so it doesn't flop (where the fastner is by the bottom, near the tire) and it will be just like factory. Leave the "lip" in place that the bumper cover mounting brackets rest on and it you'd never even know it was done unless you get under the car.
Get a wire wheel out, and you can get about 18 lbs of seam sealer off the floor of the interior of the car as well... There's a total of about 58 more lbs you can get out.
When you're ready to really get to work with that welder, lemme know and I'll tell ya about 100 more lbs you can get out. it will, require finishing your cage to a 10 pt and going thru the firewall with 2 bars, but in the end will be worth the weight savings, and added safety.
Oh, swap to a coil over, relocate them to the inner part of the frame rail, up where the stock tank sits, and you can remove about 15 lbs more out of the car and only add about 5 lbs to the cage/shock mount structure.
The mini radiator I have here with the water pump on it and fan on it, including the overflow tank, is 28 lbs lighter then the stock radiator, fans and std race meziere pump. Fwiw, that's not a cheap mod, but it does make mounting the radiator alot easier as it takes up alot less real estate in the engine bay.
Get a wire wheel out, and you can get about 18 lbs of seam sealer off the floor of the interior of the car as well... There's a total of about 58 more lbs you can get out.
When you're ready to really get to work with that welder, lemme know and I'll tell ya about 100 more lbs you can get out. it will, require finishing your cage to a 10 pt and going thru the firewall with 2 bars, but in the end will be worth the weight savings, and added safety.
Oh, swap to a coil over, relocate them to the inner part of the frame rail, up where the stock tank sits, and you can remove about 15 lbs more out of the car and only add about 5 lbs to the cage/shock mount structure.
The mini radiator I have here with the water pump on it and fan on it, including the overflow tank, is 28 lbs lighter then the stock radiator, fans and std race meziere pump. Fwiw, that's not a cheap mod, but it does make mounting the radiator alot easier as it takes up alot less real estate in the engine bay.
02-20-2011, 09:02 PM
#355
Heres a link to my thread where I cut them out. I havent welded the panels back in yet because I just finished the tubs tonight but will update with pics when I do.
https://ls1tech.com/forums/showthrea...errerid=108931
https://ls1tech.com/forums/showthrea...errerid=108931
02-20-2011, 09:28 PM
#356
Im gona do that soon, been working on some friends cars. yesterday on a car were getting light, I cut down the dash bar. And just used the ends peices, and its still super strong there. Might have to make up a little alum strap for the middle. But it saved like 4.5/5 pounds. I'm gona do that to my car next time I have the dash out.
I'm gona cut out the spare tire well and the other side in front on the filler neck. working on some heads for some locals last few weeks, and going away next week. I'll keep this updated for sure. If anyone whats to post anything go ahead, if you get real weight numbers I'll add it on the 1st page.
Oh, I made some tools to get the door bars out of the tight camaro doors. (I still have mine) welding a 10mm socket to a piece of 1/8 x 1 works ok. Its still tight once you get the bolt loose, for it hitting the door skin, and making the socket shorter it is hard to reach inside the bar on the rear front. And you can only turn it like 1/10 of the turn on the bolt. It was a LT1 car the rear bolt was 13mm and I just used the "OEM" brand serpentine belt tool. The tool is long put fits in the door the get the bolt loose, then ratching wrench to get the rear nut off.

The better tool I made was a cheap 10mm wrench, cut the box end off like 1inch. And weld it back on at the 60-70* angle. It only work on one side but works mint. You can just tack it, cut the tacks, flip it and make it for the other side. But its only $3 for a cheap wrench so just bought 2, to make a right and left. Gets the the rear front bolt really easy, and you can turn it alot more the other ways.
I'll get a pic. I welded it so the open end wrench was facing so you can double wrench it easy to break the bolt lose. Then it the prefect size and work it one hand in the door, with your pinky in the open end part ebery time you re put it on the bolt.
I'm gona cut out the spare tire well and the other side in front on the filler neck. working on some heads for some locals last few weeks, and going away next week. I'll keep this updated for sure. If anyone whats to post anything go ahead, if you get real weight numbers I'll add it on the 1st page.
Oh, I made some tools to get the door bars out of the tight camaro doors. (I still have mine) welding a 10mm socket to a piece of 1/8 x 1 works ok. Its still tight once you get the bolt loose, for it hitting the door skin, and making the socket shorter it is hard to reach inside the bar on the rear front. And you can only turn it like 1/10 of the turn on the bolt. It was a LT1 car the rear bolt was 13mm and I just used the "OEM" brand serpentine belt tool. The tool is long put fits in the door the get the bolt loose, then ratching wrench to get the rear nut off.
The better tool I made was a cheap 10mm wrench, cut the box end off like 1inch. And weld it back on at the 60-70* angle. It only work on one side but works mint. You can just tack it, cut the tacks, flip it and make it for the other side. But its only $3 for a cheap wrench so just bought 2, to make a right and left. Gets the the rear front bolt really easy, and you can turn it alot more the other ways.
I'll get a pic. I welded it so the open end wrench was facing so you can double wrench it easy to break the bolt lose. Then it the prefect size and work it one hand in the door, with your pinky in the open end part ebery time you re put it on the bolt.
Last edited by studderin; 02-20-2011 at 09:42 PM.
02-20-2011, 10:17 PM
#357
For pulling the door bars I bought this set and cut the 10mm socket down about 1/4". Ive used it twice now and works great. I paid the $30 for it and ofcourse now its on sale for $10
http://www.harborfreight.com/hand-to...set-93150.html
http://www.harborfreight.com/hand-to...set-93150.html
02-21-2011, 01:19 AM
#360
ya. not sure on the front , but in the back looks like there some extra you can cut. Like the whole bottem off it maybe? Got any pics?
and what do you need to do, I think I saw somone adding washer or something any removing everything? Like just bolting the latch right to the door,
and what do you need to do, I think I saw somone adding washer or something any removing everything? Like just bolting the latch right to the door,